


Trophy Guide Preview
Overall Trophy Progress
0 / 50 Completed
0%
Trophy Types
Platinum
0 / 1Gold
0 / 1Silver
0 / 11Bronze
0 / 37Categories
Collectible
0 / 9Grind
0 / 2Combat
0 / 16Misc
0 / 15Story
0 / 7
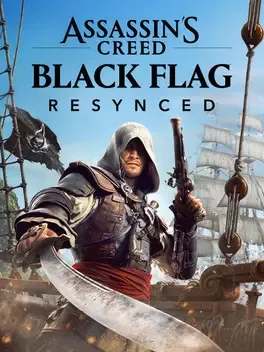
Sail the Caribbean as Edward Kenway in a rebuilt pirate adventure combining naval warfare, stealth, exploration, and brutal combat. Captain the Jackdaw, hunt treasure, raid enemy ships, upgrade your arsenal, and carve out your legend during the Golden Age of Piracy.
Overall Trophy Progress
0 / 50 Completed
0%
Platinum Path
EARLY GAME Welcome aboard, Captain. Your first job is simple: enjoy the story, learn the systems, and get comfortable sailing the Jackdaw across the Caribbean. There is no need to stress about the Platinum yet, because nothing is missable and nearly everything can be cleaned up later. You can also choose the lowest difficulty and use helpful settings such as unlimited oxygen to make exploration a little less painful....
Completion Video Playlist
1 video
Assassin's Creed Black Flag Resynced Platinum Walkthrough - Part 1 100% Completion Guide
Trophy: Prizes, Plunder, and Adventure!
Win every trophy
Type: Platinum
Unlock Details
Win every trophy
Trophy: Among Thieves
Unlock a smuggler's chest
Type: Bronze
Category: Collectible
Unlock Details
Open your first Smuggler's Chest. The easiest early location is the Smuggler's Den at Jiguey, coordinates 537, 514. Enter the cave and locate the Smuggler Leader, then either eliminate him or pickpocket him to obtain the Smuggler's Key. Once you have the key, head to the small pool of water near the center of the cave and open the locked Smuggler's Chest to unlock the trophy.
Tip
Smuggler's Chests are also tied to Weathered Map fragments, so you will be visiting these dens anyway if you are working toward Zero Waste and Dilettante. In other words, this one is basically a free appetizer before the larger collectible meal.
Video Guide: https://www.youtube.com/watch?v=t_Yxwn_ob8s&list=PLA-WmTFNuWuU&index=9
Trophy: Blow The Man Down
Shoot down all the hanging bodies in Long Bay
Type: Silver
Category: Collectible
Unlock Details
Shoot down all three hanging bodies in Long Bay. You must first complete Sequence 10 – Mission 03: The Observatory, which fully opens Long Bay for exploration. Once you return, use any firearm to shoot either the bodies or the ropes holding them up. The three bodies are located at: Body #1 – 505, 232 Hanging from the synchronization tower. Body #2 – 502, 228 Along the jungle path just north of the synchronization point. Body #3 – 502, 228 Hanging beside the second body along the same path.
Tip
Synchronize the viewpoint at 505, 232 first. It puts you right beside the first body and gives you a good vantage point for spotting the path leading to the other two.
Video Guide: https://www.youtube.com/watch?v=_O8Ll5uk5LU&list=PLA-WmTFNuWuU&index=17

Trophy: Dilettante
Fill all Art Collection and Equipment slots in the Great Inagua manor
Type: Silver
Category: Collectible
Unlock Details
Fully furnish every display position inside Great Inagua Manor. The manor becomes available during Sequence 04 – Mission 01: This Old Cove at coordinates 826, 444. From that point on, you will gradually collect decorations through story progress, exploration, Treasure Chests, Buried Treasures, General Stores, side activities, naval combat, Kenway’s Fleet, and other activities across the Caribbean. There are 99 display positions spread across the manor. You need to fill: 9 Paintings 7 Table Decorations 2 Large Table Decorations 3 Furniture Items 27 Shelf Decorations 1 Outfit 18 Swords 12 Pistols 20 Ship Models 11 Portraits Simply owning the items does not count. You must return to Great Inagua and physically place them into the appropriate empty displays around the manor. Most of this will come naturally while working through the rest of the game, so do not try to grind the entire collection immediately. Clear Warehouses for Paintings, fight different ship types for Ship Models, collect weapons as you progress, and complete The Memory of My Enemy for the Portraits. The one part worth starting early is Kenway’s Fleet. Some Art Pieces are tied to Brig Piracy missions and depend on which rewards are currently available. Whenever you return to Great Inagua, check the Fleet Planning Room and send ships on any Brig Piracy mission offering an Art Piece you still need. Let the fleet do its thing in the background while Edward handles the slightly more exciting pirate business.
Tip
Use Codex > Database to help track the collectibles you have found, but do not assume you need every Codex entry. There are more collectibles available than actual manor display slots. Your real completion checklist is the manor itself. If the trophy refuses to unlock, carefully inspect every room for an empty interaction point. Pay extra attention to the Weapons Room, which contains 27 Shelf Decorations alongside the Sword and Pistol displays, and the Treasure Cove staircase, where one Portrait frame is easy to overlook. That’s about the level of detail I’d use for trophies like this: enough that someone knows exactly what the game wants, but not a 300-line inventory list.
Trophy: Owned
Complete every activity in a single location
Type: Bronze
Category: Collectible
Unlock Details
Reach 100% completion in any single location. That means collecting everything and completing every activity tied to one area, such as Treasure Chests, viewpoints, and any other location-specific objectives. The easiest way to earn this is while working on Seven Deadly Seas. Each underwater shipwreck counts as its own location, so if you fully clear one wreck by opening every regular chest and Secret Chest, this trophy will unlock naturally.
Tip
Do this on your first fully completed underwater location. It saves you from clearing an extra island just for the trophy and lets you make progress toward Seven Deadly Seas at the same time.
Trophy: Seven Deadly Seas
Find all treasure chests in underwater shipwrecks
Type: Bronze
Category: Collectible
Unlock Details
Open every Treasure Chest and Secret Chest across all seven underwater locations. Underwater exploration becomes available after completing Sequence 06 – Mission 01: Diving for Medicines, when you unlock the Diving Bell. From there, you can visit all seven dive sites scattered across the Caribbean. There are 68 chests in total: 61 Treasure Chests 7 Secret Chests The seven underwater locations are: Antocha Wreck – 600, 636 Black Trench Wreck – 184, 425 Devil’s Eye Caverns – 456, 332 Kabah Ruins – 738, 120 La Concepción Wreck – 150, 271 San Ignacio Wreck – 348, 744 The Blue Hole – 440, 145 Use L2 while swimming to scan the area for nearby treasure markers, and check the collectible counter before leaving each location. That will save you from the classic collectible-hunt experience of returning later for one chest you somehow swam past three times. Edward’s oxygen is limited, so make use of air barrels and air pockets while exploring. Some locations also contain sharks, so be ready to dodge when you see the white flash before an attack.
Tip
Clear each underwater location completely the first time you visit. The Secret Chests contain unique weapons or Ultimate Plans for the Jackdaw, so this trophy also makes progress toward Ship This and Cartographer.

Trophy: Ship This
Fully upgrade the Jackdaw
Type: Silver
Category: Collectible
Unlock Details
Fully upgrade the Jackdaw. This requires purchasing every ship upgrade, including the final levels locked behind 12 Ultimate Plans. Some plans are found in underwater locations, while others come from buried treasures that require specific Treasure Maps. You will need roughly: 309,800 Reales 4,755 Metal 2,750 Wood 550 Cloth Underwater exploration becomes available after Sequence 06 – Mission 01: Diving for Medicines, which is when you can start collecting the plans tied to shipwrecks. The 12 Ultimate Plans are: Fire Barrel Storage Ultimate Plan Ram Ultimate Plan Heavy Shot Strength Ultimate Plan Broadside Cannons Ultimate Plan Swivel Guns Ultimate Plan Fire Barrel Strength Ultimate Plan Mortar Storage Ultimate Plan Hull Armor Ultimate Plan Harpoon Strength Ultimate Plan Mortars Ultimate Plan Round Shot Strength Ultimate Plan Heavy Shot Storage Ultimate Plan Some come from underwater chests, while the rest require finding the appropriate Treasure Map and digging up the buried reward. There is no need to farm everything at once. Keep collecting Reales and materials while doing Forts, naval combat, underwater locations, treasure hunts, and the rest of the trophy list.
Tip
Seven Deadly Seas overlaps nicely with this trophy because several Ultimate Plans are found in underwater Secret Chests. Clearing those locations completely saves you from having to dive back down later.
Warning
Collecting an Ultimate Plan only unlocks the final upgrade for purchase. You still need to visit a Harbourmaster and actually buy every remaining Jackdaw upgrade before the trophy will unlock.
Trophy: The Memory of My Enemy
Display all character portraits in the Great Inagua manor
Type: Bronze
Category: Collectible
Unlock Details
Collect and display the 10 original Character Portraits inside the Great Inagua manor. There are 11 portraits available in Assassin’s Creed Black Flag Resynced, but Robert Maynard’s portrait from the new A World Without Gold content is not required for this trophy. Simply collecting the portraits is not enough. Once you have them, return to the Great Inagua manor and place each portrait into its designated frame. When the required portraits have been displayed, a cutscene with the manor caretaker will trigger and the trophy will unlock. Most portraits become available as you progress through the story, so this is best treated as a late-game collectible trophy rather than something to obsess over early. You can check which portraits you already have by opening the Codex, going to Database, and selecting Portraits. The portraits are: Julien Du Casse Coordinates: 827, 443 Region: Gibara / Great Inagua Codex Order: 4 Available after: Sequence 3 – Mission 7: Single Madman You can collect this portrait when you first enter Great Inagua while heading toward the first Templar. If you miss it then, return later and find it near the armoury. Laurens Prins Coordinates: 594, 174 Region: Navassa / Kingston Codex Order: 7 Available after: Sequence 5 – Mission 3: Unmanned Head to the Plantation Manor west of Kingston. Go up the stairs in the middle of the manor and enter the first floor through the open window on the right. Commodore Chamberlaine Coordinates: 589, 757 Region: Eleuthera / Nassau Codex Order: 3 Available after: Sequence 7 – Mission 3: Commodore Eighty-Sixed Travel west of Nassau to the small manor. The portrait is on the top floor, which you can reach through the open window on the left side. Blackbeard Side Quest: Blackbeard’s Treasure Codex Order: 1 Available after: Sequence 8 – Mission 1: Do Not Go Gently… Travel to the Anotto Bay sea cave in the eastern Charlotte region at coordinates 590, 245. Look for jellyfish near the cave entrance. Inside, continue until you reach the first group of enemies. Place an explosive charge against the wall at the end of the left platform and detonate it. Continue forward to the next group, then place another explosive charge against the wall behind the waterfall. After reaching Blackbeard’s treasure and triggering the cutscene, return to Great Inagua and visit the quest marker to speak with the estate caretaker and receive the portrait. Stede Bonnet Side Quest: Captain Stede Bonnet Codex Order: 2 Available after: Sequence 8 – Mission 3: Marooned Start the side quest at Great Inagua, then sail to Mystery Island at coordinates 906, 123, northeast of Navassa. Speak with Stede Bonnet’s crew, help them escape the British, and then board his ship. Ben Hornigold Coordinates: 191, 223 Region: Chinchorro / Santanillas Codex Order: 5 Available after: Sequence 10 – Mission 2: Murder and Mayhem Return to the remains of Hornigold’s shipwreck northeast of Santanillas Island. His portrait can be found at the location where you defeated him. Woodes Rogers Coordinates: 618, 171 Region: Navassa / Kingston Codex Order: 9 Available after: Sequence 12 – Mission 1: A Governor No Longer Head into central Kingston and return to the area where Rogers was giving his speech. His portrait can be found there after the mission. Bartholomew Roberts Coordinates: 113, 20 Location: Príncipe Codex Order: 8 Available after: Sequence 12 – Mission 2: Royal Misfortune Use the P icon east of the Caribbean to travel back to Príncipe. After your second story visit there, Roberts’ portrait can be found inside a small tent northeast of his men’s camp. To return to the Caribbean afterward, head back to your ship and take the wheel. A very long sailing trip would have been slightly less convenient. Laureano de Torres Coordinates: 224, 595 Region: Dry Tortuga / Havana Codex Order: 11 Available after: Sequence 12 – Mission 3: Tainted Blood Travel northeast of Havana to the four-turreted fort. The portrait is inside the northwest turret. The turret entrance is on the outside of the fort, but you first need to enter the fort itself. From there, climb down from the right side of the turret and enter through the window. El Tiburon Coordinates: 204, 608 Region: Dry Tortuga / Havana Codex Order: 10 Available after: Sequence 12 – Mission 4: Ever a Splinter Head to the medium-sized fort north of Havana. The portrait is inside the northwest room. Go around to the north side of the fort and use the wooden platforms to reach the room’s open window. Robert Maynard Location: Port Royal Codex Order: 6 Available after: A World Without Gold side quests After finishing the new A World Without Gold questline, Maynard’s portrait can be found in Port Royal at coordinates 602, 134. This portrait is not required for The Memory of My Enemy, but collecting and displaying all 11 portraits is still worthwhile because doing so rewards you with a treasure map leading to a legendary Sword required for Dilettante.
Tip
Do not stop after picking up the portraits. You must physically place them into their assigned frames inside the Great Inagua manor for the trophy to unlock. The manor has specific display locations: 2 portraits in the fleet planning area, 1 in the hallway leading to the main hall, 1 in the bedroom, 1 on the staircase leading to the treasure room, and 6 inside the treasure room itself. If you are going for the Platinum, collect Robert Maynard’s portrait too. Displaying all 11 earns the treasure map tied to the legendary Sword needed for Dilettante, so you may as well finish decorating Edward’s extremely cheerful gallery of people he has crossed paths with.
Trophy: Yo Ho…
Learn a new shanty
Type: Bronze
Category: Collectible
Unlock Details
Learn your first new Shanty. Shanties are collectible music sheets found throughout the Caribbean and marked on the map with a Shanty icon. When you approach one, it will start moving along a set route, so chase it down and collect it before it disappears. The earliest Shanty can be found in Havana. If you miss it, do not worry—it will eventually respawn and you can try again. You only need to learn one Shanty for the trophy.
Tip
If chasing flying music sheets sounds like pirate paperwork, you can ignore them completely. After completing Sequence 08 – Memory 01: Do Not Go Gently..., your crew automatically learns a new Shanty and the trophy will unlock through normal story progression.

Trophy: Zero Waste
Restore a map from map pieces
Type: Bronze
Category: Collectible
Unlock Details
Restore one special Treasure Map at the Treasure Dealer in Great Inagua. Before you can do this, restore the Treasure Dealer for 5,000 Reales as part of Governor. Once it is available, you can reconstruct five different Treasure Maps using map fragments and the required material. You only need to fully restore one of them for the trophy, and you do not need to actually follow the map or dig up the treasure afterward. The easiest option is the Weathered Map. It requires six fragments and 350 Spice total. Five fragments come from Smuggler Chests inside Smuggler’s Dens, while the sixth can be purchased directly from the Treasure Dealer. The five Smuggler’s Dens are: Jiguey – 537, 512 Petite Caverne – 864, 237 Anotto Bay – 591, 246 San Juan – 454, 462 Ambergris Key – 28, 160 At each den, steal the key from the Smuggler Leader or eliminate him and loot it, then open the locked Smuggler Chest to collect the fragment. Once you have all five, buy the final piece from the Treasure Dealer and provide the required Spice to restore the map.
Tip
Go for the Weathered Map unless you already have another one nearly complete. The other maps can involve random warehouse drops, Fleet missions, Pirate Hunters, or animal respawns, while this one is mostly fixed and predictable. In other words: less RNG, fewer pirate headaches.
Video Guide: https://www.youtube.com/watch?v=GNParIe3DFI&list=PLA-WmTFNuWuU&index=6
Trophy: Business And Pleasure
Spend 50,000 Reales
Type: Bronze
Category: Grind
Unlock Details
Spend a total of 50,000 Reales. This should unlock naturally while working toward the Platinum, especially while upgrading the Jackdaw for Ship This. A full ship upgrade costs far more than 50,000 Reales, so there is no need to waste money just to force this trophy. Good ways to keep your wallet full include conquering Forts, looting underwater shipwrecks, boarding higher-level Frigates and Man-o’-Wars, and keeping ships busy on Kenway’s Fleet missions.
Tip
Do not grind this separately. Keep buying useful upgrades and the trophy will pop long before Edward finishes draining his retirement fund.
Trophy: Cartographer
Visit every location in the game
Type: Silver
Category: Grind
Unlock Details
Visit every named location in the Caribbean. You do not need to fully complete each area. Simply getting close enough for the location to register is enough, so this is more about exploration than clearing every icon on the map. The easiest way to make progress is to conquer each regional Fort as soon as your Jackdaw is strong enough. Forts reveal surrounding locations and activities on the map, making it much easier to see what areas you still have not visited. Underwater locations also count, but these only become accessible after completing Sequence 06 – Mission 01: Diving for Medicines. If you are already working on Seven Deadly Seas, you will naturally visit all seven underwater areas along the way.
Tip
Do not turn this into a full 100% map cleanup unless you want to. For the trophy, visiting each named location is enough. If you are missing one near the end, check regions where you have not conquered the Fort yet and make sure all underwater shipwrecks have been visited. Those are the easiest places for one stubborn little map icon to hide while pretending it does not exist.
Video Guide: https://www.youtube.com/watch?v=mXDuyNHbXEQ
Trophy: Articles Of Agreement
Ensure the survival of all pirates in a street fight
Type: Bronze
Category: Combat
Unlock Details
Complete one pirate street fight without allowing any of the pirates involved to die. These dynamic events appear while exploring the Caribbean. When you find one, jump in immediately and focus on the guards attacking your pirate allies. The pirates can get overwhelmed quickly, so this is less about looking stylish and more about ending the fight before your future crew members become former crew members. If even one pirate dies before the encounter is over, it will not count and you will need to find another street fight.
Tip
Prioritize enemies already engaged with the pirates instead of chasing guards farther away. These events respawn throughout the game, so a failed attempt is only a temporary setback.
Video Guide: https://www.youtube.com/watch?v=-9RG8BlXwmA&list=PLA-WmTFNuWuU&index=10

Trophy: Backs To The Wall
Kill an enemy with a wall takedown
Type: Bronze
Category: Combat
Unlock Details
Kill an enemy using a Wall Takedown. Lure an enemy close to a wall, fence, or building, then press R2 + Square to kick them backward into the surface. As soon as they rebound, press Triangle to perform the contextual Wall Takedown and finish them. The trophy will unlock as soon as the takedown animation is completed.
Tip
You may earn this naturally during regular melee combat near buildings, so there is no need to hunt for it early. If Edward decides to introduce someone to a wall at high speed, just make sure you finish the job.

Trophy: Caught 'Em All
Catch at least five enemies within a single smoke bomb
Type: Bronze
Category: Combat
Unlock Details
Catch at least five enemies in the blast radius of a single Smoke Bomb. One of the easiest early locations is the warehouse in Eleuthera. There are plenty of guards nearby, and the alarm bells can be used to pull even more enemies into the area. Alert the guards on purpose, let one of them ring the alarm if you need reinforcements, then keep moving around the group while dodging or countering attacks so they bunch together. Once at least five guards are standing close to each other, press Down on the directional pad to throw a Smoke Bomb into the middle of the group. If five or more enemies are caught in the smoke cloud, the trophy will unlock immediately.
Tip
You do not need to kill anyone. The only requirement is that five enemies are affected by the same Smoke Bomb, so once the trophy pops, feel free to disappear into the smoke like Edward suddenly remembered he had somewhere else to be.
Video Guide: https://www.youtube.com/watch?v=CSCfUJDXuus&list=PLA-WmTFNuWuU&index=7

Trophy: Devil of the Caribbean
Defeat all legendary ships
Type: Silver
Category: Combat
Unlock Details
Defeat all five Legendary Ships scattered around the Caribbean Sea. These are the toughest naval battles in the game, so this is one trophy worth saving until late. A fully upgraded Jackdaw is strongly recommended, along with all three optional officer abilities: Ram-Dash from The Padre, Perfect Brace from Lucy Baldwin, and Double Shot from Deadman. The Legendary encounters are: HMS Prince – 854, 55 La Dama Negra – 240, 72 HMS Fearless & Royal Sovereign – 811, 858 El Impoluto – 117, 841 HMS Fearless and Royal Sovereign count as two Legendary Ships, bringing the total to five. HMS Prince: This fight revolves around fog and long-range Mortar attacks. As you damage it, HMS Prince repeatedly disappears into the mist and bombards the Jackdaw from range. Watch the water for incoming Mortar zones and keep track of where the ship disappears so you can close the distance again. La Dama Negra: Think floating fortress. Its broadside armor is extremely tough, so concentrate attacks on the more vulnerable bow and stern whenever possible. It also uses powerful Mortars from long range, meaning staying at a comfortable distance does not necessarily make you safe. HMS Fearless & Royal Sovereign: You fight both Man-o'-Wars simultaneously. Try to manage their positioning and avoid getting trapped between their overlapping cannon fire. Once one ship is destroyed, the survivor becomes much more aggressive, so do not assume the battle is basically over after sinking the first one. You also cannot board either ship for a mid-fight repair. El Impoluto: This is the angry one. El Impoluto repeatedly creates distance and then charges the Jackdaw at extremely high speed with its reinforced ram. Avoid taking these hits head-on and be ready for powerful flaming broadsides whenever it gets close. As its health drops, it becomes even more aggressive, because apparently ramming you at terrifying speed was not enthusiastic enough already.
Tip
Finish Ship This and All Hands On Deck first if possible. These fights are far more manageable with maximum Jackdaw upgrades and every officer ability available. If one Legendary Ship is giving you trouble, leave it and try another. They can be challenged in any order, so there is no reason to turn one bad naval fight into a personal vendetta.
Trophy: Double Tap
Parry two Ocelot attacks in rapid succession
Type: Bronze
Category: Combat
Unlock Details
Parry two Ocelot attacks in rapid succession. The easiest opportunity comes during the story on Abaco Island, shortly after obtaining the Jackdaw. Two Ocelots appear together here, which makes this much easier than trying to set it up somewhere else. Let both Ocelots become aggressive, then wait for the first one to leap at you. Press L1 just before the attack connects to parry it, then immediately do the same with the second Ocelot. If both parries are performed close enough together, the trophy will unlock.
Tip
If you miss it during the story, synchronize the Abaco Island viewpoint before leaving so you can fast travel back later and try again. No need to restart the whole mission because two angry cats ruined the timing.
Video Guide: https://www.youtube.com/watch?v=pVUHn-XJVlA&list=PLA-WmTFNuWuU&index=11

Trophy: Gun-kata
Use pistols to kill four enemies in a row within five seconds
Type: Bronze
Category: Combat
Unlock Details
Kill four enemies with pistols within five seconds. The easiest setup is to unlock all four Pistol Holsters so Edward can fire four loaded shots without stopping to reload. Pistol Holsters: Level 2 – Unlocked automatically during Sequence 03 – Mission 01: This Tyro Captain Level 3 – Requires 2 Rabbit Pelts Level 4 – Requires 4 Bull Shark Skins Once you have four loaded shots, find a group of at least four enemies in a restricted area, plantation, settlement, or anywhere else with several guards nearby. The cleanest method is to create some distance, line up four targets in front of you, and quickly land four headshots in a row. Headshots are ideal because they remove any uncertainty about enemy health. You can also use Quickshot with R2 + Triangle against weaker enemies at close range, but it is less reliable since not every shot is guaranteed to kill.
Tip
Do not rush so hard that you miss. Four bullets for four targets is perfect—until Edward decides to donate one to a nearby wall. Accuracy matters more than shaving off a fraction of a second.
Video Guide: https://www.youtube.com/watch?v=vcxDemYPx6c&list=PLA-WmTFNuWuU&index=4

Trophy: Hunter Hunted
Defeat a Pirate Hunter while at maximum Wanted Level
Type: Bronze
Category: Combat
Unlock Details
Defeat a Pirate Hunter while your Wanted Level is at the maximum of four stars. Raise your Wanted Level by attacking and sinking ships across the Caribbean Sea. Once you reach ★★★★, a Pirate Hunter fleet consisting of a Man-o'-War and a Frigate will begin pursuing the Jackdaw. Engage the fleet and destroy either the Man-o'-War or the accompanying Frigate while your Wanted Level is still at maximum. You do not need to sink both ships.
Tip
This is much easier once the Jackdaw is heavily upgraded or fully upgraded for Ship This. At four stars, the Pirate Hunters stop being mildly annoyed and start arriving with enough firepower to make Edward reconsider his recent life choices.
Trophy: King of the Castle
Capture all forts
Type: Silver
Category: Combat
Unlock Details
Capture all 11 forts scattered across the Caribbean. Forts are marked on the map with a red tower icon and require both naval combat with the Jackdaw and an on-foot assault with Edward. To capture a fort, first use the Jackdaw to destroy its defensive towers. Once the naval defenses are down, dock and enter the fort. Fight through the defending soldiers until the morale gauge is depleted, then head to the war room and kill the fort commander to officially take control. You will capture Punta Guarico automatically during Sequence 05 – Mission 01: The Forts. The remaining 10 forts can be tackled whenever you are ready. The 11 forts are: Punta Guarico Ruler: Spanish Difficulty: Medium Naval Fort Defense: 2 Coordinates: 747, 379 Dry Tortuga Ruler: Spanish Difficulty: Easy Naval Fort Defense: 2 Coordinates: 223, 722 Eleuthera Ruler: British Difficulty: Easy Naval Fort Defense: 4 Coordinates: 692, 762 Gibara Ruler: Spanish Difficulty: Easy Naval Fort Defense: 4 Coordinates: 630, 494 Navassa Ruler: British Difficulty: Medium Naval Fort Defense: 9 Coordinates: 701, 194 Cabo de Cruz Ruler: Spanish Difficulty: Medium Naval Fort Defense: 4 Coordinates: 537, 362 Castillo de Jagua Ruler: Spanish Difficulty: Medium Naval Fort Defense: 6 Coordinates: 328, 535 Conttoyor Ruler: Spanish Difficulty: Medium Naval Fort Defense: 7 Coordinates: 76, 523 Charlotte Ruler: British Difficulty: Hard Naval Fort Defense: 5 Coordinates: 442, 245 Serranilla Ruler: British Difficulty: Hard Naval Fort Defense: 7 Coordinates: 317, 120 Chinchorro Ruler: Spanish Difficulty: Hard Naval Fort Defense: 4 Coordinates: 91, 331 The forts generally become tougher as you move south, so there is no reason to charge straight at the hardest ones with a Jackdaw held together by optimism and a few spare planks. Save the tougher forts until your ship is heavily upgraded or close to its Ultimate form.
Tip
Prioritize upgrading the Mortar. Its long range lets you hammer fort towers before getting too close to their cannons, then you can finish weakened defenses with regular cannon fire. Remember that destroying the towers is only the first half of the job. You must also complete the ground assault and kill the fort commander for the capture to count.
Trophy: Let Me Explain
After a perfect parry, perform a total of four takedowns
Type: Bronze
Category: Combat
Unlock Details
Perform four takedowns in a single chain immediately after a Perfect Parry. Before attempting this, restore the General Store at Great Inagua to Level II and equip a weapon that supports a maximum chain of four takedowns. Without a weapon capable of a four-kill chain, the trophy cannot be earned. Head to a plantation or another area with a large group of guards and let at least four of them surround Edward. Wait for a normal attack with the blue indicator, then press L1 just before it connects to perform a Perfect Parry. Immediately press Triangle to start the takedown chain, then keep pressing Triangle to eliminate four different guards before the combo ends.
Tip
Avoid guards carrying large axes. They cannot be killed as part of the chain and will instantly ruin the combo. Stick to standard guards and try not to let one oversized axe enthusiast wander into Edward’s little murder rhythm.
Video Guide: https://www.youtube.com/watch?v=6xdhsxiWJoc&list=PLA-WmTFNuWuU&index=5

Trophy: Matador
Dodge a total of three charge attacks by a Wild Pig
Type: Bronze
Category: Combat
Unlock Details
Perform three Perfect Dodges against Wild Pig charge attacks. Wild Pigs can be found throughout the Caribbean, with Nassau being one of the earliest places to encounter them. Allow a Wild Pig to become aggressive and wait for it to lower its head and charge. The attack is unblockable and is signaled by a red flash. Press Circle at the last moment before the charge connects. A successful Perfect Dodge will trigger a blur effect and brief slow-motion animation. Repeat this three times to unlock the trophy.
Tip
The three Perfect Dodges do not need to be consecutive or performed against the same Wild Pig, so there is no need to stand there repeatedly annoying one particularly determined pig.
Video Guide: https://www.youtube.com/watch?v=dus0LFFdc-c&list=PLA-WmTFNuWuU&index=13

Trophy: Old Ironsides
Perform 3 perfect braces
Type: Bronze
Category: Combat
Unlock Details
Perform three Perfect Braces with the Jackdaw. Perfect Brace becomes available after recruiting Lucy Baldwin and completing A Proper Shipwright. Once unlocked, engage any hostile ship and watch for the enemy cannons to glow orange before they fire. Hold Square just before the cannonballs hit the Jackdaw. If your timing is right, Edward’s crew will perform a Perfect Brace and reduce or nearly eliminate the incoming damage. Repeat this three times to unlock the trophy. The braces do not need to be performed during the same battle.
Tip
You will have plenty of chances to earn this naturally while working toward Devil of the Caribbean. Learning the timing now is worth it, because Legendary Ships hit hard enough to make “brace properly” feel less like advice and more like a survival plan.
Trophy: Overdesign IV
Kick a berserk enemy caught in smoke off a ship
Type: Silver
Category: Combat
Unlock Details
Kick a berserk enemy caught in smoke off a ship. You need both of these story-unlocked tools first: Smoke Bomb – unlocked during Sequence 02 – Mission 01: Lively Havana Berserk Dart – unlocked during Sequence 04 – Mission 04: Overrun and Outnumbered Board a Schooner or Brig and choose an enemy standing near an exposed edge of the deck. Shoot them with a Berserk Dart and wait for the purple symbol to confirm the effect is active. Next, throw a Smoke Bomb so that same enemy is caught inside the smoke. Move in while they are disoriented and press Triangle when the takedown prompt appears. The trophy will unlock if the takedown animation sends the berserk, smoke-covered enemy overboard.
Tip
Positioning matters more than anything else here. Keep the target right beside an open railing before using the takedown.
Warning
The finishing animation is contextual, so Edward may sometimes kill the enemy normally instead of throwing them into the sea. If that happens, repeat the setup with another target closer to the edge.
Video Guide: https://www.youtube.com/watch?v=WeiQ5oK3ajA&list=PLA-WmTFNuWuU&index=2
Trophy: Perfect Predator
Get a perfect harpoon shot on a Great White Shark
Type: Bronze
Category: Combat
Unlock Details
Land one Perfect Harpoon Shot on a Great White Shark. A good place to attempt this is the Great White Shark harpooning location at coordinates 490, 303, between Cruz and Charlotte. This encounter is rated 1/5 difficulty, making it one of the easier shark hunts to use for the trophy. Before starting, it helps to buy at least one upgrade for Harpoon Damage, Rowboat Armor, and Harpoon Storage. Great White Sharks hit hard, and a little extra survivability makes the whole thing less stressful. During the hunt, hold L2 to aim at the shark and hold R2 to charge the harpoon. Watch the aiming reticle as it tightens around the target. Release R2 at the exact moment the reticle flashes red. If the harpoon connects during that brief window, it will count as a Perfect Harpoon Shot and the trophy will unlock immediately.
Tip
You only need one perfect hit. You do not have to kill the shark or finish the expedition afterward, so once the trophy pops, Edward has officially impressed the fish and you can move on.
Video Guide: https://www.youtube.com/watch?v=J3mxIMOpht4&list=PLA-WmTFNuWuU&index=15
Trophy: Return The Favor
Dash ram a ramming Brig
Type: Silver
Category: Combat
Unlock Details
Use Ram-Dash to counter a Brig while it is attempting to ram the Jackdaw. Before attempting this, you need to recruit The Padre and install at least the first Ram Upgrade on the Jackdaw. The Padre becomes available after Sequence 04 – Mission 01: This Old Cove. Complete his first two Officer Quests: A Second Chance – Caracol, around 919, 339 Loyalty, Discipline, and Courage – Cumberland Bay, around 648, 348 Once The Padre joins the Jackdaw, Ram-Dash becomes available during naval combat. Next, find a Brig and give it enough distance to line up a ramming attack. When it begins charging toward you, press L1 + R1 to activate Ram-Dash and collide with the Brig head-on. If your Ram-Dash successfully counters its incoming ram, the trophy will unlock.
Tip
Do not rush the setup. Give the Brig plenty of room so its attack is obvious, then trigger Ram-Dash as it commits to the charge. It is basically a very expensive game of pirate chicken.
Video Guide: https://www.youtube.com/watch?v=Xt1eKch2I14&list=PLA-WmTFNuWuU&index=3
Trophy: Silence, Fool!
Kill a guard ringing a bell
Type: Bronze
Category: Combat
Unlock Details
Kill a guard while they are actively ringing an alarm bell. Alarm bells can be found around heavily guarded areas. Once Edward is detected, one of the guards may sprint toward the nearest bell to call in reinforcements. One of the earliest places to do this is in northwestern Havana, where several Spanish guards patrol around two alarm bells near a crop field. Let a guard spot you, then watch for the yellow bell icon above the head of the guard running toward the alarm. Once they reach the bell and begin ringing it, kill them before the animation finishes. The easiest method is to use a Flintlock Pistol or another firearm. Let the guard start ringing the bell, aim with L2, then fire with R2. A clean shot saves you from having to fight through the rest of the group while the alarm enthusiast is busy ruining everyone’s day.
Tip
Do not kill the guard before they actually start ringing the bell. The trophy only counts while the alarm animation is in progress.
Video Guide: https://www.youtube.com/watch?v=t4uHOIG1kn0&list=PLA-WmTFNuWuU&index=14

Trophy: The Hangman
Kill 10 enemies by hanging them with the rope dart
Type: Bronze
Category: Combat
Unlock Details
Kill 10 enemies using Rope Dart hanging executions. You receive the Rope Dart during the story mission Sugarcane and its Yields. Soon after, the game teaches you how to hang unsuspecting guards from rooftops, ledges, and tree branches. To perform a hanging execution, stay hidden above an enemy and lure them underneath your position. Using Eagle Vision with R3 can help you track nearby guards, and you can whistle with Right on the directional pad to bring one into place. Once the hanging prompt appears, press R1. The plantation later in Sugarcane and its Yields is a great place to start working on this because it has plenty of elevated positions and patrol routes. These kills are cumulative, so you do not need all 10 during one mission. Just keep using hanging executions whenever the opportunity appears.
Tip
Do not let the target spot you before they reach the correct position. Once open combat starts, the hanging prompt disappears.
Warning
Do not try to farm this by reloading an earlier save. Any kills made after that save point are lost when you reload, so make sure your progress is recorded through normal gameplay.
Video Guide: https://www.youtube.com/watch?v=KYCYLouUV5s&list=PLA-WmTFNuWuU&index=18
Trophy: All Hands On Deck
Recruit all Officers
Type: Bronze
Category: Misc
Unlock Details
Recruit all three optional officers for the Jackdaw: Lucy Baldwin, The Padre, and Deadman. Adéwalé and Anne Bonny serve as quartermasters automatically during the story and do not require any extra work. The trophy is specifically tied to recruiting the three optional officers added in Resynced. Lucy Baldwin becomes available after Sequence 04 – Memory 01: This Old Cove. Adéwalé will tell you about an imprisoned shipwright near Salt Key Bank. Complete her first quest, A Proper Shipwright, to recruit her and unlock the Perfect Brace ability. The Padre also becomes available after Sequence 04 – Memory 01: This Old Cove. His questline begins in Caracol. Complete A Second Chance to recruit him, then continue into Loyalty, Discipline, and Courage if you also want to unlock Ram-Dash for Return the Favor. Deadman becomes available much later during the A World Without Gold chapter after progressing through Sequence 11. Complete No Box Dark Enough to recruit him and unlock Double Shot. Once Lucy Baldwin, The Padre, and Deadman have all joined the crew, the trophy will unlock. They do not all need to be assigned to the Jackdaw at the same time.
Tip
It is worth finishing their later quests too. Their abilities are useful in naval combat, and some of their rewards contribute toward other trophies such as Dilettante and Return the Favor. None of the officer questlines are missable, so you can clean them up later if needed.
Trophy: Collective Madness
Add one of each ship class to Kenway's fleet
Type: Silver
Category: Misc
Unlock Details
Have one of each boardable ship class in Kenway’s Fleet at the same time. You need these four classes: Schooner Brig Frigate Man-o’-War Cutters do not count because they cannot be boarded. Use the Spyglass with R3 while sailing to identify a ship’s class before attacking it. After disabling and boarding the ship, choose Send to Kenway’s Fleet. Once your fleet contains at least one Schooner, Brig, Frigate, and Man-o’-War simultaneously, the trophy will unlock.
Tip
Keep one of each class in your fleet while working on Kenway’s Fleet missions instead of immediately replacing them. That way this trophy should come naturally while you make progress toward Ship This and Dilettante.
Trophy: Davy Jones' Locker
Swim to the lowest point on the map
Type: Bronze
Category: Misc
Unlock Details
Swim to the lowest point on the map. Travel to The Black Trench Wreck at coordinates 184, 425. Once inside the underwater area, swim along the right-hand side of the wreckage. Around the middle of the location, dive downward while keeping slightly to the right until you see the Diving Bell. Swim all the way to the bottom beside it and remain there for a few seconds. The trophy should unlock once Edward reaches the deepest point.
Tip
Do this while clearing The Black Trench Wreck for Seven Deadly Seas. That way you only have to make one trip into the abyss, which is probably enough time underwater for anybody.
Video Guide: https://www.youtube.com/watch?v=YQWzggEDKdQ
Trophy: Dressing Overall
Equip new cosmetics in each of the Jackdaw's vanity slots
Type: Bronze
Category: Misc
Unlock Details
Equip a new cosmetic in each of the Jackdaw’s five vanity slots. After completing Sequence 04 – Mission 01: This Old Cove, restore the Harbourmaster at Great Inagua for 500 Reales. Speak with the merchant and open the Appearance menu with R2. You need to equip one cosmetic in each of these slots: Sails Figurehead Hull Wheel Crew If you do not already own enough cosmetics, use See Shop at the Harbourmaster to buy additional options with Reales.
Tip
There is no need to rush this. Forts, Legendary Ships, and certain treasure chests all reward cosmetics, so you will naturally build up plenty of options while working through the rest of the trophy list. If you own the Deluxe Edition, the Legendary cosmetic set already covers every vanity slot, so you can unlock this as soon as the Appearance menu becomes available.
Trophy: Ed the Diver
Swim a total of 1000m underwater, excluding underwater shipwrecks
Type: Bronze
Category: Misc
Unlock Details
Swim a cumulative total of 1,000 meters underwater in the open world. While swimming in deep water, press Circle to dive beneath the surface, then continue swimming underwater until you reach the required total distance. Important: distance traveled inside designated underwater shipwreck locations does not count. Only free swimming beneath the ocean in the open world contributes to the 1,000 meters.
Tip
Turn on Unlimited Oxygen in the Gameplay settings before attempting this. It lets Edward stay submerged indefinitely, turning the trophy into one long, peaceful swim instead of repeated trips to the surface.

Unlock Details
Swim a cumulative total of 1,000 meters underwater in the open world.
While swimming in deep water, press Circle to dive beneath the surface, then continue swimming underwater until you reach the required total distance.
Important: distance traveled inside designated underwater shipwreck locations does not count. Only free swimming beneath the ocean in the open world contributes to the 1,000 meters.
Tip
Turn on Unlimited Oxygen in the Gameplay settings before attempting this. It lets Edward stay submerged indefinitely, turning the trophy into one long, peaceful swim instead of repeated trips to the surface.
Trophy: Edward Catway
Break 50 potted plants
Type: Bronze
Category: Misc
Unlock Details
Break a total of 50 potted plants. Havana is the easiest place to do this because its streets, balconies, and walkways are packed with small orange flower pots. Simply run or sprint into them to smash them. The total is cumulative, so you do not need all 50 in one visit. If you want to farm it, clear a good stretch of Havana, then fast travel away or reload the area to make the pots respawn.
Tip
You may unlock this naturally if you spend enough time running through Havana instead of sticking to the rooftops. For once, reckless property damage is officially encouraged.

Trophy: Friend To All
Interact with all seven friendly animals
Type: Bronze
Category: Misc
Unlock Details
Interact with every friendly animal species. Despite the trophy description saying seven, there are actually eight friendly animal types that need to be interacted with: Dog – Great Inagua Cat – Cat Island Turtle – Around 146, 581 Parrot – Tavern in Havana Monkey – Encountered automatically during the story Cow – Farms throughout the Caribbean Pig – Farms throughout the Caribbean Chicken – Havana market around 212, 585 Approach each animal and press Triangle to interact with it.
Tip
Most of these will show up naturally while exploring, so pet them when you see them and save yourself from doing a Caribbean-wide animal census at the end.

Trophy: Glutton for Nourishment
Consume 20 food items
Type: Bronze
Category: Misc
Unlock Details
Consume 20 environmental food items. Food can be found throughout the Caribbean as berry bushes, bowls of fruit, bottles of wine, and similar items. These restore health when Edward has taken damage. Whenever you see one, take a little damage if needed and press Triangle to consume it. Repeat this until you have eaten 20 food items in total.
Tip
Do not bother farming this. If you make a habit of grabbing food whenever Edward is injured, the trophy should unlock naturally during the story.
Warning
Stored rations used with Up on the d-pad do not count. Only food found in the environment contributes to the total.

Trophy: Governor
Restore all buildings in the Great Inagua village
Type: Bronze
Category: Misc
Unlock Details
Restore all seven buildings in the Great Inagua village to Level 1. Great Inagua becomes your main base after completing Sequence 04 – Mission 01: This Old Cove, but the village starts out looking a little less “pirate paradise” and a little more “someone should probably fix this place.” You need a total of 23,100 Reales to restore every required building: General Store – 500 Reales Tavern – 100 Reales Harbourmaster – 500 Reales Brothel – 6,000 Reales Campfire – 6,000 Reales Treasure Dealer – 5,000 Reales Fisherman’s Wharf – 5,000 Reales Some buildings will not appear until you restore their prerequisite businesses and speak with the appropriate merchant. If something seems to be missing, explore the village and docks for any remaining merchant or construction icons. Only the first restoration level of each building is required. You do not need the additional General Store or Harbourmaster upgrades, and manor renovations do not count toward this trophy.
Tip
Restore the Harbourmaster early. It gives you access to Jackdaw upgrades, which will make ship battles, boarding, and Fort assaults much easier as you work through the rest of the game.
Warning
Nothing here is missable. If you do not have enough Reales during the story, you can finish the remaining restorations later in free roam.
Trophy: Grandmaster
Win at each of the different tavern games
Type: Silver
Category: Misc
Unlock Details
Win one match of each tavern game: Nine-Man Morris, Checkers, and Fanorona. You do not need to beat the toughest opponents. A win against a 1-star player counts, so there is no prize for voluntarily turning this into a pirate chess championship. Recommended easy locations: Nine-Man Morris – Salt Key Bank Dry Tortuga Region Coordinates: 467, 605 Checkers – Andreas Island Eleuthera Region Coordinates: 543, 697 Fanorona – Crooked Island Gibara Region Coordinates: 777, 520 Each match requires a small wager in Reales. If a tavern table cannot be used yet, speak with the barkeeper, request a drink, and complete the tavern brawl that follows. Once the enemies are defeated, the tavern and its game table will become available. For Nine-Man Morris, try to form rows of three pieces called mills. Each mill lets you remove one enemy piece. Focus on central connecting points and look for opportunities to repeatedly break and reform a mill. For Checkers, captures are mandatory whenever one is available. Keep your pieces grouped together, protect your back row, and try to create Kings by reaching the opposite side of the board. For Fanorona, captures are made by moving toward or away from enemy pieces. Look for moves that remove multiple pieces in a line and chain together several captures in one turn.
Tip
Stick with the 1-star opponents at the locations above. You only need one victory in each game, so there is absolutely no reason to let a 3-star tavern regular ruin Edward’s evening.
Video Guide: https://www.youtube.com/watch?v=8-EUYt3kdzA&list=PLA-WmTFNuWuU&index=8
Trophy: Help A Brother Out
Complete a Templar Hunt sequence
Type: Bronze
Category: Misc
Unlock Details
Complete any one full Templar Hunt sequence. Templar Hunts become available after Sequence 04 – Mission 01: This Old Cove. There are four separate storylines across the Caribbean, and each one contains four missions ending with the assassination of a Templar. You only need to complete one full sequence for this trophy. The recommended option is Opía Apito in Cayman Sound. Her questline also gives you progress toward the Digested Map, so you can knock out part of another objective while you are here instead of doing extra cleanup later. The four available Templar Hunts are: Upton Travers – Nassau Rhona Dinsmore – Havana Antó – Kingston Opía Apito – Cayman Sound Complete all four missions in whichever sequence you choose and the trophy will unlock after the final mission.
Tip
If you are going for the Platinum, Opía Apito is the most efficient choice for this trophy because her questline also contributes toward the Digested Map. Completing all four Templar Hunts later will also give you the keys needed to claim the Templar Armor, so none of this effort goes to waste.
Trophy: Hungover
Wake up in a haystack
Type: Bronze
Category: Misc
Unlock Details
Wake up in a haystack after drinking too much at a tavern. After completing Sequence 02, visit any tavern outside of Nassau. If the tavern is not yet unlocked, buy a drink to trigger the brawl, defeat the drunken troublemakers, and the bartender’s services will become available. Then speak with the bartender and choose Have a Drink five times in the same visit. Each drink costs 25 Reales, for a total of 125 Reales. After the fifth drink, the screen will fade to black and Edward will wake up in a haystack, unlocking the trophy.
Tip
Buy all five drinks without leaving the tavern. If you walk away before Edward passes out, you may have to start the drinking streak again.
Video Guide: https://www.youtube.com/watch?v=jsLI2u0b9Fs&list=PLA-WmTFNuWuU&index=12
Trophy: Last To Leave
Take a seat on a burning ship
Type: Silver
Category: Misc
Unlock Details
While sailing around the Caribbean, keep an eye out for random burning shipwreck encounters. These ships are heavily damaged, abandoned, and already having a considerably worse day than Edward. Use your spyglass with R3 from time to time and scan the horizon for columns of smoke. Burning ships appear randomly, so there is no guaranteed location or reliable way to force one to spawn. Once you find one, sail over and board it as quickly as possible. You are looking for a chair on the deck that can be interacted with. Unfortunately, not every burning wreck will have one, because apparently finding a sinking ship was not enough RNG already. If a chair is present, walk up to it and press Triangle to sit down. The trophy should unlock as soon as Edward takes his seat.
Tip
Move quickly once you board. Burning ships only remain afloat for around 25 seconds before disappearing beneath the water.
Warning
This trophy depends on a random burning ship encounter, and even then, the wreck may not contain an interactable chair. Keep checking smoke columns while naturally sailing around the Caribbean rather than trying to grind it immediately.
Video Guide: https://www.youtube.com/watch?v=VmzZknPbXg4&list=PLA-WmTFNuWuU
Trophy: Strike The Colors
Board a Lead Convoy ship
Type: Bronze
Category: Misc
Unlock Details
Board a Lead Convoy ship. Lead Convoys appear as temporary roaming encounters while sailing across the Caribbean. When one appears, head toward the convoy and identify the designated lead vessel. Damage the ship until it becomes vulnerable to boarding, then pull alongside and hold Circle when prompted. Complete the boarding objectives and reduce the crew’s morale just like you would during a normal ship capture. The trophy unlocks once the Lead Convoy ship has been successfully boarded.
Tip
Lead Convoys are time-limited and can disappear if you take too long to reach them. If one vanishes, do not worry—another will eventually appear elsewhere while you continue sailing.
Trophy: Unsinkable
Survive a rogue wave taken from the side
Type: Bronze
Category: Misc
Unlock Details
Survive a Rogue Wave hitting the side of the Jackdaw. Rogue Waves appear during severe storms while sailing across the Caribbean. When your crew starts shouting warnings and you see a giant wall of water approaching, turn the Jackdaw so either the port or starboard side faces the wave. Hold Square to brace just before impact. Bracing reduces the damage but still allows the hit to count for the trophy. You may get this naturally while sailing during storms, but there is also a reliable opportunity during Sequence 02 – Mission 06: The Treasure Fleet, where Rogue Waves appear during the final storm sequence.
Tip
Normally, pointing the bow into a wave is the smart thing to do. For this trophy, forget sensible seamanship for a moment and let the Caribbean slap the Jackdaw directly in the side.
Trophy: A Poxy Bird
Captain your own ship (complete Sequence 2, Memory 6)
Type: Bronze
Category: Story
Unlock Details
Complete Sequence 02 – Memory 06: A Poxy Bird. This trophy unlocks automatically through story progression as Edward and Stede Bonnet escape Havana and you are introduced to the basics of naval combat, sailing, boarding, and ship repairs. Finish the mission and Edward will officially take command of his own ship, which is where the real pirate business begins.
Trophy: Ever A Splinter
Stop a Templar plot (complete Sequence 12, Memory 5)
Type: Gold
Category: Story
Unlock Details
Complete Sequence 12 – Memory 05: Ever a Splinter. This is story-related and unlocks automatically after Edward reaches the Observatory, confronts Laureano de Torres, and brings the main Templar plot to an end. No extra requirements are needed. Finish the memory and the trophy will unlock.
Trophy: In A World Without Gold
Witness the end of a legend (complete Sequence 8, Memory 1)
Type: Bronze
Category: Story
Unlock Details
Complete Sequence 08 – Memory 01: Do Not Go Gently... This is story-related and unlocks automatically at the end of the memory. No additional requirements are needed, so just continue through the campaign and the trophy will pop as Edward reaches one of the major turning points in the story.
Trophy: Lively Havana
Get a tour of Havana (complete Sequence 2, Memory 1)
Type: Bronze
Category: Story
Unlock Details
Complete Sequence 02 – Memory 01: Lively Havana. This is story-related and unlocks automatically as Edward explores Havana with Stede Bonnet and works through the mission’s introduction to weapons, viewpoints, chases, combat, and Smoke Bombs. No extra requirements are needed.

Trophy: Not So Little Friend
Unlock the secondary firing mode on a Jackdaw weapon
Type: Bronze
Category: Story
Unlock Details
Unlock the secondary firing mode for a Jackdaw weapon. This happens automatically during Sequence 04 – Mission 03: Proper Defenses, when Edward unlocks Heated Shot for the Broadside Cannons. To use it, hold L2 to aim the broadside cannons, press Triangle to switch between standard cannonballs and Heated Shot, then fire with R2. Heated Shot has shorter range but deals much heavier damage at close range, making it especially useful when fighting powerful ships later in the game.
Tip
This trophy is unmissable, but it is worth getting comfortable with Heated Shot early. It becomes one of the Jackdaw’s best tools once naval fights start getting serious.
Trophy: Smooth Operator
Craft an item
Type: Bronze
Category: Story
Unlock Details
Craft your first item. This trophy unlocks automatically during Sequence 03 – Mission 01: This Tyro Captain. After hunting two Ocelots on Abaco Island, Edward uses their pelts to craft the Second Pistol Holster. This upgrade is required to continue the story, so the trophy is unmissable.
Tip
Keep hunting animals as you explore. Crafting upgrades improve Edward’s health, ammunition capacity, and carrying limits, which makes later combat much more forgiving.
Trophy: Walls That Hold Back The Wind
Settle in a new home (complete Sequence 4, Memory 1)
Type: Bronze
Category: Story
Unlock Details
Complete Sequence 04 – Memory 01: This Old Cove. This trophy unlocks automatically through story progression when Edward claims Great Inagua as his new base of operations. The mission also introduces several important systems tied to the hideout, including building restorations, new services, ship upgrades, and fleet management. Finish the memory and the trophy will unlock.

Welcome aboard, Captain. Your first job is simple: enjoy the story, learn the systems, and get comfortable sailing the Jackdaw across the Caribbean. There is no need to stress about the Platinum yet, because nothing is missable and nearly everything can be cleaned up later. You can also choose the lowest difficulty and use helpful settings such as unlimited oxygen to make exploration a little less painful.
As you travel, complete side activities and clear locations whenever it feels natural. You do not need every collectible for the Platinum, but exploring now earns useful resources, upgrades, and rewards while saving you from staring at a sea of icons later wondering what life choices brought you here.
Once you reach Sequence 04 – Mission 01: This Old Cove, almost the entire Caribbean opens for free exploration. A few islands will remain unavailable until later, so do not worry if you cannot reach absolutely everything yet. Just keep sailing, upgrading, and causing the appropriate amount of pirate-related trouble.
As the Caribbean opens up, start mixing more exploration and side content into your story progression. Clearing islands and completing activities along the way will make the Jackdaw stronger and steadily reduce the amount of cleanup waiting for you after the credits.
Two trophies are worth keeping in the back of your mind because their opportunities can involve a little randomness. For Dilettante, you will eventually need to fill every Art Collection and Equipment slot in the Great Inagua manor. For Last To Leave, you need to take a seat on a burning ship. Neither needs to dominate your playthrough, but if an opportunity appears naturally, take advantage of it instead of leaving everything for cleanup.
Story trophies will continue unlocking automatically as you progress, including Lively Havana for completing Sequence 2, Memory 1, A Poxy Bird for completing Sequence 2, Memory 6, and Walls That Hold Back The Wind for completing Sequence 4, Memory 1. No special preparation is required for these, so just keep following Edward's extremely responsible career path.
Continue through the remaining story while finishing side activities whenever you feel like taking a break from the main missions. There is still no need to clear every collectible or point of interest for the Platinum, so focus your time on activities that give useful resources, upgrades, or trophy progress.
As you approach the end, you will automatically earn In A World Without Gold for completing Sequence 8, Memory 1 and Ever A Splinter for completing Sequence 12, Memory 5. Because nothing is missable, you do not need to perform a giant pre-finale checklist before finishing the story.
If Dilettante or Last To Leave still have not unlocked naturally, that is completely fine. The goal during the story is simply to make some progress whenever convenient so you potentially save yourself a little hunting later. Finish the campaign first; the Caribbean will still be waiting afterward.
With the story complete, it is time to turn Edward Kenway from successful pirate into certified Platinum pirate. Everything remaining can be completed through free roam, and no second playthrough is required. That means you can work through the remaining trophies in whatever order you prefer without worrying about missing something permanently.
Do not let the enormous number of icons across the Caribbean fool you into thinking you need full map completion. The Platinum does not require every collectible or every point of interest. Focus specifically on trophy-related activities, unfinished upgrades, Dilettante, Last To Leave, and any miscellaneous objectives you did not complete naturally during the story.
If you explored regularly while progressing through the campaign, this final stage should be much lighter than the map initially makes it look. Work through the remaining requirements one at a time, use Ask Gami whenever a trophy, location, or objective gives you trouble, and eventually the only thing left to do will be watch another Platinum sail comfortably into your completed list.
Completion Video Playlist
1 video
Assassin's Creed Black Flag Resynced Platinum Walkthrough - Part 1 100% Completion Guide