


Trophy Guide Preview
Overall Trophy Progress
0 / 34 Completed
0%
Trophy Types
Platinum
0 / 1Gold
0 / 6Silver
0 / 7Bronze
0 / 20Categories
Collectible
0 / 2Ending
0 / 3Misc
0 / 20Story
0 / 8

Enter the cursed city of Yharnam as a Hunter searching for answers to a mysterious blood-borne illness. Battle nightmarish beasts with transforming weapons, master aggressive combat, and explore a haunting gothic world where every discovery raises darker questions.
Overall Trophy Progress
0 / 34 Completed
0%
Platinum Path
EARLY GAME Welcome to Yharnam, Hunter! Your Platinum journey begins in Central Yharnam, where you'll learn the importance of dodging, parrying, and the Rally mechanic, which lets you recover recently lost health by attacking. Work through Cleric Beast, Father Gascoigne, and Cathedral Ward while getting comfortable with your chosen weapon. Bloodborne rewards aggression, but there's a fine line between being fearless a...
Completion Video Playlist
2 videos
Bloodborne - Walkthrough Part 1: Central Yharnam
Trophy: Bloodborne
All trophies acquired. Hats off!
Type: Platinum
Unlock Details
Earn every trophy in the base game of Bloodborne to unlock the Platinum.
Trophy: Hunter's Craft
Acquire all special hunter tools.
Type: Gold
Category: Collectible
Unlock Details
Acquire all nine special Hunter Tools found throughout the base game of Bloodborne. These are reusable Arcane abilities that consume Quicksilver Bullets when activated. You only need to collect them for the trophy; you don't need enough Arcane to use every tool. Several are hidden in optional areas, so careful exploration is essential. All Nine Special Hunter Tool Locations 1. Old Hunter Bone — Abandoned Old Workshop: Defeat the Blood-starved Beast to open the right-hand door inside Oedon Chapel. Ride the elevator to the Healing Church Workshop, then enter the dark tower below. Carefully descend across the wooden platforms until you reach a small doorway leading into the Abandoned Old Workshop. Inside, collect the Old Hunter Bone from a grave near the workshop building. 2. Beast Roar — Forbidden Woods: From the Forbidden Woods lamp, head toward the village and take the uphill path to the left. Continue past the buildings and search the isolated house near the village outskirts. Enter the building and collect Beast Roar from a corpse inside. 3. Empty Phantasm Shell — Byrgenwerth: After defeating the Shadow of Yharnam, enter Byrgenwerth and explore the main building. Locate the chest on the upper floor near the route leading toward the balcony overlooking the lake. Open it to collect the Empty Phantasm Shell. 4. Executioner's Gloves — Forsaken Castle Cainhurst: Obtain the Cainhurst Summons through the back entrance to Iosefka's Clinic, then travel to Cainhurst from Hemwick Charnel Lane. Explore the castle's library and upper interior rooms. From the upper library level, follow the route through the open window and descend to the lower balcony area. Open the chest to obtain the Executioner's Gloves. 5. Messenger's Gift — Nightmare Frontier: Reach the Nightmare Frontier through the Lecture Building. Progress toward the poisonous swamp, where you'll encounter dangerous enemies that inflict Frenzy. Search the cave along the swamp's lower section, guarded by a Winter Lantern, to find the Messenger's Gift on a corpse. 6. Tiny Tonitrus — Yahar'gul, Unseen Village: After defeating Rom, return to Yahar'gul and progress toward the Yahar'gul Chapel. Near the area containing the Upper Cathedral Ward Key, search the interior room with a large chest. Open it to obtain Tiny Tonitrus. 7. Augur of Ebrietas — Lecture Building: Enter the Nightmare Lecture Building and explore the lecture rooms. Find the Lecture Theatre Key, which opens a previously locked lecture room on the lower floor. Inside, open the chest containing the Augur of Ebrietas. 8. A Call Beyond — Upper Cathedral Ward: Obtain the Upper Cathedral Ward Key in Yahar'gul and use it to access Upper Cathedral Ward through the Healing Church Workshop. Progress through the main building, obtain the Orphanage Key, and defeat the Celestial Emissary. After the fight, break the large window behind the boss arena to access the next area. Collect A Call Beyond from the corpse along the balcony before descending toward Ebrietas. 9. Choir Bell — Nightmare of Mensis: After defeating Micolash, continue into Mergo's Loft: Middle. Use the moving cage elevator to reach the hidden opening leading toward the Brain of Mensis route. Pass through the dangerous bridge area containing Winter Lanterns and descend into the interior passages. Find the chest guarded by another Winter Lantern across a narrow walkway to collect the Choir Bell. Once all nine tools have been collected, Hunter's Craft will unlock. Whether you're planning an Arcane build or simply hoarding mysterious supernatural objects, your collection is now complete.
Tip
Bring Sedatives when searching the Nightmare Frontier and Nightmare of Mensis. Winter Lanterns can build Frenzy extremely quickly, making the Messenger's Gift and Choir Bell particularly dangerous to collect.
Warning
Collect all nine tools before completing your final ending if you want to avoid revisiting their locations in New Game+. The Workshop Haze Extractor is not one of the nine tools required for this trophy.
Video Guide: https://www.youtube.com/watch?v=9-65AIGT4fE&list=PLRr5L69yg_kFDMwd2f8lLLEwBYcWoEv_F&index=3
Trophy: Hunter's Essence
Acquire all hunter weapons.
Type: Gold
Category: Collectible
Unlock Details
Acquire all 26 Hunter weapons in the base game of Bloodborne. This includes 15 right-hand weapons and 11 left-hand weapons. You don't need to upgrade or equip them, but each weapon must be obtained at least once. Many weapons become available for purchase from the Bath Messengers in the Hunter's Dream after collecting specific Hunter Badges. Others must be discovered through exploration, optional areas, or Chalice Dungeons. Here are all 26 required weapons and how to obtain them. Right-Hand Weapons (15) 1. Saw Cleaver — Hunter's Dream: Choose it as your starting weapon or purchase it from the Bath Messengers after obtaining the Saw Hunter Badge. The badge is found in the sewer area of Central Yharnam, near the large pig. 2. Hunter Axe — Hunter's Dream: Choose it as your starting weapon or purchase it after obtaining the Saw Hunter Badge in Central Yharnam. 3. Threaded Cane — Hunter's Dream: Choose it as your starting weapon or purchase it after obtaining the Saw Hunter Badge in Central Yharnam. 4. Saw Spear — Central Yharnam: Find the hanging corpse in the upper sewer area, cut it down, and descend to retrieve the weapon. Alternatively, purchase it after obtaining the Saw Hunter Badge. 5. Kirkhammer — Hunter's Dream: Defeat the Cleric Beast on the Great Bridge in Central Yharnam to obtain the Sword Hunter Badge. Purchase the Kirkhammer from the Bath Messengers for 3,000 Blood Echoes. 6. Rifle Spear — Hunter's Dream: Obtain the Powder Keg Hunter Badge from Djura, the machine-gun Hunter in Old Yharnam. You can defeat him or earn the badge through a peaceful encounter. Purchase the Rifle Spear for 4,000 Blood Echoes. 7. Stake Driver — Hunter's Dream: Obtain the Powder Keg Hunter Badge from Djura in Old Yharnam, then purchase the Stake Driver for 8,000 Blood Echoes. 8. Ludwig's Holy Blade — Hunter's Dream: Defeat the Blood-starved Beast to open the right-hand door inside Oedon Chapel. Ride the elevator into the Healing Church Workshop and open the chest near the top to obtain the Radiant Sword Hunter Badge. Purchase Ludwig's Holy Blade for 20,000 Blood Echoes. 9. Tonitrus — Yahar'gul, Unseen Village: Find the weapon on a corpse at the end of the street outside the Hypogean Gaol area. Alternatively, defeat Darkbeast Paarl to obtain the Spark Hunter Badge and purchase the Tonitrus for 26,000 Blood Echoes. 10. Reiterpallasch — Forsaken Castle Cainhurst: Obtain the Cainhurst Summons from Iosefka's Clinic through the hidden Forbidden Woods route. Travel to Hemwick Charnel Lane and approach the carriage monument to reach Cainhurst. Inside the castle, locate the chest on the ground floor containing the Reiterpallasch. 11. Logarius' Wheel — Hunter's Dream: Obtain the Wheel Hunter Badge by completing Alfred's questline or defeating him. Purchase Logarius' Wheel from the Bath Messengers for 13,000 Blood Echoes. 12. Chikage — Hunter's Dream: Defeat Martyr Logarius on the roof of Castle Cainhurst. Equip the Crown of Illusions he drops to reveal the hidden throne room. Kneel before Queen Annalise to join the Vilebloods and receive the Cainhurst Badge. Purchase the Chikage for 50,000 Blood Echoes. 13. Blade of Mercy — Hunter's Dream: Obtain the Crow Hunter Badge by completing Eileen the Crow's questline or defeating her. Eileen can first be encountered in Central Yharnam, hidden behind breakable barrels near the sewer entrance. Following her quest eventually leads to a confrontation at the Grand Cathedral. Once you obtain her badge, purchase the Blade of Mercy for 40,000 Blood Echoes. 14. Beast Claw — Ailing Loran Chalice Dungeon: Defeat Amygdala in the Nightmare Frontier to obtain the Ailing Loran Chalice. Create the dungeon at a ritual altar in the Hunter's Dream and explore Layer 2. Find the side-area treasure room containing the Beast Claw in a chest. 15. Burial Blade — Hunter's Dream: At the end of the game, refuse Gehrman's offer and defeat him to unlock the Old Hunter Badge. The Burial Blade then becomes available from the Bath Messengers for 60,000 Blood Echoes, normally purchased in New Game+. This weapon cannot be obtained through the Yharnam Sunrise ending alone. Left-Hand Weapons (11) 16. Hunter Pistol — Hunter's Dream: Choose it as your starting firearm or purchase it from the Bath Messengers for 1,600 Blood Echoes. 17. Hunter Blunderbuss — Hunter's Dream: Choose it as your starting firearm or purchase it from the Bath Messengers for 1,700 Blood Echoes. 18. Torch — Central Yharnam: Find the corpse near the large brick-wielding enemy pounding on a gate, along the route toward the sewers. Loot it to obtain the Torch. 19. Wooden Shield — Cathedral Ward: From the Cathedral Ward lamp, head outside toward the path leading up to the Grand Cathedral. Find the shield on a corpse near the gates and stairs. 20. Repeating Pistol — Hunter's Dream: Defeat the Cleric Beast to obtain the Sword Hunter Badge, then purchase the Repeating Pistol for 3,000 Blood Echoes. 21. Hunter's Torch — Old Yharnam: From the entrance to Old Yharnam, follow the route through the ruined buildings and descend onto the lower balconies. Find the Hunter's Torch on a corpse near the area patrolled by beast enemies. 22. Ludwig's Rifle — Hunter's Dream: Obtain the Radiant Sword Hunter Badge from the Healing Church Workshop, then purchase Ludwig's Rifle for 10,000 Blood Echoes. 23. Flamesprayer — Central Yharnam / Hunter's Dream: After defeating Father Gascoigne, return to Gilbert, the NPC speaking through the window beside the Central Yharnam lamp. Speak with him to receive the Flamesprayer. It can also be purchased from the Bath Messengers after obtaining the Radiant Sword Hunter Badge. 24. Evelyn — Forsaken Castle Cainhurst: Find Evelyn inside a chest in the castle's library area. Alternatively, after joining the Cainhurst Vilebloods and obtaining the Cainhurst Badge, purchase it from the Bath Messengers for 16,000 Blood Echoes. 25. Cannon — Forbidden Woods: Progress through the village until reaching the large building beyond the enemy operating a cannon. Enter the building, descend to the lower level, and climb the ladder into the rafters. Carefully cross the wooden beams and machinery to find the Cannon on a corpse. 26. Rosmarinus — Hunter's Dream: Obtain the Cosmic Eye Watcher Badge from Upper Cathedral Ward. Inside the main building, locate the badge on a corpse along the upper interior passages. Return to the Hunter's Dream and purchase the Rosmarinus for 60,000 Blood Echoes. Once you've obtained all 26 weapons, Hunter's Essence will unlock. You don't have to keep every weapon equipped or upgraded, so feel free to stick with your favorites. Collecting an entire arsenal just to keep using the Saw Cleaver is a perfectly respectable Hunter tradition.
Tip
Keep a running inventory checklist and focus on collecting Hunter Badges as you explore. The Beast Claw and Burial Blade are particularly easy to overlook because they require Chalice Dungeon progression and defeating Gehrman, respectively.
Warning
Eileen's Crow Hunter Badge can become inaccessible if her encounters are mishandled. Secure it before completing the game. Defeating Gehrman also leads toward an ending, so prepare your save and remaining trophy cleanup before that fight. Lost and Uncanny weapon variants and DLC weapons are not required.
Video Guide: https://www.youtube.com/watch?v=HlnHy5hbeqA&list=PLRr5L69yg_kFDMwd2f8lLLEwBYcWoEv_F&index=2
Trophy: Childhood's Beginning
You became an infant Great One, lifting humanity into its next childhood.
Type: Gold
Category: Ending
Unlock Details
Unlock Bloodborne's secret ending by consuming at least three One Third of Umbilical Cord items and defeating both Gehrman and the Moon Presence. There are four Umbilical Cords available during a playthrough, but you only need three. Their locations and requirements are: 1. Abandoned Old Workshop: Defeat the Blood-starved Beast to unlock the right-hand door inside Oedon Chapel. Take the elevator into the Healing Church Workshop, descend carefully through the dark tower using the wooden platforms, and enter the Abandoned Old Workshop. Collect the Umbilical Cord from the altar inside. 2. Iosefka's Clinic: From the Forbidden Woods, locate the hidden path through the poisonous cave and climb the ladders leading back toward the clinic. Enter through the rear entrance. After defeating Rom, the Vacuous Spider, return to the clinic's upper floor and defeat the impostor Iosefka to obtain her Umbilical Cord. Do not kill her before defeating Rom, or you will lose this opportunity. 3. Arianna's Questline: Speak with Arianna at her residence in Cathedral Ward and send her to Oedon Chapel before defeating Rom. After defeating Micolash, return to the chapel and descend toward the Tomb of Oedon. You'll find Arianna and her newborn below the chapel. Defeat the creature to obtain another Umbilical Cord. 4. Mergo's Wet Nurse: Defeat Mergo's Wet Nurse during the main story. This Umbilical Cord is awarded automatically and cannot be missed. Once you have collected at least three cords, use them from your inventory before defeating Gehrman. Return to the Hunter's Dream, speak with Gehrman, and select "Refuse." Defeat Gehrman as you would for Honoring Wishes. However, because you've consumed the three cords, a new boss encounter against the Moon Presence will begin. The Moon Presence uses sweeping melee attacks, sudden lunges, and a devastating ability that reduces your health to just 1 HP. When this happens, capitalize on its recovery animation to attack and regain health through the Rally mechanic, but watch for the temporary healing restriction. Stay close to its sides or behind it when possible, avoid getting greedy with your attacks, and defeat the Moon Presence to trigger Childhood's Beginning. Turns out the secret to surviving the hunt involves eating three mysterious umbilical cords. Yharnam's medical practices really could use some oversight.
Tip
The Abandoned Old Workshop, Iosefka's Clinic, and Mergo's Wet Nurse provide a reliable route to three cords without depending on Arianna's questline. If you're using backups, save this ending for last.
Warning
You must consume at least three cords before defeating Gehrman, not simply carry them in your inventory. Killing the clinic's occupant too early or missing Arianna's quest requirements can permanently prevent you from obtaining their respective cords during that playthrough.
Video Guide: https://www.youtube.com/watch?v=6Fnr4YDPd2k
Trophy: Honoring Wishes
Captivated by the Moon Presence, you pledge to watch over the Hunter's Dream.
Type: Gold
Category: Ending
Unlock Details
Complete the game by refusing Gehrman's offer without having consumed three One Third of Umbilical Cord items. After defeating Mergo's Wet Nurse, return to the Hunter's Dream and enter the newly opened garden gate. Speak with Gehrman and select "Refuse." This begins the battle against Gehrman, the First Hunter. Gehrman is a fast, aggressive opponent who alternates between long-reaching scythe attacks and a quicker sword-and-firearm fighting style. Focus on dodging sideways rather than retreating directly backward, and punish the openings after his attacks. His melee attacks can also be parried with a well-timed firearm shot, allowing you to perform powerful visceral attacks. As his health decreases, he becomes more aggressive and gains additional attacks, including a dangerous area-of-effect explosion. Keep your distance when he begins charging this attack, then move back in once it's safe. Defeat Gehrman without having consumed three Umbilical Cords to trigger the Honoring Wishes ending and unlock the trophy. Congratulations, Hunter. You defeated the old man. Surely nothing unsettling could happen next.
Tip
A heavily upgraded weapon and a healthy supply of Blood Vials make this fight considerably easier. If you're using a save backup for all endings, restore it after earning this trophy.
Warning
Consuming three or more One Third of Umbilical Cord items changes the outcome after defeating Gehrman and prevents this ending on that save state. Completing Honoring Wishes also immediately begins New Game+.
Video Guide: https://www.youtube.com/watch?v=swzoqD8GBPQ
Trophy: Yharnam Sunrise
You lived through the hunt, and saw another day.
Type: Gold
Category: Ending
Unlock Details
Complete the game by accepting Gehrman's offer at the end of the hunt. After defeating Mergo's Wet Nurse in the Nightmare of Mensis, return to the Hunter's Dream. You'll notice the workshop is burning, and the previously locked gate in the garden is now open. Head through the gate and speak with Gehrman, who will offer to free you from the Hunter's Dream. When presented with the choice, select "Submit Your Life." This immediately triggers the Yharnam Sunrise ending and unlocks the trophy. There's no final boss fight required for this ending. Apparently, the easiest way to survive Yharnam is to know when to call it a night.
Tip
If you're using save backups to earn all three endings in one playthrough, complete this ending first. Create your backup before speaking with Gehrman, then restore it after earning the trophy.
Warning
Completing this ending automatically starts New Game+. Without a backup, you'll need to progress through another playthrough to obtain the remaining endings. Do not consume three One Third of Umbilical Cord items before making your backup if you intend to use it for all three endings.
Video Guide: https://www.youtube.com/watch?v=JbpOUKBVXIM&list=PLRr5L69yg_kFDMwd2f8lLLEwBYcWoEv_F&index=9
Trophy: Amygdala
Defeat Great One: Amygdala.
Type: Bronze
Category: Misc
Unlock Details
Defeat Amygdala, an optional Great One found at the end of the Nightmare Frontier. To reach this area, you'll first need access to the Nightmare Lecture Building. You can enter through normal story progression after defeating The One Reborn, or reach it earlier by obtaining a Tonsil Stone and allowing the invisible Amygdala near the Grand Cathedral to grab you. Once inside the Lecture Building, travel to the first floor and locate the large doorway leading into the Nightmare Frontier. Progress through the area, passing hostile Hunters, rocky pathways, and dangerous poisonous swamps. Watch out for enemies that inflict Frenzy, as they can quickly drain your health. Continue toward the far end of the swamp until you reach the rocky island containing Amygdala's boss arena. Activate the nearby shortcut elevator before entering if you haven't already. Boss Strategy Amygdala is an enormous, multi-armed creature with devastating reach. Despite its intimidating size, the fight becomes much more manageable once you understand which body parts are vulnerable. The most important rule is to avoid wasting attacks on its legs. They have extremely high physical resistance, making them poor targets for most weapons. Instead, focus on Amygdala's head and arms. During the opening phase, stay at a safe distance in front of the boss and watch for its sweeping arm combinations and overhead slams. After certain attacks, Amygdala lowers its head toward the ground, creating an excellent opportunity to strike. Weapons with good vertical reach, such as the transformed Hunter Axe or Ludwig's Holy Blade, can make hitting these weak points easier. Alternatively, you can position yourself near its sides and attack the lower arms when they're within reach. Watch out for its jumping attacks. If Amygdala leaps into the air, avoid panic rolling and pay attention to where it will land before repositioning. Final Phase As Amygdala loses health, it eventually tears off two of its own arms and begins using them as weapons. This dramatically increases the reach of its attacks, making it more dangerous to stand directly in front of the creature. Keep your distance during its extended combinations, then move in when it lowers its head or leaves an arm exposed. Fire Paper or Bolt Paper can provide additional damage if your chosen weapon supports these buffs. Continue targeting its vulnerable limbs and head until it falls. Defeating Amygdala unlocks the trophy and rewards you with the Ailing Loran Chalice, which is needed for the Beast Claw weapon and Chalice Dungeon progression. Apparently, having six arms wasn't enough, so Amygdala decided to start using a couple as clubs. Creative problem-solving, really.
Tip
Take advantage of Amygdala's recovery animations rather than chasing its legs. Attacking the head deals significantly more damage and can eventually stagger the boss, opening the opportunity for a visceral attack.
Warning
Don't confuse this encounter with the Amygdala boss found in the Defiled Chalice Dungeon. The Nightmare Frontier version awards the Ailing Loran Chalice, while the Defiled version is part of the route toward the Pthumerian Queen.
Video Guide: https://www.youtube.com/watch?v=A1UxI1SQwb0&pp=ygUTYmxvb2Rib3JuZSBBbXlnZGFsYQ%3D%3D
Trophy: Blood Gem Contact
Acquire a blood gem that imbues hunter weapons with special strength.
Type: Bronze
Category: Misc
Unlock Details
Acquire your first Blood Gem, a special upgrade item used to enhance Hunter weapons. Blood Gems provide additional bonuses to your equipment, including increased physical attack power, elemental damage, and other combat improvements. You can obtain them through exploration, enemy drops, and Chalice Dungeon rewards. One of the earliest opportunities to obtain a Blood Gem is in Central Yharnam, where certain enemies and loot locations can provide basic gems. You'll also find Blood Gems naturally while progressing through Cathedral Ward, the Forbidden Woods, and later areas. However, if you haven't obtained one during normal exploration, Chalice Dungeons provide an extremely reliable opportunity. After defeating the Blood-starved Beast in Old Yharnam, you'll receive the Pthumeru Chalice. Return to the Hunter's Dream and interact with one of the ritual altars to create the Pthumeru Chalice Dungeon using the required ritual materials. Explore the dungeon, defeat enemies, and collect their rewards until you obtain a Blood Gem. The trophy unlocks as soon as you acquire your first qualifying Blood Gem. You don't need to equip it or modify a weapon. For practical use, return to the workshop in the Hunter's Dream and interact with the Blood Gem Fortification table to equip compatible gems to your weapons once that feature is unlocked. Congratulations, Hunter. You've discovered that the solution to surviving Yharnam involves putting mysterious blood-covered stones into your weapons. What could possibly go wrong?
Tip
Blood Gems can provide substantial damage improvements, especially as stronger versions become available. Check your weapon's available gem slots regularly and replace weaker gems with better ones as you progress.
Video Guide: https://www.youtube.com/watch?v=68zNncUPX0U&pp=ygUkYmxvb2Rib3JuZUVicmlldGFzLEJsb29kIEdlbSBDb250YWN0
Trophy: Blood Gem Master
Acquire an extremely precious blood gem.
Type: Silver
Category: Misc
Unlock Details
Acquire an extremely precious Blood Gem by obtaining a sufficiently powerful gem during your exploration or Chalice Dungeon progression. Blood Gems are special upgrade items that can be equipped to weapons at the workshop in the Hunter's Dream. They provide various bonuses, including increased physical attack, elemental damage, and other weapon enhancements. For this trophy, you need to acquire a Blood Gem of sufficiently high quality. Gems meeting the requirement can be obtained from enemies and bosses inside the deeper Chalice Dungeons. One reliable opportunity is the Ailing Loran Chalice Dungeon, unlocked by defeating Amygdala in the Nightmare Frontier. After obtaining the chalice, create the dungeon at one of the ritual altars in the Hunter's Dream. Progress through Layer 1, locate the lever that opens the boss gate, and defeat the Beast-Possessed Soul. This boss can drop a sufficiently powerful Blood Gem to satisfy the trophy requirement. If you don't receive a qualifying gem, continue progressing through the later Chalice Dungeons, where high-quality gems become increasingly common. The trophy unlocks when you acquire a qualifying Blood Gem. You don't need to equip it or upgrade a weapon with it.
Tip
You'll already be spending plenty of time in the Chalice Dungeons for the Pthumerian Queen. Save yourself unnecessary farming by pursuing this trophy alongside that progression.
Video Guide: https://www.youtube.com/watch?v=af5jSnXA8CA
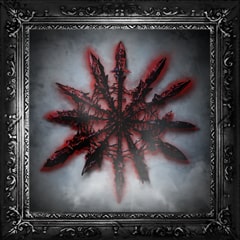
Trophy: Blood-starved Beast
Defeat Blood-starved Beast.
Type: Bronze
Category: Misc
Unlock Details
Defeat the Blood-starved Beast, an optional boss found at the bottom of Old Yharnam. From Cathedral Ward, travel toward the church containing the large stone coffin. Use the upper balcony lever to move the coffin and reveal the passage leading down toward Old Yharnam. Enter the area and continue descending through the ruined streets, avoiding the enemies and the machine-gun fire from Djura's tower. Eventually, you'll reach the lower section of Old Yharnam, where a large church serves as the Blood-starved Beast's arena. Enter the building and approach the far end to begin the encounter. Boss Strategy The Blood-starved Beast is a fast, aggressive enemy that relies on sweeping claw attacks, lunges, and poison damage. Its speed can be intimidating, especially when it begins chaining attacks together. However, many of its movements can be avoided by dodging toward its side rather than retreating directly backward. During the opening phase, focus on learning its attack patterns. Wait for the creature to lunge or swing, dodge to its side, and land a few quick attacks before repositioning. As the fight continues, the Blood-starved Beast becomes increasingly aggressive and begins inflicting poison through its attacks. In its later phase, it can also release a poisonous aura that damages your Hunter simply by standing nearby. Bring several Antidotes and keep them assigned to your quick items so you can respond immediately if your poison meter fills. Fire is particularly effective against the Blood-starved Beast. Apply Fire Paper to your weapon if available, or use Molotov Cocktails when you have enough distance. Using Pungent Blood Cocktails One of the most useful strategies involves Pungent Blood Cocktails, which can temporarily distract the creature. Throw a cocktail toward a wall or into a corner of the arena. The Blood-starved Beast will often move toward the location, giving you an opportunity to attack without immediately worrying about its usual aggression. Take advantage of this distraction to deal several hits, then retreat before it turns its attention back toward you. Continue avoiding its poison attacks and punishing its recovery animations until it falls. Defeating the Blood-starved Beast unlocks the trophy and rewards you with the Pthumeru Chalice, which grants access to the first set of Chalice Dungeons. The beast may be starved for blood, but after enough attempts, you'll probably be starved for Blood Vials. Fair trade, apparently.
Tip
Pungent Blood Cocktails combined with Fire Paper can make this fight significantly easier. Bring Antidotes as well, since poison becomes increasingly dangerous during the later phases.
Warning
The Blood-starved Beast's final phase produces a dangerous poison aura. Avoid staying directly beside it for extended periods, even when it isn't actively attacking. Watch your poison meter and heal or reposition when necessary.
Video Guide: https://www.youtube.com/watch?v=xJIcjL9Mfy8
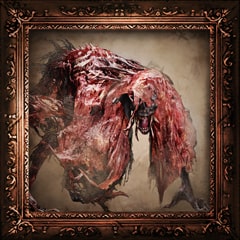
Trophy: Cainhurst
Gain entry to Cainhurst, the lost and ruined castle.
Type: Silver
Category: Misc
Unlock Details
Gain entry to Forsaken Castle Cainhurst, a hidden optional area accessible after obtaining the Cainhurst Summons from Iosefka's Clinic. You'll need to reach the Forbidden Woods and discover a secret route leading back to the clinic where your journey began. Follow these steps: 1. Reach the Forbidden Woods: Defeat Vicar Amelia in the Grand Cathedral and inspect the skull on the altar. Return to Cathedral Ward, follow the path toward the Forbidden Woods entrance, and use the password to open the locked door. 2. Find the hidden cave: From the Forbidden Woods lamp, cross the bridge and head toward the village. Before entering the main village area, follow the uphill path on the left, near the house and dog cages. Continue past the cages to discover a hidden cave entrance. 3. Cross the poisonous cave: Enter the cave and carefully make your way through the poisonous water. Avoid unnecessary fights with the large enemies and locate the exit leading toward a tall ladder. 4. Return to Iosefka's Clinic: Climb the ladders to reach the rear of the clinic. Follow the rooftop path and enter through the open window. Explore the interior until you reach the room near the starting area, where you'll find the Cainhurst Summons resting on an examination table. 5. Travel to Hemwick Charnel Lane: Return to Hemwick Charnel Lane and defeat the Witch of Hemwick if you haven't already. From the Witch's Abode lamp, head back down the path toward the large stone monument near the executioners. 6. Summon the carriage: Approach the monument while carrying the Cainhurst Summons. A cutscene will begin, revealing a mysterious horse-drawn carriage. Interact with the carriage to climb inside. After the journey, you'll arrive at Forsaken Castle Cainhurst and unlock the trophy. Congratulations! You've discovered an enormous haunted castle filled with dangerous enemies. Apparently, Yharnam's tourism department specializes in places nobody should ever visit.
Tip
Explore Cainhurst thoroughly while you're here. You'll find the Reiterpallasch, Evelyn, and Executioner's Gloves, all required for other trophies. Defeating Martyr Logarius also opens the path to the Cainhurst Vilebloods, allowing you to obtain the badge needed to purchase the Chikage.
Warning
The Witch of Hemwick must be defeated before the carriage can appear. Make sure you've collected the Cainhurst Summons and cleared her boss encounter before heading to the monument.
Video Guide: https://www.youtube.com/watch?v=VJdIerGpYy0&list=PLRr5L69yg_kFDMwd2f8lLLEwBYcWoEv_F&index=6
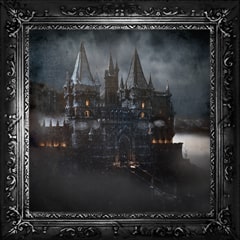
Trophy: Celestial Emissary
Defeat Great One: Celestial Emissary.
Type: Bronze
Category: Misc
Unlock Details
Defeat the Celestial Emissary, an optional Great One found in the Lumenflower Gardens of Upper Cathedral Ward. To reach this boss, you'll need the Upper Cathedral Key from Yahar'gul, Unseen Village. After defeating Rom, progress through Yahar'gul until you reach the elevated walkway near the Amygdala that fires an explosive laser across the street. Locate the broken railing along the right side, drop into the hidden building below, and retrieve the Upper Cathedral Key from the corpse inside the locked cell. Return to Cathedral Ward and enter the right-hand door inside Oedon Chapel, which opens after defeating the Blood-starved Beast. Ride the elevator into the Healing Church Workshop, climb the tower, and use the key to unlock the entrance to Upper Cathedral Ward. Reaching the Boss Once inside Upper Cathedral Ward, continue toward the large cathedral-like building. Enter through the side entrance and explore its dark interior, where several Scourge Beasts and Brainsuckers patrol the corridors. Make your way to the upper floor and locate the Brainsucker carrying the Orphanage Key. Defeat it to obtain the key. Return to the main hall and use the key to unlock the large doors leading outside. Follow the staircase toward the Lumenflower Gardens and enter the arena to begin the fight. Boss Strategy The Celestial Emissary begins the encounter disguised as one of several smaller blue celestial creatures. Most of these enemies are ordinary minions, while one is the actual boss. The easiest way to identify the real Emissary is to watch its behavior. While most of the creatures actively chase you, the boss usually hangs back and avoids direct confrontation. Move around the arena until you identify the correct target, then rush in and deal several quick attacks. The smaller creatures continue spawning throughout the encounter, so there's no need to eliminate every one of them. Instead, focus your damage on the boss while keeping enough space to avoid being surrounded. Once the Emissary loses enough health, it transforms into a much larger creature, making it considerably easier to identify. During this phase, the boss gains stronger melee attacks and can eventually use ranged Arcane projectiles. Stay close to its sides or behind it, dodge its slower attacks, and punish the openings with quick combinations. Weapons with wide sweeping attacks are particularly useful because they can damage the boss while clearing nearby minions. Continue attacking until the Celestial Emissary falls and the trophy unlocks. For once, Bloodborne gives you a boss that doesn't seem particularly interested in winning. Enjoy the rare moment of generosity.
Tip
After defeating the Celestial Emissary, activate the new lamp but don't leave the area permanently. Break the large window behind the boss arena to access a hidden passage leading toward Ebrietas, Daughter of the Cosmos. You'll also find the A Call Beyond Hunter Tool along this route.
Warning
The Brainsuckers inside Upper Cathedral Ward can drain your Insight if they grab you. Approach them carefully and avoid letting multiple enemies surround you in the dark corridors.
Video Guide: https://www.youtube.com/watch?v=Nb-ApmLnb9g&pp=ygUdYmxvb2Rib3JuZSBDZWxlc3RpYWwgRW1pc3Nhcnk%3D
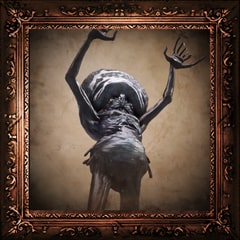
Trophy: Chalice of Ailing Loran
Acquire the Chalice of Ailing Loran that seals the tragic land lost to the sands.
Type: Bronze
Category: Misc
Unlock Details
Acquire the Ailing Loran Chalice by defeating Amygdala, an optional boss located in the Nightmare Frontier. To reach the Nightmare Frontier, you'll first need access to the Nightmare Lecture Building. You can reach the Lecture Building through normal story progression after defeating The One Reborn or access it earlier by carrying a Tonsil Stone when grabbed by the invisible Amygdala near the Grand Cathedral. Once inside the Lecture Building, travel to the first floor and locate the doorway leading into the Nightmare Frontier. Progress through the rocky pathways and poisonous swamps, avoiding the hostile Hunters and dangerous enemies that inflict Frenzy. Continue toward the far end of the area until you reach Amygdala's boss arena. Boss Strategy Amygdala is an enormous Great One with multiple arms, powerful sweeping attacks, and a massive reach advantage. Its legs are heavily resistant to damage, so attacking them is generally ineffective. Instead, focus on its arms and head whenever they become accessible. During the opening phase, maintain a safe distance in front of Amygdala and wait for it to finish its large sweeping attacks. After certain combinations, Amygdala lowers its head toward the ground, giving you an opportunity to land several powerful strikes. Weapons with good vertical reach are particularly helpful for targeting its vulnerable body parts. You can also position yourself near its sides to attack the lower arms, but watch for stomping attacks and sudden jumps. As Amygdala's health decreases, it eventually tears off two of its own arms and begins using them as weapons. These attacks have considerably longer reach, so avoid standing directly in front of the boss during its extended combinations. Continue exploiting the openings after its attacks, focusing on its vulnerable head and arms until it falls. Defeating Amygdala rewards you with the Ailing Loran Chalice and unlocks the trophy. The chalice provides access to additional Chalice Dungeons containing important ritual materials and the Beast Claw weapon, which is required for Hunter's Essence. Apparently, defeating a six-armed cosmic monstrosity earns you permission to explore an even worse underground labyrinth. Yharnam really knows how to reward hard work.
Tip
Explore Layer 2 of the Ailing Loran Chalice Dungeon to find the Beast Claw in a side-area treasure chest. You'll also need Bastard of Loran ritual materials from this dungeon for the conventional route toward the Pthumerian Queen.
Warning
The Nightmare Frontier contains poisonous swamp areas and enemies capable of inflicting Frenzy. Bring Antidotes and Sedatives to make exploration safer, especially when collecting optional items.

Trophy: Chalice of Isz
Acquire the Great Chalice of Isz that seals the home of the cosmic kin.
Type: Bronze
Category: Misc
Unlock Details
Acquire the Great Isz Chalice by defeating Ebrietas, Daughter of the Cosmos, an optional boss found beneath Upper Cathedral Ward. Before reaching Ebrietas, you'll need to obtain the Upper Cathedral Key from Yahar'gul, Unseen Village. After defeating Rom, progress through Yahar'gul until reaching the elevated walkway near the Amygdala that fires an explosive beam across the street. Find the broken railing along the right side and drop into the hidden building below. Locate the corpse inside the enclosed cell to obtain the Upper Cathedral Key. Return to Cathedral Ward and enter the right-hand doorway inside Oedon Chapel, which opens after defeating the Blood-starved Beast. Ride the elevator toward the Healing Church Workshop, climb the tower, and use the key to enter Upper Cathedral Ward. Progress through the area until reaching the large cathedral building. Explore the interior, defeat the Brainsucker carrying the Orphanage Key, and open the doors leading toward the Lumenflower Gardens. Defeat the Celestial Emissary, then activate the newly available lamp. Behind the lamp, break the large window to reveal a hidden passage. Follow the walkway, collect A Call Beyond if you haven't already, and descend using the elevator leading to the Altar of Despair. At the bottom, approach Ebrietas to begin the boss encounter. Boss Strategy Ebrietas is a powerful Great One that combines devastating physical attacks with dangerous Arcane abilities. Her most threatening melee attacks include wide tentacle sweeps, powerful head strikes, and an extremely damaging forward charge. Avoid staying directly in front of her for extended periods, as this makes her charging attacks much harder to escape. Instead, try to position yourself near her sides or behind her, attacking when she finishes a combination. Her head is especially vulnerable, and repeated damage can eventually stagger her, opening the opportunity for a visceral attack. As the fight progresses, Ebrietas gains additional Arcane abilities, including a powerful sequence of homing projectiles. When she prepares this attack, move sideways and carefully time your dodges to avoid the incoming barrage. She can also generate a damaging aura around herself, making prolonged close-range attacks more dangerous. Bolt Paper can increase your damage against Ebrietas if your weapon supports the buff. Remain patient, attack during her recovery animations, and avoid overcommitting when she's preparing a powerful ability. Defeat Ebrietas to receive the Great Isz Chalice and unlock the trophy. The Great Isz Chalice grants access to another series of Chalice Dungeons, where you can obtain valuable Blood Gems and ritual materials. You've defeated another ancient cosmic horror and earned a ceremonial cup for your trouble. At this point, you could probably open Yharnam's least inviting kitchenware store.
Tip
The Great Isz Chalice Dungeon provides a useful source of additional Red Jelly, which is needed to perform the Great Pthumeru Ihyll ritual. If you're working toward the Pthumerian Queen, exploring Isz can help you gather the remaining materials.
Warning
Ebrietas is one of the more difficult optional bosses in the base game. Her charging attack and later-phase Arcane abilities can deal tremendous damage, so bring a well-upgraded weapon, plenty of Blood Vials, and enough stamina to reposition safely.
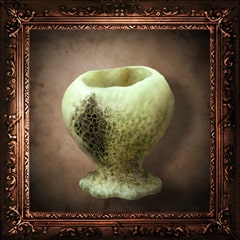
Trophy: Chalice of Pthumeru
Acquire the Chalice of Pthumeru that seals the catacombs that form a web deep below Yharnam.
Type: Bronze
Category: Misc
Unlock Details
Acquire the Pthumeru Chalice by defeating the Blood-starved Beast, an optional boss encountered in Old Yharnam. From the Cathedral Ward lamp, head toward the church containing the large movable coffin. Reach the upper balcony and pull the lever to move the coffin, revealing a staircase leading down toward Old Yharnam. Descend through the passage and enter Old Yharnam, where you'll encounter numerous beast enemies and Djura, the Hunter operating a machine gun from a distant rooftop. Make your way through the ruined streets, descending toward the lower sections of the area until you reach the large church containing the Blood-starved Beast. Enter the building and approach the far end to begin the boss encounter. Boss Strategy The Blood-starved Beast relies on rapid claw attacks, aggressive lunges, and increasingly dangerous poison abilities. Stay mobile and focus on dodging toward its sides instead of retreating directly backward. This allows you to avoid many of its attacks while positioning yourself for quick counterattacks. As the fight progresses, the beast becomes more aggressive and begins inflicting poison through its attacks. During the final phase, it can also release a poisonous aura around its body. Bring Antidotes to remove poison and keep your Blood Vials ready for emergencies. Fire Paper and Molotov Cocktails are particularly effective against this boss. You can also throw Pungent Blood Cocktails toward a wall to distract the creature temporarily, creating an opportunity to attack while it focuses on the thrown item. Continue punishing its missed attacks until the Blood-starved Beast falls. Defeating it awards the Pthumeru Chalice and unlocks the trophy. The chalice allows you to begin exploring the Pthumerian Labyrinth through the ritual altars in the Hunter's Dream. Congratulations, Hunter. You've unlocked an entirely new collection of underground nightmares. Because the regular ones clearly weren't enough.
Tip
The Pthumeru Chalice is your starting point for the Chalice Dungeon progression required to defeat Yharnam, Pthumerian Queen. You can begin exploring these dungeons immediately or return later with stronger equipment.

Trophy: Cleric Beast
Defeat Cleric Beast.
Type: Bronze
Category: Misc
Unlock Details
Defeat the Cleric Beast, an optional boss encountered on the Great Bridge in Central Yharnam. From the Central Yharnam lamp, work your way through the streets toward the large bridge guarded by Scourge Beasts and other enemies. Continue along the bridge until you reach its far end. Approaching the arena triggers a cutscene introducing the Cleric Beast. Although this boss is optional, defeating it is required for the Platinum. Boss Strategy The Cleric Beast is an enormous creature with long arms, powerful sweeping attacks, and a terrifying scream. Fortunately, its size makes many of its attacks relatively easy to anticipate. The safest approach is to stay close to its sides or behind it, avoiding prolonged combat directly in front of the creature. Watch for its wide arm swings and overhead slams. Dodge toward its side when an attack begins, then punish the recovery animation with several quick strikes. Bloodborne's Rally mechanic is especially useful during this encounter. If the Cleric Beast hits you, attacking quickly can recover some of your recently lost health before it disappears permanently. However, don't become reckless. Recovering health is helpful, but surviving the next attack is considerably more important. The Cleric Beast is vulnerable to fire, making Molotov Cocktails particularly effective. If you have Oil Urns, throw one at the boss before following up with a Molotov Cocktail to deal additional damage. Repeatedly damaging its head can also stagger the creature, creating an opportunity for a visceral attack. Continue dodging its sweeping attacks, attacking from safer angles, and using fire when convenient until the boss falls. Defeating the Cleric Beast unlocks the trophy and rewards you with the Sword Hunter Badge, allowing you to purchase the Kirkhammer and Repeating Pistol from the Bath Messengers. Your first giant monster is officially dead. Unfortunately, the rest of Yharnam didn't get the message.
Tip
Molotov Cocktails are particularly strong during this early encounter. Try to save a few for when the Cleric Beast becomes difficult to approach, and use the Rally mechanic to recover health when you have a safe opportunity to counterattack.
Video Guide: https://www.youtube.com/watch?v=KKxohl0GFjk
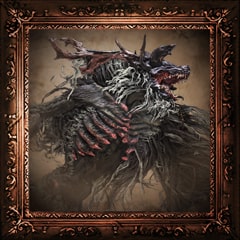
Trophy: Darkbeast Paarl
Defeat Darkbeast Paarl.
Type: Bronze
Category: Misc
Unlock Details
Defeat Darkbeast Paarl, an optional boss found in the lower section of Yahar'gul, Unseen Village. You can reach Paarl relatively early through Hypogean Gaol, or return later when the main story brings you back to Yahar'gul. Early Access Through Hypogean Gaol After defeating the Blood-starved Beast, new enemies called Snatchers begin appearing in certain areas, including Cathedral Ward. These large, hooded enemies carry enormous sacks and deal substantial damage. Allowing a Snatcher to kill you for the first time transports your Hunter to Hypogean Gaol, an early version of Yahar'gul. After awakening in a prison cell, leave the room and explore the building. Head upstairs to locate the Hypogean Gaol lamp, which allows you to return to the Hunter's Dream. When you're ready to fight Paarl, descend through the prison building toward the lower hallways. Continue past the prison cells and Snatchers until you reach a damaged wall opening leading down toward an outdoor arena. Drop through the opening and approach the enormous skeletal creature lying on the ground to begin the encounter. If you missed the early visit, Darkbeast Paarl remains accessible later through Yahar'gul after defeating Rom. Boss Strategy Darkbeast Paarl is a massive skeletal beast surrounded by electricity. Its long limbs, fast movement, and wide-reaching lightning attacks make it difficult to approach safely. The key to this encounter is targeting its legs. Rather than attacking its head or torso, focus your damage on one of its limbs until you break its posture. Repeatedly striking a leg can cause Paarl to collapse, temporarily disabling its electrical charge and leaving it vulnerable to additional attacks. Weapons with good reach, such as the transformed Hunter Axe or Ludwig's Holy Blade, are particularly effective for reaching its legs. As the fight progresses, Paarl will attempt to restore its electrical charge. When this happens, it briefly pauses to gather energy. Take advantage of the opening and attack aggressively to interrupt the process if possible. Watch out for its large electrical explosion, which can deal tremendous damage to anyone standing too close. When you notice Paarl preparing this attack, retreat immediately and wait for the explosion before approaching again. Paarl can also leap around the arena and swipe with its electrified limbs, so staying mobile is essential. If you're struggling with the camera, consider fighting without locking on when directly beneath the beast. This makes it easier to target individual legs and avoid losing sight of its larger movements. Continue breaking its limbs, exploiting its stagger animations, and avoiding its electrical attacks until it falls. Defeating Darkbeast Paarl unlocks the trophy and rewards you with the Spark Hunter Badge, allowing you to purchase the Tonitrus from the Bath Messengers. Congratulations! You've successfully unplugged Yharnam's most aggressive electrical appliance.
Tip
Focus on attacking one leg until Paarl collapses, then move to another limb while it's vulnerable. Keeping the beast staggered can prevent it from unleashing many of its more dangerous attacks.
Warning
Darkbeast Paarl can deal heavy damage with its electrical explosion, especially if you're standing beneath its body. Watch for the charging animation and create distance before the attack goes off.
Video Guide: https://www.youtube.com/watch?v=kDXeTFIpG7c&pp=ygUaYmxvb2Rib3JuZSBEYXJrYmVhc3QgUGFhcmw%3D
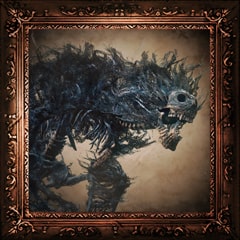
Trophy: Ebrietas, Daughter of the Cosmos
Defeat Great One: Ebrietas, Daughter of the Cosmos.
Type: Bronze
Category: Misc
Unlock Details
Defeat Ebrietas, Daughter of the Cosmos, an optional Great One found in the Altar of Despair beneath Upper Cathedral Ward. Before reaching this boss, you'll need to obtain the Upper Cathedral Key from Yahar'gul, Unseen Village, and defeat the Celestial Emissary in the Lumenflower Gardens. After defeating the Celestial Emissary, activate the lamp inside the boss arena. Directly behind the lamp is a large window overlooking the Grand Cathedral. Break the window with your weapon and step through the opening to reach a hidden walkway. Follow the walkway and collect the A Call Beyond special Hunter Tool from the corpse along the right side. This is required for Hunter's Craft. Continue through the passage, defeat or avoid the celestial enemies, and locate the elevator leading down to the Altar of Despair. At the bottom, you'll find Ebrietas resting near the altar. Approach her to begin the encounter. Boss Strategy Ebrietas is one of the toughest optional bosses in the base game. She combines enormous physical attacks with dangerous Arcane abilities, making careless positioning particularly punishing. The safest general approach is to stay close to her sides or behind her, where many of her frontal attacks are less threatening. However, she turns quickly, so you'll need to reposition frequently to avoid being caught directly in front of her. During the opening phase, Ebrietas primarily attacks using her tentacles, sweeping head strikes, and powerful charging attacks. Her charge is especially dangerous because of its speed and damage. Watch for her lowering her head and preparing to rush forward, then dodge to the side with careful timing. Avoid remaining directly in front of her for extended periods. When you're close enough, focus on attacking her sides and head whenever an opening appears. Her head is particularly vulnerable to damage, and repeated strikes can stagger her, creating an opportunity for a visceral attack. Later Phase As Ebrietas loses health, she gains additional Arcane abilities and becomes increasingly dangerous. One of her most threatening attacks is a sequence of powerful Arcane projectiles that track your position. When you see her preparing this attack, begin moving sideways and time your dodges to avoid the incoming projectiles. She can also generate an Arcane aura around herself that damages nearby Hunters over time, making prolonged close-range attacks more dangerous. Don't get greedy with your damage. Move in when she's recovering, land a few hits, and retreat when she begins preparing another attack. Bolt Paper is particularly useful against Ebrietas, provided your weapon supports the buff. A fully upgraded weapon, good Vitality, and a healthy supply of Blood Vials will make the encounter much more manageable. Continue exploiting her openings until she falls. Defeating Ebrietas unlocks the trophy and rewards you with the Great Isz Chalice, which can be useful for obtaining additional ritual materials needed for the Pthumerian Queen. You've now defeated a cosmic being whose appearance raises far more questions than anyone in Yharnam seems willing to answer. Probably best not to ask.
Tip
Try to remain behind Ebrietas during her slower melee combinations and attack her head whenever she lowers it. Bolt Paper can improve your damage, while a high-Vitality build gives you more room to survive her devastating charge and Arcane attacks.
Warning
Ebrietas can inflict Frenzy with certain attacks, and her later-phase Arcane abilities can deal enormous damage. Bring Sedatives if needed, maintain enough stamina to dodge, and avoid staying directly in front of her when she begins charging an attack.
Video Guide: https://www.youtube.com/watch?v=HZZAGh2zQ34&pp=ygUqYmxvb2Rib3JuZUVicmlldGFzLCBEYXVnaHRlciBvZiB0aGUgQ29zbW9z
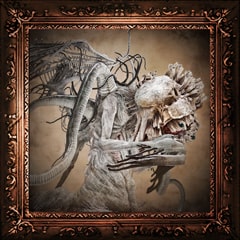
Unlock Details
Defeat Ebrietas, Daughter of the Cosmos, an optional Great One found in the Altar of Despair beneath Upper Cathedral Ward.
Before reaching this boss, you'll need to obtain the Upper Cathedral Key from Yahar'gul, Unseen Village, and defeat the Celestial Emissary in the Lumenflower Gardens.
After defeating the Celestial Emissary, activate the lamp inside the boss arena.
Directly behind the lamp is a large window overlooking the Grand Cathedral.
Break the window with your weapon and step through the opening to reach a hidden walkway.
Follow the walkway and collect the A Call Beyond special Hunter Tool from the corpse along the right side. This is required for Hunter's Craft.
Continue through the passage, defeat or avoid the celestial enemies, and locate the elevator leading down to the Altar of Despair.
At the bottom, you'll find Ebrietas resting near the altar. Approach her to begin the encounter.
Boss Strategy
Ebrietas is one of the toughest optional bosses in the base game. She combines enormous physical attacks with dangerous Arcane abilities, making careless positioning particularly punishing.
The safest general approach is to stay close to her sides or behind her, where many of her frontal attacks are less threatening.
However, she turns quickly, so you'll need to reposition frequently to avoid being caught directly in front of her.
During the opening phase, Ebrietas primarily attacks using her tentacles, sweeping head strikes, and powerful charging attacks.
Her charge is especially dangerous because of its speed and damage. Watch for her lowering her head and preparing to rush forward, then dodge to the side with careful timing.
Avoid remaining directly in front of her for extended periods.
When you're close enough, focus on attacking her sides and head whenever an opening appears.
Her head is particularly vulnerable to damage, and repeated strikes can stagger her, creating an opportunity for a visceral attack.
Later Phase
As Ebrietas loses health, she gains additional Arcane abilities and becomes increasingly dangerous.
One of her most threatening attacks is a sequence of powerful Arcane projectiles that track your position.
When you see her preparing this attack, begin moving sideways and time your dodges to avoid the incoming projectiles.
She can also generate an Arcane aura around herself that damages nearby Hunters over time, making prolonged close-range attacks more dangerous.
Don't get greedy with your damage. Move in when she's recovering, land a few hits, and retreat when she begins preparing another attack.
Bolt Paper is particularly useful against Ebrietas, provided your weapon supports the buff.
A fully upgraded weapon, good Vitality, and a healthy supply of Blood Vials will make the encounter much more manageable.
Continue exploiting her openings until she falls.
Defeating Ebrietas unlocks the trophy and rewards you with the Great Isz Chalice, which can be useful for obtaining additional ritual materials needed for the Pthumerian Queen.
You've now defeated a cosmic being whose appearance raises far more questions than anyone in Yharnam seems willing to answer. Probably best not to ask.
Tip
Try to remain behind Ebrietas during her slower melee combinations and attack her head whenever she lowers it. Bolt Paper can improve your damage, while a high-Vitality build gives you more room to survive her devastating charge and Arcane attacks.
Warning
Ebrietas can inflict Frenzy with certain attacks, and her later-phase Arcane abilities can deal enormous damage. Bring Sedatives if needed, maintain enough stamina to dodge, and avoid staying directly in front of her when she begins charging an attack.
Trophy: Martyr Logarius
Defeat Martyr Logarius.
Type: Bronze
Category: Misc
Unlock Details
Defeat Martyr Logarius, an optional boss located on the rooftop of Forsaken Castle Cainhurst. Before reaching him, you'll need the Cainhurst Summons from Iosefka's Clinic. Obtain the summons through the hidden route connecting the Forbidden Woods to the rear of the clinic, then travel to Hemwick Charnel Lane. After defeating the Witch of Hemwick, approach the stone monument along the road near the executioners to summon the carriage to Castle Cainhurst. Once you arrive, enter the castle and progress through its interior until you reach the enormous library. Explore the upper floors, open the elevator shortcut, and follow the staircases and ladders leading toward the castle rooftops. From the upper roof, carefully cross the narrow walkways and sloped rooftops. Continue along the route until you reach the final ladder leading to the large rooftop arena. Climb the ladder and approach Martyr Logarius to begin the fight. Boss Strategy Martyr Logarius is one of Bloodborne's more demanding optional bosses. He combines powerful Arcane attacks with aggressive melee combat, forcing you to change your approach as the fight progresses. Phase 1: Arcane Attacks During the first phase, Logarius primarily attacks from a distance using magical projectiles. His most dangerous attacks include a spread of smaller skull projectiles and a large explosive skull that travels toward your position. Use the structures around the rooftop to block some of his attacks, but don't rely on cover against the large explosive projectile. Instead, move sideways to avoid incoming magic and close the distance whenever he finishes casting. Logarius can be staggered by quick melee attacks during this phase, so weapons with fast attack animations are particularly effective. Avoid spending too much time at long range, where he'll have more opportunities to bombard you with spells. Phase 2: Aggressive Melee Combat Once his health drops sufficiently, Logarius begins charging a power-up that changes his fighting style. During the transition, you can attempt a charged attack from behind to interrupt him and open an opportunity for a visceral attack. After transforming, he becomes considerably more aggressive, using his scythe and sword for rapid melee combinations. This is where firearm parrying becomes especially useful. Watch for his incoming melee attacks, fire your weapon just before an attack connects, and follow up with a visceral attack when he's staggered. If you're uncomfortable parrying, dodge sideways and attack during the short openings after his combinations. Logarius can also plant a sword into the rooftop, creating a storm of flying blades that repeatedly attack your position. When this happens, quickly locate the sword embedded in the ground and destroy it with a melee attack or firearm shot to stop the effect. Stay patient, avoid lengthy combos, and continue punishing his openings until he falls. Defeating Martyr Logarius unlocks the trophy and allows you to collect the Crown of Illusions from the rooftop. Don't leave just yet. Equip the Crown of Illusions and approach the throne at the far end of the arena. This reveals a hidden passage leading to Queen Annalise and the Cainhurst Vilebloods. Kneel before the Queen to join the covenant and receive the Cainhurst Badge, which allows you to purchase the Chikage for Hunter's Essence. Nothing quite says royal hospitality like fighting an elderly wizard on a frozen rooftop before being allowed inside.
Tip
Parrying is extremely effective against Logarius during his melee phase. If you're struggling, practice timing your firearm shots rather than trying to trade hits. Destroying his planted sword immediately also prevents the flying blades from overwhelming you.
Warning
The rooftops leading to Logarius contain narrow ledges where falling can be fatal. Unlock the castle's elevator shortcut before attempting the boss so you won't need to repeat the entire library route after each death.
Video Guide: https://www.youtube.com/watch?v=D-Rpw5YN48s&pp=ygUaYmxvb2Rib3JuZSBNYXJ0eXIgTG9nYXJpdXM%3D
Trophy: Rune Contact
Acquire a Caryll Rune that endows hunters with special strength.
Type: Bronze
Category: Misc
Unlock Details
Acquire your first Caryll Rune, a special item that grants passive bonuses to your Hunter. Caryll Runes provide various enhancements, including increased health, additional Quicksilver Bullet capacity, improved stamina, and other useful effects. One of the earliest guaranteed opportunities to obtain a rune becomes available after defeating the Blood-starved Beast in Old Yharnam. Follow these steps: 1. Defeat the Blood-starved Beast: Travel through Old Yharnam and defeat the boss to unlock the previously sealed door inside Oedon Chapel. 2. Return to Cathedral Ward: Travel to the Cathedral Ward lamp and enter the newly opened doorway on the right side of the chapel. 3. Ride the elevator: Follow the passage to the elevator leading toward the Healing Church Workshop. Ride it to the upper floor. 4. Find the treasure chest: After exiting the elevator, enter the nearby room containing a wheelchair enemy armed with a firearm. Defeat or avoid the enemy and locate the chest at the opposite end of the room. 5. Collect the Communion Rune: Open the chest to obtain the Communion Caryll Rune, which increases the number of Blood Vials you can carry. The trophy unlocks immediately after acquiring your first Caryll Rune. You don't need to equip it. If you've already found another Caryll Rune during your exploration, this trophy may have unlocked naturally.
Tip
After defeating the Witch of Hemwick, explore the room beyond her arena to obtain the Rune Workshop Tool. This allows you to equip Caryll Runes at the Memory Altar inside the Hunter's Dream and benefit from their passive effects.
Trophy: Rune Master
Acquire an extremely precious Caryll Rune.
Type: Silver
Category: Misc
Unlock Details
Acquire an extremely precious Caryll Rune. These special runes provide passive bonuses to your Hunter, such as increased health, additional Quicksilver Bullet capacity, or improved stamina. One of the easiest ways to unlock this trophy is by collecting the Formless Oedon rune hidden in Cathedral Ward. Follow these steps: 1. Defeat the Blood-starved Beast in Old Yharnam. This opens the previously locked door on the right side of Oedon Chapel, beside the Cathedral Ward lamp. 2. Return to Cathedral Ward, enter the newly opened doorway, and ride the elevator leading toward the Healing Church Workshop. 3. While the elevator is ascending, watch for an opening in the wall. Step or roll through this opening as the elevator passes to reach a hidden passage. 4. Follow the passage through the upper interior of Oedon Chapel, carefully navigating the connected walkways. 5. Locate the treasure chest containing the Formless Oedon rune, which increases your maximum Quicksilver Bullet capacity by four. 6. Open the chest and collect the rune to unlock Rune Master. You do not need to equip the rune for the trophy to unlock.
Tip
This is an excellent trophy to collect early because it becomes available shortly after defeating the Blood-starved Beast. The elevator can be reused if you miss the opening on your first attempt. No need to throw yourself into the wall repeatedly like an overly enthusiastic Hunter.
Video Guide: https://www.youtube.com/watch?v=gbzKSNukUzQ&list=PLRr5L69yg_kFDMwd2f8lLLEwBYcWoEv_F&index=7
Trophy: The Choir
Gain entry to the realm of the Choir, the high stratum of the Healing Church.
Type: Silver
Category: Misc
Unlock Details
Gain entry to Upper Cathedral Ward, the hidden domain of the Choir within the Healing Church. To access this location, you'll need the Upper Cathedral Key, found in Yahar'gul, Unseen Village after defeating Rom, the Vacuous Spider. Follow these steps: 1. Progress to Yahar'gul: Defeat Rom in Byrgenwerth to advance the story. You'll gain access to Yahar'gul, Unseen Village, where powerful enemies and Bell-Ringing Women make exploration especially dangerous. 2. Reach Yahar'gul Chapel: Continue through the village until you reach the area near the Yahar'gul Chapel lamp. Look for the large Amygdala positioned above the street, which fires an explosive beam across the area. 3. Find the broken railing: From the elevated walkway overlooking the laser-covered street, look along the right-hand railing for a broken section. Carefully drop through this opening onto the lower platform. 4. Collect the Upper Cathedral Key: Follow the hidden passage into the building below. You'll encounter enemies guarding the area. Locate the opening above a locked cell, drop inside, and loot the corpse sitting in the chair to obtain the Upper Cathedral Key. 5. Return to Cathedral Ward: Travel to the Cathedral Ward lamp in Oedon Chapel. If you've already defeated the Blood-starved Beast, the door on the right side of the chapel will be open. Enter and ride the elevator toward the Healing Church Workshop. 6. Climb the Healing Church Workshop: Follow the tower's upper pathways, climbing the stairs and ladders until you reach the large locked door at the top. Watch out for the enemies guarding the route. 7. Enter Upper Cathedral Ward: Use the Upper Cathedral Key to unlock the door and step into the area beyond. The Choir trophy unlocks once you enter Upper Cathedral Ward. You've finally reached the upper ranks of the Healing Church. Unfortunately, their idea of a warm welcome involves dark hallways, strange creatures, and absolutely no customer service.
Tip
Don't leave Upper Cathedral Ward immediately after earning the trophy. You'll need to explore this area to defeat Celestial Emissary and Ebrietas, Daughter of the Cosmos. You can also collect the Cosmic Eye Watcher Badge and A Call Beyond, which contribute toward Hunter's Essence and Hunter's Craft.
Warning
The Upper Cathedral Key is easy to overlook because its location requires dropping through a broken railing rather than following the main path. The area also contains dangerous enemies that can drain your Insight, so approach unfamiliar creatures carefully.
Video Guide: https://www.youtube.com/watch?v=e-7gH5Gqq4g&list=PLRr5L69yg_kFDMwd2f8lLLEwBYcWoEv_F&index=5
Trophy: The Source of the Dream
Discover the abandoned old workshop, the source of the Hunter's Dream.
Type: Silver
Category: Misc
Unlock Details
Discover the Abandoned Old Workshop, a hidden location beneath the Healing Church Workshop that closely resembles the Hunter's Dream. This area becomes accessible after defeating the Blood-starved Beast in Old Yharnam. Follow these steps: 1. Defeat the Blood-starved Beast: Travel through Old Yharnam and defeat the Blood-starved Beast to unlock the previously sealed door inside Oedon Chapel. 2. Return to Cathedral Ward: Travel to the Cathedral Ward lamp. Enter the newly opened door on the right side of the chapel and ride the elevator upward. 3. Reach the Healing Church Workshop: From the elevator, cross the connecting bridge toward the large tower. Instead of climbing toward the top, look for the lower exterior path along the right side of the tower. 4. Enter the dark tower: Drop onto the lower walkway and follow it into the tower's interior. You'll reach a large vertical shaft containing numerous wooden platforms suspended along the walls. 5. Locate the hidden platform: Look down carefully for a small wooden platform positioned against the wall below. Line yourself up with the platform and drop onto it. This is the most dangerous part of the route, so take your time and use the camera to judge the distance. 6. Descend toward the workshop: From the small platform, continue dropping carefully onto the lower walkways until you reach a large doorway. 7. Enter the Abandoned Old Workshop: Open the doors and step inside the hidden workshop to unlock the trophy. The abandoned workshop contains several important items, including the Old Hunter Bone special Hunter Tool and one One Third of Umbilical Cord, which is required for the secret ending. The place looks suspiciously familiar, doesn't it? Nothing says comforting discovery quite like finding an abandoned copy of your supposedly safe home.
Tip
Collect the Old Hunter Bone and the Umbilical Cord before leaving. You'll need the Bone for Hunter's Craft, while the Cord contributes toward Childhood's Beginning. Finding both now saves an unnecessary return trip.
Warning
The descent through the tower is dangerous, and falling onto the wrong platform can kill you instantly. Move carefully, identify each landing before dropping, and make sure your health is full before attempting longer falls.
Video Guide: https://www.youtube.com/watch?v=J04k4Pkuttk&list=PLRr5L69yg_kFDMwd2f8lLLEwBYcWoEv_F&index=4
Trophy: The Witch of Hemwick
Defeat the Witch of Hemwick.
Type: Bronze
Category: Misc
Unlock Details
Defeat the Witch of Hemwick, an optional boss located at the end of Hemwick Charnel Lane. From the Grand Cathedral, head outside and follow the path to the right, leading toward the wooded outskirts of Cathedral Ward. Continue along the route until you reach Hemwick Charnel Lane, a village filled with hostile residents, executioners, and narrow pathways. Progress through the area, following the winding path toward the large building near the end of the village. Before entering the boss arena, activate the nearby shortcut gate to make returning easier if you die. Enter the building and descend the staircase to begin the boss encounter. Boss Strategy The Witch of Hemwick is an unusual boss encounter involving two witches that can turn invisible and summon hostile creatures called Mad Ones. Unlike most Bloodborne bosses, the witches themselves are relatively weak. The main challenge is locating them while avoiding their summoned enemies. At the beginning of the fight, you'll notice a Mad One appearing inside the arena. These tall, shadowy enemies can be dangerous if they catch you with repeated melee attacks, but you don't need to defeat them to complete the boss encounter. Instead, focus on finding the invisible witch. She usually appears near the edges or corners of the room, occasionally revealing herself through a faint red glow. Run around the arena while watching for the glow. When you discover her position, move in and attack quickly. After taking several hits, she'll disappear and relocate somewhere else in the room. Continue searching and attacking until the second witch becomes involved in the fight. Dealing With Both Witches Eventually, you'll be fighting two witches, although their health bars may not both be immediately visible. The witches can use Arcane attacks that temporarily immobilize your Hunter, leaving you vulnerable to nearby Mad Ones. Watch for glowing projectiles and dodge whenever a witch begins casting. One witch can also revive the other if you take too long to finish the encounter. To prevent this, try to reduce both witches to low health before eliminating them in quick succession. Once both witches are defeated, the fight ends and the trophy unlocks. You've just defeated two invisible witches who outsourced most of their fighting to summoned monsters. Even by Yharnam standards, that's impressively lazy.
Tip
Entering the arena with zero Insight prevents Mad Ones from appearing, making this fight considerably easier. You can spend your Insight at the Insight Messenger shop beforehand if you want to use this strategy.
Warning
Defeating only one witch does not permanently end the encounter. The surviving witch can revive her partner, so finish both before the revival occurs.
Video Guide: https://www.youtube.com/watch?v=5yDzWh0eRNw&pp=ygUgYmxvb2Rib3JuZSAgVGhlIFdpdGNoIG9mIEhlbXdpY2s%3D
Trophy: Weapon Master
Acquire a weapon of the highest level.
Type: Silver
Category: Misc
Unlock Details
Upgrade any right-hand or left-hand weapon to its maximum level of +10 using the weapon fortification table inside the Hunter's Dream workshop. You'll need three types of Blood Stone materials and one Blood Rock to complete the upgrades. +1: 3 Blood Stone Shards +2: 5 Blood Stone Shards +3: 8 Blood Stone Shards +4: 3 Twin Blood Stone Shards +5: 5 Twin Blood Stone Shards +6: 8 Twin Blood Stone Shards +7: 3 Blood Stone Chunks +8: 5 Blood Stone Chunks +9: 8 Blood Stone Chunks +10: 1 Blood Rock Regular Blood Stone Shards can be found throughout early areas such as Central Yharnam and Cathedral Ward. Twin Blood Stone Shards become more common in areas such as the Forbidden Woods, while Blood Stone Chunks are found throughout later locations, including Castle Cainhurst, Yahar'gul, and the Nightmare of Mensis. The most important material is the Blood Rock. One can be found in the Nightmare of Mensis, accessible through the hidden route near Mergo's Loft: Middle. From the Mergo's Loft: Middle lamp, locate the nearby cage elevator. While riding it, carefully exit through the opening in the wall to reach a hidden path guarded by Winter Lanterns. Continue through the dangerous passage until you reach the lever that drops the Brain of Mensis into the abyss. Return along the connecting route and enter the tower where the Brain previously hung. Carefully descend through the interior to find the Blood Rock on a corpse. Once you have the necessary materials, return to the Hunter's Dream, interact with the workshop table, and select Fortify Weapon. Upgrade your chosen weapon to +10 to unlock Weapon Master.
Tip
Prioritize upgrading the weapon you're most comfortable using. A fully upgraded Saw Cleaver, Hunter Axe, or Ludwig's Holy Blade can carry you through the toughest Chalice Dungeons. No need to reinvent your entire build when your favorite weapon already gets the job done.
Warning
The route to the Blood Rock contains Winter Lanterns, which rapidly inflict Frenzy. Bring Sedatives, watch your Frenzy meter, and avoid rushing the narrow passages.
Video Guide: https://www.youtube.com/watch?v=oxQ-skKs6fQ&list=PLRr5L69yg_kFDMwd2f8lLLEwBYcWoEv_F&index=8
Trophy: Yharnam, Pthumerian Queen
Defeat Yharnam, Blood Queen of the Old Labyrinth.
Type: Gold
Category: Misc
Unlock Details
Defeat Yharnam, Blood Queen of the Old Labyrinth, on Layer 3 of the Great Pthumeru Ihyll Chalice Dungeon. Reaching her requires completing a series of fixed Chalice Dungeons and collecting the ritual materials needed to unlock each one. You can access the Chalice Dungeons through the ritual altars in the Hunter's Dream after obtaining your first chalice. Follow this progression: 1. Pthumeru Chalice: Defeat the Blood-starved Beast in Old Yharnam to obtain the chalice. Complete its three layers and defeat the Watchdog of the Old Lords to obtain the Central Pthumeru Chalice. 2. Central Pthumeru Chalice: Complete all three layers and defeat the Pthumerian Descendant to obtain the Lower Pthumeru Chalice. 3. Lower Pthumeru Chalice: Progress through all four layers and defeat the Bloodletting Beast to obtain the chalice needed for the Defiled Dungeon. 4. Ailing Loran Chalice: Defeat Amygdala in the Nightmare Frontier to obtain this chalice. Explore Ailing Loran to collect the Bastard of Loran ritual materials required for the Defiled Chalice. You'll also find the Beast Claw weapon here, which is required for Hunter's Essence. 5. Defiled Chalice: Complete its three layers while dealing with a curse that reduces your maximum HP by half. Defeat the final boss, Amygdala, to obtain the Great Pthumeru Ihyll Chalice. 6. Great Pthumeru Ihyll Chalice: Gather the necessary ritual materials, create the dungeon, and progress through its three layers. The Pthumerian Queen awaits as the final boss on Layer 3. Before creating the Great Pthumeru Ihyll Dungeon, you'll need several important materials, including four Red Jelly and one Living String. Two Red Jelly can be collected from the Lecture Building's first floor. Another two can be obtained from the Great Isz Chalice Dungeon, which becomes accessible after defeating Ebrietas, Daughter of the Cosmos. The Living String comes from the Brain of Mensis in the Nightmare of Mensis. Use the lever accessible from the route near Mergo's Loft: Middle to drop the Brain into the abyss. Then descend using the special cage elevator and defeat the Brain to obtain the Living String. Once you've reached the Pthumerian Queen, prepare for a fight focused on spacing and controlled attacks. She primarily uses blood-based attacks, including ranged projectiles, close-range strikes, and powerful area-of-effect abilities. Use a fast weapon to land one or two attacks before retreating, then wait for another opening. As the fight progresses, she'll summon duplicate versions of herself. These clones disappear after a single hit, so eliminate them quickly before returning your attention to the real Queen. Avoid extended combos when she's preparing an area attack, and keep moving to prevent her ranged abilities from overwhelming you. Defeat the Queen to unlock the trophy. After everything the Chalice Dungeons have put you through, the Queen herself might actually feel like a reasonable opponent. Almost suspiciously reasonable.
Tip
Aim for a character around level 120 or higher with a +10 weapon before tackling the deepest dungeons. The fixed Chalice Dungeons required for this trophy do not scale with New Game+, and your dungeon progress carries over. You can also earn Blood Gem Master naturally while progressing through the tougher dungeons.
Warning
Obtain the Living String before entering New Game+ if you haven't already created the final dungeon. Missing it means progressing back through the Nightmare of Mensis to collect it. Root Chalice Dungeons are not required for the standard Platinum route.
Video Guide: https://www.youtube.com/watch?v=0aDi5j92zUc
Trophy: Father Gascoigne
Defeat the beast that once was Father Gascoigne.
Type: Bronze
Category: Story
Unlock Details
Defeat Father Gascoigne, one of Bloodborne's earliest mandatory bosses, in the Tomb of Oedon at the end of Central Yharnam. To reach him, progress through Central Yharnam toward the sewer area. Continue through the lower passages and climb the ladders leading toward the large graveyard. Once you enter the arena, the fight against Father Gascoigne will begin. Gascoigne is a fast and aggressive Hunter who uses a trick axe and firearm, making him a dangerous opponent for players still learning Bloodborne's combat. Phase 1: Hunter Form At the beginning of the fight, Gascoigne attacks using his axe and Hunter Blunderbuss. He combines quick melee strikes with firearm blasts, punishing players who remain directly in front of him. Use the gravestones around the arena to interrupt his movement and create opportunities to heal. His melee attacks can be parried with a well-timed firearm shot, allowing you to follow up with a powerful visceral attack. Stay mobile, dodge around his attacks, and avoid committing to long combos. A few well-placed hits are safer than getting caught in one of his aggressive counterattacks. As the fight progresses, Gascoigne can transform his axe into its extended form, giving his attacks significantly more reach. Phase 2: Beast Form When his health becomes low, Gascoigne transforms into a powerful beast. His attacks become faster, more aggressive, and capable of closing the distance quickly. This is where the Tiny Music Box becomes especially useful. Before fighting Gascoigne, you can speak with his daughter through a window in Central Yharnam. From the sewer area, climb the long ladder leading toward the upper streets and locate the window marked by a red lantern. She'll give you the Tiny Music Box. Using the Music Box during the fight temporarily stuns Gascoigne, creating an opportunity to deal significant damage. It can also be used in his beast form, although its effectiveness is limited. Once he transforms, use the stairs toward the rear of the arena to create more space. Fire-based attacks, including Molotov Cocktails, work particularly well against his beast form. Wait for openings after his lunging attacks, punish him with quick strikes or Molotovs, and avoid getting trapped against the gravestones. Continue attacking until Gascoigne falls. Defeating him unlocks the trophy and grants the Oedon Tomb Key, allowing you to progress into Cathedral Ward. Welcome to Bloodborne, Hunter. Your first serious skill check is a furious priest with an axe and unresolved family problems. Things only get stranger from here.
Tip
Save the Tiny Music Box for a useful opening, preferably during his beast phase. Oil Urns followed by Molotov Cocktails can also deal substantial damage, helping you finish the most dangerous part of the fight quickly.
Warning
Using the Tiny Music Box repeatedly during Gascoigne's human phases can trigger his beast transformation earlier than normal. Don't spam it at the start of the fight, or you may end up dealing with his most aggressive form longer than necessary.
Video Guide: https://www.youtube.com/watch?v=VjIxrPRbEsk
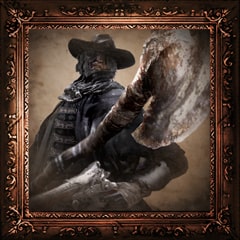
Trophy: Mergo's Wet Nurse
Defeat Great One: Mergo's Wet Nurse.
Type: Bronze
Category: Story
Unlock Details
Defeat Mergo's Wet Nurse, a mandatory story boss encountered near the top of Mergo's Loft in the Nightmare of Mensis. After defeating Micolash, Host of the Nightmare, continue through the newly accessible passage and cross the bridge leading toward Mergo's Loft: Middle. Activate the lamp and continue climbing through the area. You'll encounter several Shadows of Yharnam and enormous pig enemies patrolling the path toward the boss. Take your time clearing or avoiding these enemies, then locate the elevator shortcut leading toward the upper section of the loft. Continue through the final passage and enter the arena to begin the encounter. Boss Strategy Mergo's Wet Nurse is a towering, hooded creature wielding multiple curved blades. Despite her intimidating appearance, most of her attacks are predictable once you understand their timing. The safest strategy is to stay close to her sides or behind her whenever possible. During the first phase, she'll use sweeping blade combinations, forward slashes, and spinning attacks. These can deal tremendous damage if you're caught directly in front of her. Wait for her to begin an attack combination, dodge around her side, and move behind her to land several hits while she finishes attacking. Avoid getting greedy with your combos. Her attacks cover a wide area, and remaining too close for too long can leave you exposed. As the fight progresses, Mergo's Wet Nurse can summon a dark mist that covers the arena and creates a duplicate of herself. During the Nightmare Phase When the purple mist appears, the arena becomes darker and a second Wet Nurse begins attacking alongside the original. Trying to fight both at once is extremely dangerous. Instead, focus on survival. Keep moving around the outer edge of the arena, sprinting and dodging whenever either enemy approaches. Avoid committing to attacks during this phase unless you're confident there's a safe opening. Eventually, the mist disappears and the duplicate vanishes, allowing you to resume fighting the original boss. Continue circling behind her, punish the recovery animations after her blade combinations, and retreat whenever she begins another dangerous attack. Defeat Mergo's Wet Nurse to unlock the trophy and receive one One Third of Umbilical Cord, an important item for the secret ending. You've now defeated a nightmare creature carrying enough blades to stock an entire weapons shop. Surely the hunt must be almost over. Surely.
Tip
Staying behind Mergo's Wet Nurse makes many of her attacks easier to avoid. During the darkness phase, prioritize survival over damage. You don't need to defeat the duplicate; simply outlast the effect.
Warning
Defeating Mergo's Wet Nurse opens the final encounter in the Hunter's Dream. Completing an ending immediately begins New Game+, so finish your remaining exploration, optional bosses, weapons, and Hunter Tools before making your final choice.
Video Guide: https://www.youtube.com/watch?v=QMSckpek_To
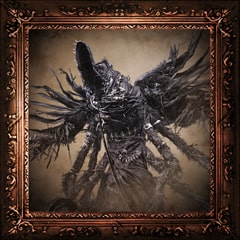
Trophy: Micolash, Host of the Nightmare
Defeat Micolash, Host of the Nightmare.
Type: Bronze
Category: Story
Unlock Details
Defeat Micolash, Host of the Nightmare, a mandatory boss encountered in the Nightmare of Mensis. After defeating The One Reborn, interact with the seated mummy beyond the boss arena to enter the Nightmare Lecture Building. Travel through the Lecture Building's upper floor and use the large doorway leading into the Nightmare of Mensis. Progress through the Nightmare, surviving the Frenzy-inducing environment and dangerous enemies until you reach Mergo's Loft. Enter the large interior area to begin the encounter with Micolash. Unlike most bosses, Micolash spends much of the fight running away from you through a maze of hallways and rooms. Your goal is to corner him and force him into direct combat. Phase 1: The Chase At the beginning of the fight, Micolash runs through the corridors while skeletal puppets patrol the surrounding rooms. Chase him through the passages, paying attention to where he turns and which rooms he approaches. Eventually, you'll find him standing near a doorway leading into a dead-end room. Rather than chasing him directly from behind, circle around through the connecting corridors and approach from another direction. This forces Micolash into the room, where you can finally fight him. During this first phase, his primary attack is Augur of Ebrietas, which summons a powerful tentacle strike directly in front of him. The attack is heavily telegraphed, making it relatively easy to avoid by moving sideways. Dodge the tentacles, land a few quick attacks, and repeat. His physical attacks are comparatively weak, so maintaining close-to-medium range can make this phase straightforward. Once you've reduced his health sufficiently, Micolash disappears and escapes into the upper section of the maze. Phase 2: The Final Chase Follow the newly accessible stairs and continue pursuing Micolash through the upper corridors. He'll eventually use mirrors to escape between rooms before dropping into a lower chamber and closing a gate behind himself. You cannot follow him directly through the gate. Instead, climb back toward the upper passages and locate the room containing a hole in the floor above his chamber. Drop through this opening to confront Micolash again. He retains his Augur of Ebrietas attack but gains a much more dangerous ability called A Call Beyond. This Arcane spell releases multiple homing projectiles that can deal enormous damage, potentially killing you in a single volley. The safest approach is to remain close enough to pressure Micolash without exhausting your stamina. If he starts casting A Call Beyond, a firearm shot or quick attack can interrupt the spell before it activates. If the spell is released, time your dodge toward Micolash as the projectiles converge rather than attempting to retreat directly backward. Continue avoiding his tentacle attacks and punish his recovery animations with quick strikes. Defeat Micolash to unlock the trophy and open the route toward Mergo's Wet Nurse. You've now spent several minutes chasing a man wearing a cage on his head through an enormous nightmare library. Somehow, that isn't even the strangest thing you've done today.
Tip
During the second phase, it's possible to attack Micolash from the elevated opening before dropping into his final chamber. Poison Knives and other ranged attacks can damage him while keeping you outside the room, providing an alternative if you're struggling with A Call Beyond.
Warning
A Call Beyond is considerably more dangerous than Micolash's other attacks. Avoid creating large gaps between you and the boss during the second phase, as this gives him more opportunities to cast it. Keep enough stamina available to dodge or interrupt the spell.
Video Guide: https://www.youtube.com/watch?v=W_c-nZ61QEQ
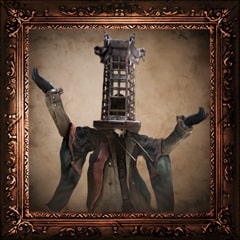
Trophy: Nightmare Lecture Building
Gain entry into the Byrgenwerth lecture building, that drifts within the realm of nightmare.
Type: Silver
Category: Story
Unlock Details
Discover the Nightmare Lecture Building, a mysterious location connected to Byrgenwerth and the Nightmare realms. This trophy is earned through normal story progression, but you can also reach the building earlier by obtaining a Tonsil Stone. Method 1: Normal Story Progression Progress through the main story until reaching Yahar'gul, Unseen Village. Defeat The One Reborn, the large boss encountered at the end of the area. After the battle, continue up the staircase behind the boss arena. Inside the building, approach the seated mummy positioned at the far end of the room. Interact with the mummy to trigger a cutscene transporting you to the Nightmare Lecture Building. Once you arrive, the trophy will unlock. Method 2: Early Access Using a Tonsil Stone 1. After defeating Vicar Amelia and advancing the story into the Forbidden Woods, speak with an NPC behind a red-lit window. The mysterious voice will provide a Tonsil Stone. 2. Return to Cathedral Ward and travel toward the Grand Cathedral. Take the path to the right of the cathedral, leading through the area containing hostile Hunters. 3. Continue until you reach a large circular chamber with a massive closed doorway on the opposite side. 4. Carry the Tonsil Stone in your inventory and approach the doorway. An invisible Amygdala will grab you, triggering a special cutscene. 5. Instead of being killed, you'll awaken inside the Nightmare Lecture Building and unlock the trophy. Either method works, so there's no need to rush the early route unless you want access to the Lecture Building and Nightmare Frontier sooner. Apparently, the admission requirements for this school involve getting kidnapped by an invisible cosmic monster. At least there's no tuition.
Tip
Explore the Lecture Building while you're here. You'll find the Augur of Ebrietas special Hunter Tool and Red Jelly, which is needed for the Great Pthumeru Ihyll Chalice ritual. The lower-floor exit also leads to the Nightmare Frontier, where you can defeat Amygdala.
Trophy: Rom, the Vacuous Spider
Defeat Great One: Rom, the Vacuous Spider.
Type: Bronze
Category: Story
Unlock Details
Defeat Rom, the Vacuous Spider, a mandatory boss encountered at Byrgenwerth after progressing through the Forbidden Woods. After defeating the Shadow of Yharnam, follow the newly opened path into Byrgenwerth. Explore the grounds surrounding the main building and unlock the shortcut gate near the entrance. Inside, you'll encounter a hostile Hunter guarding the upper floors. Defeat or avoid the Hunter, climb to the upper level, and collect the Lunarium Key. Use the key to open the balcony door overlooking the lake. Approach Master Willem, then jump into the lake to enter Rom's arena and begin the boss fight. Boss Strategy Rom is a large, relatively passive boss protected by numerous smaller spiders. Although Rom herself moves slowly, her companions can deal tremendous damage, especially with their jumping attacks. The smaller spiders are heavily armored around their heads, making frontal attacks ineffective. If you decide to eliminate them, attack their sides or backs for much better damage. During the first phase, Rom primarily relies on her spider companions for protection. You can approach carefully, clear some of the smaller spiders, and attack Rom from her sides or behind. Once enough damage has been dealt, Rom teleports to another part of the arena and begins using powerful Arcane attacks. Her most dangerous abilities include: 1. Meteor Shower: Rom raises her body and summons Arcane projectiles from above. Sprint or dodge continuously to avoid the incoming barrage. 2. Ground Eruption: Rom rolls onto her back, causing Arcane projectiles to erupt from the ground around her. Move away when you see the animation begin. 3. Close-Range Explosion: Rom unleashes a powerful burst of Arcane energy around her body. Retreat immediately when she begins charging the attack. Additional spiders appear as the fight progresses, making positioning increasingly important. You can either eliminate the smaller spiders before attacking Rom or carefully maneuver around them and focus your damage on the boss. Clearing them provides a safer approach, while rushing Rom can shorten the encounter at the cost of greater risk. Avoid attacking her armored head. Instead, target her vulnerable sides and body, using quick combinations before retreating. Once Rom is defeated, the trophy unlocks and the story advances toward Yahar'gul, Unseen Village. Apparently, the secret to defeating a giant cosmic spider is to avoid the smaller cosmic spiders. Who would have thought?
Tip
If you're struggling, take your time clearing Rom's smaller spiders before committing to damage. Their bodies are vulnerable from the sides and behind, and removing them creates much safer opportunities to attack the boss.
Warning
Defeating Rom causes significant changes throughout Yharnam and can affect NPC questlines. Before completing this fight, handle any remaining interactions involving Eileen, Arianna, or Iosefka that are important to your Platinum route. In particular, do not kill the clinic's occupant before Rom if you need her Umbilical Cord.
Video Guide: https://www.youtube.com/watch?v=EZKUTCkuoKc
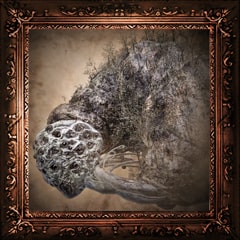
Trophy: Shadow of Yharnam
Defeat the Shadow of Yharnam.
Type: Bronze
Category: Story
Unlock Details
Defeat the Shadow of Yharnam, a mandatory boss encounter near the end of the Forbidden Woods. After defeating Vicar Amelia and inspecting the skull inside the Grand Cathedral, return to Cathedral Ward and use the newly acquired password to enter the Forbidden Woods. Progress through the forest, navigating the village, snake-infested paths, and swamp areas until you reach the large graveyard where the boss encounter takes place. Be sure to unlock the shortcuts throughout the Forbidden Woods before entering the arena. The area is extensive, and having to repeat the entire route after a failed attempt is nobody's idea of a relaxing woodland stroll. Boss Strategy Unlike most Bloodborne bosses, the Shadow of Yharnam consists of three enemies fighting together. Each has a different combat style: Katana Shadow: Uses aggressive melee attacks and frequently closes the distance. Candle Shadow: Combines melee attacks with short-range fire abilities. Fireball Shadow: Attacks from a distance using fire projectiles. The biggest challenge is managing all three enemies simultaneously. Keep moving around the arena, use the large gravestone for cover, and avoid letting the Shadows surround you. A reliable strategy is to prioritize the Fireball Shadow, reducing the number of ranged attacks you need to dodge. Use quick attacks whenever it becomes separated from the others, then retreat before its allies can punish you. As their health decreases, the Shadows begin transforming, gaining more dangerous attacks and extended melee reach. Focus on eliminating one opponent rather than spreading damage evenly across all three. Once the first Shadow falls, the encounter becomes easier to control. Next, target the Candle Shadow while keeping the remaining katana wielder in view. When only one Shadow remains, be prepared for its ability to summon enormous snakes from the ground. These attacks can cover a large portion of the arena, so keep moving and avoid standing directly in their path. Finish the final Shadow to unlock the trophy and open the route toward Byrgenwerth. Three mysterious figures, one Hunter, and absolutely no respect for a fair fight. Welcome to the Forbidden Woods.
Tip
Weapons with wide sweeping attacks, such as the transformed Hunter Axe, are particularly useful when multiple Shadows approach together. The large gravestone can also block incoming fireballs while you heal or reposition.
Warning
Leaving the final Shadow alive for too long can allow repeated giant snake attacks. Once you've reduced the fight to a single opponent, stay aggressive while respecting its attack animations.
Video Guide: https://www.youtube.com/watch?v=YTKvWN1WMsw
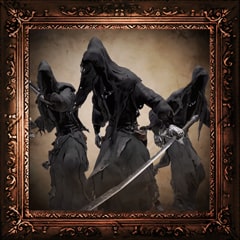
Trophy: The One Reborn
Defeat the One Reborn.
Type: Bronze
Category: Story
Unlock Details
Defeat The One Reborn, a mandatory boss found in Yahar'gul, Unseen Village. After defeating Rom, the Vacuous Spider, you'll gain access to the later version of Yahar'gul. Progress through the village, dealing with dangerous enemies, Bell-Ringing Women, and the enormous Amygdala creatures positioned above the streets. The Bell-Ringing Women can repeatedly summon or revive enemies, so eliminate them whenever possible to make progressing through the area easier. Continue through the village until you reach the large plaza at the bottom of the area. Enter the boss arena to trigger the encounter with The One Reborn. Boss Strategy The One Reborn is a massive collection of twisted limbs and bodies supported by several smaller legs. While the creature itself is dangerous, the Bell-Ringing Women positioned on the balconies above the arena make the fight significantly more troublesome. Before focusing on the boss, locate the staircases along the sides of the arena and climb to the upper balconies. Eliminate the six Bell-Ringing Women positioned around the arena. Doing so removes their ranged fire attacks and makes the main fight substantially easier. Once they're defeated, return to ground level and concentrate on attacking The One Reborn's legs and lower body. Repeatedly striking its limbs can stagger the boss, causing it to collapse and allowing you to deal substantial damage while it's vulnerable. Weapons with good reach, such as the transformed Hunter Axe, are particularly effective at hitting its legs consistently. Watch carefully for the boss's main attacks: 1. Limb Strikes: The creature lashes out with its legs and body parts. Stay mobile and attack from its sides when possible. 2. Area Explosion: The boss begins glowing before unleashing a powerful area attack. Retreat immediately when you notice the animation. 3. Body Fluid Attack: The One Reborn releases a large pool of damaging fluid across the arena floor. Move toward the stairs or another safe area until the attack ends. Continue targeting its legs, taking advantage of each stagger to deal significant damage. Once the boss falls, the trophy unlocks. Afterwards, climb the stairs behind the arena and interact with the seated mummy to progress toward the Nightmare Lecture Building. Congratulations, Hunter. You've defeated what appears to be an entire graveyard having a very bad day.
Tip
Eliminating the Bell-Ringing Women before attacking the boss makes a huge difference. You'll have fewer projectiles to worry about and can focus on staggering The One Reborn without being constantly interrupted.
Video Guide: https://www.youtube.com/watch?v=kjUxOzqUho8
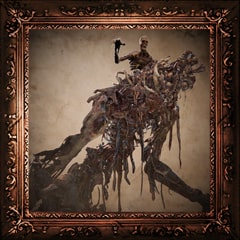
Trophy: Vicar Amelia
Defeat the beast that once was Vicar Amelia.
Type: Bronze
Category: Story
Unlock Details
Defeat Vicar Amelia, the powerful beast waiting inside the Grand Cathedral in Cathedral Ward. This is a mandatory story boss, so you'll encounter her naturally as you progress through Yharnam. From the Cathedral Ward lamp, make your way toward the large plaza and the gates leading up to the Grand Cathedral. You can purchase the Hunter Chief Emblem for 10,000 Blood Echoes to open the main gate, or unlock an alternative route through the Healing Church Workshop after defeating the Blood-starved Beast. Continue up the long staircase toward the Grand Cathedral, opening any shortcut gates you encounter along the way. Enter the cathedral and approach the figure praying at the altar to begin the fight. Boss Strategy Vicar Amelia is a large, aggressive beast with powerful claw attacks, sweeping strikes, and devastating ground slams. Her size makes her intimidating, but staying close to her sides or behind her can help you avoid many of her frontal attacks. Fire is particularly effective against Amelia. Bring Fire Paper, Molotov Cocktails, and Oil Urns if you have them. Coat your weapon with Fire Paper to increase your damage, then focus on attacking her limbs whenever you find an opening. Repeatedly damaging her limbs can stagger her, giving you opportunities to deal additional damage and potentially perform a visceral attack. Watch for her jumping attacks and overhead slams, which can deal substantial damage if you remain directly in front of her. Dodge sideways when she begins these animations, then move back in to punish her recovery. As Amelia's health decreases, she may begin praying and healing herself. This can quickly undo your progress if you allow her to finish. Use Numbing Mist to prevent her from healing, or attack aggressively enough to interrupt the animation. Numbing Mist can be found along the Cathedral Ward route leading toward her arena. Continue attacking until Amelia falls to unlock the trophy. Afterwards, inspect the skull on the altar to advance the story and gain the password needed to enter the Forbidden Woods.
Tip
Fire Paper and Numbing Mist are an excellent combination for this fight. The first helps you deal damage quickly, while the second prevents Amelia from recovering health. She already has enough advantages without being allowed to undo your hard work.
Video Guide: https://www.youtube.com/watch?v=djx4tXFnznk
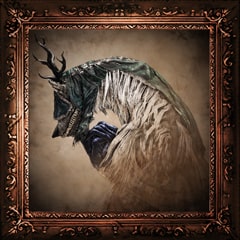
EARLY GAME
Welcome to Yharnam, Hunter! Your Platinum journey begins in Central Yharnam, where you'll learn the importance of dodging, parrying, and the Rally mechanic, which lets you recover recently lost health by attacking. Work through Cleric Beast, Father Gascoigne, and Cathedral Ward while getting comfortable with your chosen weapon. Bloodborne rewards aggression, but there's a fine line between being fearless and donating your Blood Echoes to the nearest werewolf.
Head into Old Yharnam and defeat the Blood-starved Beast to obtain the Pthumeru Chalice, which begins your journey toward the Pthumerian Queen. This also opens access to the Healing Church Workshop, where you can discover the Abandoned Old Workshop and collect an important One Third of Umbilical Cord. Keep an eye out for Eileen the Crow during your early exploration, as obtaining her Crow Hunter Badge is necessary for the Blade of Mercy and the Hunter's Essence trophy. You can earn it through her questline or by defeating her, but following her quest is the friendlier option.
MID GAME
After defeating Vicar Amelia, explore Hemwick Charnel Lane, the Forbidden Woods, and Byrgenwerth as you continue the main story. Make time for optional areas and bosses, including the Witch of Hemwick and Darkbeast Paarl. While exploring the Forbidden Woods, locate the hidden route back to Iosefka's Clinic to collect the Cainhurst Summons. This grants access to Castle Cainhurst, where Martyr Logarius, additional weapons, and a special Hunter Tool await. Yharnam has plenty of secrets, and apparently hiding an entire castle wasn't enough.
Start building your Hunter's Essence and Hunter's Craft collections by purchasing weapons unlocked through Hunter Badges and collecting special tools as you explore. You'll need all 26 base-game Hunter weapons and nine special Hunter Tools for their respective trophies. Upgrade your preferred weapon regularly, gather Blood Stone materials, and consider starting the early Pthumeru Chalice Dungeons. Before defeating Rom, the Vacuous Spider, check any unfinished NPC interactions, particularly Arianna's quest if you're pursuing her Umbilical Cord. After defeating Rom, another cord becomes available through Iosefka's Clinic, provided you haven't eliminated its occupant too early.
LATE GAME
Continue through Yahar'gul, the Nightmare Lecture Building, and the Nightmare of Mensis, collecting remaining weapons, tools, and important upgrade materials. Find the Upper Cathedral Ward Key to access the Choir, then defeat Celestial Emissary and Ebrietas, Daughter of the Cosmos. You'll also want to defeat Amygdala in the Nightmare Frontier for the Ailing Loran Chalice. Don't forget the Blood Rock in the Nightmare of Mensis, which allows you to upgrade a weapon to +10 for Weapon Master. Your Hunter should be getting considerably stronger by now, even if the nightmares haven't received the memo.
Before finishing the game, obtain the Living String from the Brain of Mensis, as it's required for the final Pthumerian Chalice ritual. You'll also need at least three One Third of Umbilical Cord items for Childhood's Beginning. There are four available, including one earned through defeating Mergo's Wet Nurse, but some depend on earlier actions. After defeating the Wet Nurse, the Hunter's Dream workshop begins burning, signaling that the final confrontation is available. Do not complete an ending until you've handled your remaining exploration, collections, and preparation. Finishing an ending sends you directly into New Game+, so this is your chance to settle unfinished business before the hunt starts all over again.
TROPHY CLEANUP AND EXTRA TIPS
Before triggering an ending, finish any remaining optional bosses, Hunter Tools, and accessible weapon purchases. The biggest remaining challenge will likely be reaching Yharnam, Pthumerian Queen, through the fixed Chalice Dungeons. Progress through Pthumeru, Central Pthumeru, Lower Pthumeru, the Defiled Chalice, and Great Pthumeru Ihyll while gathering the required ritual materials. You'll also need to explore Ailing Loran for materials and the Beast Claw weapon. The Defiled Chalice reduces your maximum health by half, making some encounters especially unforgiving. If you thought the main game was cruel, the Chalice Dungeons would like a word.
Bloodborne has three ending trophies: Yharnam Sunrise, Honoring Wishes, and Childhood's Beginning. Without save backups, you'll need three playthroughs to earn them all. Alternatively, you can use a properly prepared save backup before speaking to Gehrman to unlock all three endings in one playthrough. Complete Yharnam Sunrise by submitting your life, restore your backup, then earn Honoring Wishes by refusing Gehrman without consuming three Umbilical Cords. Restore the backup once more, consume three cords, and refuse Gehrman to unlock the secret final encounter for Childhood's Beginning. Defeating Gehrman also unlocks the Burial Blade for purchase in New Game+, which is required for Hunter's Essence. Chalice Dungeon progress carries into New Game+, so you can tackle the Queen before or after your endings. No online trophies or DLC are required for the Platinum. Once every weapon, tool, boss, and ending is accounted for, claim your Platinum and enjoy the rare privilege of leaving Yharnam with something other than trauma.
Completion Video Playlist
2 videos
Bloodborne - Walkthrough Part 1: Central Yharnam