


Trophy Guide Preview
Overall Trophy Progress
0 / 17 Completed
0%
Trophy Types
Platinum
0 / 1Gold
0 / 8Silver
0 / 8Bronze
0 / 0Categories
Collectible
0 / 4Grind
0 / 2Misc
0 / 9Story
0 / 1
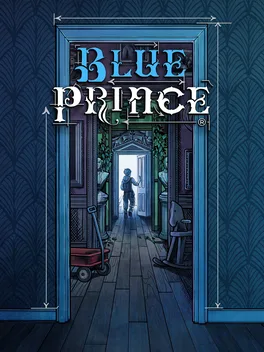
Step inside Mt. Holly, a mysterious mansion where every doorway offers a choice and the layout resets each day. Draft rooms, solve intricate puzzles, manage limited resources, and uncover buried family secrets as you search for the elusive Room 46 in this atmospheric adventure.
Overall Trophy Progress
0 / 17 Completed
0%
Platinum Path
EARLY GAME Begin your journey through Mount Holly by learning how to draft rooms, manage your steps, and conserve keys, gems, and coins. The mansion's layout changes every day, so focus on understanding room connections rather than forcing your way toward the top floor. Explore thoroughly, inspect unusual objects, read books and letters, and keep notes on puzzles that may take several days to solve. Your first major...
Completion Video Playlist
1 video
*NO Spoiler* strategies for EVERY Trophy 🏆 (100% Achievement Blue Prince Guide)
Trophy: Case Closed
Complete the Trophy Case
Type: Platinum
How to Unlock
Earn all **16 other trophies** in Blue Prince and complete the Trophy Case. Unlike most PlayStation games, Blue Prince requires you to physically collect trophies inside Mount Holly. Some appear immediately after completing their objectives, while others must be collected the following day or from a specific room. You'll also need to transfer trophy data earned on separate save files into your main save. Once all 15 other non-Platinum trophies are recorded together, draft the Trophy Room and collect Trophy of Trophies to unlock the Platinum.
Tip
**Never delete your main save.** Use the Blackbridge Grotto's Data Transfer feature to import trophies earned in Dare Mode, Curse Mode, and fresh-save challenges before clearing their save files.

Trophy: Explorer's Trophy
Complete the Mount Holly Directory
Type: Gold
Category: Collectible
How to Unlock
**Complete the Mount Holly Directory by drafting and entering all 110 rooms.** Most rooms can appear naturally, but several require special unlocks. You'll need to obtain all eight additions from the **Drafting Studio**, discover eight hidden floorplans, and enter rooms that only appear under specific conditions. Important examples include **Room 8**, which requires Key 8; the **Bookshop**, accessed through the Library; and the **Pump Room**, **Sauna**, and **Locker Room**, which become available after drafting the Pool. The hidden floorplans include **Planetarium, Conservatory, Tunnel, Closed Exhibit, Mechanarium, Lost and Found, Throne Room, and Treasure Trove**. Find their plans, add them to your drafting pool, then enter each room at least once. Your progress is cumulative across multiple days. Check the Room Directory to identify anything you haven't visited.
Tip
Prioritize unlocking the **Conservatory**, which lets you adjust room rarity. Making difficult-to-find rooms more common can greatly reduce the time needed to finish your directory.
Video Guide: https://www.youtube.com/watch?v=N3xof85gj3o&list=PL-RCyS_hpkioBox-fsygCQFd6Nw4rZjWT&index=3&pp=iAQB

Trophy: Trophy of Invention
Create all 8 Workshop Contraptions
Type: Silver
Category: Collectible
How to Unlock
**Create all eight Workshop contraptions** at least once. Draft the Workshop and combine the correct tools at its central workbench. Each contraption requires two or three specific items, which can be found throughout the mansion or purchased from shops. The eight required combinations are: - **Burning Glass:** Magnifying Glass + Metal Detector - **Detector Shovel:** Shovel + Metal Detector - **Pick Sound Amplifier:** Lockpick + Metal Detector - **Dowsing Rod:** Shovel + Compass - **Powered Electromagnet:** Compass + Battery Pack - **Lucky Coin Purse:** Coin Purse + Lucky Rabbit's Foot - **Jack Hammer:** Shovel + Battery Pack + Broken Lever - **Power Hammer:** Sledgehammer + Battery Pack + Broken Lever Crafting progress carries across multiple days. You do not need to create all eight contraptions in one run.
Tip
Use the **Coat Check** to preserve difficult-to-find components for another day. The Power Hammer and Jack Hammer both consume a Broken Lever, so choose carefully if you also need that item for the Greenhouse. Check the Library's Scrapbook to see which contraptions you've already created.
Video Guide: https://www.youtube.com/watch?v=3rIX3HbXzp8&list=PL-RCyS_hpkioBox-fsygCQFd6Nw4rZjWT&index=4&pp=iAQB

Trophy: Trophy of Sigils
Unlock all 8 Realm Sigils
Type: Gold
Category: Collectible
How to Unlock
**Unlock all eight Realm Sigils in the Underground Sanctum.** Reach Room 46 a second time to discover a poem describing the locations of eight **Sanctum Keys**. Each key opens a corresponding door near the North Lever in the Underground. The eight keys are found in: - **Room 46:** On the desk during a subsequent visit. - **Vault:** Inside safety deposit box #370. - **Clock Tower:** Behind a clock puzzle accessible at 1:30 p.m. - **Reservoir:** Inside a locked chest after completely draining the water. - **Throne Room:** On a stone counter. - **Underground Safehouse:** Accessible by repositioning the Reservoir's boat and adjusting the water level. - **Music Room:** Available when drafting the room late in the in-game day. - **Mechanarium:** Behind a door unlocked by drafting enough Mechanical rooms before the Mechanarium. Bring each key to the Sanctum and unlock its door. Inside, solve the associated Realm Sigil puzzle by arranging the correct symbols for that realm. Your progress is permanent, so the eight doors and puzzles can be completed across multiple days.
Tip
Purchase **Realm and Rune** from the Bookshop and study the Classroom lessons for clues about each realm's symbols. Sanctum Keys generally cannot be carried into the next day unless stored through the Coat Check. Whenever possible, take a newly discovered key directly to the Underground and unlock its door before ending the day.
Video Guide: https://www.youtube.com/watch?v=KzDKnKN27xE&list=PL-RCyS_hpkioBox-fsygCQFd6Nw4rZjWT&index=6&pp=iAQB

Trophy: Trophy of Trophies
Collect all 16 trophies
Type: Gold
Category: Collectible
How to Unlock
**Collect all 16 in-game trophies to complete the Trophy Case.** After earning the other 15 non-Platinum trophies, return to your original main save and check the trophy checklist in the Entrance Hall. Some trophies must be earned on separate save files, including **Day One Trophy**, **Trophy of Speed**, **Dare Bird Trophy**, and **Cursed Trophy**. Their data must be imported into your main save before you can complete the collection. To transfer trophy data, unlock **Blackbridge Grotto**, access its computer, and sign in using the administrator account **MoorR**. Select **Data Transfer**, then **Import Trophy Data**, and choose the trophies you earned on your secondary saves. Once all 15 preceding trophies are recorded on your main save, draft the rare **Trophy Room**, which normally costs five gems. Enter the room and collect Trophy of Trophies to unlock both this trophy and the **Case Closed** Platinum.
Tip
**Do not clear secondary saves until their trophies have been imported and verified on your main save's checklist.** Losing an untransferred trophy could force you to repeat a difficult challenge. The Trophy Room may take several additional days to appear. Use the Conservatory to increase its availability, and consider the Emerald Bracelet or other methods of reducing its gem cost.

Trophy: A Logical Trophy
Win 40 Parlor Games
Type: Silver
Category: Grind
How to Unlock
**Win 40 Parlor Games** across your playthrough. When you draft the Parlor, interact with the three locked boxes to begin a logic puzzle. Each box has a statement, and your goal is to identify which box contains the gems. At least one statement must be true and at least one must be false. The remaining statement can be either. Analyze how the statements relate to one another before choosing a box. Only correct selections count toward the trophy. Your victories accumulate across multiple days, so you do not need to win all 40 games in one run.
Tip
Unlike the Billiard Room's dartboard, the Parlor normally allows **only one attempt per puzzle**. An upgraded version can provide a second wind-up key. Track your completed wins in the Library's Scrapbook.

Trophy: Bullseye Trophy
Solve 40 Dartboard Puzzles
Type: Silver
Category: Grind
How to Unlock
**Successfully solve 40 Dartboard Puzzles** in the Billiard Room. Each time you draft the Billiard Room, interact with its dartboard to begin a mathematical puzzle. Work from the center toward the outer edge, applying the operations indicated by the colored sections. Blue represents addition, yellow subtraction, pink multiplication, and purple division. Later puzzles introduce special symbols for squaring, reversing digits, rounding, and modifying values. Your successful solutions accumulate across multiple days, so you do not need to complete all 40 puzzles in one run. The trophy appears after your 40th successful solution.
Tip
The dartboard allows unlimited attempts, so an incorrect answer does not permanently fail the puzzle. Check the **Scrapbook on the Library's second floor** to track your total completed puzzles.

Trophy: Cursed Trophy
Reach Room 46 in Curse Mode
Type: Gold
Category: Misc
How to Unlock
**Reach Room 46 in Curse Mode.** Unlock Curse Mode by purchasing **The Curse of the Black Bridge** from the Bookshop for 40 coins, then requesting and reading it through the Library. This makes the **Cursed Coffers** available at the Mount Holly Gift Shop for 13 coins. Purchase the Cursed Coffers, draft the **Shrine** as your Outer Room, and break open the chest with a Sledgehammer. After activating the curse, Curse Mode becomes available as a new-game option. In Curse Mode, you begin each day with only **13 steps**. Drafting certain room colors also removes resources, making exploration considerably more difficult. Focus on permanent upgrades that provide additional steps and resources. The **Nursery**, **Sleep Mask**, and Laboratory experiments are especially valuable. Continue making progress across multiple days until you can reach Room 46.
Tip
The Laboratory experiment that **sets your steps to 40** can make Curse Mode substantially easier. Unlock the Gem Cavern for extra starting gems, and avoid unnecessary backtracking. Keep your completed Curse Mode save until you've transferred its trophy data into your main save.
Video Guide: https://www.youtube.com/watch?v=qzbsV_PVBk0&list=PL-RCyS_hpkioBox-fsygCQFd6Nw4rZjWT&index=10&pp=iAQB

Reach Room 46 in Curse Mode.
Unlock Curse Mode by purchasing The Curse of the Black Bridge from the Bookshop for 40 coins, then requesting and reading it through the Library. This makes the Cursed Coffers available at the Mount Holly Gift Shop for 13 coins.
Purchase the Cursed Coffers, draft the Shrine as your Outer Room, and break open the chest with a Sledgehammer. After activating the curse, Curse Mode becomes available as a new-game option.
In Curse Mode, you begin each day with only 13 steps. Drafting certain room colors also removes resources, making exploration considerably more difficult.
Focus on permanent upgrades that provide additional steps and resources. The Nursery, Sleep Mask, and Laboratory experiments are especially valuable. Continue making progress across multiple days until you can reach Room 46.
The Laboratory experiment that sets your steps to 40 can make Curse Mode substantially easier. Unlock the Gem Cavern for extra starting gems, and avoid unnecessary backtracking.
Keep your completed Curse Mode save until you've transferred its trophy data into your main save.
Trophy: Dare Bird Trophy
Reach Room 46 in Dare Mode
Type: Gold
Category: Misc
How to Unlock
**Reach Room 46 in Dare Mode.** First, reach Room 46 in the main game to unlock the **Mount Holly Gift Shop**. Purchase the **Swim Bird Plushie for 110 coins** to make Dare Mode available when starting a new save. Dare Mode introduces one additional challenge on each of your first four days. You must receive all four Dares and obey their restrictions while working toward Room 46. These challenges can include limits on which rooms you draft, how often you enter rooms, or which resources you can carry. Breaking a Dare ends the current day and resets that day's progress. Once you've successfully followed the required Dares and reached Room 46, collect your trophy from the Entrance Hall the following morning.
Tip
Consider restarting if you receive a particularly restrictive combination of Dares. **Preserve your successful Dare Mode save** until you've imported its trophy data into your main save through Blackbridge Grotto.
Video Guide: https://www.youtube.com/watch?v=qsBYz4Bduis&list=PL-RCyS_hpkioBox-fsygCQFd6Nw4rZjWT&index=8&pp=iAQB

Trophy: Day One Trophy
Reach Room 46 in one day
Type: Gold
Category: Misc
How to Unlock
**Reach Room 46 on Day One of a new game.** Start a fresh save in Bequest Mode and reach Room 46 before ending your first in-game day. This is one of the hardest trophies because you cannot rely on permanent upgrades earned during previous days, and the mansion's randomized layout must provide the rooms and resources needed to complete your route. Your main objectives are to open an Antechamber door, reach both necessary sections of the Underground, activate the North Lever, and return to Room 46 with enough steps remaining. Prioritize the **Garage and Utility Closet** to access the West Gate, then use the Outer Room to find the **Tomb**. You'll also need a route into the Basement, such as the Foundation elevator, a powered Pump Room, or the Power Hammer.
Tip
The **Great Hall** and **Secret Garden** are useful options for opening the Antechamber. Save keys, gems, and steps for critical rooms rather than unnecessary exploration. Expect multiple attempts. Once successful, collect the trophy the following morning and **transfer its trophy data to your main save before deleting the new save**.
Video Guide: https://www.youtube.com/watch?v=0qBdDeR1yBk&list=PL-RCyS_hpkioBox-fsygCQFd6Nw4rZjWT&index=9&pp=iAQB0gcJCSsMAYcqIYzv

Trophy: Diploma Trophy
Ace the Classroom Final Exam
Type: Gold
Category: Misc
How to Unlock
**Earn an A on the Classroom Final Exam.** First, unlock the additional **Classroom** floorplan through the Drafting Studio. Then select the **Schoolhouse** as your Outer Room, which adds eight Classrooms to the drafting pool. You must draft all **nine Classrooms during a single day** to access the Final Exam in the ninth Classroom. Each Classroom costs one gem, so conserve resources and use room-reroll effects to improve your chances of finding all nine. The exam contains **46 questions** covering subjects taught throughout Mount Holly, including mathematics, history, geography, language, and art. Once the exam begins, you have **30 minutes of real time** to complete it. Use the following answer key to earn a perfect score: 1. C — Red 2. A — Oris 3. D — Orange 4. C — A Greenhouse in Corarica 5. A — Yellow 6. A — 0 7. D — 24 8. B — 11 9. B — 4 10. B — 1 11. B — 1 12. A — Carbon 13. B — Ne 14. C — Ll 15. C — Silver 16. C — Radon 17. B — 2 18. C — Morning Bay 19. A — 2 20. D — Corarica 21. A — Mountain-shaped Realm symbol 22. C — Fenn Aries 23. B — Mt. Holly, Reddington, Fenn Aries 24. B — Hay Bale and Mug of Ale 25. D — Jungle 26. C — Realize 27. B — I 28. B — General Teskin 29. D — Sixth Era 30. C — Twenty-Two Years 31. A — Grand City of Fenn 32. D — Nuance 33. C — Colossus Orinda 34. D — 36 35. D — 6 36. B — 21 37. B — 4 38. A — 14 39. D — 200 40. C — Hew 41. B — New Gate 42. B — My tree is not very old 43. B — Ulraajoram 44. D — Le 45. C — Ajinn Ett Ovtrei Issja Treivo 46. D — 8 After passing, collect the trophy from the Entrance Hall the following morning.
Tip
The **Ornate Compass** lets you rotate compatible room floorplans and can make placing nine Classrooms considerably easier. Save Ivory Dice and other rerolls for this attempt. The exam timer begins when you start the test, not when you enter the ninth Classroom. Prepare your answers beforehand, since submitted answers cannot be changed.
Video Guide: https://www.youtube.com/watch?v=_YjPX1bMBZc&list=PL-RCyS_hpkioBox-fsygCQFd6Nw4rZjWT&index=7&pp=iAQB

Trophy: Full House Trophy
Draft a room in each open slot of your house.
Type: Silver
Category: Misc
How to Unlock
**Draft a room into every available slot of the Mount Holly floorplan during a single day.** The mansion has 45 main floorplan positions, but the Entrance Hall and Antechamber are fixed, leaving **43 slots to fill**. You do not need to reach Room 46 or enter the Antechamber to complete this challenge. Prioritize rooms with multiple exits, especially T-shaped rooms and four-door rooms. Keep pathways open across the mansion and avoid placing Dead End rooms where they could block access to unfinished sections. Once you fill the final available slot, the trophy appears in that room.
Tip
Use **Ivory Dice** and other room-reroll effects to avoid unwanted Dead Ends. Place single-exit rooms along the outer edges or in slots where you no longer need additional connections.
Video Guide: https://www.youtube.com/watch?v=EoWf7FcPql8&list=PL-RCyS_hpkioBox-fsygCQFd6Nw4rZjWT&index=2&pp=iAQB

Trophy: Trophy 8
Solve the enigma of Room 8 on Rank 8
Type: Silver
Category: Misc
How to Unlock
**Solve the mystery of Room 8 on Rank 8.** First, draft the **Gallery** and solve its four picture puzzles. The correct answers are **PONDER, REALIZE, RUMINATE, and THINK**. Completing these puzzles rewards you with **Key 8**. Next, find a locked door leading into a room slot on Rank 8 and use Key 8 to access Room 8. Inside, you'll find eight animal figures and eight bins labeled with different sins. Place each animal in its corresponding bin to reveal the trophy. The correct placements are: - Penguin — Gluttony - Monkey — Hubris - Dog — Mundanity - Bear — Sloth - Lion — Envy - Swan — Lust - Rabbit — Avarice - Elephant — Wrath
Tip
Key 8 must be used on a door leading **into Rank 8**, not simply on any locked door. The animal puzzle allows you to reposition figures without penalty, so incorrect placements won't ruin your attempt.
Video Guide: https://www.youtube.com/watch?v=EoWf7FcPql8&list=PL-RCyS_hpkioBox-fsygCQFd6Nw4rZjWT&index=2&pp=iAQB

Trophy: Trophy of Drafting
Win the Drafting Strategy Sweepstakes
Type: Silver
Category: Misc
How to Unlock
**Win the Drafting Strategy Sweepstakes** by drafting at least 20 Dead End rooms during a single day. The contest is described in *Drafting Strategy, Volume 5*, available through the Bookshop. Your objective is to exceed the existing record of 19 Dead Ends before ending the day. Plan your floorplan carefully. Build connecting pathways through the second and fourth columns, then place Dead End rooms in the first, third, and fifth columns. This allows you to accumulate Dead Ends without cutting off your remaining drafting opportunities. Certain rooms provide extra progress. The **Bunk Room counts as two Dead Ends**, while the Outer Room also counts toward the total. After successfully drafting 20 or more Dead Ends, end the day and visit the **Mail Room on a subsequent day** to collect your trophy and a 200-coin reward.
Tip
Save Ivory Dice and other room-reroll options for this challenge. The **Inkwell** constellation, unlocked through Observatory progress, is especially useful because it allows you to spend accumulated stars to reroll room choices.
Video Guide: https://www.youtube.com/watch?v=E-AbXVhtfb0&list=PL-RCyS_hpkioBox-fsygCQFd6Nw4rZjWT&index=5&pp=iAQB

Trophy: Trophy of Speed
Reach Room 46 in under an hour
Type: Gold
Category: Misc
How to Unlock
**Reach Room 46 within 60 minutes of real time on a new save.** Start a fresh game and reach Room 46 before the total elapsed time exceeds one hour. Unlike Day One Trophy, this challenge does not require completion during the first in-game day. You can use multiple days as long as the entire attempt stays within the time limit. The easiest approach is to combine this with **Day One Trophy**, since both require a fresh start and efficient progress toward Room 46. However, completing them together is optional. Move quickly through familiar rooms, skip unnecessary puzzles, and prioritize shortcuts to the Antechamber and Underground. Avoid spending too much time planning room choices.
Tip
**Hold L2 to sprint** and reduce travel time, particularly when navigating the Underground. If your Day One attempt takes longer than an hour, pursue this trophy separately. Remember to collect the trophy the following morning and preserve the save until its trophy data has been transferred.

Trophy: Trophy of Wealth
Buy Out the entire Showroom
Type: Silver
Category: Misc
How to Unlock
**Purchase every item in the Showroom and buy the trophy itself during a single day.** The Showroom is a special shop that displays four expensive items selected from a pool of six. You must purchase all four available items to reveal **Trophy of Wealth**, which costs an additional **100 coins**. Depending on the items offered, you'll need approximately **230–320 coins** to complete the purchase. This total must be available during the same day; buying items across separate visits does not count. One of the best strategies is to complete **Trophy of Drafting** first. Its reward includes 200 coins, which can be collected from the Mail Room on a later day. Combine that reward with your allowance, money-generating rooms, or savings preserved through the Freezer.
Tip
Try to draft the **Mail Room and Showroom on the same day** so you can immediately spend the 200-coin contest reward. Don't collect the reward on a day when the Showroom isn't available unless you have another way to preserve your money.

Trophy: Inheritance Trophy
Reach Room 46
Type: Silver
Category: Story
How to Unlock
**Reach Room 46 for the first time.** Your main objective in Blue Prince is to locate the hidden Room 46 at Mount Holly. To reach it, you must open a route into the **Antechamber**, located at the center of Rank 9, and unlock the sealed northern doorway. Several rooms contain mechanisms for opening the Antechamber's entrances, including the **Great Hall**, **Secret Garden**, and **Greenhouse**. You'll also need to explore the Underground, access the Inner Sanctum, and activate the mechanism that opens Room 46. These objectives may take multiple days because room availability and resources change with each new layout. Once you enter Room 46, complete the ending sequence and collect your trophy the following morning.
Tip
Focus on permanent shortcuts, particularly the **Foundation elevator**, Underground access routes, and additional Antechamber levers. These improvements make future visits to Room 46 considerably easier and are especially valuable for the Day One and Speed trophies.
Video Guide: https://www.youtube.com/watch?v=w3mVZx2hcOA&list=PL-RCyS_hpkioBox-fsygCQFd6Nw4rZjWT&index=1&pp=iAQB

Begin your journey through Mount Holly by learning how to draft rooms, manage your steps, and conserve keys, gems, and coins. The mansion's layout changes every day, so focus on understanding room connections rather than forcing your way toward the top floor. Explore thoroughly, inspect unusual objects, read books and letters, and keep notes on puzzles that may take several days to solve. Your first major objective is reaching Room 46 to earn the Inheritance Trophy.
Prioritize permanent upgrades that make future days easier. Opening the West Gate gives you access to Outer Rooms, unlocking the Apple Orchard provides additional starting steps, and discovering the Gem Cavern supplies extra gems each morning. The Foundation, Underground passages, and tools created in the Workshop can also open valuable routes through the estate. These improvements remain useful long after your first successful visit to Room 46.
Start making progress toward Bullseye Trophy and A Logical Trophy whenever you encounter the Billiard Room or Parlor, since both require 40 successful puzzles. You can also work toward Full House Trophy by filling every available room slot in the mansion. No trophies are permanently missable, so enjoy uncovering the mysteries at your own pace. Mount Holly has plenty of secrets, and it certainly isn't in a hurry to share them.
After reaching Room 46, continue exploring your original save file rather than immediately starting over. Additional rooms and opportunities become available, allowing you to work toward Explorer's Trophy, which requires drafting and entering all 110 rooms in the Mount Holly Directory. Visit the Drafting Studio to unlock its eight additional floorplans, search for the eight hidden floorplans, and pay attention to rooms that require special conditions before they can appear.
Use this stage to complete the mansion's larger challenges. Trophy of Invention requires crafting all eight Workshop contraptions, while Trophy of Drafting requires placing 20 Dead End rooms in a single day and collecting the resulting trophy from the Mail Room. You'll also need to solve the mystery of Room 8 for Trophy 8 and purchase the entire Showroom inventory, followed by its trophy, for Trophy of Wealth. Save up money and take advantage of permanent upgrades to make these objectives more manageable.
Continue investigating the Underground and the estate's history to unlock all eight Realm Sigils for Trophy of Sigils. You should also prepare for Diploma Trophy, which requires drafting nine Classrooms in one day and earning an A on a timed 46-question final exam. Some of these challenges involve substantial puzzle spoilers, so consider completing as much as possible through natural exploration before consulting individual trophy solutions.
Once you've made substantial progress on your main save, prepare for the trophies that require fresh game files. Day One Trophy requires reaching Room 46 on the very first in-game day, making it one of the Platinum's most unpredictable challenges. Familiarity with the mansion's room layouts, Underground routes, Antechamber levers, and resource management will be essential. Random room generation can make this take many attempts, even when you understand exactly what needs to be done.
You must also earn Trophy of Speed by reaching Room 46 within one hour of real time on a new save. This can be combined with Day One Trophy, but it does not have to be completed on the first day. If your Day One attempt takes longer than an hour, you can pursue the speed requirement separately across multiple in-game days, provided the total elapsed time stays under 60 minutes.
Next, complete the two additional game modes. Dare Bird Trophy requires unlocking Dare Mode and reaching Room 46 while obeying its daily challenges. Cursed Trophy requires unlocking Curse Mode and reaching Room 46 while dealing with severely restricted starting steps and additional resource penalties. Both modes demand careful planning, but permanent upgrades can still make progress easier. Keep your original save file intact throughout these attempts.
Return to your original save to finish any remaining cumulative objectives, including the 40 Parlor wins, 40 Dartboard solutions, undiscovered rooms, unfinished contraptions, and missing Realm Sigils. Check the Room Directory and the Library's records to track your progress. Remember that Blue Prince trophies often appear as physical objects inside the mansion, sometimes the following morning or in a specific room. Completing an objective is not always enough; you must also collect its in-game trophy.
Important: Do not delete your original save or successful secondary saves before transferring their trophy data. To complete Trophy of Trophies, all 15 preceding non-Platinum, non-final trophies must be recorded on the same in-game checklist. Use the Data Transfer function at Blackbridge Grotto to import trophies earned on separate save files into your main save. Verify that the Entrance Hall checklist reflects your progress before clearing any secondary save.
Once all 15 required trophies are registered, draft the rare Trophy Room and collect Trophy of Trophies to unlock the Case Closed Platinum. The Platinum is entirely offline, but its completion time depends heavily on randomized room draws, particularly during Day One attempts. Expect many daily runs rather than a fixed number of playthroughs. If you're stuck on a specific puzzle, room requirement, or route, use Ask Gami for targeted help without spoiling the rest of the mansion.
Completion Video Playlist
1 video
*NO Spoiler* strategies for EVERY Trophy 🏆 (100% Achievement Blue Prince Guide)