


Trophy Guide Preview
Overall Trophy Progress
0 / 36 Completed
0%
Trophy Types
Platinum
0 / 1Gold
0 / 4Silver
0 / 14Bronze
0 / 17Categories
Missable
0 / 2Collectible
0 / 2Grind
0 / 6Combat
0 / 4Misc
0 / 14Story
0 / 7

Crash onto Kairos as a Vault Hunter and battle through a vast world packed with outrageous weapons, dangerous enemies, quests, and loot. Master powerful Action Skills, create deadly builds, and use new movement abilities as you fight to overthrow the Timekeeper.
Overall Trophy Progress
0 / 36 Completed
0%
Platinum Path
EARLY GAME Start by playing through the story on any difficulty with whichever Vault Hunter sounds the most fun. There is no reason to turn the opening hours into a spreadsheet with guns. Explore as you go, clear the fog from the map, and complete side missions whenever you run into them. There are 98 side missions required for the Platinum, and doing a healthy chunk during the story will also keep your level moving...
Completion Video Playlist
1 video
Borderlands 4 - 100% Walkthrough (Hard Mode, No Commentary, All Achievements, FULL GAME) | Part [1]
Trophy: Aw Man, Now We Have to Make BL5
Earn all trophies.
Type: Platinum
Unlock Details
Earn all trophies.
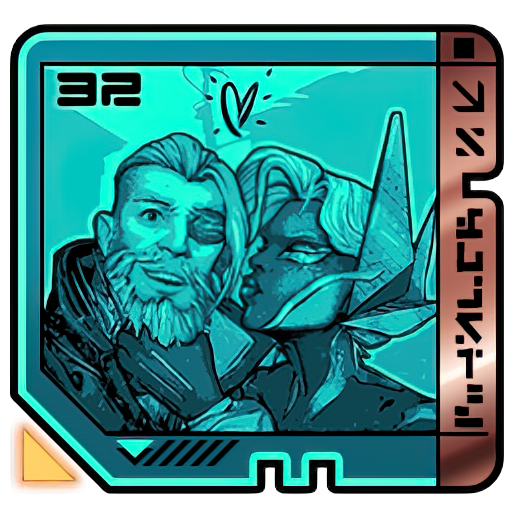
Trophy: All Things Vend
Deliver the contents of the Legendary Vending Machine.
Type: Bronze
Category: Missable
Unlock Details
Earn the secret alternative ending during Side Mission: Vend of the Line. This can only be done during the objective “Defeat whatever that is,” so follow the steps carefully. Defeat the legendary vending machine boss, Vend Zane, at the end of the mission. Do not buy anything from the machine yet. Check the floor where Vend Zane was originally standing. On a wooden board you will see the code showing 3 green crossed-out dollar signs followed by 1 orange dollar sign. After Zane finishes speaking, interact with Vend Zane once it turns into a vending machine. Sell 3 green-rarity items in a row. Then buy 1 legendary item. The vending machine will explode and drop the item “Picture of Zane and Levaine.” Pick up the picture. Follow the new objective to find Zane, usually at Moxxi’s Bottoms Up in Carcadia Burn > Ruined Sumplands. Give Zane the picture and finish the mission. The trophy unlocks when the mission ends with this secret outcome.
Tip
Before touching that vending machine, make sure you already have 3 green items ready to sell. This is not the time to discover your inventory is full of purples, oranges, and regret.
Warning
This trophy is missable. If you buy the legendary item before selling 3 green items, sell the wrong rarity, or do the steps in the wrong order, the picture will not drop. This mission cannot be replayed normally through the mission menu. If you miss it, finish the story and start a Level 30 character through Title Screen > New Game > Ultimate Vault Hunter. The side content will be available again, letting you replay Vend of the Line. You can also join a friend who has not completed the mission yet.
Video Guide: https://www.youtube.com/watch?v=gB44qdI_rao&list=PLRr5L69yg_kG5TCOT870RJrJYuO6sOHzR&index=4
Trophy: Rift Incompatible
Find Oddman's final resting place.
Type: Bronze
Category: Missable
Unlock Details
Complete Side Mission: Exit Through the Rift Shop and make the correct choice with Francis Oddman. At the end of the mission, you can either Punch or Shoot Oddman. Choose Punch. This sends him falling through the rift and is required for the trophy. After the mission is complete, travel to Terminus Range > Windspear. Near a Dead Bolt collectible, you can find Oddman frozen in the ice. Approach his final resting place and the trophy will unlock.
Tip
When the game gives you the choice, remember: this is one of the rare situations where punching someone is actually the responsible trophy-hunting decision.
Warning
This trophy is missable. If you shoot Oddman instead of punching him, the trophy will not unlock, even though his frozen body can still appear later. If you miss it, finish the story and start a Level 30 character through Title Screen > New Game > Ultimate Vault Hunter. The side content will be available again so you can replay the mission. You can also join a friend who chose to punch Oddman.
Video Guide: https://www.youtube.com/watch?v=OcayAygQXO0&list=PLRr5L69yg_kG5TCOT870RJrJYuO6sOHzR&index=2
Trophy: Guac is Extra
Find Dave the Burrito.
Type: Bronze
Category: Collectible
Unlock Details
Find Dave the Burrito by locating and destroying all 15 hidden Burritos in Dominion City, then visiting Dave’s room in Upper Dominion. None of the Burritos are missable, and you can collect them after the story in free roam. There is no in-game tracker for them, so it is best to work through the list carefully. Carcadia District: Burrito #1 — Near an ECHO Log behind a bench. Climb the wall at the northern edge of Carcadia District, enter the building, and follow the corridor toward the ECHO Log. Burrito #2 — On the front roof of Mosmellow Retreat, sitting on a piece of metal hanging from the wall. Burrito #3 — On top of a Kratch nest in the yellow acidic water area, inside a green hive. Burrito #4 — On the northeast side of the house in the acidic water, on a small balcony with boxes. Burrito #5 — Between a Propaganda Speaker and ECHO Log, hidden behind a stall with a green light where two NPCs are arguing. Terminus District: Burrito #6 — Fast travel to Food Court, climb the yellow ledge above the station, and check the right counter inside Whimsy Willies. Burrito #7 — Inside the large building near the “Keep Out” exit, in the blue-lit resting area. Check the toilet behind the mattresses. Burrito #8 — Inside the “24h Get the Funk Out” laundromat, behind the counter near a washing machine. Burrito #9 — From Frantic Scrawl, head east up the stairs into the tunnel, take the first left, then the next right. It is on the top shelf in the food shop. Burrito #10 — Southwest of Frantic Scrawl at the Mr. Cucur Bils market stall. Look under the western pumpkin shelf near the largest pumpkin. Fades District: Burrito #11 — From Zadra’s Lab, head forward and check behind the staircase near the Vault Hunter’s Guide to Kairos collectible. It sits on a green box. Burrito #12 — At the entrance to a Ripper camp in the swamp, in the raised hand of the corpse hanging above the entrance. Burrito #13 — North of the swamp near an ECHO Log. Check under the wooden pallet leaning against the small poison-ivy-covered storage shack. Burrito #14 — Near an ECHO Log, hidden inside the raised flower bed under the foliage. Burrito #15 — On the roof of the building with the swimming pool, behind the boombox on a pallet. After destroying all 15 Burritos, travel to Upper Dominion, which becomes accessible during Main Mission 20: The Timekeeper’s Order. Mark the Vault Symbol collectible in the north of Upper Dominion and follow the location path. Glide through the small waterfall, then take the path opposite the Vault Symbol to find the golden Dave the Burrito. Approach Dave and the trophy will unlock.
Tip
Because there is no tracker, follow the list in order and do not rely on memory. Fifteen hidden burritos sounds ridiculous, but forgetting whether you shot Burrito #7 or Burrito #11 is how a silly collectible hunt becomes a full-blown tortilla investigation.
Video Guide: https://www.youtube.com/watch?v=E8pT5_LWgl4
Trophy: The Lookbook is the Cookbook
Collect 60 Cosmetics.
Type: Bronze
Category: Collectible
Unlock Details
Collect any 60 cosmetics. You should earn well over 60 naturally while completing the 25 main missions and 98 side missions required for other trophies, so there is no need to go hunting for every cosmetic in the game. After completing missions or challenges, open Inventory > Equipment and press Triangle to view your reward packages. Make sure to open these packages, since many contain cosmetics that count toward the trophy. There are 189 cosmetics available in total: 54 Vault Hunter cosmetics — 15 Heads, 1 Body, and 38 Styles. 54 ECHO-4 cosmetics — 13 Attachments, 3 Frames, and 38 Styles. 47 Vehicle cosmetics — 47 Paintjobs. 34 Weapon cosmetics — 34 Styles. You can check the cosmetics you have collected from the Customization Menu.
Tip
You only need 60 out of 189, so do not turn this into a fashion-themed collectible marathon. Keep opening your mission and challenge reward packages as you play and this should take care of itself. The real endgame may be looking fabulous, but thankfully the trophy has much lower standards.
Trophy: Catch-A-Ride
Collect 10 personal vehicles.
Type: Silver
Category: Grind
Unlock Details
Collect all personal vehicles. There are 10 required for the trophy, and you can check your collection under Touchpad > Customization > Vehicle > Vehicle Select. The first 6 vehicles come from story progression: Digirunner — complete Main Mission 3: Down and Outbound. Driftblade — complete Main Mission 6: Rush the Gate. Punchy Whoopster — complete Main Mission 10: Her Flaming Vision. Carapacer — complete Main Mission 14: His Vile Sanctum. Fang Glider — complete Main Mission 16: Another Day, Another Universe. Sprintcraft — complete Main Mission 20: The Timekeeper’s Order. The remaining 4 come from reaching Level 50 with each character class: Skimmer — complete “An Unseen Braid” by reaching Level 50 as Siren (Vex). Rockslider — complete “Knight Errant” by reaching Level 50 as Forgeknight (Amon). Gyrosled — complete “Form and Function” by reaching Level 50 as Gravitar (Harlowe). Pulsor — complete “YOLT” by reaching Level 50 as Exo-Soldier (Rafa). You can track these under Missions > Challenges > Character. The Level 50 reward uses the red vehicle icon, so do not confuse it with vehicle cosmetics, which use a red paintbrush icon. After finishing the story once, you can start your other characters directly at Level 30 by going to Title Screen > New Game > Ultimate Vault Hunter (Level 30). That means you only need to level them from 30 to 50 instead of starting from scratch. The vehicle unlocks are stored on your overall profile save, so once a vehicle is unlocked on one character, it becomes available across your other characters and saves.
Tip
You can reduce the grind with some planning. Your main character should naturally hit Level 50 while completing the 25 main missions and 98 side missions. Use a second Level 30 character for the 80 Contracts required for “Freelance, but Not for Free,” which should take them close to or all the way to Level 50. For the final two characters, replay Primordial Vaults for fast XP. The free “How Rush Saved Mercenary Day” DLC also adds an extra vehicle that counts toward the 10 required for this trophy. Completing its single mission and claiming the vehicle from your inventory rewards can let you skip one of the base-game vehicles.
Warning
This is one of those trophies that looks rude until you realize the game lets your backup Vault Hunters start at Level 30. Still a grind, yes. But at least Borderlands 4 is only asking you to climb the mountain from halfway up.
Trophy: Freelance, but Not For Free
Complete 80 contracts.
Type: Bronze
Category: Grind
Unlock Details
Complete 80 Contracts. Contracts are accepted from Contract Boards found at Safehouses and in the Faction Towns of The Launchpad, Carcadia, and Belton’s Bore. Contracts are short mini-quests with one main objective. They include: Bounties — kill a specific enemy. Collect — kill certain enemy types and gather their items. Acquire — retrieve a specific object. Trace — locate a specific item inside a search area. Patrol — defeat a group of enemies. You can only have 5 Contracts active at once, so try to accept ones that are close together and complete them in batches. All active Contracts can be tracked, and their objectives will appear on the map. For the most efficient Platinum route, consider doing the 80 Contracts on a second character. After finishing the story once, you can start another character at Level 30 in Ultimate Vault Hunter Mode with the story already completed. Farming 80 Contracts should help take that character from Level 30 to Level 50, which also moves you toward the personal vehicle requirement for that class. The downside is that the new character’s map will be fogged again, and you will need to reclaim Safehouses to access their Contract Boards.
Tip
Pair this trophy with leveling your second character to 50. Eighty Contracts is a chunky grind, so you may as well make it do double duty instead of letting Borderlands charge you twice for the same suffering.
Video Guide: https://www.youtube.com/watch?v=7EOtkREAFx8
Trophy: Gear Five!
Reach Ultimate Vault Hunter level 5.
Type: Gold
Category: Grind
Unlock Details
Reach Ultimate Vault Hunter Level 5. You must first finish the story to unlock Ultimate Vault Hunter Mode, which becomes available after Main Mission 25 – Ultimate Vault Hunter: Wildcard Missions. After the story, you can turn Ultimate Vault Hunter Mode on or off under Pause Menu > Session Setting > Ultimate Vault Hunter Level. To increase your UVH Rank, go to Missions > Challenges > Ultimate Vault Hunter and complete the required boss challenges for each rank. Once the required bosses are defeated, a guaranteed Wildcard Mission will appear. Complete that Wildcard Mission to advance to the next UVH level. UVH 1: Kill Bramblesong in UVH 1 — Abandoned Auger Mine, Stoneblood Forest, Terminus Range. Kill Bio Armored Omega Thresher in UVH 1 — Fades District, Dominion. This requires previously completing the side missions “One Gassy Issue” and “One Slimy Issue.” Kill Bio-Bulkhead in UVH 1 — Synthetic Nave, Dissected Plateau, Fadefields. Kill Sydney Pointylegs in UVH 1 — Ripper Drill Site, Hungering Plain, Fadefields. Complete Lilith’s “Rush The Gate” Wildcard Mission to unlock UVH 2. It appears at Moxxi’s Bottoms Up after the four bosses are defeated. UVH 2: Kill Shadowpelt in UVH 2 — Abandoned Auger Mine, Cuspid Climb, Terminus Range. Kill Core Observer in UVH 2 — Order Bunker, The Howl, Fadefields. Kill Rocken Roller in UVH 2 — Abandoned Auger Mine, Ruined Sumplands, Carcadia Burn. Kill Frank the Furnace in UVH 2 — Ripper Drill Site, Idolator’s Noose, Fadefields. Complete Lilith’s “His Vile Sanctum” Wildcard Mission to unlock UVH 3. UVH 3: Kill Battle Wagon in UVH 3 — Ripper Drill Site, Stoneblood Forest, Terminus Range. Kill Mimicron in UVH 3 — Order Bunker, Idolator’s Noose, Fadefields. Kill the Immortal Boneface in UVH 3 — Ripper Drill Site, Cuspid Climb, Terminus Range. Kill Skull Orchid in UVH 3 — Abandoned Auger Mine, Grindstone of the Worthy, Carcadia Burn. Complete Lilith’s “Her Flaming Vision” Wildcard Mission to unlock UVH 4. UVH 4: Complete Lilith’s “Primordial Vault: Fadefields” Wildcard Mission. You must have previously completed the Fadefields Primordial Vault. Complete Lilith’s “Primordial Vault: Terminus Range” Wildcard Mission. You must have previously completed the Terminus Range Primordial Vault. Complete Lilith’s “Primordial Vault: Carcadia Burn” Wildcard Mission. You must have previously completed the Carcadia Burn Primordial Vault. Complete Lilith’s “The Timekeeper’s Order” Wildcard Mission to reach UVH 5 and unlock the trophy.
Tip
Previously defeated activity bosses can be replayed using Moxxi’s Big Encore machine at their boss locations. The required Wildcard Missions are guaranteed to appear after completing the necessary challenges, so you do not need to wait around for random weekly Wildcards. Ultimate Vault Hunter Mode makes enemies tougher but also increases Cash, Eridium, XP, and loot quality. Take it one rank at a time — this looks like a small novel when written out, but in practice it is just a series of boss fights followed by Wildcard Missions. Shoot boss, grab loot, repeat. Very Borderlands.
Trophy: Grassroots Campaigner
Complete all side missions.
Type: Silver
Category: Grind
Unlock Details
Complete all 98 side missions in the base game. DLC missions do not count toward this trophy. You can complete the side missions as you encounter them during the story, then clean up anything you missed afterward in free roam. Since several other trophies are tied to specific faction and character questlines, working through side missions regularly will also move a lot of the Platinum forward at the same time.
Tip
Do not leave all 98 for the end unless you enjoy turning your trophy cleanup into a second campaign. Chip away at them as you explore and the final cleanup will feel much less brutal.
Video Guide: https://www.youtube.com/watch?v=m1hGjqCGyog
Trophy: I Earned This
Equip legendary gear in every slot.
Type: Silver
Category: Grind
Unlock Details
Equip legendary gear in all 9 equipment slots at the same time. Legendary gear is orange and is the rarest equipment tier, although it becomes much more common once you reach Level 50 and push into the endgame. The 9 required slots are: 4 Weapon Slots 1 Repkit 1 Ordnance 1 Class Mod 1 Shield 1 Enhancement You will likely find most of these naturally while completing the 98 side missions, 80 Contracts, and other endgame content. The tricky part is getting a legendary for every slot, especially Class Mods and Enhancements, which begin dropping more frequently after Level 25. Whenever you find a legendary you might need later, keep it in your inventory or send it to your Bank. You can access the Bank in faction towns, including The Launchpad in The Howl, The Fadefields. After reaching Level 50, good ways to farm legendary gear include: Progressing to Ultimate Vault Hunter Level 5, where better loot becomes more common. Checking vending machines for legendary “Item of the Day” offers. Their inventories refresh every 30 minutes. Completing the weekly Wildcard Mission and checking Maurice’s Bounty machine after the story. Replaying Primordial Vaults, which throw plenty of enemies at you and give repeated chances at legendary drops. If you have a friend with the pieces you are missing, they can also drop legendary gear for you to equip.
Tip
Do not sell every orange item just because the stats are worse than what you are currently using. For this trophy, an ugly legendary Repkit you hate is still a beautiful little piece of progress.
Warning
You need legendary gear in all 9 slots at once. Four legendary weapons alone will not do it, no matter how aggressively you stare at the trophy list.
Unlock Details
Equip legendary gear in all 9 equipment slots at the same time. Legendary gear is orange and is the rarest equipment tier, although it becomes much more common once you reach Level 50 and push into the endgame.
The 9 required slots are:
4 Weapon Slots
1 Repkit
1 Ordnance
1 Class Mod
1 Shield
1 Enhancement
You will likely find most of these naturally while completing the 98 side missions, 80 Contracts, and other endgame content. The tricky part is getting a legendary for every slot, especially Class Mods and Enhancements, which begin dropping more frequently after Level 25.
Whenever you find a legendary you might need later, keep it in your inventory or send it to your Bank. You can access the Bank in faction towns, including The Launchpad in The Howl, The Fadefields.
After reaching Level 50, good ways to farm legendary gear include:
Progressing to Ultimate Vault Hunter Level 5, where better loot becomes more common.
Checking vending machines for legendary “Item of the Day” offers. Their inventories refresh every 30 minutes.
Completing the weekly Wildcard Mission and checking Maurice’s Bounty machine after the story.
Replaying Primordial Vaults, which throw plenty of enemies at you and give repeated chances at legendary drops.
If you have a friend with the pieces you are missing, they can also drop legendary gear for you to equip.
Tip
Do not sell every orange item just because the stats are worse than what you are currently using. For this trophy, an ugly legendary Repkit you hate is still a beautiful little piece of progress.
Warning
You need legendary gear in all 9 slots at once. Four legendary weapons alone will not do it, no matter how aggressively you stare at the trophy list.
Trophy: Master of Death and Dance
Reach player level 50.
Type: Gold
Category: Grind
Unlock Details
Reach player level 50 with any character. You should get there naturally while completing the 25 main story missions and all 98 side missions required for other trophies, so there is usually no need to stop and grind XP just for this. If you somehow finish all of that and are still short of level 50, pick up available Contracts and combine ones that are close together, work through the Ultimate Vault Hunter Challenges, or replay Primordial Vaults for fast XP.
Tip
Do not waste time farming levels early. There is a lot of required content ahead of you, and Borderlands 4 is already more than happy to throw enough enemies at your face. Let the XP come naturally, then clean up the last few levels only if needed.
Trophy: Area of Expertise
Complete any gear challenge category.
Type: Bronze
Category: Combat
Unlock Details
Complete every challenge in any one Gear Challenge category. You can track these under Touchpad > Missions > Challenges. There are 9 Gear Challenge categories: Pistol Submachine Gun Assault Rifle Shotgun Sniper Rifle Grenade Shield Heavy Weapon Repkits Pick a category you naturally use a lot and work on its challenges as you play. Assault Rifles are a solid choice because they are useful in most situations and their challenges are generally easier to work into normal combat. If you reach the endgame without finishing a category, check which one is closest to completion and focus on that instead of starting over with something new. You can buy specific weapon types from vending machines if you need help filling a gap.
Tip
Primordial Vaults are a great place to clean up remaining Gear Challenges because they have plenty of enemies and can be replayed. If you are already close on one category, this is where you can finish the job without turning the rest of Kairos into your personal firing range.
Trophy: Brand Equity
Complete any manufacturer challenge category.
Type: Bronze
Category: Combat
Unlock Details
Complete every challenge in any one Manufacturer Challenge category. You can track these under Touchpad > Missions > Challenges. There are 8 weapon manufacturers: Jakobs Daedalus Vladof Maliwan Tediore Torgue Ripper Order Whenever you pick up a weapon, its manufacturer is shown on the item. The easiest way to make steady progress is to stick with weapons from one manufacturer for a good portion of the game instead of constantly swapping brands. Jakobs is a strong option because its kinetic weapons are straightforward to use and its challenges are generally easier than some of the others. If you prefer another manufacturer, that is perfectly fine too — pick the one that fits your playstyle and keep using it until the category is complete. If you reach the endgame without finishing one, check which manufacturer category is closest and focus on that. You can also buy weapons from specific manufacturers at vending machines if you need the right tool for the remaining challenges.
Tip
Try to stay loyal to one brand early. Borderlands already gives you approximately nine million guns to choose from, so giving yourself one small rule now can save you a very annoying grind later.
Video Guide: https://www.youtube.com/watch?v=QSjA5aneVz8
Trophy: Nothing Left to Guard
Defeat all Guardians in Primordial Vaults.
Type: Gold
Category: Combat
Unlock Details
Defeat the Guardian boss at the end of all 3 Primordial Vaults. There is one Primordial Vault in each of these regions: The Fadefields Carcadia Burn Terminus Range Dominion City does not have a Primordial Vault. To unlock each Vault, collect all 3 Vault Fragments in that region to obtain the Vault Key. Once you have the key, the Primordial Vault icon appears on the map. Travel there, insert the key into the pillar, and enter the purple portal. Inside each Vault, accept the side quest and use the yellow ramp to enter the arena. You will fight through 3 combat arenas filled with enemies, followed by the Vault Guardian boss in the 4th arena. Defeat the Guardian in all 3 Primordial Vaults to unlock the trophy. Each Vault takes around 20 minutes and scales to your level.
Tip
You can lower the difficulty to Easy under Pause Menu > Session Settings if you just want to get these done efficiently. The Vaults are also great for farming XP and challenge kills later, so you may end up becoming very familiar with them. Consider the Guardians your new coworkers.
Video Guide: https://www.youtube.com/watch?v=M_1LXkg0ODQ
Trophy: Pop Out
Defeat a world boss.
Type: Silver
Category: Combat
Unlock Details
Defeat any World Boss found inside one of the large white bubbles that can randomly appear in the open world. When you enter a white bubble, a powerful boss will spawn. Stay inside the bubble and defeat the boss to unlock the trophy. These bubbles are random, but they are more common than the rare World Events. You should encounter plenty while completing the story and side missions, especially in The Fadefields and Terminus Range.
Tip
If you see a white bubble, drop what you are doing and take the fight. You do not want to ignore one and then spend the next hour roaming Kairos asking the game where all the giant murder bubbles went.
Warning
Do not leave the white bubble or die during the fight. If you step outside the area, the bubble disappears and the boss is gone. In co-op, if any player fully bleeds out, the boss will also disappear.
Trophy: Arena Grande
Complete the Goredello world event.
Type: Bronze
Category: Misc
Unlock Details
Complete the Goredello World Event. Goredello is one of 3 rare random World Events, so the annoying part is getting it to appear in the first place. When it spawns, you can find it in Terminus Range > Cuspid Climb > Goredello. It appears as a named blue pinhead icon on the map. Make sure you are zoomed in enough to see side mission icons, because World Events will not appear when the map is fully zoomed out. Once you enter the event, step into the fighting ring and complete 3 rounds. Each round gives you a limited amount of time to defeat as many enemies as possible. You do not need the highest reward tier. Simply finish the event and the trophy will unlock. Tip: Check the map regularly while exploring Terminus Range, especially Cuspid Climb. The game does not notify you when the event appears, and it disappears after a short time, so if you see Goredello pop up, drop what you are doing and go handle it.
Tip
Do not stress about performance once you are inside. You are not auditioning for the Borderlands Olympics. Survive the rounds, finish the event, take the trophy, and enjoy the rare moment where “good enough” is actually good enough.
Video Guide: https://www.youtube.com/watch?v=XVIWf2rLvko
Trophy: Churn the Burn
Discover all map locations in Carcadia Burn.
Type: Silver
Category: Misc
Unlock Details
Discover every map location in Carcadia Burn. Travel through the region, clear the fog, and visit every marked area until all locations are discovered. Some areas may require story or side mission progress before you can reach them, so finish major content first and then clean up whatever is left.
Tip
Treat this like a late-game map sweep rather than a mission you need to force early. Future you will thank you when most of the map is already filled in.
Video Guide: https://www.youtube.com/watch?v=BuU-kbMCiaE
Trophy: Cut That Out
Find the cutout of Dr. Patricia Tannis.
Type: Bronze
Category: Misc
Unlock Details
Find the Dr. Patricia Tannis cutout in The Fadefields > The Howl. Head to the southwest corner of The Howl near the border with Coastal Bonescape. At the edge of the map by the water, look for a small gazebo surrounded by colored barrels. Shoot the barrels in this exact order: Green Light Blue Red Dark Blue Yellow After hitting them in the correct sequence, the Dr. Patricia Tannis cutout will rise out of the ocean and the trophy will unlock.
Tip
If nothing happens, double-check the barrel order before unloading an entire magazine into the scenery. Borderlands loves chaos, but this little puzzle apparently wants manners.
Video Guide: https://www.youtube.com/watch?v=G78e-x7aU3c&list=PLRr5L69yg_kG5TCOT870RJrJYuO6sOHzR
Trophy: Glucose Guardian
Tip Moxxi.
Type: Bronze
Category: Misc
Unlock Details
Tip Moxxi at her bar in Carcadia Burn > Ruined Sumplands > Moxxi’s Bottoms Up! You will automatically visit the bar at the end of Main Mission 7: Wrath of the Ripper Queen, and you can return at any time afterward using the fast travel point. At the front counter, interact with the tip jar and choose either the small $100 tip or the large $1000 tip. Either option will unlock the trophy.
Tip
Save yourself $900 and use the $100 option. Moxxi will survive, your wallet will survive, and the trophy still pops.
Video Guide: https://www.youtube.com/watch?v=fph7uG9piP8&list=PLRr5L69yg_kG5TCOT870RJrJYuO6sOHzR&index=3
Trophy: Mole Money, Mole Problems
Complete all Electi missions.
Type: Bronze
Category: Misc
Unlock Details
Complete the Electi faction questline in Carcadia Burn. This questline consists of 5 Side Missions: Enter the Electi Part 1 Enter the Electi Part 2 The Council Divided A Traitor Within The Mole’s Gambit Complete all five missions and the trophy will unlock.
Tip
You need all side missions for the Platinum anyway, so just keep following the Electi chain as it opens up. Five missions later, the mole problems are officially someone else’s problem.
Video Guide: https://www.youtube.com/watch?v=8E8Vtyy66e4
Trophy: Pale Blueberry Dot
Complete all Outbounder missions.
Type: Bronze
Category: Misc
Unlock Details
Complete the Outbounders faction questline in The Fadefields. This questline consists of 3 Side Missions: Null and Void All Charged Up Bound for Launch Finish all three missions and the trophy will unlock.
Tip
Since all side missions are needed for the Platinum anyway, there is no reason to overthink this one. Just keep knocking out the Outbounders questline as it appears and let the trophy come naturally. One faction down, several more people on Kairos still waiting to ask you for favors.
Video Guide: https://www.youtube.com/watch?v=n9Zz0iSEBBM
Trophy: Reverse Abduction
Complete the Airship world event.
Type: Bronze
Category: Misc
Unlock Details
Complete the Airship World Event. Airship is one of 3 rare random World Events, so the main challenge is simply catching it while it is active. When it spawns, you can find it in The Fadefields > Hungering Plain > The Flarewell. It appears as a named blue pinhead icon on the map. Make sure the map is zoomed in enough to show side mission icons, because World Events will not appear when you are fully zoomed out. During the event, you will be pulled up into an airship. Once inside, destroy as many enemies and objects as possible before the timer expires. After the timer ends, leave the ship and wait for the next one to arrive. There are 4 airships in total. Repeat the process for each one. The amount of destruction you cause only affects the reward tier, so you do not need a perfect score. Once the fourth airship leaves and the event is completed, the trophy will unlock. Tip: Check the Hungering Plain map regularly while exploring. The game does not notify you when the event appears, and it can disappear after a short time, so if The Flarewell pops up, head there immediately.
Tip
You do not need to turn each airship into a smoking crater for the trophy. Break things, shoot things, enjoy the chaos, and keep moving. Four ships later, you are done.
Video Guide: https://www.youtube.com/watch?v=8leU7zCLFw4
Trophy: Ruler of Everything
Complete all activities.
Type: Silver
Category: Misc
Unlock Details
Complete all 53 Activities across Kairos. Activities appear as “?” icons while you unfog the map. Once you get close, the activity type is revealed and an objective appears in the top-left corner showing what needs to be done. There are 6 activity types: 9 Order Silos — activate the console to launch the balloon and reveal the Vault Fragment in that area. 14 Safehouses — find the datapad and use it at the Safehouse console to unlock fast travel, vending machines, and a Contract Board. 11 Ancient Crawlers — find a power source, activate the structure, climb it, and collect the reward. 7 Abandoned Auger Mines — work through the mine and defeat the boss at the end. These become available after Main Mission 11: Shadow of the Mountain. 6 Order Bunkers — clear the bunker and defeat the boss. These become available after Main Mission 5: One Fell Swoop. 6 Ripper Drill Sites — defeat the enemy waves and the boss that appears at the end. None of the Activities are missable, and all of them can be completed after the story in free roam. Some areas and activity types require story progress before they become accessible. The Fadefields: Coastal Bonescape — Safehouse: Abandoned Post. Automatically unlocked during Main Mission 2: Recruitment Drive. Coastal Bonescape — Abandoned Auger Mine: Timid Kyle’s Neglected Opening. Coastal Bonescape — Ancient Crawler: Slugmetal Ditch. Coastal Bonescape — Order Silo: The Stockroom. The Howl — Order Silo: The Kit Hole. The Howl — Order Bunker: Blacklime Bunker. The Howl — Safehouse: Shut-Eye Keep. Hungering Plain — Ripper Drill Site: The Prospects. Defeat the enemy waves and Sidney Pointylegs. Hungering Plain — Ancient Crawler: The Roaming Pasture. Idolator’s Noose — Safehouse: Someday Rise. Idolator’s Noose — Ancient Crawler: The Eminent Husk. Idolator’s Noose — Ripper Drill Site: The Pitted Stain. Defeat Frank the Furnace, Sal the Engineer, and Hank the Welder. If they have red skull icons, come back after gaining some levels. Idolator’s Noose — Order Bunker: Tipping Point. Idolator’s Noose — Safehouse: Wyclef’s Reprieve. Idolator’s Noose — Ancient Crawler: Pester’s Grotto. Dissected Plateau — Abandoned Auger Mine: The Claim. Dissected Plateau — Order Silo: Deep Seven. Carcadia Burn: Lopside — Ancient Crawler: The Belle. Lopside — Safehouse: Makeshift Chalet. Lopside — Ripper Drill Site: Tendercage. Grindstone of the Worthy — Abandoned Auger Mine: Embossed Fault. Grindstone of the Worthy — Order Silo: Rustical Hurl. Grindstone of the Worthy — Order Bunker: The Crawlcroft. Tonnage Peel — Ancient Crawler: Crumpled Lurch. Tonnage Peel — Safehouse: The Lowrise. Tonnage Peel — Order Silo: Site Unseen. Ruined Sumplands — Ancient Crawler: Wanton Tread. Ruined Sumplands — Abandoned Auger Mine: Trinket Crevass. Ruined Sumplands — Order Silo: Judgement’s Lapse. Ruined Sumplands — Ripper Drill Site: Saw’s Clench. Ruined Sumplands — Safehouse: Wildhorn’s Beard. Terminus Range: Cuspid Climb — Ripper Drill Site: The Old Scrape. Cuspid Climb — Order Silo: The Reliquary. Cuspid Climb — Safehouse: Grey Havenage. Cuspid Climb — Abandoned Auger Mine: Whistler’s Maw. Cuspid Climb — Ancient Crawler: The Stonewarden. Cuspid Climb — Ancient Crawler: The Great Work. Cuspid Climb — Safehouse: Heritage Opus. Cuspid Climb — Order Silo: Covered Charge. Heart of the Mountain — Order Bunker: Craven’s Nook. The Low Leys — Order Bunker: The Wireworks. The Low Leys — Ancient Crawler: Eureka Stane. The Low Leys — Order Silo: Deathright. The Low Leys — Ancient Crawler: Forgotten Cornerstone. Windspear — Safehouse: The Nightcap. Stoneblood Forest — Safehouse: Snowy Wells. Stoneblood Forest — Ripper Drill Site: The Lowering March. Stoneblood Forest — Abandoned Auger Mine: Bittervein. Dominion: Carcadia District — Safehouse: The Lockaway. Automatically unlocked during Main Mission 17: The Falling Wall. Carcadia District — Abandoned Auger Mine: The Toil of Spoiling Vis. Terminus District — Safehouse: The Food Court. Terminus District — Order Bunker: Ironwall Resolve. Fades District — Safehouse: Sumpview Falls. Tip: Prioritize Order Silos and Safehouses while exploring because they unlock useful fast-travel points and make the rest of the cleanup much easier. Leave tougher combat Activities for later if enemies are above your level. You can also track an Activity on the map and press D-Pad Up to display a route toward the objective when the game supports it.
Tip
Fifty-three Activities sounds like Borderlands has handed you a second job, but a lot of these naturally disappear while you explore. Knock out the convenient ones during the story, save the stubborn bosses for later, and eventually those question marks stop looking mysterious and start looking afraid of you.
Trophy: Shoot the Moon
Complete the Creep Impact world event.
Type: Bronze
Category: Misc
Unlock Details
Complete the Creep Impact World Event. This is one of the 3 rare random World Events in Borderlands 4, so getting it to appear is the part that may test your patience more than the event itself. When Creep Impact is active, it can be found in The Fadefields > Carcadia Burn > Lopside > Stardown Point. It appears as a named blue pinhead icon on the map. Make sure the map is zoomed in enough to show side mission icons, because World Events will not appear when the map is fully zoomed out. The game also does not notify you when one becomes available, and the event can disappear after a short time.
Tip
Check Stardown Point regularly while you are doing other objectives in Carcadia Burn. If Creep Impact appears, go there immediately. Rare event trophies are basically Borderlands saying, “Hope you weren’t busy.”
Video Guide: https://www.youtube.com/watch?v=IRV7CGDxTEs
Trophy: The Mountain Provides
Discover all map locations in Terminus Range.
Type: Silver
Category: Misc
Unlock Details
Discover every map location in Terminus Range. Explore the region thoroughly and clear all remaining fog from the map. Some locations only become accessible after enough story progress, so save your final cleanup until later in the game.
Tip
Terminus Range is exactly the kind of place where one tiny patch of unexplored map can hide for ages. If the trophy has not popped, zoom in and start hunting for the suspicious little dark corners.
Video Guide: https://www.youtube.com/watch?v=w1IG0Neaat4
Trophy: Unfaded
Discover all map locations in The Fadefields.
Type: Silver
Category: Misc
Unlock Details
Discover every map location in The Fadefields. Map locations are revealed as you explore and clear the fog from the region. Some areas are tied to story progress or side content, so it is best to finish the main story and side missions before doing a final sweep. Check the regional map carefully for any remaining undiscovered areas and visit each one until it registers.
Tip
Do not obsess over this during the story. Explore naturally, then come back for cleanup once everything is accessible. It is much easier than trying to force your way into places the game has not opened yet.
Video Guide: https://www.youtube.com/watch?v=dVw4Sf4jAuc
Trophy: Useful Citizen
Discover all map locations in Dominion City.
Type: Silver
Category: Misc
Unlock Details
Discover every map location in Dominion City. Explore the city fully and visit each location until the entire region has been uncovered. Because Dominion City is tied to later story progression, focus on completing the story first and then return for any missed areas.
Tip
Cities love hiding one last location down a side path you walked past twelve times. If the trophy is being stubborn, check the edges of the map before questioning your entire life.
Video Guide: https://www.youtube.com/watch?v=OltZDwYqrKs
Trophy: Who's the Boss?
Complete all Auger missions.
Type: Bronze
Category: Misc
Unlock Details
Complete the Augers faction questline in Terminus Range. This questline consists of 4 Side Missions: Mob Mentality Mob Rules Angry Mob Mob Justice Complete all four missions to unlock the trophy.
Tip
These missions are part of the larger side mission cleanup required for the Platinum, so handle them while working through Terminus Range. At least the mission names make it very clear that the mob is, in fact, having a perfectly normal day.
Video Guide: https://www.youtube.com/watch?v=GPY72lJ8IkA
Trophy: Widely Beloved Mascot
Complete all Claptrap missions.
Type: Bronze
Category: Misc
Unlock Details
Complete the 5 side missions involving Claptrap: No Place Like Home Sum of His Parts Potty Mouth Peak Performance Father of the Glide Finish all five missions and the trophy will unlock.
Tip
Since these missions count toward the full side mission requirement, you can knock them out naturally during cleanup. And yes, somehow helping Claptrap five separate times is considered progress. Borderlands remains committed to chaos.
Video Guide: https://www.youtube.com/watch?v=n_N9o_aPnIQ
Trophy: As If Moved by an Occult Hand
Complete the mission “His Vile Sanctum”.
Type: Silver
Category: Story
Unlock Details
Complete Main Mission 14: His Vile Sanctum. This trophy unlocks automatically through story progression and cannot be missed.
Trophy: Crimson Rising
Reach player level 10.
Type: Bronze
Category: Story
Unlock Details
Reach player level 10 with any character. This should unlock naturally very early in the game and will likely be one of your first trophies. No special farming is needed, just keep playing, completing missions, and turning enemies into increasingly expensive piles of loot.
Trophy: Everything Breaks
Complete the mission “The Timekeeper's Order”.
Type: Gold
Category: Story
Unlock Details
Complete Main Mission 20: The Timekeeper’s Order. This trophy unlocks automatically through story progression and cannot be missed.
Trophy: False Idolator
Complete the mission “Rush the Gate”.
Type: Silver
Category: Story
Unlock Details
Complete Main Mission 6: Rush the Gate. This trophy unlocks automatically through story progression and cannot be missed.
Trophy: Good Hunter
Reach player level 30.
Type: Silver
Category: Story
Unlock Details
Reach player level 30 with any character. You should reach level 30 naturally by finishing the main story and doing a small amount of side content. If you finish the story below level 30, there is an easy shortcut. Go to the Title Screen, start a New Game in the post-story mode, and choose a level 30 character. The trophy should pop immediately.
Tip
After finishing the story once, your other character classes can also start directly at level 30 in the post-story mode. Very handy for later cleanup, and much nicer than dragging every new Vault Hunter through the baby levels again.
Trophy: Howling on the Moon
Complete the mission “Another Day, Another Universe”.
Type: Silver
Category: Story
Unlock Details
Complete Main Mission 16: Another Day, Another Universe. This trophy unlocks automatically through story progression and cannot be missed.
Trophy: Long Live the Queen
Complete the mission “Her Flaming Vision”.
Type: Silver
Category: Story
Unlock Details
Complete Main Mission 10: Her Flaming Vision. This trophy unlocks automatically through story progression and cannot be missed.
Start by playing through the story on any difficulty with whichever Vault Hunter sounds the most fun. There is no reason to turn the opening hours into a spreadsheet with guns. Explore as you go, clear the fog from the map, and complete side missions whenever you run into them. There are 98 side missions required for the Platinum, and doing a healthy chunk during the story will also keep your level moving in the right direction. Contracts from Contract Boards do not count toward that total, so you can safely leave those for later.
A few habits now will save you some very Borderlands-flavored suffering during cleanup. Keep legendary gear you find, since you eventually need a legendary equipped in every equipment slot for “I Earned This.” Start working toward a Gear or Manufacturer Challenge under Missions > Challenges as you play instead of leaving every kill requirement until the end. Also watch the map for the rare Goredello, Airship, and Creep Impact World Events, along with a World Boss appearing inside a white bubble. If one pops up while you are nearby, go introduce yourself with several thousand bullets.
There is one important missable to watch for: “All Things Vend” must be earned during the side mission “Vend of the Line.” Everything else from this stage can largely be cleaned up later in free roam, so outside of that trophy, enjoy the story and do not worry about squeezing every possible objective into your first trip through Kairos.
As more of the world opens up, keep mixing side missions and exploration into your main progression. Eventually you need all 98 side missions, so every one you finish naturally now is one less icon staring judgmentally at you later. Side missions are also important because some lead into locations you cannot otherwise access, which matters when it is time to uncover the entire map.
Start knocking out activities whenever your level makes them comfortable. There are 53 total: 9 Order Silos, 14 Safehouses, 11 Ancient Crawlers, 7 Abandoned Auger Mines, 6 Order Bunkers, and 6 Ripper Drill Sites. Silos and Safehouses open useful fast-travel points, while the other activities involve combat encounters and bosses. After the story these scale to around Level 40, so there is no prize for throwing yourself into them underleveled just to prove a point.
You can also begin collecting the 9 Vault Fragments needed to unlock all 3 Primordial Vaults. Each Vault is a combat arena with three waves followed by a boss, and they scale to your level. They can be completed on Easy difficulty, so save the heroic suffering for somewhere the game actually rewards it.
Once the story is finished, Ultimate Vault Hunter Mode becomes available and you can freely enable or disable it from Session Settings. Reaching Ultimate Vault Hunter Level 5 requires completing the Ultimate Vault Hunter challenges found under Missions > Challenges. These send you after specific bosses at specific UVH ranks, followed by guaranteed Wildcard Missions that must be completed to increase your rank. The Wildcard Missions reuse main missions with additional modifiers, so expect familiar territory with the game turning the pain dial a little higher.
This is also a good time to finish the Primordial Vaults and any remaining activities. Completing all three Vaults earns “Nothing Left to Guard,” while completing all 53 activities earns “Ruler of Everything.” If you are still underleveled for some of the post-story encounters, go clean up side missions first rather than repeatedly donating your body to the nearest boss.
Before declaring Kairos conquered, finish any remaining side missions and then sweep the map for all 197 locations. Waiting until your missions are complete is useful because some areas only become accessible through side content. Hover over each map region and use the region overview to check the Travel Network and Areas of Interest you are still missing. At this stage, the question marks are no longer mysterious places. They are personal enemies.
One of the larger cleanup jobs is completing 80 Contracts for “Freelance, but Not for Free.” Contracts come from boards at Safehouses and Faction Towns and include objectives such as Bounties, Collect, Acquire, Trace, and Patrol. You can hold five at once, so stack contracts that take you into the same general area instead of crossing Kairos like an interplanetary delivery driver. This is also a great opportunity to level a second character. After finishing the story once, new characters can begin Ultimate Vault Hunter Mode at Level 30 with the main story already finished and side content available.
You eventually need to reach Level 50 with all four character classes — Siren, Forgeknight, Gravitar, and Exo-Soldier — because each class has a Level 50 Character Challenge that rewards one of the remaining personal vehicles. Six of the 10 vehicles come automatically through the story, while these four require the character levels. Starting alternate characters at Level 30 cuts down the grind considerably, and combining your 80 Contracts with one of those characters can make the process even more efficient. For the remaining levels, replaying Primordial Vaults provides an unlimited source of enemies. Vehicle unlocks carry across characters and saves, but remember to claim challenge rewards from the reward box after earning them.
Finally, check your Gear and Manufacturer Challenges. If you have been making progress since the beginning, this may barely qualify as cleanup. If not, choose whichever challenge is closest to completion and farm the remaining kills inside a Primordial Vault. Finish your remaining legendary equipment slots, any rare World Events you still need, and whatever map or activity objectives slipped through the cracks. The Platinum is a long haul, but most of the work overlaps nicely if you stay organized. And if one stubborn objective refuses to cooperate, Ask Gami before you spend an hour shooting the wrong thing.
Completion Video Playlist
1 video
Borderlands 4 - 100% Walkthrough (Hard Mode, No Commentary, All Achievements, FULL GAME) | Part [1]