


Trophy Guide Preview
Overall Trophy Progress
0 / 35 Completed
0%
Trophy Types
Platinum
0 / 1Gold
0 / 4Silver
0 / 10Bronze
0 / 20Categories
Missable
0 / 5Collectible
0 / 6Grind
0 / 2Combat
0 / 10Misc
0 / 7Story
0 / 4

Explore the vast continent of Pywel as Kliff, a Greymane warrior fighting to reunite his scattered companions. Master fast, freeform combat, discover ancient ruins and strange realms, tackle powerful enemies, and shape your journey across a massive interactive open world.
Overall Trophy Progress
0 / 35 Completed
0%
Platinum Path
EARLY GAME Welcome to Pywel. Crimson Desert is enormous, so the best thing you can do early is make the world easier to navigate before worrying too much about the Platinum. Start uncovering the map with Bells in towns and cities, activate fast-travel points whenever you find them, and discover Secret Places along the way. If you are struggling to spot a fast-travel point, get some elevation and use R1 + R2 to flash...
Completion Video Playlist
2 videos
Crimson Desert - 100% Platinum Walkthrough - PS5 Pro 4K60fps - No Commentary - Part 1
Trophy: Pywel Legend
You've claimed every trophy. Your name will echo through Pywel's history as the legendary explorer for venturing every path and conquering every challenge.
Type: Platinum
Unlock Details
You've claimed every trophy. Your name will echo through Pywel's history as the legendary explorer for venturing every path and conquering every challenge.

Trophy: Battlefield Conqueror
By sensing the rhythm of battle, you’ve learned to bend the battlefield to your will.
Type: Bronze
Category: Missable
Unlock Details
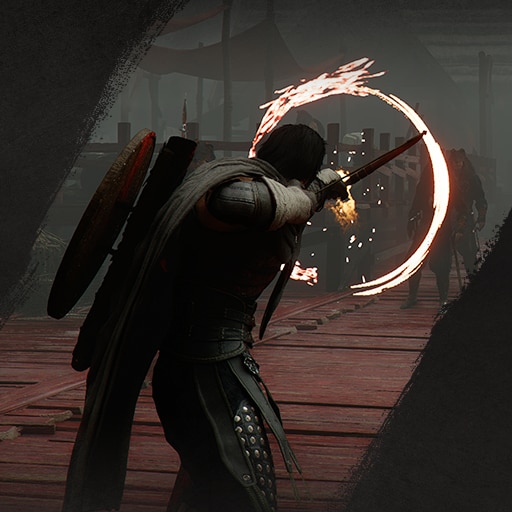
Complete all 10 Battle Challenges. These revolve primarily around combat abilities and performing specific attacks or actions against enemies. Most can be completed individually whenever you have the necessary skills, but Battle Challenge 6 has an important missable opportunity during Chapter 8. Hit enemies 30 times with Meteor Kick within 3 minutes. You'll need Level 5 Unarmed Combat for Meteor Kick. Once unlocked, land 30 hits with the ability before the 3-minute timer expires. Hit 5 targets at once with Blinding Flash. Find a large group of enemies, gather at least 5 close together, and use Blinding Flash so a single use hits all of them. Hit enemies 9 times within 5 seconds using Force Palm. Find a group of enemies and rapidly use Force Palm until you've landed 9 hits within the 5-second window. Destroy 3 Watchtowers within 20 seconds. Find 3 destructible Watchtowers positioned close enough together that you can destroy all of them within 20 seconds. Take down 7 enemies with a single explosion. Gather a large group of enemies and kill at least 7 with one explosion. Explosive arrows or explosive barrels can be used. Later in the game you'll also unlock a Dragon mount capable of firing fireballs, which count as explosions. Sometimes the solution really is "get a dragon." Defeat 5 enemies at once with a cannon. This is the challenge you need to pay special attention to. The best opportunity is during Chapter 8 in the quest "Rebel Suppression." MAKE A MANUAL SAVE BEFORE STARTING THIS MISSION. During the quest, look for the cannons positioned along the walls and aim them toward the largest groups of enemies you can find. The groups around or inside the large wooden towers you're required to destroy are particularly useful. You need to defeat 5 enemies at once with a cannon shot. If you destroy the tower or lose your opportunity without completing the challenge, reload your save and try again. Heal allies 3 times with Force Palm: Healing. Use Force Palm: Healing to restore health to allies 3 times. Attack sleeping enemies 5 times. Attack enemies while they're asleep a total of 5 times. Sleeping arrows are particularly useful for setting this up. Put them to sleep, hit them, and try not to feel bad about how unfair this challenge is. Hit enemies 7 times within 30 seconds with Giant Swing. You'll need Level 3 Grappling to use Giant Swing. Grab an enemy and HOLD the required buttons while swinging them around. If you release too quickly, you'll simply throw the enemy instead. Keep swinging to land 7 hits within 30 seconds. Take down 3 enemies within 1 minute without using a weapon. Unequip your weapons and defeat 3 enemies using unarmed attacks within the 1-minute time limit.
Tip
Several Battle Challenges become much easier after investing further into your combat skills. There's no need to force most of these early if you're missing useful abilities.
Warning
Battle Challenge 6 is missable. Make a manual save before the Chapter 8 quest "Rebel Suppression" and use the cannons during the mission to defeat 5 enemies at once. If you miss the opportunity, reload your save before progressing.
Video Guide: https://www.youtube.com/watch?v=9oSpYjJsr3A
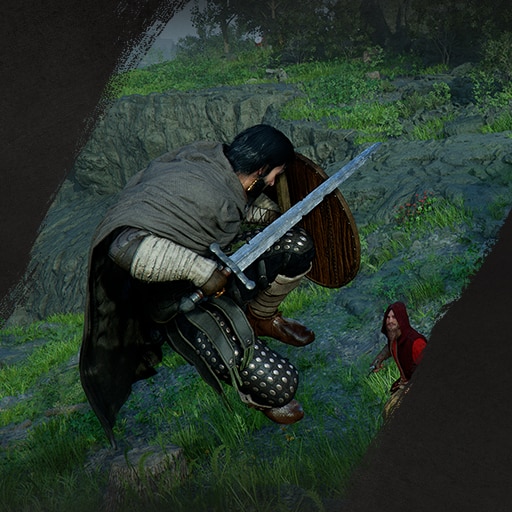
Trophy: Brilliant Tactician
You've steered countless operations to success by reading the tide of battle.
Type: Bronze
Category: Missable
Unlock Details
Complete all 10 Operation Challenges. These require a mixture of combat abilities, specific equipment, regional reputation rewards, and some very particular actions that aren't always explained especially well by the challenge descriptions. Several require region-specific clothing or equipment, so expect to work on these throughout the game rather than completing everything at once. Most importantly, pay close attention to Operation Challenge 7. The One-Eyed Jackals needed for that challenge can become much harder to find if you wipe them out of Pailune first. Hit 10 enemies at once with the Disruptor. You'll need the Disruptor backpack from Delesyia. It can be obtained from defeated Ironflame Orcs or through research during Chapter 12. Once you have it, find a large group and use the Disruptor to hit at least 10 enemies at the same time. Defeat 10 soldiers with banner pikes in Demeniss within 30 minutes. Look around the Southern Court, Western Court, and Eastern Court in Demeniss, where enemies carrying banner pikes appear frequently. Defeat 10 of these soldiers within the 30-minute limit. Fast traveling or moving a decent distance away can cause enemies to respawn if you need additional targets. Assassinate 5 enemies at night. Wait until nighttime and assassinate 5 enemies. To perform an assassination, crouch and sneak behind an enemy before attacking them. Apparently being stabbed in the back during the daytime isn't tactical enough. Defeat 30 enemies within 1 minute. Find an area containing a large number of enemies and defeat 30 of them before the 1-minute timer expires. Come prepared with your strongest attacks. Thirty enemies in sixty seconds doesn't leave much time for introductions. Commit a crime in Delesyia while wearing Varnian Contribution Armor, then commit a crime in Varnia while wearing Delesyian Contribution Armor. First, equip Varnian Contribution Armor and commit a crime while inside the City of Delesyia. Then equip Delesyian Contribution Armor and commit a crime while inside the City of Varnia. You don't need to begin a city-wide crime spree. Stealing a small item from a table is enough to count. Dress like the neighboring region, steal something, leave. Brilliant tactician or international nuisance? You decide. Assassinate 3 enemies within 1 minute. Find several enemies positioned close enough together that you can sneak between them quickly, then perform 3 assassinations before the 1-minute timer expires. Defeat 10 One-Eyed Jackals while wearing the Black Bear's Leather Helm. Equip the Black Bear's Leather Helm and defeat 10 One-Eyed Jackals. Complete this challenge before wiping the Jackals out of Pailune or clearing all of their camps. If the faction has already been eliminated from the region, finding enough Jackals can become significantly more difficult unless they retake enemy camps. Neutralize an elite using only guns. Elite enemies are marked with an * on the map. Find an elite and defeat them using only gun attacks. The elite cannot take damage from any other source, so use your firearm from beginning to end. Destroy 2 Palisade Gates at night. Wait until nighttime and find Palisade Gates. First, set a gate on fire using Blinding Light or fire arrows. Once the flames have gone out, use Turning Slash with R1 + R2 to destroy it. Repeat this process on a second Palisade Gate to complete the challenge. Subdue the guards in the Storm Veil. Ignore the confusing wording because this challenge is much more specific than it sounds. First, unlock Kliff's Storm Veil skill, which creates a large smoke cloud around him. Equip the Thieves Mask and attack a friendly guard so they become a valid enemy. Activate Storm Veil, then assassinate a guard from within the smoke. This challenge can be finicky about registering, so you may need to repeat the process several times before it completes. If you're wondering how anyone was supposed to figure that out from "Subdue the guards in the Storm Veil," congratulations, you've completed the secret eleventh challenge: understanding the description.
Tip
Work on the Operation Challenges as you gain the required skills, equipment, and regional Contribution Armor. Trying to finish them all at once will likely leave you hunting for several prerequisites first.
Warning
Complete Operation Challenge 7 before defeating the One-Eyed Jackals or clearing all of their camps in Pailune. If the Jackals are wiped out first, finding the enemies needed for the challenge can become significantly more difficult unless they retake camps.
Video Guide: https://www.youtube.com/watch?v=c8jkBwFXAao

Trophy: Grand Collector of Arms
All the weapons in the world are now in your hands.
Type: Silver
Category: Missable
Unlock Details
Complete all of the Special Weapons Challenges. These challenges generally require using specific weapons and equipment found throughout Pywel, with many asking you to defeat a certain number of enemies using that particular weapon. This trophy requires some extra care because certain required weapons can break, be sold, or be upgraded into their Kuku versions. Kuku-upgraded versions do not count toward their original weapon's challenge based on the current information, so keep the original versions until you've completed their requirements. Several pieces of equipment deserve special attention: Lightning Spear, Bismuth Spear, and Propeller Spear: These weapons can break, so MAKE A MANUAL SAVE before attempting their respective challenges. For the Lightning and Bismuth Spears, weaken enemies using another weapon before delivering the killing blow with the required spear. This reduces the amount of durability you'll burn through while working toward the required kills. The Propeller Spear challenge doesn't require kills, but the weapon can still break, so keep an eye on its durability. If one of these weapons breaks before you've completed its challenge, you can eventually dispatch Comrades to specific locations to craft another. However, this requires completing the necessary research and adds extra work, so finishing the challenge with your first weapon is much easier. Gale Shield and Shotgun Shield: Both shields have special abilities connected to Shield Bash, performed with L1 followed by R2. These attacks can deal decent damage but also consume shield durability without guaranteeing a kill. A safer method is to use Shield Charge instead. Killing enemies with Shield Charge does not reduce the shield's durability, and the kills will still count toward the appropriate challenge as long as the shield's impact delivers the killing blow. Be careful not to knock an enemy away and have the resulting impact with the ground kill them instead, as that won't count. Apparently the greatest threat to becoming the Grand Collector of Arms isn't an enormous boss. It's weapon durability. Titan Armor: Titan Armor is different from the other required equipment because you don't need to perform kills with it. The armor is rewarded for defeating a specific late/post-game boss tied to the Stjar Clan questline. Before you can access this boss, you'll need to complete all quests associated with: Pailune Militia Beighen Tribe Skoghorn Tribe Longleaf Tribe Once those questlines are complete, continue the Stjar Clan questline until you can fight the required boss. Bring plenty of food and arrows, as the fight can be difficult. Defeat the boss to receive the Titan Armor and satisfy its associated requirement. The remaining Special Weapons Challenges are relatively straightforward once you've obtained their required weapons.
Tip
Whenever a Special Weapons Challenge requires kills with a breakable weapon, weaken enemies with another weapon first and only use the special weapon for the finishing blow. This will conserve as much durability as possible. For the Gale and Shotgun Shields, Shield Charge is particularly useful because it can score qualifying kills without consuming the shield's durability.
Warning
Keep every unique weapon required for the Special Weapons Challenges until you've completed its associated requirement. Required equipment can be broken, sold, or upgraded into a Kuku version, potentially preventing the original version from counting. Make a manual save before working on challenges involving the Lightning Spear, Bismuth Spear, or Propeller Spear in case the weapon breaks before you finish.
Video Guide: https://www.youtube.com/watch?v=V7Opk67gbA4
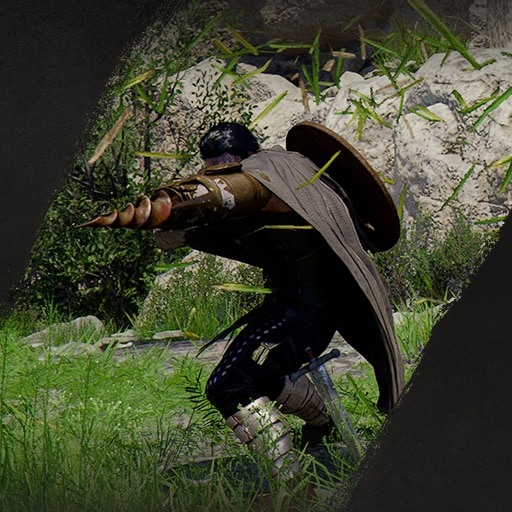
Trophy: Shadowlord
Knowledge of the shadowed world reaches depths few have ever known.
Type: Bronze
Category: Missable
Unlock Details
Complete all of the Above the Law Challenges. These challenges revolve around breaking the law, stealing, destroying property, and generally becoming exactly the kind of person every town guard hopes doesn't walk through the gate. None of the individual challenges are described as particularly complicated, but this trophy can be missed if you progress too far without completing the necessary objectives. Pay particular attention to the challenge requiring you to turn in 3 bounties. Previously completed bounties do not count retroactively, so you'll need 3 available bounties to complete after the challenge becomes active. There are bounties spread throughout the different regions of Pywel, so you should still have plenty available unless you've already completed them all. There is also a missable concern involving collecting all of the Sealed Abyss Artifacts, so make sure the Above the Law Challenges are completed before finishing every one of those collectibles. Turns out becoming the Shadowlord isn't about mastering darkness. It's mostly theft, property damage, and making questionable life choices.
Tip
Save at least 3 bounties until the Above the Law Challenges are available. Once they are active, complete and turn in 3 bounties to satisfy the requirement.
Warning
The challenge for turning in 3 bounties does not count previously completed bounties retroactively. This trophy can also become missable if you collect all of the Sealed Abyss Artifacts before finishing the required Above the Law Challenges.
Video Guide: https://www.youtube.com/watch?v=iwSL9xIVHzg
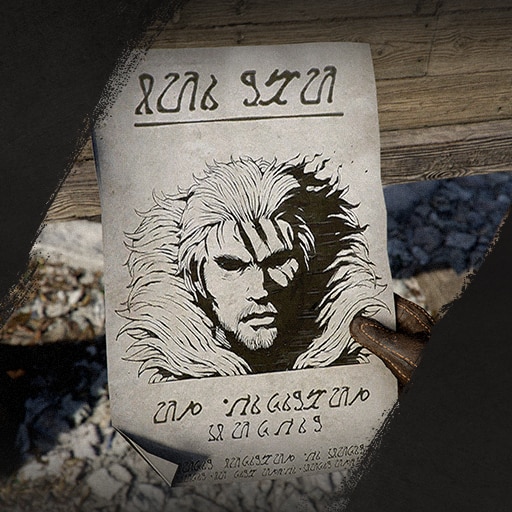
Trophy: Unvanquished Strategist
Command of battle's momentum makes the entire field yours to orchestrate.
Type: Gold
Category: Missable
Unlock Details
Complete all of the Mastery Challenges. This trophy serves as the final reward for completing the various weapon, combat, and horse challenge sets found throughout the game. You'll need to complete: 6 Sword Challenges — Master of Swords 6 Shield Challenges — Master of Shields 6 Bow Challenges — Master of Bows 5 Spear Challenges — Master of Spears 6 Two-Handed Weapon Challenges — Master of Two-Handed Weapons 5 Cannon Challenges — Master of Artillery 5 Rapier and Shield Challenges — Master of Rapiers 5 Gun Challenges — Master of Firearms 10 Special Weapons Challenges — Grand Collector of Arms 10 Horse Challenges — Tamer of Legends Each of these challenge sets has its own trophy, so you should naturally complete almost everything required for Unvanquished Strategist while working through the rest of the trophy list. Once you've earned the final required Mastery-related trophy and completed all of its challenges, Unvanquished Strategist should unlock. Turns out mastering one weapon wasn't enough. Or two. Or five. Pywel apparently needs written proof that you can kill something with everything in the shed.
Warning
The missable concern comes from the Special Weapons Challenges required for Grand Collector of Arms. Some of those weapons can be broken, sold, or upgraded into versions that may no longer count for their original challenges. Complete Grand Collector of Arms and its 10 Special Weapons Challenges carefully to avoid locking yourself out of this trophy.
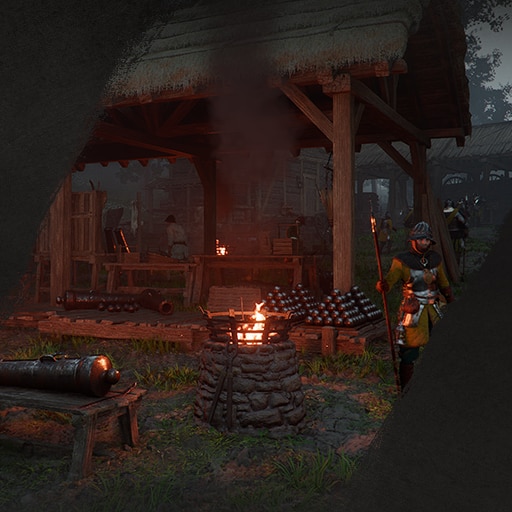
Trophy: Conqueror of Spires
Climbing ever higher has opened the way toward the skies above.
Type: Bronze
Category: Collectible
Unlock Details
Complete all 8 Spire Challenges across Pywel. Spires are marked with a tower-shaped icon on the map and act as gateways to the floating islands known as the Abyss. You'll generally need to solve a puzzle to enter each Spire, followed by additional puzzles if you continue through its Abyss section. You only need to complete the Spire portion for this trophy, but you'll eventually need to complete all of the Abyss sections anyway. Save yourself the future eight-course puzzle buffet and finish them as you encounter them when possible. Four Spires are completed automatically through the main story: Spire of the Stars — Chapter 4 during "Spire of Stars." Spire of Soaring — Chapter 5 during "Toward the Nest." Spire of the Sun — Chapter 9 during "Unwavering Steps." Jijeong Temple Pagoda — Chapter 9 during "Face the Inner Self." The remaining four are found in the open world: Spire of Insight — Northwest of the Steel Mountains in Southern Hernand. Spire of Ringing Truth — Western Pailune. Spire of Clockwork — Northeastern Demeniss. This Spire only becomes available after completing Chapter 8. Spire of Frost — Northwestern Demeniss. Complete all 8 Spire Challenges to unlock the trophy.
Tip
You don't technically need to finish each Spire's Abyss section for this trophy, but you'll need all of them later. Completing the full section while you're already there will save you from having to revisit every Spire during cleanup.
Warning
Spire of Clockwork cannot be completed until after Chapter 8, so don't waste time searching northeastern Demeniss wondering where your missing Spire went.
Video Guide: https://www.youtube.com/watch?v=luM6WKpCvPg&list=PLicOuDSiPvy3-ItpPU3Ot5TRHuliO5h76&index=3

Trophy: Expert Explorer
Revelation of every corner of Pywel brings the entire land into clear view.
Type: Gold
Category: Collectible
Unlock Details
Complete all of the Exploration Challenges across Pywel. This is essentially the grand finale for most of the game's exploration-related trophy requirements, so if you've been working through the rest of the trophy list, the majority should already be finished. The required Exploration Challenges include: 40 Abyss Challenges — Conqueror of the Abysses 60 Secret Places — Pilgrim of Wonders 37 Ancient Ruins — Puzzle Solver 4 Mazes — Maze Pathfinder 16 Sanctums — Lightbringer 8 Spires — Conqueror of Spires 13 Constellations — Navigator of the Stars 7 New Power Challenges — Beast Slayer 22 original Legendary Animals — no separate trophy The Legendary Animals should be the main requirement here that isn't already covered by another trophy. There are currently 25 known Legendary Animals, but only the original 22 are required for this trophy based on the supplied information. Legendary Horses must be tamed, while the other Legendary Animals must be killed. Legendary Fish work differently and can be caught normally or grabbed directly from the water by swimming up to them. Legendary Fish are also extremely useful if you're still working on the requirement to tame 30 different pets for Natural Collector. They can be used to max out Trust with a cat, so don't overlook them while cleaning up your Legendary Animals. Once every required Exploration Challenge is complete, Expert Explorer will unlock. At this point, "Explorer" might be underselling it. You've basically inspected every suspicious rock in Pywel personally.
Tip
Most of this trophy overlaps with other trophies, so focus on those individual requirements first and leave Expert Explorer as one of your final exploration cleanups. Legendary Fish can also help with Natural Collector by allowing you to max out Trust with a cat.
Warning
Although 25 Legendary Animals were known at the time of the supplied guide, only the original 22 are required for the Exploration Challenge according to that information. This number could change if the game's requirements are altered in an update.
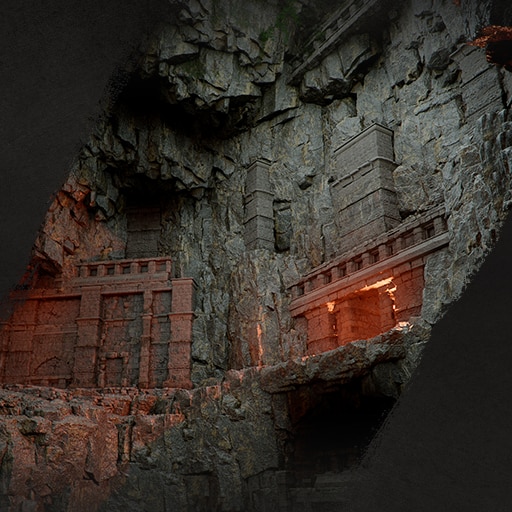
Trophy: Maze Pathfinder
Even the most tangled paths fail to lead you astray.
Type: Bronze
Category: Collectible
Unlock Details
Complete all 4 Maze challenges scattered across Pywel. Mazes are larger environmental puzzles similar to Ancient Ruins and can be identified by a "?" surrounded by a white circle on the map. Completing each Maze rewards an Abyss Artifact and unlocks the location as a fast travel point. The 4 Mazes are: Maze of Burham — Clear out the enemies before starting the puzzle so they aren't trying to murder you while you're attempting to think. You'll also want plenty of stamina, as the puzzle requires climbing several towers. Smoking Lands Desert Mouth Maze — Head to the center and examine the map on the floor. Around the Maze are several sun/moon doors that must be flipped using Force Palm (R3) or the optional Force Current skill. Find and rotate each door until every corresponding location on the central map is illuminated. This is the most involved of the four Mazes, so don't be surprised if you're staring at that floor map for a while wondering which door you've offended. Ancient Rift Maze — Thankfully, this one gives you a break. There are no enemies and very little climbing involved. Use Focus Light (L1 + R1, then hold L1) on the sets of pillars to work through the puzzle. Maze of Dawnreach — Defeat the enemies here before attempting the puzzle and make sure you have good stamina. More importantly, upgrade Force Palm to Level 3 before attempting this Maze. You'll need to strike the puzzle's towers quickly enough to knock them into position, making the Level 3 upgrade essential. Complete all four Maze challenges to unlock the trophy.
Tip
Clear enemies from Maze of Burham and Maze of Dawnreach before touching their puzzles. Solving ancient mysteries is considerably easier when nobody is hitting you in the back of the head.
Warning
Force Palm Level 3 is essential for the Maze of Dawnreach puzzle, so get the upgrade before attempting to complete it.
Video Guide: https://www.youtube.com/watch?v=7utB0nvZnlg&list=PLicOuDSiPvy3-ItpPU3Ot5TRHuliO5h76&index=6
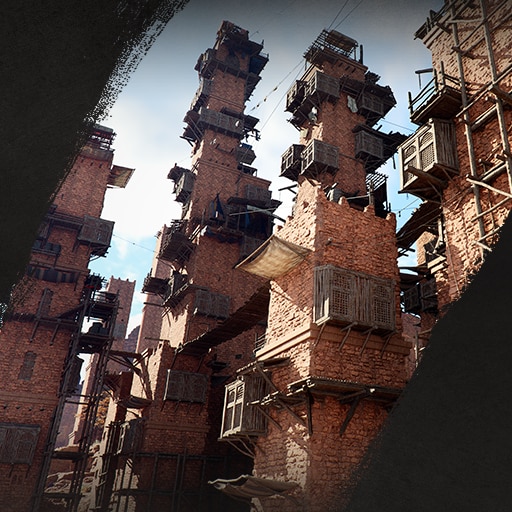
Trophy: Navigator of the Stars
The constellations that illuminate Pywel have revealed their secrets.
Type: Bronze
Category: Collectible
Unlock Details
Complete all 13 Constellation Challenges scattered throughout Pywel. Before you can start hunting them down, you'll need the Constellation Helmet. It is obtained through the "What the Stars Left Behind" Faction Quest Chain at the Sholastone Institute in Hernand. You may need to complete other quests for the Troll Alliance or Sholastone Institute before this quest chain becomes available. Once you have the Constellation Helmet, travel around the map and complete all 13 Constellation Challenges to unlock the trophy. Apparently navigating by simply looking at the sky wasn't complicated enough. You need special headgear too.
Tip
Don't worry about actively hunting the 13 Constellations until you've obtained the Constellation Helmet.
Video Guide: https://www.youtube.com/watch?v=3o3PxbroK8k&list=PLicOuDSiPvy3-ItpPU3Ot5TRHuliO5h76&index=2

Trophy: Pilgrim of Wonders
The hidden beauty of Pywel has been revealed.
Type: Silver
Category: Collectible
Unlock Details
Discover all 60 Secret Places scattered throughout Pywel. Secret Places are well worth completing as you explore because each one rewards you with an Abyss Artifact for upgrading your skills and also becomes a new Fast Travel point. With 60 required, this is a sizable collectible hunt, but activating them along the way will gradually make traversing Pywel much easier. Future you will be very thankful that past you didn't leave all 60 until cleanup. The trophy will unlock once you've discovered all 60 Secret Places.
Tip
Complete Secret Places whenever you encounter them instead of saving everything for the end. Besides reducing the amount of cleanup required, every location you finish gives you another Fast Travel point and an Abyss Artifact.
Video Guide: https://www.youtube.com/watch?v=gKKRrVXBO88&list=PLicOuDSiPvy3-ItpPU3Ot5TRHuliO5h76&index=5
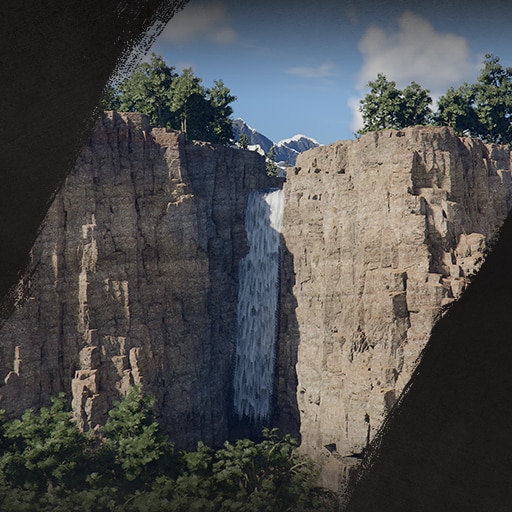
Trophy: Puzzle Solver
Sharp insight now guides you through any riddle.
Type: Silver
Category: Collectible
Unlock Details
Complete all Ancient Ruins scattered throughout Pywel. Ancient Ruins are similar to Secret Places, but simply finding them isn't enough. Each one contains a puzzle that must be solved before you'll receive its Abyss Artifact and unlock the location as a Fast Travel point. Some Ancient Ruins require specific skills to complete, so it's better to save serious cleanup for the late or post-game when you've unlocked more abilities and collected enough Abyss Artifacts to develop the skills you need. Several of these puzzles can also be lengthy and difficult to figure out without help. If you're using a written or video solution, follow the steps carefully to avoid wasting time trying to reverse-engineer whatever ancient architect decided a Fast Travel point needed an entrance exam. Of course, if you enjoy solving environmental puzzles yourself, this is your time to shine. Complete every Ancient Ruin to unlock the trophy.
Tip
Leave any Ancient Ruins you can't solve or access for late-game cleanup. Some require specific skills, so having a more developed skill set will save you from repeatedly returning to locations you aren't ready to complete yet.
Video Guide: https://www.youtube.com/watch?v=Ob3jXl2nnNo&list=PLicOuDSiPvy3-ItpPU3Ot5TRHuliO5h76&index=7
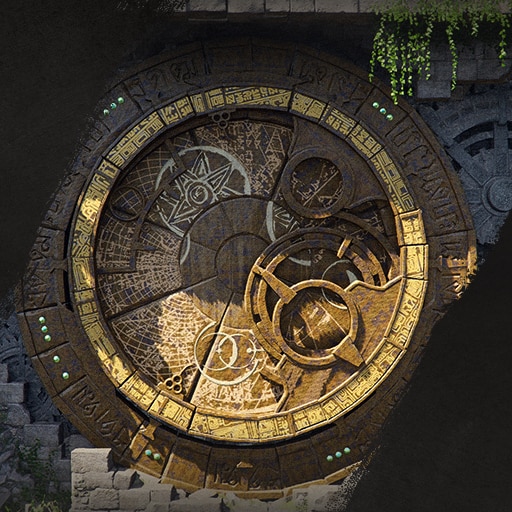
Trophy: Conqueror of the Abysses
Exploration of every abyss extends far into the depths of the world.
Type: Gold
Category: Grind
Unlock Details
Complete all 40 Abyss challenges. 39 of the 40 are completed by exploring the Abyss routes accessed through the Spires and solving their puzzles. Refer back to Conqueror of Spires for the 8 Spire locations. If you've been completing the full Abyss section whenever you encounter a Spire, all that earlier effort is finally about to pay off. If you skipped them... well, welcome back to puzzle town. After completing the 39 Abyss challenges, you must also finish both the main story AND the Epilogue before the final challenge can be completed. Once all of those requirements are finished, return to the location where you fought the first final boss. Each completed Spire route has a path connecting its ending to the central Abyss island. Travel from the end of each Spire route toward the center island and follow the connecting path until you find a button. Use Force Palm to activate the button. Repeat this process from each of the Spire route endings leading to the central island. Once you've activated all of the buttons around the outside of the center island, a cutscene will begin and you'll gain access to the doors of the large building in the center. The trophy will unlock once you've completed this final Abyss requirement. After 40 Abyss challenges, countless puzzles, and enough Force Palm usage to qualify as a repetitive stress injury, you've officially conquered the Abysses.
Tip
Complete the full Abyss route whenever you finish a Spire instead of leaving all 39 challenges for the end. This turns what could be a massive post-game grind into something you gradually complete throughout your playthrough.
Warning
The final Abyss requirement cannot be completed until you've finished the main story, completed the Epilogue, and cleared the other Abyss challenges.

Trophy: Natural Collector
Deeper understanding of Pywel’s nature enriches knowledge of life throughout the land.
Type: Silver
Category: Grind
Unlock Details
Complete all of the nature-related collection challenges across Pywel. This will likely be one of the most time-consuming trophies in the game, requiring knowledge of things such as gatherables, minerals, insects, fish, sea creatures, and pets. Thankfully, there are several ways to cut down what could otherwise become a truly horrifying amount of collecting. One of the biggest shortcuts comes from defeating Praevus the Ancient, a boss found in the Crimson Desert region. Praevus rewards you with the Memory of Ancient Nature. Consume the Memory of Ancient Nature from your inventory to immediately gain knowledge of all gatherables, completing a large portion of the requirements for these challenges. For insects, craft the insect-collecting Kuku pack at the Kuku Workshop. This is the same location where you first obtain the Kuku Pot by speaking with the dwarf and gathering the required materials. Once equipped, press L2 + R2 to open the pack and suck up nearby insects. It can collect bugs within a few feet of your character, including ones you may not have even noticed. Congratulations. After mastering swords, shields, guns, and artillery, your next legendary weapon is apparently a bug vacuum. Fishing knowledge will likely be one of the biggest grinds. Visit every fisherman's shop you encounter throughout Pywel. Some shops display fish and sea creatures that you can examine to gain their knowledge without actually having to catch them. More importantly, TALK TO NPCs MARKED WITH WHITE DOTS ON THE MINIMAP whenever you encounter them. Continue talking until they begin repeating dialogue. Some NPC conversations provide knowledge for fish, potentially saving you many hours of actual fishing. The Sailfish is likely to be one of the worst entries to obtain. NPCs who provide Sailfish knowledge appear to be extremely rare, while catching the fish itself can also take several hours. Based on the supplied information, previous attempts took roughly 5 hours through fishing or around 3–4 hours searching for and speaking with NPCs. For the pet-related challenge, you'll need to tame 30 different pets. Duplicate pet types do not count, so keep track of what you've already tamed and make sure each new pet is a different type. This trophy is a marathon, not a sprint. Grab the major shortcuts, collect things naturally while exploring, and leave the stubborn missing entries for cleanup. Your Platinum journey has officially become a nature documentary.
Tip
Defeat Praevus the Ancient in the Crimson Desert region and consume the Memory of Ancient Nature as soon as practical. It immediately grants knowledge of all gatherables and can eliminate a large portion of the grind. Craft the insect-collecting Kuku pack rather than searching manually for every bug. Visit every fisherman's shop and speak with white-dot NPCs until their dialogue repeats. Both can provide fish knowledge without requiring you to actually catch the fish, potentially saving hours.
Warning
The 30-pet requirement needs 30 different types of pets. Taming duplicates will not increase your progress, so keep track of the pet types you've already collected.
Trophy: Beast Slayer
You've defeated the beasts, bringing peace to Pywel.
Type: Bronze
Category: Combat
Unlock Details
Complete the Beast-related challenges that become available once you reach Chapter 12. The challenges won't appear before Chapter 12, but any applicable objectives you've already completed will count retroactively once they're unlocked. So if you've already been wandering around Pywel picking fights with enormous creatures, your questionable decision-making has not gone to waste. Some of these challenges involve very specific requirements and boss encounters. Make sure your weapons are properly upgraded and bring a good supply of food before tackling the tougher fights. The provided information does not list the individual Beast Challenges or their exact requirements, so those should not be added to the guide until their confirmed objectives and solutions are available.
Tip
You don't need to avoid Beast-related content before Chapter 12. Relevant progress can count retroactively once these challenges become available, so feel free to complete encounters naturally as you explore.
Video Guide: https://www.youtube.com/watch?v=CscDoYtNGWI

Trophy: Master of Artillery
Artillery skill honed through practice makes your enemies mere measure of efficiency.
Type: Bronze
Category: Combat
Unlock Details
Complete all 5 Barraging Cannon challenges using the arm cannon. Oongka is required for these challenges, as he is the only character who can use it. You can buy additional arm cannon ammunition from Blacksmiths or craft it yourself. Enemy camps provide plenty of targets for most challenges, although you'll want to be a little more selective for some of the more specific requirements. Most importantly, elemental kills only count if the actual cannon shot delivers the killing blow. If an enemy survives the initial hit and then burns, freezes, gets electrocuted, or otherwise regrets their life choices a few seconds later, it will not count. Barraging Cannon 1 — Hit 3 enemies at once with a hand cannon. Arm cannon shots deal splash damage, making this fairly simple. Find a tightly packed group of enemies and fire into the middle of them so the blast hits at least 3 enemies at once. Barraging Cannon 2 — Defeat 3 enemies with normal, fire, ice, lightning, and wind enhanced Charged Shots. You need kills using each of the required Charged Shot types. Be careful with the elemental versions because their lingering damage does not count. The initial projectile must deliver the killing blow. Weaken enemies first, then use the required Charged Shot to finish them. When charging the cannon, continue holding the attack until you see a small flash appear in front of it. This indicates that the shot is fully charged. You also won't gain access to the elemental abilities needed for this challenge until you've completed 4 specific Abyss locations. One of these isn't available until Chapter 9, so don't worry about completing this challenge before then. Barraging Cannon 3 — Defeat 10 enemies within 30 seconds using a hand cannon without destroying any surrounding objects. Enemy camps provide plenty of targets but also plenty of conveniently placed objects waiting to explode and ruin your attempt. Instead, lure a group of enemies away from their camp and into a large open area. Once they're away from destructible objects, use the arm cannon to kill 10 within the 30-second limit. Charged Shots can help, although the charging time can also work against you, so use whichever attacks allow you to clear the group fastest. Barraging Cannon 4 — Defeat a mounted enemy from at least 30 meters away using a hand cannon. This is one of the most annoying challenges in the game and can be inconsistent about registering correctly. A reliable method is to find mounted allied guards in friendly areas. Equip a Thieves Mask so you can damage friendly NPCs and have them count as enemies for the challenge. Get as much elevation and distance from the mounted target as possible, making sure you're at least 30 meters away, then attack them with the arm cannon. Ice-enhanced Charged Shots are highly recommended, as this method appears to make the challenge register more reliably. This is a lot of preparation just to shoot one guy off a horse, but trophy hunting has never been accused of respecting your time. Barraging Cannon 5 — Destroy 2 Watchtowers with a hand cannon within 10 seconds. Look around fortresses, camps, and other fortified areas for two destructible wooden Watchtowers positioned close together. Use Charged Shots from the arm cannon to completely destroy both towers within 10 seconds. Finding two towers close together is the important part. Once you've found a good location, position yourself so you can quickly fire at one and immediately turn toward the other.
Tip
For the elemental kills in Barraging Cannon 2, weaken enemies before firing your Charged Shot. You want the projectile itself to kill them rather than the lingering elemental effect.
Warning
Barraging Cannon 2 cannot be completed until you've gained the necessary elemental abilities from 4 specific Abyss locations, with one unavailable until Chapter 9. For Barraging Cannon 4, you'll need a Thieves Mask for the reliable allied-guard method so friendly mounted NPCs can be damaged and treated as enemies.
Video Guide: https://www.youtube.com/watch?v=km-9FQEV9UA
Trophy: Master of Bows
Arrows guided by the wind reflect mastery over the art of archery.
Type: Bronze
Category: Combat
Unlock Details
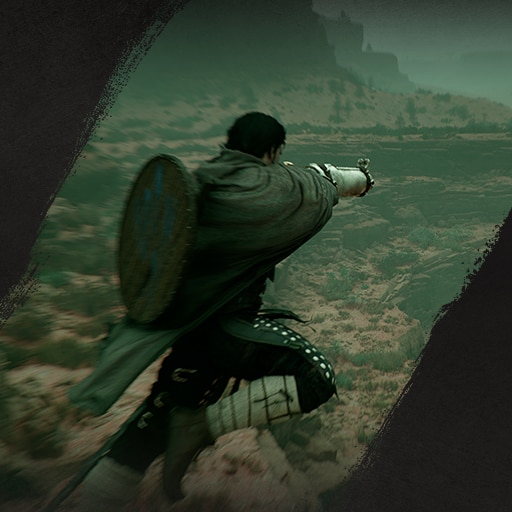
Complete all 6 Bow Aimed at Fate challenges. None are particularly bad except Challenge 5, which apparently woke up and chose violence. Investing in Kliff's bow-related skills, especially Marksmanship, will increase your damage and unlock abilities that make several of these challenges much easier. Enemy camps are good places to work through most of the requirements thanks to their reliable supply of targets. Bow Aimed at Fate 1 — Defeat 5 enemies with a bow within 60 seconds. Find a group of enemies and kill 5 with your bow before the 60-second timer expires. Avoid enemies carrying shields, as they can block your arrows and waste valuable time. Upgrading Kliff's Marksmanship skill will increase your bow damage and give you additional abilities that can make this much easier. Bow Aimed at Fate 2 — Defeat 7 enemies in a row using only normal arrows. Stock up on normal arrows before starting. You can buy them from blacksmith shops, craft them, or collect them from defeated archers. Keep an eye on your ammunition because Kliff will automatically switch to another arrow type if you run out of normal arrows. Thankfully, there is no time limit, so you can leave the fight, restock, and return without resetting the challenge. Seven enemies. Normal arrows only. For once, the game isn't asking you to perform aerial gymnastics while setting somebody on fire. Enjoy it. Bow Aimed at Fate 3 — Hit 3 different enemies with the bow while in midair. Jump and use Force Palm with R3 up to 3 times to launch yourself higher into the air. Starting from a wall, cliff, or tower before using Force Palm can give you even more height. Focused Shot is particularly useful here because it can slow time while you're airborne and allows Kliff to mark enemies before firing at them in rapid succession. You must hit 3 separate enemies for the challenge to count. Bow Aimed at Fate 4 — Take down 3 birds with a bow from more than 15 meters away. When you find birds, keep your distance so you don't scare them away and shoot them with your bow from at least 15 meters. The birds do not need to be flying, so shooting them while they're peacefully standing on the ground works perfectly fine. A heroic display of archery. Those birds never stood a chance. Bow Aimed at Fate 5 — Take down 5 enemies at once from more than 20 meters away using a bow. This is one of the hardest challenges in the game. The easiest method is to travel to Delesyia and look for the large groups of flying bug enemies. These bugs always die in a single hit and commonly travel in large groups, making them ideal targets. Stay more than 20 meters away and try using Focused Shot to target 5 bugs. The challenge can sometimes count the rapid sequence of shots as defeating all 5 "at once." If Focused Shot doesn't work, use explosive arrows against a tightly packed group instead. Yes, your path to becoming a legendary master archer involves exterminating bugs. Nobody said the legends had to sound impressive. Bow Aimed at Fate 6 — Hit 5 enemies with Focused Shot. Use the Focused Shot ability to hit 5 different enemies. There is no time limit and the hits do not need to be consecutive, so simply work on this naturally as you encounter enemies. Once Focused Shot has connected with 5 different targets, the challenge is complete.
Tip
Upgrade Kliff's Marksmanship skills before seriously working on these challenges. The additional bow damage and abilities will make several requirements much quicker. For Bow Aimed at Fate 5, the flying bug groups in Delesyia are your best targets because they always die in one hit and appear in large groups.
Video Guide: https://www.youtube.com/watch?v=oNjD-bdE2U8
Trophy: Master of Firearms
Firearm expertise keeps your foes' heads bowed in fear.
Type: Bronze
Category: Combat
Unlock Details
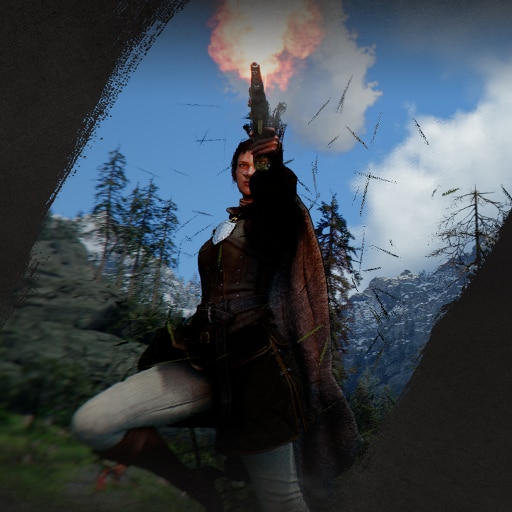
Complete all 5 When Lightning Strikes challenges. These must be completed as Damiane, as she uses a pistol instead of a bow. Investing in Damiane's firearm skills and upgrading her gun a few times will make these challenges much easier. You'll also need plenty of bullets, which can be crafted or purchased from Blacksmiths. When Lightning Strikes 1 — Take down 5 enemies from more than 30 meters away using a gun. Find enemies from a distance and kill 5 of them with your pistol while staying more than 30 meters away. The mechanical flying bugs in Delesyia are excellent targets because they remain high in the air and die from a single hit. Turns out becoming a master gunslinger begins with some long-range pest control. When Lightning Strikes 2 — Defeat 5 enemies from more than 5 meters away within 5 seconds using a gun. Focused Shot is required here, as firing normally takes too long between shots. Activate Focused Shot, mark 5 enemies, and fire. If you don't get all 5 within the time limit, find another group and try again. The flying bugs in Delesyia are once again ideal because they die in one hit and can be found grouped together. When Lightning Strikes 3 — Hit a target 3 times within 1 second using a pistol. Focused Shot provides the easiest method. Activate it and mark the same enemy 3 times so the shots land in rapid succession. Avoid shielded enemies because they can simply block the shots and ruin the attempt. Alternatively, you can fully upgrade Evasive Shot. Aim with L2 and repeatedly dodge with Circle to quickly fire enough shots for the challenge. When Lightning Strikes 4 — Hit 7 mounted enemies with a gun while riding a horse. Despite the slightly misleading description, both you and your targets need to be riding horses. Enemies mounted on bears or lizards will not count. Get on your horse and shoot 7 enemies who are also riding horses. If you're struggling to find enough mounted enemies, use the same method from Barraging Cannon 4 under Master of Artillery. Mounted allied guards provide reliable spawns and can be turned hostile so they count as enemies. Crimson Desert finally gives you a proper horseback shootout, and naturally it's because a trophy demanded one. When Lightning Strikes 5 — Take down 3 enemies each using regular, evasive or Focused evasive, and aerial shots. You'll need to kill 3 enemies with each of the required firearm attack types. Kill 3 enemies using regular shots, then 3 using evasive shots. Upgrading Evasive Shot is worthwhile since it can also help with When Lightning Strikes 3. Finally, kill 3 enemies using aerial shots. Using Focused Shot while airborne makes these significantly easier to land.
Tip
The mechanical flying bugs in Delesyia are particularly useful for When Lightning Strikes 1 and 2 because they're easy to target, appear in groups, and die in a single hit. Upgrading Focused Shot and Evasive Shot before working through these challenges will also make several requirements considerably easier.
Video Guide: https://www.youtube.com/watch?v=CQm7iM2SfeM
Trophy: Master of Rapiers
Rapier mastery has carved a name recognized far and wide.
Type: Bronze
Category: Combat
Unlock Details
Complete all 5 Dancing Blade, Shining Shield challenges. These challenges must be completed as Damiane, as she is the character who uses a rapier and shield. None of the challenges are particularly difficult, but investing in Damiane's rapier skills and upgrading the rapier itself a few times will make everything faster. Enemy camps are once again excellent places to find plenty of willing test subjects. You can also hold R1 or R2 to continuously attack rather than mashing the buttons. Your fingers have survived enough weapon mastery challenges already. Dancing Blade, Shining Shield 1 — Defeat 5 enemies with a rapier within 60 seconds. Play as Damiane and kill 5 enemies with her rapier within the 60-second time limit. Upgrading your rapier and related combat skills beforehand will make this even easier. Dancing Blade, Shining Shield 2 — Stab enemies 10 times with a rapier without taking damage. Use the rapier's Stab attack with R1 + Triangle. Since taking damage will ruin your attempt, isolate a single enemy and repeatedly use Stab until they're defeated. Find another isolated enemy if necessary and continue until you've landed all 10 attacks without being hit. There's no need to fight an entire camp here. Ten stabs sounds much less intimidating when only one angry person is trying to stop you at a time. Dancing Blade, Shining Shield 3 — Hit prone enemies 5 times with a rapier. Upgrade Damiane's Smiting Bolt attack, which is performed with R2. Once upgraded, hold R2 against enemies until they're knocked to the ground. While they're prone, hit them with R1. Repeat this until you've landed 5 attacks against prone enemies. Dancing Blade, Shining Shield 4 — Take down 3 enemies at once from more than 10 meters away using a rapier. Smiting Bolt is the key to making this challenge manageable, and fully upgrading the ability is highly recommended. At maximum level, Smiting Bolt won't miss and can call down multiple beams that strike enemies simultaneously. Find a large group, stay more than 10 meters away, and repeatedly use Smiting Bolt until 3 enemies are defeated at once. Shielded enemies aren't as troublesome here because Smiting Bolt can usually break through their guard. Apparently mastering the rapier eventually means standing 10 meters away and summoning death beams. Fencing has changed. Dancing Blade, Shining Shield 5 — Hit 9 enemies within 15 seconds using Shield Toss. Press R3 as Damiane to use Shield Toss. The challenge can be completed without upgrading the ability, but maxing out Shield Toss makes it significantly easier because the shield can bounce between several enemies. Find a large group and repeatedly throw the shield until you've hit 9 enemies within the 15-second limit.
Tip
Invest in Damiane's Smiting Bolt and Shield Toss upgrades before tackling the later challenges. A fully upgraded Smiting Bolt makes Dancing Blade, Shining Shield 4 considerably easier, while an upgraded Shield Toss can bounce between multiple enemies for Challenge 5.
Video Guide: https://www.youtube.com/watch?v=kACIT4xPbbQ

Trophy: Master of Shields
Your reputation for mastery in wielding shields has spread across the land.
Type: Bronze
Category: Combat
Unlock Details
Complete all 6 Shield of Unchanging Will challenges. These must be performed with a shield in one hand and a sword in the other. Enemy camps are useful for most of them since you'll have plenty of unfortunate volunteers available. For any challenge requiring you to defeat enemies with the shield, the actual killing blow must come from the shield. Knocking someone off a cliff and letting gravity finish your work does not count. Apparently gravity refuses to share the credit. Shield of Unchanging Will 1 — Defeat 3 enemies with a shield. Hold L1 and press R2 to attack with your shield. You can weaken enemies with your sword first, then finish them with the shield to make this much quicker. Shield of Unchanging Will 2 — Block 10 arrows with a shield. Find one or more enemies using bows, keep your distance, and hold L1 to block their arrows. You can farm all 10 blocks from a single archer, although lone enemies may eventually switch to a melee weapon if you get too close. Shield of Unchanging Will 3 — Hit 3 enemies at once with a shield. Gather at least 3 enemies in front of you, then hold L1 and press R2 to Shield Bash them. The attack doesn't deal much damage, so you can repeatedly bash the same group until the challenge registers. Shield of Unchanging Will 4 — Defeat 5 enemies with a shield without taking damage. This is one of the trickier shield challenges because Shield Bash doesn't deal much damage. Instead of attempting it in a busy camp, look for smaller groups or individual enemies along the roads. There is no time limit, and leaving combat does not reset your progress. Isolate enemies, dodge whenever you're in danger, and slowly work your way through all 5 kills. Take your time. Nobody is giving out bonus trophies for completing it while surrounded by twelve angry people. Shield of Unchanging Will 5 — Flip 5 enemies with a shield. There is an easy workaround for this one. Play as Damiane and press R3 to throw your shield at enemies. Hit 5 enemies with the thrown shield and the challenge will complete. Sometimes true shield mastery means finding somebody who is better at throwing one. Shield of Unchanging Will 6 — Land 10 Shield Charge hits on enemies within 1 minute. First, unlock Kliff's Charge ability from the Armed Combat skill. Perform Shield Charge by holding L1, repeatedly pressing Cross, and holding a movement direction. You'll need to hit 10 different enemies within the 1-minute limit, so find the largest group you can before starting. Once you're surrounded by enough enemies, start charging through the crowd until you've hit all 10.
Tip
For Shield of Unchanging Will 4, enemies along the roads are safer than camps. Since leaving combat doesn't reset the challenge, you can patiently pick off isolated enemies rather than trying to become Captain Pywel and fight an entire camp with a shield.
Warning
Shield kills only count when the shield itself delivers the final hit. If Shield Bash knocks an enemy somewhere and fall damage kills them, that kill will not count.
Video Guide: https://www.youtube.com/watch?v=CGI6cnCktiM
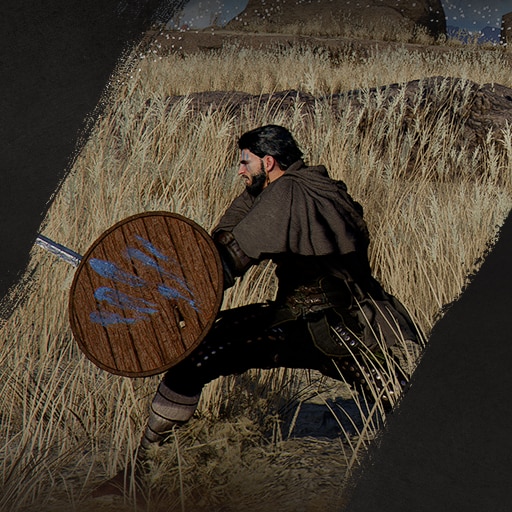
Trophy: Master of Spears
All under the skies revere you as the master spearsman.
Type: Bronze
Category: Combat
Unlock Details
Complete all 5 Sharpened Spear challenges. Spears are two-handed weapons, so you won't need to worry about pairing one with a shield. Enemy camps can provide plenty of targets for most of these challenges, although you'll want somewhere quieter when the game inevitably asks you not to get hit. Also, give your fingers a break. You can hold R1 to continuously perform light attacks or R2 for heavy attacks instead of repeatedly mashing the buttons. Your controller will appreciate the mercy. Sharpened Spear 1 — Land 15 counterattacks with a spear within 30 seconds. Parries count as counterattacks for this challenge. Even better, a parry performed while surrounded by several enemies can hit multiple targets, with each hit adding toward the required 15. Equip a spear, find a decent-sized group of enemies, stand among them, and repeatedly parry their attacks until you reach 15 counterattacks within the 30-second limit. For once, being surrounded is actually part of the plan. Sharpened Spear 2 — Hit enemies 50 times with a spear within 30 seconds. Find a large group of enemies and hold R1 to repeatedly perform the spear's fastest attacks. You don't need 50 different enemies, just 50 hits within 30 seconds, so keep attacking the crowd until the challenge completes. Sharpened Spear 3 — Take down 5 enemies within 15 seconds using the Stab attack. Use the spear's Stab attack with R1 + Triangle and kill 5 enemies within the 15-second limit. Find a tightly packed group and repeatedly use Stab until all 5 are down. Try to avoid enemies carrying shields, as blocking your attacks can quickly eat through the short time limit. Apparently the solution to this particular challenge is very simple: stab first, stab second, and then continue stabbing. Sharpened Spear 4 — Defeat 3 enemies within 1 minute using Spear Leap Attacks. Jump and press either R1 or R2 while airborne to perform a Spear Leap Attack. R2 is recommended because the heavy version deals more damage and has good range. Find a group of enemies and repeatedly jump and use R2 in midair until you've killed 3 enemies with Leap Attacks within the 1-minute limit. Sharpened Spear 5 — Defeat 5 enemies with a spear while maintaining 100% health. Ignore the confusing in-game wording about taking damage "from spears." The actual requirement is to kill 5 enemies with a spear while keeping your health at 100%. There is no need to make this harder by fighting an entire camp. Look for isolated enemies and kill them one at a time, prioritizing dodging and avoiding damage above everything else. Be especially careful around camps and forts. One archer landing a cheap shot from somewhere in another postal code can ruin your progress
Tip
For Sharpened Spear 1, try to surround yourself with several enemies before parrying. A single parry can hit multiple enemies and add several counterattacks toward the required 15. For Sharpened Spear 5, isolated roadside enemies are much safer than camps because you can work through the 5 kills without worrying about stray arrows or attacks resetting your perfect-health run.
Video Guide: https://www.youtube.com/watch?v=E4jAzYKinec
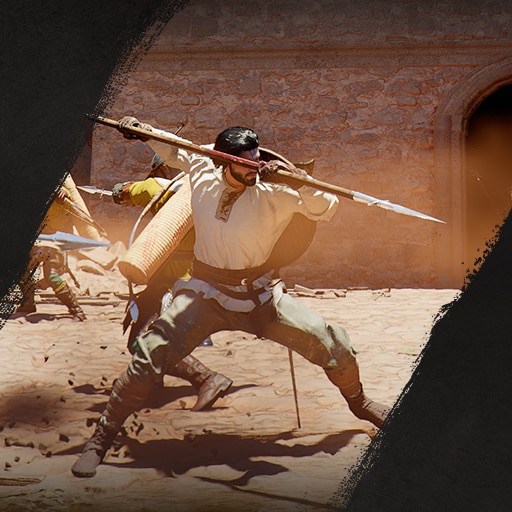
Trophy: Master of Swords
Through discipline and mastery, you’ve earned the right to be called a true master of the blade.
Type: Bronze
Category: Combat
Unlock Details
Complete all 6 Sword of Trials challenges using the one-handed sword. Some requirements can be completed while dual-wielding, but using a sword in one hand and a shield in the other will generally make these easier. Enemy camps are great places to work through most of the challenges thanks to their reliable groups of enemies. Also, save your fingers: you can hold R1 to repeatedly perform light attacks or hold R2 to repeatedly perform heavy attacks. No need to mash the buttons like they owe you money. Sword of Trials 1 — Defeat 3 enemies within 30 seconds using a sword. Equip a sword, find a group of enemies, and kill 3 of them within the time limit. You can potentially complete this alongside Trials 2 and 4. Sword of Trials 2 — Defeat 3 enemies at once using a one-handed sword. Gather at least 3 enemies together and use Turning Slash with R1 + R2 to kill all 3 at once. This can also knock out Trials 1 and 4 at the same time if everything lines up nicely. Sword of Trials 3 — Defeat 3 enemies with a sword without taking damage. Enemies wandering along roads are a better choice than a camp or fort for this one. Camps often have archers who are more than happy to ruin your perfect run from somewhere off-screen. Dodge away when enemies approach and try to isolate them so you can safely kill 3 without taking a hit. Sword of Trials 4 — Defeat 3 enemies at once using a Sword Turning Slash attack. Group at least 3 enemies together and use Turning Slash with R1 + R2. The attack deals plenty of damage, so get everyone nice and cozy in front of you before using it. If all 3 don't die, gather another group and try again. Sword of Trials 5 — Defeat 3 enemies in a row using only Sword Stab attacks. Use Sword Stab with R1 + R2 and kill 3 enemies consecutively using only this attack. If you've upgraded the skill, you can perform a follow-up stab after the first one. There is no requirement to avoid damage here, so embrace your inner kebab enthusiast and start stabbing. Sword of Trials 6 — Defeat 5 enemies within 15 seconds using Forward Slash with a one-handed sword. This is probably the trickiest of the six, although it's still fairly manageable. Find a camp or another large group of enemies, get into the middle of them, and use Forward Slash by holding R2. Keep attacking until you've killed 5 enemies within the 15-second limit.
Tip
Try combining Sword of Trials 1, 2, and 4. Group 3 enemies together and kill all of them with a single Turning Slash to potentially complete all three challenges at once.
Video Guide: https://www.youtube.com/watch?v=SabBn-E9vqI&list=PLicOuDSiPvy3-ItpPU3Ot5TRHuliO5h76
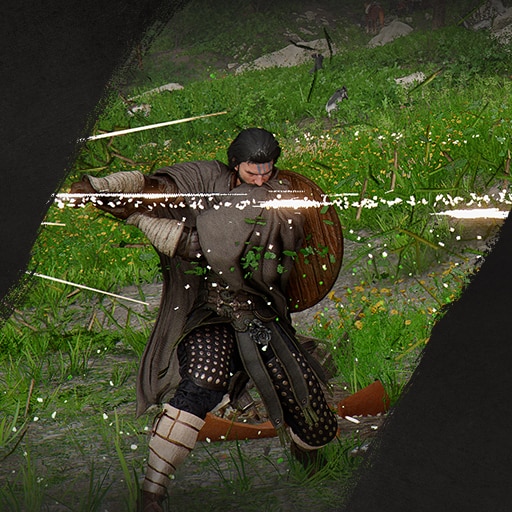
Trophy: Master of Two-Handed Weapons
Warriors honor you for your strength and precision with two-handed weapons.
Type: Bronze
Category: Combat
Unlock Details
Complete all 6 two-handed weapon challenges. The first 3 use a Longsword, while the final 3 require a two-handed club or axe. Oongka is required for the club/axe challenges and conveniently comes equipped with a two-handed axe. As with the other weapon challenges, enemy camps are great for anything requiring large groups. You can also hold R1 for repeated light attacks or R2 for repeated heavy attacks instead of mashing the buttons until your thumb files for workers' compensation. Overwhelming Slash 1 — Hit 3 enemies at once with a Longsword while below 50% health. Equip a Longsword and allow enemies to damage you until your health drops below 50%. Find a group of at least 3 enemies and use Kliff's Spinning Slash with R1 + Cross. You can hold the buttons to repeatedly perform Spinning Slash until you run out of stamina, making it much easier to catch 3 enemies with the same attack. Overwhelming Slash 2 — Defeat 3 enemies with Longsword finishers without taking damage. Finishers can trigger automatically when attacking enemies at low health, although they won't activate every time. Because of this, you may need to fight more than 3 enemies before getting all 3 required finishers. There is no time limit, so isolate enemies and fight them one at a time to minimize your chances of taking damage. Both R1 and R2 attacks can trigger finishers, although R1 appears to trigger them more frequently. Patience wins this one. Well, patience and repeatedly introducing people to a very large sword. Overwhelming Slash 3 — Knock back 10 enemies within 30 seconds using a Longsword. Play as Kliff, find a large group of enemies, and repeatedly use Turning Slash with R1 + R2. Keep using the attack through the crowd until you've knocked back 10 enemies within the 30-second limit. Ground Shaking Impact 1 — Land 30 hits within 30 seconds using a two-handed club or axe. Play as Oongka, who starts with a two-handed axe. The easiest method is to sprint toward groups of enemies while holding L1 to charge through them. You can hit the same enemies multiple times, so repeatedly charge through the group until you've landed 30 hits within 30 seconds. If the charge method isn't working well for you, find a large group and start swinging instead. Oongka isn't here to discuss strategy. Oongka is the strategy. Ground Shaking Impact 2 — Defeat 10 enemies with a two-handed club or axe without taking damage. Play as Oongka and look for weaker enemies around Hernand. Try to isolate them and fight one at a time rather than taking on an entire camp. Using light attacks with R1 is recommended because they're faster and let you cover ground more quickly than the heavier R2 attacks. There is no reason to rush this. Stay defensive, pick your fights carefully, and work through all 10 enemies without taking a hit. Ground Shaking Impact 3 — Send 5 enemies flying at once with a two-handed club or axe. Play as Oongka and invest in his Armed Combat skill until you unlock Quick Swap. You'll need two separate two-handed weapons equipped so you can swap between them while performing the attack. Find a large group of enemies and repeatedly use Quick Swap among the crowd until a single attack sends 5 enemies flying at once. If you're going for subtlety, you've chosen the wrong character.
Tip
Use Kliff for the Longsword challenges and Oongka for the two-handed axe/club challenges. For requirements involving several enemies at once, camps provide the large groups you'll need, while the no-damage challenges are much safer against isolated enemies.
Video Guide: https://www.youtube.com/watch?v=lPkHNqBT6EU
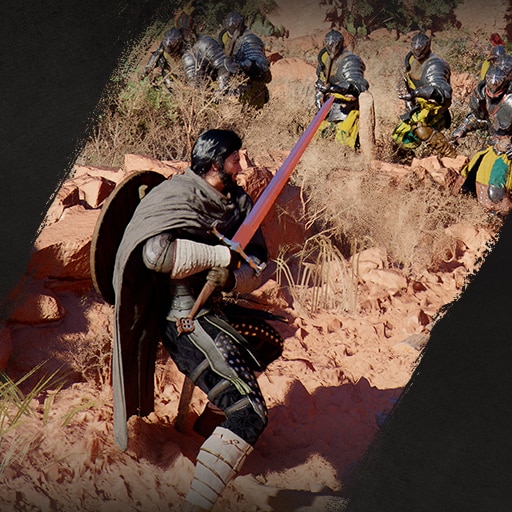
Trophy: Relentless Warrior
Unwavering resolve has forged strength worthy of a relentless warrior.
Type: Bronze
Category: Combat
Unlock Details
Complete all 10 Training Challenges. These test a mixture of combat, movement, traversal, and other abilities, so you'll need to invest in several different parts of the skill tree before you can finish them all. Most can be tackled individually once you have the necessary skills unlocked. Subdue 3 opponents within 1 minute using wrestling skills. Use your wrestling abilities to subdue 3 enemies before the 1-minute timer expires. Use Aerial Force Palm to reach a height of 10 meters. Double jump, then use Force Palm in midair 3 times to propel yourself upward until you reach the required height. Apparently jumping normally wasn't impressive enough. The game wants you to briefly become a rocket. Slide down 50 meters. Find a sufficiently long slope and slide continuously for 50 meters. Use a banner pike to pole vault 5 times within 30 seconds. Equip a banner pike and double-tap Square to pole vault. Perform 5 pole vaults before the 30-second timer expires. Walk 10 meters on a rope. Walk at least 10 meters across a rope. This can also be completed on rooftops or other narrow surfaces that cause your character to use the balancing animation. Successfully parry 7 times without taking damage. Perform 7 successful parries without being hit. You can repeatedly parry the same enemy, so finding one predictable opponent can make this much easier. Hit enemies 6 times with normal, fire, ice, lightning, and wind enhanced Turning Slash. Use Turning Slash to land the required hits with the normal version and each of the four elemental versions: fire, ice, lightning, and wind. Successfully land Diving Force Palm twice in a row without touching the ground. You'll need both the Aerial Swing and Diving Force Palm skills. Use your aerial abilities to perform Diving Force Palm twice consecutively without touching the ground between them. Swim 100 meters at full speed without resting. Swim at full speed continuously for 100 meters without stopping to rest. This distance is longer than it sounds, so bring food that restores stamina and use it while swimming if necessary. Turns out the real final boss was cardio. Hang onto a bear for more than 10 seconds. You'll need Level 4 Grappling for this challenge. Once you've upgraded the skill far enough, grapple onto a bear and remain attached for more than 10 seconds. Try not to think too hard about who decided hanging onto an angry bear was an essential component of warrior training.
Tip
Don't worry about completing all 10 Training Challenges immediately. Several require specific skill upgrades, so it's more efficient to return to the remaining challenges once you've developed Kliff's movement, combat, and grappling abilities.
Video Guide: https://www.youtube.com/watch?v=gPgkjD9w0RE
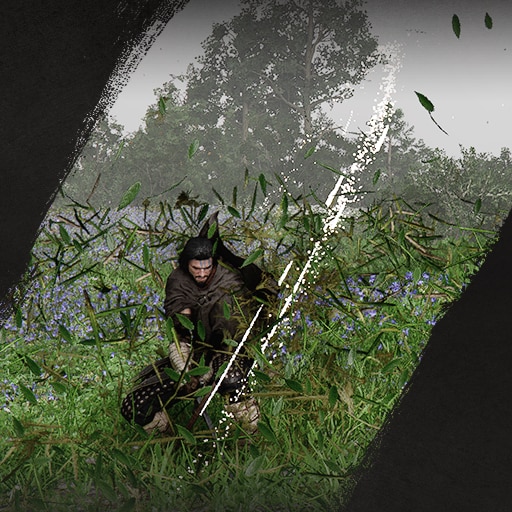
Trophy: Lightbringer
Shadow guided into light has restored the forgotten sanctums.
Type: Silver
Category: Misc
Unlock Details
Complete all 16 Sanctums scattered throughout Pywel. Each Sanctum contains a puzzle that must be solved in order to cleanse and restore it. Before you can complete them all, you'll need a Kuku Pot and the Force Current ability, as both are essential for solving the Sanctum puzzles. The Sanctums are also connected to the Witches Faction, so you'll need to meet the Witches and obtain their quests before you can begin cleansing them. You'll encounter the first Witch during Chapter 5, while the remaining 4 are found throughout the open world. You cannot complete all 16 Sanctums until at least Chapter 9 because the Sanctum of Mortification is encountered during that chapter. Once you have the required abilities, equipment, and Witch quests, work through and cleanse all 16 Sanctums to unlock the trophy. Nothing says "Lightbringer" quite like traveling across an entire continent doing magical maintenance work for 16 ancient buildings.
Tip
Don't worry about completing every Sanctum as soon as you find one. You'll need the Kuku Pot, Force Current, the appropriate Witches Faction quests, and Chapter 9 story progress before all 16 can be completed.
Video Guide: https://www.youtube.com/watch?v=-OhlHj2avQY&list=PLicOuDSiPvy3-ItpPU3Ot5TRHuliO5h76&index=4
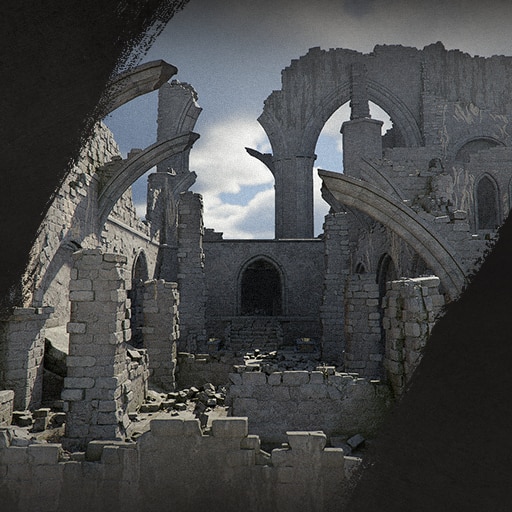
Trophy: Lord of Honor
Your name is honored in every corner of the lands.
Type: Bronze
Category: Misc
Unlock Details
Complete all of the Challenges and Changes Challenges. Several of these can be tricky, particularly the challenges involving the Duo card game. Two things can make the Duo-related challenges significantly easier: obtaining the Deceiver's Fedora and learning how to recognize when the dealer is cheating. The Deceiver's Fedora allows you to see your opponents' hands during card games. This makes it much easier to decide when you have a strong enough hand to continue betting and when it's better to fold. Be aware that folding will end your win streak, but sometimes sacrificing the streak is better than continuing to throw money into a losing hand. Even trophy hunters occasionally have to make responsible financial decisions. The other important mechanic is catching cheaters. The most reliable visual clue is the dealer's elbow. During a normal deal, the dealer raises their elbow high, practically above their shoulder. When they're cheating, their elbow remains noticeably lower and closer to their side. Watch the dealer carefully each time the cards are dealt and call them out when you spot the lower elbow animation. If you incorrectly accuse the dealer of cheating, you'll temporarily be unable to return to that table. The exact lockout time is unclear, but it may be somewhere around 12–24 in-game hours. Learning to reliably recognize the cheating animation while using the Deceiver's Fedora will make the Duo-related Challenges and Changes objectives considerably easier.
Tip
Get the Deceiver's Fedora before seriously working on the Duo challenges. Being able to see your opponents' cards removes much of the guesswork and makes deciding whether to bet, fold, or go all-in much easier. When watching for cheating, focus on the dealer's elbow. High elbow means a normal deal; an unusually low elbow beside their body is the most reliable sign provided that they're cheating.
Video Guide: https://www.youtube.com/watch?v=Xcs2Er0p75Q

Trophy: Proud Returnee
Trials overcome have paved the way back home.
Type: Silver
Category: Misc
Unlock Details
Rebuild Pailune and move your camp there. As you recruit Comrades throughout the game, use them to help with the reconstruction of Pailune. You'll also need to progress through and complete Chapter 7 of the main story. Once Pailune has been rebuilt and Chapter 7 is complete, you'll be told that your camp can be moved back to Pailune. Follow the "Reconstruction of Pailune" quest and then complete the quest to relocate your camp to Pailune to unlock the trophy. After everything Kliff has been through, sometimes the biggest victory is simply getting to go home.
Video Guide: https://www.youtube.com/watch?v=RuyH1lx_wb0

Unlock Details
Rebuild Pailune and move your camp there.
As you recruit Comrades throughout the game, use them to help with the reconstruction of Pailune. You'll also need to progress through and complete Chapter 7 of the main story.
Once Pailune has been rebuilt and Chapter 7 is complete, you'll be told that your camp can be moved back to Pailune.
Follow the "Reconstruction of Pailune" quest and then complete the quest to relocate your camp to Pailune to unlock the trophy.
After everything Kliff has been through, sometimes the biggest victory is simply getting to go home.
Trophy: Tamer of Legends
Even the wildest horses yield to your steady guidance.
Type: Silver
Category: Misc
Unlock Details
Complete all of the Horse Challenges. These include taming horses along with several challenges that involve riding from one location to another within a time limit. The taming minigame can be a little temperamental, especially when you're attempting to tame the Legendary horses. While trying to stay mounted, keep your joystick pointed toward the back of the horse and rotate the camera so the horse is facing away from you. Increasing your maximum stamina is highly recommended before seriously working on the harder taming challenges. More stamina means you'll be able to stay on a struggling horse longer and have more time to complete the minigame. You should also prioritize taming the Legendary horses as soon as you're capable of doing so. Their stats are significantly better than normal horses, which makes the riding and time-based Horse Challenges much easier afterward. Don't get discouraged if a Legendary horse repeatedly throws you off. You can often remount fairly quickly and immediately try again. It may take some practice before the taming controls start to feel natural. Remember: every legendary horse is just a future best friend currently trying to launch you into another zip code.
Tip
Increase your maximum stamina before attempting the Legendary horses. Once you've successfully tamed one, use its superior stats to make the remaining riding and time-based Horse Challenges easier. Be patient with the taming minigame. Getting thrown off doesn't mean you've lost the horse, and you can often remount quickly for another attempt.
Video Guide: https://www.youtube.com/watch?v=kpSid_53rzs
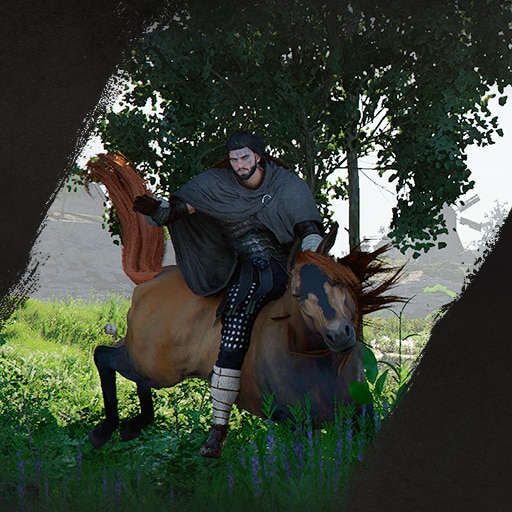
Trophy: The Golden Merchant
Astute trade and quick judgment have filled your coffers well.
Type: Bronze
Category: Misc
Unlock Details
Complete all Trade Challenges. These revolve around buying, transporting, and trading goods along with interacting with NPCs. Most of the Trade Challenges are fairly straightforward, but Challenge 4 can look much more time-consuming than it actually needs to be. For Challenge 4, load several of the Royal Trade Goods requested by the court onto your horse. Instead of slowly transporting everything across the map by wagon, fast travel to the location where you need to deliver the goods and then call your horse. Your horse will teleport to your location along with the cargo, allowing you to quickly trade in the Royal Trade Goods. You will lose roughly half of the stack when doing this, so bring more than you actually need. Even with the loss, this method is considerably faster than making the entire journey normally. Is teleporting a horse full of merchandise across Pywel really the mark of a brilliant merchant? Absolutely. Time is money.
Tip
For Challenge 4, load extra Royal Trade Goods onto your horse before fast traveling because roughly half of the stack will be lost. The time saved compared with slowly transporting everything by wagon makes the loss worthwhile.
Video Guide: https://www.youtube.com/watch?v=mfYR-LUgIQY
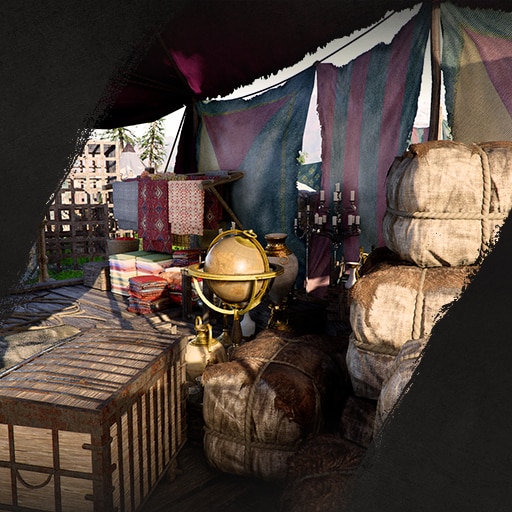
Trophy: True Gamer
Claim victory in various minigames so no challenge dare rattle you.
Type: Silver
Category: Misc
Unlock Details
Complete all challenges across the Minigame categories. The required categories are: Shooting Test of Strength Duel Racing Mind Games Most of these challenges aren't particularly difficult and can be completed as you work through their respective minigames. For the Mind Games challenges involving Duo, the same strategies described under Lord of Honor are useful. Obtaining the Deceiver's Fedora makes the card-game challenges considerably easier because it allows you to see your opponents' hands. You should also learn to recognize cheating by watching the dealer's elbow. During a normal deal, the elbow is raised high, while a cheating animation keeps the elbow lower and closer to the dealer's side. The biggest obstacle to completing all of the Minigame Challenges is Test of Strength Challenge 3. This challenge is locked behind a side quest and can be annoying to unlock because the required quest doesn't necessarily appear immediately. You'll need to cycle between locations where these particular side quests can spawn until "Arm Wrestling of the Wages" appears. Complete and turn in "Arm Wrestling of the Wages" to make the Pailune champion available. You can then defeat the champion for the required Test of Strength challenge. You've conquered monsters, mastered weapons, explored ancient ruins, and crossed Pywel. Naturally, the real test of becoming a True Gamer is waiting for the correct arm-wrestling quest to spawn.
Tip
If Test of Strength Challenge 3 is holding up the trophy, focus on cycling through the relevant side-quest spawn locations until "Arm Wrestling of the Wages" appears. Complete that quest to gain access to the Pailune champion. For the Mind Games challenges, the Deceiver's Fedora and learning the dealer's cheating animation can make the Duo-related requirements considerably easier.
Video Guide: https://www.youtube.com/watch?v=gmRDapOC6cc

Trophy: Ultimate Hunter
Success in diverse hunts has forged a hunter of legendary renown.
Type: Silver
Category: Misc
Unlock Details
Complete all of the Hunting Challenges. These challenges involve hunting different animals and using specific hunting tools throughout Pywel. Most of the individual requirements are straightforward once you know where to find the necessary animal or equipment. Because many of the challenges depend primarily on finding specific targets or locations, work through them individually as you explore and clean up the map. If you're struggling with a particular Hunting Challenge, focus on locating the required animal or tool first rather than wandering around Pywel hoping your next unfortunate woodland encounter happens to be the right one. The provided information does not include the individual Hunting Challenges or their exact requirements, so those should not be added to the guide until their confirmed objectives and solutions are available.
Tip
Don't worry if you can't immediately find the animal or equipment needed for a particular Hunting Challenge. These are good candidates for late-game cleanup once you've explored more of Pywel and unlocked plenty of Fast Travel points.
Video Guide: https://www.youtube.com/watch?v=ZxGxX6MaiIg
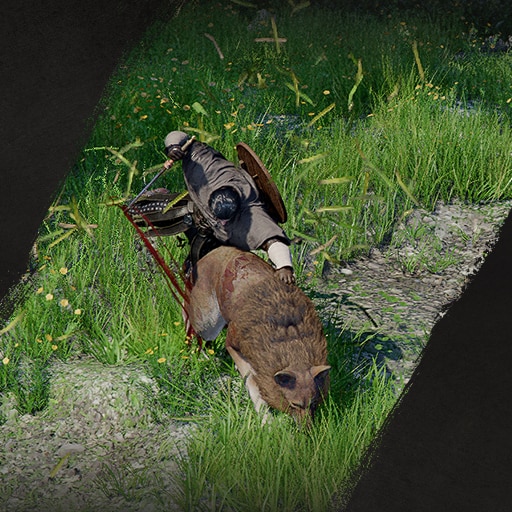
Trophy: Expert Storyteller
Every thread of Pywel’s narrative now forms a complete story.
Type: Gold
Category: Story
Unlock Details
Complete the main story of Crimson Desert. The main story consists of 12 chapters, along with a Prologue and Epilogue. The Epilogue is not required for this trophy, so Expert Storyteller will unlock once you've completed the main 12-chapter story. By this point, Kliff and the Greymanes have faced those attempting to abuse the power of the Abyss, and Kliff has been put through just about everything Pywel could possibly throw at one man. After the trophy unlocks, continue into the Epilogue. It isn't needed for Expert Storyteller, but completing it is required for Conqueror of the Abysses later. Twelve chapters later, Kliff has earned some rest. Unfortunately, you still have trophies to collect.
Tip
Continue through the Epilogue after earning this trophy. You'll need to complete it before you can finish the final requirement for Conqueror of the Abysses.

Trophy: Master Camper
A safe haven now stands ready for you and your comrades.
Type: Bronze
Category: Story
Unlock Details
Continue the story until around the beginning of Chapter 3, when the Greymanes prepare to settle at Howling Hill. Complete the quest "Familiar Curses", which becomes available after "Return of the Comrade." After finishing the quest, you'll have a brief conversation with Yann. Once the conversation ends, the trophy will unlock. Congratulations, the Greymanes have a home. Surely nothing terrible will happen from here.
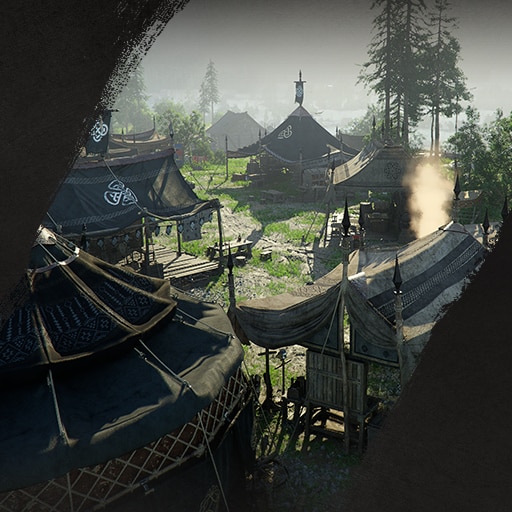
Trophy: Novice Adventurer
Countless adventures await beyond the horizon.
Type: Bronze
Category: Story
Unlock Details
Complete all story quests in Chapter 1. The chapter consists of 2 main quests and 2 required sub-quests, so you can't accidentally skip anything here. The trophy unlocks during the quest "Woman in White" when you are tasked with returning to Hernand. This quest becomes available after completing "Abyss without Balance." Your adventure has officially begun. Enjoy this nice, easy trophy while Crimson Desert is still pretending to be friendly.

Trophy: Protector of Pailune
Freedom returned to Pailune after defeating the Black Bears and the Jackals.
Type: Silver
Category: Story
Unlock Details
Complete Chapter 7 of the main story. This trophy unlocks during the quest "Time to Face Justice," which becomes available after completing "Ludvig's Whereabouts." After defeating Myurdin and driving the Jackals out of Pailune, Kliff is injured. You'll then play as Oongka for a stretch of the story while Kliff recovers, working to secure peace throughout Pailune. Continue following the main story through this section and the trophy will unlock automatically.

Welcome to Pywel. Crimson Desert is enormous, so the best thing you can do early is make the world easier to navigate before worrying too much about the Platinum. Start uncovering the map with Bells in towns and cities, activate fast-travel points whenever you find them, and discover Secret Places along the way. If you are struggling to spot a fast-travel point, get some elevation and use R1 + R2 to flash your sword, or hold up your lantern with L1. The lantern is especially handy while gliding. Secret Places are worth finding too, since they double as fast-travel locations and reward Abyss Artifacts used for upgrading skills.
Artifacts should also be on your radar early. There are 141 scattered across the different regions, and there is currently no in-game tracker for them. Collecting them unlocks challenges, so grabbing them while you are already exploring can save you from a much uglier cleanup later. You do not need to turn the opening hours into Artifact Simulator 2026, but don't walk past them either.
Loot enemies, sell what you don't need, and gradually improve your equipment. The Hwando is a particularly powerful early sword that can carry you through much of the game. Prioritize equipment that can actually be upgraded, and remember that attack stats on gloves and boots only improve punches and kicks respectively, not your weapon damage. Buy upgrade materials from blacksmiths when useful, complete NPC quests that reward inventory bags, and buy the small bag sold by each shop as you work toward the 240-slot inventory maximum. Most importantly, do not sell or burn through unique-looking weapons or weapons with durability. Some are required for later challenges, and future you does not deserve that headache.
Once you are comfortable exploring Pywel, start pushing the story while continuing to knock out challenges naturally. Reaching the point where you have a camp is useful because it gives you somewhere to upgrade and store items. You will eventually gain the ability to move your camp as well, which is connected to Proud Returnee. There is no need to rush this trophy; once the option becomes available, you can handle it whenever it fits naturally into your journey.
This is also where a little trophy planning can prevent some nasty surprises. Complete Operation 7: Disruption before wiping the Jackals out of Pailune or clearing all of their camps, because the challenge requires Jackal faction enemies. Keep the Vessel of Dark Pursuit until its Special Weapon challenge is finished, and avoid using other special weapons unnecessarily before completing their associated challenges so they don't break before you need them. The Marni Laser Helm can be upgraded into the Kuku version, as the updated version now counts for its challenge as well.
Another one worth planning around is Battle 6: Into the Barrage. The cleanest opportunity is during Chapter 8's main quest, Rebel Suppression, where you have the cannon and enemies needed for the challenge. If the attempt goes wrong, die or reload a save and try again. It can still be completed afterward, but setting up the right situation becomes much more difficult. This is exactly the kind of "I'll do it later" challenge that eventually makes you question every decision you've ever made, so take the easy opportunity when the game gives it to you.
As you approach the end of the story, check your remaining challenges before charging ahead. One particularly important requirement is Above the Law 4: Back Alley Cleanup. If you complete every bounty before obtaining the required Abyss Artifact, there is no other way to complete the challenge. Make sure this is taken care of while the necessary content is still available.
Otherwise, you are free to finish the story at your own pace. Keep working on challenges whenever convenient, experiment with different weapons, continue upgrading your equipment, and grab Artifacts and other objectives as you travel. Every challenge you finish naturally now is one less item waiting for you during the much larger cleanup phase.
There is no reason to turn the final stretch into a giant checklist if you are enjoying the game. Take care of the requirements that can cause problems later, then enjoy finishing the story. The real checklist is waiting patiently for you afterward. And unfortunately, it has been eating well.
Once the story is complete, the Platinum becomes much more straightforward: finish the remaining Challenges. This is where you should expect to spend a large portion of your Platinum journey. Open the Journal and use the Challenges tab as your master checklist, then work through whatever remains in whatever order makes sense. Camps, enemies, and the open world give you plenty of opportunities to clean up weapon and combat requirements you didn't complete naturally.
Hopefully you experimented with different weapons and completed plenty of the easier challenges during the story. If you didn't, don't panic. Take the remaining trophy-related challenges one at a time rather than staring at the entire list and wondering what life choices brought you here. Some requirements have easier methods, workarounds, or exploits, and updates may introduce additional options over time, so it is worth checking for newer solutions if a particular challenge is giving you trouble.
Keep chipping away at the Journal until the last challenge falls. Crimson Desert's Platinum is a long haul, but by this point you have already explored Pywel, built up your gear, finished the story, and survived the bulk of the journey. Now it is just you and the checklist. And Sailfish. Apparently Sailfish has chosen violence.
Completion Video Playlist
2 videos
Crimson Desert - 100% Platinum Walkthrough - PS5 Pro 4K60fps - No Commentary - Part 1