


Trophy Guide Preview
Overall Trophy Progress
0 / 43 Completed
0%
Trophy Types
Platinum
0 / 1Gold
0 / 3Silver
0 / 13Bronze
0 / 26Categories
Collectible
0 / 12Combat
0 / 6Ending
0 / 3Misc
0 / 7Story
0 / 14

Enter the fading kingdom of Lothric, where ancient lords have abandoned their thrones and the world teeters on the edge of darkness. Battle terrifying enemies, explore interconnected ruins, and master unforgiving combat in FromSoftware's dark fantasy action RPG.
Overall Trophy Progress
0 / 43 Completed
0%
Platinum Path
EARLY GAME Welcome to Lothric, Ashen One. Your first playthrough is about learning the combat, exploring every suspicious corner, and building the foundation for your Platinum. Take your time, experiment with weapons, and collect as many rings, gestures, sorceries, miracles, and pyromancies as possible. Keep boss souls instead of consuming them, since several are needed for special rings and spells. Collect Estus Sha...
YouTube Playlist
DARK SOULS III — Platinum Walkthrough
Trophy: The Dark Soul
Acquire all trophies.
Type: Platinum
Unlock Details
Earn all 42 other trophies in DARK SOULS III to unlock the Platinum.

Trophy: Covenant: Blue Sentinels
Discover Blue Sentinels covenant.
Type: Bronze
Category: Collectible
Unlock Details
Discover the Blue Sentinels covenant by speaking with Horace the Hushed in the Road of Sacrifices. Progress through the area until you reach the Halfway Fortress bonfire. Nearby, you'll find Anri of Astora and Horace resting beside the path. Speak with Anri, then interact with Horace to receive the Blue Sentinels covenant item. The trophy unlocks immediately.
Tip
The Blue Sentinels covenant allows you to be summoned automatically to help players wearing the Way of Blue covenant defend against invaders. It's also a useful introduction to the multiplayer system before tackling the more demanding covenant rewards.
Video Guide: https://www.youtube.com/watch?v=0bzLK7tRg1w&list=PLRr5L69yg_kFoVHrYn8gemJvOwNQhXK-M&index=11&pp=iAQB
Trophy: Covenant: Warrior of Sunlight
Discover Warrior of Sunlight covenant.
Type: Bronze
Category: Collectible
Unlock Details
Discover the Warrior of Sunlight covenant in the Undead Settlement. From the Undead Settlement bonfire, head toward the large gathering of enemies surrounding a burning tree. Continue past them and enter the nearby house through the side passage. Inside, drop through the hole in the floor to reach a small room containing Estus Soup and the Warrior of Sunlight covenant item. Pick up the item to unlock the trophy.
Tip
You'll need this covenant for Master of Miracles. Offering 10 Sunlight Medals at the Sunlight Altar earns Sacred Oath, while 30 earns Great Lightning Spear. Helping other players defeat bosses is an effective way to earn medals, but Lothric Knights can also drop them if you prefer playing offline.
Video Guide: https://www.youtube.com/watch?v=xlG6rK0rRdw&list=PLRr5L69yg_kFoVHrYn8gemJvOwNQhXK-M&index=10&pp=iAQB
Trophy: Covenant: Way of Blue
Discover Way of Blue covenant.
Type: Bronze
Category: Collectible
Unlock Details
Discover the Way of Blue covenant by speaking with Emma, the High Priestess of Lothric Castle. You'll find Emma inside the cathedral directly opposite Vordt of the Boreal Valley's boss arena, near the beginning of the game. Speak with her to receive the Small Lothric Banner, then continue the conversation until she gives you the Way of Blue covenant item. The trophy unlocks as soon as you receive it.
Tip
Equip the Way of Blue covenant if you're worried about hostile player invasions. It can summon friendly Blue Sentinels or Blades of the Darkmoon to help defend you. Sometimes even Lothric believes in calling for backup.
Video Guide: https://www.youtube.com/watch?v=s0L-ZwdnSuk&list=PLRr5L69yg_kFoVHrYn8gemJvOwNQhXK-M&index=8&pp=iAQB
Trophy: Master of Expression
Learn all gestures.
Type: Silver
Category: Collectible
Unlock Details
Learn all 33 gestures in the base game. Seven are available from the beginning, while the remaining 26 come from NPC interactions, questlines, summons, and exploration. Many gestures are easy to obtain simply by speaking with characters and exhausting their dialogue. Others require specific actions, such as helping Siegward defeat the Fire Demon, progressing Sirris's questline, or summoning certain NPCs before boss encounters. Be especially careful with Proper Bow, Dignified Bow, Duel Bow, Darkmoon Loyalty, and the gestures associated with Siegward and Patches. Follow the accompanying video to collect every gesture and unlock the trophy.
Tip
Whenever you meet a friendly NPC, exhaust their dialogue and check back after major bosses. In a world where nearly everything wants to kill you, the occasional conversation is surprisingly rewarding.
Warning
Several gestures are highly missable, particularly those tied to NPC summons before the Abyss Watchers or Pontiff Sulyvahn. Missing these opportunities can force you to wait until another playthrough.
Video Guide: https://www.youtube.com/watch?v=nqRQ_fbx6ro&list=PLSz08HX7PxlUPbDBVbkojs3MX52TrgAsz&index=24&pp=iAQB
Trophy: Master of Infusion
Perform all forms of infusion.
Type: Silver
Category: Collectible
Unlock Details
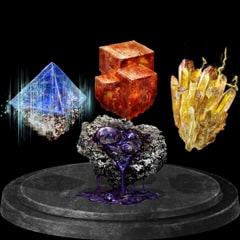
Perform all 15 weapon infusion types using Blacksmith Andre at Firelink Shrine. Infusion allows you to modify a weapon's damage properties, elemental effects, status buildup, or attribute scaling. Different infusions require specific gems, and many remain unavailable until you collect special coals and deliver them to Andre. To unlock this trophy, you must perform each of the 15 infusion types at least once. You do not need to keep every infused weapon equipped or use it in combat. First, locate the four coals required to unlock the additional infusion options. 1. Farron Coal — Road of Sacrifices Travel to the Halfway Fortress bonfire and proceed toward the swamp near the Crucifixion Woods. Follow the right side of the swamp toward the ruined stone building containing a Black Knight. Enter the building, defeat or avoid the knight, and collect the Farron Coal from the corpse among the rubble. Give the coal to Andre to unlock: Heavy Infusion Sharp Infusion Poison Infusion 2. Sage's Coal — Farron Keep Travel to the Farron Keep bonfire and enter the poisonous swamp. Follow the left-hand wall until you reach a small tower guarded by a Darkwraith. Defeat or avoid the enemy and enter the tower to collect the Sage's Coal from the corpse inside. Give the coal to Andre to unlock: Crystal Infusion Blessed Infusion Deep Infusion 3. Giant's Coal — Anor Londo Travel to the Anor Londo bonfire and climb the main staircase leading into the cathedral. At the top, turn left and enter the side area containing the remains of the Giant Blacksmith. Collect the Giant's Coal from his body. Give the coal to Andre to unlock: Lightning Infusion Simple Infusion Chaos Infusion 4. Profaned Coal — Irithyll Dungeon Progress through Irithyll Dungeon until you reach the lower prison section containing several Jailers. Search the cells in the large room patrolled by the Jailers. The Profaned Coal can be found on a corpse inside one of the accessible cells. Give the coal to Andre to unlock: Dark Infusion Blood Infusion Hollow Infusion 5. Perform All 15 Infusions With the four coals collected, you'll have access to the full selection of infusion types. The complete list is: Refined — Refined Gem Raw — Raw Gem Fire — Fire Gem Heavy — Heavy Gem Sharp — Sharp Gem Poison — Poison Gem Crystal — Crystal Gem Blessed — Blessed Gem Deep — Deep Gem Dark — Dark Gem Blood — Blood Gem Hollow — Hollow Gem Lightning — Lightning Gem Simple — Simple Gem Chaos — Chaos Gem Refined, Raw, and Fire infusions are available without collecting any additional coals. The remaining infusion types unlock as you deliver the four coals to Andre. Infusion gems can be discovered throughout the game, obtained from Crystal Lizards, or farmed from certain enemies. Once you have a compatible weapon, the corresponding gem, and any necessary coal, speak with Andre and select Infuse Weapon. Perform each infusion type at least once to satisfy the trophy's requirements.
Tip
You don't need 15 different weapons. You can repeatedly change the infusion on a compatible weapon, provided you have the required gems and souls. Keep track of the infusions you've already performed so you don't waste rare materials repeating the same one.
Warning
Infusions can significantly alter weapon scaling and damage, potentially making your primary weapon less effective for your build. Consider using a spare weapon for the trophy instead of repeatedly changing the equipment you rely on during difficult boss fights.
Video Guide: https://www.youtube.com/watch?v=JKgkdnXWg2c
Trophy: Master of Miracles
Acquire all miracles.
Type: Silver
Category: Collectible
Unlock Details
Acquire all 35 miracles in the base game. Miracles are obtained through merchants, exploration, boss soul transposition, NPC questlines, and covenant rewards. Rescue Irina of Carim in the Undead Settlement and Karla in Irithyll Dungeon. Give Irina the standard divine tomes and reserve the dark tomes for Karla to avoid interfering with Irina's services. Several miracles require additional preparation. You'll need to progress Siegward's questline for Emit Force, obtain the Londor Braille Divine Tome from Yuria, and collect covenant rewards such as Great Lightning Spear and Darkmoon Blade. Use the accompanying video to find the remaining miracles scattered throughout Lothric.
Tip
Work on covenant rewards during your regular playthroughs rather than saving them all for the end. Proofs of a Concord Kept are especially notorious for their low drop rate. Even the Silver Knights will eventually start looking tired of seeing you.
Warning
The Londor Braille Divine Tome is missable if you fail to unlock Yuria as a merchant. Complete Yoel's five free levels before defeating the Abyss Watchers to make Yuria available.
Video Guide: https://www.youtube.com/watch?v=xg1kiDgwfO0&list=PLSz08HX7PxlUPbDBVbkojs3MX52TrgAsz&index=27&pp=iAQB
Trophy: Master of Pyromancies
Acquire all pyromancies.
Type: Silver
Category: Collectible
Unlock Details
Acquire all 27 pyromancies in the base game. These fiery abilities come from merchants, hidden locations, boss soul transposition, and covenant rewards. Rescue Cornyx of the Great Swamp in the Undead Settlement and Karla in Irithyll Dungeon. Both teach pyromancies, and you'll need to collect the appropriate pyromancy tomes to unlock their additional spells. Several pyromancies are found in optional areas, particularly Smouldering Lake and the Demon Ruins. You'll also need Warmth, which requires offering 30 Vertebra Shackles to the Mound-makers covenant. Follow the accompanying video to locate every pyromancy and complete the collection.
Tip
Explore Smouldering Lake thoroughly before moving into New Game+. It's packed with valuable pyromancies, hidden passages, and enemies determined to turn you into a particularly crispy Ashen One.
Warning
Don't overlook the Mound-makers covenant. Its Warmth pyromancy is required for the trophy, and failing to unlock the covenant early can complicate your collection.
Video Guide: https://www.youtube.com/watch?v=l6gJXmeY5Xc&list=PLSz08HX7PxlUPbDBVbkojs3MX52TrgAsz&index=26&pp=iAQB
Trophy: Master of Rings
Acquire all rings.
Type: Silver
Category: Collectible
Unlock Details
Acquire all 107 required rings and ring variants from the base game on a single character. Rings are found throughout Lothric, purchased from merchants, obtained through NPC questlines, created through boss soul transposition, and earned from covenants. You'll need to progress through New Game+ and New Game++ to collect the additional ring variants that don't appear during your first playthrough. This includes the +1 and +2 variants and the Life Ring +3. Some important rings are tied to Sirris, Anri, Orbeck, and covenant rewards, so follow their questlines carefully. Use the accompanying video to track down the complete collection across all three playthroughs.
Tip
Keep every ring you collect, including duplicates and upgraded variants. Organizing your collection as you progress is considerably easier than discovering you're missing one ring after three journeys through Lothric.
Warning
The Silvercat Ring from Sirris is missable if you advance Rosaria's Fingers covenant too early. Complete Sirris's required questline first, and remember that all ring variants must be collected for the trophy.
Video Guide: https://www.youtube.com/watch?v=rG9zDPjmbz8&list=PLSz08HX7PxlUPbDBVbkojs3MX52TrgAsz&index=23&pp=iAQB0gcJCUcMAYcqIYzv

Trophy: Master of Sorceries
Acquire all sorceries.
Type: Silver
Category: Collectible
Unlock Details
Acquire all 34 sorceries in the base game. These are obtained through merchants, exploration, boss soul transposition, and covenant rewards. Recruit Orbeck of Vinheim in the Road of Sacrifices with at least 10 Intelligence, then collect the four sorcery scrolls to expand his inventory. You'll also need to rescue Karla from Irithyll Dungeon for her dark sorceries. Pay special attention to Chameleon, which is tied to Anri's questline, and Great Deep Soul, which requires reaching Rank 1 with the Aldrich Faithful covenant. Use the accompanying video to track down every sorcery and complete your collection.
Tip
Collect Orbeck's scrolls early and purchase his available spells before advancing too far. Keeping your magical shopping list under control now will save plenty of backtracking later.
Warning
Orbeck can permanently leave Firelink Shrine during a playthrough if you fail to provide him with a scroll before progressing too far. Several sorceries are also tied to missable NPC questlines, so don't leave everything until the final boss.
Video Guide: https://www.youtube.com/watch?v=voy5R4GtaK4&list=PLSz08HX7PxlUPbDBVbkojs3MX52TrgAsz&index=25&pp=iAQB
Trophy: Supreme Weapon Reinforcement
Reinforce any weapon to the highest level.
Type: Silver
Category: Collectible
Unlock Details
Upgrade a standard weapon to its maximum reinforcement level of +10. Weapon reinforcement is handled by Blacksmith Andre at Firelink Shrine. Speak with him and select the Reinforce Weapon option to improve your equipment using Titanite materials and souls. For this trophy, choose a standard weapon that follows the regular +10 upgrade path, such as a Long Sword, Broadsword, or Claymore. You'll need the following upgrade materials: Titanite Shards +1: 2 Titanite Shards +2: 4 Titanite Shards +3: 6 Titanite Shards Large Titanite Shards +4: 2 Large Titanite Shards +5: 4 Large Titanite Shards +6: 6 Large Titanite Shards Titanite Chunks +7: 2 Titanite Chunks +8: 4 Titanite Chunks +9: 6 Titanite Chunks Titanite Slab - +10: 1 Titanite Slab In total, upgrading a standard weapon from its base level to +10 requires 12 Titanite Shards, 12 Large Titanite Shards, 12 Titanite Chunks, and 1 Titanite Slab. Titanite materials can be found throughout Lothric, obtained from certain enemies, and eventually purchased from the Shrine Handmaid after providing the appropriate ashes. Titanite Slabs are considerably rarer, so you'll want to save one for a weapon you actually intend to use. Once Andre upgrades your chosen standard weapon to +10, the trophy unlocks.
Tip
Upgrade a weapon that suits your character's build rather than choosing something solely for the trophy. You'll be completing at least three playthroughs for the Platinum, and having a fully upgraded weapon makes the increasingly difficult enemies much easier to handle.
Warning
For a reliable unlock, use a standard weapon that reaches +10. Some special and boss weapons only reach +5 and are not reliably recognized for this trophy. Don't spend a valuable Titanite Slab upgrading one of those weapons solely to earn Supreme Weapon Reinforcement.
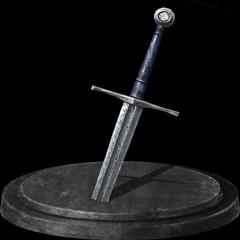
Trophy: Ultimate Bonfire
Reinforce a bonfire to the highest level.
Type: Silver
Category: Collectible
Unlock Details
Reinforce the Firelink Shrine bonfire to its maximum level by burning 10 Undead Bone Shards. These shards are hidden throughout Lothric, including the Undead Settlement, Farron Keep, Cathedral of the Deep, Catacombs of Carthus, Smouldering Lake, Irithyll, Profaned Capital, Lothric Castle, and Grand Archives. Once you've collected an Undead Bone Shard, return to the Firelink Shrine bonfire and select Burn Undead Bone Shard. Each upgrade increases the amount of HP and FP restored by your Estus Flasks. Burn your tenth shard to reach the maximum bonfire level and unlock the trophy.
Tip
Burn shards as soon as you find them. Stronger Estus healing makes a huge difference during difficult boss fights, especially when your health bar starts disappearing faster than your confidence.
Video Guide: https://www.youtube.com/watch?v=30Sp80lyyFU&list=PLRr5L69yg_kFoVHrYn8gemJvOwNQhXK-M&index=2&pp=iAQB
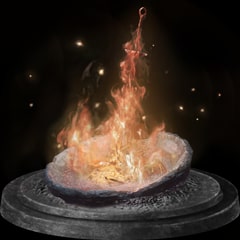
Trophy: Ultimate Estus
Reinforce the Estus Flask to the highest level.
Type: Silver
Category: Collectible
Unlock Details
Reinforce your Estus Flask to its maximum capacity by collecting 11 Estus Shards. Estus Shards are scattered throughout the game, often hidden near bonfires, inside buildings, or along optional paths. Each shard increases your total available flask uses when given to Blacksmith Andre at Firelink Shrine. Speak with Andre and select Reinforce Estus Flask whenever you find a shard. You'll eventually reach a maximum of 15 total flask uses, shared between your regular Estus Flask and Ashen Estus Flask. Once you reach maximum capacity, the trophy unlocks.
Tip
You can also speak with Andre to adjust how your flask uses are divided between healing HP and restoring FP. If your build relies entirely on melee combat, shifting more charges toward regular Estus can make surviving boss encounters considerably easier.
Warning
Increasing your flask capacity and strengthening your bonfire are separate upgrades. Collect Estus Shards for additional uses and Undead Bone Shards for stronger healing. You'll need both systems fully upgraded to earn their respective trophies.
Video Guide: https://www.youtube.com/watch?v=I1feotRmNKA&list=PLRr5L69yg_kFoVHrYn8gemJvOwNQhXK-M&index=1&pp=iAQB

Trophy: Ancient Wyvern
Defeat Ancient Wyvern.
Type: Bronze
Category: Combat
Unlock Details
Defeat the Ancient Wyvern, an optional boss encountered near the beginning of Archdragon Peak. After reaching Archdragon Peak using the Path of the Dragon gesture, progress through the area until you encounter the enormous Ancient Wyvern. Although the boss has a massive health bar, you don't need to fight it directly. Instead, run past the Wyvern and take the path to the left. Continue through the surrounding ruins, avoiding the serpent enemies as you climb the ladders and scaffolding toward the upper section of the arena. Eventually, you'll reach a high ledge overlooking the Wyvern's head. Wait until the Wyvern moves into position beneath you, then jump from the ledge and perform a plunging attack while falling. If executed correctly, the attack will kill the Ancient Wyvern instantly and unlock the trophy.
Tip
Ignore the temptation to fight the Wyvern head-on. The intended solution is reaching the elevated platform and delivering a plunging attack. After spending hours upgrading weapons and perfecting combat techniques, defeating a dragon by jumping on its head is wonderfully straightforward.
Warning
You must perform an actual plunging attack as you fall toward the Wyvern's head. Simply jumping off the ledge without attacking won't trigger the special kill and may result in an unfortunate landing.
Video Guide: https://www.youtube.com/watch?v=q_dEu_8D_W0
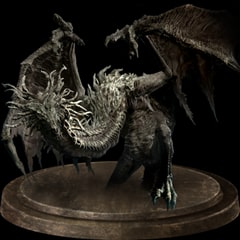
Trophy: Champion Gundyr
Defeat Champion Gundyr.
Type: Bronze
Category: Combat
Unlock Details
Defeat Champion Gundyr in the hidden Untended Graves area. After defeating Oceiros, continue through the passage behind his arena and strike the illusory wall beyond the treasure chest to reveal the entrance to Untended Graves. Follow the path through this darkened version of the Cemetery of Ash until you reach Champion Gundyr's arena. Unlike his earlier appearance, Champion Gundyr fights without transforming into an abyssal creature. Instead, he relies on relentless halberd attacks, powerful kicks, shoulder charges, and aggressive combinations. Stay close enough to punish his missed attacks, but avoid standing directly behind him for extended periods. His kicks can quickly interrupt your attacks and leave you vulnerable. As the fight progresses, Gundyr becomes faster and more aggressive, chaining attacks together with very little downtime. Dodge carefully, wait for reliable openings, and avoid trading blows unnecessarily. Defeat Champion Gundyr to unlock the trophy automatically.
Tip
Many of Gundyr's halberd attacks can be parried, making this fight significantly easier if you've mastered the timing. If parrying isn't your strength, focus on dodging and counterattacking instead. Gundyr is more than happy to provide a practical demonstration of why mistimed parries are dangerous.
Video Guide: https://www.youtube.com/watch?v=C9HqKNbnBZ0
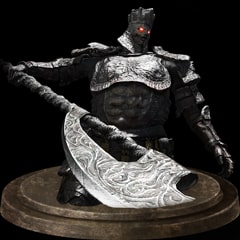
Trophy: Curse-rotted Greatwood
Defeat the Curse-rotted Greatwood.
Type: Bronze
Category: Combat
Unlock Details
Defeat the Curse-rotted Greatwood, an optional boss found in the Undead Settlement. Progress through the settlement until you reach the large courtyard beyond the graveyard, where a massive tree is surrounded by worshipping enemies. Enter the arena to begin the encounter. Unlike most bosses, the Greatwood takes significant damage when you attack the pale, egg-like growths covering its body. Begin by targeting the large cluster on its lower torso while avoiding its sweeping attacks and the surrounding enemies. After enough damage, the Greatwood breaks through the floor, dropping you into an underground arena for the second phase. Continue attacking the remaining growths on its limbs and back. You can also damage the pale arm that emerges from its body, but be careful of its powerful grabs and slams. Destroy enough growths or deal sufficient damage to defeat the Greatwood and unlock the trophy.
Tip
Defeating the Greatwood rewards you with the Transposing Kiln, which allows Ludleth of Courland at Firelink Shrine to transform boss souls into unique weapons, rings, and spells. Several of these rewards are required for the Platinum, so don't forget to bring him the kiln.
Warning
If you haven't joined the Mound-makers covenant through Holy Knight Hodrick, do so before defeating the Greatwood. Killing this boss closes the early cage-transport method of joining, although another opportunity exists through Sirris's questline.
Video Guide: https://www.youtube.com/watch?v=JLJp8NOsCbA
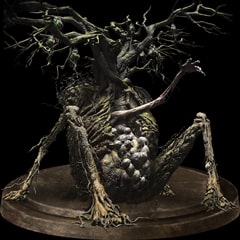
Trophy: Oceiros, the Consumed King
Defeat Oceiros, the Consumed King.
Type: Bronze
Category: Combat
Unlock Details
Defeat Oceiros, the Consumed King, in the Consumed King's Garden. After defeating the Dancer of the Boreal Valley, climb the ladder behind her arena and take the left passage toward the Consumed King's Garden. Progress through the poisonous garden and defeat or avoid the powerful Cathedral Knights guarding the approach to Oceiros's boss room. During the first phase, Oceiros attacks with his staff, sweeping strikes, and magical frost breath. Stay near his sides or behind him, dodge his attacks, and strike whenever an opening appears. At approximately half health, Oceiros becomes much more aggressive, moving on all fours and charging unpredictably across the arena. Avoid standing directly in front of him, as his sudden charges can catch you before you have time to react. Stay patient, reposition after each charge, and continue attacking until Oceiros falls. Defeat him to unlock the trophy automatically.
Tip
Lightning damage can be effective against Oceiros. Staying close to his rear legs also helps avoid several attacks, although his frantic second phase can turn even the best positioning into a complete mess.
Warning
Oceiros's second-phase charges are extremely fast and can deal heavy damage. Avoid committing to lengthy attack combinations, and keep enough stamina available to dodge when he suddenly changes direction.
Video Guide: https://www.youtube.com/watch?v=niSVw7CXVFU
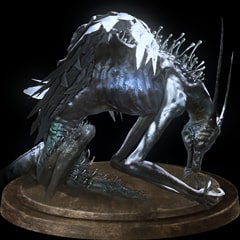
Trophy: Old Demon King
Defeat Old Demon King.
Type: Bronze
Category: Combat
Unlock Details
Defeat the Old Demon King, an optional boss found in Smouldering Lake. From the Catacombs of Carthus, reach the suspension bridge near High Lord Wolnir and destroy it. Once the bridge collapses, use it as a ladder to descend into the lower area and continue toward Smouldering Lake. Cross the lake while avoiding the giant ballista's projectiles and the enormous Carthus Sandworm. The Old Demon King's arena is located beyond the worm. The boss uses powerful fire attacks, sweeping hammer strikes, and explosions that punish players who remain too close for too long. Bait an attack, move in for a few hits, and retreat before he retaliates. As his health decreases, he gains additional fire-based attacks, including dangerous area-of-effect explosions. Watch his movements carefully and create distance whenever he begins charging a large attack. Defeat the Old Demon King to unlock the trophy.
Tip
Ranged attacks can make this fight considerably easier, allowing you to damage the boss without constantly dealing with his close-range explosions. Fire resistance also helps, although bringing fire protection to a battle against a demon king feels like the bare minimum of preparation.
Video Guide: https://www.youtube.com/watch?v=suSZS4sFvIU
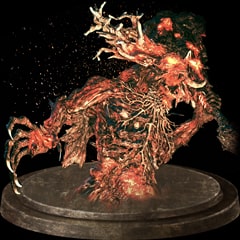
Trophy: The Nameless King
Defeat Nameless King.
Type: Bronze
Category: Combat
Unlock Details
Defeat the Nameless King, an optional boss found at the end of Archdragon Peak. Progress through Archdragon Peak until you reach the Great Belfry bonfire. Ring the enormous bell to summon a storm, then cross the cloudy pathway to enter the boss arena. This challenging encounter has two phases. During the first phase, you'll fight the King of the Storm, a massive wyvern ridden by the Nameless King. Focus your attacks on the wyvern's head rather than its body, dodging the rider's lightning attacks and striking whenever the creature lowers its head. Avoid standing directly beneath the wyvern for too long, as it can take flight and unleash a devastating blast of fire. Once the wyvern falls, the Nameless King enters the fight himself with a completely new health bar. During the second phase, he attacks with powerful lightning strikes, sweeping spear combinations, and delayed attacks designed to punish impatient dodging. Watch his movements carefully, dodge when his attacks actually connect, and counter with one or two strikes before retreating. Stay patient and defeat the Nameless King to unlock the trophy.
Tip
Lightning damage is particularly effective against the King of the Storm, while the Nameless King himself is vulnerable to dark damage. Ranged attacks can also make the second phase easier by allowing you to maintain some distance. Most importantly, don't panic-roll. This boss has spent centuries perfecting the art of making impatient players regret their life choices.
Warning
If you die during the second phase, you'll have to defeat the King of the Storm again. Both phases must be completed in a single attempt, so conserve your Estus and avoid unnecessary risks during the opening fight.
Video Guide: https://www.youtube.com/watch?v=idZL-pG_zU8
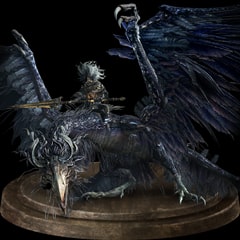
Unlock Details
Defeat the Nameless King, an optional boss found at the end of Archdragon Peak.
Progress through Archdragon Peak until you reach the Great Belfry bonfire. Ring the enormous bell to summon a storm, then cross the cloudy pathway to enter the boss arena.
This challenging encounter has two phases.
During the first phase, you'll fight the King of the Storm, a massive wyvern ridden by the Nameless King. Focus your attacks on the wyvern's head rather than its body, dodging the rider's lightning attacks and striking whenever the creature lowers its head.
Avoid standing directly beneath the wyvern for too long, as it can take flight and unleash a devastating blast of fire.
Once the wyvern falls, the Nameless King enters the fight himself with a completely new health bar.
During the second phase, he attacks with powerful lightning strikes, sweeping spear combinations, and delayed attacks designed to punish impatient dodging. Watch his movements carefully, dodge when his attacks actually connect, and counter with one or two strikes before retreating.
Stay patient and defeat the Nameless King to unlock the trophy.
Tip
Lightning damage is particularly effective against the King of the Storm, while the Nameless King himself is vulnerable to dark damage. Ranged attacks can also make the second phase easier by allowing you to maintain some distance. Most importantly, don't panic-roll. This boss has spent centuries perfecting the art of making impatient players regret their life choices.
Warning
If you die during the second phase, you'll have to defeat the King of the Storm again. Both phases must be completed in a single attempt, so conserve your Estus and avoid unnecessary risks during the opening fight.
Trophy: The End of Fire
Reach "The End of Fire" ending.
Type: Gold
Category: Ending
Unlock Details
Reach The End of Fire ending by obtaining the Eyes of a Fire Keeper and summoning the Fire Keeper after defeating the final boss. First, defeat Oceiros, the Consumed King, in the Consumed King's Garden. Continue into the room beyond his arena and strike the illusory wall behind the treasure chest to reveal a hidden passage leading to the Untended Graves. Travel through this secret area, defeat Champion Gundyr, and enter the darkened version of Firelink Shrine. Head toward the corridor where Irina of Carim normally resides in the regular shrine and strike the illusory wall at its end. Behind it, you'll find the Eyes of a Fire Keeper. Return to the normal Firelink Shrine and give the eyes to the Fire Keeper. Speak with her about wishing for a world without flame, preparing her for the ending. Continue through the story until you reach the Soul of Cinder. After defeating the boss, do not interact with the bonfire. Instead, look for the Fire Keeper's summon sign on the ground nearby and use it to summon her. Allow the resulting cutscene to finish without interfering, and The End of Fire trophy will unlock.
Tip
This ending fits nicely into your New Game+ playthrough. You can collect the new ring variants along the way while working toward the secret areas needed to obtain the Fire Keeper's eyes.
Warning
Do not attack the Fire Keeper during the ending cutscene. Doing so triggers an alternate version of the ending that does not award The End of Fire trophy. After everything you've survived, accidentally ruining the ending yourself would be a particularly cruel way to celebrate.
Video Guide: https://www.youtube.com/watch?v=eHrDMa02c8c&list=PLRr5L69yg_kFoVHrYn8gemJvOwNQhXK-M&index=6&pp=iAQB

Trophy: The Usurpation of Fire
Reach "The Usurpation of Fire" ending.
Type: Gold
Category: Ending
Unlock Details
Reach The Usurpation of Fire ending by completing the interconnected questlines of Yoel of Londor, Yuria of Londor, and Anri of Astora. This is the most complicated of the three required endings, with several decisions that can permanently prevent completion during your current playthrough. Following each stage carefully is essential. Step 1 — Recruit Yoel of Londor After defeating Vordt of the Boreal Valley, travel to the Foot of the High Wall bonfire in the Undead Settlement. Head down the stairs toward the group of pilgrims and locate Yoel of Londor among them. Speak with Yoel and accept his services. He will relocate to Firelink Shrine. Step 2 — Obtain Five Dark Sigils Find Yoel in Firelink Shrine and select his option to draw out your true strength. This grants a free level and your first Dark Sigil. To receive additional levels, you must accumulate Hollowing by dying. Return to Yoel whenever more levels become available and repeat the process until you have received five free levels and possess five Dark Sigils. All five levels must be obtained before defeating the Abyss Watchers. Once that boss is defeated, Yoel's quest can no longer be advanced. After obtaining the five levels, Yoel will eventually die and Yuria of Londor will appear in his place. Speak with Yuria and exhaust her dialogue. Step 3 — Meet Anri of Astora Travel to the Halfway Fortress bonfire in the Road of Sacrifices and speak with Anri of Astora. Continue talking until all dialogue is exhausted. Anri's appearance depends on your character's gender, but the quest requirements remain the same. Step 4 — Speak with Anri at Firelink Shrine Defeat the Deacons of the Deep in the Cathedral of the Deep. Return to Firelink Shrine and locate Anri near the thrones. Speak with Anri again until all dialogue has been exhausted. Step 5 — Find Anri in the Catacombs of Carthus After defeating the Abyss Watchers, enter the Catacombs of Carthus. Find Anri in a passage near the first rolling skeleton boulder. Anri will explain that Horace has gone missing. Exhaust the dialogue before continuing. Later, locate Anri again on the ledge overlooking the long suspension bridge near the approach to High Lord Wolnir. Step 6 — Deal with Horace Break the suspension bridge near High Lord Wolnir and use the collapsed bridge as a ladder to descend toward Smouldering Lake. From the lake entrance, head to the right and locate the cave containing Horace, who has become hostile. Defeat him before continuing Anri's questline. Do not reveal Horace's location to Anri while he remains alive, as this can disrupt the quest. Step 7 — Meet Anri at the Church of Yorshka Continue into Irithyll of the Boreal Valley and reach the Church of Yorshka bonfire. Anri will be standing nearby. Speak with Anri until the dialogue is exhausted. A disguised pilgrim connected to Yuria will also be present in the church, appearing as a statue. Do not attack or kill this pilgrim. The pilgrim must survive for the required ceremony to take place. Step 8 — Speak with Yuria After Pontiff Sulyvahn Defeat Pontiff Sulyvahn, then return to Firelink Shrine and speak with Yuria. Continue the conversation until she informs you that your intended spouse is waiting at the Darkmoon Tomb. Step 9 — Complete the Ceremony Return to Irithyll and travel through the area beyond Pontiff Sulyvahn toward Anor Londo. Shortly before the rotating staircase tower that leads to Anor Londo, locate the circular room containing an illusory wall. Strike the wall to reveal the passage into the Darkmoon Tomb. Speak with the pilgrim waiting inside to receive the Sword of Avowal. Continue to the far end of the tomb and interact with Anri to perform the ceremony. Once the cutscene finishes, this major requirement for The Usurpation of Fire is complete. Step 10 — Preserve Your Dark Sigils Return to Firelink Shrine and speak with Yuria again to confirm your progress. From this point onward, continue through the main story while preserving your Dark Sigils. You must not use the Fire Keeper's option to heal the Dark Sigil, as removing them will prevent the ending. Step 11 — Claim the Flame Progress to the Kiln of the First Flame and defeat the Soul of Cinder. After the battle, interact with the bonfire. If you've completed the necessary questline requirements, the unique Usurpation of Fire ending will play, unlocking the trophy. Congratulations! You've successfully navigated one of Lothric's most elaborate questlines. Apparently, defeating gods wasn't complicated enough without organizing a deeply unsettling wedding.
Tip
Save this ending for New Game++ as recommended in the Platinum roadmap. By then, you'll have completed most of your other objectives and can focus on the quest without juggling as many distractions. Yuria also sells items required for other collection trophies, so check her inventory while she's available.
Warning
This ending is highly missable. Failing to obtain all five levels from Yoel before defeating the Abyss Watchers, killing the disguised pilgrim in the Church of Yorshka, or healing your Dark Sigils can prevent completion. There is no chapter select, so a failed questline may require another playthrough.
Video Guide: https://www.youtube.com/watch?v=4qXFr_nzPyk&list=PLRr5L69yg_kFoVHrYn8gemJvOwNQhXK-M&index=7&pp=iAQB

Trophy: To Link the First Flame
Reach "To Link the First Flame" ending.
Type: Gold
Category: Ending
Unlock Details
Reach the standard ending by defeating the Soul of Cinder and linking the First Flame. Progress through the main story and defeat the four Lords of Cinder: the Abyss Watchers, Yhorm the Giant, Aldrich, Devourer of Gods, and Lothric, Younger Prince. Return their remains to their respective thrones in Firelink Shrine, then interact with the bonfire to travel to the Kiln of the First Flame. Make your way through the area and defeat the Soul of Cinder. This final boss has two phases, with different fighting styles and powerful attacks. Stay patient, learn its attack patterns, and avoid getting greedy with your hits. You've made it this far, so there's no reason to start treating stamina like an optional feature. Once the boss is defeated, approach the bonfire in the arena and choose to link the First Flame. The ending will play, unlocking the trophy.
Tip
This is the simplest of the three required endings because it has no special questline requirements. It's an excellent choice for your first playthrough, allowing you to focus on exploration and collecting trophies without worrying about complicated ending conditions.
Warning
If you've fulfilled the conditions for The Usurpation of Fire, interacting with the bonfire can trigger that ending instead. Make sure you haven't completed its required ritual if you're specifically aiming for To Link the First Flame.
Video Guide: https://www.youtube.com/watch?v=kPP35HRfQ5U&list=PLRr5L69yg_kFoVHrYn8gemJvOwNQhXK-M&index=5&pp=iAQB
Trophy: Archdragon Peak
Reach Archdragon Peak.
Type: Bronze
Category: Misc
Unlock Details
Discover Archdragon Peak, a secret area accessible through a special gesture in Irithyll Dungeon. First, defeat Oceiros, the Consumed King. Continue into the room behind his boss arena and collect the Path of the Dragon gesture from the seated knight statue beside the fountain. Next, travel to Irithyll Dungeon and locate the outdoor platform near the shortcut elevator, where several dragon-like statues are sitting in meditation overlooking a distant mountain. Stand on the empty mat beside them and perform the Path of the Dragon gesture. Remain in position until a cutscene plays, transporting you to Archdragon Peak. Walk forward into the new area to unlock the trophy.
Tip
Archdragon Peak contains two optional bosses, Ancient Wyvern and the Nameless King, both required for the Platinum. The latter is particularly fond of reminding players that dodging half a second too early is still dodging incorrectly.
Video Guide: https://www.youtube.com/watch?v=wp_oJmqeIfk&list=PLRr5L69yg_kFoVHrYn8gemJvOwNQhXK-M&index=4&pp=iAQB
Trophy: Covenant: Aldrich Faithful
Discover Aldrich Faithful covenant.
Type: Bronze
Category: Misc
Unlock Details
Discover the Aldrich Faithful covenant in Irithyll of the Boreal Valley. After defeating Pontiff Sulyvahn, continue into the courtyard filled with fallen giants. Cross the area toward the building leading to Anor Londo. Inside, locate the illusory wall near the staircase and strike it to reveal a hidden passage. Descend the ladder into the underground chamber. Two enormous Sulyvahn's Beasts guard the room, so be prepared for a difficult encounter. Once you've dealt with them, approach Archdeacon McDonnell in the corner and interact with him to join the covenant. The trophy unlocks when you receive the covenant item.
Tip
Offering 10 Human Dregs earns the Great Deep Soul sorcery, required for Master of Sorceries. The Deacons near the courtyard beyond Pontiff Sulyvahn can drop Human Dregs, making them a convenient farming option.
Warning
There's also a Ring of Favor waiting for anyone brave enough to defeat both beasts. Two oversized monsters guarding valuable treasure? Classic Dark Souls hospitality.
Video Guide: https://www.youtube.com/watch?v=Uuit1uaUjUY&list=PLRr5L69yg_kFoVHrYn8gemJvOwNQhXK-M&index=14&pp=iAQB
Trophy: Covenant: Blade of the Darkmoon
Discover Blade of the Darkmoon covenant.
Type: Bronze
Category: Misc
Unlock Details
Discover the Blade of the Darkmoon covenant by speaking with Company Captain Yorshka in Anor Londo. From the Anor Londo bonfire, descend the rotating staircase tower and look toward the distant tower across the gap. An invisible walkway connects the two structures, allowing you to cross safely despite appearances. Follow the invisible path to Yorshka's tower and speak with her to join the covenant. If you've learned the Darkmoon Loyalty gesture from Sirris, you can use it to pledge allegiance. The trophy unlocks once you receive the covenant item.
Tip
You'll need 30 Proofs of a Concord Kept to earn the Darkmoon Blade miracle, plus 10 for the Darkmoon Ring along the way. The Silver Knights near the Anor Londo bonfire can drop them, although they aren't exactly famous for their generosity.
Warning
If you haven't learned Darkmoon Loyalty, Yorshka may refuse to let you join. Make sure to obtain the gesture through Sirris's questline before progressing too far.
Video Guide: https://www.youtube.com/watch?v=QhYwVw3wGew&list=PLRr5L69yg_kFoVHrYn8gemJvOwNQhXK-M&index=15&pp=iAQB
Trophy: Covenant: Mound-makers
Discover Mound-makers covenant.
Type: Bronze
Category: Misc
Unlock Details
Discover the Mound-makers covenant in the Undead Settlement before defeating the Curse-rotted Greatwood. From the Undead Settlement bonfire, travel through the building toward the large gathering of enemies surrounding the burning tree. Cross the bridge on the right, then follow the path around the nearby building and climb the ladder. Continue across the rooftops until you find a large Hollow Manservant carrying a cage on its back. Approach the enemy from behind and interact with the cage instead of attacking. You'll be transported underground to meet Holy Knight Hodrick, who allows you to join the Mound-makers covenant. The trophy unlocks when you receive the covenant item.
Tip
You'll eventually need 30 Vertebra Shackles to earn the Warmth pyromancy. These can be obtained through appropriate multiplayer victories or farmed from certain skeleton enemies in the Catacombs of Carthus. Expect a little grinding. Apparently, collecting actual human vertebrae wasn't unpleasant enough without terrible drop rates.
Warning
Defeating the Curse-rotted Greatwood closes this early method of joining the covenant. A later opportunity exists through Sirris's questline, but obtaining the covenant before fighting the boss is the safest approach.
Video Guide: https://www.youtube.com/watch?v=TmEWhv3TEZY&list=PLRr5L69yg_kFoVHrYn8gemJvOwNQhXK-M&index=9&pp=iAQB
Trophy: Covenant: Rosaria's Fingers
Discover Rosaria's Fingers covenant.
Type: Bronze
Category: Misc
Unlock Details
Discover the Rosaria's Fingers covenant in the Cathedral of the Deep. Progress through the cathedral until you unlock the shortcut elevator near the area containing the giants. Ride the elevator upward, climb the nearby ladder, and follow the rooftops toward the cathedral's upper rafters. Carefully drop onto the platforms below and make your way into Rosaria's Bed Chamber. Speak with Rosaria and join her covenant to unlock the trophy.
Tip
Offering 10 Pale Tongues to Rosaria earns the Obscuring Ring, which you'll need for Master of Rings. Darkwraiths in Farron Keep can drop Pale Tongues if you'd rather farm them offline.
Warning
Offering Pale Tongues to Rosaria can interfere with Sirris's questline. Secure Darkmoon Loyalty and the Silvercat Ring first, unless you're deliberately following the requirements for Proper Bow during this playthrough.
Video Guide: https://www.youtube.com/watch?v=f4BlaCBwPa8&list=PLRr5L69yg_kFoVHrYn8gemJvOwNQhXK-M&index=13&pp=iAQB0gcJCUcMAYcqIYzv
Trophy: Covenant: Watchdogs of Farron
Discover Watchdogs of Farron covenant.
Type: Bronze
Category: Misc
Unlock Details
Discover the Watchdogs of Farron covenant by finding the Old Wolf of Farron in Farron Keep. From the Keep Ruins bonfire, descend the ramp into the poisonous swamp and locate the nearby tower with a ladder leading upward. Climb the ladder to reach the Old Wolf of Farron bonfire, then approach the enormous sleeping wolf and interact with it. Choose to pray to the Old Wolf to receive the Watchdogs of Farron covenant item and unlock the trophy.
Tip
You'll need to offer 30 Wolf's Blood Swordgrass to earn the Wolf Ring for Master of Rings. The three Ghru enemies near the Keep Ruins bonfire provide a convenient offline farming location.
Warning
Discover this covenant before advancing too far into the main story. Access to the Old Wolf can become unavailable later in the playthrough, forcing you to wait until New Game+.
Video Guide: https://www.youtube.com/watch?v=g77AE-HmT8M&list=PLRr5L69yg_kFoVHrYn8gemJvOwNQhXK-M&index=12&pp=iAQB
Trophy: Untended Graves
Reach the Untended Graves.
Type: Bronze
Category: Misc
Unlock Details
Discover the hidden Untended Graves area beyond the Consumed King's Garden. After defeating Oceiros, the Consumed King, continue through the passage behind his boss arena until you reach a room containing a treasure chest. Directly behind the chest is an illusory wall. Strike it to reveal a hidden passage, then follow the path down into the darkness. Continue forward until you enter the Untended Graves, unlocking the trophy.
Tip
Don't leave this area unexplored! You'll find Champion Gundyr, valuable rings, and a mysterious version of Firelink Shrine. It's also where you'll obtain the Eyes of a Fire Keeper, required for The End of Fire ending.
Video Guide: https://www.youtube.com/watch?v=9qKaIxOTG20&list=PLRr5L69yg_kFoVHrYn8gemJvOwNQhXK-M&index=3&pp=iAQB
Trophy: Crystal Sage
Defeat Crystal Sage.
Type: Bronze
Category: Story
Unlock Details
Defeat the Crystal Sage in the Road of Sacrifices. From the Crucifixion Woods bonfire, proceed through the ruined building until you reach the boss arena. The Crystal Sage relies on powerful sorceries and frequently teleports around the battlefield. Close the distance quickly, dodge incoming spells, and attack whenever possible. The Sage staggers easily, allowing you to interrupt several attacks. During the second phase, the Sage summons multiple copies that bombard you with magic. The illusions disappear after a single hit, while the real Sage casts purple spells instead of the clones' blue magic. Find the real Sage, keep up the pressure, and defeat it to unlock the trophy.
Tip
Throwing Knives are excellent for quickly eliminating the illusions without chasing them across the arena. Sometimes the best answer to an elaborate magical trick is simply throwing something sharp at it.
Video Guide: https://www.youtube.com/watch?v=UEjjWenxaSg
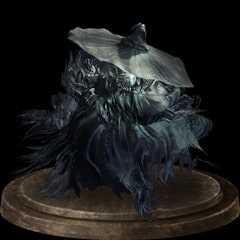
Trophy: Dancer of the Boreal Valley
Defeat Dancer of the Boreal Valley.
Type: Bronze
Category: Story
Unlock Details
Defeat the Dancer of the Boreal Valley in the High Wall of Lothric. After defeating three Lords of Cinder, you'll be transported back to the cathedral where you first met Emma, opposite Vordt's boss arena. Approach the statue behind Emma to trigger the Dancer encounter. During the first phase, the Dancer uses sweeping sword attacks, slow movements, and a dangerous grab that can deal enormous damage. Stay near her rear legs, dodge carefully, and avoid attacking directly in front of her. At approximately half health, she draws a second sword and becomes considerably more aggressive. Her extended spinning combinations can cover a large portion of the arena, so create distance until the attack finishes. Return to her sides when an opening appears, land a few controlled attacks, and repeat until she falls. Defeat the Dancer to unlock the trophy and gain access to Lothric Castle.
Tip
The arena's pillars can provide useful cover while you heal or reposition. Just don't rely on them to block every attack. The Dancer has absolutely no respect for architectural boundaries.
Warning
Her grab attack can deal devastating damage, particularly during later New Game cycles. Avoid standing directly in front of her, and don't attempt to trade hits during her lengthy spinning combinations.
Video Guide: https://www.youtube.com/watch?v=kNlDCaHylw0
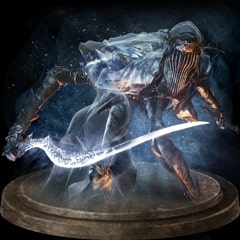
Trophy: Deacons of the Deep
Defeat the Deacons of the Deep.
Type: Bronze
Category: Story
Unlock Details
Defeat the Deacons of the Deep inside the Cathedral of the Deep. Progress through the cathedral until you reach the large chamber containing the gathered Deacons. During the first phase, focus on the Deacon glowing with a red aura. Defeating that enemy damages the shared boss health bar and transfers the aura to another Deacon. Once enough damage has been dealt, Archdeacon Royce appears and becomes your primary target. Push through the surrounding enemies, avoid their dark magic, and attack Royce until the boss health bar is depleted. Defeat the Deacons to unlock the trophy and obtain the Small Doll, which is required to enter Irithyll of the Boreal Valley.
Tip
Weapons with wide sweeping attacks are especially effective against the tightly packed enemies. Finally, a boss fight where wildly swinging a greatsword into a crowd is a surprisingly reasonable strategy.
Warning
During the second phase, the Deacons can channel a powerful curse attack that will eventually kill you. Interrupt their casting and defeat Royce quickly rather than allowing the fight to drag on.
Video Guide: https://www.youtube.com/watch?v=tTwu8MM9CYk
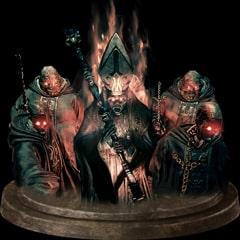
Trophy: Dragonslayer Armour
Defeat Dragonslayer Armour.
Type: Bronze
Category: Story
Unlock Details
Defeat the Dragonslayer Armour in Lothric Castle. Progress through Lothric Castle until you reach the Dragon Barracks. Continue past the two wyverns and make your way toward the large bridge leading to the Dragonslayer Armour's boss arena. This heavily armored opponent wields a massive greataxe and shield, delivering powerful attacks that can quickly drain your health and stamina. Stay mobile, dodge around his swings, and strike after he finishes an attack combination. During the second phase, the Pilgrim Butterflies surrounding the arena begin launching additional projectiles. Keep moving, watch for incoming attacks, and avoid getting trapped near the edges of the bridge. Defeat the Dragonslayer Armour to unlock the trophy automatically.
Tip
Lightning resistance and a weapon that deals consistent damage can make this encounter more manageable. Don't waste stamina repeatedly attacking his shield. Even an Ashen One should recognize when a giant slab of metal isn't interested in negotiating.
Warning
The arena has exposed edges, and several of the Dragonslayer Armour's attacks can knock you backward. Avoid fighting too close to the sides, especially when his heavier attacks begin.
Video Guide: https://www.youtube.com/watch?v=o1PTGsPSv2c
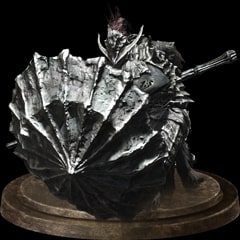
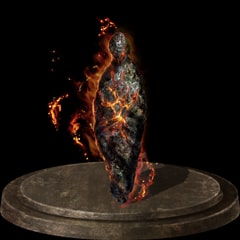
Trophy: Embrace the Flame
Become a Host of Embers for the first time.
Type: Bronze
Category: Story
Unlock Details
Become a Host of Embers for the first time. Ember is a special state that increases your maximum health and allows you to summon other players or eligible NPCs for assistance. You'll automatically enter this state after defeating Iudex Gundyr, the first boss in the Cemetery of Ash. Alternatively, you can activate the effect by consuming an Ember item while you're not already embered. Once you become a Host of Embers for the first time, the trophy unlocks.
Tip
Save your Ember items for challenging areas or boss encounters where the additional health and access to summons can make a real difference. The effect disappears when you die, so try not to spend one immediately before demonstrating your impressive ability to fall off a cliff.
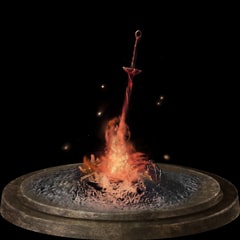
Trophy: Enkindle
Light a bonfire flame for the first time.
Type: Bronze
Category: Story
Unlock Details
Light a bonfire for the first time. After beginning your journey in the Cemetery of Ash, follow the main path until you discover your first bonfire. Approach it and interact with the Coiled Sword to light the flame. The trophy unlocks immediately after lighting your first bonfire. You'll naturally earn this trophy while progressing through the opening area, so there's no special preparation required.
Tip
Bonfires restore your health, replenish Estus Flasks, and serve as checkpoints throughout Lothric. Rest whenever you discover one. You'll appreciate having somewhere familiar to return after a boss decides your current strategy isn't working.
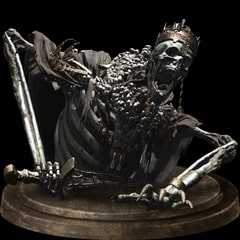
Trophy: High Lord Wolnir
Defeat High Lord Wolnir.
Type: Bronze
Category: Story
Unlock Details
Defeat High Lord Wolnir in the Catacombs of Carthus. After progressing through the catacombs, enter the dark chamber containing a mysterious chalice. Interact with it to begin the encounter. Wolnir is a massive skeletal boss whose primary weaknesses are the three glowing golden bracelets around his wrists. Two bracelets are on one arm and one is on the other. Focus your attacks on these bracelets, destroying them individually to remove large portions of his health. Stay near his hands while avoiding his sweeping attacks, summoned skeletons, and dangerous dark mist. Destroy all three bracelets to defeat Wolnir and unlock the trophy.
Tip
Attack the bracelets whenever Wolnir lowers his arms. Breaking them deals far more damage than striking his body, so there's no need to challenge the world's largest skeleton to a conventional sword fight.
Warning
Avoid the dark mist surrounding Wolnir's upper body and the clouds he releases from his mouth. It deals devastating damage and can kill you extremely quickly if you remain inside it.
Video Guide: https://www.youtube.com/watch?v=tJC9ZNWqRfE
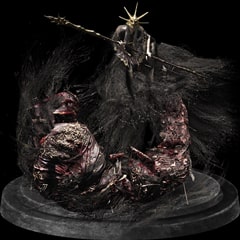
Trophy: Iudex Gundyr
Defeat Iudex Gundyr.
Type: Bronze
Category: Story
Unlock Details
Defeat Iudex Gundyr, the first boss encountered in the Cemetery of Ash. At the beginning of the game, follow the main path through the graveyard until you reach a large courtyard containing a kneeling armored warrior. Approach Gundyr and remove the Coiled Sword from his chest to begin the encounter. During the first phase, Gundyr attacks with sweeping halberd strikes, thrusts, and powerful overhead blows. Stay close, circle around him, and dodge through his attacks to create openings. At approximately half health, Gundyr transforms into a monstrous black creature with larger, more unpredictable attacks. Keep moving around his sides and strike when his combinations finish. Defeat him to unlock the trophy automatically.
Tip
You can land several free attacks while Gundyr rises after the Coiled Sword is removed. Firebombs are also effective during his transformed phase. Enjoy this early advantage, because the game won't be handing out many more.
Video Guide: https://www.youtube.com/watch?v=rATl9KthNOA

Trophy: Lord of Cinder: Aldrich, Devourer of Gods
Defeat Aldrich, Devourer of Gods, Lord of Cinder.
Type: Silver
Category: Story
Unlock Details
Defeat Aldrich, Devourer of Gods, one of the Lords of Cinder, in Anor Londo. After defeating Pontiff Sulyvahn in Irithyll of the Boreal Valley, continue through the courtyard filled with fallen giants and make your way toward Anor Londo. Climb the enormous staircase, enter the cathedral, and prepare to face Aldrich. This boss specializes in powerful magic attacks and can quickly overwhelm players who keep their distance. His attacks include magical projectiles, devastating scythe swings, and a particularly unpleasant barrage of arrows. The safest approach is to stay relatively close to Aldrich and attack his exposed lower body whenever possible. This reduces the opportunities he has to bombard you with long-range spells. Watch carefully when he begins raising his bow. His arrow attacks can inflict tremendous damage, especially during the second phase. Keep moving and sprint away from the advancing barrage rather than trying to block it. Aldrich frequently disappears beneath the floor and reappears elsewhere in the arena. When this happens, immediately reposition yourself and close the distance before he can unleash another series of spells. Once his health drops sufficiently, Aldrich enters his second phase, gaining additional fire effects and more dangerous attacks. Maintain your pressure, dodge his magic carefully, and avoid committing to long attack combinations. Defeat Aldrich to unlock the trophy automatically.
Tip
Fire damage is particularly effective against Aldrich, making fire-infused weapons, resins, and pyromancies useful options. Staying near his lower body also helps you avoid some of his more troublesome attacks.
Warning
Aldrich's second-phase arrow barrage can track your movement and last considerably longer than expected. If you see him preparing to fire upward, prioritize escaping the attack over dealing damage. Trying to squeeze in one final hit is an excellent way to discover how quickly a health bar can disappear.
Video Guide: https://www.youtube.com/watch?v=A1CkOqoiEzU
Trophy: Lord of Cinder: Lothric, Younger Prince
Defeat Lothric, Younger Prince, Lord of Cinder.
Type: Silver
Category: Story
Unlock Details
Defeat Lothric, Younger Prince, and his brother Lorian at the top of Lothric Castle. Progress through Lothric Castle, defeat the Dragonslayer Armour, and continue into the Grand Archives. Fight your way through the archives and climb toward the highest section of the castle, eventually reaching the enormous staircase leading to the Twin Princes' boss arena. This encounter has two distinct phases, both requiring careful timing and patience. During the first phase, you'll fight Lorian, Elder Prince. Despite his limited mobility, Lorian frequently teleports around the arena, appearing beside or behind you before launching powerful sword attacks. Stay close enough to punish his openings, but avoid becoming greedy. Dodge his combinations and land one or two attacks before preparing for his next move. Pay particular attention when Lorian teleports away and raises his sword to charge a powerful attack. This releases a devastating wave of light across the arena. Watch his weapon carefully and dodge as the attack is released. Once Lorian's health reaches zero, the second phase begins. Lothric joins the battle, riding on Lorian's back while casting magical projectiles and supporting his brother. You'll now need to manage Lorian's aggressive sword attacks alongside Lothric's ranged magic. Your primary objective during this phase is to defeat Lothric. Try to position yourself behind Lorian when attacking, allowing your strikes to damage Lothric as well. When Lorian falls, Lothric begins reviving him, creating an opportunity to attack Lothric directly. If the revival finishes, Lorian returns with part of his health restored, forcing you to continue the fight. Keep concentrating on Lothric whenever an opportunity appears. Once Lothric's health is depleted, both princes fall and the trophy unlocks automatically.
Tip
Lightning damage is effective against Lorian, and attacking from behind during the second phase helps damage both brothers. When Lothric begins reviving his brother, use the opening to deal as much damage to Lothric as safely possible.
Warning
Defeating Lorian repeatedly won't end the second phase. Lothric will continue reviving him until Lothric himself is defeated. Focus on the correct target, or this family reunion could last considerably longer than you'd like.
Video Guide: https://www.youtube.com/watch?v=s3D_nzRVXi8
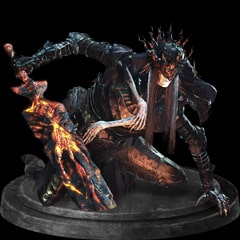
Trophy: Lord of Cinder: Yhorm the Giant
Defeat Yhorm the Giant, Lord of Cinder.
Type: Silver
Category: Story
Unlock Details
Defeat Yhorm the Giant, one of the Lords of Cinder, in the Profaned Capital. To reach Yhorm, progress through Irithyll Dungeon and enter the Profaned Capital. Continue through the area until you reach his enormous throne room, where the giant awaits. Yhorm has an intimidating health bar and tremendous physical strength, but this fight has a special mechanic that makes it much more manageable. As soon as the battle begins, run toward the throne at the far end of the arena and pick up the Storm Ruler sword lying beside it. Equip the weapon and use its unique skill to defeat Yhorm. Hold the weapon skill button until the sword becomes charged with wind, then unleash its powerful Storm Ruler attack. A successful charged strike deals massive damage to Yhorm, removing a significant portion of his health. Repeat the process while avoiding his sweeping machete attacks, heavy stomps, and aggressive charges. As the fight progresses, Yhorm becomes more dangerous, so create enough distance to charge the sword safely before attacking again. Defeat Yhorm to unlock the trophy automatically.
Tip
If you've progressed Siegward of Catarina's questline correctly, he can join you for this battle and use his own Storm Ruler against Yhorm. It's one of the game's most memorable character moments, and having a heavily armored onion enthusiast fighting alongside you certainly doesn't hurt.
Warning
The Storm Ruler must be charged before its special attack deals significant damage to Yhorm. Simply swinging it like a normal sword won't produce the intended effect. You can also miss Siegward's participation if you fail to advance his questline before this encounter.
Video Guide: https://www.youtube.com/watch?v=GoT_LT9jsck
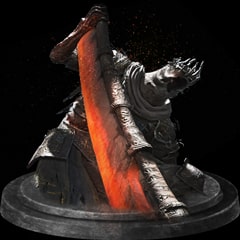
Trophy: Lords of Cinder: Abyss Watchers
Defeat the Abyss Watchers, Lords of Cinder.
Type: Silver
Category: Story
Unlock Details
Defeat the Abyss Watchers, one of the Lords of Cinder, located beyond Farron Keep. To reach the boss arena, explore the poisonous swamp of Farron Keep and extinguish the flames at all three ceremonial altars. Once all three are extinguished, the large sealed door near the Keep Ruins bonfire will open, allowing you to proceed toward the Abyss Watchers. The battle has two phases. During the first phase, you'll face an Abyss Watcher wielding a greatsword. Additional Watchers will rise during the fight, including a red-eyed Watcher who attacks the others. Use this temporary distraction to your advantage, focusing your damage on the main boss whenever an opening appears. When the first health bar is depleted, a cutscene begins and the second phase starts. The remaining Abyss Watcher returns with a full health bar and a flaming sword. His attacks become faster and more aggressive, with fiery trails following several swings and lunges. Watch for his charging attacks, dodge to the side, and strike during the brief recovery afterward. Avoid attacking recklessly, as his extended combos can quickly punish anyone who gets too comfortable. Defeat the second phase to earn the trophy automatically.
Tip
The boss can be staggered and is vulnerable to backstabs when properly positioned. During the first phase, let the red-eyed Watcher draw attention away from you whenever possible. There's no shame in letting someone else handle part of the fight, especially when they're already enthusiastically stabbing their coworkers.
Warning
Defeating the Abyss Watchers ends Yoel of Londor's opportunity to grant his five free levels and removes certain NPC summon opportunities associated with the boss. Collect any required gestures and complete Yoel's leveling requirements before entering the fight.
Video Guide: https://www.youtube.com/watch?v=ppkvXtr2UsM
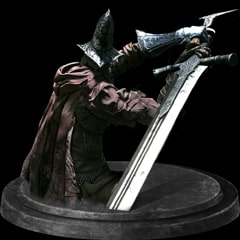
Trophy: Pontiff Sulyvahn
Defeat Pontiff Sulyvahn.
Type: Bronze
Category: Story
Unlock Details
Defeat Pontiff Sulyvahn in Irithyll of the Boreal Valley. Progress through Irithyll until you reach the large cathedral beyond the Church of Yorshka. Pontiff Sulyvahn wields two enchanted swords and attacks with aggressive combinations that leave little room for mistakes. Stay close, circle around his sides, and dodge through his swings rather than repeatedly retreating. During the second phase, Pontiff summons a shadow clone that mirrors his attacks. The clone usually performs its attack first, giving you a brief warning of what Pontiff himself is about to do. You can eliminate the clone to simplify the fight or use its movements to anticipate the real boss. Keep your attacks controlled and defeat Pontiff to unlock the trophy.
Tip
Pontiff's opening lunge can be parried, making a properly timed parry an excellent way to start the battle. If parrying isn't your specialty, summoning an available NPC can help divide his attention. No shame in bringing backup to a two-sword problem.
Warning
If you still need Duel Bow from Londor Pale Shade or By My Sword from Black Hand Gotthard, obtain the required summon gestures before defeating Pontiff. This is an important alternative opportunity if you missed them at the Abyss Watchers.
Video Guide: https://www.youtube.com/watch?v=Z0VRUFYnSEA
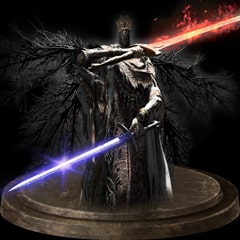
Trophy: Vordt of the Boreal Valley
Defeat Vordt of the Boreal Valley.
Type: Bronze
Category: Story
Unlock Details
Defeat Vordt of the Boreal Valley, the boss guarding the exit from the High Wall of Lothric. Progress through the High Wall until you reach the large staircase leading down to Vordt's arena, directly opposite the cathedral where Emma resides. During the first phase, Vordt uses heavy mace swings and sweeping attacks that inflict Frostbite buildup. Stay close to his sides or behind him, dodging his attacks and striking his rear legs whenever possible. At approximately half health, Vordt becomes more aggressive and begins charging across the arena. Dodge his rushes, avoid his frost breath, and move back behind him when an opening appears. Defeat Vordt to unlock the trophy automatically.
Tip
Staying behind Vordt makes many of his attacks easier to avoid. Just remember to watch your stamina, because repeatedly attacking a giant armored beast while standing beneath it is only a brilliant strategy until you can't roll away.
Video Guide: https://www.youtube.com/watch?v=WlcQ4OlZh0I
Welcome to Lothric, Ashen One. Your first playthrough is about learning the combat, exploring every suspicious corner, and building the foundation for your Platinum. Take your time, experiment with weapons, and collect as many rings, gestures, sorceries, miracles, and pyromancies as possible. Keep boss souls instead of consuming them, since several are needed for special rings and spells. Collect Estus Shards and Undead Bone Shards as you explore, and remember that even the most ordinary-looking wall might be hiding something useful. Lothric isn't particularly generous with directions.
Pay special attention to NPC questlines, since several trophies can become unavailable if you advance too far. Recruit Yoel of Londor in the Undead Settlement and obtain all five free levels before defeating the Abyss Watchers if you want Yuria to appear. Meet Anri, Sirris, Siegward, and the other characters you encounter, exhausting their dialogue whenever possible. Prioritize Sirris's Darkmoon Loyalty gesture and Silvercat Ring before offering Pale Tongues to Rosaria, as advancing Rosaria's covenant can interfere with Sirris's quest. Also secure the Mound-makers covenant before defeating the Curse-rotted Greatwood, and collect the gestures tied to NPC summons before their associated bosses are defeated.
Aim for the To Link the First Flame ending during this first run. Before finishing, explore optional areas such as Smouldering Lake, Untended Graves, and Archdragon Peak, defeat their bosses, and gather as many remaining collectibles as possible. Start working on covenant rewards, especially those needed for exclusive rings, miracles, sorceries, and pyromancies. You can earn every Platinum-required covenant reward without online multiplayer, although some offline drops require considerable farming. Once you're satisfied with your progress, defeat the Soul of Cinder and interact with the bonfire to complete your first ending.
New Game+ is your chance to clean up unfinished business while collecting the rings that only appear in later playthroughs. Your character levels, equipment, and collected trophies carry forward, but enemies become tougher and the world resets. Search each area for its new +1 rings and any standard rings you missed, while continuing to purchase spells, complete infusions, and gather covenant rewards. There is no prize for rushing into another cycle with half your shopping list unfinished.
Use this playthrough to finish important NPC questlines, particularly Siegward's and Sirris's if you haven't already completed their rewards. Siegward's journey provides several gestures and the Emit Force miracle, while Sirris rewards you with the Silvercat Ring. Make sure you've also obtained the gestures associated with Patches, Orbeck, and other NPCs. Keep track of boss souls needed for transposition, since some provide multiple trophy-related rewards that must be obtained across different playthroughs.
For your second ending, work toward The End of Fire. Defeat Oceiros, enter Untended Graves, and find the Eyes of a Fire Keeper behind the hidden wall in the alternate Firelink Shrine. Give them to the Fire Keeper in your normal Firelink Shrine, then continue through the game. After defeating the Soul of Cinder, use the Fire Keeper's summon sign beside the bonfire instead of linking the flame. Let the ending play out without attacking her, and you'll secure another major step toward the Platinum.
New Game++ should be your final required playthrough, provided you've handled your earlier collectibles and questlines carefully. The biggest remaining objective is gathering the rings exclusive to this cycle, including the +2 variants and Life Ring +3. You'll need all 107 base-game rings and their required upgraded variants for Master of Rings, so check your collection before leaving each area. Any missing gestures, spells, covenant rewards, or optional bosses should also be finished during this run.
Your final ending is The Usurpation of Fire, the most demanding of the three and one that deserves your full attention. Recruit Yoel of Londor and obtain all five Dark Sigils from his free levels before defeating the Abyss Watchers. Continue Yuria of Londor's questline while carefully following Anri of Astora's journey through the Road of Sacrifices, Catacombs of Carthus, and Irithyll. Keep the disguised pilgrim alive in the Church of Yorshka, complete the ceremony in the Darkmoon Tomb, and never heal your Dark Sigils before the ending. One poorly timed decision can send you back for another full playthrough, which is a punishment even by Dark Souls standards.
Before confronting the Soul of Cinder, make one final sweep of your remaining collection requirements. Confirm that you've acquired the necessary rings, gestures, spells, and covenant rewards, and that the Usurpation questline is complete. After defeating the final boss, interact with the bonfire to trigger The Usurpation of Fire ending. With all three endings secured, your remaining work should be limited to whatever collectible or covenant trophies you've yet to finish.
The biggest Platinum time investment usually comes from collecting every ring, sorcery, miracle, pyromancy, and gesture. Covenant rewards are particularly demanding, with several requiring 10 or 30 offerings to unlock trophy-related items. Prioritize Sunlight Medals, Proofs of a Concord Kept, Vertebra Shackles, Wolf's Blood Swordgrass, Pale Tongues, and Human Dregs as needed. Online play can speed up certain rewards, but offline enemy farming remains an option. Improve your Item Discovery with equipment such as the Symbol of Avarice, Covetous Gold Serpent Ring, Crystal Sage's Rapier, and Rusted Coins. The enemies may not be particularly cooperative about dropping what you need.
Remember that DARK SOULS III has no chapter select, and entering another New Game cycle resets the world and NPC questlines. Keep all your rings until Master of Rings unlocks, and avoid spending boss souls before checking their transposition rewards. Finish upgrading a standard weapon to +10, perform every required infusion, and maximize your Estus capacity and bonfire strength using Estus Shards and Undead Bone Shards. Some missed materials can be collected again in later cycles, but careful exploration during your first run will save considerable time.
The Platinum requires at least three playthroughs, reaching New Game++ for the final ring variants, but there is no trophy requirement to complete the game at a specific difficulty setting or to defeat bosses without assistance. Summoning other players or NPCs is a perfectly valid way to handle difficult encounters. Focus on your remaining trophy requirements rather than completing every optional activity again. Once the final collectible or covenant reward is secured, The Dark Soul will be yours. Praise the Sun!
YouTube Playlist
DARK SOULS III — Platinum Walkthrough