


Trophy Guide Preview
Overall Trophy Progress
0 / 41 Completed
0%
Trophy Types
Platinum
0 / 1Gold
0 / 2Silver
0 / 20Bronze
0 / 18Categories
Missable
0 / 2Collectible
0 / 4Combat
0 / 2Ending
0 / 2Misc
0 / 17Story
0 / 13
Journey through the dying kingdom of Lordran as a cursed Undead chosen to confront ancient lords and uncover the fate of the First Flame. Explore interconnected ruins, master deliberate combat, and face towering bosses in a dark fantasy world where every victory is earned.
Overall Trophy Progress
0 / 41 Completed
0%
Platinum Path
EARLY GAME Welcome to Lordran, Chosen Undead! Your Platinum journey begins in the Undead Asylum before taking you to Firelink Shrine, Undead Burg, and Undead Parish. Learn to manage stamina, dodge carefully, upgrade your favorite weapon, and resist the temptation to fight everything that looks at you funny. Your first major objectives are ringing the two Bells of Awakening, one above the Undead Parish and the other b...
Completion Video Playlist
1 video
Dark Souls Remastered Platinum Trophy Guide 01 / Northern Undead Asylum, Combat Practice
Trophy: The Dark Soul
All trophies obtained. Congratulations!
Type: Platinum
Unlock Details
Earn every other trophy in DARK SOULS: REMASTERED to unlock the Platinum.
Trophy: Covenant: Darkwraith
Discover Darkwraith covenant.
Type: Silver
Category: Missable
Unlock Details
Discover and join the Darkwraith covenant by speaking with Darkstalker Kaathe after defeating the Four Kings in the Abyss. This is one of the easiest covenant trophies to miss because a major story decision can prevent Kaathe from appearing. The most important requirement is that you must defeat the Four Kings before placing the Lordvessel at the Firelink Altar through Kingseeker Frampt. If you've already placed the Lordvessel with Frampt, you'll normally need to wait until your next playthrough to join the Darkwraith covenant. Step 1: Obtain the Covenant of Artorias Ring Travel to Darkroot Garden and defeat Great Grey Wolf Sif. To reach Sif, purchase the Crest of Artorias from Andre of Astora for 20,000 souls and open the sealed forest door, or use the longer route through Darkroot Basin. Progress through the forest until you reach the large graveyard containing Artorias's tomb. Defeat Sif to obtain the Covenant of Artorias ring. You'll need this ring to survive inside the Abyss, where the Four Kings are located. Step 2: Obtain the Key to the Seal Travel to New Londo Ruins using the elevator beneath Firelink Shrine. Progress across the wooden walkways and through the ghost-filled buildings until you reach the large structure containing Ingward, the red-robed NPC standing on its rooftop. You'll need a Transient Curse to attack the ghosts with normal weapons, although certain cursed weapons can also damage them. After obtaining the Lordvessel, speak with Ingward to receive the Key to the Seal. This key opens the floodgates that keep New Londo Ruins submerged. Return through the ruins and locate the locked mechanism controlling the floodgates. Use the key to open the gates and drain the water, revealing the lower section of New Londo. Step 3: Reach the Four Kings Descend into the newly accessible lower ruins. You'll encounter Darkwraith enemies wielding dark swords and using dangerous grab attacks. These enemies can also drop the Dark Hand, which is required for Knight's Honor. Continue through the ruins until you reach the large circular tower containing the entrance to the Abyss. Before proceeding, equip the Covenant of Artorias ring. Descend the staircase inside the tower and drop into the darkness below. Without the ring equipped, you'll die immediately. Boss Strategy: The Four Kings encounter is a damage-focused battle in which additional kings appear as time passes. Each king uses large sword attacks, magical projectiles, and an extremely dangerous grab. The longer the battle continues, the more likely you are to face multiple kings simultaneously. Stay close to your current target and attack aggressively whenever possible. Although their swords appear enormous, standing near a king's body reduces the damage from some of its melee attacks because you'll be struck by the inner part of the weapon rather than its blade. Use strong, upgraded equipment and keep enough stamina available to dodge or recover. Watch for the grab animation, which can drain Humanity and deal significant damage. Also watch for the large magical explosion. When a king begins charging this attack, create some distance or prepare to block it with suitable protection. Defeat each king as quickly as possible before the next one appears. The shared boss health bar must be fully depleted to win, and you may need to defeat more than four individual kings if the fight continues long enough. Step 4: Join the Darkwraith Covenant After defeating the Four Kings, remain in the Abyss. If you haven't placed the Lordvessel through Frampt, Darkstalker Kaathe should appear near the newly formed bonfire. Speak with Kaathe and answer his questions. He'll offer to transport you to the Firelink Altar, where you can place the Lordvessel. You can allow him to take you there, then return to the Abyss and speak with him again to join the covenant. If you're following his route, you can also place the Lordvessel while accompanied by Kaathe. When he offers you membership in the Darkwraith covenant, accept. The trophy unlocks immediately. You'll receive the Dark Hand, a special weapon required for Knight's Honor. Darkwraith membership also allows you to purchase Cracked Red Eye Orbs from Kaathe. Further covenant ranks grant equipment associated with invasions, although no rank advancement is necessary for this trophy. Congratulations! You've joined an ancient covenant led by a mysterious primordial serpent. At least this time the suspicious NPC is very upfront about wanting you to embrace the darkness.
Tip
Complete the Darkwraith covenant during your first playthrough if possible. The safest progression is to obtain the Lordvessel, defeat Sif, drain New Londo Ruins, defeat the Four Kings, and speak with Kaathe before placing the Lordvessel. Joining the covenant also awards the Dark Hand, saving you from farming it from Darkwraith enemies.
Warning
DO NOT PLACE THE LORDVESSEL THROUGH FRAMPT BEFORE SPEAKING WITH KAATHE. This is the main Darkwraith lockout. If you've already placed the Lordvessel at the Firelink Altar, Kaathe won't appear after the Four Kings battle during that playthrough. You must also equip the Covenant of Artorias ring before entering the Abyss and keep it equipped throughout the boss fight.
Video Guide: https://www.youtube.com/watch?v=iR9ooEHN-3M&list=PLy8mZW3dyYeDHRXlnbGa3c5qjKadbEGIy&index=5&pp=iAQB0gcJCTcMAYcqIYzv
Trophy: Covenant: Gravelord Servant
Discover Gravelord Servant covenant.
Type: Silver
Category: Missable
Unlock Details
Discover and join the Gravelord Servant covenant by entering a special coffin in the Catacombs and speaking with Gravelord Nito. This covenant has an important progression restriction: you must join before defeating Gravelord Nito as a boss in the Tomb of the Giants. Joining Gravelord Servant awards the Gravelord Sword and Gravelord Sword Dance miracle. Both are important for the Platinum. Step 1: Obtain an Eye of Death Before joining the covenant, you'll need at least one Eye of Death in your inventory. You can find Eyes of Death in the Catacombs, including a group of three near the area containing the Titanite Demon and the covenant coffin. Alternatively, Eyes of Death can be farmed from Basilisks in the Depths or the Great Hollow. The Depths is generally the most convenient early farming location, since the Basilisks can be reached after defeating the Capra Demon and entering the sewers. You only need one Eye of Death to access the covenant, but keep at least 10 available for its first rank reward. Step 2: Find the Hidden Coffin Travel to the Catacombs through the cemetery beside Firelink Shrine. Progress through the area, defeating Necromancers to stop the skeletons they control from reviving. Eventually, you'll reach a passage containing a Titanite Demon, the large one-legged enemy armed with a pole weapon. Near the Titanite Demon is a row of stone coffins. Look for the coffin with its lid partially open. Approach the coffin and select the option to nestle inside. Your character will climb into the coffin and lie down. Remain inside for approximately 30 seconds without moving. If you have an Eye of Death in your inventory, a special cutscene will trigger. You'll be transported to a hidden chamber containing Gravelord Nito. Step 3: Join the Covenant Inside the chamber, approach Nito's large sarcophagus. Interact with it and choose to join the Gravelord Servant covenant. Accept the invitation to unlock the trophy. You'll immediately receive the Gravelord Sword and Gravelord Sword Dance miracle. The Gravelord Sword is required for Knight's Honor, while Gravelord Sword Dance is required for Prayer of a Maiden. Step 4: Obtain Gravelord Greatsword Dance Although joining the covenant is sufficient for this trophy, you'll also need to reach covenant rank +1 for Prayer of a Maiden. Collect 10 Eyes of Death and return to Nito's sarcophagus using the same coffin transportation method. Offer 10 Eyes of Death to the covenant. You'll receive the Gravelord Greatsword Dance miracle as the rank +1 reward. Once you've obtained both miracles and the Gravelord Sword, you've collected all the covenant rewards needed for the Platinum. You've joined a covenant dedicated to an ancient lord of death, and your membership card was issued after lying inside a coffin for half a minute. Lordran's secret societies certainly know how to make an entrance.
Tip
Join Gravelord Servant as soon as you reach the Titanite Demon passage in the Catacombs. You can obtain the Gravelord Sword early, and it's a powerful weapon for much of the game. If you're planning to collect the two Gravelord miracles, farm all 10 Eyes of Death before leaving the covenant to avoid losing progress from switching allegiances.
Warning
YOU MUST JOIN GRAVELORD SERVANT BEFORE DEFEATING GRAVELORD NITO. Once Nito has been defeated in the Tomb of the Giants, you cannot use his coffin covenant interaction during that playthrough. This is one of the most important covenant missables in DARK SOULS: REMASTERED. Don't confuse visiting Nito through the special coffin with his actual boss fight. Joining his covenant doesn't start the boss encounter.
Video Guide: https://www.youtube.com/watch?v=dFjOkeDtmlY&list=PLy8mZW3dyYeDHRXlnbGa3c5qjKadbEGIy&index=6&pp=iAQB
Trophy: Bond of a Pyromancer
Acquire all pyromancies.
Type: Silver
Category: Collectible
Unlock Details
Acquire all 19 base-game pyromancies on a single character. Pyromancies are obtained through merchant purchases, hidden items, NPC questlines, and covenant rewards. Unlike sorceries and miracles, pyromancy effectiveness doesn't require investing in Intelligence or Faith, making this collection approachable for nearly any character build. The most important NPCs are Laurentius of the Great Swamp, Quelana of Izalith, Eingyi, and the Fair Lady. Pyromancies Sold by Laurentius of the Great Swamp Laurentius is imprisoned inside a large barrel in the Depths. From the entrance to the Depths, progress past the Butchers until you reach the room containing several wooden barrels. Locate Laurentius trapped inside one of them. Roll into the barrel to break it without accidentally attacking him. Speak with him until he relocates to Firelink Shrine. Purchase these five pyromancies: Fireball — Laurentius, Firelink Shrine: Purchase for 800 souls. Fire Orb — Laurentius, Firelink Shrine: Purchase for 8,000 souls. Combustion — Laurentius, Firelink Shrine: Purchase for 500 souls. Iron Flesh — Laurentius, Firelink Shrine: Purchase for 2,000 souls. Flash Sweat — Laurentius, Firelink Shrine: Purchase for 2,000 souls. Laurentius can also provide and upgrade your Pyromancy Flame. Pyromancies Sold or Rewarded by Quelana of Izalith Quelana appears in the Blighttown swamp near one of the large stone pillars close to the waterwheel area. To make her appear, you'll generally need a Pyromancy Flame upgraded to at least +10. Once this requirement is met, travel to Blighttown and locate her sitting beside a stone pillar near the route toward Quelaag's Domain. She sells several powerful pyromancies: Great Fireball — Quelana, Blighttown: Purchase for 20,000 souls. Firestorm — Quelana, Blighttown: Purchase for 30,000 souls. Fire Whip — Quelana, Blighttown: Purchase for 10,000 souls. Great Combustion — Quelana, Blighttown: Purchase for 5,000 souls. Undead Rapport — Quelana, Blighttown: Purchase for 10,000 souls. 11. Fire Tempest — Quelana, Blighttown: After meeting Quelana and progressing her dialogue, she'll ask you to defeat the Bed of Chaos in Lost Izalith. Defeat the boss, then return to Quelana and speak with her to receive Fire Tempest. Pyromancies Obtained Through the Chaos Servant Covenant The Chaos Servant covenant is located beneath the second Bell of Awakening, after defeating Chaos Witch Quelaag. Descend the stairs beyond Quelaag's arena and strike the illusory wall near the entrance to Demon Ruins. Inside, you'll find Eingyi and the Fair Lady, Quelaag's sister. Speak with Eingyi to gain access to the covenant. 12. Great Chaos Fireball — Chaos Servant Covenant: Join the covenant to receive Great Chaos Fireball immediately. 13. Chaos Storm — Chaos Servant Covenant: Offer a total of 30 Humanity to the Fair Lady to reach covenant rank +2. She'll reward you with Chaos Storm and unlock the covenant shortcut connecting Demon Ruins to Lost Izalith. Pyromancies Sold by Eingyi Eingyi is the egg-bearing servant guarding the Fair Lady. He'll sell two unique pyromancies once you've gained his trust by becoming infected with an Egg Head parasite. To become infected, allow one of the egg-bearing enemies near the entrance to Demon Ruins to grab you. After the parasite develops, return to Eingyi and speak with him. 14. Poison Mist — Eingyi, Quelaag's Domain: Purchase for 10,000 souls after satisfying his requirements. Alternatively, obtain it from a corpse in the Blighttown swamp near the entrance to the Great Hollow. 15. Toxic Mist — Eingyi, Quelaag's Domain: Purchase for 20,000 souls after satisfying his requirements. Pyromancies Found Through Exploration 16. Power Within — Blighttown: Progress through the upper wooden walkways of Blighttown. Near the large wall-mounted parasitic creature overlooking the platforms, locate the corpse holding Power Within. 17. Acid Surge — Painted World of Ariamis: Reach the main courtyard containing the Phalanx enemies. Search the graveyard-like area with impaled bodies near the courtyard wall to find Acid Surge on a corpse. 18. Fire Surge — Painted World of Ariamis: Descend into the underground passages containing Bonewheel Skeletons. Find the illusory wall near the lever mechanism and follow the hidden passage to encounter an infected Hollow carrying the spell. Defeat the enemy to obtain Fire Surge. 19. Chaos Fire Whip — Lost Izalith: Progress toward the Bed of Chaos boss arena. Search the side passage near the boss entrance for a chest guarded by a Chaos Eater. Open the chest to obtain Chaos Fire Whip. Collect all 19 pyromancies to unlock Bond of a Pyromancer. You've officially mastered the ancient art of setting absolutely everything on fire. Somewhere in Lordran, a pyromancer is probably very proud of you. Hopefully from a safe distance.
Tip
Upgrade your Pyromancy Flame to +10 early enough to meet Quelana before defeating the Bed of Chaos. Collecting Chaos Storm also opens a useful shortcut through Lost Izalith, which can help with the later stages of Solaire's questline.
Warning
Quelana's availability can become restricted if you defeat the Bed of Chaos before meeting her. Buy her spells and establish her questline before completing Lost Izalith. Do not attack or kill the Fair Lady or Eingyi before obtaining their unique rewards. The Black Flame pyromancy from Artorias of the Abyss is not required for this trophy.
Video Guide: https://www.youtube.com/watch?v=7e9K_NqyV8k&list=PLy8mZW3dyYeDHRXlnbGa3c5qjKadbEGIy&index=13&pp=iAQB0gcJCTcMAYcqIYzv

Trophy: Knight's Honor
Acquire all rare weapons.
Type: Silver
Category: Collectible
Unlock Details
Acquire every required rare weapon and shield in the base game on a single character. This is one of the longest trophies in DARK SOULS: REMASTERED. The collection includes weapons created from boss souls, weapons obtained by cutting off tails, covenant rewards, rare enemy drops, and equipment hidden throughout Lordran. You'll need to reach at least New Game++ through normal solo play because the Soul of Sif is used to create three different pieces of equipment. Boss Soul Weapons All 15 boss-soul weapons must be created by the Giant Blacksmith in Anor Londo. Most require a compatible regular +10 weapon or shield, along with the appropriate boss soul. Catalysts are an exception and do not need upgrading. 1. Moonlight Butterfly Horn — Soul of the Moonlight Butterfly: Defeat the Moonlight Butterfly in Darkroot Garden. Bring its soul and a regular +10 spear or thrusting sword to the Giant Blacksmith. 2. Crystal Ring Shield — Soul of the Moonlight Butterfly: Defeat the Moonlight Butterfly during a second playthrough. Use its soul and a regular +10 shield to create the Crystal Ring Shield. 3. Quelaag's Furysword — Soul of Quelaag: Defeat Chaos Witch Quelaag in Blighttown. Use her soul and a regular +10 curved sword, such as a Scimitar, to create the weapon. 4. Chaos Blade — Soul of Quelaag: Obtain another Soul of Quelaag during New Game+. Use it with a regular +10 katana, such as an Uchigatana or Iaito. 5. Greatsword of Artorias — Soul of Sif: Defeat Great Grey Wolf Sif in Darkroot Garden. Use the soul with a regular +10 Broken Straight Sword or Straight Sword Hilt to create the version that deals physical and magic damage. 6. Greatsword of Artorias (Cursed) — Soul of Sif: Defeat Sif again during another playthrough. Use the soul with a regular +10 dagger, straight sword, or greatsword, such as a Longsword. Do not use a Broken Straight Sword or Straight Sword Hilt for this version. 7. Greatshield of Artorias — Soul of Sif: Defeat Sif a third time in New Game++. Use the soul and a regular +10 shield to create the Greatshield of Artorias. 8. Golem Axe — Core of an Iron Golem: Defeat the Iron Golem at the top of Sen's Fortress. Bring its core and a regular +10 axe, such as a Battle Axe, to the Giant Blacksmith. 9. Dragon Bone Fist — Core of an Iron Golem: Defeat the Iron Golem again during New Game+. Use its core with a regular +10 fist weapon, such as a Caestus. 10. Lifehunt Scythe — Soul of Priscilla: Enter the Painted World of Ariamis through the large painting in Anor Londo while carrying the Peculiar Doll from your original cell in the Undead Asylum. Defeat Crossbreed Priscilla and use her soul with a regular +10 halberd, scythe, or whip. 11. Dragonslayer Spear — Soul of Ornstein: During the Ornstein and Smough fight in Anor Londo, defeat Smough first, then Ornstein. Use Ornstein's soul with a regular +10 spear or thrusting sword. 12. Smough's Hammer — Soul of Smough: During your next playthrough, defeat Ornstein first, then Smough. Use Smough's soul with a regular +10 hammer or great hammer. 13. Darkmoon Bow — Soul of Gwyndolin: Defeat Dark Sun Gwyndolin in the hidden Darkmoon Tomb beneath Anor Londo. Use the soul with a regular +10 bow. 14. Tin Darkmoon Catalyst — Soul of Gwyndolin: Defeat Gwyndolin again during another playthrough. Use the soul with a compatible catalyst at the Giant Blacksmith. The catalyst does not need upgrading. 15. Great Lord Greatsword — Soul of Gwyn: Defeat Gwyn, Lord of Cinder, to obtain his soul, then begin New Game+. When you reach Anor Londo again, bring Gwyn's soul and a regular +10 dagger, straight sword, or greatsword to the Giant Blacksmith. Tail Weapons Several rare weapons are obtained by attacking specific enemies' tails until they are severed. These are separate rewards from defeating the enemies themselves. 16. Drake Sword — Hellkite Dragon, Undead Burg: Reach the large bridge guarded by the red dragon. From beneath the bridge, use a bow to repeatedly shoot its hanging tail until the Drake Sword is awarded. You can also attack the tail directly when you have a safe opportunity. 17. Dragon King Greataxe — Gaping Dragon, The Depths: During the Gaping Dragon boss fight, move behind the creature and repeatedly attack its tail near the tip until it breaks off. Obtain the weapon before defeating the boss. 18. Priscilla's Dagger — Crossbreed Priscilla, Painted World of Ariamis: Reach Priscilla at the end of the Painted World. Before killing her, attack her tail until the dagger is awarded. Her invisibility can make this difficult, so try to position yourself behind her before initiating the fight. 19. Moonlight Greatsword — Seath the Scaleless, Crystal Cave: During the final Seath encounter, attack the tip of his large central tail. Do not confuse it with his two smaller side tails. Repeatedly strike the rear portion until it separates and awards the Moonlight Greatsword. 20. Dragon Greatsword — Stone Dragon, Ash Lake: Travel through the Great Hollow beneath Blighttown to reach Ash Lake. Find the Everlasting Dragon at the far end and attack its tail until the Dragon Greatsword is awarded. The dragon remains nonhostile when its tail is cut. Covenant Weapons 21. Gravelord Sword — Gravelord Servant: Enter the Catacombs and locate the room containing a Titanite Demon and several coffins. Carry at least one Eye of Death, enter the open coffin, and remain inside until you're transported to Nito's chamber. Join the Gravelord Servant covenant to receive the Gravelord Sword. You must do this before defeating Gravelord Nito. 22. Dark Hand — Darkwraith: Defeat the Four Kings in New Londo Ruins without having placed the Lordvessel through Frampt. Speak with Darkstalker Kaathe in the Abyss and join the Darkwraith covenant to receive the Dark Hand. Alternatively, it can drop from Darkwraith enemies in drained New Londo Ruins. Rare Enemy Drops and NPC Equipment 23. Black Knight Sword — Black Knights: Defeat sword-wielding Black Knights in areas such as Undead Burg or the Kiln of the First Flame. The Black Knights in the Kiln respawn, making them a useful farming source. 24. Black Knight Greatsword — Black Knights: Farm greatsword-wielding Black Knights, including the respawning enemies in the Kiln of the First Flame. 25. Black Knight Greataxe — Black Knights: Defeat greataxe-wielding Black Knights in the Catacombs or Kiln of the First Flame until one drops the weapon. 26. Black Knight Halberd — Black Knights: Defeat halberd-wielding Black Knights in Darkroot Basin, Tomb of the Giants, or the Kiln of the First Flame. 27. Black Knight Shield — Black Knights: Obtain this as a random drop from Black Knights. The respawning enemies in the Kiln are useful for farming it. 28. Channeler's Trident — Channelers: Farm the Channeler enemies inside the Duke's Archives. These enemies respawn and have a chance to drop the trident. 29. Crescent Axe — Patches: Spare Patches during his encounters so he eventually becomes a merchant at Firelink Shrine after you defeat Nito. Purchase the Crescent Axe from him for 10,000 souls. Alternatively, it can be obtained by defeating him. 30. Crest Shield — Oscar of Astora: Return to the Undead Asylum by using the giant crow at Firelink Shrine. Find Oscar, the knight who originally gave you the Estus Flask, now hostile inside the asylum. Defeat him to receive the Crest Shield. 31. Giant's Halberd — Giant Blacksmith, Anor Londo: Purchase the weapon from the Giant Blacksmith for 5,000 souls. It can also drop from certain giant Sentinels in Anor Londo. 32. Silver Knight Straight Sword — Silver Knights, Anor Londo: Farm sword-wielding Silver Knights inside the main cathedral building until the weapon drops. 33. Silver Knight Spear — Silver Knights, Anor Londo: Farm spear-wielding Silver Knights inside Anor Londo until one drops the spear. 34. Silver Knight Shield — Silver Knights, Anor Londo: Obtain the shield as a random drop from Silver Knights. 35. Stone Greatsword — Stone Knights, Darkroot Garden: Farm the large stone guardians near the Moonlight Butterfly route. Alternatively, join the Forest Hunter covenant and purchase the sword from Shiva of the East when he appears in the Blighttown swamp. 36. Stone Greatshield — Stone Knights, Darkroot Garden: Farm the large stone guardians near the Moonlight Butterfly route until one drops the shield. 37. Grant — Paladin Leeroy, Tomb of the Giants: Before defeating Gravelord Nito, reverse Hollowing to enter human form and travel toward Nito's boss arena. Paladin Leeroy will invade along the route. Defeat him to obtain Grant. 38. Sanctus — Paladin Leeroy, Tomb of the Giants: Defeat the same invading Paladin Leeroy to obtain Sanctus alongside Grant. Weapons and Shields Found Through Exploration 39. Astora's Straight Sword — Valley of Drakes: From the Valley of Drakes, locate the sleeping Undead Dragon beside the cliff. Loot the corpse positioned near its front claws to obtain Astora's Straight Sword. 40. Dragon Crest Shield — Valley of Drakes: Loot the other item beside the same Undead Dragon to obtain the Dragon Crest Shield. Be ready to retreat when the dragon awakens. 41. Dragon Tooth — Anor Londo: Inside the main palace, locate the fireplace in the room near the interior bonfire where Solaire can be found. Strike the illusory wall inside the fireplace and descend into the hidden room. Open one of the chests to obtain the Dragon Tooth. 42. Havel's Greatshield — Anor Londo: Inside the same hidden fireplace chamber, open the other chest to obtain Havel's Greatshield. 43. Dragonslayer Greatbow — Anor Londo: In the main hall leading toward Ornstein and Smough, reach the upper walkway and locate the broken window. Pass through it and carefully drop onto the lower exterior ledge. Follow the ledge to the corpse holding the greatbow. 44. Velka's Rapier — Painted World of Ariamis: Obtain the Annex Key from the underground passages beneath the Painted World courtyard. Use it to unlock the annex building, break the wooden boards blocking the passage, and collect Velka's Rapier from the corpse beyond. 45. Bloodshield — Painted World of Ariamis: Progress to the bridge containing the Undead Dragon. Loot the corpse along the bridge to obtain the Bloodshield. 46. Black Iron Greatshield — Anor Londo: Enter the large building containing the painting that leads to the Painted World of Ariamis. Search the floor beside the painting to find the Black Iron Greatshield. 47. Effigy Shield — Tomb of the Giants: Explore the narrow paths between the first and second bonfires. Find the side passage near the Black Knight and loot the corpse holding the Effigy Shield. Additional Tail Weapon Worth Collecting 48. Gargoyle Tail Axe — Bell Gargoyles: During the Bell Gargoyles boss fight on the roof of Undead Parish, attack the first gargoyle's tail until it separates. You can also obtain it from a gargoyle in Anor Londo if you miss the first opportunity. This weapon is not consistently included in verified trophy requirement lists, but collecting it removes any uncertainty. Once you've collected every required weapon and shield on the same character, Knight's Honor will unlock. The hardest part isn't necessarily defeating every boss. It's remembering which sword was made from which soul, which shield came from which enemy, and why you've somehow ended up needing to fight Sif for a third time. Lordran's inventory management is a boss encounter of its own.
Tip
Save all boss souls until you've forged the required weapons, and prepare compatible +10 equipment before visiting the Giant Blacksmith. For rare enemy drops, equip the Covetous Gold Serpent Ring and maintain up to 10 soft Humanity to improve Item Discovery. Prioritize Channeler's Trident and the Silver Knight weapons while their farming locations are convenient.
Warning
Knight's Honor should be completed on a single character. Do not consume required boss souls, accidentally kill tail-cut bosses before obtaining their weapons, or miss Paladin Leeroy's invasion before defeating Nito. Collect both Ornstein's and Smough's souls across different playthroughs, and remember that the two Greatswords of Artorias are distinct weapons despite their nearly identical names.
Video Guide: https://www.youtube.com/watch?v=wLJiAQdZJhA&list=PLy8mZW3dyYeDHRXlnbGa3c5qjKadbEGIy&index=10&pp=iAQB0gcJCTcMAYcqIYzv
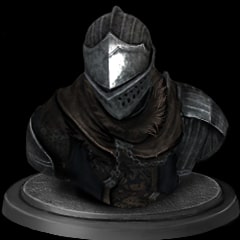
Trophy: Prayer of a Maiden
Acquire all miracles.
Type: Silver
Category: Collectible
Unlock Details
Acquire all 23 miracles in the base game of DARK SOULS: REMASTERED on a single character. Miracles are obtained through NPC merchants, covenant rewards, questlines, and exploration. You don't need the Faith required to cast them, but you'll need to meet the requirements for certain covenants to obtain their rewards. This trophy normally requires progressing into New Game+ because the Sunlight Spear miracle requires the Soul of Gwyn, Lord of Cinder. Miracles Sold by Petrus of Thorolund Petrus is found near Firelink Shrine, inside the ruined building toward the cemetery side of the area. Speak with him to access his miracle shop. Purchase the following five miracles: Heal — Petrus, Firelink Shrine: Purchase for 4,000 souls. Great Heal Excerpt — Petrus, Firelink Shrine: Purchase for 10,000 souls. Homeward — Petrus, Firelink Shrine: Purchase for 8,000 souls. Force — Petrus, Firelink Shrine: Purchase for 4,000 souls. Seek Guidance — Petrus, Firelink Shrine: Purchase for 2,000 souls. These miracles can also be purchased from Rhea of Thorolund later, often at lower prices. Miracles Obtained Through Rhea of Thorolund Rhea initially appears at Firelink Shrine alongside her two companions before traveling into the Catacombs. To rescue her, progress through the Catacombs into the Tomb of the Giants. Near the beginning of the Tomb, encounter Patches and follow the path leading down into the pit beneath his position. Inside, you'll discover Rhea trapped with her two companions, who have become Hollow. Defeat both Hollow companions and speak with Rhea to rescue her. Afterwards, she relocates to the altar inside the church at Undead Parish, where she sells additional miracles. 6. Great Heal — Rhea, Undead Parish: Purchase for 10,000 souls. 7. Wrath of the Gods — Rhea, Undead Parish: Purchase for 10,000 souls. 8. Magic Barrier — Rhea, Undead Parish: Purchase for 6,000 souls. 9. Replenishment — Rhea, Tomb of the Giants: Receive this miracle directly from Rhea after defeating her two Hollow companions and completing the rescue conversation. Miracle Sold by Oswald of Carim 10. Karmic Justice — Oswald, Undead Parish: After defeating the Bell Gargoyles and ringing the first Bell of Awakening, find Oswald inside the bell tower. Purchase Karmic Justice from him for 40,000 souls. Miracles Obtained Through the Warrior of Sunlight Covenant The Warrior of Sunlight covenant is located at the Sunlight Altar beneath the Hellkite Dragon's bridge near Undead Parish. To join, you'll need at least 25 Faith. This requirement is reduced by five points each time you successfully help another player defeat a boss through cooperative multiplayer. Once you qualify, approach the altar and join the covenant. 11. Lightning Spear — Warrior of Sunlight: Join the covenant to receive Lightning Spear. 12. Great Lightning Spear — Warrior of Sunlight: Offer 10 Sunlight Medals to the altar to reach covenant rank +1 and receive Great Lightning Spear. 13. Sunlight Spear — Warrior of Sunlight: Defeat Gwyn at the end of your first playthrough to obtain his soul. During New Game+, return to the Sunlight Altar while belonging to the covenant at rank +1 or higher. Offer Gwyn's soul to receive Sunlight Spear. Sunlight Medals can be obtained through cooperative multiplayer, certain NPC summons, treasure chests, and farming Chaos Bugs in the Demon Ruins/Lost Izalith shortcut area. Miracles Obtained Through the Gravelord Servant Covenant To join the Gravelord Servant covenant, travel into the Catacombs and locate the room containing a Titanite Demon and several stone coffins. Bring at least one Eye of Death, enter the open coffin, and remain inside until you're transported to Gravelord Nito's chamber. 14. Gravelord Sword Dance — Gravelord Servant: Join the covenant to receive the miracle. 15. Gravelord Greatsword Dance — Gravelord Servant: Offer 10 Eyes of Death to Nito to reach covenant rank +1 and receive Gravelord Greatsword Dance. Eyes of Death can be found in the Catacombs and Tomb of the Giants, or farmed from Basilisks in areas such as the Depths and Great Hollow. Miracle Obtained Through the Blade of the Darkmoon Covenant 16. Darkmoon Blade — Blade of the Darkmoon: Obtain the Darkmoon Seance Ring from the Catacombs. Travel to Anor Londo, lower the rotating staircase to its lowest position, and equip the ring near the large statue beside the Darkmoon Tomb bonfire. The statue disappears, revealing the hidden entrance to Gwyndolin's chamber. Do not enter the boss fog. Instead, kneel before the entrance and join the Blade of the Darkmoon covenant. Offer 10 Souvenirs of Reprisal to reach covenant rank +1 and receive Darkmoon Blade. You can farm Souvenirs of Reprisal from the Crow Demons in the Painted World of Ariamis. Miracles Found Through Exploration and NPC Quests 17. Sunlight Blade — Anor Londo: After obtaining the Darkmoon Blade miracle, enter the boss arena and defeat Dark Sun Gwyndolin. Open the chest at the end of the passage beyond the arena to obtain Sunlight Blade. 18. Soothing Sunlight — Duke's Archives: During the prison escape sequence, descend toward the lower prison cells. Defeat the non-respawning Pisaca enemies near Big Hat Logan's prison cell to obtain Soothing Sunlight. 19. Bountiful Sunlight — Duke's Archives: Defeat the other special Pisaca near Logan's prison cell to obtain Bountiful Sunlight. Both this miracle and Soothing Sunlight are associated with the Princess's Guard covenant, although you only need to collect them for the trophy. 20. Great Magic Barrier — Ash Lake: Travel through the Great Hollow beneath Blighttown to reach Ash Lake. Follow the shoreline toward the large hollow tree, climb its roots, and search the interior branch passages for the corpse holding Great Magic Barrier. 21. Tranquil Walk of Peace — Catacombs: Explore the upper Catacombs, searching the side passages around the rotating bridges and skeleton-filled corridors. Locate the small chamber accessible from a ladder and collect the miracle from the corpse inside. 22. Vow of Silence — Painted World of Ariamis: Obtain the Annex Key from the underground passages of the Painted World. Unlock the annex building, climb the tower to its uppermost level, and collect Vow of Silence from the corpse guarded by Crow Demons. 23. Emit Force — Siegmeyer of Catarina: Meet Siegmeyer outside Sen's Fortress and continue his questline as he progresses through the fortress and Anor Londo. After helping him in Anor Londo, return to Firelink Shrine and speak with him. Answer "Yes" when he asks whether you opened the path for him, and he'll reward you with Emit Force. Once all 23 miracles have been obtained, Prayer of a Maiden will unlock. Congratulations, Chosen Undead! You've mastered the art of divine miracles, collected enough sacred spells to impress an entire cathedral, and somehow still need to drink Estus every time a skeleton sneezes in your direction.
Tip
Prioritize covenant rewards before defeating the NPCs associated with them. Farm 10 Souvenirs of Reprisal for Darkmoon Blade, 10 Eyes of Death for Gravelord Greatsword Dance, and 10 Sunlight Medals for Great Lightning Spear. Once you've acquired these miracles, you can safely move on to the related boss encounters.
Warning
Several miracles can become unavailable for the remainder of a playthrough if you progress carelessly. Rescue Rhea and purchase her spells promptly, complete the Gravelord Servant requirements before defeating Nito, and obtain Darkmoon Blade before fighting Gwyndolin. Save the Soul of Gwyn for Sunlight Spear in New Game+; you'll need another Gwyn soul for Knight's Honor.
Video Guide: https://www.youtube.com/watch?v=3PR2IPugpCY&list=PLy8mZW3dyYeDHRXlnbGa3c5qjKadbEGIy&index=11&pp=iAQB

Trophy: Wisdom of a Sage
Acquire all sorceries.
Type: Silver
Category: Collectible
Unlock Details
Acquire all 24 sorceries available in the base game of DARK SOULS: REMASTERED on a single character. Sorceries are obtained from merchants, NPC questlines, hidden treasure, and enemy drops. You don't need the Intelligence required to cast them, only to collect each unique spell. The most important NPCs for this trophy are Griggs of Vinheim, Big Hat Logan, Dusk of Oolacile, and Ingward. Sorceries Sold by Griggs of Vinheim Griggs is imprisoned in Lower Undead Burg, behind a locked door near the route to the Capra Demon. Purchase the Residence Key from the Undead Merchant in Undead Burg for 1,000 souls, unlock Griggs's room, and speak with him until he relocates to Firelink Shrine. Purchase the following six sorceries: Soul Arrow — Griggs, Firelink Shrine: Purchase for 1,000 souls. Great Soul Arrow — Griggs, Firelink Shrine: Purchase for 6,000 souls. Heavy Soul Arrow — Griggs, Firelink Shrine: Purchase for 2,000 souls. Great Heavy Soul Arrow — Griggs, Firelink Shrine: Purchase for 8,000 souls. Aural Decoy — Griggs, Firelink Shrine: Purchase for 1,000 souls. Fall Control — Griggs, Firelink Shrine: Purchase for 1,500 souls. These spells become available after rescuing him. Purchase them before progressing his questline too far. Sorceries Sold by Griggs or Big Hat Logan Magic Weapon — Griggs or Logan: Purchase for 3,000 souls after either merchant becomes available. Magic Shield — Griggs or Logan: Purchase for 3,000 souls. Sorceries Obtained Through Big Hat Logan Big Hat Logan is initially imprisoned inside Sen's Fortress. Find his cage in the lower part of the fortress and free him using the Cage Key or Master Key. After his rescue, Logan relocates to Firelink Shrine, where he'll sell his early spells. Later, he'll travel to the Duke's Archives and become imprisoned again. Locate the Archive Tower Giant Cell Key in the Archives' library section, free him, and find him in the study containing several bookshelves and chests. His remaining spells become available there. 9. Homing Soulmass — Big Hat Logan: Purchase for 20,000 souls after rescuing him from Sen's Fortress. 10. Soul Spear — Big Hat Logan: Purchase for 40,000 souls. 11. Homing Crystal Soulmass — Big Hat Logan, Duke's Archives: After freeing him from his second imprisonment, purchase the spell for 30,000 souls. 12. Crystal Soul Spear — Big Hat Logan, Duke's Archives: Purchase for 50,000 souls. 13. Crystal Magic Weapon — Big Hat Logan, Duke's Archives: Purchase for 20,000 souls. 14. White Dragon Breath — Hollow Logan, Duke's Archives: Purchase all of Logan's available sorceries and defeat Seath the Scaleless. Return to Logan's study and exhaust his dialogue. After reloading the area, Logan will eventually relocate to the room where you first encountered Seath. Return to that room and defeat the now-hostile Logan to obtain White Dragon Breath. Sorceries Sold by Dusk of Oolacile Dusk is found in Darkroot Basin. First, defeat the Hydra in the lake. Reload the area and follow the shoreline into the cave behind the Hydra's original position. Defeat the Golden Crystal Golem inside the cave to rescue Dusk. Speak with her and accept her offer. Return to the shore of the lake and locate her summon sign near a rock beside the water. Summon her to access her spell shop. Hidden Weapon — Dusk of Oolacile: Purchase for 2,000 souls. Hidden Body — Dusk of Oolacile: Purchase for 2,000 souls. Cast Light — Dusk of Oolacile: Purchase for 1,000 souls. Repair — Dusk of Oolacile: Purchase for 10,000 souls. Chameleon — Dusk of Oolacile: Purchase for 3,000 souls. Sorcery Sold by Ingward 20. Resist Curse — Ingward, New Londo Ruins: Find Ingward on the rooftop of the large ghost-filled building in New Londo Ruins. Speak with him and purchase Resist Curse for 5,000 souls. If he survives the Four Kings encounter and relocates to Firelink Shrine, you can purchase it there instead. Sorceries Found Through Exploration 21. Great Magic Weapon — Anor Londo: Enter the large building containing the painting that leads to the Painted World of Ariamis. Carefully walk along the ceiling rafters and strike the chain holding the chandelier. Descend to the floor below and loot the fallen chandelier to obtain the spell. 22. Strong Magic Shield — Duke's Archives: Explore the large library section before reaching the prison tower. Search the upper floors for a chest containing Strong Magic Shield. 23. Remedy — Blighttown: Explore the upper wooden platforms of Blighttown. Find the chest in the rear section of the upper settlement to obtain Remedy. 24. Hush — Sen's Fortress: Reach the boulder-control room near the top of the fortress. Follow the boulder passage toward the Mimic chest and locate the broken opening in the wall. Jump across to the wooden platform, then follow the hidden corridor into a cell containing Hush. Alternatively, the spell can be obtained by defeating Griggs later in his questline. Once all 24 sorceries are collected, Wisdom of a Sage will unlock. If you're wondering why every powerful sorcerer in Lordran eventually ends up imprisoned, missing, or completely unhinged, that's apparently just part of the academic career path.
Tip
Keep a running sorcery checklist and purchase every spell available from Griggs, Logan, and Dusk as soon as you can afford it. Logan's later spells are expensive, so save a substantial amount of souls before beginning his Duke's Archives questline.
Warning
White Dragon Breath requires completing Big Hat Logan's questline. Do not kill him prematurely. Dusk must also be rescued to access her five unique sorceries, and progression involving the DLC can complicate her availability if you haven't purchased them first.
Video Guide: https://www.youtube.com/watch?v=5E6q8PnrMk0&list=PLy8mZW3dyYeDHRXlnbGa3c5qjKadbEGIy&index=12&pp=iAQB
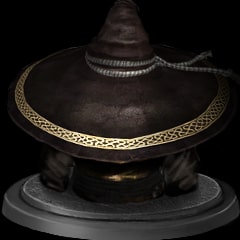
Trophy: Defeat Crossbreed Priscilla
Defeat Crossbreed Priscilla, the Lifehunter.
Type: Silver
Category: Combat
Unlock Details
Defeat Crossbreed Priscilla, the optional boss located at the end of the Painted World of Ariamis. Unlike most bosses in DARK SOULS: REMASTERED, Priscilla is initially peaceful and won't attack unless you provoke her. You can leave the Painted World without fighting her, but you'll need to defeat her to unlock this trophy and complete the Platinum. You'll also want to cut off her tail to obtain Priscilla's Dagger for Knight's Honor and save her boss soul to forge the Lifehunt Scythe. Step 1: Return to the Northern Undead Asylum Before entering the Painted World of Ariamis, you'll need to obtain the Peculiar Doll. This key item is found inside your original prison cell in the Northern Undead Asylum, but it only becomes available after returning to the area later in the game. From Firelink Shrine, take the elevator leading toward Undead Parish. As the elevator rises, step off onto the ruined rooftop partway up. Follow the narrow path across the grass and carefully roll onto the large stone support pillar nearby. Continue along the pillar toward the stairs leading to the giant crow's nest. Enter the nest and interact with it to curl into a ball. Remain in this position for approximately 30 seconds until the giant crow carries you back to the Northern Undead Asylum. Once you arrive, follow the familiar passages toward the prison cell where your character began the game. Inside the cell, you'll find the Peculiar Doll on a corpse. Collect it and return to Lordran when you're ready. You can also explore the asylum to fight the Stray Demon and obtain a Titanite Slab, but this optional boss isn't required for Priscilla's trophy. Step 2: Enter the Painted World of Ariamis Travel to Anor Londo, the large city reached after defeating the Iron Golem in Sen's Fortress. From the first Anor Londo bonfire, head toward the enormous rotating staircase in the center of the city. Operate the staircase mechanism until you can access the large building containing the Painting Guardians. Inside, you'll find an enormous painting hanging on the far wall. This is the entrance to the Painted World of Ariamis. With the Peculiar Doll in your inventory, approach the painting and interact with it. Your character will be transported into the Painted World. Once inside, activate the bonfire near the starting area. You'll remain trapped inside the painting until you reach the exit at the end of the level, so make sure you're prepared for a reasonably lengthy exploration. Step 3: Explore the Painted World The Painted World of Ariamis is a snowy fortress populated by Hollows, Crow Demons, Bonewheel Skeletons, and other dangerous enemies. From the first bonfire, proceed through the ruined buildings toward the central courtyard. You'll encounter several infected Hollows whose bodies are covered in swollen growths. These enemies can release a toxic cloud when killed, so attack carefully and avoid standing directly beside them when they die. Continue through the rooftops and connected buildings until you reach the main courtyard containing a large group of Phalanx enemies. These enemies carry shields and spears and are clustered around a central statue. You can fight them directly or run around them to reach the nearby passages. The large gate leading toward Priscilla is initially locked. To open it, you'll need to reach the underground tunnels beneath the courtyard. Locate the stairs leading into the lower passages, where several Bonewheel Skeletons patrol the dark corridors. These enemies are particularly dangerous because their rolling attacks can deal repeated damage and easily kill an unprepared character. Try to lure them individually rather than fighting the entire group. Search the tunnels until you locate the large wheel mechanism. Turn the mechanism to open the main gate connecting the central courtyard to the bridge leading toward Priscilla. You can now return to the bonfire more easily and access the final section of the area. Important Collectibles: Before fighting Priscilla, take some time to collect the important equipment and spells scattered throughout the Painted World. Several items are required for other Platinum trophies: 1. Priscilla's Dagger — Obtained by cutting off Priscilla's tail during the boss encounter. Required for Knight's Honor. 2. Soul of Priscilla — Awarded after defeating Priscilla. Required to forge the Lifehunt Scythe for Knight's Honor. 3. Velka's Rapier — Found in the annex area, accessible after obtaining the Annex Key. Required for Knight's Honor. 4. Bloodshield — Found on the bridge containing the Undead Dragon. Required for Knight's Honor. 5. Vow of Silence — Found in the upper section of the annex. Required for Prayer of a Maiden. 6. Acid Surge — Found on a corpse in the graveyard area. Required for Bond of a Pyromancer. 7. Fire Surge — Dropped by an infected Hollow in the underground tunnels. Required for Bond of a Pyromancer. 8. Dark Ember — Found on a petrified blacksmith in the annex. Required if you're creating an Occult weapon rather than upgrading the pre-existing Occult Club. The Crow Demons in this area also drop Souvenirs of Reprisal, which are used to obtain the Darkmoon Blade miracle from the Blade of the Darkmoon covenant. Collecting these items before leaving can save a return trip later. Step 4: Reach Crossbreed Priscilla Once you've opened the main gate, return to the central courtyard and follow the bridge leading toward the large tower at the far end of the Painted World. You'll encounter a heavily armored enemy guarding the path. Defeat or avoid the enemy and continue toward the fog gate. Pass through the fog to enter Priscilla's arena. Unlike most bosses, Priscilla won't immediately become hostile. Instead, she'll speak to you and ask you to leave her world in peace. If you simply walk past her and approach the ledge at the far end, you can leave the Painted World without fighting. However, to unlock this trophy, you'll need to attack her. Before initiating the battle, position yourself carefully behind her. This is especially important if you're also collecting Priscilla's Dagger. Step 5: Obtain Priscilla's Dagger Priscilla's Dagger is awarded by severing Priscilla's tail during the encounter. The weapon is required for Knight's Honor, so you should prioritize obtaining it before defeating her. While Priscilla is still peaceful, move behind her and locate her long white tail. Equip a weapon with a strong, accurate attack that can strike the tail without hitting too much of her body. A powerful overhead attack is particularly useful. Aim toward the end of her tail rather than attacking her legs or torso. Your first attack will make Priscilla hostile, so use the opening to deal as much damage to the tail as possible. If you successfully sever it, Priscilla's Dagger will be added to your inventory automatically. If the tail doesn't break immediately, don't panic. You can still obtain the dagger during the fight, although positioning becomes more difficult once she turns invisible. Avoid using extremely powerful area-of-effect attacks that might kill Priscilla before you've obtained the weapon. Remember, the objective is to cut off her tail, not accidentally send the entire boss into the next life with your opening attack. Step 6: Defeat Crossbreed Priscilla Once attacked, Priscilla turns invisible and begins fighting. Her main weapon is a large scythe capable of dealing significant damage and inflicting Bleed. She also uses sweeping melee attacks that can punish players who remain directly in front of her. Although her invisibility makes the fight intimidating at first, there are several reliable ways to track her. Watch the Snow: The easiest method is to look for Priscilla's footprints in the snow. Even while invisible, her feet leave marks on the ground as she moves. Watch the footprints carefully to determine her approximate location and the direction she's facing. If the tracks are approaching you, prepare to dodge her next attack. Try to remain near the snowy portion of the arena, where her movements are easier to follow. Make Her Visible Again: Priscilla won't necessarily remain invisible throughout the entire fight. Dealing enough poise damage to stagger her causes her to become visible again. Weapons with strong stagger potential are particularly useful. You can also use suitable spells or fire-based attacks to help reveal her position. Once she becomes visible, take advantage of the opportunity to attack her tail if you haven't obtained Priscilla's Dagger yet. Avoid Her Scythe Attacks: Priscilla's scythe has considerable reach and can build up Bleed quickly. Avoid standing directly in front of her for extended periods. Instead, dodge toward her side or move behind her after she finishes an attack. If you're using a shield, remember that blocking repeated strikes can drain your stamina and leave you vulnerable. Maintaining enough stamina to roll away is generally safer than attempting to block everything. Watch Your Bleed Meter: Priscilla's attacks can rapidly build up Bleed. When the meter fills completely, you'll suffer a large burst of damage. Keep an eye on the buildup and create distance when necessary to allow it to decrease. Equipment with higher Bleed resistance can also help. Finish the Encounter: Once you've obtained her tail weapon, focus on dealing damage safely. Watch the footprints while she's invisible, dodge her scythe attacks, and strike during openings. When she becomes visible, stay near her side and continue attacking until her health is depleted. Defeating Crossbreed Priscilla awards the Soul of Priscilla and unlocks the trophy. Congratulations! You've defeated one of Lordran's few characters who actually asked you to leave peacefully. Somewhere, the game's moral compass is quietly judging you. Step 7: Leave the Painted World After defeating Priscilla, follow the passage beyond her arena toward the ledge at the end of the walkway. Approach the edge to trigger the exit sequence. Your character will return to Anor Londo, near the enormous painting that originally transported you into the Painted World. You can now continue your journey through Lordran or return later if you missed any collectibles.
Tip
The most important task is obtaining Priscilla's Dagger before killing her. Because Priscilla starts the encounter peacefully, you can position yourself behind her and deliver a precise opening attack to the tail. Consider using a weapon with good reach and a strong vertical attack. If you're also pursuing Knight's Honor, save the Soul of Priscilla after defeating her. Bring it to the Giant Blacksmith in Anor Londo along with a compatible regular +10 halberd, scythe, or whip to create the Lifehunt Scythe.
Warning
PRISCILLA'S DAGGER IS MISSABLE DURING THE BOSS FIGHT. If you defeat Priscilla without severing her tail, you'll need another playthrough to obtain the dagger. Once you attack her, she remains hostile, and you cannot simply walk past her to leave the Painted World. You'll need to defeat her. Also, the Painted World doesn't allow normal bonfire warping to escape, even after obtaining the Lordvessel. Make sure you're ready before entering the painting.

Unlock Details
Defeat Crossbreed Priscilla, the optional boss located at the end of the Painted World of Ariamis.
Unlike most bosses in DARK SOULS: REMASTERED, Priscilla is initially peaceful and won't attack unless you provoke her.
You can leave the Painted World without fighting her, but you'll need to defeat her to unlock this trophy and complete the Platinum.
You'll also want to cut off her tail to obtain Priscilla's Dagger for Knight's Honor and save her boss soul to forge the Lifehunt Scythe.
Step 1: Return to the Northern Undead Asylum
Before entering the Painted World of Ariamis, you'll need to obtain the Peculiar Doll.
This key item is found inside your original prison cell in the Northern Undead Asylum, but it only becomes available after returning to the area later in the game.
From Firelink Shrine, take the elevator leading toward Undead Parish.
As the elevator rises, step off onto the ruined rooftop partway up.
Follow the narrow path across the grass and carefully roll onto the large stone support pillar nearby.
Continue along the pillar toward the stairs leading to the giant crow's nest.
Enter the nest and interact with it to curl into a ball.
Remain in this position for approximately 30 seconds until the giant crow carries you back to the Northern Undead Asylum.
Once you arrive, follow the familiar passages toward the prison cell where your character began the game.
Inside the cell, you'll find the Peculiar Doll on a corpse.
Collect it and return to Lordran when you're ready.
You can also explore the asylum to fight the Stray Demon and obtain a Titanite Slab, but this optional boss isn't required for Priscilla's trophy.
Step 2: Enter the Painted World of Ariamis
Travel to Anor Londo, the large city reached after defeating the Iron Golem in Sen's Fortress.
From the first Anor Londo bonfire, head toward the enormous rotating staircase in the center of the city.
Operate the staircase mechanism until you can access the large building containing the Painting Guardians.
Inside, you'll find an enormous painting hanging on the far wall.
This is the entrance to the Painted World of Ariamis.
With the Peculiar Doll in your inventory, approach the painting and interact with it.
Your character will be transported into the Painted World.
Once inside, activate the bonfire near the starting area.
You'll remain trapped inside the painting until you reach the exit at the end of the level, so make sure you're prepared for a reasonably lengthy exploration.
Step 3: Explore the Painted World
The Painted World of Ariamis is a snowy fortress populated by Hollows, Crow Demons, Bonewheel Skeletons, and other dangerous enemies.
From the first bonfire, proceed through the ruined buildings toward the central courtyard.
You'll encounter several infected Hollows whose bodies are covered in swollen growths.
These enemies can release a toxic cloud when killed, so attack carefully and avoid standing directly beside them when they die.
Continue through the rooftops and connected buildings until you reach the main courtyard containing a large group of Phalanx enemies.
These enemies carry shields and spears and are clustered around a central statue.
You can fight them directly or run around them to reach the nearby passages.
The large gate leading toward Priscilla is initially locked.
To open it, you'll need to reach the underground tunnels beneath the courtyard.
Locate the stairs leading into the lower passages, where several Bonewheel Skeletons patrol the dark corridors.
These enemies are particularly dangerous because their rolling attacks can deal repeated damage and easily kill an unprepared character.
Try to lure them individually rather than fighting the entire group.
Search the tunnels until you locate the large wheel mechanism.
Turn the mechanism to open the main gate connecting the central courtyard to the bridge leading toward Priscilla.
You can now return to the bonfire more easily and access the final section of the area.
Important Collectibles:
Before fighting Priscilla, take some time to collect the important equipment and spells scattered throughout the Painted World.
Several items are required for other Platinum trophies:
The Crow Demons in this area also drop Souvenirs of Reprisal, which are used to obtain the Darkmoon Blade miracle from the Blade of the Darkmoon covenant.
Collecting these items before leaving can save a return trip later.
Step 4: Reach Crossbreed Priscilla
Once you've opened the main gate, return to the central courtyard and follow the bridge leading toward the large tower at the far end of the Painted World.
You'll encounter a heavily armored enemy guarding the path.
Defeat or avoid the enemy and continue toward the fog gate.
Pass through the fog to enter Priscilla's arena.
Unlike most bosses, Priscilla won't immediately become hostile.
Instead, she'll speak to you and ask you to leave her world in peace.
If you simply walk past her and approach the ledge at the far end, you can leave the Painted World without fighting.
However, to unlock this trophy, you'll need to attack her.
Before initiating the battle, position yourself carefully behind her.
This is especially important if you're also collecting Priscilla's Dagger.
Step 5: Obtain Priscilla's Dagger
Priscilla's Dagger is awarded by severing Priscilla's tail during the encounter.
The weapon is required for Knight's Honor, so you should prioritize obtaining it before defeating her.
While Priscilla is still peaceful, move behind her and locate her long white tail.
Equip a weapon with a strong, accurate attack that can strike the tail without hitting too much of her body.
A powerful overhead attack is particularly useful.
Aim toward the end of her tail rather than attacking her legs or torso.
Your first attack will make Priscilla hostile, so use the opening to deal as much damage to the tail as possible.
If you successfully sever it, Priscilla's Dagger will be added to your inventory automatically.
If the tail doesn't break immediately, don't panic.
You can still obtain the dagger during the fight, although positioning becomes more difficult once she turns invisible.
Avoid using extremely powerful area-of-effect attacks that might kill Priscilla before you've obtained the weapon.
Remember, the objective is to cut off her tail, not accidentally send the entire boss into the next life with your opening attack.
Step 6: Defeat Crossbreed Priscilla
Once attacked, Priscilla turns invisible and begins fighting.
Her main weapon is a large scythe capable of dealing significant damage and inflicting Bleed.
She also uses sweeping melee attacks that can punish players who remain directly in front of her.
Although her invisibility makes the fight intimidating at first, there are several reliable ways to track her.
Watch the Snow:
The easiest method is to look for Priscilla's footprints in the snow.
Even while invisible, her feet leave marks on the ground as she moves.
Watch the footprints carefully to determine her approximate location and the direction she's facing.
If the tracks are approaching you, prepare to dodge her next attack.
Try to remain near the snowy portion of the arena, where her movements are easier to follow.
Make Her Visible Again:
Priscilla won't necessarily remain invisible throughout the entire fight.
Dealing enough poise damage to stagger her causes her to become visible again.
Weapons with strong stagger potential are particularly useful.
You can also use suitable spells or fire-based attacks to help reveal her position.
Once she becomes visible, take advantage of the opportunity to attack her tail if you haven't obtained Priscilla's Dagger yet.
Avoid Her Scythe Attacks:
Priscilla's scythe has considerable reach and can build up Bleed quickly.
Avoid standing directly in front of her for extended periods.
Instead, dodge toward her side or move behind her after she finishes an attack.
If you're using a shield, remember that blocking repeated strikes can drain your stamina and leave you vulnerable.
Maintaining enough stamina to roll away is generally safer than attempting to block everything.
Watch Your Bleed Meter:
Priscilla's attacks can rapidly build up Bleed.
When the meter fills completely, you'll suffer a large burst of damage.
Keep an eye on the buildup and create distance when necessary to allow it to decrease.
Equipment with higher Bleed resistance can also help.
Finish the Encounter:
Once you've obtained her tail weapon, focus on dealing damage safely.
Watch the footprints while she's invisible, dodge her scythe attacks, and strike during openings.
When she becomes visible, stay near her side and continue attacking until her health is depleted.
Defeating Crossbreed Priscilla awards the Soul of Priscilla and unlocks the trophy.
Congratulations! You've defeated one of Lordran's few characters who actually asked you to leave peacefully. Somewhere, the game's moral compass is quietly judging you.
Step 7: Leave the Painted World
After defeating Priscilla, follow the passage beyond her arena toward the ledge at the end of the walkway.
Approach the edge to trigger the exit sequence.
Your character will return to Anor Londo, near the enormous painting that originally transported you into the Painted World.
You can now continue your journey through Lordran or return later if you missed any collectibles.
Tip
The most important task is obtaining Priscilla's Dagger before killing her.
Because Priscilla starts the encounter peacefully, you can position yourself behind her and deliver a precise opening attack to the tail.
Consider using a weapon with good reach and a strong vertical attack.
If you're also pursuing Knight's Honor, save the Soul of Priscilla after defeating her.
Bring it to the Giant Blacksmith in Anor Londo along with a compatible regular +10 halberd, scythe, or whip to create the Lifehunt Scythe.
Warning
PRISCILLA'S DAGGER IS MISSABLE DURING THE BOSS FIGHT.
If you defeat Priscilla without severing her tail, you'll need another playthrough to obtain the dagger.
Once you attack her, she remains hostile, and you cannot simply walk past her to leave the Painted World. You'll need to defeat her.
Also, the Painted World doesn't allow normal bonfire warping to escape, even after obtaining the Lordvessel.
Make sure you're ready before entering the painting.
Trophy: Defeat the Dark Sun Gwyndolin
Defeat Dark Sun Gwyndolin, the Darkmoon God.
Type: Silver
Category: Combat
Unlock Details
Defeat Dark Sun Gwyndolin, the optional boss hidden beneath Anor Londo. Gwyndolin is associated with the Blade of the Darkmoon covenant, making this encounter particularly important for players pursuing Prayer of a Maiden. Unlike the four Lord Soul bosses, defeating Gwyndolin is not required to complete the main story. However, defeating him is required for the Platinum. Step 1: Obtain the Darkmoon Seance Ring Travel to the Catacombs through the cemetery beside Firelink Shrine. Progress through the underground passages until you reach the section containing the rotating bridges and hidden corridors. Locate the breakable wall leading into a concealed passage. Continue through the hidden rooms and ladders until you reach the chamber containing a Giant Skeleton and a coffin. Collect the Darkmoon Seance Ring from the coffin. This ring allows you to reveal Gwyndolin's hidden chamber in Anor Londo. Step 2: Reach the Darkmoon Tomb Return to Anor Londo and travel to the large rotating staircase in the center of the city. Operate the staircase mechanism until the platform reaches its lowest position. Descend the stairs toward the Darkmoon Tomb bonfire. Rest at the bonfire to establish a checkpoint. Near the bonfire, you'll see a large statue of Gwyn blocking the passage. Equip the Darkmoon Seance Ring. The statue will disappear, revealing a hidden corridor leading to Gwyndolin's fog gate. Step 3: Complete the Covenant Requirements First Before entering the boss fog, make sure you've joined the Blade of the Darkmoon covenant. Approach the carpet in front of the fog gate and kneel when prompted. Accept Gwyndolin's covenant invitation to unlock the associated covenant trophy if you haven't already. Next, collect 10 Souvenirs of Reprisal. These can be farmed from Crow Demons in the Painted World of Ariamis. Return to Gwyndolin and offer the 10 Souvenirs to reach covenant rank +1. You'll receive the Darkmoon Blade miracle, which is required for Prayer of a Maiden. Only after receiving this miracle should you enter the boss fog and challenge Gwyndolin. Step 4: Defeat Dark Sun Gwyndolin Gwyndolin fights inside a long, seemingly endless corridor. Rather than engaging in normal melee combat, he teleports backward and attacks from a distance using magical projectiles and arrows. There are three main attacks to watch for. Magic Projectiles: Gwyndolin summons several small magical orbs that travel toward you. These attacks can be avoided by running behind the stone pillars along the corridor. Keep moving between the pillars and wait for the projectiles to pass. Large Magic Blast: Gwyndolin raises his catalyst and fires a powerful magical projectile directly down the corridor. This attack can pass through the pillars, so don't rely on cover. Watch his casting animation and dodge to the side just before the blast reaches you. Arrow Barrage: Gwyndolin draws his bow and fires a rapid sequence of arrows. The arrows travel down the corridor in a relatively predictable pattern. Move behind a nearby pillar to block the shots, or dodge while advancing. General Strategy: The safest strategy is to approach Gwyndolin gradually, moving between the stone pillars while avoiding his attacks. Pay attention to his casting animations so you know when to take cover and when you need to dodge. Once you get close enough, Gwyndolin will begin teleporting farther down the corridor. Try to reach him quickly between attacks and land several melee strikes before he teleports. Ranged attacks and spells can also be effective, depending on your build. Repeat this process until his health is depleted. After Gwyndolin is defeated, the trophy unlocks. Step 5: Collect Sunlight Blade After defeating Gwyndolin, continue down the corridor beyond the boss arena. You'll find a large tomb chamber containing several chests. Open the chest containing the Sunlight Blade miracle. This miracle is required for Prayer of a Maiden. Defeating Gwyndolin also rewards you with the Soul of Gwyndolin. Save the soul, as you'll need two copies across separate playthroughs to create the Darkmoon Bow and Tin Darkmoon Catalyst for Knight's Honor. Congratulations! You've defeated a secret god hiding at the end of an endless hallway. Apparently, the hardest part of becoming a divine being is learning when to stop running away.
Tip
Complete the Blade of the Darkmoon covenant's rank +1 reward before fighting Gwyndolin. The Darkmoon Blade miracle is required for Prayer of a Maiden, while the Sunlight Blade miracle is found after defeating the boss. Collecting both in the correct order allows you to finish these requirements during the same playthrough.
Warning
Defeating Gwyndolin prevents you from joining or progressing the Blade of the Darkmoon covenant during that playthrough. Do not enter the boss fog until you've received Darkmoon Blade. Also, save the Soul of Gwyndolin. You'll need two copies across separate playthroughs for Knight's Honor.
Video Guide: https://www.youtube.com/watch?v=tRfNLzPB2h0&list=PLy8mZW3dyYeDHRXlnbGa3c5qjKadbEGIy&index=25&pp=iAQB
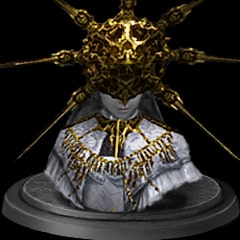
Trophy: Dark Lord
Reach "The Dark Lord" ending.
Type: Gold
Category: Ending
Unlock Details
Complete DARK SOULS: REMASTERED by defeating Gwyn, Lord of Cinder, and choosing to leave the First Flame unlinked. Dark Lord is one of the game's two ending trophies. The other is To Link the Fire, which requires interacting with the bonfire after defeating Gwyn. Both endings are necessary for the Platinum, so you'll normally unlock them across two separate playthroughs. Reaching the Final Boss: Before confronting Gwyn, you must obtain the Lordvessel from Gwynevere in Anor Londo and collect the souls of the four major Lord Soul bosses. These bosses are: 1. Gravelord Nito — Found at the bottom of the Tomb of the Giants, beyond the Catacombs. 2. Bed of Chaos — Found in Lost Izalith, beyond Demon Ruins. 3. Four Kings — Found in the Abyss beneath New Londo Ruins. You must equip the Covenant of Artorias ring obtained by defeating Great Grey Wolf Sif. 4. Seath the Scaleless — Found in the Crystal Cave beyond the Duke's Archives. After defeating all four bosses, return to the Firelink Altar and offer their souls to the Lordvessel. This opens the path to the Kiln of the First Flame. Enter the Kiln and follow the ash-covered pathways toward the final boss arena. Several Black Knights patrol the area. These enemies can drop rare weapons and shields needed for Knight's Honor, making this an excellent location to farm anything you're still missing. Continue until you reach the fog gate and enter to fight Gwyn, Lord of Cinder. Boss Strategy: Gwyn is an aggressive opponent who attacks with a flaming greatsword, combining fast sword strikes, lunging attacks, and dangerous grabs. The most effective strategy is to parry his sword attacks. Unlike many other Dark Souls bosses, Gwyn can be parried with a properly timed shield or parrying tool. Watch his sword movements carefully and parry just before an attack connects. A successful parry leaves him vulnerable to a riposte, allowing you to deal substantial damage. If you're uncomfortable with parrying, use the stone pillars around the arena to interrupt his movement and create opportunities to heal. Stay mobile, avoid trading hits, and punish his recovery animations with quick attacks. Gwyn can be particularly dangerous when you're healing, as he'll often close the distance before your Estus animation finishes. Continue fighting until he falls. Choosing the Dark Lord Ending: After defeating Gwyn, a bonfire will appear in the middle of the arena. DO NOT interact with the bonfire. Instead, turn around and walk back toward the entrance you originally used to enter the boss arena. Continue through the doorway and leave the arena. This triggers the Dark Lord ending cutscene and unlocks the trophy. You've defeated the Lord of Cinder and decided the best way to handle the world's biggest fire is to simply walk away. Honestly, after everything Lordran has put you through, that's a remarkably understandable decision.
Tip
Save this ending for your second playthrough if you earned To Link the Fire during your first. The choice is entirely determined by your action after defeating Gwyn. You don't need to join the Darkwraith covenant or complete any special NPC questline to unlock Dark Lord.
Warning
Interacting with the bonfire triggers To Link the Fire instead, so avoid it completely when pursuing Dark Lord. Completing either ending immediately begins the next New Game cycle. Finish all remaining exploration, covenant rewards, spell purchases, and weapon upgrades before defeating Gwyn. Also, keep the Soul of Gwyn. You'll need one copy for the Great Lord Greatsword and another for the Sunlight Spear miracle.
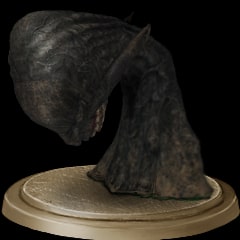
Trophy: To Link the Fire
Reach "To Link the Fire" ending.
Type: Gold
Category: Ending
Unlock Details
Complete DARK SOULS: REMASTERED by defeating Gwyn, Lord of Cinder, and choosing to link the First Flame. This is one of the game's two ending trophies. Both endings are required for the Platinum, so you'll normally earn To Link the Fire during one playthrough and Dark Lord during another. Before confronting Gwyn, you'll need to obtain the Lordvessel and collect the four required Lord Souls or their equivalents. Preparing for the Final Boss: After obtaining the Lordvessel in Anor Londo, place it on the Firelink Altar through either Kingseeker Frampt or Darkstalker Kaathe, depending on your covenant plans. You'll then need to defeat the four major Lord Soul bosses. 1. Gravelord Nito — Located at the bottom of the Tomb of the Giants, beyond the Catacombs. 2. Bed of Chaos — Located deep within Lost Izalith, beyond Demon Ruins. 3. The Four Kings — Found in the Abyss beneath New Londo Ruins. You must obtain and equip the Covenant of Artorias ring before entering. 4. Seath the Scaleless — Found in the Crystal Cave beyond the Duke's Archives. After collecting the required souls, return to the Firelink Altar and offer them to the Lordvessel. The path to the Kiln of the First Flame will open. Travel into the Kiln and progress through the ash-covered landscape toward the final boss arena. Several Black Knights guard the route. These enemies can drop rare equipment required for Knight's Honor, so this is an excellent opportunity to farm any missing Black Knight weapons or shields. Continue until you reach the final fog gate and enter to confront Gwyn, Lord of Cinder. Boss Strategy: Gwyn is an extremely aggressive boss who attacks using a flaming greatsword. He combines fast sword combinations, lunging attacks, and powerful grabs, leaving relatively little time to recover between attacks. One of the most effective strategies is to parry his sword attacks. Unlike many bosses in the game, Gwyn can be parried with a properly timed shield or parrying tool. Wait for his sword swing to approach, parry just before the attack connects, and follow up with a riposte for substantial damage. If you're uncomfortable parrying, use the stone pillars and rocky structures around the arena to create distance and interrupt his movement. Focus on dodging around his sword combinations and attack only during clear recovery openings. Avoid trying to heal directly in front of him, as his aggressive attacks can punish your Estus animation. Fire-resistant equipment can reduce some incoming damage, but avoiding his attacks remains the safest strategy. Continue fighting until Gwyn is defeated. Choosing the Ending: After defeating Gwyn, a bonfire appears in the center of the boss arena. To unlock To Link the Fire, approach the bonfire and interact with it. Your character will link the First Flame, triggering the ending cutscene. The To Link the Fire trophy unlocks as the ending completes. You've fought through an entire dying kingdom, defeated its ancient ruler, and finally reached the ultimate decision. Naturally, the solution involves setting yourself on fire. Classic Dark Souls.
Tip
Gwyn's sword attacks are unusually vulnerable to parrying, so practicing this mechanic can make the final encounter considerably easier. Save the Soul of Gwyn after defeating him. One copy is required to forge the Great Lord Greatsword, while another is required for the Sunlight Spear miracle.
Warning
Defeating Gwyn and completing an ending immediately transitions your character into New Game+. There is no option to continue exploring the current playthrough afterward. Before fighting Gwyn, finish any outstanding covenant requirements, spell collections, NPC questlines, optional bosses, and weapon upgrades you want to complete during the current cycle. To earn this specific ending trophy, you must interact with the bonfire after defeating Gwyn. Walking out of the arena instead triggers the Dark Lord ending, which is a separate trophy.
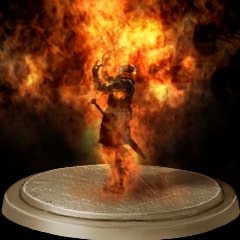
Trophy: Chaos Weapon
Acquire best wpn through chaos reinfrc.
Type: Bronze
Category: Misc
Unlock Details
Upgrade a weapon to Chaos +5, the maximum level of the Chaos reinforcement path. Chaos weapons deal physical and fire damage, but unlike ordinary Fire weapons, they also gain additional damage from your stored Humanity, up to a maximum of 10 soft Humanity. To unlock this trophy, you'll need Vamos in the Catacombs, a Fire +5 weapon, the Chaos Flame Ember, and the required Red Titanite materials. Step 1: Prepare a Fire +5 Weapon Travel into the Catacombs from the cemetery near Firelink Shrine and locate Vamos in his hidden workshop beneath the broken spiral staircase. Choose a regular weapon and upgrade it to +5 using nine Titanite Shards. Bring the weapon to Vamos and convert it into the Fire reinforcement path. Continue upgrading it to Fire +5 using 10 Green Titanite Shards. You do not need the Large Flame Ember for this step. That's required for Fire +6 through Fire +10, not the Chaos path. Step 2: Obtain the Chaos Flame Ember Travel through Blighttown and defeat Chaos Witch Quelaag to gain access to Demon Ruins. Progress through the area until you reach Ceaseless Discharge. Defeat the boss to drain much of the lava from the large basin below. Return to the newly accessible lower lava bed, where several Taurus Demons patrol the rocky terrain. The Chaos Flame Ember is located on a corpse in this area, surrounded by the Taurus Demons. Approach carefully and defeat or lure away the enemies guarding the corpse. You don't need to fight the entire group at once. Collect the Chaos Flame Ember and return to Vamos in the Catacombs. Step 3: Convert Your Weapon to Chaos Give Vamos the Chaos Flame Ember and select Modify Equipment. Choose your Fire +5 weapon and convert it into the Chaos reinforcement path. Continue reinforcing it until it reaches Chaos +5. The complete requirements are: Regular +0 to +5: 9 Titanite Shards. Regular +5 to Fire +5: 10 Green Titanite Shards. Fire +5 to Chaos +4: 8 Red Titanite Chunks. Chaos +4 to Chaos +5: 1 Red Titanite Slab. Red Titanite Chunks can be obtained from Chaos Eaters in Lost Izalith. A Red Titanite Slab can be found in the poisonous lower section of Lost Izalith, while another is obtainable through a trade with Snuggly the Crow using an Ascended Pyromancy Flame. Once your weapon reaches Chaos +5, the trophy unlocks. You've successfully created a weapon powered by fire and Humanity. Apparently, Lordran looked at regular flames and decided they weren't emotionally unstable enough.
Tip
You can work toward Fire Weapon and Chaos Weapon together by preparing two separate Fire +5 weapons. Once you have both embers, reinforce one along the Fire path and the other along the Chaos path.
Warning
Fire +10 and Chaos +5 each require a Red Titanite Slab, so plan for two slabs if you're completing both trophies on separate weapons. Also, Chaos damage scaling uses the Humanity displayed beside your health bar, not unused Humanity items sitting in your inventory.
Video Guide: https://www.youtube.com/watch?v=Ag3OWLrbWZM&list=PLy8mZW3dyYeDHRXlnbGa3c5qjKadbEGIy&index=23&pp=iAQB

Trophy: Covenant: Blade of the Darkmoon
Discover Blade of the Darkmoon covenant.
Type: Silver
Category: Misc
Unlock Details
Discover and join the Blade of the Darkmoon covenant by locating Dark Sun Gwyndolin's hidden chamber in Anor Londo. This covenant is especially important for the Platinum because reaching rank +1 awards the Darkmoon Blade miracle, which is required for Prayer of a Maiden. You'll need the Darkmoon Seance Ring to reveal the hidden entrance without disrupting Gwynevere. Step 1: Obtain the Darkmoon Seance Ring Travel to the Catacombs through the graveyard beside Firelink Shrine. Progress through the underground passages, defeating the Necromancers controlling the skeleton enemies. Continue until you reach the lower Catacombs, where several narrow passages connect to rooms containing skeletons and coffins. Locate the hallway containing a breakable wall near a rotating bridge mechanism. Break the wall to reveal a hidden passage. Follow this route, climbing the ladders and moving through the connected chambers. Eventually, you'll reach a room containing a Giant Skeleton and a coffin holding the Darkmoon Seance Ring. Defeat or avoid the enemy, then collect the ring from the coffin. Step 2: Reach the Darkmoon Tomb Travel to Anor Londo and reach the large rotating staircase in the center of the city. Use the staircase mechanism to lower the central platform to its lowest position. Descend the stairs until you reach the Darkmoon Tomb bonfire. Near the bonfire, you'll find a large statue of Gwyn blocking the passage. Equip the Darkmoon Seance Ring. The statue disappears, revealing a hidden corridor leading toward a fog gate. Walk down the corridor but DO NOT enter the fog gate. Step 3: Join the Covenant Before the fog gate, locate the kneeling mat on the floor. Approach the mat and choose the option to kneel. Dark Sun Gwyndolin will speak to you and offer the opportunity to join the Blade of the Darkmoon covenant. Accept the invitation. The trophy unlocks immediately. You'll also receive the Blue Eye Orb and the Darkmoon Blade Covenant Ring. Step 4: Obtain the Darkmoon Blade Miracle Although joining the covenant is enough for this trophy, you'll also need its rank +1 reward for Prayer of a Maiden. To reach rank +1, collect 10 Souvenirs of Reprisal. The most reliable offline farming location is the Painted World of Ariamis. To enter the Painted World, collect the Peculiar Doll from your original cell during a return visit to the Northern Undead Asylum. Travel to Anor Londo and interact with the enormous painting inside the building guarded by Painting Guardians. Once inside the Painted World, locate the Crow Demons, the winged humanoid enemies found around the upper rooftops and tower. Defeat these enemies repeatedly until you've collected 10 Souvenirs of Reprisal. Equip the Covetous Gold Serpent Ring and maintain soft Humanity to improve your Item Discovery. Return to the Darkmoon Tomb, kneel before Gwyndolin, and offer the 10 Souvenirs of Reprisal. Reaching covenant rank +1 awards the Darkmoon Blade miracle and Darkmoon Talisman. After you've obtained Darkmoon Blade, you can challenge Gwyndolin for his separate boss trophy and the Sunlight Blade miracle. You've now joined a secret order dedicated to punishing sinners. Naturally, the initiation ceremony involves crawling through skeleton-filled tunnels and collecting suspiciously shaped souvenirs. Lordran's recruitment department remains undefeated.
Tip
Collect Darkmoon Blade before fighting Gwyndolin. After receiving the miracle, you're free to enter his arena and defeat him for the corresponding trophy. You'll also need two Souls of Gwyndolin across separate playthroughs for Knight's Honor.
Warning
Entering Gwyndolin's boss fog before joining the covenant makes him hostile and prevents normal covenant access. Killing Gwyndolin removes the opportunity to obtain Darkmoon Blade during that playthrough. Attacking Gwynevere can also complicate covenant progression. The safest route is to keep her alive, equip the Darkmoon Seance Ring, join the covenant, and obtain Darkmoon Blade before triggering either related boss confrontation.
Video Guide: https://www.youtube.com/watch?v=jCp4fwdHgA8&list=PLy8mZW3dyYeDHRXlnbGa3c5qjKadbEGIy&index=2&pp=iAQB

Trophy: Covenant: Chaos Servant
Discover Chaos Servant covenant.
Type: Silver
Category: Misc
Unlock Details
Discover and join the Chaos Servant covenant by speaking with the Fair Lady, Quelaag's sister, in the hidden chamber beneath Quelaag's Domain. This covenant is particularly important for the Platinum because it provides Great Chaos Fireball and Chaos Storm, two pyromancies required for Bond of a Pyromancer. Step 1: Defeat Chaos Witch Quelaag Travel through Blighttown until you reach the poisonous swamp at the bottom. From the swamp bonfire, cross toward the enormous white mound covered in spiderwebs. Enter Quelaag's Domain and proceed through the tunnel to the boss arena. Defeat Chaos Witch Quelaag, the half-human, half-spider boss who uses flaming sword attacks and lava pools. After the battle, continue through the passage beyond her arena. You'll reach the staircase leading down toward the second Bell of Awakening. Ring the bell if you haven't already. Step 2: Reveal the Hidden Chamber From the bell chamber, descend toward the passage leading into Demon Ruins. Near the entrance to Demon Ruins, look for a suspicious section of wall beside the staircase. Strike or roll through this illusory wall to reveal a hidden passage. Inside, you'll encounter Eingyi, an egg-bearing servant guarding the Fair Lady. Speak with Eingyi and answer his questions without attacking him. He'll allow you to approach the Fair Lady, who rests against the wall at the back of the chamber. There's also a bonfire in this hidden room, making it a useful checkpoint. Step 3: Join the Covenant Approach the Fair Lady and interact with her. Although she cannot communicate normally unless you have a special ring, you can still join her covenant without understanding her dialogue. Choose the option to enter the Chaos Servant covenant. The trophy unlocks immediately. You'll receive the Great Chaos Fireball pyromancy for joining. This is one of the 19 pyromancies required for Bond of a Pyromancer. Step 4: Obtain Chaos Storm To receive the second required pyromancy, you must reach covenant rank +2. This requires offering 30 Humanity to the Fair Lady. The Humanity must be available as soft Humanity, shown by the number beside your health and stamina bars. If you're carrying Humanity consumables, use them to increase your soft Humanity before making your offerings. Interact with the Fair Lady and select the option to offer Humanity. You can donate the full amount or contribute in smaller amounts until you've offered 30 total. At 10 Humanity, you'll reach covenant rank +1. At 30 Humanity, you'll reach rank +2 and receive the Chaos Storm pyromancy. You'll also unlock a shortcut between Demon Ruins and Lost Izalith. The shortcut is located near the Demon Firesage area and can help you bypass part of the normal route through Demon Ruins. It's also useful for progressing Solaire's questline. Humanity Farming: If you don't have enough Humanity, several areas provide reliable farming opportunities. Rats in the Depths can drop Humanity consumables. The group of rats near the Depths bonfire is a convenient farming option. Later in the game, Humanity Phantoms in the Chasm of the Abyss provide another source, although the DLC area is not required for the Platinum. Equip the Covetous Gold Serpent Ring and maintain up to 10 soft Humanity to improve Item Discovery when farming consumable drops. After collecting Chaos Storm, the covenant's important Platinum rewards are complete. You've found a secret spider covenant, donated thirty pieces of Humanity, and received a powerful firestorm in return. Somewhere in Lordran, an accountant is having a very strange day.
Tip
Join Chaos Servant immediately after defeating Quelaag. You're already close to the covenant entrance, and Great Chaos Fireball is awarded as soon as you join. If you're collecting all pyromancies, speak with Eingyi as well. He sells Poison Mist and Toxic Mist once you've met his conditions.
Warning
Do not kill the Fair Lady or Eingyi before obtaining their covenant and pyromancy rewards. If you leave Chaos Servant before reaching rank +2, switching covenants can reduce your accumulated contribution. It's safest to offer all 30 Humanity and receive Chaos Storm before joining another covenant. You don't need to open the Lost Izalith shortcut for the trophy itself, but you'll need the rank +2 pyromancy for Bond of a Pyromancer.
Video Guide: https://www.youtube.com/watch?v=ldPwApu-RU0&list=PLy8mZW3dyYeDHRXlnbGa3c5qjKadbEGIy&index=3&pp=iAQB
Trophy: Covenant: Forest Hunter
Discover Forest Hunter covenant.
Type: Silver
Category: Misc
Unlock Details
Discover and join the Forest Hunter covenant by speaking with Alvina, a large talking cat found in Darkroot Garden. The Forest Hunter covenant is responsible for protecting the sealed forest area from intruders. You only need to join the covenant to unlock this trophy. No multiplayer invasions or rank advancement are required. Reaching the Forest Hunter Covenant: From Undead Parish, travel down the staircase near Andre of Astora and enter Darkroot Garden. Continue along the forest path until you reach the magically sealed stone door beside a hidden bonfire. To open this door, purchase the Crest of Artorias from Andre for 20,000 souls. Return to the sealed entrance and use the crest to unlock it. Beyond the door, you'll enter a wooded area patrolled by several hostile human NPC enemies. These include melee fighters, a sorcerer, and other dangerous opponents who can overwhelm an unprepared character. Avoid fighting multiple enemies simultaneously. Continue through the forest toward the ruined stone structures in the central clearing. Look for a partially collapsed building containing a large stone window. Inside the window sits Alvina, a gray cat with glowing eyes. Approach her and initiate a conversation. She'll question your intentions and eventually offer you the chance to join the Forest Hunter covenant. Choose the dialogue options that express your willingness to join. Accept the covenant invitation to unlock the trophy. You'll also receive the Cat Covenant Ring, which allows members to be summoned into other players' worlds to defend the forest. Alternative Route: If you don't want to purchase the Crest of Artorias, you can reach the same forest area through Darkroot Basin. From Darkroot Garden, descend toward the basin containing the Hydra. Defeat or avoid the Hydra, then locate the ladder near the waterfall along the edge of the lake. Climb the ladder and follow the connected forest pathways until you reach the area containing Alvina. This route is longer but avoids spending 20,000 souls on the crest. Forest Hunter Merchant: Joining the covenant also grants access to Shiva of the East, a merchant associated with the Forest Hunters. After joining, speak with Shiva near Alvina's building. He later appears in the Blighttown swamp, near the large waterwheel elevator, provided you're still a member of the covenant. Shiva sells several weapons, including the Stone Greatsword, which is required for Knight's Honor. Joining Forest Hunter is a particularly good idea before exploring the rest of Darkroot Garden, since covenant membership causes the forest's human NPC guardians to become friendly. Congratulations! You've joined a secret forest-protection organization led by a talking cat. Compared with the usual gods, demons, and ancient serpents, this might actually be Lordran's most sensible leadership structure.
Tip
Join Forest Hunter before fighting Great Grey Wolf Sif if you haven't already obtained the trophy. Alvina is located near the route leading toward Sif's arena, so the covenant requires very little additional exploration. If you need the Stone Greatsword for Knight's Honor, joining this covenant also lets you purchase it from Shiva instead of relying on rare enemy drops.
Warning
Attacking Alvina or the forest's friendly covenant NPCs can break your covenant membership and make the area hostile again. Joining another covenant will also end your Forest Hunter membership, although the trophy remains unlocked. If you plan to buy equipment from Shiva, do so before leaving the covenant.
Video Guide: https://www.youtube.com/watch?v=wZ1DxtP7D_Q&list=PLy8mZW3dyYeDHRXlnbGa3c5qjKadbEGIy&index=4&pp=iAQB

Trophy: Covenant: Path of the Dragon
Discover Path of the Dragon covenant.
Type: Silver
Category: Misc
Unlock Details
Discover and join the Path of the Dragon covenant by speaking with the Everlasting Dragon at the end of Ash Lake. Ash Lake is an optional area hidden beneath the Great Hollow in Blighttown. No bosses, character stats, or special offerings are required to join this covenant. Step 1: Reach the Great Hollow Travel to Blighttown and descend to the poisonous swamp at the bottom. From the swamp bonfire near the waterwheel elevator, head toward the enormous hollow tree growing along the far side of the swamp. The tree is accessible through a large root extending out of the poisonous water. Climb the root and enter the opening in the trunk. Inside, you'll find a treasure chest containing the Plank Shield. Behind the chest is an illusory wall. Strike or roll through the wall to reveal a hidden passage. Continue forward and strike the second illusory wall to reveal the entrance to the Great Hollow. Step 2: Descend the Great Hollow The Great Hollow is a massive vertical area filled with tangled branches, narrow platforms, Basilisks, and dangerous drops. Carefully work your way downward along the roots. Avoid sprinting or jumping unnecessarily, as a small mistake can send you falling a tremendous distance. Basilisks are particularly dangerous because their breath can inflict Curse, dramatically reducing your maximum health until the effect is removed. When you encounter them, defeat them quickly or move away from their curse clouds. Continue descending until you reach the bottom of the tree. Pass through the fog gate to enter Ash Lake. Step 3: Find the Everlasting Dragon Ash Lake is a long, open shoreline filled with enormous trees and shallow water. Activate the bonfire near the entrance before continuing. Follow the beach toward the far end of the area. You'll encounter a Hydra along the shoreline, but you don't need to defeat it to join the covenant. Keep to the accessible land and avoid wandering into the deep water. Continue past the large trees and along the shoreline until you reach another bonfire. Beyond this bonfire sits the Everlasting Dragon, an enormous ancient dragon resting at the end of the lake. Approach the dragon and interact with it. Choose to join the Path of the Dragon covenant. The trophy unlocks immediately. You'll receive the Dragon Eye and Dragon Head Stone as your initial covenant rewards. The Dragon Eye is used for covenant-related multiplayer challenges, while the Dragon Head Stone allows you to transform your character's head into a dragon-like form while not wearing a helmet. Further covenant ranks require Dragon Scales, but these are not needed for the trophy. You've officially joined a covenant dedicated to ancient dragons. The initiation ceremony involves an exhausting climb through a tree and a very quiet conversation with an enormous reptile. Honestly, that's still more reasonable than most covenants in Lordran.
Tip
While visiting the Everlasting Dragon, attack its tail to obtain the Dragon Greatsword. Cutting off the tail doesn't turn the dragon hostile, and collecting the weapon now saves a return trip for Knight's Honor. Ash Lake also contains the Great Magic Barrier miracle, which is required for Prayer of a Maiden.
Warning
The Great Hollow is particularly dangerous because of its narrow branches and Curse-inflicting Basilisks. If you're exploring before obtaining the Lordvessel, remember that you'll need to climb back out manually. Fast travel makes this optional area much more convenient. Do not confuse the Dragon Greatsword obtained from the Everlasting Dragon with the Dragon King Greataxe obtained from the Gaping Dragon. Both are separate weapons.
Video Guide: https://www.youtube.com/watch?v=F-VX7e_OLuc&list=PLy8mZW3dyYeDHRXlnbGa3c5qjKadbEGIy&index=7&pp=iAQB
Trophy: Covenant: Princess's Guard
Discover Princess's Guard covenant.
Type: Silver
Category: Misc
Unlock Details
Discover and join the Princess's Guard covenant by speaking with Gwynevere, Princess of Sunlight, in Anor Londo. This covenant becomes available after defeating Dragonslayer Ornstein and Executioner Smough, the boss duo guarding the central cathedral. Reaching Gwynevere: After arriving in Anor Londo, progress through the city until you reach the enormous cathedral. Navigate the exterior rooftops, pass the Silver Knight archers guarding the narrow ledges, and enter the main building. Continue through the interior passages until you reach Ornstein and Smough's boss arena. Defeat both bosses to open the path toward Gwynevere. The order in which you defeat them determines which boss soul you receive, so remember to obtain both souls across separate playthroughs for Knight's Honor. After the fight, climb either of the large elevators at the rear of the arena. At the top, enter the enormous chamber containing Gwynevere. Speak with her to receive the Lordvessel if you haven't already. After receiving it, speak with her again. Continue through her dialogue until she offers you the opportunity to join the Princess's Guard covenant. Accept the invitation to join. The Covenant: Princess's Guard trophy unlocks immediately. You'll also receive the Ring of the Sun Princess, which improves the effectiveness of certain supportive miracles when worn. The covenant doesn't require any offerings or rank progression for trophy purposes. For once, joining a covenant involves having a polite conversation with a princess instead of crawling into a coffin or donating your life savings. Enjoy it while it lasts.
Tip
Join Princess's Guard immediately after obtaining the Lordvessel. You're already standing in front of Gwynevere, so there's no reason to postpone this easy trophy. Two miracles associated with this covenant, Bountiful Sunlight and Soothing Sunlight, can be collected from special Pisaca enemies inside the Duke's Archives. Both are required for Prayer of a Maiden, although you don't need to remain in the covenant to collect them.
Warning
Do not attack Gwynevere before joining the covenant. Attacking her destroys the illusion, changes Anor Londo, and prevents you from joining Princess's Guard during that playthrough. Joining the covenant does not interfere with the Lordvessel or either ending.
Video Guide: https://www.youtube.com/watch?v=3M8sFjyFFN4&list=PLy8mZW3dyYeDHRXlnbGa3c5qjKadbEGIy&index=9&pp=iAQB0gcJCTcMAYcqIYzv

Trophy: Covenant: Warrior of Sunlight
Discover Warrior of Sunlight covenant.
Type: Silver
Category: Misc
Unlock Details
Discover and join the Warrior of Sunlight covenant by praying at the Sunlight Altar in Undead Parish. This is the covenant associated with Solaire of Astora and cooperative multiplayer. For the Platinum, the covenant is especially important because it awards three miracles required for Prayer of a Maiden: Lightning Spear, Great Lightning Spear, and Sunlight Spear. Reaching the Sunlight Altar: From Undead Parish, travel toward the large bridge guarded by the Hellkite Dragon. The Sunlight Altar is located on the far side of the bridge, near the bonfire beneath the dragon's resting position. One approach is to reach the bridge from Undead Burg, use the staircase leading underneath it, and carefully make your way toward the far-side passage. You can also reach the altar from the Undead Parish side once you've progressed through the surrounding area. Locate the broken stone altar near the bonfire. Interact with it once you meet the covenant requirements. Joining Requirements: Unlike most covenants, Warrior of Sunlight has a Faith requirement. In DARK SOULS: REMASTERED, you'll normally need 25 Faith to join. However, successful cooperative boss victories can reduce this requirement. Each time you're summoned into another player's world and successfully help defeat an area boss, the Faith requirement decreases by five points. For example: 25 Faith — No cooperative victories required. 20 Faith — 1 successful cooperative boss victory. 15 Faith — 2 successful cooperative boss victories. 10 Faith — 3 successful cooperative boss victories. 5 Faith — 4 successful cooperative boss victories. No Faith requirement — 5 successful cooperative boss victories. You can meet the requirement entirely offline by investing enough levels into Faith. Once you're eligible, interact with the Sunlight Altar and choose to join the covenant. The Covenant: Warrior of Sunlight trophy unlocks immediately. You'll also receive the Lightning Spear miracle. Obtaining Great Lightning Spear: To reach covenant rank +1, offer 10 Sunlight Medals at the altar. Sunlight Medals can be obtained through cooperative victories involving Warriors of Sunlight, certain NPC interactions, and treasure. A reliable offline farming method becomes available later in the game. Travel to Demon Ruins and access the passage leading toward the Lost Izalith shortcut near the Chaos Servant covenant's hidden entrance. Chaos Bugs in this passage can drop Sunlight Medals. Defeat them repeatedly until you've collected the required medals. Return to the Sunlight Altar and offer 10 Sunlight Medals to reach rank +1. You'll receive the Great Lightning Spear miracle. Obtaining Sunlight Spear: To collect the final required Warrior of Sunlight miracle, defeat Gwyn, Lord of Cinder, at the end of the game. After completing your first playthrough and entering New Game+, return to the Sunlight Altar with Gwyn's soul. Join or rejoin the Warrior of Sunlight covenant and make sure you've reached rank +1. Offer Gwyn's soul to receive the Sunlight Spear miracle. This spell is required for Prayer of a Maiden and cannot be obtained through ordinary first-playthrough progression without acquiring a Gwyn soul from another player. Praise the Sun! You've joined Lordran's most cheerful covenant, earned the power to throw lightning bolts, and discovered that even divine miracles require paperwork in the form of ten shiny medals.
Tip
If you're planning a Faith-focused build, investing in 25 Faith is the simplest offline method of joining. For other builds, cooperative boss victories can save levels. Remember that the requirement decreases when you successfully help defeat another player's boss, not merely when you collect Sunlight Medals.
Warning
Do not consume the Soul of Gwyn. You'll need one copy for Sunlight Spear and another for the Great Lord Greatsword required by Knight's Honor. Also, leaving a covenant before completing its rank rewards can reduce your accumulated offerings. It's safest to collect all 10 Sunlight Medals and obtain Great Lightning Spear before switching to another covenant.
Video Guide: https://www.youtube.com/watch?v=bM6j3rOVK0A&list=PLy8mZW3dyYeDHRXlnbGa3c5qjKadbEGIy&index=8&pp=iAQB

Trophy: Covenant: Way of White
Discover Way of White covenant.
Type: Bronze
Category: Misc
Unlock Details
Discover and join the Way of White covenant, one of the earliest covenants available in DARK SOULS: REMASTERED. After escaping the Undead Asylum and arriving at Firelink Shrine, you'll find Petrus of Thorolund standing near the ruined stone building on the hillside, close to the path leading toward the cemetery. From the Firelink Shrine bonfire, head toward the large stone ruins behind the central area. Look for the staircase leading into a partially collapsed structure. Petrus is the man wearing chainmail and carrying a mace and shield. Speak with Petrus and exhaust his dialogue until he offers you the opportunity to join the Way of White. Accept his invitation to enter the covenant and unlock the trophy. There are no special items, stat requirements, boss fights, or offerings needed to join. If Petrus is no longer available, you can also join through Rhea of Thorolund after rescuing her from the Tomb of the Giants and meeting her at the altar inside the Undead Parish church. The Way of White is mainly associated with cooperative play and miracles, but you don't need to participate in multiplayer or reach any covenant rank for this trophy. Your first covenant is officially complete. A friendly invitation, no terrifying ritual, and nobody demanding thirty pieces of Humanity. Enjoy the rare hospitality.
Tip
Join the covenant when you first reach Firelink Shrine. It's a quick trophy that requires almost no detour, and Petrus can also sell several miracles needed for Prayer of a Maiden.
Warning
Starting as a Knight or Cleric can place you in the Way of White automatically, but you should still speak with Petrus and use the covenant-joining dialogue to ensure the discovery trophy registers. Joining another covenant later will not erase an already earned trophy.
Video Guide: https://www.youtube.com/watch?v=RD99J920utA&list=PLy8mZW3dyYeDHRXlnbGa3c5qjKadbEGIy

Trophy: Crystal Weapon
Acquire best wpn through crystal reinfrc.
Type: Bronze
Category: Misc
Unlock Details
Upgrade a weapon to Crystal +5, the maximum level of the crystal reinforcement path. Crystal weapons deal high damage but have significantly reduced durability. More importantly, they cannot be repaired normally, making them risky choices for everyday combat. Fortunately, you don't need to use a crystal weapon in battle to earn this trophy. There are two methods: creating a crystal weapon from scratch or upgrading a Crystal Halberd found in Anor Londo. Method 1: Upgrade the Crystal Halberd This is the recommended method because it avoids the early steps of upgrading and converting a standard weapon. After defeating the Iron Golem in Sen's Fortress, travel to Anor Londo. From the first Anor Londo bonfire, enter the nearby building guarded by two large Sentinels. Search the room containing a treasure chest that is actually a Mimic. Defeat the Mimic to obtain the Crystal Halberd, which is already on the crystal reinforcement path. Take the Crystal Halberd to the Giant Blacksmith in Anor Londo. He's located through the side passage of the main cathedral building, near the route leading toward Ornstein and Smough. You'll need a total of: Crystal +0 to +4: 9 Titanite Chunks. Crystal +4 to +5: 1 Titanite Slab. Upgrade the halberd to Crystal +5 to unlock the trophy. Method 2: Create a Crystal Weapon If you'd prefer to create your own crystal weapon, you'll first need the Crystal Ember. Travel to the Duke's Archives after obtaining the Lordvessel. Progress through the large library until you reach the room containing the lever that opens the staircase leading toward the Crystal Cave. Search between the bookshelves near this mechanism to find the chest containing the Crystal Ember. Bring the ember to the Giant Blacksmith in Anor Londo. Next, upgrade a compatible regular weapon to +10 using Andre of Astora. Return to the Giant Blacksmith and select Modify Equipment to convert the +10 weapon into a Crystal weapon. Then continue reinforcing it with Titanite Chunks and a Titanite Slab until it reaches Crystal +5. Either method unlocks the trophy. Just remember that crystal weapons are essentially Lordran's version of disposable luxury equipment. Excellent damage, terrible warranty.
Tip
The Crystal Halberd is the easiest option because you can obtain it relatively early in Anor Londo without collecting the Crystal Ember or preparing a separate +10 weapon. Save it for this trophy rather than breaking it during normal combat.
Warning
Crystal weapons cannot be repaired once their durability reaches zero, although reinforcing them restores durability. Do not confuse the Crystal Halberd with the Crystal Straight Sword or other naturally crystal-themed equipment that cannot follow the required reinforcement path. You'll also need a rare regular Titanite Slab to reach Crystal +5.
Video Guide: https://www.youtube.com/watch?v=U9AeOfOWXFc&list=PLy8mZW3dyYeDHRXlnbGa3c5qjKadbEGIy&index=15&pp=iAQB
Trophy: Divine Weapon
Acquire best wpn through divine reinfrc.
Type: Bronze
Category: Misc
Unlock Details
Upgrade a weapon to Divine +10, the maximum level of the Divine reinforcement path. Divine weapons deal physical and magical damage, with their magical damage benefiting from Faith. They also have an additional advantage in the Catacombs: skeletons killed with Divine weapons cannot be revived by their Necromancers. To earn this trophy, you'll need Andre of Astora, the Divine Ember, the Large Divine Ember, and several upgrade materials. Step 1: Obtain the Divine Ember Travel to Darkroot Garden through the passage beside Andre's workshop in Undead Parish. Progress through the forest until you reach the Moonlight Butterfly boss arena. Defeat the Moonlight Butterfly, then cross the stone bridge on the opposite side of the arena. Climb the stairs inside the tower and locate the petrified blacksmith near the top. Loot the remains to obtain the Divine Ember. Return to Andre of Astora and give him the ember. He can now convert regular +5 weapons into Divine weapons. Step 2: Create a Divine +5 Weapon Choose a compatible regular weapon and upgrade it to +5 using nine Titanite Shards. Return to Andre and select Modify Equipment to convert the weapon into the Divine path. Continue reinforcing it to Divine +5 using 10 Green Titanite Shards. Step 3: Obtain the Large Divine Ember Travel to the Catacombs through the cemetery beside Firelink Shrine. Progress through the Catacombs, defeat Pinwheel, and continue into the Tomb of the Giants. The Large Divine Ember is located before the first Tomb of the Giants bonfire. As you descend through the dark tunnels, search for a large square opening in the floor leading into a lower chamber. Drop carefully into the chamber. Several Giant Skeletons guard the area, including powerful enemies carrying large swords. Locate the remains of a petrified blacksmith inside the chamber and collect the Large Divine Ember. This is an extremely dangerous location, especially because of the darkness and the number of enemies. A Skull Lantern, Sunlight Maggot, or Cast Light sorcery makes navigation much easier. Return to Andre and give him the ember. Step 4: Complete Divine +10 With both embers delivered, Andre can ascend your Divine +5 weapon to Divine +6 and reinforce it to its maximum level. The complete requirements are: Regular +0 to +5: 9 Titanite Shards. Regular +5 to Divine +5: 10 Green Titanite Shards. Divine +5 to Divine +9: 7 White Titanite Chunks. Divine +9 to Divine +10: 1 White Titanite Slab. White Titanite Chunks can be farmed from certain enemies in the Tomb of the Giants. A White Titanite Slab can be found in the Tomb of the Giants near the route leading toward Gravelord Nito. Once the weapon reaches Divine +10, the trophy unlocks. Your weapon is now officially blessed. Unfortunately, nobody remembered to bless the platforms, skeleton dogs, or bottomless pits you'll encounter while collecting the materials.
Tip
Keep a Divine weapon available while exploring the Catacombs. It permanently defeats ordinary skeletons controlled by Necromancers, making the area considerably easier to navigate.
Warning
The Large Divine Ember is guarded by multiple Giant Skeletons in a confined, dark chamber. Clear enemies carefully rather than rushing into the middle of the group. You'll also need a White Titanite Slab for Occult Weapon, so plan your slab collection around both reinforcement paths.
Video Guide: https://www.youtube.com/watch?v=Qjx8zs91CHU&list=PLy8mZW3dyYeDHRXlnbGa3c5qjKadbEGIy&index=20&pp=iAQB
Trophy: Enchanted Weapon
Acquire best wpn through enchanted reinfrc.
Type: Bronze
Category: Misc
Unlock Details
Upgrade a weapon to Enchanted +5, the maximum level of the Enchanted reinforcement path. Enchanted weapons emphasize Intelligence scaling and magical damage. Like Magic reinforcement, this upgrade path is handled by Rickert of Vinheim in New Londo Ruins. The most convenient approach is to collect a pre-enchanted weapon in the Duke's Archives, although you can also create one yourself using the Enchanted Ember. Method 1: Upgrade the Enchanted Falchion Progress through the Duke's Archives until you encounter Seath the Scaleless for the first time. After the unavoidable defeat, you'll awaken inside the prison tower. Escape the cell and explore the tower's lower levels. Search the prison rooms for a Mimic containing an Enchanted Falchion. Defeat the Mimic and collect the weapon. The falchion already follows the Enchanted reinforcement path, allowing you to avoid upgrading an ordinary weapon through its earlier stages. Take the weapon to Rickert of Vinheim and reinforce it to Enchanted +5 using Blue Titanite Chunks and a Blue Titanite Slab. The remaining material cost depends on its existing upgrade level. Method 2: Create Your Own Enchanted Weapon If you'd prefer to choose your own weapon, you'll need the Enchanted Ember. Travel to Darkroot Garden and reach the forest beyond the magically sealed door near the bonfire. You can purchase the Crest of Artorias from Andre of Astora for 20,000 souls to open the door, or enter the forest using the longer route through Darkroot Basin. Explore the forest near Alvina, the talking cat associated with the Forest Hunter covenant. Look for a shallow pool of water guarded by large Mushroom Parents. They're much more dangerous than their appearance suggests, so approach carefully. Defeat or avoid the mushrooms and open the chest in the water to obtain the Enchanted Ember. Return to Rickert in New Londo Ruins and give him the ember. Next, upgrade a regular weapon to +5 using Titanite Shards. Convert it into a Magic weapon and reinforce it to Magic +5 using Green Titanite Shards. With the Enchanted Ember delivered, Rickert can ascend that weapon into the Enchanted path. Full Reinforcement Requirements Regular +0 to +5: 9 Titanite Shards. Regular +5 to Magic +5: 10 Green Titanite Shards. Magic +5 to Enchanted +4: 8 Blue Titanite Chunks. Enchanted +4 to Enchanted +5: 1 Blue Titanite Slab. Once your weapon reaches Enchanted +5, the trophy unlocks. You've officially created a magical weapon with enough Intelligence scaling to make even the most dedicated sorcerer feel appreciated. The mushrooms guarding its ember, however, would probably prefer you hadn't.
Tip
Using the Enchanted Falchion saves materials and avoids the need to collect the Enchanted Ember. If you prefer to build your own weapon, obtain the ember while exploring Darkroot Garden for Sif and the Forest Hunter covenant.
Warning
Enchanted +5 consumes a Blue Titanite Slab, the same rare material needed for Magic +10. You'll need separate slabs for both fully upgraded weapons unless you use a properly restored save backup.
Video Guide: https://www.youtube.com/watch?v=eJWFb3cK1sM&list=PLy8mZW3dyYeDHRXlnbGa3c5qjKadbEGIy&index=19&pp=iAQB
Trophy: Fire Weapon
Acquire best wpn through fire reinfrc.
Type: Bronze
Category: Misc
Unlock Details
Upgrade a weapon to Fire +10, the maximum level of the Fire reinforcement path. Fire weapons deal physical and fire damage without relying on Strength, Dexterity, Intelligence, or Faith scaling. This makes them particularly useful for builds that focus heavily on Vitality and Endurance. The blacksmith responsible for Fire reinforcement is Vamos, a skeletal blacksmith hidden inside the Catacombs. You'll need to locate him, create a Fire +5 weapon, collect the Large Flame Ember, and finish reinforcing the weapon to +10. Step 1: Find Vamos From Firelink Shrine, enter the Catacombs through the cemetery. Progress deeper into the Catacombs, passing the Necromancers, skeletons, and rotating bridges. Eventually, you'll reach a dark spiral staircase with a large drop through its center. Carefully descend and locate the broken section of the staircase leading toward a lower platform. Drop onto the lower ledges and continue downward until you reach the chamber containing Vamos. A cutscene plays when you enter his workshop for the first time. Speak with Vamos to access his blacksmith services. Step 2: Create a Fire +5 Weapon Choose a compatible regular weapon and upgrade it to +5 using nine Titanite Shards. Bring the weapon to Vamos and select Modify Equipment to convert it into the Fire reinforcement path. No ember is required for the initial conversion. Continue reinforcing it to Fire +5 using Green Titanite Shards. Step 3: Obtain the Large Flame Ember Progress through Blighttown and defeat Chaos Witch Quelaag to reach Quelaag's Domain. Continue into Demon Ruins and defeat Ceaseless Discharge to lower the lava level. From the Demon Ruins bonfire, descend into the newly accessible lower area and continue toward the Demon Firesage boss entrance. Before entering the Demon Firesage fog gate, take the passage branching left. Follow the narrow route along the edge of the ruins, watching for Burrowing Rockworms and other dangerous enemies. Continue to the end of the passage and open the chest containing the Large Flame Ember. Return to Vamos in the Catacombs and give him the ember. Step 4: Complete Fire +10 Vamos can now ascend your Fire +5 weapon to Fire +6 and continue upgrading it to +10. The complete requirements are: Regular +0 to +5: 9 Titanite Shards. Regular +5 to Fire +5: 10 Green Titanite Shards. Fire +5 to Fire +9: 7 Red Titanite Chunks. Fire +9 to Fire +10: 1 Red Titanite Slab. Red Titanite Chunks can be farmed from Chaos Eaters in Lost Izalith. A Red Titanite Slab is also available in Lost Izalith, hidden inside a chest in the poisonous lower area containing Chaos Eaters. Upgrade your weapon to Fire +10 to unlock the trophy. Nothing says progress quite like traveling through a skeleton-filled underground maze to ask another skeleton to set your sword on fire. Lordran has a very particular approach to customer service.
Tip
Locate Vamos early if possible. You can begin Fire reinforcement before reaching Demon Ruins, which makes it easier to prepare a Fire +5 weapon in advance.
Warning
The Large Flame Ember is located along a dangerous side passage in Demon Ruins. Don't confuse it with the Chaos Flame Ember, which is found elsewhere in the same area. You'll need both embers if you're completing Fire Weapon and Chaos Weapon through normal reinforcement.
Video Guide: https://www.youtube.com/watch?v=m_pdpaZ9bpY&list=PLy8mZW3dyYeDHRXlnbGa3c5qjKadbEGIy&index=22&pp=iAQB
Trophy: Lightning Weapon
Acquire best wpn through lightning reinfrc.
Type: Bronze
Category: Misc
Unlock Details
Upgrade a weapon to Lightning +5, the maximum level of the lightning reinforcement path. Lightning weapons deal a combination of physical and lightning damage. They're particularly useful against enemies vulnerable to lightning, although they sacrifice normal attribute scaling. The easiest way to unlock this trophy is to obtain the Lightning Spear from Sen's Fortress and upgrade it to its maximum level. Method 1: Upgrade the Lightning Spear After ringing both Bells of Awakening, travel to Sen's Fortress through the large gate near Andre of Astora in Undead Parish. Progress through the fortress, navigating the swinging blades, pressure plates, and boulder traps. Eventually, you'll reach the interior passage where large rolling boulders repeatedly travel down a sloped corridor. Look for the treasure chest positioned at the bottom of one of these boulder passages. The chest is actually a Mimic. Defeat the Mimic to obtain the Lightning Spear, which is already on the lightning upgrade path. Once you reach Anor Londo, find the Giant Blacksmith inside the main cathedral building. Bring the Lightning Spear and the following materials: Lightning +0 to +4: 9 Titanite Chunks. Lightning +4 to +5: 1 Titanite Slab. Reinforce the spear to Lightning +5 to unlock the trophy. Method 2: Create Your Own Lightning Weapon If you've missed the Lightning Spear or prefer another weapon, you can convert a regular +10 weapon into a lightning weapon. First, obtain the Large Ember from the Depths and give it to Andre in Undead Parish. Upgrade a compatible weapon to +10. Travel to the Giant Blacksmith in Anor Londo and select Modify Equipment. Choose the lightning reinforcement option to convert your regular +10 weapon into a Lightning weapon. Unlike crystal reinforcement, lightning reinforcement does not require a special ember. Continue upgrading your lightning weapon with Titanite Chunks and a Titanite Slab until it reaches +5. The trophy unlocks as soon as the final reinforcement is completed. And there you have it: a weapon infused with the power of lightning. Unfortunately, it still won't make you immune to gravity, which remains Lordran's undefeated champion.
Tip
Use the Lightning Spear from Sen's Fortress to avoid upgrading another weapon from scratch. The Giant Blacksmith can reinforce it once you have enough Titanite materials.
Warning
Lightning +5 requires a regular Titanite Slab, just like standard +15 and crystal +5. Plan your upgrades carefully if you're attempting to complete several reinforcement trophies in one playthrough.
Video Guide: https://www.youtube.com/watch?v=PwfgBeydUak&list=PLy8mZW3dyYeDHRXlnbGa3c5qjKadbEGIy&index=16&pp=iAQB
Trophy: Magic Weapon
Acquire best wpn through magic reinfrc.
Type: Bronze
Category: Misc
Unlock Details
Upgrade a weapon to Magic +10, the maximum level of the Magic reinforcement path. Magic weapons deal both physical and magical damage, with their magical attack power scaling primarily with Intelligence. For this trophy, however, you don't need to invest in Intelligence or use the weapon. You only need to complete the upgrade. The blacksmith responsible for Magic reinforcement is Rickert of Vinheim, located in New Londo Ruins beneath Firelink Shrine. Step 1: Find Rickert of Vinheim From the Firelink Shrine bonfire, descend the stairs toward the elevator leading to New Londo Ruins. Ride the elevator down and exit into the ruined area. Before crossing the wooden bridges toward the ghosts, follow the staircase descending along the right-hand side of the ruins. Rickert is sitting behind iron bars at the bottom. You can speak with him through the bars to access his shop and reinforcement services. No boss fight is required to reach him. Step 2: Upgrade a Weapon to Magic +5 Choose a regular weapon that can be reinforced with standard Titanite, such as a Longsword or Battle Axe. First, upgrade it to regular +5 using nine Titanite Shards. Bring the weapon to Rickert and select Modify Equipment to convert it into a Magic weapon. Continue reinforcing it until it reaches Magic +5. This stage requires 10 Green Titanite Shards. Step 3: Obtain the Large Magic Ember Progress through Anor Londo, obtain the Lordvessel, and travel to the Duke's Archives. Inside the Archives, you'll eventually encounter Seath the Scaleless in a chamber where you cannot defeat him during the first encounter. Continue through the Archives, escape the prison tower, and reach the Crystal Cave. Defeat Seath during his second encounter. Afterward, return to the chamber where you first encountered him. The room now contains a chest holding the Large Magic Ember. Collect the ember and bring it to Rickert in New Londo Ruins. Step 4: Complete Magic +10 Once Rickert has the Large Magic Ember, he can ascend your Magic +5 weapon to Magic +6. The complete reinforcement requirements are: Regular +0 to +5: 9 Titanite Shards. Regular +5 to Magic +5: 10 Green Titanite Shards. Magic +5 to Magic +9: 7 Blue Titanite Chunks. Magic +9 to Magic +10: 1 Blue Titanite Slab. Blue Titanite Chunks can be obtained from Crystal Golems in the Crystal Cave or the Duke's Archives. A Blue Titanite Slab can be found along an invisible path in the Crystal Cave. Once your weapon reaches Magic +10, the trophy unlocks. Congratulations! You've infused your weapon with powerful sorcery. It still won't stop an angry Hollow from interrupting your attacks with a rusty kitchen knife, but progress is progress.
Tip
You can begin the Magic reinforcement path relatively early because Rickert is accessible from the start of the game. Prepare your Magic +5 weapon before collecting the Large Magic Ember to save time later.
Warning
A Blue Titanite Slab is required for the final upgrade and is also needed for Enchanted Weapon. These slabs are rare, so plan to obtain two or use an additional playthrough. Do not consume the only slab you've found without considering both trophies.
Video Guide: https://www.youtube.com/watch?v=6IRHQOQGiAU&list=PLy8mZW3dyYeDHRXlnbGa3c5qjKadbEGIy&index=18&pp=iAQB
Trophy: Occult Weapon
Acquire best wpn through occult reinfrc.
Type: Bronze
Category: Misc
Unlock Details
Upgrade a weapon to Occult +5, the maximum level of the Occult reinforcement path. Occult weapons deal physical and magical damage, with their magical damage scaling primarily with Faith. They also deal bonus damage against certain enemies associated with the gods. This reinforcement path is handled by Andre of Astora in Undead Parish. There are two ways to earn the trophy. The easiest method is to upgrade the Occult Club found in Anor Londo, while the traditional method requires creating an Occult weapon using the Divine Ember and Dark Ember. Method 1: Upgrade the Occult Club This is the recommended method because it avoids gathering both embers and preparing an ordinary weapon through several reinforcement stages. Step 1: Find the Occult Club Travel to Anor Londo after defeating the Iron Golem in Sen's Fortress. Progress through the city until you reach the main cathedral building containing the interior bonfire where Solaire of Astora can be found. Explore the nearby rooms until you reach the chamber containing a large fireplace. Strike the back wall of the fireplace to reveal an illusory passage. Descend the staircase into a hidden basement room containing several treasure chests and Havel's equipment. This room contains the Dragon Tooth and Havel's Greatshield, which are required for Knight's Honor. One of the chests is actually a Mimic. Attack the Mimic to reveal it, then defeat it to obtain the Occult Club. The weapon is already on the Occult reinforcement path. Step 2: Collect the Upgrade Materials To upgrade the Occult Club to +5, you'll need: 7 White Titanite Chunks. 1 White Titanite Slab. White Titanite Chunks can be found throughout the Tomb of the Giants and occasionally drop from enemies such as Bone Towers and Pinwheel Servants. You can also obtain them from certain Black Knights, including the greataxe-wielding Black Knight in the Kiln of the First Flame. A guaranteed White Titanite Slab can be found in the Tomb of the Giants near the final passage leading toward Gravelord Nito's boss arena. Close to Nito's fog gate, look for a small lower passage accessible by dropping from the main route. Follow the tunnel to the corpse holding the slab. Be careful when collecting it, as the nearby Pinwheel Servants can overwhelm you with magical attacks. Step 3: Upgrade the Occult Club Take the Occult Club and your collected materials to Andre of Astora in Undead Parish. Select Reinforce Weapon and continue upgrading the club until it reaches Occult +5. You don't need the Dark Ember when reinforcing a weapon that's already on the Occult path. Once the club reaches Occult +5, the trophy unlocks. Method 2: Create Your Own Occult Weapon If you'd prefer to create a different Occult weapon, you'll need the Divine Ember and Dark Ember. Step 1: Obtain the Divine Ember Travel to Darkroot Garden and defeat the Moonlight Butterfly. Cross the bridge beyond its arena and climb the tower. Loot the petrified blacksmith near the top to obtain the Divine Ember. Return to Andre and give him the ember. This allows him to convert compatible regular +5 weapons into Divine weapons. Step 2: Obtain the Dark Ember Travel to the Painted World of Ariamis. To enter the Painted World, return to the Northern Undead Asylum and obtain the Peculiar Doll from your original prison cell. Then travel to Anor Londo and interact with the enormous painting inside the building guarded by Painting Guardians. Once inside the Painted World, progress to the central courtyard. Descend into the underground tunnels and locate the Annex Key. Return to the courtyard and use the key to unlock the annex building. Explore the annex and its upper walkways until you reach the area containing the remains of a petrified blacksmith. Collect the Dark Ember from the remains. Be prepared for Crow Demons and other enemies guarding the area. Return to Andre in Undead Parish and give him the Dark Ember. Step 3: Prepare a Divine +5 Weapon Choose a compatible regular weapon, such as a Longsword or Battle Axe. Upgrade it to regular +5 using nine Titanite Shards. Use Andre's Modify Equipment option to convert the weapon into the Divine path. Continue reinforcing it until it reaches Divine +5 using 10 Green Titanite Shards. Step 4: Convert to Occult and Complete the Upgrade With the Dark Ember delivered, Andre can convert your Divine +5 weapon into an Occult weapon. Select Modify Equipment and choose the Occult reinforcement path. Continue upgrading the weapon until it reaches Occult +5. The complete material requirements for creating an Occult weapon from scratch are: Regular +0 to +5: 9 Titanite Shards. Regular +5 to Divine +5: 10 Green Titanite Shards. Divine +5 to Occult +4: 8 White Titanite Chunks. Occult +4 to Occult +5: 1 White Titanite Slab. Once your weapon reaches Occult +5, the trophy unlocks. Congratulations! You've created a weapon specifically suited to challenging the gods. Considering how many gods you've already fought, this feels like a sensible long-term investment.
Tip
Use the Occult Club from Anor Londo whenever possible. It's a straightforward shortcut that saves upgrade materials and removes the need to collect the Dark Ember just for this trophy. The hidden fireplace room is also worth visiting for Knight's Honor, so you can collect several important items during the same trip.
Warning
Occult +5 requires a White Titanite Slab, the same rare material needed for Divine +10. If you're completing both reinforcement trophies, you'll need two slabs unless you obtain another through an additional playthrough or a rare enemy drop. Don't accidentally convert a Divine +5 weapon into the Divine +6 path when you intend to create an Occult weapon. These are separate upgrade branches.
Video Guide: https://www.youtube.com/watch?v=Xjvqc1X5E98&list=PLy8mZW3dyYeDHRXlnbGa3c5qjKadbEGIy&index=21&pp=iAQB
Trophy: Raw Weapon
Acquire best wpn through raw reinfrc.
Type: Bronze
Category: Misc
Unlock Details
Upgrade a weapon to Raw +5, the maximum level of the raw reinforcement path. Raw reinforcement increases a weapon's base physical damage while reducing the benefits gained from Strength and Dexterity scaling. This is one of the easier reinforcement trophies because it requires only Titanite Shards and Large Titanite Shards. No Titanite Slab is needed. You'll need Andre of Astora in Undead Parish and the Large Ember found in the Depths. Step 1: Find the Large Ember Defeat the Capra Demon in Lower Undead Burg to obtain the Key to the Depths. Open the entrance to the Depths near the Capra Demon arena and descend into the underground kitchen area. You'll encounter several Hollows and large Butcher enemies wielding enormous cleavers. Defeat or avoid the Butchers and search the treasure chest near the kitchen tables to obtain the Large Ember. Return to Andre in Undead Parish and give him the ember. Step 2: Upgrade a Normal Weapon to +5 Purchase or obtain a weapon that follows the standard reinforcement path, such as a Longsword, Shortsword, or Battle Axe. Bring it to Andre and upgrade it from +0 to +5 using a total of nine Titanite Shards. These can be purchased directly from Andre if you don't already have enough. Step 3: Convert the Weapon to Raw With the Large Ember delivered, interact with Andre and select Modify Equipment. Choose the option to ascend your regular +5 weapon into a Raw weapon. This first conversion costs one Large Titanite Shard. Afterwards, return to the Reinforce Weapon menu and continue upgrading it until it reaches Raw +5. The complete material requirements are: Normal +0 to +5: 9 Titanite Shards. Normal +5 to Raw +0: 1 Large Titanite Shard. Raw +0 to +5: 9 Large Titanite Shards. That's a total of 9 Titanite Shards and 10 Large Titanite Shards. Once your weapon reaches Raw +5, the trophy unlocks. Congratulations! You've successfully mastered the art of making your weapon hit harder through the highly sophisticated technique of hitting it with a hammer repeatedly.
Tip
You can earn this trophy relatively early, shortly after defeating the Capra Demon and collecting the Large Ember. Raw reinforcement is convenient for characters with lower Strength or Dexterity because it emphasizes base damage rather than attribute scaling.
Warning
Raw reinforcement stops at +5 and cannot continue directly into the standard +15 path. If you want to use the same weapon for Strongest Weapon later, you'll need to revert its upgrade path, which sacrifices some of the materials you've already spent. Using a spare weapon is usually simpler.
Video Guide: https://www.youtube.com/watch?v=fy2I6_blMLo&list=PLy8mZW3dyYeDHRXlnbGa3c5qjKadbEGIy&index=17&pp=iAQB
Trophy: Strongest Weapon
Acquire best wpn through standard reinfrc.
Type: Bronze
Category: Misc
Unlock Details
Upgrade a regular weapon to +15 using the standard reinforcement path. This trophy requires the blacksmith Andre of Astora, two specific embers, and several types of Titanite. Andre is located beneath the bonfire beside the Undead Parish church, near the entrance to Sen's Fortress and Darkroot Garden. Before upgrading your weapon to +15, you'll need to collect the Large Ember and Very Large Ember. Step 1: Obtain the Large Ember Travel to the Depths, accessible after defeating the Capra Demon in Lower Undead Burg. After opening the door to the Depths, descend into the underground passages and enter the kitchen area containing the Butchers. Defeat or avoid the Butcher enemies, then search the large chest near the cooking tables to obtain the Large Ember. Return to Andre in Undead Parish and give him the ember. This allows him to ascend regular +5 weapons to +6, opening the path toward +10. Step 2: Obtain the Very Large Ember Progress through the main story until you've obtained the Lordvessel and can explore New Londo Ruins more fully. Enter New Londo from Firelink Shrine and make your way through the ghost-infested buildings until you reach Ingward, the red-robed NPC standing on the rooftop of the large central building. Speak with Ingward after obtaining the Lordvessel to receive the Key to the Seal. Use the key to open the floodgates and drain New Londo Ruins. Once the water has been lowered, descend into the newly accessible lower streets and explore the ruins populated by Darkwraith enemies. Locate the staircase leading into the large ruined building where you'll find a chest containing the Very Large Ember. Return to Andre and give him this ember to unlock standard reinforcement beyond +10. Step 3: Upgrade Your Weapon Choose a normal weapon that uses the standard Titanite upgrade path. A Longsword, Claymore, or Battle Axe works perfectly. You'll need the following materials: +0 to +5: 9 Titanite Shards. +5 to +10: 9 Large Titanite Shards. +10 to +14: 7 Titanite Chunks. +14 to +15: 1 Titanite Slab. At the +5 and +10 milestones, use Andre's Modify Equipment option to ascend the weapon to the next reinforcement tier. Then return to Reinforce Weapon to continue upgrading. Titanite Chunks can be obtained from Black Knights and Darkwraiths, while a guaranteed Titanite Slab is awarded by defeating the Stray Demon during your return visit to the Undead Asylum. Once your weapon reaches +15, Strongest Weapon will unlock. Congratulations! Your weapon is now fully upgraded. Naturally, Lordran will still find enemies capable of flattening you in two hits.
Tip
Upgrade a weapon you actually enjoy using, since a standard +15 weapon can remain extremely powerful throughout New Game+ and beyond. Farming Darkwraiths in drained New Londo Ruins is also a useful way to obtain additional Titanite Chunks.
Warning
Titanite Slabs are rare. Don't spend one on an unnecessary weapon before you've planned your reinforcement trophies. The standard, crystal, and lightning upgrade trophies each require a regular Titanite Slab if completed using separate weapons.
Video Guide: https://www.youtube.com/watch?v=M0t4hrNvNZY&list=PLy8mZW3dyYeDHRXlnbGa3c5qjKadbEGIy&index=14&pp=iAQB
Trophy: Art of Abysswalking
Acquire the Art of Abysswalking.
Type: Bronze
Category: Story
Unlock Details
Defeat Great Grey Wolf Sif in Darkroot Garden to obtain the Covenant of Artorias ring. This ring allows you to survive inside the Abyss, making it essential for reaching and defeating the Four Kings later in the game. Although Sif is an optional encounter during your earlier exploration, defeating the wolf eventually becomes mandatory for story progression. You'll also need Sif's boss soul three times across separate playthroughs to complete Knight's Honor. Reaching Great Grey Wolf Sif: From the Undead Parish bonfire near Andre of Astora, descend toward the entrance to Darkroot Garden. Pass the Titanite Demon near Andre's workshop and continue along the forest path. You'll eventually reach a magically sealed stone door beside a hidden bonfire. The simplest way to open this door is to purchase the Crest of Artorias from Andre for 20,000 souls. Return to the sealed door and use the crest to unlock it. Beyond the entrance, you'll encounter several hostile human NPC enemies, including sorcerers and melee fighters. These enemies can deal significant damage, so avoid fighting multiple opponents simultaneously. Continue deeper into the forest until you reach the area containing Alvina, the talking cat associated with the Forest Hunter covenant. If you haven't already joined this covenant, speak with Alvina before progressing. Discovering the covenant is required for another trophy. Follow the forest paths toward the large stone bridge leading into a circular graveyard. Cross the bridge and approach the enormous sword embedded in the central grave to trigger the encounter with Great Grey Wolf Sif. Boss Strategy: Sif is a massive wolf wielding an enormous greatsword in its mouth. Its attacks consist of wide sword swings, spinning combinations, and jumping movements that can quickly punish players who remain directly in front of it. Despite the enormous size of its weapon, Sif becomes much easier to fight once you learn to position yourself beneath its body. During the opening phase, move toward Sif and dodge through its sweeping attacks. Try to position yourself between its legs or near its hindquarters, where several of its sword swings will pass over your character. Attack the legs and body whenever you have an opening, but avoid spending all your stamina. Sif frequently leaps backward to create distance before attacking again. When this happens, close the gap carefully rather than chasing recklessly. Watch for its spinning sword attack, which can hit multiple times and rapidly drain your stamina if you attempt to block it. Dodging through the attack is generally safer than relying entirely on your shield. As Sif's health becomes critically low, it begins limping, slowing its movement and attacks. Use this opportunity to finish the encounter while continuing to respect its sword swings. Defeat Sif to receive the Covenant of Artorias ring, the Soul of Sif, and the Art of Abysswalking trophy. You've defeated a giant sword-wielding wolf guarding an ancient grave. If that doesn't make you feel like the villain for a moment, the limping animation probably will.
Tip
Keep the Soul of Sif in your inventory until you're ready to forge one of the three required Artorias weapons at the Giant Blacksmith in Anor Londo. You'll need to defeat Sif during three separate playthroughs to obtain the three souls required for Knight's Honor.
Warning
You must equip the Covenant of Artorias ring before dropping into the Abyss to fight the Four Kings. Simply carrying the ring in your inventory is not enough. Entering without it equipped causes immediate death. Keep the ring equipped throughout the Four Kings encounter. The Covenant of Artorias ring does not carry into New Game+, so you'll need to defeat Sif again before fighting the Four Kings during another cycle.
Trophy: Defeat Bed of Chaos
Defeat the Soul Lord Bed of Chaos.
Type: Silver
Category: Story
Unlock Details
Defeat the Bed of Chaos, one of the four major Lord Soul bosses, located at the deepest point of Lost Izalith. This encounter is different from most Dark Souls boss fights. Rather than defeating an enemy through ordinary combat, you'll need to destroy two glowing roots and reach the small creature hidden inside the boss. The biggest challenge is navigating the collapsing arena while avoiding sweeping attacks and bottomless pits. Step 1: Reach Demon Ruins Travel through Blighttown and defeat Chaos Witch Quelaag. Continue beyond Quelaag's arena and descend toward Demon Ruins. Progress into the large lava-filled area until you encounter Ceaseless Discharge. Defeat Ceaseless Discharge to lower the lava level, opening access to the lower section of Demon Ruins. Continue through the area toward Demon Firesage. After defeating Demon Firesage, proceed toward the Centipede Demon. Defeat the Centipede Demon to obtain the Orange Charred Ring, which greatly reduces damage from walking through lava. Equip the ring and continue into Lost Izalith. Alternatively, if you've reached rank +2 in the Chaos Servant covenant by offering 30 Humanity, you can open the shortcut between Demon Ruins and Lost Izalith to bypass part of this route. Step 2: Navigate Lost Izalith Proceed through the lava-filled ruins, passing the enormous dinosaur-like enemies scattered throughout the area. Keep the Orange Charred Ring equipped whenever you're walking through lava. Continue into the ruined buildings, where you'll encounter Chaos Eaters and other enemies. Explore the area carefully, collecting any pyromancies and upgrade materials you still need. In particular, make sure to obtain Chaos Fire Whip from its chest near the Bed of Chaos route if you're completing Bond of a Pyromancer. Eventually, you'll reach the large fog gate leading to the Bed of Chaos. Step 3: Destroy the First Glowing Root Enter the boss arena and slide down the long slope. At the bottom, you'll see the Bed of Chaos surrounded by enormous roots and branches. Look toward either side of the arena to locate a glowing orange root enclosed in a spherical barrier of branches. Choose one side and move toward it. The boss will attack with enormous sweeping arms that can knock you into the surrounding pits. Keep your shield raised when appropriate, move carefully, and avoid standing near the edges. Once you reach the glowing root, break through the surrounding branches and strike the glowing center. The first root will be destroyed, triggering a change in the boss's behavior and causing sections of the floor to collapse. Step 4: Destroy the Second Glowing Root Now move toward the opposite side of the arena. Additional sections of the floor will collapse, creating more obstacles. You'll also face increasingly aggressive sweeping attacks. Use the remaining solid pathways around the edges of the arena, moving only when you have a safe opening. Reach the second glowing root, break through its protective branches, and destroy the center. The Bed of Chaos will become fully vulnerable, but the arena will now contain even more dangerous gaps. Step 5: Reach the Bed of Chaos's Core After destroying both glowing roots, return toward the center of the arena. You'll notice a large pit directly in front of the boss. Look below the edge for a thick tree branch extending toward the center. Carefully drop onto the branch, then run along it toward the boss's body. Timing is critical because the boss continues using sweeping attacks and fire eruptions. Once you reach the center, enter the tunnel beneath the roots. Break through the small branches blocking the passage until you reach the tiny creature hidden inside. Strike the creature once to defeat the Bed of Chaos. The trophy unlocks when the boss is defeated. Congratulations! You've defeated one of Lordran's ancient powers by navigating a collapsing floor and poking a tiny bug. Sometimes the greatest enemy really is the level designer.
Tip
Progress against the Bed of Chaos is preserved after death. Once you destroy a glowing root, it stays destroyed even if you fall into a pit. You can therefore focus on one objective per attempt rather than trying to complete the entire fight without dying.
Warning
The Bed of Chaos is connected to Quelana of Izalith's questline. Meet Quelana and purchase her pyromancies before defeating this boss. Afterward, return to her to receive Fire Tempest, provided you've properly established her questline. Fire Tempest is required for Bond of a Pyromancer. Also, avoid rushing the central pit after destroying both roots. You must land on the branch beneath the opening, not jump directly into the darkness.
Trophy: Defeat Gravelord Nito
Defeat the Soul Lord Gravelord Nito.
Type: Silver
Category: Story
Unlock Details
Defeat Gravelord Nito, one of the four major Lord Soul bosses, at the bottom of the Tomb of the Giants. Nito is located beyond the Catacombs, in one of Lordran's darkest and most dangerous areas. You'll need to obtain and place the Lordvessel before you can pass the golden fog gate blocking the deeper section of the Tomb of the Giants. Step 1: Reach the Tomb of the Giants From Firelink Shrine, enter the cemetery and descend into the Catacombs. Progress through the area until you reach Pinwheel, the boss who awards the Rite of Kindling. Defeat Pinwheel if you haven't already, then climb the ladder beyond his arena to reach the Tomb of the Giants. This area is almost completely dark, so bring a reliable light source. You can use a Skull Lantern, the Cast Light sorcery, or the Sunlight Maggot helmet obtained later in Lost Izalith. Proceed carefully through the tunnels, following the glowing markers and descending the narrow ledges. Watch for Giant Skeletons and Skeleton Beasts, both of which can deal enormous damage. Eventually, you'll reach the first Tomb of the Giants bonfire. Continue descending until you reach the area containing Patches and Rhea of Thorolund. If you're collecting all miracles, rescue Rhea before progressing too far. She sells several miracles required for Prayer of a Maiden. Step 2: Reach Nito's Boss Arena Continue through the Tomb of the Giants, passing additional skeleton enemies and the large underground caverns. After placing the Lordvessel, the golden fog gate blocking the lower section will disappear. Beyond this point, you'll encounter Skeleton Towers, Pinwheel Servants, and Skeleton Babies. Proceed through the final tunnels until you reach the fog gate leading to Gravelord Nito. Before entering, make sure you've completed the Gravelord Servant covenant requirements. You'll also want to defeat the invading Paladin Leeroy before killing Nito if you're collecting Grant and Sanctus for Knight's Honor. Leeroy invades along the route toward the boss when you're in human form, provided the invasion conditions are met. Boss Strategy: When you enter Nito's arena, you'll drop from a ledge and take fall damage. Heal immediately if necessary. Nito is accompanied by several skeleton enemies that revive after being defeated. These skeletons can become more dangerous than Nito himself if you allow them to surround you. A Divine weapon is particularly useful because skeletons killed with Divine damage won't revive. At the beginning of the fight, remain near the entrance rather than running directly toward Nito. This helps avoid attracting the larger Giant Skeletons at the far end of the arena. Let Nito approach your position while eliminating the smaller skeletons. Nito uses several dangerous attacks, including sweeping sword strikes, a powerful area-of-effect explosion, and a sword attack that erupts from the ground beneath your character. Watch for his scream, which signals the underground sword attack. Time your dodge carefully to avoid the strike. When Nito begins charging his large magical explosion, retreat or block with a suitable shield. One useful strategy is to stay relatively close to Nito once the nearby skeletons are defeated. His larger attacks can damage his own skeleton allies, giving you additional opportunities to attack. Continue dealing damage while managing the surrounding enemies until Nito falls. Defeating him awards the Lord Soul and unlocks the trophy. You've defeated an ancient lord of death surrounded by an army of skeletons. Apparently, even the Grim Reaper needs backup in Lordran.
Tip
Bring a Divine weapon to eliminate Nito's smaller skeleton companions permanently during the encounter. Avoid advancing too far into the arena, as this can attract the Giant Skeletons and make the fight considerably harder.
Warning
Defeating Nito permanently prevents you from joining the Gravelord Servant covenant or earning its remaining covenant rewards during that playthrough. Before entering his boss arena, obtain the Gravelord Sword, Gravelord Sword Dance, and Gravelord Greatsword Dance. Also, defeat invading Paladin Leeroy before Nito if you still need Grant and Sanctus for Knight's Honor.

Trophy: Defeat Seath the Scaleless
Defeat Seath the Scaleless, inheritors of souls.
Type: Silver
Category: Story
Unlock Details
Defeat Seath the Scaleless, one of the four major Lord Soul bosses, inside the Crystal Cave beyond the Duke's Archives. Seath is an ancient dragon who has become obsessed with sorcery, crystal magic, and immortality. His encounter involves two separate confrontations, and you'll need to destroy the Primordial Crystal before he can be defeated. For Knight's Honor, you'll also need to sever his central tail to obtain the Moonlight Greatsword before killing him. Step 1: Reach the Duke's Archives After obtaining and placing the Lordvessel, return to Anor Londo. From the first Anor Londo bonfire, follow the passage guarded by the armored boars toward the Duke's Archives. Proceed into the large library complex filled with Crystal Soldiers and Channelers. Explore the Archives, working your way through the rotating staircases and interconnected rooms. Eventually, you'll reach a fog gate leading to Seath's original chamber. During this first encounter, Seath is protected by the Primordial Crystal and cannot be damaged normally. The encounter is intended to end with your character being defeated. Afterward, you'll awaken inside a prison cell in the Archive Tower. Step 2: Escape the Prison Tower When you awaken, defeat the Snake Soldier guarding your cell to obtain the Archive Tower Cell Key. Unlock the door and escape into the prison tower. Continue through the area, passing the Serpent Soldiers and Pisaca enemies. Explore the lower cells if you're collecting every miracle. Two special Pisaca enemies near Big Hat Logan's prison cell drop the Soothing Sunlight and Bountiful Sunlight miracles required for Prayer of a Maiden. You'll also need to rescue Big Hat Logan if you're completing Wisdom of a Sage. Eventually, you'll reach the mechanism that allows you to escape the prison tower and return to the main library. Step 3: Reach the Crystal Cave Continue exploring the Duke's Archives, manipulating the rotating staircases to reach previously inaccessible areas. Collect the Archive Tower Giant Cell Key and free Big Hat Logan if you haven't already. Proceed through the library until you reach the route leading outside toward the Crystal Golem garden. Follow the path beyond the Crystal Golems to enter the Crystal Cave. The Crystal Cave contains invisible walkways suspended above enormous drops. Watch the falling crystal particles, which reveal the locations of safe paths. You can also use Prism Stones to mark where it's safe to walk. Proceed carefully across the invisible bridges until you reach the lower cave. Defeat or avoid the Moonlight Butterflies and Crystal Golems along the route. Continue until you reach the final fog gate leading to Seath's true boss arena. Step 4: Destroy the Primordial Crystal When you enter the arena, you'll see Seath at the far end. Behind him is a large glowing crystal formation called the Primordial Crystal. This crystal makes Seath effectively immortal. Before attempting to damage him, destroy the crystal. You can attack it directly, or position yourself so Seath destroys it with his own crystal breath attack. Once the Primordial Crystal is destroyed, Seath becomes vulnerable to damage. Step 5: Obtain the Moonlight Greatsword Before killing Seath, focus on obtaining the Moonlight Greatsword for Knight's Honor. Seath has three tails: one large central tail extending behind him and two smaller tails on either side. Only the large central tail awards the Moonlight Greatsword. You must attack the tip of this central tail rather than the section close to his body. An effective strategy is to position yourself near the Primordial Crystal and wait for Seath to begin his crystal breath attack. When he commits to the attack, run around him toward the large central tail. If his attack destroys the Primordial Crystal, he'll briefly stagger, giving you a valuable opportunity to strike the tail. Attack the tip with a powerful weapon until it breaks off. The Moonlight Greatsword will be awarded immediately. Step 6: Defeat Seath Once you've obtained the Moonlight Greatsword, focus on finishing the boss. Seath uses sweeping crystal breath attacks that create large formations of crystals across the ground. These crystals inflict damage and build up Curse, making them particularly dangerous. Avoid standing inside the crystal formations and move out of their area before they erupt. Seath also uses tail slams and sweeping attacks when you remain behind him for too long. Stay near his side, attack during his recovery animations, and retreat whenever he prepares a large magical attack. Physical or lightning damage is generally more effective than relying entirely on magic, since Seath has strong magical resistance. Continue attacking until he falls. Defeating Seath awards a Bequeathed Lord Soul Shard and unlocks the trophy. You've defeated an immortal crystal dragon whose greatest weakness turned out to be a shiny rock and a well-placed sword. Even ancient magical beings have design flaws.
Tip
If you're collecting the Moonlight Greatsword, prioritize cutting Seath's tail before trying to defeat him. Use a strong weapon with a reliable downward or vertical attack, and avoid locking onto his body while positioning behind him. After defeating Seath, return to the chamber where you first encountered him to collect the Large Magic Ember for the Magic Weapon trophy.
Warning
The Moonlight Greatsword can only be obtained while Seath is alive. If you defeat him without severing his central tail, you'll need to wait until another playthrough to try again. Do not attack the side tails or the thick portion closest to his body when attempting the cut. Also, complete Big Hat Logan's questline and collect the required Duke's Archives miracles before leaving the area permanently.
Trophy: Defeat the Four Kings
Defeat the Four Kings, inheritors of souls.
Type: Silver
Category: Story
Unlock Details
Defeat the Four Kings in the Abyss beneath New Londo Ruins. The Four Kings are one of the four major Lord Soul encounters required to complete the game. Unlike most bosses, the Four Kings fight becomes progressively more difficult as time passes because additional kings appear during the battle. You'll need the Covenant of Artorias ring from Great Grey Wolf Sif to enter the Abyss. Step 1: Defeat Great Grey Wolf Sif Travel to Darkroot Garden and locate the large graveyard beyond the Forest Hunter area. Defeat Great Grey Wolf Sif to obtain the Covenant of Artorias ring. Keep this ring in your inventory and remember to equip it before entering the Abyss. Defeating Sif also awards the Soul of Sif, which is needed three times across playthroughs for Knight's Honor. Step 2: Drain New Londo Ruins From Firelink Shrine, take the elevator beneath the shrine down to New Londo Ruins. Progress across the wooden bridges and through the buildings filled with ghost enemies. You can use a Transient Curse to temporarily make the ghosts vulnerable to ordinary weapons. Continue through the ruins until you reach Ingward, the red-robed NPC standing on the rooftop of the large central building. After obtaining the Lordvessel, speak with Ingward to receive the Key to the Seal. Locate the sealed floodgate mechanism and use the key to drain the water from New Londo Ruins. This reveals the lower section of the city. Step 3: Reach the Abyss Descend into the drained ruins. You'll encounter Darkwraith enemies wielding dark swords and using dangerous grab attacks. These enemies can drop several useful items, including the Dark Hand and Titanite Chunks. Fight them carefully or move past them until you reach the large circular tower leading into the Abyss. Before descending, equip the Covenant of Artorias ring. Continue down the staircase until it ends, then drop into the darkness below. You'll land inside the Abyss and begin the Four Kings encounter. Boss Strategy: The Four Kings battle rewards aggressive damage output more than defensive patience. When the fight begins, one king will appear from the darkness. Additional kings spawn over time, so your goal is to defeat each one before the next arrives. Move toward the first king immediately. Staying close to its body can reduce the damage you take from certain sword attacks, as the inner portion of its weapon deals less damage than the outer blade. Use a fully upgraded weapon and apply a damage buff if your build allows it. Attack aggressively between the king's movements, but keep enough stamina available for dodging. Watch for its grab attack, which can drain Humanity and deal significant damage. Also watch for magical projectiles and a powerful area-of-effect explosion. When the king begins charging the explosion, retreat to a safe distance or prepare to defend against it. Once the first king is defeated, immediately search for the next one. The encounter uses a shared health bar, so continue dealing damage until that bar is completely depleted. Despite the name, it's possible to fight more than four individual kings if the battle lasts long enough. Defeat the shared boss health bar to earn the Bequeathed Lord Soul Shard and unlock the trophy. You've defeated the Four Kings, who apparently decided that a one-on-one duel would be far too sporting. At least they had the decency to attack you in a bottomless void.
Tip
High-damage equipment makes this fight significantly easier. Heavy armor with strong poise can help some builds survive repeated attacks while staying close enough to deal damage. If you're struggling, prioritize increasing your weapon's damage output rather than trying to fight each king from a distance.
Warning
YOU MUST EQUIP THE COVENANT OF ARTORIAS RING BEFORE ENTERING THE ABYSS. Entering without it causes immediate death. Removing it during the boss encounter is also fatal. If you're pursuing the Darkwraith covenant, do not place the Lordvessel through Kingseeker Frampt before defeating the Four Kings. Once the boss is defeated, speak with Darkstalker Kaathe in the Abyss and join the covenant before making any conflicting Lordvessel decisions.
Trophy: Enkindle
Light bonfire flame.
Type: Bronze
Category: Story
Unlock Details
Light your first bonfire in the Northern Undead Asylum. This is one of the earliest trophies in DARK SOULS: REMASTERED and is effectively unmissable during normal gameplay. After creating your character and watching the opening sequence, you'll awaken inside a prison cell in the Northern Undead Asylum. Pick up the Dungeon Cell Key from the corpse inside your cell, unlock the door, and follow the corridor past the imprisoned Hollows. Continue until you reach a larger room containing an unlit bonfire. Approach the bonfire and interact with it to light the flame. The Enkindle trophy unlocks immediately. Bonfires serve as checkpoints throughout Lordran. Resting at one restores your health and Estus Flask charges, but also respawns most ordinary enemies. Later, you'll use bonfires to level up, reverse Hollowing, kindle flames for additional Estus charges, and eventually travel between certain locations after obtaining the Lordvessel. Congratulations! You've successfully lit a fire. It's arguably the safest accomplishment you'll have for the next hundred hours.
Tip
Rest at newly discovered bonfires whenever possible. Lighting a bonfire activates it, but resting there establishes it as your current respawn point.
Trophy: Estus Flask
Acquire Estus Flask.
Type: Bronze
Category: Story
Unlock Details
Obtain the Estus Flask from Oscar of Astora during the Northern Undead Asylum tutorial. The Estus Flask is your primary healing item throughout DARK SOULS: REMASTERED. Its charges refill whenever you rest at a bonfire. After lighting your first bonfire, continue through the asylum until you encounter the Asylum Demon for the first time. Rather than fighting the demon with your starting equipment, run toward the open doorway along the left side of the arena. Pass through the doorway and continue along the corridor until you reach another bonfire. Rest at the bonfire, then proceed through the nearby passages. You'll eventually reach a staircase where a large iron ball rolls down toward you. Move out of its path and allow the ball to smash through the wall at the bottom of the staircase. Enter the newly opened room to find Oscar of Astora, the wounded knight who helped you escape your cell. Speak with Oscar and exhaust his dialogue. Accept his request when prompted, and he'll give you the Estus Flask along with the Undead Asylum F2 East Key. The trophy unlocks when you receive the flask. You can now use Estus to restore your health during combat and exploration. You'll begin with a limited number of charges, but kindling bonfires allows you to replenish more flasks when resting.
Tip
Use your Estus Flask between enemy encounters rather than waiting until you're one hit away from death. As you progress, you can also reinforce the flask with Fire Keeper Souls to increase the amount of health restored per use.
Warning
Don't confuse Fire Keeper Souls with ordinary Humanity. Fire Keeper Souls are valuable upgrade items, and consuming them directly prevents you from using those particular souls to strengthen your Estus Flask.
Trophy: Lordvessel
Acquire the Lordvessel.
Type: Silver
Category: Story
Unlock Details
Obtain the Lordvessel from Gwynevere, Princess of Sunlight, after defeating Dragonslayer Ornstein and Executioner Smough in Anor Londo. The Lordvessel is a major progression item that allows you to warp between selected bonfires and eventually access the final areas of the game. After reaching Anor Londo, your main objective is to explore the city and reach the large cathedral where Ornstein and Smough await. Reaching Ornstein and Smough: From the first Anor Londo bonfire, continue toward the enormous rotating staircase in the center of the city. Lower the staircase to access the surrounding pathways and enter the large building containing the Painting Guardians. Navigate the narrow ceiling rafters carefully, then continue toward the exterior rooftops. You'll eventually reach a dangerous section guarded by Silver Knight archers firing enormous arrows. Keep moving across the narrow walkway, timing your dodges to avoid being knocked off the ledge. Once you reach the cathedral's side entrance, follow the interior hallways until you find the bonfire where Solaire of Astora can be encountered. Activate the shortcut leading toward the cathedral's main entrance before proceeding to the boss. If you're in human form and have progressed Solaire's interactions, his summon sign can be found near the large staircase leading toward the Ornstein and Smough arena. Boss Strategy: Ornstein and Smough are one of the most demanding boss encounters in DARK SOULS: REMASTERED. You'll fight both enemies simultaneously, and the order in which you defeat them determines the boss soul you'll receive. Ornstein is the faster opponent, using lightning attacks, spear thrusts, and long-distance lunges. Smough is slower but hits extremely hard with his enormous hammer. Use the large pillars around the arena to separate the bosses and interrupt some of their attacks. Avoid standing directly between them, as this can leave you vulnerable to simultaneous attacks from both directions. Focus on defeating one opponent first rather than dividing damage equally. After the first boss is defeated, the surviving opponent absorbs additional power and begins the second phase with a full health bar. If you defeat Ornstein first, Smough becomes empowered and gains lightning attacks. If you defeat Smough first, Ornstein grows larger and becomes considerably more dangerous. For Knight's Honor, you'll need both boss souls across separate playthroughs. A useful plan is to defeat Ornstein first during your initial playthrough, earning the Soul of Smough. During New Game+, defeat Smough first to earn the Soul of Ornstein. However, either order works as long as you obtain both souls eventually. Second Phase Strategy: Against empowered Smough, stay mobile and move around the pillars to avoid his hammer charges. Watch for his jumping attack, which ends in a large lightning explosion. Retreat immediately when he leaps into the air. Against empowered Ornstein, try to remain close to his legs while dodging his spear attacks. Watch for his jumping lightning slam, which creates a dangerous area-of-effect attack around his body. Remain patient and attack only when you have a safe opening. Once the second boss is defeated, the encounter ends and the path toward Gwynevere becomes available. Obtaining the Lordvessel: After defeating Ornstein and Smough, climb either of the large elevators at the back of the boss arena. At the upper level, enter the enormous chamber containing Gwynevere, Princess of Sunlight. Approach her and speak with her. She'll present you with the Lordvessel, unlocking the trophy. You can now warp between selected bonfires by resting at a bonfire and choosing the Warp option. You've defeated one of Lordran's most infamous boss duos and earned the ability to fast travel. Apparently, the gods believe convenience should be locked behind extreme violence.
Tip
After receiving the Lordvessel, speak with Gwynevere again and join the Princess's Guard covenant to unlock its associated trophy. Also, visit the Giant Blacksmith before leaving Anor Londo. You can use your saved boss souls to create rare weapons, provided you've prepared the appropriate equipment.
Warning
Do not consume Ornstein's or Smough's soul. Both are required for Knight's Honor, and you'll need to defeat them in different orders across separate playthroughs. Most importantly, if you're pursuing the Darkwraith covenant during this playthrough, do not place the Lordvessel through Kingseeker Frampt at Firelink Shrine. Instead, obtain the Covenant of Artorias ring, defeat the Four Kings in New Londo Ruins, and speak with Darkstalker Kaathe in the Abyss before placing the vessel. Placing the Lordvessel through Frampt prematurely can prevent you from joining the Darkwraith covenant during that playthrough.

Trophy: Reach Anor Londo
Arrive in Anor Londo.
Type: Silver
Category: Story
Unlock Details
Reach Anor Londo after defeating the Iron Golem at the top of Sen's Fortress. This trophy is earned through normal story progression after ringing both Bells of Awakening. Once you've rung the bells in Undead Parish and Quelaag's Domain, a cutscene shows the enormous gates near Andre of Astora opening. These gates provide access to Sen's Fortress. Reaching the Iron Golem: From the Undead Parish bonfire near Andre, follow the pathway toward the newly opened fortress entrance. Enter Sen's Fortress and carefully navigate its interior. The fortress contains swinging blade traps, pressure plates that fire arrows, narrow walkways, rolling boulders, and numerous Serpent Soldiers. Move slowly across the narrow bridges, watching the timing of the swinging blades before attempting to cross. Many traps can be used against the enemies guarding them, so don't hesitate to let the fortress do some of your fighting. Continue upward through the structure until you reach the mechanism controlling the rolling boulders. Use the mechanism to redirect the boulders and explore the newly accessible passages. You'll eventually reach the exterior rooftop, where a Giant throws explosive projectiles toward your position. Before progressing to the boss, locate the rooftop bonfire by dropping from a broken section of the outer wall onto the platform below. Rest here to establish a checkpoint. You can also rescue Big Hat Logan from his cage inside Sen's Fortress if you haven't already. He's essential for collecting every sorcery. Continue across the rooftop pathways until you reach the fog gate leading to the Iron Golem. Boss Strategy: The Iron Golem is an enormous armored enemy wielding a massive axe. Its attacks are slow but powerful, and fighting on the narrow rooftop can make the encounter especially dangerous. The biggest threat isn't always the boss's damage. It's being knocked off the edge of the arena. Stay away from the rooftop boundaries whenever possible. During the fight, the Iron Golem uses sweeping axe attacks, overhead strikes, stomps, and a grab attack. Wait for one of its heavier attacks, dodge toward its legs, and punish the recovery animation with several strikes. Focus on attacking its legs repeatedly. Dealing enough damage to one leg can cause the Iron Golem to stagger, temporarily leaving it vulnerable. If you stagger it near the edge of the arena, it's possible to knock it off the rooftop for an immediate victory. You can also summon Iron Tarkus to assist with this encounter while in human form. His summon sign is located in a nearby tower before the boss arena. Tarkus is particularly effective against the Iron Golem and can sometimes defeat it with very little assistance. Once the Iron Golem falls, you'll receive the Core of an Iron Golem. Save this boss soul, as you'll need two copies across playthroughs to forge the Golem Axe and Dragon Bone Fist for Knight's Honor. Entering Anor Londo: After defeating the boss, look for the glowing golden ring of light that appears near the far side of the rooftop arena. Approach the ring and interact with it. A group of Batwing Demons will descend and carry your character over the fortress walls toward Anor Londo. Once you arrive in the city, Reach Anor Londo will unlock. Congratulations! You've survived a fortress designed almost entirely around murdering its visitors, and your reward is a complimentary flight provided by winged demons. Lordran's transportation system is improving.
Tip
Explore Anor Londo carefully. The city contains the Giant Blacksmith, rare equipment needed for Knight's Honor, several important covenant opportunities, and valuable upgrade materials. The Giant Blacksmith is especially important because he's responsible for creating boss-soul weapons.
Warning
Don't consume the Core of an Iron Golem. You'll need two copies for Knight's Honor, one for the Golem Axe and another for the Dragon Bone Fist. Also, make sure to interact with the glowing ring after defeating the Iron Golem. The trophy does not unlock until you actually arrive in Anor Londo.
Trophy: Reach Lordran
Arrive in Lordran.
Type: Bronze
Category: Story
Unlock Details
Escape the Northern Undead Asylum and arrive in Lordran. This trophy is earned automatically after completing the opening tutorial area and defeating the Asylum Demon. After obtaining the Estus Flask from Oscar of Astora, continue through the asylum until you reach the upper passages overlooking the demon's arena. You'll encounter a few additional Hollow enemies along the way, including an archer and a sword-wielding Hollow. Defeat them or carefully move past them, then enter the fog gate overlooking the Asylum Demon's arena. If you approach from above, you can perform a plunging attack onto the demon to deal substantial opening damage. Once you land, stay close to the demon's sides or behind it to avoid its powerful frontal attacks. Watch for its large club swings, ground slams, and jumping attacks. Dodge away when it prepares a heavy strike, then move back in to attack during its recovery. Continue until the Asylum Demon is defeated. After the battle, collect the Big Pilgrim's Key and use it to open the large doors at the far end of the asylum. Step outside and follow the path up the hill until you reach the cliff overlooking the surrounding mountains. A short cutscene begins, showing an enormous crow carrying your character away from the asylum. When you arrive at Firelink Shrine in Lordran, the Reach Lordran trophy unlocks. Congratulations, Chosen Undead! You've escaped prison, defeated your first demon, and been transported by a giant bird. Your travel arrangements are already becoming questionable.
Tip
Before leaving Firelink Shrine, speak with the Crestfallen Warrior sitting near the bonfire. His dialogue provides clues about your next objective: ringing the two Bells of Awakening. You can also explore the shrine to discover several NPCs and useful items, but avoid wandering into the graveyard or New Londo Ruins too early if you're still learning the combat.
Trophy: Ring the Bell (Quelaag's Domain)
Ring Bell of Awakening in Quelaag's domain.
Type: Bronze
Category: Story
Unlock Details
Ring the second Bell of Awakening in Quelaag's Domain after defeating Chaos Witch Quelaag. The second bell is located deep beneath Lordran, at the bottom of Blighttown. There are multiple routes to reach it, but the conventional progression path takes you through Lower Undead Burg, the Depths, and Blighttown. Reaching Blighttown: From Undead Parish, obtain the Basement Key near the portcullis behind the armored boar. Return to the large bridge where you encountered the Hellkite Dragon and use the Basement Key to unlock the door near Solaire's original location. Descend into Lower Undead Burg, where you'll encounter thieves, attack dogs, and the Capra Demon. Defeat the Capra Demon to obtain the Key to the Depths. Locate the entrance to the Depths near the Capra Demon arena and unlock the door. Progress through the sewer passages, defeat the Butchers, and collect the Large Ember from the chest inside the kitchen area. Give this ember to Andre when convenient, as it's required for several weapon reinforcement trophies. Continue through the Depths until you reach the Gaping Dragon. Defeat the boss to obtain the Blighttown Key, then find the large locked door near Domhnall of Zena, the merchant sitting beside the sewer passage. Use the Blighttown Key to enter the upper section of Blighttown. Navigating Blighttown: Blighttown consists of narrow wooden platforms, ladders, dangerous enemies, and a poisonous swamp at the bottom. Carefully descend through the wooden structures, looking for ladders marked by torches. Avoid unnecessary fights on narrow platforms, as falling can kill you instantly. Watch out for Blowdart Snipers, whose attacks inflict Toxic. Unlike normal Poison, Toxic drains health extremely quickly. Bring Blooming Purple Moss Clumps to cure Toxic and Purple Moss Clumps to cure ordinary Poison. Once you reach the bottom swamp, locate the bonfire inside the stone drainage tunnel and rest there. From the bonfire, head across the swamp toward the enormous white mound covered in spiderwebs. The entrance to Quelaag's Domain is inside this structure. Enter the cave, defeat or avoid the egg-bearing enemies, and continue toward the boss fog gate. Boss Strategy: Chaos Witch Quelaag is a powerful half-human, half-spider boss who uses a flaming sword, lava attacks, and devastating area explosions. The safest general approach is to stay near the spider's side, avoiding prolonged periods directly in front of it. During the opening phase, Quelaag uses sword combinations that cover a wide area in front of her. Wait for her to begin an attack, dodge toward the side of her spider body, and land several quick strikes before retreating. Her spider half can also release streams of lava that remain on the ground, creating hazardous areas throughout the arena. Keep moving and avoid becoming trapped between lava pools and the arena walls. One of Quelaag's most dangerous abilities is a large area-of-effect explosion. Before using it, her human upper body leans forward against the spider's body. When you notice this animation, immediately retreat to a safe distance. The explosion deals tremendous damage and can kill an underleveled character outright. Once the attack finishes, move back in and continue attacking her sides. Quelaag is highly resistant to fire, so avoid relying on fire-based weapons or pyromancies during this encounter. Physical attacks, lightning damage, and well-timed dodges are much more effective. If you're struggling, you can summon Maneater Mildred to assist with the fight. To make her summon sign available, defeat her when she invades you in the Blighttown swamp while you're in human form. Her summon sign then appears near Quelaag's fog gate when you're human. Defeat Chaos Witch Quelaag to receive her boss soul and unlock the route to the second bell. Ringing the Second Bell: After defeating Quelaag, follow the passage beyond the arena and descend the staircase. You'll reach a chamber containing the second Bell of Awakening. Approach the bell and interact with it to ring it. The Ring the Bell (Quelaag's Domain) trophy unlocks immediately. A cutscene will show the enormous gates to Sen's Fortress opening, allowing you to continue your journey toward Anor Londo. Congratulations! You've survived a poisonous swamp, defeated a fire-breathing spider demon, and finally rung the second bell. Lordran's idea of a simple errand is officially ridiculous.
Tip
After ringing the second bell, explore the lower chamber leading toward Demon Ruins. Look for an illusory wall beside the passage. Behind it, you'll discover Eingyi and the Fair Lady, who leads the Chaos Servant covenant. Joining this covenant unlocks Great Chaos Fireball, and offering 30 Humanity eventually rewards you with Chaos Storm. Both pyromancies are required for Bond of a Pyromancer. Also, save Quelaag's soul. You'll need two copies across playthroughs to forge Quelaag's Furysword and the Chaos Blade for Knight's Honor.
Warning
Do not consume Quelaag's soul for ordinary souls. It's required for one of the rare weapons you'll create later, and you'll need to defeat her again during New Game+ to obtain the second copy. If you're attempting the standard Platinum route, avoid harming the Fair Lady or Eingyi before collecting their covenant and pyromancy rewards.
Trophy: Ring the Bell (Undead Church)
Ring Bell of Awakening at Undead Church.
Type: Bronze
Category: Story
Unlock Details
Ring the first Bell of Awakening at the top of the Undead Parish church after defeating the Bell Gargoyles. After arriving at Firelink Shrine, speak with the Crestfallen Warrior to learn about the two Bells of Awakening. Your first objective is the bell located above the church in Undead Parish. From the Firelink Shrine bonfire, take the uphill path leading toward Undead Burg, passing several Hollow soldiers along the way. Continue through Undead Burg, crossing the narrow walkways and rooftops until you reach the Taurus Demon boss encounter. Defeat the Taurus Demon and proceed across the large stone bridge guarded by the Hellkite Dragon. Use the staircase on the right side of the bridge to access the lower passage and continue toward Undead Parish. Progress through the parish, passing the armored enemies and the large church containing several Hollow soldiers. Before proceeding to the boss, locate Andre of Astora beneath the nearby bonfire. He's the blacksmith who can reinforce your weapons and will become essential for several upgrade trophies. Return to the church and climb through its upper floors, passing the Channeler and the Hollow enemies guarding the stairs. Continue upward until you reach the fog gate leading onto the church rooftop. Enter the arena to begin the Bell Gargoyles encounter. Boss Strategy: The Bell Gargoyles fight begins with one gargoyle attacking you using a large halberd and sweeping melee combinations. Stay close to its side or behind it whenever possible, dodging around its attacks and punishing the recovery animations. Avoid attacking continuously. The gargoyle can quickly counterattack if you exhaust your stamina. When the first gargoyle loses roughly half its health, a second gargoyle joins the fight. The second gargoyle uses fire-breathing attacks, making positioning significantly more important. Try to finish the first gargoyle quickly before focusing on the second. Fighting them separately is much easier than allowing both to attack you simultaneously. If you have Gold Pine Resin, applying it to your weapon can provide a useful damage boost. You can also summon Solaire of Astora to help with the fight, provided you've spoken with him earlier and are in human form. His summon sign appears near the boss fog gate. Once both gargoyles are defeated, climb the ladder inside the tower beyond the rooftop. Continue up the stairs until you reach the enormous bell. Interact with the bell to ring it and unlock the trophy. One bell down, one to go! Unfortunately, the second bell isn't conveniently located in another nice church. Lordran has other plans.
Tip
Before defeating the first Bell Gargoyle, attack its tail until it breaks off to obtain the Gargoyle Tail Axe. This weapon is not necessary for the Platinum's core rare-weapon collection, but it's a useful optional pickup. After ringing the bell, speak with Oswald of Carim at the base of the tower. He sells the Karmic Justice miracle required for Prayer of a Maiden and provides the Absolution service for resolving hostility with certain NPCs.
Warning
Ringing the bell does not occur automatically after defeating the gargoyles. You must climb the tower and interact with it. If you're struggling with the boss, upgrade your preferred weapon at Andre before returning. Even a few reinforcement levels can make the encounter much easier.
Trophy: Rite of Kindling
Acquire the Rite of Kindling.
Type: Bronze
Category: Story
Unlock Details
Defeat Pinwheel, the boss located deep within the Catacombs, to obtain the Rite of Kindling. This special item allows you to kindle bonfires beyond their normal limit, increasing the maximum number of Estus Flask charges restored when resting from 10 to 20. You can obtain this trophy relatively early, although the Catacombs can be dangerous for characters with low health or poorly upgraded weapons. Reaching the Catacombs: From the Firelink Shrine bonfire, head toward the graveyard containing several skeleton enemies. Follow the descending staircase along the cliff beside the graveyard to reach the entrance to the Catacombs. Continue into the underground passages, where you'll encounter skeletons that repeatedly revive unless you defeat the Necromancers controlling them or kill them with a Divine weapon. The Necromancers carry lanterns and typically attack using fireballs. Prioritize eliminating them whenever possible to prevent nearby skeletons from returning. Progress through the Catacombs, activating bonfires and using the levers to rotate the bridges connecting different sections of the area. You'll eventually reach a series of lower passages containing Bonewheel Skeletons, which can deal tremendous damage if they catch you against a wall. Move cautiously through this area, avoiding their rolling attacks and eliminating them individually when possible. Continue through the lower tunnels until you reach the fog gate leading into Pinwheel's chamber. Boss Strategy: Pinwheel is one of the easiest bosses in DARK SOULS: REMASTERED, especially if you've already progressed through several other areas. However, the fight can become troublesome if you allow him to summon too many copies of himself. At the beginning of the encounter, Pinwheel attacks using fire-based magical projectiles. He'll also create duplicate versions of himself that can cast similar spells, making it difficult to identify the real boss. The copies disappear after taking damage, while the real Pinwheel has a visible boss health bar that decreases when you hit him. A strong strategy is to rush the real Pinwheel and attack aggressively before he has time to fill the arena with duplicates. His health is relatively low, so an upgraded melee weapon can defeat him quickly. If several copies appear, eliminate the nearest ones or move around them until you have a clear path toward the original. Avoid standing still while multiple copies are casting, as their combined fire attacks can become dangerous. Continue attacking until Pinwheel is defeated. You'll automatically receive the Rite of Kindling, unlocking the trophy. After the fight, you can enter the Tomb of the Giants, but it's generally better to return later when you have stronger equipment and the Lordvessel. Congratulations! You've defeated a mysterious three-faced necromancer and earned the ability to carry more healing flasks. For once, Lordran has rewarded you with something genuinely useful.
Tip
After obtaining the Rite of Kindling, you can kindle individual bonfires up to three times to receive 20 Estus Flask charges when resting at them. Each kindling action consumes one soft Humanity and requires you to be in human form. The increased Estus capacity is tied to that specific bonfire, so prioritize bonfires near difficult bosses.
Warning
The Catacombs can be explored before obtaining the Lordvessel, but descending too far into the Tomb of the Giants early can leave you facing difficult enemies and a long return journey. Defeating Pinwheel is sufficient for this trophy. You don't need to defeat Gravelord Nito or complete the Tomb of the Giants.
Welcome to Lordran, Chosen Undead! Your Platinum journey begins in the Undead Asylum before taking you to Firelink Shrine, Undead Burg, and Undead Parish. Learn to manage stamina, dodge carefully, upgrade your favorite weapon, and resist the temptation to fight everything that looks at you funny. Your first major objectives are ringing the two Bells of Awakening, one above the Undead Parish and the other beneath Blighttown in Quelaag's Domain. The Master Key can provide useful shortcuts, but be careful where you wander. Lordran has a habit of welcoming curious adventurers with enemies they are spectacularly unprepared to fight.
Start collecting sorceries, miracles, pyromancies, rare weapons, and covenant rewards during your first playthrough rather than leaving everything for New Game+. Rescue useful NPCs such as Griggs of Vinheim and Laurentius of the Great Swamp, and begin tracking the weapons required for Knight's Honor. Join covenants when you discover them, but pay particular attention to Gravelord Servant, which must be joined before defeating Nito. Save your boss souls instead of consuming them, as many are needed to forge unique weapons later. You'll also need three Souls of Sif across multiple playthroughs, so defeating the Great Grey Wolf during each cycle is essential. Poor Sif really drew the short straw in this Platinum journey.
After ringing both Bells of Awakening, conquer Sen's Fortress and defeat the Iron Golem to reach Anor Londo. Here you'll face Ornstein and Smough, whose boss souls are required for two different rare weapons. The soul you receive depends on which opponent you defeat last, so make sure to reverse that order during New Game+. After obtaining the Lordvessel, prepare for one of the most important covenant decisions in the game. If you want to join the Darkwraith covenant, do not place the Lordvessel with Frampt. Instead, defeat Great Grey Wolf Sif, obtain the Covenant of Artorias ring, defeat the Four Kings in New Londo Ruins, and speak with Darkstalker Kaathe in the Abyss before placing the vessel.
Use this stage to make serious progress toward Knight's Honor, Wisdom of a Sage, Bond of a Pyromancer, and Prayer of a Maiden. Explore the Painted World of Ariamis for rare equipment, spells, and covenant materials, and visit the Giant Blacksmith in Anor Londo to begin forging boss-soul weapons. Join the Blade of the Darkmoon covenant and obtain its Darkmoon Blade miracle before challenging Gwyndolin, as defeating him first can block covenant progression for the current playthrough. You'll also need covenant rewards from Warrior of Sunlight, Gravelord Servant, and Chaos Servant, including offerings of 10 Sunlight Medals, 10 Eyes of Death, and 30 Humanity respectively. Farming covenant items might test your patience, but at least the enemies are generous enough to occasionally drop something besides your self-esteem.
With the Lordvessel obtained and placed, focus on defeating the remaining Lord Soul bosses: Gravelord Nito, Seath the Scaleless, the Four Kings, and the Bed of Chaos. Explore the Duke's Archives, Tomb of the Giants, New Londo Ruins, and Lost Izalith while collecting any missing spells, rare weapons, upgrade materials, and embers. Pay particular attention to NPC questlines involving Big Hat Logan, Rhea of Thorolund, Siegmeyer of Catarina, and Quelana of Izalith, as their rewards are required for spell collection trophies. You should also defeat optional trophy bosses such as Dark Sun Gwyndolin and Crossbreed Priscilla after securing any important covenant rewards and rare items tied to their areas.
Before approaching Gwyn, Lord of Cinder, complete as many remaining weapon reinforcement trophies as possible. These require maximum upgrades across the standard, crystal, lightning, raw, magic, enchanted, divine, occult, fire, and chaos paths, so keep track of your Titanite Slabs and their colored variants. Finish purchasing spells, collecting rare equipment, and farming covenant materials while your first-playthrough enemies are still relatively manageable. Defeating Gwyn and choosing an ending immediately sends you into New Game+, so don't enter the final confrontation until you're satisfied with your cleanup. For your first ending, either link the First Flame or leave the arena to become the Dark Lord. You'll choose the opposite ending during your second playthrough. After everything Lordran has thrown at you, making a simple decision without a boss fight almost feels suspicious.
New Game+ is where you'll collect the remaining boss souls, complete your second ending, and finish anything missed during the first cycle. Enemies become significantly tougher, so take advantage of your upgraded equipment and skip optional areas that no longer contain anything you need. Defeat Ornstein and Smough in the opposite order to obtain their other boss soul, defeat Sif again, and collect a second Soul of Gwyn after completing the game. One Gwyn soul is required for the Great Lord Greatsword, while another is offered to the Warrior of Sunlight covenant for the Sunlight Spear miracle. This means Prayer of a Maiden cannot be completed until New Game+ without obtaining the required soul through another player. If you're missing covenant materials, offline farming remains possible, although the game may occasionally make you question whether the enemies understand what a drop rate is.
Your final stretch takes place in New Game++, where the standard Platinum route requires defeating Sif a third time and reaching the Giant Blacksmith in Anor Londo to forge the last Artorias weapon. Knight's Honor requires the complete collection of rare weapons and shields on the same character, including both Greatsword of Artorias variants and the Greatshield of Artorias. Keep your required boss souls, tail weapons, covenant equipment, and rare enemy drops organized throughout all three cycles. Online multiplayer is optional, and the included Artorias of the Abyss content is not required for Platinum. Once both endings, every covenant, all required spells, weapon upgrades, bosses, and rare weapons are complete, The Dark Soul will finally unlock. Congratulations, Chosen Undead! You've conquered Lordran, survived countless deaths, and probably developed an entirely reasonable distrust of treasure chests.
Completion Video Playlist
1 video
Dark Souls Remastered Platinum Trophy Guide 01 / Northern Undead Asylum, Combat Practice