


Trophy Guide Preview
Overall Trophy Progress
0 / 38 Completed
0%
Trophy Types
Platinum
0 / 1Gold
0 / 2Silver
0 / 23Bronze
0 / 12Categories
Missable
0 / 4Collectible
0 / 5Grind
0 / 1Combat
0 / 1Ending
0 / 1Misc
0 / 15Story
0 / 10

Enter the cursed kingdom of Drangleic, where forgotten ruins, deadly creatures, and relentless bosses stand between you and the truth. Shape your warrior, master punishing combat, and explore a vast dark fantasy world where every victory is earned and every mistake has a price.
Overall Trophy Progress
0 / 38 Completed
0%
Platinum Path
EARLY GAME Welcome to Drangleic, where even the weakest enemies can ruin your afternoon if you get careless. Start by exploring Things Betwixt, Majula, and the Forest of Fallen Giants while getting comfortable with stamina management, dodging, and the game's unforgiving combat. Upgrade a weapon you enjoy, collect Estus Flask Shards, and spend your souls regularly. Most importantly, talk to every friendly NPC until th...
Completion Video Playlist
1 video
Dark Souls 2 Scholar of the First Sin Platinum Trophy Guide 01 / Things Betwixt, Majula
Trophy: The Dark Soul
Acquire all trophies
Type: Platinum
Unlock Details
Earn every other trophy in Dark Souls II: Scholar of the First Sin to unlock the Platinum.

Trophy: Curious Map
Light all flames on the map in Majula
Type: Silver
Category: Missable
Unlock Details
Light all eight flames on the map inside the Majula mansion, then speak with Cale the Cartographer to receive his equipment. First, you need to find Cale in the Forest of Fallen Giants and convince him to return to Majula. From the Cardinal Tower bonfire, climb down the ladder and head outside toward the large fallen tree trunk connecting the lower ruins to the rooftops. Cross the trunk and make your way across the rooftops while avoiding the Hollow Soldiers and archers. Continue toward the cave entrance in the stone wall. As you enter, watch for a large boulder that rolls down the passage. Avoid it, then follow the uphill path inside the cave to find Cale examining the ground. Speak with Cale until he gives you the House Key for the mansion in Majula, then exhaust his remaining dialogue. After defeating the Last Giant and clearing the enemies from the mansion basement, Cale can relocate there. Return to Majula and use the House Key to enter the mansion. Descend into the basement and locate the large stone map embedded in the floor. Cale will eventually stand beside it. To light all eight flames, complete the following objectives: 1. The Last Giant — Forest of Fallen Giants: Defeat the Last Giant boss in the underground chamber beneath the Forest of Fallen Giants. 2. Lost Sinner — Sinner's Rise: Defeat the Lost Sinner and light the primal bonfire beyond the boss arena. 3. Old Iron King — Iron Keep: Defeat the Old Iron King and light the primal bonfire beyond his arena. 4. The Rotten — Black Gulch: Defeat The Rotten and light the primal bonfire beyond the boss arena. 5. The Duke's Dear Freja — Brightstone Cove Tseldora: Defeat Freja and activate the primal bonfire beyond the boss area. 6. King's Ring — Undead Crypt: Defeat Velstadt, enter Vendrick's chamber, and collect the King's Ring. 7. Ashen Mist Heart — Dragon Shrine: Reach the Ancient Dragon at the summit of Dragon Shrine and speak with it to obtain the Ashen Mist Heart. 8. Throne Watcher and Throne Defender — Throne of Want: Enter the Throne of Want through the King's Door in Drangleic Castle and defeat both bosses. Once all eight objectives have been completed, return to the mansion basement in Majula. Check that all eight flames on the stone map are illuminated, then speak with Cale. He will reward you with his equipment, unlocking Curious Map.
Tip
You don't need to wait until after defeating Nashandra to complete this trophy. Once the Throne Watcher and Throne Defender have been defeated and the other seven requirements are satisfied, you can return to Cale and claim his reward. This is a convenient way to finish the trophy before the game's ending.
Warning
Do not kill Cale the Cartographer. He must remain alive to give you his equipment after all eight flames have been lit. Also, if you use the Shrine of Winter's soul-memory shortcut to bypass any of the four Old Ones, you'll still need to return and complete their associated requirements to finish the map.
Video Guide: https://www.youtube.com/watch?v=5Yyw-x3dHC4&list=PLlEciSr0LRTpuiIGTajbd7iOC4Ubw7Ct7&index=13&pp=iAQB
Trophy: Gathering of Exiles
Increase the population of Majula
Type: Silver
Category: Missable
Unlock Details
Bring the seven required NPCs to Majula by meeting them throughout Drangleic and satisfying their relocation conditions. Most characters move to Majula after you exhaust their dialogue, although some require additional actions or story progression. Find and relocate the following seven NPCs: 1. Merchant Hag Melentia — Forest of Fallen Giants: From the Cardinal Tower bonfire, find Melentia sitting beside her collection of supplies. Speak with her until her dialogue repeats. After defeating the Last Giant, she can relocate to Majula, where she'll set up shop near the bonfire. 2. Cale the Cartographer — Forest of Fallen Giants: From the Cardinal Tower bonfire, climb down the ladder, cross the fallen tree trunk, and navigate the rooftops toward the cave entrance. Avoid the boulder trap inside and speak with Cale until he gives you the House Key. Exhaust his dialogue, then return to Majula and unlock the mansion. Cale will eventually relocate to the basement, where he studies the large stone map. 3. Licia of Lindeldt — Heide's Tower of Flame: Defeat the Dragonrider and speak with Licia near the bonfire beyond his arena. Continue talking until she mentions traveling elsewhere. She will relocate to the underground passage between Majula and Heide's Tower of Flame, where she can operate the rotating mechanism that opens the route to Huntsman's Copse. 4. Carhillion of the Fold — No-Man's Wharf: Near the docks leading toward the ship containing the Flexile Sentry, find Carhillion sitting on a wooden platform overlooking the water. You need at least 8 Intelligence to access his services. Meet this requirement and exhaust his dialogue until he agrees to relocate. He will eventually appear in Majula beneath a tree overlooking the sea. 5. Stone Trader Chloanne — Harvest Valley: Shortly after entering Harvest Valley, find Chloanne sitting on a rock overlooking the poison-filled area near the first bonfire. Speak with her until she mentions leaving. After resting or progressing further, she will relocate to Majula near the blacksmith's building. 6. Laddersmith Gilligan — Earthen Peak: Find Gilligan on an exterior ledge in Earthen Peak, reached through a break in the wooden railing near the central sections of the tower. Speak with him to access his ladder-building services. He will relocate to Majula beside the large pit after you've progressed sufficiently through Earthen Peak. 7. Rosabeth of Melfia — Path to Shaded Woods: Use a Fragrant Branch of Yore to free Rosabeth from the petrified statue blocking the passage. Speak with her and give her a piece of clothing. Afterward, she'll move to Majula and establish herself near the monument overlooking the sea. Once all seven NPCs have successfully relocated, return to Majula and allow the area to refresh by resting at the bonfire or traveling away and back. The trophy will unlock once the required population conditions have been met.
Tip
Try to recruit each NPC as soon as you encounter them. Carhillion is particularly easy to overlook if your character has low Intelligence, but a Soul Vessel can be used to redistribute your attributes if necessary. Recruiting Rosabeth, Cale, and Gilligan also advances several other trophies, making this a useful objective to complete naturally during your first playthrough.
Warning
Do not kill any of the seven required NPCs before earning this trophy. Some merchants have additional relocation conditions, so simply meeting them once isn't always enough. Leave everyone alive until Gathering of Exiles unlocks, and avoid using Licia's special invasion encounter before you've completed the population requirement.
Trophy: Lucatiel
Inherit equipment from Lucatiel of Mirrah
Type: Silver
Category: Missable
Unlock Details
Complete Lucatiel of Mirrah's questline and inherit her equipment in Aldia's Keep. To earn this trophy, you must meet Lucatiel at her required dialogue locations, exhaust her conversations, and summon her for at least three successful boss victories. Lucatiel must survive until each boss is defeated. Her locations have changed in the PS4 Scholar of the First Sin edition, so follow these specific directions rather than the original PS3 locations. First, meet Lucatiel at the following locations: 1. No-Man's Wharf — Upper House: From the Unseen Path to Heide bonfire, progress into No-Man's Wharf until you reach the first large stone staircase between the wooden buildings. Climb the initial stairs, then turn left into the nearby house. Continue upstairs to find Lucatiel leaning against the wall. Speak with her until her dialogue repeats. 2. Lost Bastille — Tower Near McDuff's Workshop: From the McDuff's Workshop bonfire, climb the stairs and follow the path toward the tower ahead. Enter the tower to find Lucatiel leaning against the wall. Speak with her until her dialogue is exhausted. 3. Earthen Peak — Poisonbite Ring Room: Enter Earthen Peak from Harvest Valley and progress through the lower section containing poison-filled rooms. Near the beginning of the area, locate the room containing the Poisonbite Ring, across from a Pharros' Contraption. Lucatiel will be waiting inside. Speak with her until she repeats her dialogue. 4. Black Gulch — Hidden Ledge: From the Black Gulch Mouth bonfire, exit the cave and immediately look over the cliff edge before reaching the first group of oil pools. You'll see a narrow ledge below. Carefully drop onto it and follow the hidden passage to find Lucatiel leaning against the wall. Exhaust her dialogue. 5. Aldia's Keep — Foregarden Bonfire: After speaking with Lucatiel at all four previous locations, she'll appear beside the Foregarden bonfire in Aldia's Keep. This is her final location, where she can reward you with her equipment. Before speaking with Lucatiel at Aldia's Keep, summon her for at least three successful boss victories. The main opportunities are: 1. Flexile Sentry — No-Man's Wharf: After speaking with Lucatiel in the upper house, progress through No-Man's Wharf toward the ship. In the PS4 Scholar edition, her summon sign is located on the wooden docks leading toward the boss ship. Summon her and defeat the Flexile Sentry while keeping her alive. 2. Lost Sinner — Sinner's Rise: After speaking with Lucatiel in the Lost Bastille, travel to Sinner's Rise. Descend the elevator leading toward the prison basement, where you'll find her summon sign. Summon her and defeat the Lost Sinner while ensuring she survives. 3. Smelter Demon — Iron Keep: After speaking with Lucatiel in Earthen Peak, progress into Iron Keep. Find her summon sign outside the Smelter Demon fog gate. Summon her and defeat the boss while keeping her alive. 4. The Rotten — Black Gulch: After finding Lucatiel on the hidden ledge in Black Gulch, unlock the Hidden Chamber bonfire using a Fragrant Branch of Yore to clear the petrified obstacle. Her summon sign will appear near this bonfire. Summon her and defeat The Rotten while ensuring she survives. Once Lucatiel has survived three qualifying boss victories, travel to Aldia's Keep and activate the Foregarden bonfire. Speak with Lucatiel and exhaust her dialogue. She will reward you with her equipment, including the Mirrah Greatsword, unlocking the Lucatiel trophy.
Tip
The Rotten is a convenient boss for repeating Lucatiel's successful summons because the Hidden Chamber bonfire is close to the arena. You can use Bonfire Ascetics to repeat the fight, although the increasing boss difficulty makes keeping her alive harder. The Redeye Ring can help keep the boss focused on you, giving Lucatiel a better chance of surviving.
Warning
Do not speak with Lucatiel at Aldia's Keep until she has survived three qualifying boss victories. Her final conversation can cause her to disappear permanently for the current playthrough, preventing you from earning her equipment if the requirement hasn't been met. This is one of the most important missable trophy conditions in the game.
Video Guide: https://www.youtube.com/watch?v=cv5Ze3A3C0c&list=PLlEciSr0LRTpuiIGTajbd7iOC4Ubw7Ct7&index=10&pp=iAQB
Trophy: Moonlight Greatsword
Inherit Benhart of Jugo's equipment
Type: Silver
Category: Missable
Unlock Details
Complete Benhart of Jugo's questline and inherit his equipment. To earn this trophy, you must speak with Benhart at his various locations, exhaust his dialogue, and summon him for at least three successful boss battles. Benhart must survive until the boss is defeated for the battle to count. You can complete these requirements during your first playthrough, and repeated victories against the same boss using Bonfire Ascetics also count. First, find Benhart at the following locations: 1. Majula — Entrance to Shaded Woods: Find Benhart sitting along the path leading toward the petrified Rosabeth of Melfia. Speak with him until his dialogue repeats. After freeing Rosabeth with a Fragrant Branch of Yore, return to Benhart and exhaust his new dialogue. 2. Drangleic Castle — Central Castle Drangleic: After progressing through Drangleic Castle, find Benhart near the Central Castle Drangleic bonfire. Speak with him until his dialogue is exhausted to advance his questline and enable his summon for the Looking Glass Knight. 3. Forest of Fallen Giants — Pursuer's Arena: Return to the area beyond the Pursuer boss arena, near the bird's nest that leads to the Lost Bastille. Benhart will appear near the fallen giant that provides access to the Memory of Orro. Speak with him until his dialogue repeats. 4. Memory of Orro — Forest of Fallen Giants: After obtaining the Ashen Mist Heart from the Ancient Dragon, return to the fallen giant beyond the Pursuer's arena and enter the Memory of Orro. Benhart can be found near the beginning of the memory. Speak with him after fulfilling his boss survival requirements to receive his equipment. Next, summon Benhart for three successful boss victories. He can assist with the following encounters: 1. Prowling Magus and Congregation — Brightstone Cove Tseldora: After freeing Rosabeth and advancing Benhart's dialogue, travel to the Royal Army Campsite bonfire in Brightstone Cove Tseldora. Find his summon sign inside one of the tents near the campsite. Summon him and escort him through the area to the Prowling Magus and Congregation boss fight. Defeat the boss while Benhart remains alive. 2. Looking Glass Knight — Drangleic Castle: Speak with Benhart near the Central Castle Drangleic bonfire. His summon sign will appear outside the Looking Glass Knight's fog gate. Summon him and keep him alive until the boss is defeated. 3. Giant Lord — Memory of Jeigh: After obtaining the Ashen Mist Heart, progress Benhart's dialogue in the Forest of Fallen Giants and Memory of Orro. Enter the Memory of Jeigh through the fallen giant beyond the King's Door. Find Benhart's summon sign near the beginning of the memory and summon him for the Giant Lord battle. Keep him alive until the boss falls. 4. Throne Watcher and Throne Defender — Throne of Want: After progressing Benhart's questline, find his summon sign outside the Throne of Want fog gate in Drangleic Castle. Summon him and defeat the Throne Watcher and Throne Defender while he remains alive. After Benhart has survived at least three qualifying boss victories and you've completed his required conversations, return to the Memory of Orro. Speak with him until he gives you his equipment, unlocking Moonlight Greatsword.
Tip
The Prowling Magus and Congregation is one of the easier encounters for keeping Benhart alive. You can repeat the fight using Bonfire Ascetics if necessary, although this increases the area's difficulty. Equipping the Redeye Ring, purchased from Sweet Shalquoir in Majula, helps draw enemy aggression toward you instead of Benhart.
Warning
Benhart must be alive when the boss dies. Simply summoning him isn't enough. If he dies during the fight, that victory will not count toward the three required successes. Avoid completing all his available boss encounters without securing the necessary victories, as recovering missed opportunities may require Bonfire Ascetics or another playthrough.
Video Guide: https://www.youtube.com/watch?v=bsF-aleF-Vc&list=PLlEciSr0LRTpuiIGTajbd7iOC4Ubw7Ct7&index=11&pp=iAQB
Trophy: Gesture Maestro
Learn all gestures
Type: Silver
Category: Collectible
Unlock Details
Learn all 20 gestures available in Dark Souls II: Scholar of the First Sin. Eight are available automatically when creating your character, leaving 12 gestures to learn from NPCs and covenant interactions. The following locations cover all 12 additional gestures: 1. Welcome — Majula: Speak with Crestfallen Saulden beside the monument overlooking the sea. Exhaust his dialogue and select the option to learn his gesture. 2. Duel Bow — Cathedral of Blue: Defeat the Old Dragonslayer in Heide's Tower of Flame and speak with Blue Sentinel Targray on the balcony beyond the boss arena. Bring a Token of Fidelity, join the Blue Sentinels, and learn his gesture. 3. Mock — Lost Bastille: Locate Straid of Olaphis near the Straid's Cell bonfire. Use a Fragrant Branch of Yore to remove his petrification, then speak with him and learn the gesture. 4. Fist Pump — Huntsman's Copse: Find the Undead Lockaway Key along the elevated cliffside path near the large bridge. Unlock the room containing the Undead Lockaway bonfire, speak with Creighton the Wanderer, and learn his gesture. 5. Praise the Sun — Harvest Valley: Find the Altar of Sunlight near the route toward Earthen Peak. Cross the bridge near the large enemy wielding a hammer and follow the side path to the shrine. Interact with the altar and join the Heirs to the Sun covenant to learn the gesture. 6. Prostration — Earthen Peak or Majula: Speak with Laddersmith Gilligan in Earthen Peak and pay him 2,000 souls for his services to learn the gesture. You can also learn it after he relocates to Majula. 7. Joy — Majula: Speak with Benhart of Jugo near the petrified Rosabeth of Melfia on the path toward the Shaded Woods. Free Rosabeth using a Fragrant Branch of Yore, then return to Benhart and speak with him again to learn Joy. 8. Decapitate — Shaded Woods: From the Ruined Fork Road bonfire, enter the fog-covered forest and follow the left wall until you reach a clearing containing the Head of Vengarl. Speak with him until you can learn the gesture. 9. Warmup — Shaded Ruins: Purchase the Ring of Whispers from Sweet Shalquoir in Majula. Find Manscorpion Tark among the ruins, defeat Scorpioness Najka, and return while wearing the ring. Speak with Tark to learn his gesture. 10. This One's Me — Drangleic Castle: Enter Drangleic Castle and climb the main entrance staircase. Speak with Chancellor Wellager, the ghostly merchant standing near the top, and learn his gesture. 11. Have Mercy! — Undead Crypt: Find Grave Warden Agdayne in the Undead Crypt. Approach without a lit torch, exhaust his dialogue, and learn the gesture. 12. Hurrah! — Memory of Vammar: Obtain the Ashen Mist Heart from the Ancient Dragon, then return to the Forest of Fallen Giants. Enter the Memory of Vammar through the fallen giant near the area with the armored enemies and explosive barrels. Find Captain Drummond inside, speak with him, and learn his gesture. Once all 20 gestures are available in your gesture menu, the trophy will unlock.
Tip
Check every friendly NPC for a gesture option before leaving an area. Several gestures overlap with NPC equipment trophies, so collecting them during the first playthrough saves unnecessary backtracking.
Warning
Killing an NPC before learning their gesture can prevent you from completing the collection until your next playthrough. Keep all gesture-related NPCs alive until their gestures have been obtained.
Video Guide: https://www.youtube.com/watch?v=YJEBD4juDpg&list=PLlEciSr0LRTpuiIGTajbd7iOC4Ubw7Ct7&index=1&pp=iAQB
Trophy: Master of Hexes
Learn all hexes
Type: Silver
Category: Collectible
Unlock Details
Collect all 23 hexes in Dark Souls II: Scholar of the First Sin on the same character. This includes 19 hexes from the main game and four additional hexes spread across the three DLC expansions. Hexes are obtained from merchants, hidden treasure, boss soul trades, and covenant progression. You'll also need to complete the Pilgrims of the Dark covenant questline and defeat Darklurker to acquire two important hexes: Climax and Lifedrain Patch. Collect the following 23 hexes: 1. Dark Orb — Felkin the Outcast, Straid of Olaphis, or Darkdiver Grandahl: Purchase Dark Orb from any of these merchants. Felkin can be found along the path leading toward Huntsman's Copse, while Straid is located in the Lost Bastille. 2. Dark Hail — Straid of Olaphis, Magerold of Lanafir, or Darkdiver Grandahl: Purchase Dark Hail from any of these merchants. Magerold can be found inside Iron Keep near the entrance. 3. Dark Fog — The Gutter: Explore the lower sections of The Gutter and search the wooden platforms and enclosed rooms for a chest containing Dark Fog. Alternatively, purchase it from Straid of Olaphis. 4. Affinity — Straid of Olaphis: Purchase Affinity from Straid. The spell can also drop from enemies in Aldia's Keep, but purchasing it is the simpler option. 5. Dead Again — Stone Trader Chloanne: Purchase Dead Again from Chloanne after she relocates from Harvest Valley to Majula. It can also drop from Cragslippers in Black Gulch. 6. Dark Weapon — Felkin the Outcast: Purchase Dark Weapon from Felkin, who sits near the entrance to Huntsman's Copse. If he refuses to offer his services, ensure you meet his Intelligence and Faith requirements. 7. Whisper of Despair — Grave of Saints: From Harval's Resting Place bonfire, continue into the circular chamber and locate the Pharros Contraption near the bridge mechanism. Use a Pharros Lockstone to activate the route, then climb the newly accessible ramp and collect the hex from the corpse at the top. 8. Repel — Straid of Olaphis: Defeat the Giant Lord in the Memory of Jeigh after obtaining the Ashen Mist Heart. Keep the Giant Lord Soul and trade it to Straid for Repel. 9. Twisted Barricade — Doors of Pharros: From the Gyrm's Respite bonfire, progress through the Doors of Pharros until you reach a ladder. Climb to the upper walkway and search the nearby corpse for Twisted Barricade. 10. Numbness — Straid of Olaphis: Defeat The Rotten at NG+ bonfire intensity or higher to obtain the Old Dead One's Soul. You can obtain it during New Game+ or by using a Bonfire Ascetic on the appropriate Black Gulch bonfire. Trade the soul to Straid for Numbness. 11. Scraps of Life — Black Gulch: Explore the path near the first large worm emerging from the wall and search the nearby corpse for Scraps of Life. Alternatively, purchase the hex from Cromwell the Pardoner in Brightstone Cove Tseldora. 12. Darkstorm — Magerold of Lanafir or Darkdiver Grandahl: Purchase Darkstorm from either merchant. 13. Resonant Soul — Felkin the Outcast: Purchase Resonant Soul from Felkin. It can also be obtained as a reward for reaching rank one in the Pilgrims of the Dark covenant. 14. Great Resonant Soul — Felkin the Outcast: Purchase Great Resonant Soul from Felkin. Alternatively, earn it through Pilgrims of the Dark covenant progression. 15. Climax — Pilgrims of the Dark Covenant: Find Darkdiver Grandahl in Shaded Woods, Black Gulch, and Drangleic Castle to join his covenant. Complete all three Dark Chasm of Old areas, lighting their required braziers, and defeat Darklurker at the end of the covenant questline. Reach rank three and speak with Grandahl to receive Climax. 16. Resonant Flesh — Felkin the Outcast: Purchase Resonant Flesh from Felkin along the path to Huntsman's Copse. 17. Resonant Weapon — Felkin the Outcast: Purchase Resonant Weapon from Felkin. 18. Lifedrain Patch — Straid of Olaphis: Defeat Darklurker during the Pilgrims of the Dark covenant questline and obtain its boss soul. Trade the Darklurker Soul to Straid for Lifedrain Patch. 19. Profound Still — Darkdiver Grandahl: Purchase Profound Still from Grandahl after gaining access to his services through the Pilgrims of the Dark covenant. 20. Promised Walk of Peace — Shulva, Sanctum City (Crown of the Sunken King DLC): Progress through Shulva toward the second bonfire and locate the area containing red-eyed statues and a movable stone platform. Shoot the distant switch to raise the mechanism and open the route into a hidden cave. Follow the passage toward the tree and collect the hex from the nearby corpse. 21. Dark Greatsword — Shulva, Sanctum City (Crown of the Sunken King DLC): From the Priestess' Chamber bonfire, activate the nearby elevator using the wall switch. Ride the elevator downward and step off onto the intermediate ledge before reaching the bottom. Follow the narrow walkway around the exterior of the structure and open the chest containing Dark Greatsword. 22. Recollection — Brume Tower (Crown of the Old Iron King DLC): Progress through Brume Tower until you reach the section containing the Smelter Scepter and surrounding tower rooms. Descend into the dark chamber connected to several small side rooms. Search the rooms for the corpse holding Recollection. 23. Dark Dance — Frozen Eleum Loyce (Crown of the Ivory King DLC): From the second bonfire, explore the snowy exterior paths before ascending the main staircase. Follow the side route around the building and along the cliffside until you reach a corpse holding Dark Dance. Once all 23 hexes have been collected on the same character, Master of Hexes will unlock.
Tip
Prioritize the Pilgrims of the Dark covenant during your first playthrough. Completing its three dungeons and defeating Darklurker earns Climax and provides the boss soul needed for Lifedrain Patch. Bring spare Human Effigies, healing supplies, and Flame Butterflies for lighting the dungeon braziers.
Warning
Each Dark Chasm of Old attempt requires a Human Effigy, so repeated deaths can become expensive. Save the Darklurker Soul for Lifedrain Patch rather than consuming it. You must also obtain all four DLC hexes for the PS4 edition; collecting only the original game's 19 hexes will not unlock the trophy.
Video Guide: https://www.youtube.com/watch?v=fzAHcUieDbA&list=PLlEciSr0LRTpuiIGTajbd7iOC4Ubw7Ct7&index=5&pp=iAQB
Trophy: Master of Miracles
Learn all miracles
Type: Silver
Category: Collectible
Unlock Details
Collect all 28 miracles in Dark Souls II: Scholar of the First Sin on the same character. This includes 26 miracles from the main game and two additional miracles from the DLC expansions. Many miracles can be purchased from merchants, while others require boss soul trades, covenant progression, special NPC interactions, or exploration. For the standard offline Platinum route, you'll need to reach New Game++ to purchase Bountiful Sunlight and Wrath of the Gods from Chancellor Wellager. Collect the following 28 miracles: 1. Heal — Licia of Lindeldt or Merchant Hag Melentia: Purchase Heal from Licia after meeting her in Heide's Tower of Flame, or buy it from Merchant Hag Melentia in the Forest of Fallen Giants or Majula. 2. Med Heal — Licia of Lindeldt: Purchase Med Heal from Licia. She initially appears after the Dragonrider boss fight in Heide's Tower of Flame and later relocates to the passage connecting Majula to Huntsman's Copse. 3. Great Heal Excerpt — Licia of Lindeldt: Purchase this miracle from Licia at either of her locations. 4. Great Heal — Grave of Saints: Descend through the Majula pit and explore the Grave of Saints. Near the lower route toward The Gutter, enter the watery passage containing exploding enemies. Search the side tunnel for a chest holding Great Heal. Alternatively, purchase it from Cromwell the Pardoner in Brightstone Cove Tseldora. 5. Soothing Sunlight — Licia of Lindeldt: Obtain the Crushed Eye Orb from a chest in the Undead Crypt. After Licia relocates to Majula, enter the rotunda where she operates the passage mechanism and use the orb to invade her world. Defeat Licia during this special invasion to obtain Soothing Sunlight. 6. Replenishment — Licia of Lindeldt or Cromwell the Pardoner: Purchase this miracle from either merchant. 7. Resplendent Life — Licia of Lindeldt or Straid of Olaphis: Purchase the miracle from Licia or Straid. Straid must first be freed from petrification in the Lost Bastille using a Fragrant Branch of Yore. 8. Bountiful Sunlight — Chancellor Wellager, NG++: Progress to Drangleic Castle during New Game++ and speak with Chancellor Wellager near the entrance staircase. Purchase Bountiful Sunlight from his expanded inventory. It is also obtainable through the Blue Sentinels covenant, but the NG++ purchase is considerably more practical for an offline Platinum. 9. Caressing Prayer — Licia of Lindeldt or Cromwell the Pardoner: Purchase the miracle from either merchant. 10. Force — Licia of Lindeldt or Cromwell the Pardoner: Purchase Force from either merchant. 11. Wrath of the Gods — Chancellor Wellager, NG++: Reach Drangleic Castle during New Game++ and purchase the miracle from Chancellor Wellager. It is also available through Blue Sentinels covenant progression, but purchasing it in NG++ avoids the extensive multiplayer requirements. 12. Emit Force — No-Man's Wharf: Explore the upper wooden walkways and buildings around No-Man's Wharf. Search the exterior upper-level paths for the corpse containing Emit Force. Alternatively, purchase it from Blue Sentinel Targray or Cromwell the Pardoner. 13. Heavenly Thunder — Blue Sentinel Targray or Cromwell the Pardoner: Purchase Heavenly Thunder from either merchant. Targray is found in the Cathedral of Blue after defeating the Old Dragonslayer, while Cromwell is located in Brightstone Cove Tseldora. 14. Lightning Spear — Licia of Lindeldt: Purchase Lightning Spear from Licia. It can also be found while exploring Earthen Peak, making it possible to acquire without buying it. 15. Great Lightning Spear — Majula Pit: Purchase the longest ladder from Laddersmith Gilligan and descend into the pit. Locate the locked door requiring the Forgotten Key, obtained from the giants beneath Black Gulch. Open the door and search the chests inside for Great Lightning Spear. Alternatively, purchase it from Straid of Olaphis or find another copy in the Undead Crypt. 16. Sunlight Spear — Heirs to the Sun Covenant: Join the Heirs to the Sun by interacting with the Altar of Sunlight in Harvest Valley. Collect 30 Sunlight Medals and offer them to the altar to reach covenant rank three. Sunlight Medals can be earned through successful cooperative boss encounters or farmed offline from eligible enemies, including Falconers in Brightstone Cove Tseldora. Sunlight Spear is your reward for reaching the required rank. 17. Soul Appease — Stone Trader Chloanne or Grave Warden Agdayne: Purchase the miracle from either merchant. Chloanne can be found in Harvest Valley before moving to Majula, while Agdayne is located in the Undead Crypt. 18. Blinding Bolt — Straid of Olaphis: Obtain the Old King Soul by defeating the Old Iron King at NG+ bonfire intensity or higher. This can be accomplished during New Game+ or by using a Bonfire Ascetic at the appropriate Iron Keep bonfire. Trade the Old King Soul to Straid for Blinding Bolt. 19. Magic Barrier — Head of Vengarl or Felkin the Outcast: Purchase Magic Barrier from Vengarl in the Shaded Woods or Felkin along the route toward Huntsman's Copse. 20. Great Magic Barrier — Aldia's Keep: Explore Aldia's Keep and search its interior treasure chests for Great Magic Barrier. Alternatively, purchase the miracle from Chancellor Wellager in Drangleic Castle. 21. Homeward — Licia of Lindeldt: Purchase Homeward from Licia. 22. Guidance — Licia of Lindeldt: Purchase Guidance from Licia. 23. Sacred Oath — Straid of Olaphis: Defeat Velstadt, the Royal Aegis, in the Undead Crypt. Keep his boss soul and trade it to Straid of Olaphis for Sacred Oath. 24. Unveil — Straid of Olaphis: Purchase Unveil from Straid in the Lost Bastille. 25. Perseverance — Cromwell the Pardoner: Purchase Perseverance from Cromwell in Brightstone Cove Tseldora. He can be reached by climbing the ladder outside the building where you fight the Prowling Magus and Congregation. 26. Sunlight Blade — Shrine of Amana: Explore Shrine of Amana near the Crumbled Ruins bonfire. Search the watery area around the large stone structures near the Ogre for a chest containing Sunlight Blade. Watch your footing while exploring, as the water conceals dangerous drop-offs. 27. Denial — Dragon's Sanctum (Crown of the Sunken King DLC): Progress through Dragon's Sanctum until you reach the room containing floor spikes and a rotating circular door. Look through the opening in the mechanism and shoot the switch behind it with arrows three times to move the door into the correct position. Enter the newly accessible passage and open the chest containing Denial. 28. Splintering Lightning Spear — Frozen Eleum Loyce (Crown of the Ivory King DLC): Progress through Frozen Eleum Loyce and obtain the Eye of the Priestess, which reveals previously invisible enemies and objects. Return to the tower near the route leading toward the Eye and locate the ladder that was previously invisible. Climb to the upper section and open the chest containing Splintering Lightning Spear. Once all 28 miracles have been collected on the same character, Master of Miracles will unlock.
Tip
Complete the Heirs to the Sun covenant requirements as early as possible. The 30 Sunlight Medals needed for Sunlight Spear can take considerable time to farm offline, so collecting them throughout your first playthrough helps avoid a lengthy cleanup session. You can also obtain the special NG+ boss souls using Bonfire Ascetics instead of waiting for the next full playthrough.
Warning
Do not kill Licia of Lindeldt prematurely. Buy any miracles you still need from her before using the Crushed Eye Orb to obtain Soothing Sunlight. Also, Chancellor Wellager's NG++ spell inventory cannot be unlocked early by burning Bonfire Ascetics. The two DLC miracles are mandatory for the PS4 version, even though they are not required for the original PS3 trophy list.
Video Guide: https://www.youtube.com/watch?v=DImVElkIUJI&list=PLlEciSr0LRTpuiIGTajbd7iOC4Ubw7Ct7&index=4&pp=iAQB

Trophy: Master of Pyromancy
Learn all pyromancies
Type: Silver
Category: Collectible
Unlock Details
Collect all 24 pyromancies in Dark Souls II: Scholar of the First Sin on the same character. This includes 21 pyromancies from the main game and three additional pyromancies from the Crown of the Old Iron King DLC. Pyromancies are obtained through merchant purchases, hidden treasure, boss soul trades, NPC questlines, and exploration. One of the required spells, Great Chaos Fireball, can be purchased from Chancellor Wellager in NG++, making it an important part of the standard offline Platinum route. Collect the following 24 pyromancies: 1. Fireball — Rosabeth of Melfia: Free Rosabeth from petrification along the path to the Shaded Woods using a Fragrant Branch of Yore. Purchase Fireball from her after she becomes a merchant. Alternatively, find it in No-Man's Wharf or obtain it as a rare drop from the Fire Salamanders in the Forest of Fallen Giants. 2. Fire Orb — Rosabeth of Melfia: Purchase Fire Orb from Rosabeth. Fire Salamanders in the Forest of Fallen Giants can also drop the spell. 3. Great Fireball — Brightstone Cove Tseldora: Defeat the Duke's Dear Freja and obtain the Brightstone Key from Duke Tseldora afterward. Return to the chapel containing spiders hanging from the ceiling, before the descent toward Freja's arena. Unlock the nearby door with the key and open the chest inside to collect Great Fireball. It can also rarely drop from Fire Salamanders. 4. Great Chaos Fireball — Chancellor Wellager, NG++: Reach Drangleic Castle during New Game++ and purchase Great Chaos Fireball from Chancellor Wellager near the entrance staircase. The spell can also be obtained through the Brotherhood of Blood covenant, but the NG++ purchase is the recommended offline method. 5. Firestorm — Titchy Gren or Drangleic Castle: Defeat the Executioner's Chariot in Undead Purgatory and speak with Titchy Gren while carrying a Token of Spite to access his shop. Purchase Firestorm from him, or locate a copy in Drangleic Castle in a room containing Alonne Captains. 6. Fire Tempest — Shrine of Amana: Progress through Shrine of Amana past the Ogre and toward the small hut patrolled by an Archdrake enemy. From the hut, carefully follow the water's edge toward the far-right side of the area. Continue along the narrow, partially submerged route until you find the hidden chest containing Fire Tempest. 7. Chaos Storm — Iron Keep: From the Ironhearth Hall bonfire, enter the large chamber containing platforms and lava. Locate the chest positioned on one of the lava-covered pathways. Equip fire-resistant armor, the Flame Quartz Ring, and use Flash Sweat to reduce fire damage. Break the nearby water-filled urns to soak yourself before attempting the crossing. Reach the chest, collect Chaos Storm, and heal as necessary to survive the return. 8. Combustion — Rosabeth of Melfia: Purchase Combustion from Rosabeth. Alternatively, explore the skeleton-filled cave near the broken bridge in Huntsman's Copse and search the corpse at the end of the passage. 9. Great Combustion — Drangleic Castle: Approach the main entrance to Drangleic Castle and search the right-hand side of the exterior entrance area for a chest containing Great Combustion. It can also be purchased from Titchy Gren. 10. Fire Whip — Titchy Gren: Purchase Fire Whip from Titchy Gren in Undead Purgatory after gaining access to his shop. It can also drop from Bell Keeper enemies in Belfry Sol. 11. Poison Mist — Rosabeth of Melfia: Purchase Poison Mist from Rosabeth after freeing her from petrification. 12. Toxic Mist — Straid of Olaphis: Defeat the Royal Rat Vanguard in the Grave of Saints and keep its boss soul. Trade the Royal Rat Vanguard Soul to Straid of Olaphis for Toxic Mist. 13. Acid Surge — Straid of Olaphis: Defeat the Royal Rat Authority in the Doors of Pharros and trade its boss soul to Straid for Acid Surge. 14. Lingering Flame — Straid of Olaphis: Purchase Lingering Flame from Straid. The spell can also drop from Undead Jailers in the Lost Bastille. 15. Flame Swathe — Straid of Olaphis: Purchase Flame Swathe from Straid. Bell Keeper enemies in Belfry Sol can also drop the spell. 16. Forbidden Sun — Royal Sorcerer Navlaan: Find Navlaan imprisoned on the lower floor of Aldia's Keep. While hollow, speak with him without releasing him and begin his assassination assignments. One assignment requires presenting the Sunset Staff as proof of killing Felkin the Outcast. You can obtain the staff peacefully by speaking with Felkin while possessing at least 20 Intelligence and 20 Faith, or obtain another copy from the mimic in Aldia's Keep. Present the staff to Navlaan to receive Forbidden Sun. 17. Flame Weapon — Straid of Olaphis: Defeat the Lost Sinner at NG+ bonfire intensity or higher to obtain the Old Witch Soul. You can do this during New Game+ or by using a Bonfire Ascetic at the appropriate Sinner's Rise bonfire. Trade the Old Witch Soul to Straid for Flame Weapon. 18. Flash Sweat — Rosabeth of Melfia: Purchase Flash Sweat from Rosabeth. This pyromancy is particularly useful for surviving the lava damage while collecting Chaos Storm in the Iron Keep. 19. Iron Flesh — Rosabeth of Melfia: Purchase Iron Flesh from Rosabeth. 20. Warmth — Grave Warden Agdayne: Purchase Warmth from Agdayne in the Undead Crypt. It can also drop from rats in the Grave of Saints. 21. Immolation — Belfry Sol: Enter Belfry Sol through the Pharros Lockstone passage in Iron Keep. Explore the area beyond the bell mechanism and locate the treasure chest containing Immolation. 22. Outcry — Brume Tower (Crown of the Old Iron King DLC): Collect all 12 fragments of the Soul of Nadalia, Bride of Ash. Eleven fragments are obtained by destroying Ashen Idols with Smelter Wedges, while the remaining fragment is obtained after defeating the Fume Knight. Once the complete soul has been assembled, take it to Straid of Olaphis and trade it for Outcry. 23. Dance of Fire — Brume Tower (Crown of the Old Iron King DLC): From the first bonfire in Brume Tower, descend through the opening sections using the ladders. After reaching the lower area containing an Ashen Idol, search the room to the right of the ladder for a corpse holding Dance of Fire. 24. Fire Snake — Brume Tower (Crown of the Old Iron King DLC): From the Foyer bonfire, locate the nearby locked doorway requiring the Tower Key. Unlock the door and enter the adjoining section. Open the metal chest inside to collect Fire Snake. Once all 24 pyromancies have been collected on the same character, Master of Pyromancy will unlock.
Tip
Collect Flash Sweat before attempting Chaos Storm in the Iron Keep, and combine it with fire-resistant equipment and water for better survivability. Save the Old Witch Soul for Flame Weapon, and complete the Crown of the Old Iron King DLC before advancing to NG+ so you can finish all three additional pyromancies in your first playthrough.
Warning
Do not release Royal Sorcerer Navlaan from his confinement, as doing so can prevent you from completing the questline needed for Forbidden Sun during the current playthrough. Great Chaos Fireball is not available from Chancellor Wellager until NG++, and Bonfire Ascetics do not unlock his NG++ inventory. All three DLC pyromancies are required for the PS4 trophy.
Video Guide: https://www.youtube.com/watch?v=epnktf7ZGUE&list=PLlEciSr0LRTpuiIGTajbd7iOC4Ubw7Ct7&index=3&pp=iAQB

Trophy: Master of Sorcery
Learn all sorceries
Type: Silver
Category: Collectible
Unlock Details
Acquire all 31 sorceries in Dark Souls II: Scholar of the First Sin on the same character. This includes 29 sorceries from the main game and two additional sorceries from the DLC expansions. Many can be purchased from merchants, while others require exploring hidden locations, trading boss souls, completing covenant objectives, or progressing through Royal Sorcerer Navlaan's questline. Collect the following sorceries: 1. Soul Arrow — Merchant Hag Melentia, Carhillion of the Fold, or Magerold of Lanafir: Purchase the spell from any of these merchants. The Sorcerer starting class also begins with it. 2. Great Soul Arrow — Forest of Fallen Giants: Find the spell in the room containing multiple ballistae. Alternatively, purchase it from Carhillion of the Fold or Magerold of Lanafir. 3. Heavy Soul Arrow — Carhillion of the Fold or Magerold of Lanafir: Purchase this spell from either merchant. 4. Great Heavy Soul Arrow — Earthen Peak: Collect the spell while exploring Earthen Peak, or purchase it from Carhillion of the Fold or Magerold of Lanafir. 5. Homing Soul Arrow — Straid of Olaphis: Free Straid from petrification in the Lost Bastille using a Fragrant Branch of Yore, then purchase the spell. Weaponsmith Ornifex also sells it. 6. Heavy Homing Soul Arrow — Straid of Olaphis: Defeat the Ruin Sentinels and trade their boss soul to Straid for the spell. 7. Homing Soulmass — Shaded Woods: Find the chest near Darkdiver Grandahl's location beneath the Shaded Ruins. Alternatively, purchase the spell from Weaponsmith Ornifex. 8. Homing Crystal Soulmass — Shrine of Amana: Progress past Rhoy's Resting Place toward the large circular area populated by spellcasters and Archdrake enemies. Search the broken pillars for the corpse holding the spell. 9. Soul Spear — Huntsman's Copse: Near the large bridge leading toward Undead Lockaway, search the hut beside the path and drop through the opening to reach the chest containing the spell. Grave Warden Agdayne also sells it. 10. Crystal Soul Spear — Straid of Olaphis: Obtain the Old Paledrake Soul by defeating the Duke's Dear Freja at NG+ bonfire intensity or higher. Trade the soul to Straid for the spell. You can obtain the required soul during NG+ or by using a Bonfire Ascetic on the appropriate Brightstone Cove Tseldora bonfire. 11. Shockwave — Carhillion of the Fold: Purchase the spell from Carhillion. 12. Soul Spear Barrage — Carhillion of the Fold: Purchase the spell from Carhillion. 13. Soul Shower — Straid of Olaphis: Defeat Scorpioness Najka in the Shaded Woods and trade her boss soul to Straid for the spell. 14. Soul Greatsword — Drangleic Castle: From the Central Castle Drangleic bonfire, reach the elevator room and climb the nearby ladder. Search the upper chamber containing stone soldiers for the chest holding the spell. 15. Soul Vortex — Brightstone Cove Tseldora: Search the building near Weaponsmith Ornifex and break the bookshelves concealing the spell. It can also be found in the Majula pit or purchased from Grave Warden Agdayne. 16. Soul Bolt — Drangleic Castle: After defeating the Looking Glass Knight, return toward the elevator area and search the nearby side passage for a chest containing the spell. 17. Soul Geyser — Aldia's Keep: Progress through the long hallway containing suspended cages and enemies. Near the end, enter the side room leading down to an acid pool. Search the pool for the spell, and remove vulnerable equipment before entering to prevent durability damage. 18. Magic Weapon — Carhillion of the Fold: Purchase the spell from Carhillion. 19. Great Magic Weapon — Black Gulch: Search the area containing oil pools near the beginning of Black Gulch. Enter the small cave beside the path and open the chest containing the spell. This avoids needing an alternative covenant reward or merchant acquisition. 20. Crystal Magic Weapon — Dragon Shrine: Explore the elevated paths and platforms in Dragon Shrine. Cross the narrow bridge along the upper route and carefully drop to the ledge containing the chest with the spell. 21. Strong Magic Shield — Drangleic Castle: Ride the elevator in the castle and search the upper room for the chest containing the spell. It can also be purchased from Straid of Olaphis. 22. Yearn — Carhillion of the Fold: Purchase the spell from Carhillion. 23. Hush — Lost Bastille: Defeat the Ruin Sentinels and search their boss arena for an illusory wall concealing the spell. It can also be obtained through the Way of the Blue covenant. 24. Fall Control — Weaponsmith Ornifex or Magerold of Lanafir: Purchase the spell from either merchant. 25. Hidden Weapon — Bell Keepers Covenant: Join the Bell Keepers in Belfry Luna or Belfry Sol and reach covenant rank two. This requires 30 qualifying victories. For the offline method, repeatedly defeat the Mad Warrior red phantom that can randomly appear in Belfry Sol. Rest at the nearby bonfire between attempts and return to his spawn location until enough victories have been recorded. Speak with the covenant leader to receive the spell. 26. Repair — Shaded Woods: From the Shaded Ruins bonfire, enter the ruins containing curse pots and locate the petrified Lion Clan Warrior blocking a metal chest. Use a Fragrant Branch of Yore, defeat the enemy, and open the chest to collect Repair. 27. Cast Light — Straid of Olaphis or Darkdiver Grandahl: Purchase the spell from either merchant. 28. Chameleon — Harvest Valley: Near the route leading toward Earthen Peak, find the poison-filled area containing two large dark enemies. Search the bodies in the poison mist to collect the spell. 29. Unleash Magic — Royal Sorcerer Navlaan: Find Navlaan imprisoned inside Aldia's Keep. While hollow, speak with him without releasing him and complete his assassination assignments by presenting the requested proof items. His final assignment requires the Aged Feather, which the Emerald Herald gives you during normal progression at Dragon Aerie. Return and present the feather to receive Unleash Magic without killing her. 30. Focus Souls — Shulva, Sanctum City (Crown of the Sunken King DLC): Progress through Shulva until you reach the bridge where a dragon attacks with fire. Before crossing, follow the right-hand ledge past the breakable urns. Continue along the narrow path to the corpse holding Focus Souls. 31. Soul Flash — Frozen Eleum Loyce (Crown of the Ivory King DLC): Explore Frozen Eleum Loyce until you reach the upper-level lever controlling the obstruction around an elevator. Activate the lever, then return to the previously blocked elevator area and open the accessible chest to obtain Soul Flash. Once all 31 sorceries have been collected on the same character, the trophy will unlock.
Tip
Collect purchasable spells whenever you encounter a merchant, and save boss souls until you've checked whether they can be exchanged for required magic. Completing the Bell Keepers covenant grind during your first playthrough also helps reduce the amount of work left after the main story.
Warning
Do not release Royal Sorcerer Navlaan from his cell in Aldia's Keep. Doing so can prevent you from completing his assassination questline during the current playthrough and obtaining Unleash Magic. You also need the two DLC sorceries for the PS4 version, even though they were not required for the original PS3 Platinum.
Video Guide: https://www.youtube.com/watch?v=tlElh3VW4dY&list=PLlEciSr0LRTpuiIGTajbd7iOC4Ubw7Ct7&index=2&pp=iAQB

Trophy: Selfless Giver
Max-out devotion to covenant
Type: Gold
Category: Grind
Unlock Details
Reach the maximum rank in any covenant in Dark Souls II: Scholar of the First Sin. Most covenants require repeated multiplayer victories or collectible offerings, but the Pilgrims of the Dark covenant provides a fully offline method that also contributes directly toward Master of Hexes. The recommended method is to complete the Pilgrims of the Dark covenant by finding Darkdiver Grandahl in three locations: 1. Shaded Woods — Shaded Ruins: From the Shaded Ruins bonfire, head toward the path leading to Scorpioness Najka. Search the grassy area to the right of the ruins for a hidden pit. Drop down carefully to find Darkdiver Grandahl and exhaust his dialogue. 2. Black Gulch — Hidden Ledge: Progress through Black Gulch until you reach the two large worms emerging from the walls. Carefully drop onto the hidden ledges beneath this section. Defeat the two giants in the lower cave to obtain the Forgotten Key, then return to the locked door on the upper ledge. Open it and speak with Grandahl. 3. Drangleic Castle — King's Gate: From the King's Gate bonfire, enter the large room containing stone soldiers and sealed doors. Defeat an enemy near the back-left door to activate the nearby mechanism and open the passage. Drop down into the newly accessible area and find Grandahl near the hidden bonfire. After speaking with Grandahl at all three locations, join the Pilgrims of the Dark covenant. He will allow you to enter the Dark Chasm of Old from each location by offering a Human Effigy. Complete the three Dark Chasm of Old areas by defeating their enemies, lighting the large braziers, and exiting through the fog-covered pits. After all three areas have been completed, defeat Darklurker at the end of the final dungeon. Return to Darkdiver Grandahl and speak with him to receive the rank-three covenant reward. Reaching maximum covenant rank will unlock Selfless Giver.
Tip
Completing the Pilgrims of the Dark covenant also rewards the Climax hex and provides the Darklurker Soul needed for Lifedrain Patch. Both are required for Master of Hexes, making this one of the most efficient covenant routes for the Platinum.
Warning
Entering the Dark Chasm of Old requires a Human Effigy, including when retrying after a failed attempt. Carry several before beginning the covenant questline, and bring Flame Butterflies so you can light the required braziers without relying on a nearby torch source.

Trophy: Vendrick
Defeat Vendrick
Type: Silver
Category: Combat
Unlock Details
Defeat King Vendrick in the Undead Crypt. Vendrick is an optional boss encountered after defeating Velstadt, the Royal Aegis. You'll first find him wandering around the chamber where you acquire the King's Ring. He is initially non-hostile and will not attack unless you repeatedly strike him. Although you can encounter him relatively early, defeating Vendrick is much easier after obtaining several Souls of a Giant. These special items reduce his enormous defensive resistance, allowing your attacks to deal meaningful damage. There are five obtainable Souls of a Giant: 1. Black Gulch: Find the hidden ledges below the area containing the two large wall-dwelling worms. Drop down into the lower cave and defeat the two giants guarding the Forgotten Key. The encounter rewards one Soul of a Giant. 2. Memory of Orro: After obtaining the Ashen Mist Heart, enter the Memory of Orro through the fallen giant in the Forest of Fallen Giants. Explore the memory and find the Soul of a Giant on a corpse. 3. Memory of Vammar: Enter the Memory of Vammar through the fallen giant near the area containing armored enemies and explosive barrels. Progress through the battlefield and collect the Soul of a Giant from a corpse near the far end. 4. Memory of Jeigh: Enter the Memory of Jeigh through the King's Door in the Forest of Fallen Giants. Defeat the Giant Lord and collect the Soul of a Giant found within the memory. 5. Ancient Dragon — Dragon Shrine: Return to the Ancient Dragon at the summit of Dragon Shrine and attack it to initiate the optional boss battle. Defeating the Ancient Dragon rewards the fifth Soul of a Giant. You can defeat Vendrick with four Souls of a Giant, although collecting all five reduces his defenses further and makes the battle significantly easier. Once you've collected enough Giant Souls, return to the Undead Crypt and enter Vendrick's chamber. Attack him repeatedly until he becomes hostile and the boss fight begins. Vendrick primarily uses slow but extremely powerful sword attacks. His main attacks include wide horizontal swings, overhead strikes, and sweeping combinations that can kill an unprepared character in only a few hits. The safest melee strategy is to stay close to his left leg, positioning yourself behind or beside him whenever possible. Circle around him as he attacks, dodge his sword swings, and strike during his recovery animations. Avoid standing directly in front of Vendrick, where his attacks are most dangerous. Don't become greedy with your damage, and keep enough stamina available to dodge whenever he begins another attack. After depleting his health, Vendrick will fall and the trophy will unlock.
Tip
Four Souls of a Giant provide enough damage reduction to make this fight manageable without defeating the Ancient Dragon. If you'd rather avoid one of the game's more punishing optional bosses, collect the four Souls available elsewhere and fight Vendrick with those. A fifth Soul will make the fight easier, but it isn't mandatory.
Warning
Keep your Souls of a Giant in your inventory until Vendrick has been defeated. Consuming them removes their defensive-reduction benefit and can make the fight dramatically harder. Regular Giant Lord Souls and other boss souls do not provide this effect.
Video Guide: https://www.youtube.com/watch?v=JBCdrtKuNzU&list=PLlEciSr0LRTpuiIGTajbd7iOC4Ubw7Ct7&index=7&pp=iAQB
Trophy: The Heir
See the ending
Type: Gold
Category: Ending
Unlock Details
Complete the main story and witness an ending in Dark Souls II: Scholar of the First Sin. To reach the ending, you'll need the King's Ring, the Ashen Mist Heart, and the Giant's Kinship. Once you've acquired the Ashen Mist Heart from the Ancient Dragon, return to the Forest of Fallen Giants and enter the Memory of Jeigh through the fallen giant beyond the King's Door. Progress through the memory and defeat the Giant Lord to obtain the Giant's Kinship. This key item allows you to proceed to the final confrontation in the Throne of Want. Return to Drangleic Castle and travel to the King's Gate bonfire. Equip the King's Ring and open the King's Door leading to the Throne of Want. You'll encounter the following final bosses: 1. Throne Watcher and Throne Defender: These two bosses fight together and can revive one another if you leave one alive for too long. Reduce both health bars before finishing either boss, then defeat them in quick succession to prevent a revival. 2. Nashandra: After satisfying the story requirements, you'll face Nashandra in the Throne of Want. Avoid the dark curse orbs she summons and watch for her sweeping scythe attacks and powerful ranged beam. Destroy or move away from her curse orbs before focusing on damage. 3. Aldia, Scholar of the First Sin (Conditional): If you've completed the necessary encounters with Aldia and defeated Vendrick before Nashandra, Aldia can appear as an additional final boss. Wait for his fiery aura to subside before attacking, as he takes significantly reduced damage while surrounded by flames. After defeating the required final boss encounters, interact with the throne to choose the standard ending, or select the alternative ending if you've unlocked it. Watch the ending sequence and credits to receive The Heir.
Tip
You can summon Benhart of Jugo for the Throne of Want encounters after progressing his questline. If he survives a qualifying boss victory, it can count toward the three successful summoned battles needed for Moonlight Greatsword.
Warning
Defeating the final boss does not automatically force you into New Game+. After the credits, you'll return to Majula and can continue exploring your current world. Do not select the option to begin your next journey at the Far Fire bonfire until you've completed your remaining NPC quests, collectibles, and DLC spells.
Unlock Details
Complete the main story and witness an ending in Dark Souls II: Scholar of the First Sin.
To reach the ending, you'll need the King's Ring, the Ashen Mist Heart, and the Giant's Kinship. Once you've acquired the Ashen Mist Heart from the Ancient Dragon, return to the Forest of Fallen Giants and enter the Memory of Jeigh through the fallen giant beyond the King's Door.
Progress through the memory and defeat the Giant Lord to obtain the Giant's Kinship. This key item allows you to proceed to the final confrontation in the Throne of Want.
Return to Drangleic Castle and travel to the King's Gate bonfire. Equip the King's Ring and open the King's Door leading to the Throne of Want.
You'll encounter the following final bosses:
After defeating the required final boss encounters, interact with the throne to choose the standard ending, or select the alternative ending if you've unlocked it. Watch the ending sequence and credits to receive The Heir.
Tip
You can summon Benhart of Jugo for the Throne of Want encounters after progressing his questline. If he survives a qualifying boss victory, it can count toward the three successful summoned battles needed for Moonlight Greatsword.
Warning
Defeating the final boss does not automatically force you into New Game+. After the credits, you'll return to Majula and can continue exploring your current world. Do not select the option to begin your next journey at the Far Fire bonfire until you've completed your remaining NPC quests, collectibles, and DLC spells.
Trophy: Abysmal Covenant
Discover the abysmal covenant
Type: Bronze
Category: Misc
Unlock Details
Discover the Pilgrims of the Dark covenant by finding Darkdiver Grandahl at all three of his hidden locations throughout Drangleic. Grandahl is an elderly NPC who appears in secluded underground chambers. You must speak with him at all three locations before he'll allow you to join the covenant. The locations can be visited in any order. 1. Shaded Woods — Shaded Ruins: From the Shaded Ruins bonfire, head toward the area containing the ruined stone structures and Lion Clan Warriors. Before reaching the uphill path leading toward Scorpioness Najka, look along the right-hand side for an area of tall grass. Carefully explore the ground here to find a concealed pit. Drop into the chamber below and speak with Darkdiver Grandahl until his dialogue is exhausted. 2. Black Gulch — Hidden Chamber: Progress through Black Gulch until you reach the section where two large worms emerge from openings in the cliff wall. Between these openings, look over the edge to find a narrow ledge below. Drop onto it carefully, then descend to the next ledge. You'll find a locked door requiring the Forgotten Key. If you don't already have the key, continue descending into the cave containing two giants and defeat them to obtain it. Return to the locked door, open it, and speak with Grandahl inside. 3. Drangleic Castle — King's Gate: Travel to the King's Gate bonfire and enter the nearby chamber containing several stone soldiers and sealed doors. Defeat a stone soldier near the door in the back-left corner to activate the mechanism and open it. Pass through the doorway and drop into the hidden chamber below. Activate the nearby bonfire and continue along the passage to find Grandahl. Speak with him until his dialogue is exhausted. After finding Grandahl at all three locations, he will offer you membership in the Pilgrims of the Dark covenant. Accept his invitation to unlock Abysmal Covenant.
Tip
You'll need to progress this covenant to rank three for the Platinum because the Climax hex and Darklurker Soul are required for Master of Hexes. After joining, you can offer Human Effigies to Grandahl to enter the three Dark Chasm of Old dungeons. Completing all three and defeating Darklurker will also contribute toward Selfless Giver.
Warning
Simply finding Grandahl at one location is not enough. You must discover and speak with him at all three locations before the covenant invitation becomes available. The Forgotten Key from the giants beneath Black Gulch is required to access his chamber in that area.
Trophy: Brilliant Covenant
Discover a most brilliant covenant
Type: Bronze
Category: Misc
Unlock Details
Discover the Heirs to the Sun covenant by finding the Altar of Sunlight in Harvest Valley. To reach Harvest Valley, travel from Majula through Huntsman's Copse and defeat the Skeleton Lords. Continue into Harvest Valley and progress toward the entrance to Earthen Peak. Near the end of Harvest Valley, you'll encounter an area containing two large enemies standing in a poison-filled pit. Cross the nearby wooden bridge and follow the side path to the left, rather than continuing toward the Covetous Demon. Follow the narrow path into a small clearing containing a stone altar illuminated by sunlight. Approach the Altar of Sunlight and interact with it to receive the option to join the Heirs to the Sun covenant. Accept the invitation to join the covenant and unlock Brilliant Covenant.
Tip
The Heirs to the Sun covenant is important for the Platinum. You'll need to offer 30 Sunlight Medals to reach rank three and obtain Sunlight Spear, a miracle required for Master of Miracles. Begin collecting medals as soon as possible through cooperative boss encounters or offline farming from Falconers.
Trophy: Clangorous Covenant
Discover the clangorous covenant
Type: Bronze
Category: Misc
Unlock Details
Discover the Bell Keepers covenant by speaking with its leader in either Belfry Luna or Belfry Sol. Both locations require a Pharros' Lockstone to open their entrances. The earliest option is Belfry Luna in the Lost Bastille: Progress through the Lost Bastille and defeat the Ruin Sentinels to reach the Servants' Quarters bonfire. Climb down the ladder in the bonfire room to find a Pharros' Contraption. Insert a Pharros' Lockstone into the mechanism, then strike the glowing face revealed on the wall to open the hidden passage. Enter Belfry Luna and speak with the small Bell Keeper standing near the entrance. Exhaust his dialogue until he offers you the opportunity to join the Bell Keepers covenant. Alternatively, you can access Belfry Sol from Iron Keep. Progress beyond the Smelter Demon area until you reach the large lava chamber containing heavily armored enemies. Find the side room containing another Pharros' Contraption, activate it with a Lockstone, and enter Belfry Sol to speak with its Bell Keeper. Discovering the covenant and receiving the invitation will unlock Clangorous Covenant.
Tip
You'll eventually need Bell Keepers rank two to obtain the Hidden Weapon sorcery for Master of Sorcery. This requires 30 qualifying victories, which can be earned offline by repeatedly defeating the Mad Warrior phantom that occasionally appears in Belfry Sol. Joining the covenant now saves a return trip when you're ready to begin that grind.
Trophy: Covenant of Ancients
Discover an ancient covenant
Type: Bronze
Category: Misc
Unlock Details
Discover the Dragon Remnants covenant by obtaining the Petrified Egg from Dragon Shrine and delivering it to Magerold of Lanafir in Iron Keep. First, progress through the main story until you've obtained the King's Ring and reached Aldia's Keep. Defeat the Guardian Dragon, travel through Dragon Aerie, and enter Dragon Shrine. Once inside Dragon Shrine, locate the Petrified Egg: From the Dragon Shrine bonfire, climb the first sets of stairs toward the upper shrine. Look for a broken section of walkway with wooden crates along the right-hand side. Break the crates and carefully drop onto the hidden ledge below, where you'll find two treasure chests. Be cautious, as one is a Mimic. Follow the hidden route upward through the tower, defeating the enemies guarding the passage. Continue until you reach the chamber containing a large Petrified Egg resting on a pedestal. Collect it. After obtaining the egg, travel to Iron Keep and warp to the Threshold Bridge bonfire. Cross the bridge into the fortress, then take the hallway to the right to find Magerold of Lanafir. Speak with Magerold while carrying the Petrified Egg. He will recognize it and offer you the opportunity to join the Dragon Remnants covenant. Accept his invitation to unlock Covenant of Ancients.
Tip
You don't need to defeat the Ancient Dragon to obtain the Petrified Egg or join this covenant. The egg can be collected while exploring Dragon Shrine during normal story progression.
Trophy: Covenant of the Fittest
Discover the covenant of the fittest
Type: Bronze
Category: Misc
Unlock Details
Discover the Company of Champions covenant by interacting with the Victor's Stone monument in Majula. From the Majula bonfire, head toward Sweet Shalquoir's house, where the talking cat runs her shop. Follow the narrow path uphill beside the cliff, leading away from the main village buildings. At the top of the path, you'll find a large stone monument overlooking the sea. This is the Victor's Stone, the shrine used to join the Company of Champions covenant. Interact with the monument and proceed through the dialogue until you're offered covenant membership. Accept the invitation to join the Company of Champions and unlock the trophy.
Tip
You can earn this trophy almost immediately after reaching Majula. If you're planning to farm rare item drops later, the Company of Champions can be useful because ordinary enemies continue respawning instead of eventually disappearing after repeated kills.
Warning
Joining the Company of Champions makes enemies more dangerous and disables cooperative summoning, including NPC summons. This can interfere with the Lucatiel and Moonlight Greatsword trophies, which require NPCs to survive boss battles. Leave the covenant after earning the trophy unless you're deliberately using it for a specific farming method. Speak with Sweet Shalquoir in Majula to abandon your covenant.
Trophy: Covenant of the Meek
Discover the covenant of the meek
Type: Bronze
Category: Misc
Unlock Details
Discover the Way of Blue covenant by speaking with Crestfallen Saulden in Majula. When you first arrive in Majula from Things Betwixt, head toward the large monument overlooking the sea. You'll find Crestfallen Saulden sitting near the base of the monument, which records the total number of player deaths. Speak with Saulden and continue talking until you've exhausted his initial dialogue. He will explain the Way of Blue covenant and offer you the opportunity to join. Accept his invitation to join the Way of Blue and unlock Covenant of the Meek. This covenant is designed to assist players who are invaded by hostile players. While you're a member, eligible Blue Sentinels can automatically be summoned to defend you during online invasions.
Tip
Saulden also teaches the Welcome gesture, required for Gesture Maestro. Make sure to learn it before leaving Majula. You can earn this trophy immediately after reaching the game's central hub, making it one of the easiest covenant trophies to obtain.
Trophy: Garrulous Miser
Inherit Laddersmith Gilligan's equipment
Type: Silver
Category: Misc
Unlock Details
Inherit equipment from Laddersmith Gilligan by purchasing his most expensive ladder in Majula. Gilligan is initially found in Earthen Peak, where he offers ladder-building services. After progressing through Earthen Peak and defeating Mytha, the Baneful Queen, he'll relocate to Majula beside the large pit. To earn the trophy, follow these steps: 1. Find Gilligan — Earthen Peak: From the Central Earthen Peak bonfire, climb the nearby stairs and locate the wooden railing along the exterior of the tower. Break the railing to access a narrow ledge, then follow it around the building to find Gilligan sitting outside. 2. Progress Through Earthen Peak: Continue exploring the tower and defeat Mytha, the Baneful Queen. Gilligan will eventually relocate to Majula after this encounter, even if you didn't use his ladder services in Earthen Peak. 3. Find Gilligan — Majula: Return to Majula and head toward the large pit near Sweet Shalquoir's house. Gilligan will be sitting beside the opening, offering to build ladders into the depths below. 4. Purchase the 12,000-Soul Ladder: Speak with Gilligan and select his ladder-building service. Choose the most expensive option, costing 12,000 souls. This installs the longest ladder, providing access to the lower sections of the pit. 5. Speak with Gilligan Again: After purchasing the ladder, talk to Gilligan until he gives you his equipment, including the Melu Scimitar. Receiving his reward will unlock Garrulous Miser.
Tip
The 12,000-soul ladder provides a convenient route toward The Gutter and Black Gulch, making it useful for progressing toward Gulch Bonfire and several collectible trophies. You can safely wait until Gilligan relocates to Majula before spending the souls required for this trophy.
Warning
The cheaper ladder options do not satisfy the requirement on their own. Make sure you purchase the 12,000-soul ladder and speak with Gilligan afterward to receive his reward.
Video Guide: https://www.youtube.com/watch?v=azWg3w5vNEg&list=PLlEciSr0LRTpuiIGTajbd7iOC4Ubw7Ct7&index=12&pp=iAQB

Trophy: Gnawing Covenant
Discover the covenant of rodents
Type: Bronze
Category: Misc
Unlock Details
Discover the Rat King covenant by defeating either the Royal Rat Vanguard in the Grave of Saints or the Royal Rat Authority in the Doors of Pharros, then speaking with the Rat King. The easiest route is through the Grave of Saints, which can be accessed by descending into the large pit in Majula. Purchase the Silvercat Ring from Sweet Shalquoir to reduce fall damage, or use the ladders installed by Laddersmith Gilligan once he has relocated to Majula. Carefully descend into the pit until you reach the entrance to the Grave of Saints. Progress through the underground tunnels and chambers until you reach the Royal Rat Vanguard boss arena. The Royal Rat Vanguard encounter begins with a group of ordinary rats attacking you. Defeat several of them until the actual Royal Rat Vanguard appears among the remaining enemies. Look for the rat with the distinctive raised fur along its back to identify the boss. Focus your attacks on the Royal Rat Vanguard while keeping your distance from the surrounding rats. Once the boss is defeated, the remaining enemies will retreat. Continue through the passage beyond the arena to find the Rat King sitting atop a pile of bones. Speak with him until he offers you the opportunity to join his covenant. Accept the invitation to join the Rat King covenant and unlock Gnawing Covenant. Alternatively, you can earn the trophy by defeating the Royal Rat Authority in the Doors of Pharros and speaking with the Rat King found beyond that boss arena.
Tip
The Grave of Saints route is generally easier because the Royal Rat Vanguard is a less demanding encounter than the Royal Rat Authority. Keep the Royal Rat Vanguard Soul after the battle, as you'll need to trade it to Straid of Olaphis for the Toxic Mist pyromancy required for Master of Pyromancy.
Trophy: Holder of the Fort
Inherit Captain Drummond's equipment
Type: Silver
Category: Misc
Unlock Details
Defeat the Giant Lord in the Memory of Jeigh, then speak with Captain Drummond in the Memory of Vammar to inherit his equipment. First, progress through the main story until you obtain the King's Ring from the Undead Crypt and the Ashen Mist Heart from the Ancient Dragon in Dragon Shrine. Return to the Forest of Fallen Giants and travel to the Cardinal Tower bonfire. To find Captain Drummond: From the Cardinal Tower bonfire, climb down the ladder and follow the route toward the courtyard where you first encountered Mild-Mannered Pate. Pass through the nearby stone archway and turn right toward the large fallen giant surrounded by armored enemies and explosive barrels. Approach the fallen giant and interact with it while carrying the Ashen Mist Heart to enter the Memory of Vammar. Once inside the memory, proceed through the opening corridor filled with fallen soldiers. You'll find Captain Drummond resting near the beginning of the area. Speak with Drummond until his dialogue repeats. He also teaches the Hurrah! gesture, required for Gesture Maestro. Next, you must defeat the Giant Lord. Return to the Forest of Fallen Giants and locate the King's Door near the Cardinal Tower area. Equip the King's Ring to open the door and access the route to the Memory of Jeigh. Enter the memory using the Ashen Mist Heart, proceed through the battlefield, and defeat the Giant Lord. Watch for the giant's heavy sword attacks and use the surrounding terrain to avoid incoming projectiles while approaching. Once the Giant Lord has been defeated, return to the Memory of Vammar and speak with Captain Drummond again. He will reward you with his equipment, unlocking Holder of the Fort.
Tip
Learn the Hurrah! gesture from Drummond during your first visit so you don't need to remember it later. His equipment reward is tied to defeating the Giant Lord, so you can complete the trophy immediately after that encounter.
Video Guide: https://www.youtube.com/watch?v=03cXHqzPxzs&list=PLlEciSr0LRTpuiIGTajbd7iOC4Ubw7Ct7&index=8&pp=iAQB0gcJCUcMAYcqIYzv

Trophy: Protector Covenant
Discover the covenant of the protectors
Type: Bronze
Category: Misc
Unlock Details
Discover the Blue Sentinels covenant by speaking with Blue Sentinel Targray in the Cathedral of Blue while carrying a Token of Fidelity. Begin in Majula and travel through the underground passage leading to Heide's Tower of Flame. Progress through the area until you reach the large circular platform where the paths divide. Take the route leading toward the Cathedral of Blue, rather than the Dragonrider boss. Fight your way past the Old Knights and the Guardian Dragon guarding the drawbridge in the PS4 Scholar of the First Sin edition. Lower the drawbridge and enter the cathedral to confront the Old Dragonslayer. Defeat the Old Dragonslayer, then continue through the doorway beyond his arena. You'll find Blue Sentinel Targray standing on a balcony overlooking the sea. Before Targray will allow you to join the covenant, you must have a Token of Fidelity in your inventory. You can obtain one through either of these methods: 1. Offline — Huntsman's Copse: Travel to the Bridge Approach bonfire and locate the elevated wooden bridge nearby. Look below the bridge for a small isolated stone platform holding a corpse. Carefully drop onto the platform and collect the Token of Fidelity. 2. Online — Cooperative Boss Fight: Use the White Sign Soapstone to assist another player with a boss fight. Successfully completing the encounter as a white phantom rewards a Token of Fidelity. Return to Targray with the token, exhaust his dialogue, and accept his invitation to join the Blue Sentinels covenant to unlock Protector Covenant.
Tip
The Token of Fidelity found in Huntsman's Copse allows you to earn this trophy completely offline. Targray also teaches the Duel Bow gesture, required for Gesture Maestro, so learn it while you're visiting the cathedral.
Warning
Targray will refuse to offer covenant membership if you don't have a Token of Fidelity. Make sure you're carrying one before speaking with him. The Guardian Dragon guarding the cathedral entrance is also a PS4 Scholar-specific encounter, so don't expect the original PS3 enemy layout.
Trophy: Reflections on Disembodiment
Inherit equipment from the head of Vengarl
Type: Silver
Category: Misc
Unlock Details
Inherit equipment from the Head of Vengarl by finding him in Shaded Woods and exhausting his dialogue. Vengarl is a disembodied warrior whose head rests among ruined stones in the fog-covered section of Shaded Woods. You do not need to fight his body or complete any boss encounters to earn this trophy. Follow these steps: 1. Reach Shaded Woods: From Majula, travel toward the passage blocked by Rosabeth of Melfia. Use a Fragrant Branch of Yore to free her, then activate the nearby lever to open the gate. Continue through the area until you reach the Ruined Fork Road bonfire. 2. Enter the Foggy Forest: From the Ruined Fork Road bonfire, take the passage leading into the heavily fog-covered forest. Visibility is extremely limited, and invisible enemies patrol the area. 3. Follow the Left Wall: As you enter the forest, stay close to the left-hand wall and follow it through the fog. Continue along the edge until you find a narrow opening leading into a small clearing surrounded by ruined stone structures. 4. Find the Head of Vengarl: Inside the clearing, look for a pile of rubble containing a severed warrior's head. Approach the head and interact with it to begin speaking with Vengarl. 5. Exhaust His Dialogue: Continue talking with Vengarl until he begins repeating himself. He will eventually offer you his equipment, including Vengarl's Helm. Accept the reward to unlock Reflections on Disembodiment.
Tip
Vengarl also teaches the Decapitate gesture, required for Gesture Maestro. Make sure to learn it while you're here. His location is easy to miss because of the thick fog, so following the left wall from the entrance is the simplest way to reach him without wandering through the entire forest.
Warning
The foggy forest contains enemies that are difficult to see until they're close enough to attack. Avoid rushing blindly through the area, and keep your shield ready while following the wall toward Vengarl's clearing.
Video Guide: https://www.youtube.com/watch?v=dZMp1RameyQ&list=PLlEciSr0LRTpuiIGTajbd7iOC4Ubw7Ct7&index=6&pp=iAQB
Trophy: Sanguinary Covenant
Discover the covenant of the bloodthirsty
Type: Bronze
Category: Misc
Unlock Details
Discover the Brotherhood of Blood covenant by speaking with Titchy Gren in Undead Purgatory while carrying a Token of Spite. Begin in Huntsman's Copse and progress through the area until you reach the Undead Lockaway bonfire. From here, follow the path leading toward the large wooden suspension bridge spanning a deep ravine. Cross the bridge carefully, defeating the enemies guarding the approach, and enter Undead Purgatory. Continue through the fog gate to fight the Executioner's Chariot. The Executioner's Chariot is an unusual boss encounter that begins with the chariot racing around a circular corridor while skeletons and necromancers occupy the passage. For a reliable strategy, proceed through the corridor while using the alcoves along the walls to avoid the passing chariot. Defeat the necromancers to stop them from repeatedly resurrecting the skeletons, then reach the lever near the end of the corridor. Pull the lever to lower the gate and stop the chariot. Once the horse crashes, finish the remaining boss encounter to claim victory. After defeating the boss, enter the small room beyond the arena. You'll find Titchy Gren near the Undead Purgatory bonfire. To join the Brotherhood of Blood, you'll need a Token of Spite. One can be obtained offline from a chest along the descent into the Majula pit, near the route toward The Gutter. Alternatively, you can receive one by successfully invading and defeating another player. Speak with Titchy Gren while carrying the token, exhaust his dialogue, and accept his invitation to join the Brotherhood of Blood covenant. The trophy will unlock when you join.
Tip
You only need to discover the Brotherhood of Blood for this trophy. You do not need to rank up the covenant, as the Great Chaos Fireball pyromancy can be purchased from Chancellor Wellager during NG++. Titchy Gren also sells several pyromancies required for Master of Pyromancy, so check his inventory while you're here.

Trophy: Smith for Life
Inherit Steady Hand McDuff's equipment
Type: Silver
Category: Misc
Unlock Details
Inherit equipment from Steady Hand McDuff by giving him the Dull Ember and spending at least 14,000 souls on his blacksmith services. McDuff is located in the Lost Bastille, inside a workshop near the beginning of the area. You'll need to gain access to his workshop, obtain the Dull Ember, and use his services before he'll reward you. Follow these steps: 1. Find McDuff — Lost Bastille: From The Tower Apart bonfire, proceed through the fortress until you reach the courtyard containing several dogs and a staircase guarded by an enemy. McDuff's workshop is behind a locked door near the bottom of the stairs. You can enter using the Bastille Key or by destroying the cracked wall beside his workshop. 2. Break Open the Workshop: If you don't have the Bastille Key, lure the enemy at the top of the nearby staircase into knocking an explosive barrel down the stairs. Make sure the barrel reaches the cracked wall beside McDuff's workshop and explodes, opening a passage into the building. Activate the McDuff's Workshop bonfire inside. 3. Collect the Dull Ember — The Tower Apart: In the PS4 Scholar of the First Sin edition, the Dull Ember is found in a metal chest beside The Tower Apart bonfire in the Lost Bastille. To reach this bonfire, defeat the Pursuer in the Forest of Fallen Giants and interact with the bird's nest beyond his arena. A giant eagle will carry you to The Tower Apart. Open the chest beside the bonfire to obtain the Dull Ember. 4. Give McDuff the Dull Ember: Return to McDuff's Workshop and speak with him. Give him the Dull Ember to unlock his weapon infusion services. You can also light the nearby sconce with a torch and reload the area to make him move away from the chest he's sitting on. 5. Spend 14,000 Souls on Smithing: Use McDuff's services to reinforce or infuse weapons and equipment. Spend a combined total of at least 14,000 souls on these services. Purchasing ordinary items from his shop does not count toward the requirement. 6. Claim His Reward: After spending the required amount, select the Talk option and continue speaking with McDuff until he gives you a Titanite Slab. Receiving his reward will unlock Smith for Life.
Tip
Combine this trophy with Supreme Weapon by using McDuff to reinforce a weapon you're already upgrading toward its maximum level. The Titanite Slab he rewards you with is also useful for reaching +10 on a standard weapon.
Warning
The Dull Ember was located in Iron Keep in the original PS3 version, but it has been moved to The Tower Apart in the PS4 Scholar of the First Sin edition. Do not waste time searching Iron Keep for it. Also, make sure you're spending souls on reinforcing or infusing equipment rather than simply purchasing items from McDuff.
Video Guide: https://www.youtube.com/watch?v=WF-HDL50bS4&list=PLlEciSr0LRTpuiIGTajbd7iOC4Ubw7Ct7&index=9&pp=iAQB
Trophy: Supreme Weapon
Reinforce a weapon to its limit
Type: Silver
Category: Misc
Unlock Details
Fully reinforce any weapon using a blacksmith. The simplest method is upgrading a standard weapon to +10, which requires the following materials: 6 Titanite Shards to reach +3. 6 Large Titanite Shards to reach +6. 6 Titanite Chunks to reach +9. 1 Titanite Slab to reach +10. Visit Blacksmith Lenigrast in Majula or Steady Hand McDuff in the Lost Bastille and select the Reinforce Weapon option. Continue upgrading your chosen weapon until it reaches +10, and the trophy will unlock. Special weapons that use Twinkling Titanite or Petrified Dragon Bones can also earn the trophy when upgraded to their maximum level of +5.
Tip
Choose a standard weapon you actually plan to use throughout the game. The Fire Longsword found in the Forest of Fallen Giants is a convenient early option. Stone Trader Chloanne eventually sells the required standard upgrade materials, making cleanup easier if you're missing anything.
Trophy: This is Dark Souls
Die for the first time
Type: Bronze
Category: Misc
Unlock Details
Die for the first time. Any death will count, whether you're defeated by an enemy, fall from a cliff, or discover that an innocent-looking treasure chest has teeth. The trophy unlocks automatically after your first death.
Tip
Don't worry about deliberately earning this one. Drangleic has an excellent track record of introducing new players to the floor.
Trophy: Ancient Dragon
Acquire Ashen Mist Heart
Type: Silver
Category: Story
Unlock Details
Acquire the Ashen Mist Heart from the Ancient Dragon in Dragon Shrine. After obtaining the King's Ring from the Undead Crypt, return to the Ruined Fork Road bonfire in Shaded Woods. Take the central path and equip the King's Ring to open the sealed King's Door leading toward Aldia's Keep. Progress through the following areas: Aldia's Keep: Explore the mansion and defeat the Guardian Dragon boss to unlock the path forward. Dragon Aerie: Cross the suspended bridges and navigate the rocky paths leading through the dragon nesting grounds. Dragon Shrine: Fight or carefully navigate past the powerful Dragon Knights and continue climbing the shrine until you reach the Ancient Dragon at the summit. Approach the Ancient Dragon and speak with it. The dragon will give you the Ashen Mist Heart, unlocking the trophy. The Ashen Mist Heart allows you to enter the memories of fallen giants, which are essential for progressing toward the game's ending.
Tip
You don't need to fight the Ancient Dragon to earn this trophy. Simply speaking with it is enough. Save the optional boss fight for later if you want the additional Soul of a Giant to make Vendrick easier.
Warning
While exploring Aldia's Keep, do not pull the lever that releases Royal Sorcerer Navlaan from his magical prison. His questline provides spells needed for Master of Sorcery and Master of Pyromancy, and releasing him can prevent you from completing those assignments during the current playthrough.

Trophy: Brightstone Bonfire
Light the primal bonfire in Brightstone Cove Tseldora
Type: Silver
Category: Story
Unlock Details
Defeat The Duke's Dear Freja in Brightstone Cove Tseldora and light the primal bonfire beyond the boss area. To reach Brightstone Cove Tseldora, begin in Majula and travel toward the blocked passage leading to Shaded Woods. Use a Fragrant Branch of Yore to free Rosabeth of Melfia, then activate the mechanism behind her to open the route. Progress through the following areas: 1. Shaded Woods: Navigate the fog-covered forest and the Shaded Ruins, then defeat Scorpioness Najka. 2. Doors of Pharros: Continue through the underground passages inhabited by Gyrm enemies. The Royal Rat Authority is optional and does not need to be defeated to reach Brightstone Cove Tseldora. 3. Brightstone Cove Tseldora: Explore the military encampment, defeat the Prowling Magus and Congregation, and continue through the spider-infested buildings and descending pathways toward The Duke's Dear Freja. The Duke's Dear Freja is a massive two-headed spider accompanied by smaller spiders. Her armored body is resistant to direct attacks, so focus your damage on either of her exposed heads. Freja attacks with sweeping legs, biting strikes, and a devastating beam of energy. Stay mobile and watch for the beam's windup, then move around her body to avoid the attack and reach the opposite head. Smaller spiders can overwhelm you if ignored. Carrying a lit torch helps keep ordinary spiders away in the Scholar of the First Sin edition, giving you more room to concentrate on the boss. After defeating Freja, continue into the passage beyond her arena and defeat Duke Tseldora if necessary. Proceed to the primal bonfire and light it to unlock Brightstone Bonfire.
Tip
Benhart of Jugo can be summoned for the Prowling Magus and Congregation fight earlier in Brightstone Cove Tseldora after progressing his dialogue near Rosabeth. Keeping him alive through that battle counts toward the three successful summoned victories required for Moonlight Greatsword.
Warning
Defeating Freja is not the final step. Make sure you reach and light the primal bonfire beyond the boss area before leaving Brightstone Cove Tseldora. Also, collect the Great Soul after the Freja encounter, as it is separate from her regular boss soul.
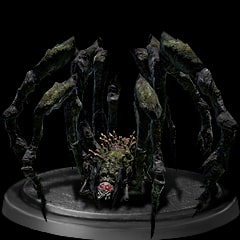
Trophy: Change of Clothes
Give Rosabeth of Melfia something to wear
Type: Silver
Category: Story
Unlock Details
Free Rosabeth of Melfia from petrification and give her a piece of equipment to wear. From Majula, follow the path toward the entrance to Shaded Woods, near the passage connecting Majula to Things Betwixt. You'll encounter Benhart of Jugo sitting beside the path, complaining about a statue blocking the way. Continue past Benhart to find Rosabeth, who has been turned to stone directly in front of a lever. Use a Fragrant Branch of Yore to restore her to normal. Speak with Rosabeth until she asks for clothing. Open the equipment selection menu that appears and give her any wearable armor piece you no longer need. Once she accepts the clothing, the trophy will unlock. Rosabeth will eventually relocate to Majula, where she becomes a pyromancy merchant.
Tip
Give Rosabeth an inexpensive piece of equipment rather than something valuable. You'll need to free her to progress into Shaded Woods anyway, and helping her also contributes toward Gathering of Exiles. She sells several pyromancies required for Master of Pyromancy, so check her inventory once she relocates.
Warning
Any equipment you give Rosabeth is permanently transferred to her. Make sure you aren't handing over something you want to keep.

Trophy: Gulch Bonfire
Light the primal bonfire in the Black Gulch
Type: Silver
Category: Story
Unlock Details
Defeat The Rotten in Black Gulch and light the primal bonfire beyond its arena. Begin in Majula and descend into the large pit near Sweet Shalquoir's house. There are two primary ways to reach the lower areas: Purchase the Silvercat Ring from Sweet Shalquoir to reduce fall damage, then carefully descend using the platforms along the walls. Progress through Earthen Peak until Laddersmith Gilligan relocates to Majula, then pay him to install ladders that provide safer access to the pit. Continue downward through the Grave of Saints or take the lower route toward The Gutter. Navigate The Gutter's wooden platforms, ladders, and dark passageways until you reach Black Gulch. Black Gulch is a short but dangerous area filled with poison-spitting statues, oil pools, and enemies hiding along the cliffs. Break the poison statues as you advance, carry Poison Moss for curing poison, and use a torch to help spot hidden ledges and enemies. At the end of Black Gulch, enter the boss arena to fight The Rotten. The Rotten is a large, slow-moving enemy that deals heavy damage with its massive cleaver. Its attacks include wide horizontal swings, overhead slams, a dangerous grab, and a dark-energy blast. The arena also contains burning oil patches that can quickly drain your health if you stand in them. Stay relatively close to the boss, dodge around its weapon attacks, and strike during the recovery after its heavier swings. Avoid attacking repeatedly without leaving enough stamina to escape. Ranged spells and poison damage can also make the encounter easier. After defeating The Rotten, proceed into the cave beyond the arena and light the primal bonfire to unlock the trophy.
Tip
Lucatiel of Mirrah can be summoned for this fight after speaking with her on a hidden ledge near the beginning of Black Gulch. Her summon sign appears near the Hidden Chamber bonfire, which is accessed through a petrified statue blocking the passage. Keep her alive through the battle to earn another successful summon toward the Lucatiel trophy.
Warning
Do not confuse the ordinary bonfires in Black Gulch with the primal bonfire required for this trophy. You must defeat The Rotten and activate the primal bonfire beyond the boss arena.
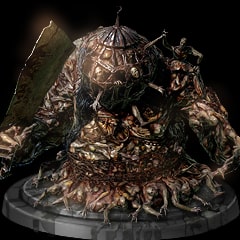
Trophy: Iron Keep Bonfire
Light the primal bonfire in the Iron Keep
Type: Silver
Category: Story
Unlock Details
Defeat the Old Iron King in Iron Keep and light the primal bonfire beyond his arena. To reach Iron Keep, begin in Majula and take the underground passage toward Heide's Tower of Flame. Defeat the Dragonrider and speak with Licia of Lindeldt until she agrees to relocate. Return to Majula and find Licia near the circular passage mechanism. Pay her 2,000 souls to rotate the passage and unlock the route toward Huntsman's Copse. Progress through the following areas: 1. Huntsman's Copse: Explore the forest and defeat the Skeleton Lords to open the route toward Harvest Valley. 2. Harvest Valley: Work through the poison-filled mining area, defeat the Covetous Demon, and enter Earthen Peak. 3. Earthen Peak: Navigate the tower and defeat Mytha, the Baneful Queen. Burning the windmill mechanism near the Central Earthen Peak bonfire will drain most of the poison from her arena, making the fight considerably easier. 4. Iron Keep: Cross the lava-filled fortress, defeat the optional Smelter Demon if desired, and continue toward the Old Iron King. The Old Iron King attacks from the lava surrounding a small stone platform. His primary attacks include sweeping arm strikes, heavy fist slams, fire breath, and a powerful ranged beam. Stay near the central structure for cover when possible, but watch for attacks that can reach through or around it. When the boss slams his fists onto the platform, dodge the impact and attack his exposed hands. Ranged magic and bows also work well, allowing you to deal damage between his attacks without approaching the edge. Be especially careful of the opening in the platform near the right-hand side of the arena. Falling into the lava will kill you regardless of how much health you have. After defeating the Old Iron King, enter the passage beyond the arena and light the primal bonfire to unlock the trophy.
Tip
The Smelter Demon is optional for story progression, but defeating him gives you an opportunity to summon Lucatiel of Mirrah for one of her required boss victories. Make sure you've spoken with her in Earthen Peak before attempting the fight, and keep her alive until the boss is defeated.
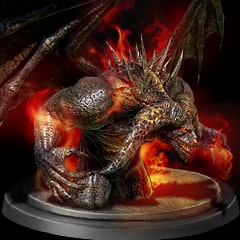
Trophy: King's Ring
Acquire the King's Ring
Type: Silver
Category: Story
Unlock Details
Acquire the King's Ring from the Undead Crypt during the main story. After defeating the Looking Glass Knight in Drangleic Castle, continue through Shrine of Amana and defeat the Demon of Song. Proceed into the Undead Crypt and work your way through the area until you reach Velstadt, the Royal Aegis. Defeat Velstadt and enter the chamber beyond his arena. You'll find King Vendrick wandering around the room. Ignore him for now and continue toward the far end of the chamber, where the King's Ring rests on a discarded set of armor. Pick up the ring to unlock the trophy. The King's Ring allows you to open special King's Doors throughout Drangleic, granting access to important areas needed to finish the story.
Tip
Equip the King's Ring whenever you encounter a large sealed door bearing the King's symbol. You'll need it to access the route toward Aldia's Keep and eventually the Throne of Want.
Warning
Do not attack Vendrick when you first encounter him. His defenses are exceptionally high without Souls of a Giant in your inventory, making an early fight unnecessarily difficult. Return once you've collected several Giant Souls.
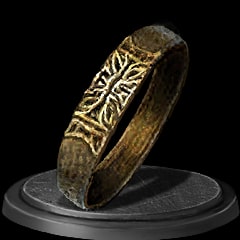
Trophy: Last Giant
Defeat the Last Giant
Type: Bronze
Category: Story
Unlock Details
Defeat the Last Giant in the Forest of Fallen Giants. From the Cardinal Tower bonfire, progress through the fortress and surrounding ruins until you reach the large elevator leading down into an underground chamber. Ride the elevator to the bottom and enter the boss arena to confront the Last Giant. The Last Giant primarily attacks using large sweeping arm movements, heavy stomps, and powerful close-range strikes. Despite his intimidating size, his attacks are relatively slow and can be avoided by watching his movements. For a reliable strategy, stay close to his legs and attack his ankles between stomps. When he lifts a foot, immediately move away or dodge to avoid being crushed. As his health decreases, he tears off one of his arms and uses it as a weapon, extending the range of his attacks. Continue attacking when safe, preserve enough stamina to dodge, and defeat him to unlock the trophy.
Tip
If you've spoken with Mild-Mannered Pate and exhausted his dialogue earlier in the Forest of Fallen Giants, you can summon him for assistance against the Last Giant. Keep your attacks controlled rather than exhausting your entire stamina bar, especially when fighting near the boss's feet.
Trophy: Looking Glass Knight
Defeat Looking Glass Knight
Type: Silver
Category: Story
Unlock Details
Defeat the Looking Glass Knight in Drangleic Castle. After collecting the four Great Souls and lighting their associated primal bonfires, return to the Ruined Fork Road bonfire in Shaded Woods. Take the left-hand path leading toward the Shrine of Winter and pass through the shrine to reach the road toward Drangleic Castle. Alternatively, the Shrine of Winter can be opened by meeting the required soul-memory threshold for your current playthrough. Make your way through Drangleic Castle, activating the doors and golem mechanisms by defeating enemies nearby. Continue through the castle until you reach the King's Passage, where the Looking Glass Knight waits beyond the boss fog. The Looking Glass Knight is a heavily armored boss wielding a large sword and a reflective shield. His attacks include powerful sword combinations, lunging strikes, and lightning-based attacks. For melee builds, stay close enough to bait his sword swings, then dodge and attack during his recovery. Avoid attacking directly into his shield, as many attacks will be blocked. For ranged or magic builds, wait until the boss lowers his shield or finishes an attack animation before casting. His reflective shield can deflect projectiles, making careless spellcasting both ineffective and potentially dangerous. During the fight, the Looking Glass Knight can summon an additional enemy through his shield. Depending on online activity, this may be an NPC phantom or another player. Defeat the summoned enemy quickly if it becomes troublesome, or focus on finishing the boss if his health is nearly depleted. Once the Looking Glass Knight is defeated, the trophy will unlock automatically.
Tip
Benhart of Jugo can be summoned for this battle after speaking with him near the Central Castle Drangleic bonfire. His summon sign appears outside the boss arena. Keeping him alive through the fight contributes toward Moonlight Greatsword, so take advantage of this opportunity if you still need successful Benhart summons.
Trophy: Self Recollection
Reclaim flesh and set out as an Undead
Type: Bronze
Category: Story
Unlock Details
At the beginning of the game, travel through Things Betwixt and enter the hut occupied by the elderly Fire Keepers. Speak with them and complete character creation to reclaim your human appearance and receive the trophy. This is an automatic story trophy that cannot be missed.

Trophy: Sinner's Bonfire
Light the primal bonfire in Sinner's Rise
Type: Silver
Category: Story
Unlock Details
Defeat the Lost Sinner in Sinner's Rise and light the primal bonfire beyond the boss arena. First, reach the Lost Bastille through either of the following routes: Forest of Fallen Giants: Defeat the Pursuer and interact with the bird's nest beyond his arena to be carried to the Lost Bastille. No-Man's Wharf: Defeat the Flexile Sentry, then board the ship to travel to the Lost Bastille. Once inside the Lost Bastille, progress through the fortress and defeat the Ruin Sentinels to reach the Servants' Quarters. Continue toward Sinner's Rise, where you'll descend through the prison tower and flooded lower chambers to reach the Lost Sinner. Before entering the boss arena, obtain the Bastille Key if you haven't already. In the PS4 Scholar of the First Sin edition, the key is found on a corpse near the Servants' Quarters bonfire, rather than at its original PS3 location. Use the Bastille Key to unlock the side rooms beside the boss entrance. Light the oil in both rooms with a torch to illuminate the arena, making it easier to maintain lock-on during the fight. The Lost Sinner is an aggressive melee boss who attacks with fast sword combinations, lunging strikes, and jumping slashes. Keep your shield raised if your build supports blocking, or dodge through her attacks and strike during her recovery animations. Avoid becoming greedy with your damage, as she can quickly punish poorly timed attacks. After defeating the Lost Sinner, continue through the exit and light the primal bonfire to unlock Sinner's Bonfire.
Tip
You can summon Lucatiel of Mirrah for this fight after speaking with her in the Lost Bastille. Keep her alive until the Lost Sinner is defeated to earn one of the three successful summoned boss victories required for the Lucatiel trophy. Sellsword Luet can also provide additional assistance.
Warning
If you bypass the four Old Ones by meeting the Shrine of Winter's soul-memory requirement, you can progress without defeating the Lost Sinner. However, you must still return to Sinner's Rise, defeat her, and light the primal bonfire to earn this trophy.
Welcome to Drangleic, where even the weakest enemies can ruin your afternoon if you get careless. Start by exploring Things Betwixt, Majula, and the Forest of Fallen Giants while getting comfortable with stamina management, dodging, and the game's unforgiving combat. Upgrade a weapon you enjoy, collect Estus Flask Shards, and spend your souls regularly. Most importantly, talk to every friendly NPC until their dialogue repeats, and avoid killing anyone. Several trophies depend on keeping characters alive, so resist the temptation to solve every conversation with a sword.
Your biggest early priorities are Lucatiel and Moonlight Greatsword, which require Lucatiel of Mirrah and Benhart of Jugo to survive three summoned boss victories each before you receive their equipment. Begin working on Lucatiel's quest in No-Man's Wharf and the Lost Bastille, and speak with Benhart near the blocked entrance to the Shaded Woods. Start collecting sorceries, miracles, pyromancies, hexes, and gestures as you explore. You should also join the Heirs to the Sun covenant in Harvest Valley and begin earning Sunlight Medals whenever possible. You'll eventually need 30 for the Sunlight Spear miracle, and leaving that entire grind until the end is a special kind of punishment.
As Drangleic opens up, focus on defeating the four Old Ones and lighting their primal bonfires in Sinner's Rise, the Iron Keep, Black Gulch, and Brightstone Cove Tseldora. Explore each region thoroughly, unlock shortcuts, and continue collecting spells and gestures from merchants and NPCs. Keep progressing Lucatiel's quest through Earthen Peak and Black Gulch, making sure she survives three boss victories before speaking to her at Aldia's Keep. Continue Benhart's quest whenever his summon sign becomes available. Bonfire Ascetics can help repeat successful summon battles, but they permanently increase the affected area's bonfire intensity, so use them carefully.
This is also a good time to tackle covenant requirements that would otherwise become tedious cleanup. The Bell Keepers covenant rewards the Hidden Weapon sorcery at rank two, which can be earned offline by repeatedly defeating the Mad Warrior phantom in Belfry Sol. Meanwhile, the Pilgrims of the Dark covenant requires finding Darkdiver Grandahl in three locations, completing the Dark Chasm of Old areas, and defeating Darklurker for the Climax hex. Continue gathering boss souls and avoid consuming any that may be needed for spell trades. Every soul you spend carelessly is another excuse for Drangleic to make you fight something twice.
Once you reach Drangleic Castle, continue through Shrine of Amana, the Undead Crypt, Aldia's Keep, and Dragon Shrine while finishing any outstanding NPC interactions. Collect the King's Ring and Ashen Mist Heart, then explore the Giant Memories to obtain Giant Souls and prepare for Vendrick. Keep those Giant Souls in your inventory, as they dramatically reduce his defenses. Before leaving Aldia's Keep, make sure Lucatiel has rewarded you with her equipment if you have completed her requirements. Also, do not release Royal Sorcerer Navlaan from his confinement. His assassination assignments provide important spells, including Unleash Magic and Forbidden Sun, and their required proof items can be obtained without murdering innocent NPCs.
The PS4 version also requires spells from all three DLC campaigns for the four spell-collection trophies. Explore the Crown of the Sunken King, Crown of the Old Iron King, and Crown of the Ivory King areas before moving into New Game+. Some spells are hidden deep within these challenging regions, and Outcry requires assembling the Soul of Nadalia. After defeating the final boss and seeing the ending, you can continue exploring your current world instead of immediately entering New Game+. Take advantage of that freedom to finish the DLC, defeat Vendrick, complete remaining NPC quests, and gather anything you missed before advancing to your next journey.
Before starting New Game+, finish as many trophies as possible. Collect all gestures, join the remaining covenants, fully upgrade a weapon, complete Majula's population and map requirements, and collect the equipment rewards from Benhart, Lucatiel, Captain Drummond, McDuff, Gilligan, and Vengarl. Finish the Heirs to the Sun and Pilgrims of the Dark covenant requirements, and collect every spell available in your current cycle, including the DLC spells. Several unique spells require additional boss souls obtainable through Bonfire Ascetics or New Game+. Your goal is to leave as little unfinished business as possible before the enemies get even less interested in your survival.
For the standard offline Platinum route, expect to reach New Game++. Use NG+ to collect the additional Old One boss souls needed for spell trades, then progress to Chancellor Wellager in Drangleic Castle during NG++. He sells Bountiful Sunlight, Wrath of the Gods, and Great Chaos Fireball in that cycle, avoiding the lengthy PvP covenant ranking alternatives. If you want to shorten the repeated journeys, the Shrine of Winter can be opened by earning 2 million additional soul memory during NG+ or 3 million during NG++, rather than defeating all four Old Ones again. These requirements count souls gained during the current cycle, not your lifetime total. Once your final missing spells are collected, the Platinum is yours. Drangleic may have taken your patience, your souls, and several perfectly good controllers, but at least you get a shiny trophy for the trouble.
Completion Video Playlist
1 video
Dark Souls 2 Scholar of the First Sin Platinum Trophy Guide 01 / Things Betwixt, Majula