


Trophy Guide Preview
Overall Trophy Progress
0 / 31 Completed
0%
Trophy Types
Platinum
0 / 1Gold
0 / 6Silver
0 / 9Bronze
0 / 15Categories
Collectible
0 / 5Grind
0 / 6Combat
0 / 5Misc
0 / 6Story
0 / 8
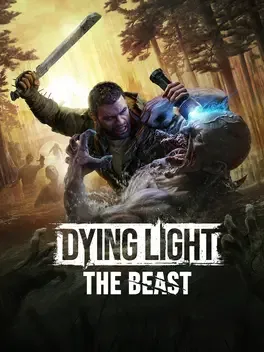
Return as Kyle Crane in Castor Woods, a dangerous open world overrun by infected. Master brutal combat, fluid parkour, survival systems, and Crane’s monstrous new abilities as he hunts the man responsible for years of experimentation.
Overall Trophy Progress
0 / 31 Completed
0%
Platinum Path
EARLY GAME Start by pushing through the story on whatever difficulty feels comfortable. Easy is completely fine for trophies, and there is no reason to make the opening harder than it needs to be. Side quests are worth doing as they appear because the XP and rewards make story progression smoother, but nothing stops you from cleaning up side content later in free roam. Prioritize Safe Zones and Substations whenever y...
Completion Video Playlist
1 video
Dying Light: The Beast - 100% Platinum Walkthrough (All Trophies & Collectibles) No Commentary Pt 1
Trophy: The Beast Unleashed
Unlock all trophies
Type: Platinum
Unlock Details
Unlock all trophies

Trophy: And Don't Forget to Wash Your Hands
Find all of the "Hidden Truths with Spark" podcast recordings
Type: Silver
Category: Collectible
Unlock Details
Find all 8 Hidden Truths with Spark podcast recordings. These count toward Cabinet of Curiosities, and you can track them in the Collections tab of your Journal. The 8 recordings are: EP01: The Valley’s Veil EP02: Bloodlines and Betrayals EP03: Nature’s Wrath EP04: Whispers in the Woods EP05: The Silent Circle EP06: The Huntsman’s Shadow EP07: The Fischer Enigma EP08: Threads of Truth Nothing here is missable, and free roam remains available after the story. Once you pick up a recording, it stays collected even if you die afterward.
Tip
Use Survivor Sense whenever you are near a suspected collectible location. The recordings show up with an orange treasure chest icon, even through walls, which saves a lot of wandering around listening for a podcast that absolutely refuses to advertise its location.
Warning
There are no missable recordings in this set, so if you are missing one at the end, check the Collections tab and hunt down the exact episode instead of rechecking all 8.
Video Guide: https://www.youtube.com/watch?v=DPyil90edWo
Trophy: Cabinet of Curiosities
Find all collectibles
Type: Gold
Category: Collectible
Unlock Details
Find all 100 collectibles in Dying Light: The Beast. You can track your progress from the Collections tab in the Journal, and the collectibles are split across 12 categories. The full breakdown is: 8 Castor Woods Newspapers. 11 Castor Woods Beavers. 8 Sigils. 3 Dr. Peter Paulaner Diaries. 2 Fischer Family Documents. 6 Asylum Patient Records. 9 Castor Woods Recipes. 9 Baron’s Research Recordings. 8 Hidden Truths With Spark. 5 Dr. Tal Cuberno Recordings. 4 Olivia’s Recordings. 27 Murals.
Tip
Use the Collections tab constantly during cleanup so you can see exactly which category is still missing something. One hundred collectibles sounds brutal, but split into 12 tracked sets it becomes much easier to manage.
Warning
Do not rely on memory for this one. With 100 total collectibles, “I’m pretty sure I got that one” is how a quick cleanup turns into a three-hour scavenger hunt.
Video Guide: https://www.youtube.com/watch?v=v-lLu5c-TiQ
Trophy: Family Picture
Find all Fischer family newspaper clippings
Type: Silver
Category: Collectible
Unlock Details
Find both Fischer Family Documents. These count toward Cabinet of Curiosities as well, and you can track them from the Collections tab in your Journal. The 2 documents are: Heinrich Fischer’s Last Will and Testament The Story of Eleanor Fischer Nothing is missable, and free roam remains available after finishing the story. Once you collect a document, it stays saved even if you die afterward.
Tip
There are only two here, so this is one of the kinder collectible trophies. If one is missing, check the Collections tab first instead of searching both locations again.
Warning
Use Survivor Sense when you are nearby. The documents can be highlighted with an orange treasure chest icon even through walls, which is much better than staring at every shelf in Castor Woods like an exhausted librarian.
Video Guide: https://www.youtube.com/watch?v=qIi2CXI3x_c

Trophy: Know What 'Castor' Means?
Find all Castor Woods Beavers
Type: Silver
Category: Collectible
Unlock Details
Find all 11 Castor Woods Beavers. They are part of the 100 collectibles needed for Cabinet of Curiosities, and your progress is tracked in the Collections tab of the Journal. Each Beaver has a unique name, so it is easy to see exactly which one you are still missing. The 11 Beavers are: Beaver the Librarian Beaver the Artist Backpacker Beaver Town Hall Beaver Beaver the Monk Pharmacist Beaver Beaver the Farmer Doctor Beaver Engineer Beaver Dam Builder Beaver Soldier Beaver They are often placed outside major buildings such as Town Hall or the Monastery. Use Survivor Sense when you are nearby, since collectibles are highlighted with an orange treasure chest icon even through walls.
Tip
Nothing here is missable, and collectibles stay saved once picked up, even if you die afterward. So if one little wooden beaver manages to outsmart you, just come back later and let Survivor Sense expose its hiding spot.
Video Guide: https://www.youtube.com/watch?v=IzQXv_e1SQU

Trophy: What Happened at the Asylum
Find all secrets about the St. Valentine Asylum
Type: Silver
Category: Collectible
Unlock Details
Find all of the collectibles tied to the St. Valentine Asylum mystery. Unlike most collectible trophies, this one requires three separate sets: 6 Asylum Patient Records Project 1913: Subject Kurt Project 1913: Subject Helga Project 1913: Subject Hans Project 1913: Subject Ingrid Project 1913: Subject Otto Project 1913: Subject Maria 3 Dr. Peter Paulaner Diaries March, 1913 April 1913 May 1913 5 Dr. Tal Cubero Recordings Voice Memo 1: February 24, 2015 Voice Memo 2: First Meeting Voice Memo 3: Discovery The Methodology Asylum Shutting Down The 6 Patient Records are collected while completing the story quest One Flew Over the Volatiles’ Nest, while the Diaries and Recordings must also be found to finish the trophy requirement. All of these collectibles count toward Cabinet of Curiosities as well, and your progress is tracked in the Collections tab of the Journal.
Tip
Use Survivor Sense whenever you are searching the Asylum or nearby areas. These collectibles show up with an orange treasure chest icon, even through walls, which can save you from doing twelve laps around the same creepy hallway wondering what you missed.
Warning
Nothing here is missable, and free roam remains available after the story. Once collected, an item stays saved even if you die afterward.
Video Guide: https://www.youtube.com/watch?v=LYZiKnRcwUU
Trophy: Blacksmith
Repair your weapons 50 times
Type: Bronze
Category: Grind
Unlock Details
Repair weapons 50 times. The cheapest method is to pick up damaged melee weapons from raiders and soldiers as you play. Since many of them are already worn down, you can repair them immediately, then dismantle them afterward to recover some materials. Scrap and Blades are both common resources, so this is much better than constantly wearing out your favorite weapons just for trophy progress.
Tip
Pick up every damaged melee weapon you see and repair it once before dismantling it. If you make that a habit, 50 repairs will sneak up on you instead of becoming a miserable endgame chore.

Trophy: Craftsman
Upgrade all blueprints to their maximum
Type: Gold
Category: Grind
Unlock Details
Upgrade 49 eligible Blueprints to Legendary status. These can include weapons, gadgets, tools, consumables, and mods. Use a workbench to improve each Blueprint through its upgrade path until it reaches Legendary. Blueprints that are already Legendary when you receive them, such as the Flamethrower or Grenade Launcher, do not count because they never had an upgrade path. An easy way to tell whether a Blueprint can count is to look for the three chevrons next to its damage or stat value. If there are no chevrons and the item started at Legendary, it will not help with this trophy. You do have some breathing room here. Deluxe Edition content, Pilgrim Outpost items, and DLC items can count as long as they do not start at Legendary, and there are more than 49 eligible Blueprints available in the game.
Tip
Do not wait until the very end to start upgrading. Chip away at Blueprints whenever you have the materials, especially the cheaper ones. Forty-nine sounds nasty on paper, but it is much less painful when you are quietly feeding the workbench all game instead of dumping your entire life savings into it at once.
Video Guide: https://www.youtube.com/watch?v=VgAMNBsv68M&list=PLY-CyFXx49py2fUc1B8AS7c_8Idi0H-de
Trophy: Hexakosioihexekontahexa
Kill 666 enemies using your beast-like powers
Type: Bronze
Category: Grind
Unlock Details
Kill 666 enemies using Beast powers. Early on, that mostly means punching enemies to death in Beast mode, but later you will unlock more options like throwing heavy objects, aerial smashes, and powerful swipe attacks. Kills with any of these Beast abilities count toward the total. You will likely make a lot of progress naturally during the story, so there is no reason to force all 666 kills early. If you still need some at the end, clean them up while working on Craftsman or other remaining activities.
Tip
Use Beast powers whenever they are available instead of saving them “for later.” Six hundred sixty-six sounds ridiculous until you realize Kyle spends half the game turning infected into stress balls.

Trophy: Ultimate Beast
Fully unlock your inner beast
Type: Gold
Category: Grind
Unlock Details
Fully unlock the entire Beast Skill Tree. You earn the Beast Points needed by defeating the 9 Chimera required before the final boss. Once all 9 are down, spend the Beast Points to unlock every Beast skill and the trophy will pop.
Tip
Do not stress about this early. Keep hunting Chimera as they become available and let the Beast tree fill out naturally. By the time you are done, Kyle is basically one bad mood away from becoming the boss fight.

Trophy: Ultimate Survivor
Fully regain your survival skills
Type: Gold
Category: Grind
Unlock Details
Fully unlock all three Skill Trees. Despite the trophy wording mentioning survival skills, you actually need to max out Agility, Power, and Survival. Once you reach level 15, you will have enough skill points to buy every skill across all three trees. Purchase them all and the trophy will unlock.
Tip
Do not worry about this too early. Keep progressing, earning XP, and spending points naturally, then finish buying the remaining skills once you hit level 15.
Trophy: We're Safe Here!
Activate all safe zones
Type: Silver
Category: Grind
Unlock Details
Activate all 23 Safe Zones across the map. They first appear as question marks, then become properly marked once you get close enough. You can also track each one from the Activities tab in the Journal to see what is required to secure it. Most Safe Zones use similar objectives, and they are absolutely worth doing as soon as you find them. They usually contain Blueprints needed for Craftsman, and they also become your nearest respawn points when you die.
Tip
Detour for Safe Zones even if you are in the middle of another quest. A few minutes now can save a long run later, and nothing makes a death feel worse than realizing your closest respawn point is in another zip code.

Trophy: Apex Predator
Kill a Volatile
Type: Bronze
Category: Combat
Unlock Details
Kill a Volatile. These are some of the most dangerous infected in the game and only come out at night. They are faster than you, hit extremely hard, and can shred your health very quickly. This becomes much easier later in the game once you have stronger gear and access to powerful tools like throwables, mines, C4, and the Saw Blade launcher.
Tip
There is absolutely no trophy bonus for fighting one undergeared. Wait until Kyle has enough toys to turn the encounter from “terrifying predator” into “very angry science project.”

Trophy: Firefighter
Kill 112 enemies with the flamethrower
Type: Bronze
Category: Combat
Unlock Details
Kill 112 enemies with the Flamethrower. Unlock the Flamethrower skill in the Survival tree, craft one, and stock up on plenty of flamethrower ammo. Find large groups of infected and set them on fire. The enemy has to die while still burning for the kill to count, so do not stop after a quick tap if they are still standing. Good farming spots include the area outside St. Valentine Asylum and the junkyard arena where you fought the Chimera.
Tip
Bring more ammo than you think you need. One hundred twelve burning zombies sounds fun right up until the flamethrower clicks empty at 97.

Trophy: Gunslinger
Do 6 headshots with a revolver within 20 seconds
Type: Silver
Category: Combat
Unlock Details
Get 6 headshots with a revolver within 20 seconds. A reliable setup is outside City Hall. Climb onto the top of the Undefeated Fighter statue, which is narrow enough that Virals will not climb up beside you. Let regular zombies gather around the base of the statue. If you need more targets, use decoys to pull them in. Avoid focusing on Virals because they move faster and their heads are harder to track. Once enough zombies are grouped below, aim down and start landing headshots. You have about 3 seconds per kill, so do not panic and rush every shot. Missing can hurt because reloading the revolver takes a long time, with each round loaded individually.
Tip
Use regular zombies for this, not Virals. They move less, give you cleaner shots, and make the 20-second window much more manageable.
Warning
If you miss enough shots that you have to reload, some of your earlier kills may fall outside the 20-second window. After reloading, keep shooting until the trophy pops instead of assuming the first six still count.
Video Guide: https://www.youtube.com/watch?v=jwsU9xJ1dr0

Trophy: I Still Don't Approve of Mindless Fun
Kill 500 zombies with your vehicle
Type: Bronze
Category: Combat
Unlock Details
Kill 500 zombies with vehicles. The kills are cumulative across all drives, so you do not need to do this in one session or with one vehicle. You will probably make a huge amount of progress just by driving around during the story, so there is no reason to grind this early. If you are short at the end, just keep using the roads as your personal zombie bowling lane.
Tip
Drive normally and let this build in the background. Five hundred sounds like a lot until you remember how many infected keep volunteering to stand directly in front of your bumper.

Trophy: Iconic
Kill an enemy using a Dropkick
Type: Bronze
Category: Combat
Unlock Details
Kill an enemy with a Dropkick. Dropkick is the first skill in the Power tree and costs 1 skill point. Approach an enemy, jump with R1, then press X twice to perform the Dropkick. If the first hit does not kill them, get back up and introduce them to Kyle’s boots again.

Trophy: And Then There Was Light
Activate all transformer stations
Type: Silver
Category: Misc
Unlock Details
Activate all 11 Transformer Stations across the map. These Substations begin appearing after The Cable Guy and are marked as question marks until you get close enough to reveal them. You can track each one from the Activities tab in your Journal to see what still needs to be done. Once activated, each Substation powers environmental traps in that region, giving you extra ways to deal with crowds. They also usually contain Blueprints, so clearing them helps with Craftsman at the same time.
Tip
Do these as you find them instead of saving all 11 for cleanup. You get useful traps, Blueprint progress, and one less question mark staring at you from the map like it knows you are procrastinating.
Video Guide: https://www.youtube.com/watch?v=joDHFelM49o
Trophy: Craftsman's Apprentice
Install your first weapon mod
Type: Bronze
Category: Misc
Unlock Details
Install your first weapon mod. After completing Life After Life, you receive a Military Cutlass with mod slots, the Venom weapon tip mod, and a short tutorial explaining how modification works. Open your Inventory, highlight a weapon with mod slots, press Triangle to open the Modify menu, choose an available mod slot, then select one of your unlocked mod Blueprints and hold X to apply it.
Tip
This one is basically handed to you by the tutorial, so there is no reason to overthink it. Pick a mod, slap it on the Cutlass, and congratulations, Kyle is officially tinkering with sharp objects again.
Trophy: Crane on a Monument
The world looks different from up here, ain't it?
Type: Silver
Category: Misc
Unlock Details
Climb to the very top of the Memorial Hill of Heroes in the Villa Area. The monument has two massive towers and is one of the highest points in the game. Reach the top of the towers and the trophy will unlock.
Tip
Grab the Carnage Trophy weapon mod Blueprint while you are up there. If you are already doing the climb, you may as well leave with more than just a nice view and sore virtual legs.
Video Guide: https://www.youtube.com/watch?v=8Ty9SB13A6M

Trophy: Good Samaritan
Complete all side quests
Type: Gold
Category: Misc
Unlock Details
Complete all 20 side quests in Dying Light: The Beast. Most become available as you progress, so it is worth knocking them out when they appear instead of saving everything for the end. You will get useful XP and rewards along the way, and it makes the final cleanup much lighter. Twenty side quests sounds like a lot written down, but spread across the whole game it is very manageable.
Tip
Do them as they unlock. Future you will be very grateful you did not leave all 20 sitting there at the end like a second job.
Video Guide: https://www.youtube.com/watch?v=X7VjmLXhFJw
Trophy: Kylin McCrane
Win gold in all Travis's races
Type: Silver
Category: Misc
Unlock Details
Win Gold in all 4 of Travis’s races. First, unlock the Efficient Driving and Collision Expert skills from the Survival Skill tree. This causes the side quest The Fast and Fortunate to appear west of the Highway Tower Safe Zone and northeast of the Farm Relay Substation. Go to the crashed vehicle, inspect the dead driver, then meet Travis and follow the quest markers to each race. Keep retrying from the race sign until you earn Gold in all four events. Once every race has a Gold result, the trophy will unlock.
Tip
Do not move on after a Silver and tell yourself you will come back later. Get the Gold while the route is still fresh in your head. Future you has enough cleanup waiting already.
Video Guide: https://www.youtube.com/watch?v=JZX5fTW_B8Y

Unlock Details
Win Gold in all 4 of Travis’s races. First, unlock the Efficient Driving and Collision Expert skills from the Survival Skill tree. This causes the side quest The Fast and Fortunate to appear west of the Highway Tower Safe Zone and northeast of the Farm Relay Substation.
Go to the crashed vehicle, inspect the dead driver, then meet Travis and follow the quest markers to each race. Keep retrying from the race sign until you earn Gold in all four events. Once every race has a Gold result, the trophy will unlock.
Tip
Do not move on after a Silver and tell yourself you will come back later. Get the Gold while the route is still fresh in your head. Future you has enough cleanup waiting already.
Trophy: Sunday Morning Run
Run at least 10,000 meters
Type: Bronze
Category: Misc
Unlock Details
Run a total of 10,000 meters. Press L3 to sprint and keep moving through the world normally. This should unlock within the first few hours of play, so there is no need to grind it. Just keep running between objectives and let Kyle handle the cardio for you.

Trophy: Enhanced Telepathy
Survive the test field experiment
Type: Bronze
Category: Story
Unlock Details
Complete the story quest Cries Trapped in the Walls. This is another automatic story trophy, so there is nothing extra you need to do.

Trophy: Experiment on the Loose
Defeat your first chimera
Type: Bronze
Category: Story
Unlock Details
Defeat Slasher, your first Chimera, during the story quest Safe Haven. This is story-related and cannot be missed.
Tip
This is your first real taste of the Chimera fights, so treat it as a chance to learn how these encounters work. You will be seeing plenty more of them before Kyle is fully unleashed.

Trophy: Free at Last
Escape from the Baron's bunker
Type: Bronze
Category: Story
Unlock Details
Complete the tutorial quest Rise and Shine. This is story-related and cannot be missed.
Trophy: Glimpse into the Future
Complete the main story
Type: Gold
Category: Story
Unlock Details
Complete the main story by finishing The Last Supper. The trophy unlocks during the credits, so once you reach the end, you are done.
Trophy: Largo Embargo
Discover the Baron's sabotage
Type: Bronze
Category: Story
Unlock Details
Complete the story quest Power Gambit. This is part of the main story and cannot be missed.
Trophy: Less Obedient
Get a mountain dropped onto your head
Type: Bronze
Category: Story
Unlock Details
Complete the story quest Vengeance is Mine. Keep following the main path and this will unlock automatically.

Trophy: New Friends
Save the survivors at town hall
Type: Bronze
Category: Story
Unlock Details
Complete the story quest Life After Life. This unlocks automatically as you progress.
Trophy: There You Are!
Capture "The Beast"
Type: Bronze
Category: Story
Unlock Details
Complete the story quest The Bait and the Beast. This is story-related and cannot be missed.
Start by pushing through the story on whatever difficulty feels comfortable. Easy is completely fine for trophies, and there is no reason to make the opening harder than it needs to be. Side quests are worth doing as they appear because the XP and rewards make story progression smoother, but nothing stops you from cleaning up side content later in free roam.
Prioritize Safe Zones and Substations whenever you pass near one. There are 23 Safe Zones and 11 Substations, and both are worth the detour. Safe Zones give you nearby respawn points and protection from the night, while many also reward useful Blueprints. Substations also help build out your crafting options and make the map much friendlier to explore.
Night falls at 19:00, and Volatiles are still very capable of ruining your evening even late in the game. If you cannot reach a Safe Zone, a Dark Zone is often the next best shelter because Volatiles will not follow you inside. Use Survivor Sense constantly too. It highlights threats, loot, interactable objects, and nearby collectibles, which saves a lot of wandering around staring at walls.
As your gear improves, stop worrying about looting absolutely everything. Regular street zombies give very little XP and basic drops, so most of your meaningful progression will come from missions, side quests, Safe Zones, Dark Zones, and major activities. Once you can handle Dark Zones comfortably, they become much better places for valuables and specialized crafting materials.
Be smart with weapon durability. Do not repair a weapon the moment the warning appears. Keep using it until it actually breaks, then repair it so you get the full value from each repair. You can stretch your favorite weapons even further by using Weapon Enhancement at a workbench, which restores durability without consuming one of the weapon’s limited repairs until the weapon reaches level 15.
Use environmental weapons whenever possible, especially during Chimera fights. Fuel tanks, pitchforks, car bombs, electric fences, and other hazards can save your weapon durability and ammo. Speaking of ammo, treat bullets like gold. Buy them whenever you see them, loot every armed enemy and convoy you pass, and save your best supply for tougher fights instead of turning every basic infected into target practice.
Once the story is nearly finished, start checking your progress on side quests, Safe Zones, Substations, Blueprints, and collectibles. You need all 20 side quests for Good Samaritan, all 49 Blueprints for Craftsman, and all 100 collectibles for Cabinet of Curiosities, so anything you handled naturally earlier will save a lot of cleanup time now.
Keep using Survivor Sense when exploring new areas because it makes collectible hunting much easier. The collectible total is spread across multiple sets, including newspapers, beavers, sigils, diaries, family documents, patient records, recipes, research recordings, hidden truths, character recordings, and murals. There is a lot here, but the game gives you plenty of opportunities to pick them up while doing everything else.
Also keep your economy simple. Dismantle weak weapons for parts instead of selling them, and only sell valuables. At shops, prioritize ammo, rare resources, and the common materials you constantly burn through. By this point, you should have a much better sense of what you actually use, so stock up on the things that support your preferred build instead of buying every shiny object in sight.
After the story, finish any remaining Safe Zones, Substations, side quests, Blueprints, and collectibles. Cleanup is much easier if you already grabbed things as you explored, but everything can still be handled in free roam. This is also the right time to finish miscellaneous trophies, including specific combat challenges such as the revolver headshot requirement.
For Cabinet of Curiosities, you need all 100 collectibles. For Craftsman, collect all 49 Blueprints. For Good Samaritan, complete all 20 side quests. If any Safe Zones or Substations are still missing, clear them now too. This final stage is basically your “fine, I’ll check every corner” tour of Castor Woods.
One last thing that is easy to forget: the top of the map is not north. North points toward the lower-left side of the map, so use the compass rather than assuming normal map orientation. If anything is still giving you trouble, Ask Gami and we can narrow down the cleanest route. By this point, you have survived Volatiles, weapon durability, ammo shortages, and Castor Woods itself. A few stubborn collectibles are not winning now.
Completion Video Playlist
1 video
Dying Light: The Beast - 100% Platinum Walkthrough (All Trophies & Collectibles) No Commentary Pt 1