


Trophy Guide Preview
Overall Trophy Progress
0 / 51 Completed
0%
Trophy Types
Platinum
0 / 1Gold
0 / 2Silver
0 / 10Bronze
0 / 38Categories
Online
0 / 4Collectible
0 / 2Grind
0 / 7Combat
0 / 15Misc
0 / 14Story
0 / 8
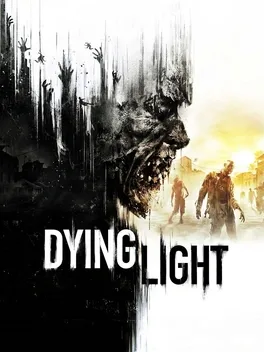
Survive the infected city of Harran using fluid parkour, brutal melee combat, crafting, and scavenging. Explore by day, prepare for the darkness, and outrun terrifying infected when night turns the streets into a deadly hunting ground.
Overall Trophy Progress
0 / 51 Completed
0%
Platinum Path
EARLY GAME Focus on pushing through the opening story while learning the movement, combat, crafting, and survival systems. Dying Light is much easier when you mix story missions with side quests, since the extra XP, money, and gear make the main path smoother. Do not feel like you need to rush straight through the campaign. Harran rewards a little wandering, even if the zombies strongly disagree. Start working on nat...
Completion Video Playlist
1 video
DYING LIGHT 100% Walkthrough Gameplay Part 1 - No Commentary (PC - 1440p 60FPS)
Trophy: We’ll talk about it next time I see you
Get all game trophies
Type: Platinum
Unlock Details
Get all game trophies

Trophy: Harran Athletics
Take part in 10 coop competitions
Type: Bronze
Category: Online
Unlock Details
Take part in 10 co-op competitions while playing with at least one other player. These events appear occasionally during co-op and prompt you to hold the touch pad to start them. You do not need to win. Wins and losses both count, so just complete 10 competitions total.
Tip
Set the co-op competition frequency to Frequent in the options before starting. That makes them appear more often and turns this into a quick cleanup instead of a waiting game.

Trophy: I've Got Your Back
Complete 1 quest in a co-op game
Type: Bronze
Category: Online
Unlock Details
Complete any story quest or side quest while playing co-op with at least one other player. You do not need to be the host, so as long as you are in a co-op session when the quest is completed, the trophy can unlock.

Trophy: Lucky 7
Win 7 coop competitions
Type: Bronze
Category: Online
Unlock Details
Win 7 co-op competitions while playing with at least one other player. These competitions appear periodically during co-op and prompt you to hold the touch pad to start them. You can make them show up more often by setting the competition frequency to Frequent in the options. Then just keep playing together and win 7 total competitions.
Tip
Turn the competition frequency up to Frequent before starting your co-op session. It cuts down the waiting and gets you to the trophy much faster.

Trophy: Polyamory
Complete 5 quests in a single co-op game with the same 3 partners
Type: Bronze
Category: Online
Unlock Details
Complete 5 quests in a single co-op session with the same 3 partners, meaning you need a full group of 4 players and the same group must stay together for all 5 quest completions. This can be awkward through random matchmaking, so the cleanest method is to organize a group specifically for the trophy. If you are hosting, you can make this much easier by completing the requirements for 5 side quests in advance, inviting the other 3 players, then turning in all 5 quests while everyone is still in the same session.
Tip
Pre-completing 5 side quests before the group joins is the easiest setup. Once all 4 players are together, turn them in one after another and get the trophy done before anyone disappears into Harran to chase zombies for twenty minutes.
Warning
The same 3 co-op partners must remain with you for all 5 quest completions in a single session.

Trophy: Disaster Recovery
Get 15 Relief Packages
Type: Bronze
Category: Collectible
Unlock Details
Collect 15 Relief Packages. Early in the game, GRE planes will periodically fly over Harran and drop these packages, with red smoke marking where they landed. Later in the story, those airdrops stop, but you can still find Relief Packages by exploring areas marked with a white hexagon and downward arrow on the map. After finishing the story, you can continue finding them through Public Events in Old Town, inside some Quarantine Zones, and in a few fixed locations across both maps. Old Town is a good place to clean this up because there are more than enough packages there and you usually have fewer zombies making your life miserable while grabbing them.
Tip
Relief Package icons often do not appear until you get close to the area, so explore thoroughly instead of relying only on the map from a distance.
Video Guide: https://www.youtube.com/watch?v=HSVosayDpOc

Trophy: It's All In the Writing
Find all text collectibles
Type: Silver
Category: Collectible
Unlock Details
Find all 67 text collectibles in Dying Light. Most can be collected once you reach Old Town, but several are locked behind side quests that open otherwise inaccessible areas. You can check which collectibles you are still missing by opening your backpack, going to the Inventory section, and pressing Square to view the collectible list. The Grappling Hook is extremely useful for reaching many of these faster, so this is a good trophy to clean up later rather than trying to grab everything the moment you enter an area. Slums: Note #4, video timestamp 00:13. Battle Journal #0, 00:38. Note #5, 01:10. Note #7 and Note #6, 01:32. Requires the Gunslinger side quest from Dawud. Note #11, 03:05. Requires the Voltage side quest from Alfie. Battle Journal #12, 04:00. Note #1, 04:50. Requires the Good Night Mr. Bahir side quest from Brijesh. Battle Journal #1, 06:13. Note #10, 06:45. Battle Journal #3, 07:13. Note #8, 07:38. Requires the Where's My Mother side quest from Meliha. Note #9, 08:25. Requires the Gas Mask Man side quest from Musa. Note #12, 09:02. Battle Journal #5, 10:12. Note #22, 12:18. Requires the A Survivor's Guide to Zombieland side quest from Neil. Battle Journal #7, 13:03. Battle Journal #2, 13:30. Note #23, 14:03. Battle Journal #4, 14:51. Note #2, 15:18. Requires the O Brother Where Art Thou side quest from Osman. Battle Journal #9, 16:16. Battle Journal #6, 16:40. Battle Journal #8, 17:04. Battle Journal #10, 17:28. Note #16, Note #17, and Note #26, 17:55. Note #20, 18:57. Note #13 and Note #14, 19:26. Requires the Tunnel Vision side quest from Ryan. Note #21, 20:42. Requires the Mother's Day side quest from Gazi. Battle Journal #11, 21:23. Note #19, 22:41. Note #3, 23:10. Note #15, 23:34. Note #18, 24:03. Note #24 and Note #25, 24:37. Requires the side quest chain The Big Bang Thesis, Steal From a Thief, and Total Security from Jaffar. Old Town: Voice Mail #11, 26:04. Voice Mail #7, 26:33. Voice Mail #2, 27:05. Note #30, Note #31, and Note #32, 27:32. Voice Mail #8, 28:25. Battle Journal #15, 28:51. Voice Mail #6, 29:19. Voice Mail #12, 29:53. Battle Journal #14, 30:17. Note #34, 30:45. Requires the Fan Zone side quest from Noah. Voice Mail #3, 32:30. Voice Mail #1, 32:57. Note #27 and Note #28, 33:24. Requires the Do You Believe and The Shadow of the King side quest chain from Mufid and Ishaq. Note #33 and Voice Mail #13, 35:51. Requires the Rupert the Gunsmith and Health Potion side quest chain from Fidan. Voice Mail #14, 37:17. Battle Journal #16 Epilogue, 37:46. Voice Mail #4, 38:13. Voice Mail #16, 38:48. Voice Mail #5, 39:18. Voice Mail #15, 39:46. Note #29, 40:16. Requires the Chasing Past side quest. Voice Mail #10, 41:21. Voice Mail #9, 41:59. Battle Journal #13, 42:26. The entries above contain all 67 collectibles because several numbered entries contain two or three collectibles at the same location.
Tip
Wait until you have reached Old Town and unlocked the Grappling Hook before doing a serious cleanup run. It makes moving between rooftops and collectible locations much faster. Also use the in-game collectible checklist to identify exactly what you are missing instead of revisiting every location. Sixty-seven is enough paperwork for a zombie apocalypse already.
Warning
Several collectibles require specific side quests to access their locations. If one appears unreachable during cleanup, check whether its associated side quest has been completed before assuming the collectible is bugged.
Video Guide: https://www.youtube.com/watch?v=UJAk-J_uZGc

Trophy: Homo Homini Lupus Est
Save 15 survivors from Rais's men
Type: Bronze
Category: Grind
Unlock Details
Save survivors from Rais's men during 15 separate Public Events. Despite the wording, this tracks the number of rescue events, not the total number of survivors saved. In rare cases in the Slums, one event may contain two survivors, but it still only counts as one rescue toward the trophy. These events are among the rarest Public Events in the game. After finishing the story, they only appear in Old Town and can be fairly infrequent, so this is one trophy you do not want to completely ignore while progressing.
Tip
If you finish the story and are still short, starting an Advanced Playthrough on a new save slot and returning to the Slums may give you better luck finding these events. This one can be stubborn, so grab every Rais rescue you see when it appears.

Trophy: Master Crafter
Use Blueprints at least 100 times
Type: Bronze
Category: Grind
Unlock Details
Use Blueprints 100 times. This should come naturally while playing, especially because you will be crafting plenty of Medkits and other useful items on the way to the Platinum.
Tip
Do not grind this early. Craft what you actually need as you play and the total should take care of itself.

Trophy: Mount Everest
Climb at least 8848 meters on various objects.
Type: Silver
Category: Grind
Unlock Details
Climb a total of 8,848 meters on climbable objects. Any normal climbing counts, but distance gained with the grappling hook does not. This is very likely to be one of your last trophies because the total depends heavily on how much you naturally climb while playing. If you are still short during cleanup, keep using rooftops and vertical routes in Old Town instead of relying on the grappling hook.
Tip
If this is the last thing standing between you and the Platinum, focus on a tall, easy-to-repeat climbing route in Old Town. At that point, it is less “Mount Everest” and more “Mount Please Just Pop Already.”

Trophy: Pheidippides
Run (move or sprint) at least 42,195 m
Type: Silver
Category: Grind
Unlock Details
Travel a total of 42,195 meters by normal movement or sprinting. Grappling and climbing do not count toward the distance. This is effectively unmissable and should unlock naturally while you play, so there is no reason to grind laps around Harran like you signed up for a zombie marathon.

Unlock Details
Travel a total of 42,195 meters by normal movement or sprinting. Grappling and climbing do not count toward the distance.
This is effectively unmissable and should unlock naturally while you play, so there is no reason to grind laps around Harran like you signed up for a zombie marathon.
Trophy: The Legend of Harran
Reach Survivor Rank lvl 18
Type: Silver
Category: Grind
Unlock Details
Reach Survivor Rank 18. Dying Light has three separate progression trees, each with its own way of earning experience. Survivor Rank, increased by turning in Relief Packages, completing side quests, and completing Public Events. Agility Rank, increased through parkour movement and certain skill-based kills. Power Rank, increased by killing enemies. For this trophy, only Survivor Rank matters. Reaching level 18 should come naturally on the way to the Platinum if you are doing side quests, collecting Relief Packages, and helping out during Public Events.
Tip
Do not worry about grinding Survivor Rank early. Play normally, turn in your Relief Packages, and clear side content as you go. Harran gives you plenty of ways to become a local celebrity whether you asked for it or not.

Trophy: The Whole Story
Finish all side quests
Type: Gold
Category: Grind
Unlock Details
Finish all side quests in Harran. New side quests become available as you progress through the story, so keep checking your map instead of trying to clear everything immediately. There are two map symbols to watch for: Exclamation point, this is the most common side quest marker. Upside-down teardrop, these are less common and are tied to side quests you overhear elsewhere. You can track your overall progress using the in-game checklist under Personal Statistics in the Extras menu. Keep knocking them out as they appear and the cleanup at the end will be much less painful.
Tip
Use the map constantly as you progress. That is the easiest way to spot newly available side quests and avoid leaving a giant pile for the end.
Video Guide: https://www.youtube.com/watch?v=Lsb4XLh5UZE

Trophy: This is Harraaaaan!
Kill 100 enemies by kicking them off the rooftops/cliffs.
Type: Bronze
Category: Grind
Unlock Details
Kill 100 enemies by kicking them off rooftops or cliffs and letting the fall finish them. The easiest place to grind this is Infamy Bridge on the far eastern side of the Slums, where large groups of infected gather and there are plenty of broken sections along the edges. Throw Firecrackers near one of the damaged edges to pull infected toward you, then use your kick attack to send them over. The infected must actually die from the fall for it to count.
Tip
Infamy Bridge is much easier than trying to do this naturally across rooftops in Old Town. Find one good broken edge, keep feeding infected into it with Firecrackers, and embrace your inner Spartan.
Video Guide: https://www.youtube.com/watch?v=mP4ly314ngg

Trophy: A Game of Catch
Kill 50 enemies with throwing weapons
Type: Bronze
Category: Combat
Unlock Details
Kill 50 enemies with throwing weapons such as throwing knives, axes, or similar ranged utility weapons. You can craft throwing weapons yourself, but the easiest farming method is through Buckshot’s Power Challenge in the Tower in the Slums. First complete his initial challenge, which requires killing infected with a bat. After that, leave and complete another challenge or side quest until his next challenge becomes available. Return to Buckshot when the marker reappears. His second challenge gives you an unlimited supply of throwing stars and requires you to kill infected with them. You can deliberately fail the challenge and retry it as many times as needed, making this a very easy way to grind out the full 50 kills.
Tip
Purposefully fail Buckshot’s throwing challenge after getting your kills so you can restart it and keep farming with the free throwing stars. Much better than burning through your own crafting supplies.
Trophy: BBQ
Stick a burning zombie on spikes
Type: Bronze
Category: Combat
Unlock Details
Stick a burning zombie onto a spike trap. Spike traps are found throughout both the Slums and Old Town. The easiest method is to set an infected on fire, then use Grapple Throw to hurl it directly onto the spikes. Molotovs work well for the fire part, but be careful because they can kill weaker infected before you get the chance to throw them.
Tip
Use a tougher infected if you are using a Molotov, then line yourself up with the spike trap before throwing. Nothing says fine dining in Harran like zombie barbecue.
Video Guide: https://www.youtube.com/watch?v=71CSn7eTYOg&list=PLRr5L69yg_kEy3rPZEfcXuyNyRVMgsNgL&index=6

Trophy: Blinded by the Lights
Blind 25 Volatiles with flares or a flashlight
Type: Bronze
Category: Combat
Unlock Details
Blind 25 different Volatiles using UV light. Volatiles only appear at night, and the UV light has to actually stop them in their tracks and make them shield their eyes for the blind to count. The UV flashlight is the easiest method. Go out at night, find Volatiles, shine the UV flashlight directly at them until they react, then move on to the next one.
Tip
Focus on different Volatiles instead of repeatedly flashing the same one. Once they stop and shield their eyes, you have the reaction you need, so get moving before the rest of the night decides to chase you.

Trophy: Bolter Hunting
Catch 5 Bolters
Type: Silver
Category: Combat
Unlock Details
Catch 5 Bolters. Bolters are introduced fairly early in the story and only appear at night. They are easy to identify because they will immediately run from you, and their locations can be tracked on the map at any time of day. Bolters are usually guarded by Volatiles, so rushing in without a plan can turn a quick kill into a very bad night. The safest method is to unlock the Camouflage skill and use it before approaching. The upgraded version is even better because you can attack infected without instantly breaking camouflage.
Tip
Use camouflage before going after a Bolter, then kill it quickly and get out before the nearby Volatiles decide you are tonight's special.
Trophy: Can't Touch This
Kill 20 enemies in a row without taking damage.
Type: Bronze
Category: Combat
Unlock Details
Kill 20 enemies in a row without taking any damage. The source recommends pairing this with Harran Shooting Club, since there is an easy method that can help you earn both trophies together.
Tip
If you are planning to go for Harran Shooting Club anyway, save this one for the same setup and knock out both trophies at once.
Video Guide: https://www.youtube.com/watch?v=jHR62gW-u08&list=PLRr5L69yg_kEy3rPZEfcXuyNyRVMgsNgL&index=10

Trophy: Electrified!
Catch 25 enemies in the Electric Fence trap
Type: Bronze
Category: Combat
Unlock Details
Catch 25 enemies in Electric Fence traps. The easiest method is the same one used for Everybody Dance Now. Throw Firecrackers near an electric fence to gather a group of infected, then activate the trap once they are packed into the electrified area.
Tip
The larger electric fence traps in the Slums are especially useful because they cover more ground and make it easier to catch several infected at once.
Trophy: Enlightened!
Blind 25 enemies in the Light Trap
Type: Bronze
Category: Combat
Unlock Details
Blind 25 enemies using Light Traps. This can only be done at night, and the traps can be easy to overlook in the dark. The easiest method is to find a Light Trap in the Slums near a Safe Zone. Sleep until night, head to the trap, then fire a gun to attract Virals and Volatiles. Once a group gathers, run underneath the trap and activate it. After the effect ends, return to the Safe Zone and sleep twice to cycle back to a fresh night with new infected, then repeat.
Tip
Use a Light Trap close to a Safe Zone so you can reset the area quickly. It turns this from a messy night chase into a controlled little zombie light show.
Video Guide: https://www.youtube.com/watch?v=qLkbXX2bv-o

Trophy: Everybody Dance Now
Simultaneously shock 5 monsters with electricity
Type: Bronze
Category: Combat
Unlock Details
Shock 5 infected with electricity at the same time. The easiest method is to use an electric fence trap. Throw Firecrackers near the trap to gather at least 5 infected into the electrified area, then activate the trap once they are packed together. You need the ability to use electric fence traps from the Survival skill tree. The larger electric fence traps in the Slums are especially useful because they cover more ground, so you do not have to bunch the infected together quite as tightly.
Tip
This is also a good opportunity to work toward Electrified! at the same time. Use Firecrackers to do the crowd control for you, then let the fence handle the rest.
Video Guide: https://www.youtube.com/watch?v=mNjF6KU4goM&list=PLRr5L69yg_kEy3rPZEfcXuyNyRVMgsNgL&index=4

Trophy: Harran Shooting Club
Kill 50 enemies with shooting weapons
Type: Bronze
Category: Combat
Unlock Details
Kill 50 enemies with firearms. Guns become easier to find later in the story, especially from Rais’s men and police vehicles, but Power Challenges are the easiest way to knock this out early. Some challenges give you firearms with unlimited ammo, which makes this much easier than burning through your own supplies. It is also a great setup for Can’t Touch This because most infected cannot hit you from range while you are shooting them.
Tip
Use a gun-based Power Challenge and work on Can’t Touch This at the same time. Infinite ammo plus distance from the infected makes both trophies much easier.

Trophy: High Flyer
Kill 25 enemies using Ground Pound or Drop Attack
Type: Bronze
Category: Combat
Unlock Details
Kill 25 enemies using either Ground Pound or Drop Attack. Both skills are found in the Power skill tree. Ground Pound requires a heavy weapon, while Drop Attack uses lighter weapons. Drop Attack is the easier option because Ground Pound does not always finish the enemy. Jump from cars, rooftops, or use Vault to get enough height, then perform the attack from above.
Tip
If you want the cleaner method, stick with Drop Attack. It is more reliable and saves you from repeatedly flattening zombies that somehow decide they are still not dead.

Trophy: Is It Really Necessary?
Kill your first Infected
Type: Bronze
Category: Combat
Unlock Details
Kill your first Infected. That is it. Find a zombie, put it down, and welcome to Dying Light.

Trophy: Italian Plumber
Kill an enemy with a wrench, using Vault followed by Drop Attack
Type: Bronze
Category: Combat
Unlock Details
Kill an enemy with a Pipe Wrench by using Vault on one infected, then following immediately with a Drop Attack onto another. Vault is unlocked in the Agility tree, while Drop Attack comes from the Power tree. For the setup, vault over the first infected, then hold R2 while dropping onto a second enemy with the Pipe Wrench equipped. It sounds a little fussy, but once both skills are unlocked, the actual move is pretty simple.
Tip
Keep one of the early Pipe Wrenches you find, especially the one from the duffle bag near the bed in Safe Houses. They become much harder to find later. If you already finished the game and need one, there is a Pipe Wrench in the school basement in the western Slums.
Warning
This trophy can be buggy. The Pipe Wrench appears to work most reliably at full durability, so if the trophy refuses to pop, wear the wrench down until it can be repaired, repair it back to full, then try the Vault into Drop Attack kill again.
Video Guide: https://www.youtube.com/watch?v=uH587Hc61F8&list=PLRr5L69yg_kEy3rPZEfcXuyNyRVMgsNgL&index=8

Trophy: Judo Master
Throw 50 enemies with Grapple
Type: Bronze
Category: Combat
Unlock Details
Throw enemies 50 times using the Grapple skill from the Agility skill tree. Hold the left stick in any direction except forward and press Cross at the right moment to perform the throw. Grapple works on basic infected, Virals, and human enemies. You do not need 50 different enemies, so the same targets can be thrown multiple times as long as you keep getting valid grapples.
Tip
Start using Grapple naturally as soon as you unlock it. Fifty sounds like a lot, but it disappears quickly if you make tossing zombies around part of your normal combat style.
Video Guide: https://www.youtube.com/watch?v=3PdTE7i0f5w
Trophy: Mouths Wide Open
Kill a Volatile
Type: Silver
Category: Combat
Unlock Details
Kill a Volatile. These are the fast, extremely dangerous infected that come out at night, so doing this early can be rough. If you want the easier early-game method, lure one into an electric fence trap, which can kill a Volatile in a single hit. Otherwise, wait until your Survival level is higher and you have stronger weapons that can drop them in just a couple of hits.
Tip
There is no prize for making this harder than it needs to be. If your gear is still weak, use a trap and let Harran's electrical grid do the heavy lifting.
Video Guide: https://www.youtube.com/watch?v=mM7Yj4k56yA&list=PLRr5L69yg_kEy3rPZEfcXuyNyRVMgsNgL&index=7

Trophy: Prom Night
Survive night pursuit of level two or higher
Type: Silver
Category: Combat
Unlock Details
Survive a night pursuit at level 2 or higher. Your current pursuit level is shown by the diamond icons on the left side of the mini-map. A pursuit increases as you draw more attention, including attracting more infected or killing Virals. One easy opportunity comes when Volatiles are first introduced, since you are already being chased. Another good opportunity is while working on A Long Way Down at the bridge. If your pursuit is still only level 1, kill nearby Virals until it reaches level 2, then escape or survive the chase.
Tip
Pair this with A Long Way Down if you have not earned either trophy yet. One terrifying sprint through the night can save you from doing two separate terrifying sprints later.
Video Guide: https://www.youtube.com/watch?v=fyhdEWkb1EE

Trophy: A Long Way Down
Jump to the water from the Infamy Bridge (Slums) at night
Type: Bronze
Category: Misc
Unlock Details
Jump from the end of Infamy Bridge into the water at night. The bridge is on the far eastern side of the Slums. Make your way to the far end after dark, then simply jump off into the water below. The vehicles along the bridge help slow down pursuing Virals and Volatiles, so the trip is usually easier than it sounds.
Tip
This pairs nicely with Prom Night. If you build your pursuit to level 2 on the way across the bridge, you can potentially earn both trophies in the same run.
Video Guide: https://www.youtube.com/watch?v=-oUlN4dHPr4&list=PLRr5L69yg_kEy3rPZEfcXuyNyRVMgsNgL&index=5

Trophy: Agile
Reach Agility Prof. Lvl 10
Type: Bronze
Category: Misc
Unlock Details
Reach Agility Level 10. Agility experience comes from parkour movement and certain skill-based actions, so this should build naturally while you run, climb, vault, and generally refuse to use the ground like a normal person.

Trophy: Bittersweet
Complete the game
Type: Gold
Category: Misc
Unlock Details
Complete the main story. No special conditions are required, so once you reach the end, this Gold trophy is yours.

Trophy: Everybody Knows Kyle
Reach Survivor Rank lvl 12
Type: Bronze
Category: Misc
Unlock Details
Reach Survivor Rank 12. Survivor Rank increases by turning in Relief Packages, completing side quests, and finishing Public Events. This should come naturally while working through the story and side content, so there is no need to rush it.

Trophy: Gabriel's Sword
Add a fire elemental effect to a sword or a khopesh
Type: Bronze
Category: Misc
Unlock Details
Add a fire elemental effect to a sword or khopesh. Any weapon with a sword icon will work, and the elemental blueprint only needs to include fire as one of its effects. Once you have a valid sword and a fire-based blueprint, craft the modification onto the weapon and the trophy should unlock.
Video Guide: https://www.youtube.com/watch?v=OiumCWqo-KU&list=PLRr5L69yg_kEy3rPZEfcXuyNyRVMgsNgL&index=9

Trophy: Hush, Hush Now
Quiet a Screamer
Type: Bronze
Category: Misc
Unlock Details
Quiet a Screamer. Screamers are infected children that cry or whimper nearby, then scream when Crane gets close. Their scream can damage you and attract more infected. You will encounter at least two during the story, and you are required to deal with them by getting into melee range and pressing Square while facing them.
Tip
Their scream can quickly turn a quiet area into a full infected party, so close the distance and silence them as soon as you safely can.
Video Guide: https://www.youtube.com/watch?v=k2lKyqRcnrA

Trophy: I'm a Runner and a fighter
Complete 15 Agility or Power Challenges
Type: Silver
Category: Misc
Unlock Details
Complete a combined total of 15 Agility and/or Power Challenges. Agility Challenges appear on the map with a running person and three stars, while Power Challenges use a melee-weapons symbol with three stars. You can mix the two types however you want. Agility Challenges are generally the easier option, so if you just want the trophy with the least hassle, lean toward those.
Tip
Do these as you come across them instead of saving all 15 for cleanup. A few here and there makes this trophy feel much less like homework.

Trophy: Little Craftsman
Craft your first item
Type: Bronze
Category: Misc
Unlock Details
Craft your first item. This will happen almost immediately through normal play, so just craft anything once you have the materials.

Trophy: Now It's Safe
Capture all Safe Zones
Type: Silver
Category: Misc
Unlock Details
Capture all 16 Safe Zones that count toward this trophy. These appear on the map and mini-map as small red house icons. Be aware that some additional Safe Zones are unlocked automatically through story progression, but those do not count toward the trophy. You need the 16 free-roam Safe Zones specifically.
Tip
Clear Safe Zones as you discover them while exploring. Besides making the trophy easier, they also give you more safe places to regroup around Harran.

Trophy: Open Sesame
Perform 10 successful Lockpicks
Type: Bronze
Category: Misc
Unlock Details
Successfully pick 10 locks. You will come across plenty of locked containers, doors, and vehicle trunks while working toward the Platinum, so this should happen naturally without any dedicated grinding.

Trophy: Strong
Reach Power Prof. Lvl 10
Type: Bronze
Category: Misc
Unlock Details
Reach Power Level 10. Power experience is earned by killing enemies, so this should come naturally as you fight your way through Harran.
Tip
There is no need to grind either of these early. Keep moving, keep fighting, and both levels should take care of themselves on the way to the Platinum.

Trophy: Trade Company
Sell items worth 10,000 dollars
Type: Bronze
Category: Misc
Unlock Details
Sell items worth a total of $10,000. This should come naturally because plenty of loot in Dying Light exists mainly to be sold, especially valuables like cigarettes and jewelry. The one thing worth keeping early on is coffee. You need 20 for a side quest, so hold onto those until that is finished. After that, feel free to become Harran’s least glamorous merchant and sell away.
Tip
Regularly clear out the Valuables section of your inventory. You will reach $10,000 without needing to farm anything.

Trophy: Trespassing
Complete all Quarantine Zones
Type: Silver
Category: Misc
Unlock Details
Complete all 8 Quarantine Zones in Harran. There are 5 in the Slums and 3 in Old Town. These locations do not automatically appear on your map. You have to discover each one yourself before it is marked, so if you are missing one, you will need to search for the entrance rather than rely on the map to hand it to you. Most Quarantine Zones involve collecting Relief Packages while dealing with infected and nearby Volatiles. Despite being labeled Hard, they are generally not much worse than normal story missions or free-roam encounters.
Tip
The Camouflage skill is extremely useful here, especially in zones with Volatiles. It can turn a stressful package run into a much calmer scavenging trip.

Trophy: We're All In This Together
Save 15 survivors from zombies
Type: Bronze
Category: Misc
Unlock Details
Save 15 survivors from zombies during Public Events around Harran. These events appear randomly, so there is no reliable way to force them or control how often they show up. This should come naturally as long as you do not ignore survivor events when they appear. See someone getting mobbed by infected, jump in, clear the area, and be the hero Harran apparently cannot stop needing.
Tip
Do these whenever you see them while exploring. Waiting until the end to farm random Public Events would make this much more annoying than it needs to be.

Trophy: Flight of the Crane
Jump from the Crane
Type: Bronze
Category: Story
Unlock Details
Jump from the Crane during the story. This unlocks automatically as you progress, so there is nothing extra you need to worry about.

Trophy: Making Faces
Show the outside world that you're still alive
Type: Bronze
Category: Story
Unlock Details
Show the outside world that you are still alive as part of the main story. This unlocks automatically through progression.

Trophy: My left or your left?
Meet with Rais
Type: Bronze
Category: Story
Unlock Details
Meet with Rais as part of the main story. Keep progressing normally and this will unlock along the way.

Trophy: Now You Can Come In
Find Camden
Type: Bronze
Category: Story
Unlock Details
Find Camden during the main story. This is a natural story unlock with no extra requirements.

Trophy: Sightseeing
Reach the Old Town
Type: Bronze
Category: Story
Unlock Details
Reach Old Town through the main story. Nothing special is required, and the trophy unlocks automatically once you get there.

Trophy: Snake in the grass
Escape the arena
Type: Bronze
Category: Story
Unlock Details
Escape the arena during the story. This is automatic through normal progression, so just survive the chaos and keep moving.

Trophy: Tied loose end
Deal with Tahir
Type: Bronze
Category: Story
Unlock Details
Deal with Tahir during the story. You cannot miss this while following the main missions.

Trophy: Vertigo
Activate the Amplifier
Type: Bronze
Category: Story
Unlock Details
Activate the Amplifier as part of the story. Keep following the main objectives and this will unlock automatically.

Focus on pushing through the opening story while learning the movement, combat, crafting, and survival systems. Dying Light is much easier when you mix story missions with side quests, since the extra XP, money, and gear make the main path smoother. Do not feel like you need to rush straight through the campaign. Harran rewards a little wandering, even if the zombies strongly disagree.
Start working on natural-progress trophies as you go. Save survivors when Public Events appear, use Grapple once you unlock it, pick locks, craft items, sell valuables, and clear Safe Zones when you find them. If you see Rais rescue events, do them immediately because Homo Homini Lupus Est can become one of the more annoying cleanup trophies later.
Side quests are also worth starting early because several collectible locations are tied to them. Knocking them out alongside the story helps with The Whole Story and prevents your collectible cleanup from becoming a giant sightseeing tour through every corner of Harran.
Once the map opens up and you begin reaching Old Town, start mixing in Quarantine Zones, Safe Zones, challenges, and more side quests. Old Town is also a good place to begin serious collectible cleanup, especially once you have the Grappling Hook to make rooftop travel much faster.
This is a good time to work on combat trophies naturally instead of saving all of them for later. Kick infected from rooftops for This is Harraaaaan!, use throwing weapons, guns, electric fences, and traps when opportunities appear, and hunt Bolters at night when you are comfortable with Volatiles. If you can earn progress while doing something you were already going to do, take the freebie.
Co-op is worth mixing in here too. Lucky 7, Harran Athletics, I’ve Got Your Back, and Polyamory all become easier if you work on them while side quests are still available. Polyamory in particular is much cleaner if you prepare several side quests, invite the same three players, and turn them all in during one session.
As you move toward the end of the story, finish any side quests or areas you still need before focusing on cleanup. Most trophies are not heavily missable, but leaving everything until after the credits can turn a fun Platinum into a long checklist of unfinished chores.
By now, you should have stronger weapons, better skills, and enough mobility to make tougher trophies much easier. This is a great time for Volatile-related trophies, Quarantine Zones, electric fence kills, throwing weapon kills, firearm kills, and challenge completions. Skills like Camouflage, Drop Attack, Grapple, and better weapons make several trophies far less frustrating than attempting them early.
Finish the story for Bittersweet, but do not worry if a bunch of trophies are still sitting there afterward. Dying Light is very cleanup-friendly, and most remaining objectives can be handled in free roam. The zombies are not going anywhere. Unfortunately.
After the story, finish all remaining side quests, Quarantine Zones, Safe Zones, collectibles, challenges, and combat trophies. For It’s All In the Writing, use the in-game collectible checklist to see exactly what you are missing, and remember that several notes are tied to side quests that open specific areas.
This is also where the bigger grinds may show up. Mount Everest can easily be one of the last trophies if you relied heavily on the Grappling Hook, so use repeatable climbing routes in Old Town if needed. Homo Homini Lupus Est may also require patience because Rais rescue events become much rarer after the story, so grab every one you see whenever they appear.
Clean up the multiplayer trophies if you have not already, especially Polyamory, which is much easier with an organized group. If anything stubborn is standing between you and the Platinum, Ask Gami and we can narrow down the fastest method. At this point, Harran has thrown zombies, Volatiles, rooftops, and several questionable trophy requirements at you. You are close. Finish the cleanup and take the Platinum home.
Completion Video Playlist
1 video
DYING LIGHT 100% Walkthrough Gameplay Part 1 - No Commentary (PC - 1440p 60FPS)