


Trophy Guide Preview
Overall Trophy Progress
0 / 51 Completed
0%
Trophy Types
Platinum
0 / 1Gold
0 / 2Silver
0 / 10Bronze
0 / 38Categories
Collectible
0 / 1Grind
0 / 4Combat
0 / 16Misc
0 / 15Story
0 / 14

Survive the Stone Age as Takkar, a hunter fighting to reunite the Wenja tribe in the untamed land of Oros. Craft spears and bows, tame sabretooth cats, face towering mammoths, and battle rival tribes in a brutal open world where every hunt could be your last.
Overall Trophy Progress
0 / 51 Completed
0%
Platinum Path
EARLY GAME Welcome to Oros, where Takkar must survive deadly predators, hostile tribes, and the occasional mammoth having a terrible day. Begin by following the main story, recruiting Wenja specialists, and establishing your village. Focus on bringing Tensay, Jayma, Karoosh, and Wogah into your tribe, as they unlock beast taming, hunting abilities, combat skills, and crafting upgrades. You can play on Easy difficulty...
YouTube Playlist
Far Cry Primal — Platinum Walkthrough
Trophy: Apex Predator
Obtain all the Trophies.
Type: Platinum
How to Unlock
Earn all 50 other trophies in Far Cry Primal to unlock the Platinum. You'll need to complete the main story, recruit the Wenja specialists, defeat the rival tribes, capture all enemy outposts, and finish the required village upgrades. You'll also need to tame legendary beasts, learn every skill, collect 80 collectibles, and complete various hunting and combat challenges. The Platinum can be earned in a single playthrough on any standard difficulty. There are no online trophies, and you can continue exploring Oros after finishing the story. Once every other trophy has been earned, Apex Predator unlocks automatically.
Tip
Collect crafting materials and animal skins throughout your adventure. You'll need plenty of resources for village upgrades, and gathering them early saves time later.
Warning
Avoid Survivor Mode while pursuing the Platinum. It introduces permanent beast deaths and disables certain abilities, making some trophies significantly harder or potentially unobtainable. Rare bugs have also been reported during Master Beast Hunts, so consider backing up your save before attempting those encounters.

Trophy: Cave Hoarder
Pickup 80 collectibles.
Type: Bronze
Category: Collectible
How to Unlock
Collect 80 collectibles scattered throughout Oros. Far Cry Primal contains 184 collectibles in total, but you only need 80 for this trophy. Collectible locations appear as blue icons on your world map as you explore and reveal new areas. There are five collectible types: Daysha Hands, Izila Masks, Wenja Bracelets, Cave Paintings, and Spirit Totems. Daysha Hands can be picked up directly, while Izila Masks must be destroyed with a ranged weapon. Wenja Bracelets require searching their marked areas, Cave Paintings involve locating hidden caches, and Spirit Totems must be placed at designated altars. Collect any combination of 80 qualifying items to unlock Cave Hoarder.
Tip
Prioritize Daysha Hands because they're generally easy to collect and their map markers indicate their locations accurately. Use Hunter Vision to highlight nearby collectibles, and gather items as you travel between story missions to reduce backtracking. Collectibles also provide XP rewards that help you progress toward Expert Wenja.
Warning
You don't need all 184 collectibles. Stop once you've collected 80 unless you want to complete the collection for personal satisfaction. Some collectibles require climbing, searching caves, or solving small environmental puzzles, so focus on easier locations first.
Video Guide: https://www.youtube.com/watch?v=jfw2AsKor_g&list=PLWaGPOt6HfARpqwV4-ADXkTdMVc3n9C80&index=44&pp=iAQB

Trophy: Armorer
Use the crafting ability 100 times to craft weapons or arrows.
Type: Silver
Category: Grind
How to Unlock
Use the crafting ability 100 times to craft weapons or arrows. Crafting is introduced early in the game and allows Takkar to replenish his ammunition and replace weapons using materials gathered throughout Oros. Open your weapon wheel and craft spears, arrows, or other eligible weapons whenever your supplies are running low. Continue crafting during combat, hunting, and exploration until you've performed 100 qualifying crafting actions. Armorer unlocks automatically once you reach the required total.
Tip
Arrows are particularly convenient because they only require hardwood, which is plentiful throughout Oros. If you haven't unlocked the trophy naturally, fire arrows to create room in your inventory, gather more hardwood, and craft replacements. Repeat until the trophy unlocks.
Warning
The trophy counts crafting weapons or ammunition, not simply gathering materials. You don't need to craft 100 different weapon types. Repeatedly crafting the same type of ammunition is sufficient.
Video Guide: https://www.youtube.com/watch?v=19xt6L8Sb1Y&list=PLWaGPOt6HfARpqwV4-ADXkTdMVc3n9C80&index=37&pp=iAQB
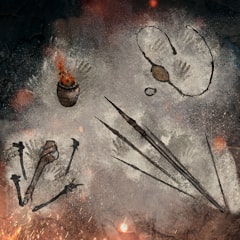
Trophy: Expansion
Capture all outposts.
Type: Gold
Category: Grind
How to Unlock
Capture all 15 enemy outposts in Oros. Enemy outposts are marked on your world map with red icons containing white mountain symbols. Each outpost is controlled by Udam or Izila warriors and must be cleared before the Wenja can claim it. Explore the different regions of Oros to reveal all 15 outpost locations. Travel to each camp and eliminate every hostile warrior inside. Use your owl to identify enemy positions and alarm horns. Remaining undetected makes the assault easier, but stealth isn't mandatory. If an enemy sounds an alarm, reinforcements may arrive. Defeat these additional enemies as well to complete the capture. Once all 15 outposts belong to the Wenja, Expansion unlocks.
Tip
Capture outposts as you encounter them during the story instead of leaving all 15 for cleanup. Unlocking combat and beast-taming skills makes later captures easier. A powerful predator can help distract enemies while you eliminate guards from a distance. Stealth captures also award valuable XP toward Expert Wenja.
Warning
Bonfires and forts are separate activities and don't count toward the 15-outpost requirement. An outpost isn't captured until every remaining enemy and any summoned reinforcements have been eliminated.
Video Guide: https://www.youtube.com/watch?v=xkEidaw3J1A&list=PLWaGPOt6HfARpqwV4-ADXkTdMVc3n9C80&index=39&pp=iAQB

Trophy: Expert Wenja
Learn all skills.
Type: Silver
Category: Grind
How to Unlock
Learn every skill available in Far Cry Primal. Open the Skills menu to view Takkar's different skill trees. Additional abilities become available as you recruit Wenja specialists, complete their missions, and progress through the main story. Earn XP by completing missions, capturing outposts and bonfires, discovering locations, and collecting items throughout Oros. Spend your skill points on every available ability until the entire skill tree is complete. Some sidequests, particularly orange-marked missions, reward skill points directly instead of relying on XP. These become especially important toward the end of your playthrough. Once every skill has been purchased, Expert Wenja unlocks.
Tip
Capture outposts without being detected whenever possible. Stealth captures provide additional XP and help you progress through the skill tree faster. Complete specialist missions and legendary beast hunts to unlock additional abilities and skill-point opportunities.
Warning
Normal XP progression eventually reaches a cap, so you cannot earn every required skill point through XP alone. You'll need to complete sidequests that award skill points directly. Some of these become available only after completing Master Beast Hunts, so check your map for new missions before assuming you're stuck. This will likely be one of your final trophies.
Video Guide: https://www.youtube.com/watch?v=YY4kfrDjpDY&list=PLWaGPOt6HfARpqwV4-ADXkTdMVc3n9C80&index=36&pp=iAQB

Trophy: Real Estate Baron
Complete all hut upgrades.
Type: Silver
Category: Grind
How to Unlock
Complete every available hut upgrade in your Wenja village. As you recruit specialists and expand your settlement, additional huts become available for construction and improvement. Each hut requires specific crafting materials, including hardwood, stone, animal skins, and resources from different regions of Oros. Open the Village menu to check which huts still need upgrades and review their material requirements. Explore the world, hunt the required animals, and collect resources until you have enough supplies to complete each improvement. Return to your village and purchase every remaining hut upgrade. Real Estate Baron unlocks once all required upgrades are finished.
Tip
Collect resources consistently throughout your playthrough, even when you don't immediately need them. Rare animal skins can take longer to obtain, so hunt rare creatures whenever you encounter them. Use Hunter Vision to identify animal trails and locate resources. Unlocking fast travel points across Oros also makes gathering materials from different regions much quicker.
Warning
Building every specialist hut isn't enough. You must also purchase all available upgrades for the huts. Equipment and weapon upgrades aren't required for Real Estate Baron; only the village hut upgrades count.
Video Guide: https://www.youtube.com/watch?v=FDFuMdqEBYY&list=PLWaGPOt6HfARpqwV4-ADXkTdMVc3n9C80&index=20&pp=iAQB

Trophy: And Stay Down
Eliminate 100 enemies using a club.
Type: Bronze
Category: Combat
How to Unlock
Eliminate 100 enemies using a club. Clubs are among Takkar's starting weapons and are especially effective during close-range combat. Equip a club from your weapon wheel and use it to attack hostile Udam and Izila warriors. Continue fighting until you've defeated 100 enemies using club attacks. You can earn these kills during story missions, sidequests, outpost captures, and random encounters throughout Oros. And Stay Down unlocks once your total reaches 100 club kills.
Tip
Use clubs frequently during the early game, when many enemies have limited protection and are easier to defeat at close range. Upgrading your club makes combat faster and helps against tougher opponents. You can also set clubs on fire to work toward Inflammable while defeating enemies.
Warning
The final killing blow must come from a club attack. If your tamed beast or another damage source finishes an enemy, that kill may not count toward your club total. You don't need to earn all 100 kills with the same club variation.
Video Guide: https://www.youtube.com/watch?v=-HCSbRM6hsE&list=PLWaGPOt6HfARpqwV4-ADXkTdMVc3n9C80&index=22&pp=iAQB0gcJCSwMAYcqIYzv

Trophy: Bad Trip
Influence 25 enemies using poison.
Type: Bronze
Category: Combat
How to Unlock
Influence 25 enemies using poison. First, capture Big Darwa Fort and recruit Dah, the Udam specialist, into your Wenja village. This unlocks access to poison-related crafting abilities. Once you've obtained the ability to craft poison bombs, gather the necessary materials and equip them from your weapon selection. Find a group of hostile enemies and throw a poison bomb into their midst. Affected enemies become disoriented and may begin attacking their own allies. Repeat this process until you've successfully influenced 25 enemies with poison to unlock Bad Trip. You don't need to personally kill the affected enemies. The trophy tracks enemies influenced by poison rather than poison-related kills.
Tip
Enemy outposts are ideal because guards often gather close together. Throwing a poison bomb into a group can influence several enemies at once. Use your owl to scout enemy positions and identify locations where a single poison bomb will affect multiple targets.
Warning
Poison bombs must successfully affect hostile enemies to count. Throwing them into empty areas or at targets outside their effective range won't contribute toward the trophy. Recruiting Dah and unlocking poison crafting are necessary before you can begin working toward this requirement.
Video Guide: https://www.youtube.com/watch?v=0tvfoIGp_5k&list=PLWaGPOt6HfARpqwV4-ADXkTdMVc3n9C80&index=28&pp=iAQB

Trophy: BEES!
Eliminate 10 enemies using sting bombs.
Type: Bronze
Category: Combat
How to Unlock
Eliminate 10 enemies using sting bombs. Sting bombs release a swarm of aggressive bees that attack nearby enemies, making them useful for disrupting groups of hostile warriors. First, upgrade Takkar's Cave to Level 1 to unlock the ability to craft sting bombs. Gather the required crafting materials, equip your sting bombs, and locate hostile enemies during story missions, outpost captures, or exploration. Throw a sting bomb directly at an enemy or into a group of opponents. The bees will attack anyone caught within their effective range. Continue using sting bombs until you've eliminated 10 enemies with bee attacks to unlock BEES!
Tip
Target ordinary, lightly armored enemies because they're easier to defeat with sting bombs. Throw bombs into groups to maximize their effectiveness. If an enemy survives, you can weaken them with another weapon before using a sting bomb to secure the final kill.
Warning
Enemies must die from the sting bomb's bee attacks. Simply damaging or distracting enemies with bees won't count. Avoid finishing affected enemies with other weapons or sending your tamed beast to attack them before the bees complete the kill.
Video Guide: https://www.youtube.com/watch?v=GGkr-xMYWU4&list=PLWaGPOt6HfARpqwV4-ADXkTdMVc3n9C80&index=29&pp=iAQB

Trophy: Bullseye
Kill a target 70 feet away or more using an arrow.
Type: Bronze
Category: Combat
How to Unlock
Kill an enemy from at least 70 feet away using an arrow. This trophy is easiest after unlocking the Long Bow, which provides better accuracy and range than Takkar's starting bow. Find an enemy standing still at an uncaptured outpost or bonfire. Use your owl to locate the target and place a waypoint on them to measure the distance. Move at least 70 feet away, equip your Long Bow, and line up a headshot. Aim carefully and account for the arrow's trajectory if the target is especially far away. Release your arrow and eliminate the enemy from the required distance to unlock Bullseye.
Tip
Choose an unarmored guard who isn't moving. Headshots are the most reliable way to secure a kill before the enemy reacts. You can attempt Bullseye and Right On Target at the same outpost by targeting different guards from appropriate distances.
Warning
A regular bow may struggle at this range, so the Long Bow is strongly recommended. The killing blow must come from an arrow fired at least 70 feet away. If the target moves closer before being hit, the shot may no longer meet the distance requirement.
Video Guide: https://www.youtube.com/watch?v=HtqwCrMTM5Q&list=PLWaGPOt6HfARpqwV4-ADXkTdMVc3n9C80&index=32&pp=iAQB

Trophy: David And Goliath
Eliminate 10 enemies using a sling.
Type: Bronze
Category: Combat
How to Unlock
Eliminate 10 enemies using a sling. The sling is a small ranged weapon that allows Takkar to launch stones at enemies. Unlike bows and spears, it requires careful aiming to deliver lethal damage. Equip the sling by holding Down on the D-pad, then target an enemy's head. Headshots are the most reliable way to secure kills with this weapon. Look for ordinary, unarmored enemies standing still or patrolling alone. Approach within a comfortable distance, aim directly at the head, and release your shot. Repeat until you've killed 10 enemies with the sling to unlock David And Goliath.
Tip
Enemy outposts and bonfires provide convenient targets because guards often remain stationary while watching entrances or patrolling predictable routes. Use Hunter Vision and your owl to identify isolated enemies before approaching. Aim for headshots against unarmored enemies to avoid wasting ammunition or alerting nearby guards.
Warning
Enemies wearing protective headgear may survive sling headshots unless you've unlocked the skill that allows your attacks to penetrate head protection. Body shots are generally ineffective for securing quick sling kills, so prioritize accurate headshots against vulnerable targets.
Video Guide: https://www.youtube.com/watch?v=wXPX7ZDSVcE&list=PLWaGPOt6HfARpqwV4-ADXkTdMVc3n9C80&index=26&pp=iAQB0gcJCSwMAYcqIYzv

Trophy: Feathered Friend
Eliminate 15 enemies using your owl. Not available in Survivor Mode.
Type: Bronze
Category: Combat
How to Unlock
Eliminate 15 enemies using your owl. First, recruit Tensay and unlock the Owl: Attack I skill in the Beast Master skill tree. This ability allows your owl to attack and kill enemies directly rather than simply scouting their locations. Summon your owl and fly toward a hostile enemy. Position the owl over the target, then use the attack command to eliminate them. After each attack, the owl enters a cooldown period before it can strike again. Continue using owl attacks against enemies until you've earned 15 kills. Feathered Friend unlocks when the final qualifying enemy has been eliminated.
Tip
Target ordinary, unarmored enemies because they're easier for your owl to kill. Use your owl while clearing enemy outposts or completing side missions so the kills accumulate naturally throughout your playthrough. Additional owl skills can reduce the attack cooldown, allowing you to earn the required kills faster.
Warning
Owl attacks are unavailable in Survivor Mode. Complete this trophy in a standard game mode. Simply marking enemies with your owl or dropping other weapons on them doesn't satisfy the requirement. The kills must come from the owl's direct attack ability.
Video Guide: https://www.youtube.com/watch?v=kND2nf_e7Cg&list=PLWaGPOt6HfARpqwV4-ADXkTdMVc3n9C80&index=35&pp=iAQB

Trophy: Gotcha
Eliminate 10 enemies using hunting traps.
Type: Bronze
Category: Combat
How to Unlock
Eliminate 10 enemies using hunting traps. Hunting traps allow Takkar to kill enemies by placing deadly traps on the ground and luring hostile warriors into them. Craft hunting traps using the required materials, then equip them from your weapon selection. Find an enemy at an outpost, bonfire, or during open-world exploration. Place a trap along the enemy's patrol route or directly in front of an approaching warrior. You can also throw rocks to attract enemies toward a trap you've already placed. Continue luring enemies into your traps until you've killed 10 of them to unlock Gotcha.
Tip
Ordinary, lightly armored enemies are the easiest targets. If you're struggling to predict their movements, approach a hostile warrior, place a trap directly in their path, and retreat until they step onto it. Enemy outposts are useful because guards often follow predictable patrol routes.
Warning
The trap must deliver the killing blow. Simply damaging an enemy with a trap before finishing them with another weapon won't count. Avoid targeting heavily armored enemies when possible, as they can be harder to eliminate with a single trap.
Video Guide: https://www.youtube.com/watch?v=EvOsmH8YjyM&list=PLWaGPOt6HfARpqwV4-ADXkTdMVc3n9C80&index=33&pp=iAQB

Trophy: Inflammable
Eliminate 50 enemies with fire.
Type: Bronze
Category: Combat
How to Unlock
Eliminate 50 enemies using fire. Fire can be used to damage enemies by igniting your weapons or throwing fire bombs. Both methods contribute toward the trophy as long as the enemy is killed by fire. Early in the game, you can ignite clubs, spears, and arrows using available flames. Strike or shoot enemies with these burning weapons to set them alight. Later, after capturing Fire Screamer Fort, you'll gain access to fire bombs, which make it easier to burn multiple enemies during combat. Continue setting enemies on fire until you've eliminated 50 of them to unlock Inflammable.
Tip
Fire bombs are especially effective against groups of enemies in outposts or during large battles. Throw them into tightly packed groups to burn several targets at once. You can also ignite your club while working toward And Stay Down, reducing the amount of separate grinding required.
Warning
The killing damage must come from fire. If an enemy survives the flames and is subsequently killed by an ordinary weapon attack or your beast companion, that kill may not count. Keep sufficient crafting materials available so you can replenish your fire bombs and other ammunition.
Video Guide: https://www.youtube.com/watch?v=Lzfr4LWlSxY&list=PLWaGPOt6HfARpqwV4-ADXkTdMVc3n9C80&index=25&pp=iAQB

Trophy: Killer's Belief
Eliminate 25 enemies using any takedown.
Type: Bronze
Category: Combat
How to Unlock
Eliminate 25 enemies using takedowns. Takedowns are stealth attacks that allow Takkar to eliminate enemies quickly at close range. Approach an enemy from behind while remaining undetected, then press R3 when the takedown prompt appears. You can perform takedowns against enemies encountered during story missions, outpost captures, and open-world exploration. Repeat this until you've eliminated 25 enemies using takedowns to unlock Killer's Belief.
Tip
Enemy outposts are excellent locations for earning takedown kills. Use your owl to scout the area and mark enemy positions before sneaking inside. Crouch, approach isolated guards from behind, and eliminate them before nearby enemies notice. This also helps you capture outposts undetected for additional XP.
Warning
Only kills performed using the takedown action count. Ordinary melee attacks with clubs or other weapons won't contribute toward this trophy. If you've already captured every outpost, you can reset them through the options menu to create additional opportunities.
Video Guide: https://www.youtube.com/watch?v=NgAC7ldgDHg&list=PLWaGPOt6HfARpqwV4-ADXkTdMVc3n9C80&index=21&pp=iAQB

Trophy: Outta My Way
Eliminate 25 enemies while riding any beast.
Type: Bronze
Category: Combat
How to Unlock
Eliminate 25 enemies while riding a beast. First, recruit Tensay and progress through the Beast Master skill tree until you unlock the Beast Rider skill. This allows Takkar to mount certain tamed animals and use them during combat. Suitable mounts include the Brown Bear, Sabretooth Tiger, and Bloodfang Sabretooth. You can also earn mounted kills while riding a mammoth after unlocking the Mammoth Rider skill. Mount a compatible beast and attack hostile Udam or Izila warriors while remaining on its back. You can use your regular weapons or perform melee attacks with your mount. Continue eliminating enemies while mounted until you've reached 25 kills to unlock Outta My Way.
Tip
The Bloodfang Sabretooth is an excellent choice because its speed makes it easy to move between enemies and avoid incoming attacks. Enemy outposts and Tribal Clash missions offer plenty of opportunities to earn mounted kills.
Warning
You must be riding a beast when the enemy is eliminated. Ordering a companion to attack while you're standing on the ground won't count toward this trophy. Make sure you've unlocked the appropriate riding skill before attempting the challenge.
Video Guide: https://www.youtube.com/watch?v=Bsu2k2JJ-k4&list=PLWaGPOt6HfARpqwV4-ADXkTdMVc3n9C80&index=27&pp=iAQB

Trophy: Quickdraw
Eliminate 15 enemies using throwing shards.
Type: Bronze
Category: Combat
How to Unlock
Eliminate 15 enemies using throwing shards. Throwing shards become available after recruiting Wogah, the Wenja crafting specialist. Complete his missions, Trapped and Blood of Oros, to bring him into your village and unlock access to additional crafting abilities. Once throwing shards are available, craft them using the required materials and equip them from your weapon selection. Find hostile Udam or Izila warriors and throw shards directly at them. Aim for the head whenever possible, as throwing shards can be difficult to kill enemies with using ordinary body shots. Continue eliminating enemies with throwing shards until you reach 15 kills to unlock Quickdraw.
Tip
One of the easiest methods is to unlock the skill that allows Takkar to throw a shard at a nearby enemy immediately after performing a takedown. Use this ability against pairs of unsuspecting guards to earn throwing shard kills while also progressing toward Killer's Belief.
Warning
Only enemies killed by throwing shards count. Damaging an enemy with a shard before finishing them with another weapon won't contribute toward the trophy. If you're struggling to find targets, reset enemy outposts through the options menu.
Video Guide: https://www.youtube.com/watch?v=v9r3rbMhBIU&list=PLWaGPOt6HfARpqwV4-ADXkTdMVc3n9C80&index=30&pp=iAQB

Trophy: Right On Target
Kill a target 50 feet away or more using a spear.
Type: Bronze
Category: Combat
How to Unlock
Kill an enemy from at least 50 feet away using a thrown spear. First, find a stationary enemy at an uncaptured outpost, bonfire, or other hostile location. Guards standing near entrances are particularly useful because they usually remain still until alerted. Use your owl to scout the area and identify a suitable target. Mark the enemy with a waypoint so you can judge the distance between Takkar and the target. Move approximately 50 feet or farther away, equip a spear, and aim slightly above the enemy to compensate for the weapon's downward trajectory. Throw your spear and land a killing blow from the required distance to unlock Right On Target.
Tip
Aim for an unarmored enemy who is standing still. Upgraded spears deal more damage and make it easier to secure a one-hit kill. Position yourself slightly beyond 50 feet rather than exactly on the minimum distance to avoid falling short of the requirement.
Warning
The enemy must be killed by a thrown spear from at least 50 feet away. Melee spear attacks don't count. If the target survives, the trophy won't unlock. Find another suitable enemy or try again with a stronger spear.
Video Guide: https://www.youtube.com/watch?v=La1A_88414o&list=PLWaGPOt6HfARpqwV4-ADXkTdMVc3n9C80&index=31&pp=iAQB

Trophy: Sharpshooter
Eliminate 100 enemies using a bow.
Type: Bronze
Category: Combat
How to Unlock
Eliminate 100 enemies using a bow. Bows are among Takkar's most useful weapons, allowing you to eliminate enemies quietly from a distance. You'll obtain your first bow early in the story and unlock improved versions as you progress. Equip a bow and defeat hostile Udam and Izila warriors during story missions, sidequests, outpost captures, and open-world encounters. Headshots are particularly effective against unarmored enemies and can eliminate many targets with a single arrow. Continue defeating enemies with your bow until you reach 100 kills to unlock Sharpshooter.
Tip
Use your bow whenever you're capturing outposts stealthily. Silent headshots help prevent enemies from raising alarms, allowing you to earn additional XP for undetected captures. Collect hardwood regularly to maintain your arrow supply. You can also work toward Bullseye by eliminating an enemy with an arrow from at least 70 feet away.
Warning
The enemy must be killed by your bow. Kills from other weapons or your tamed beasts won't contribute toward the trophy. If you finish the story before reaching 100 kills, reset enemy outposts through the options menu to find additional targets.
Video Guide: https://www.youtube.com/watch?v=EvzmT0_6QE8&list=PLWaGPOt6HfARpqwV4-ADXkTdMVc3n9C80&index=24&pp=iAQB

Trophy: Sic 'Em
Eliminate 50 hostile targets using a tamed beast.
Type: Bronze
Category: Combat
How to Unlock
Eliminate 50 hostile targets using a tamed beast. First, recruit Tensay by completing Vision of Beasts to unlock beast taming. Use bait to tame a suitable predator, such as a wolf, jaguar, or sabretooth tiger. Once you've summoned your companion, use the beast command controls to order it to attack hostile enemies. Your beast can also defend itself automatically when threatened. Continue directing your companion against Udam warriors, Izila fighters, and other hostile targets until it has eliminated 50 of them. Sic 'Em unlocks once the required number of beast kills has been reached.
Tip
Powerful predators such as the Sabretooth Tiger and Bloodfang Sabretooth are particularly effective because they can eliminate ordinary enemies quickly. Send your beast into enemy outposts while you remain hidden. This allows you to earn companion kills while minimizing the danger to Takkar. You can also make progress toward Veterinarian by healing your beast whenever it takes damage.
Warning
Your tamed beast must kill the target. If you finish an enemy with your own weapon, that elimination won't contribute toward Sic 'Em. Keep your companion healthy and revive it when necessary. Avoid Survivor Mode, where beast deaths can become permanent.
Video Guide: https://www.youtube.com/watch?v=1lVaDvE555Q&list=PLWaGPOt6HfARpqwV4-ADXkTdMVc3n9C80&index=34&pp=iAQB

Eliminate 50 hostile targets using a tamed beast.
First, recruit Tensay by completing Vision of Beasts to unlock beast taming. Use bait to tame a suitable predator, such as a wolf, jaguar, or sabretooth tiger.
Once you've summoned your companion, use the beast command controls to order it to attack hostile enemies. Your beast can also defend itself automatically when threatened.
Continue directing your companion against Udam warriors, Izila fighters, and other hostile targets until it has eliminated 50 of them.
Sic 'Em unlocks once the required number of beast kills has been reached.
Powerful predators such as the Sabretooth Tiger and Bloodfang Sabretooth are particularly effective because they can eliminate ordinary enemies quickly.
Send your beast into enemy outposts while you remain hidden. This allows you to earn companion kills while minimizing the danger to Takkar.
You can also make progress toward Veterinarian by healing your beast whenever it takes damage.
Your tamed beast must kill the target. If you finish an enemy with your own weapon, that elimination won't contribute toward Sic 'Em.
Keep your companion healthy and revive it when necessary. Avoid Survivor Mode, where beast deaths can become permanent.
Trophy: Skewered
Eliminate 100 enemies using a spear.
Type: Bronze
Category: Combat
How to Unlock
Eliminate 100 enemies using spears. Spears are powerful weapons that can be used for both close-range attacks and ranged throws. You'll gain access to them early in the story and can improve their effectiveness through crafting upgrades. Equip your spear and use it to defeat hostile enemies during missions, outpost assaults, or encounters in the wilderness. Both melee attacks and thrown spear kills contribute toward the requirement. Continue eliminating enemies with spears until you've reached 100 kills to unlock Skewered.
Tip
Thrown spears deal substantial damage and are particularly useful against heavily armored enemies. Keep collecting hardwood so you can replace your spears whenever necessary. Work toward Right On Target at the same time by attempting a spear kill from at least 50 feet away.
Warning
Kills made by your tamed beast or other weapons won't contribute toward the spear kill requirement. If you still need kills after finishing the story, reset enemy outposts through the options menu for a reliable supply of hostile targets.
Video Guide: https://www.youtube.com/watch?v=wW2re_KmYNE&list=PLWaGPOt6HfARpqwV4-ADXkTdMVc3n9C80&index=23&pp=iAQB

Trophy: Skirmish
Capture 10 outposts.
Type: Bronze
Category: Combat
How to Unlock
Capture 10 enemy outposts throughout Oros. Outposts are enemy-controlled camps marked on your world map with red icons featuring white mountain symbols. They contain groups of Udam or Izila warriors who must be eliminated before the location can be captured. Travel to an outpost and use your owl to scout the area. Mark enemy positions and locate any alarm horns before beginning your attack. Eliminate every enemy defending the outpost, including reinforcements if an alarm is triggered. Once the area is clear, the outpost becomes Wenja territory. Repeat this process until you've captured 10 outposts to unlock Skirmish.
Tip
Try to remain undetected while capturing outposts. Stealth captures provide additional XP, helping you progress toward Expert Wenja. Destroy alarm horns or eliminate enemies who can call reinforcements before attacking the remaining guards.
Warning
Bonfires and forts don't count toward Skirmish. You must capture 10 actual enemy outposts. You'll eventually need all 15 outposts for Expansion, so continue capturing them after this trophy unlocks.
Video Guide: https://www.youtube.com/watch?v=xkEidaw3J1A&list=PLWaGPOt6HfARpqwV4-ADXkTdMVc3n9C80&index=39&pp=iAQB

Trophy: Big Teddy
Tame the great scar bear.
Type: Bronze
Category: Misc
How to Unlock
Tame the legendary Great Scar Bear during Jayma's Beast Master Hunt. First, recruit Jayma and complete the Bloodfang Sabretooth hunt. This unlocks the Great Scar Bear hunting mission. Travel to the marked location and use Hunter Vision to follow the bear's tracks through the wilderness. Continue tracking it until you reach the confrontation. The Great Scar Bear is extremely powerful and can inflict heavy damage at close range. Use your bow and thrown spears to weaken it while dodging its attacks. Once the bear has taken enough damage, you'll receive a prompt to tame it. Approach the injured animal and complete the interaction to unlock Big Teddy.
Tip
Maintain your distance whenever possible and use the surrounding terrain to avoid the bear's charges. If you're defeated during the hunt, the damage you've already dealt to the legendary beast carries over to your next attempt.
Warning
The Great Scar Bear hunt has also been associated with rare trophy or taming bugs. Back up your save before beginning the mission. Avoid using another tamed beast during the encounter, as companion attacks may interfere with the intended taming sequence.
Video Guide: https://www.youtube.com/watch?v=8ORHDuoqDa8&list=PLWaGPOt6HfARpqwV4-ADXkTdMVc3n9C80&index=14&pp=iAQB

Trophy: Crush Your Enemies
Complete 10 "Tribal Clash" quests.
Type: Bronze
Category: Misc
How to Unlock
Complete 10 Tribal Clash quests throughout Oros. Tribal Clash quests are optional combat missions involving hostile Udam and Izila warriors. They appear on your world map as orange circular markers containing black skull symbols. These missions typically involve eliminating enemy leaders, attacking hostile camps, or destroying enemy settlements. Travel to a Tribal Clash marker and follow the mission objectives. Some quests require you to eliminate specific targets, while others involve clearing groups of enemies or burning enemy structures. Continue completing Tribal Clash quests until you've finished 10 to unlock Crush Your Enemies.
Tip
Complete these quests as you explore new regions rather than leaving all 10 for cleanup. They provide useful XP, and some offer additional skill points that help you progress toward Expert Wenja. Use your owl to mark enemy positions before attacking, and disable alarm horns whenever possible to avoid unnecessary reinforcements.
Warning
Only Tribal Clash quests count toward this trophy. Ordinary outpost captures, Help Wenja quests, and Beast Kill missions are separate activities. Make sure the mission is marked as completed before moving on to another objective.
Video Guide: https://www.youtube.com/watch?v=fgsi6tfYQS0&list=PLWaGPOt6HfARpqwV4-ADXkTdMVc3n9C80&index=47&pp=iAQB

Trophy: Endangered
Fight the bloodtusk mammoth.
Type: Silver
Category: Misc
How to Unlock
Hunt and defeat the legendary Bloodtusk Mammoth during Jayma's Beast Master Hunt. First, recruit Jayma by completing On the Hunt and progress through her hunting missions until the Bloodtusk Mammoth hunt becomes available. The hunt takes place in the frozen northern region of Oros, so upgrade your winter clothing before attempting it. Without sufficient cold protection, reaching and surviving the hunting area becomes much more difficult. Travel to the mission marker and use Hunter Vision to track the mammoth. Follow the clues until you locate the enormous Bloodtusk, then begin the confrontation. Attack with your strongest spears and arrows while keeping enough distance to avoid its devastating charges. Continue fighting until the mammoth is defeated to unlock Endangered.
Tip
Bring plenty of hardwood for crafting additional spears and arrows, along with enough food and healing supplies to survive a prolonged fight. Keep moving and use obstacles or uneven terrain to create distance when the mammoth charges.
Warning
Unlike the other legendary Beast Master Hunts, the Bloodtusk Mammoth must be killed rather than tamed. Rare trophy bugs have been reported with legendary hunts. Consider backing up your save before beginning the mission so you can restore it if the trophy fails to unlock.
Video Guide: https://www.youtube.com/watch?v=X0oGgMDXRR8&list=PLWaGPOt6HfARpqwV4-ADXkTdMVc3n9C80&index=15&pp=iAQB

Trophy: Fancy Friend
Tame 1 rare beast.
Type: Bronze
Category: Misc
How to Unlock
Tame one rare beast. Rare beasts are special variations of ordinary animals found throughout Oros. They usually have distinctive colors or markings that make them easier to recognize. Examples include the Rare Dhole, White Wolf, Rare Stripe Wolf, Rare Black Jaguar, and Rare Black Lion. Use Hunter Vision while exploring to identify animal tracks. Rare beasts leave distinctive yellow scent trails that can help you distinguish them from common animals. Once you've found a rare beast that you can tame, throw bait nearby and wait for it to begin eating. Approach carefully and complete the taming interaction to unlock Fancy Friend.
Tip
The White Wolf is a useful target because wolves are encountered relatively early, and the appropriate taming ability becomes available through the Beast Master skill tree. The legendary beasts encountered during Jayma's Master Beast Hunts can also satisfy this trophy.
Warning
The animal must be successfully tamed, not killed. Make sure you have the required Beast Master skill before approaching a stronger rare predator. Rare animals can be aggressive, so keep your distance until they're distracted by bait.
Video Guide: https://www.youtube.com/watch?v=y5q-v_zvL0s&list=PLWaGPOt6HfARpqwV4-ADXkTdMVc3n9C80&index=42&pp=iAQB

Trophy: Good Boy
Tame the snowblood wolf.
Type: Bronze
Category: Misc
How to Unlock
Tame the legendary Snowblood Wolf during Jayma's Beast Master Hunt. First, recruit Jayma and complete the Bloodfang Sabretooth hunt. This unlocks the Snowblood Wolf hunting mission. Travel to the marked area and activate Hunter Vision to identify the wolf's tracks. Follow the trail and complete the tracking objectives until you locate the legendary animal. The Snowblood Wolf is fast and aggressive, so avoid standing still during combat. Use your bow or thrown spears to weaken it while maintaining a safe distance. Once the wolf has taken enough damage, a taming prompt will appear. Approach the injured animal and complete the interaction to tame it and unlock Good Boy.
Tip
Keep your weapons stocked and use Hunter Vision whenever the trail becomes difficult to follow. Dismiss your current beast companion before confronting the Snowblood Wolf. This helps prevent another animal from interfering with the scripted taming sequence.
Warning
The Snowblood Wolf hunt has been associated with rare bugs that can prevent successful taming or trophy progression. Back up your save before starting the hunt, and avoid using companion beasts during the confrontation. Playing outside Survivor Mode also removes the complication of permanent beast deaths.
Video Guide: https://www.youtube.com/watch?v=sXEA934AjHM&list=PLWaGPOt6HfARpqwV4-ADXkTdMVc3n9C80&index=16&pp=iAQB

Trophy: Good Neighbor
Complete 15 "Help Wenja" quests.
Type: Bronze
Category: Misc
How to Unlock
Complete 15 Help Wenja quests throughout Oros. Help Wenja quests are optional activities involving members of your tribe who need assistance. They appear on the world map as orange circular markers containing a black hand symbol. These missions include rescuing captured Wenja, escorting vulnerable tribe members, and searching for missing people. Travel to a Help Wenja marker and follow its objectives until the mission is completed successfully. Continue helping tribe members until you've completed 15 qualifying quests to unlock Good Neighbor.
Tip
Complete Help Wenja quests whenever you encounter them while exploring. Many are relatively short and provide useful XP, resources, or additional village population. Some sidequests also award skill points, which can help you finish Expert Wenja.
Warning
Only missions classified as Help Wenja count toward the 15 required completions. Tribal Clash, Beast Kill, and Specialist missions are separate categories and won't contribute toward Good Neighbor.
Video Guide: https://www.youtube.com/watch?v=f7U8D421K4k&list=PLWaGPOt6HfARpqwV4-ADXkTdMVc3n9C80&index=45&pp=iAQB

Trophy: Here Kitty
Tame the bloodfang sabretooth.
Type: Bronze
Category: Misc
How to Unlock
Tame the legendary Bloodfang Sabretooth during Jayma's Beast Master Hunt. First, recruit Jayma by completing On the Hunt, then progress through her hunting missions until you've completed the Tall Elk hunt. This unlocks the Bloodfang Sabretooth hunt. Travel to the marked hunting area and use Hunter Vision to follow the Bloodfang's tracks. Continue tracking the animal until the confrontation begins. Fight the Bloodfang using your strongest weapons while avoiding its powerful melee attacks. Once you've weakened it sufficiently, you'll receive a prompt to tame it. Approach the injured Bloodfang and complete the taming interaction to unlock Here Kitty.
Tip
Use spears and ranged attacks to damage the Bloodfang while staying mobile. The legendary beast retains damage between attempts if you die during the hunt, making repeated attempts more manageable. Dismiss your current beast companion before the encounter to prevent it from interfering with the scripted fight.
Warning
Rare bugs have been reported where the Bloodfang dies instead of entering its taming sequence, potentially preventing the trophy from unlocking. Back up your save before starting the hunt, and avoid bringing a companion beast into the fight. If the trophy fails to unlock, restoring an earlier save may be necessary.
Video Guide: https://www.youtube.com/watch?v=wG96gQkO2yY&list=PLWaGPOt6HfARpqwV4-ADXkTdMVc3n9C80&index=13&pp=iAQB

Trophy: Kanda Of Faith
Climb to the peak of Pardaku Lookout and leap off.
Type: Bronze
Category: Misc
How to Unlock
Climb to the highest point of Pardaku Lookout and perform a leap into the water below. Pardaku Lookout is a tall natural landmark in Oros that serves as the location for this Assassin's Creed-inspired trophy. Travel to Pardaku Lookout and locate the climbing route leading toward its summit. Follow the available paths and climbing points until you reach the very top. Once you're at the highest point, look down to identify the water below. Position Takkar carefully, then jump from the summit into the water. Successfully completing the leap unlocks Kanda Of Faith.
Tip
Make sure you've reached the actual summit before attempting the jump. A leap from a lower ledge may not satisfy the trophy requirement. Take a moment to line up your jump with the water below. The goal is to land safely in the water rather than on the surrounding rocks.
Warning
Jumping from the wrong location or landing on solid ground won't unlock the trophy and may kill Takkar. If the trophy doesn't unlock, return to the summit and try again from the highest available point.
Video Guide: https://www.youtube.com/watch?v=RVEQHAOgo-o&list=PLWaGPOt6HfARpqwV4-ADXkTdMVc3n9C80&index=38&pp=iAQB

Trophy: Mapmaker
Discover 15 hidden locations.
Type: Bronze
Category: Misc
How to Unlock
Discover 15 hidden locations throughout Oros. Hidden locations are marked on your world map with question mark icons. They represent undiscovered landmarks, campsites, caves, and other points of interest. Travel toward a question mark and explore the surrounding area until the location is discovered. Once you've reached the correct spot, the game registers the discovery and reveals the location's name. Continue discovering these landmarks until you've found 15 hidden locations to unlock Mapmaker.
Tip
This trophy will usually unlock naturally while progressing through the story, exploring new regions, and completing sidequests. Check your map whenever you're traveling between objectives. Visiting nearby question marks is an easy way to gain additional XP and reveal useful locations.
Warning
Simply revealing a question mark on the map isn't enough. You must physically visit the location and trigger its discovery. You don't need to discover every hidden location in Oros; only 15 are required.
Video Guide: https://www.youtube.com/watch?v=5vyldqiaaQc&list=PLWaGPOt6HfARpqwV4-ADXkTdMVc3n9C80&index=46&pp=iAQB

Trophy: Mark 4 Wenja
Discover the future past.
Type: Bronze
Category: Misc
How to Unlock
Discover the hidden Far Cry 3: Blood Dragon Easter egg inside Hasar Likarta Cave. Hasar Likarta Cave is located in the northeastern region of Oros. Travel to this area and locate the cave entrance. Enter the cave and explore its interior, following the available passages until you reach the hidden location containing the futuristic Easter egg. Approach the unusual remains and investigate the area to trigger the discovery. Mark 4 Wenja unlocks once you've found the secret.
Tip
Use Hunter Vision and a torch to help navigate the darker sections of the cave. If you're having trouble locating the entrance, look for Hasar Likarta Cave on your world map and approach from the surrounding terrain. The secret is a reference to Far Cry 3: Blood Dragon, making it one of the game's more unusual discoveries.
Warning
Simply discovering the cave entrance isn't enough. You must explore inside and locate the hidden Easter egg. This trophy is unrelated to story progression, so you can return to the cave at any point during your playthrough.
Video Guide: https://www.youtube.com/watch?v=4ANKgSOpZqg&list=PLWaGPOt6HfARpqwV4-ADXkTdMVc3n9C80&index=49&pp=iAQB

Trophy: Master Tracker
Complete 5 "Beast Kill" quests.
Type: Bronze
Category: Misc
How to Unlock
Complete five Beast Kill quests throughout Oros. Beast Kill quests are optional hunting missions that challenge Takkar to track down and eliminate dangerous animals. These activities appear on your world map as orange circular markers containing black claw or paw symbols. Travel to a Beast Kill marker and begin the quest. Use Hunter Vision to locate tracks, follow the animal's trail, and identify its location. Once you've found the target, use your weapons to defeat it and complete any remaining mission objectives. Repeat this process until you've successfully completed five Beast Kill quests to unlock Master Tracker.
Tip
Use Hunter Vision frequently while tracking animals. It highlights trails and clues that can be difficult to spot in dense forests or rocky terrain. Bring plenty of arrows, spears, and healing supplies. Stronger predators can deal considerable damage, especially when encountered in confined areas. Completing these quests also provides rewards that help with your overall Platinum progression.
Warning
Beast Kill quests are different from Jayma's legendary Beast Master Hunts. Taming a legendary beast doesn't automatically count toward the five required Beast Kill quests. Check the quest icon and activity type before starting to ensure you're working on the correct requirement.
Video Guide: https://www.youtube.com/watch?v=QrHJ-AUHiLs&list=PLWaGPOt6HfARpqwV4-ADXkTdMVc3n9C80&index=48&pp=iAQB

Trophy: Menagerie
Tame 7 beasts.
Type: Bronze
Category: Misc
How to Unlock
Tame seven beasts throughout Oros. First, recruit Tensay by completing the Vision of Beasts mission. This unlocks beast taming and gives Takkar access to the Beast Master skill tree. To tame an animal, craft bait and throw it near a compatible wild beast. Once the animal approaches the bait and begins eating, crouch and move toward it carefully. When the taming prompt appears, hold Square to tame the animal and add it to your beast collection. Continue taming animals until you've successfully completed seven taming actions to unlock Menagerie.
Tip
You don't need to tame seven different species. Taming additional animals of a species you've already collected still counts toward the requirement. Unlock more Beast Master skills to expand the range of animals you can tame. Wolves and other common predators are convenient choices for earning this trophy early.
Warning
Simply discovering or killing an animal doesn't count. You must successfully complete the taming interaction. Some stronger predators require additional Beast Master skills before they can be tamed.
Video Guide: https://www.youtube.com/watch?v=H24lDWTvlh0&list=PLWaGPOt6HfARpqwV4-ADXkTdMVc3n9C80&index=41&pp=iAQB

Trophy: Tears Of Shame
Kill and skin 1 tamed beast.
Type: Silver
Category: Misc
How to Unlock
Kill and skin one of your own tamed beasts. First, complete Tensay's Vision of Beasts mission to unlock beast taming. Use bait to tame a wild animal, then summon it as your active companion. With your beast nearby, attack it using your weapons until it dies. Approach the body and use the skinning interaction to collect its resources. Tears Of Shame unlocks once you've successfully killed and skinned your own tamed animal.
Tip
Choose a common beast rather than a rare or legendary companion. If you need the animal again, you can normally revive a fallen tamed beast from the Beast menu using the required red leaves. Complete this trophy after you've already made progress toward Menagerie and Veterinarian so you can take advantage of your companions first.
Warning
The animal must be one you've personally tamed. Killing and skinning an ordinary wild beast won't count. Avoid attempting this in Survivor Mode, where beast deaths can be permanent.
Video Guide: https://www.youtube.com/watch?v=1O6yaA2ke8U&list=PLWaGPOt6HfARpqwV4-ADXkTdMVc3n9C80&index=19&pp=iAQB

Trophy: Twelve Labors
Complete any 12 Specialist missions.
Type: Silver
Category: Misc
How to Unlock
Complete 12 Specialist missions throughout Oros. Specialist missions are quests assigned by important Wenja characters such as Tensay, Jayma, Karoosh, and Wogah. These characters join your village as you progress through the main story. When a specialist has an available mission, their hut or quest location appears with a yellow marker on your map. Travel to the marked location, speak with the specialist when necessary, and complete the mission objectives. These quests involve activities such as hunting dangerous animals, fighting hostile tribes, and retrieving important resources. Complete any 12 Specialist missions to unlock Twelve Labors.
Tip
You'll complete several Specialist missions naturally while progressing through the story, so there's no need to grind them immediately. Continue visiting your specialists as new quests become available. Their missions also unlock useful skills and other activities needed for the Platinum.
Warning
Twelve Labors specifically requires Specialist missions. Ordinary Help Wenja, Tribal Clash, and Beast Kill quests are separate activities and don't count toward this trophy.
Video Guide: https://www.youtube.com/watch?v=qI2LeUCmuAQ&list=PLWaGPOt6HfARpqwV4-ADXkTdMVc3n9C80&index=10&pp=iAQB

Trophy: Veterinarian
Heal a tamed beast 25 times.
Type: Bronze
Category: Misc
How to Unlock
Heal a tamed beast 25 times. First, recruit Tensay and unlock beast taming. Tame a compatible animal and summon it as your active companion. Your beast can take damage while fighting enemies, hunting animals, or exploring dangerous areas. Whenever your companion is injured, approach it and press Square when the healing prompt appears. Healing consumes meat from your inventory. Repeat this process until you've successfully healed tamed beasts 25 times to unlock Veterinarian. The heals can be performed on different animals, so you don't need to use the same companion for every interaction.
Tip
Use your beast frequently during outpost captures and combat encounters. Injured companions provide natural opportunities to heal them while progressing toward Sic 'Em. If you still need healing actions, you can damage your own tamed beast slightly and then heal it. Repeat carefully until the trophy unlocks.
Warning
Only successful healing interactions count. Feeding or interacting with a beast that is already at full health won't contribute toward the requirement. Avoid accidentally killing your companion while attempting to create healing opportunities, particularly if you're playing Survivor Mode.
Video Guide: https://www.youtube.com/watch?v=Pe-6rW_gbLs&list=PLWaGPOt6HfARpqwV4-ADXkTdMVc3n9C80&index=43&pp=iAQB

Trophy: Conquest
Capture all forts.
Type: Bronze
Category: Story
How to Unlock
Capture the two major enemy forts required by the story: Big Darwa Fort and Fire Screamer Fort. Big Darwa Fort is controlled by the Udam and defended by Dah, while Fire Screamer Fort belongs to the Izila and is defended by Roshani. Both become available as you progress through their respective storylines. Travel to each fort and clear its defenses. These locations function similarly to outposts but feature stronger enemies and a specialist leader. Defeat the defenders and incapacitate the fort's leader. Continue eliminating any remaining hostile warriors until the fort is officially captured. After securing both Big Darwa Fort and Fire Screamer Fort, Conquest unlocks.
Tip
Scout each fort with your owl before attacking. Prioritize enemies near alarm horns to prevent additional reinforcements from joining the battle. Bring upgraded weapons, healing supplies, and a strong tamed beast to make the encounters more manageable. Capturing these forts also recruits Dah and Roshani, unlocking additional abilities needed for other trophies.
Warning
Defeating the fort leader alone isn't enough. You must clear the remaining enemies and complete the capture. Although Oros contains four major forts, only Big Darwa Fort and Fire Screamer Fort are required for Conquest.
Video Guide: https://www.youtube.com/watch?v=I_VoS_c5a_4&list=PLWaGPOt6HfARpqwV4-ADXkTdMVc3n9C80&index=40&pp=iAQB

Trophy: Deadeye
Karoosh joins the Wenja village.
Type: Bronze
Category: Story
How to Unlock
Recruit Karoosh and bring him to the Wenja village. As you progress through the main story, you'll unlock the specialist mission Brother in Need. Travel to its marked location and meet Karoosh, a Wenja warrior who needs your assistance. Follow the mission objectives and help Karoosh fight off the hostile Udam warriors. Once the mission is complete, Karoosh will join your settlement and Deadeye will unlock automatically. Recruiting Karoosh also unlocks additional Fighting Skills, giving Takkar access to stronger combat abilities.
Tip
Use your bow to eliminate enemies approaching from a distance, and keep your club or spear ready for close combat. Visit Karoosh's hut afterward to see which new skills and upgrades are available.
Video Guide: https://www.youtube.com/watch?v=j-4veW08eTs&list=PLWaGPOt6HfARpqwV4-ADXkTdMVc3n9C80&index=6&pp=iAQB

Trophy: Evolution in Action
Complete the mission, The Hunt for Ull.
Type: Bronze
Category: Story
How to Unlock
Complete the main story mission The Hunt for Ull. Ull is the leader of the Udam tribe, and confronting him is one of the final objectives in the Udam storyline. First, complete Into Udam Land to unlock the necessary progression and obtain the antidote needed to survive the poisonous fumes blocking the route into Ull's territory. Once The Hunt for Ull becomes available, follow the mission objectives through the hostile Udam region and reach Ull's location. Defeat Ull during the final confrontation and complete the mission to unlock Evolution in Action.
Tip
Upgrade your weapons and carry plenty of healing supplies before confronting Ull. Powerful ranged attacks can help you deal damage while keeping a safer distance.
Warning
You must obtain the antidote before accessing the poison-filled passage leading toward Ull. If the route is blocked, continue progressing through the Udam storyline.
Video Guide: https://www.youtube.com/watch?v=W0fe7sixpgg&list=PLWaGPOt6HfARpqwV4-ADXkTdMVc3n9C80&index=12&pp=iAQB

Trophy: Gray Huntress
Jayma joins the Wenja village.
Type: Bronze
Category: Story
How to Unlock
Recruit Jayma and bring her to the Wenja village. Progress through the main story until the specialist mission On the Hunt becomes available. Travel to its marked location to meet Jayma, an experienced Wenja hunter. Complete her hunting challenge by following the mission objectives, tracking your prey, and using Hunter Vision to locate clues and animal trails. Once you've finished On the Hunt, Jayma joins your settlement and Gray Huntress unlocks automatically. Recruiting Jayma unlocks additional Hunting Skills and eventually provides access to the legendary Beast Master Hunts required for several other trophies.
Tip
Recruit Jayma early so you can begin her hunting questline. You'll eventually need to hunt the Bloodfang Sabretooth, Great Scar Bear, Snowblood Wolf, and Bloodtusk Mammoth for their respective trophies. Hunter Vision makes tracking animals considerably easier, especially when following trails through dense vegetation.
Video Guide: https://www.youtube.com/watch?v=7Fn2u50068M&list=PLWaGPOt6HfARpqwV4-ADXkTdMVc3n9C80&index=9&pp=iAQB

Trophy: Home Improvement
Build or upgrade any 2 village huts.
Type: Bronze
Category: Story
How to Unlock
Build or upgrade any two huts in your Wenja village. As you progress through the story and recruit specialists, you'll gain access to additional huts in your settlement. Each hut requires a selection of crafting materials, such as wood, stone, animal skins, and regional resources. You can check the requirements through the Village menu or by interacting with the hut's construction location. Gather the necessary supplies through exploration, hunting, and resource collection, then return to your settlement to complete the construction or upgrade. Once you've successfully built or upgraded two huts, Home Improvement unlocks automatically.
Tip
Recruit specialists such as Tensay, Jayma, Karoosh, and Wogah early to make their huts available. Gather materials whenever you explore Oros rather than waiting until you need them. You'll eventually need to complete every hut upgrade for Real Estate Baron, so these early improvements also contribute toward that trophy.
Warning
Home Improvement only requires two successful hut constructions or upgrades. You don't need to fully upgrade the entire village for this trophy.
Video Guide: https://www.youtube.com/watch?v=NgmYFL04_XI&list=PLWaGPOt6HfARpqwV4-ADXkTdMVc3n9C80&index=17&pp=iAQB

Trophy: Krati, Krati, Krati!
Steal the Izila mask of Krati.
Type: Gold
Category: Story
How to Unlock
Steal the Izila Mask of Krati during the main story mission The Mask of Krati. Continue progressing through the Izila storyline until The Mask of Krati becomes available. During this mission, Takkar must infiltrate Izila territory and recover the sacred mask. Follow the marked objectives, use stealth to avoid unnecessary confrontations, and eliminate enemies who block your path. Once you've successfully stolen the mask and completed the mission, Krati, Krati, Krati! unlocks automatically. Completing The Mask of Krati also unlocks the next major Izila mission, The Fall of Batari, which is required for To Ash.
Tip
Scout the area with your owl before advancing and use silent takedowns or bow attacks to avoid attracting large groups of enemies. Having upgraded weapons and a healthy supply of healing resources makes the mission easier.
Warning
This trophy is earned through mandatory story progression and cannot be missed during a normal playthrough. There's no additional challenge beyond completing The Mask of Krati.
Video Guide: https://www.youtube.com/watch?v=PNORHTNQheQ&list=PLWaGPOt6HfARpqwV4-ADXkTdMVc3n9C80&index=5&pp=iAQB

Trophy: Liberator
Rescue a Wenja captive from the Izila.
Type: Silver
Category: Story
How to Unlock
Rescue a Wenja captive from the Izila during the main story mission The Taken Wenja. As you progress through the campaign, you'll be sent to rescue a fellow Wenja who has been captured by the Izila tribe. Follow the mission markers into enemy territory, eliminate or avoid the Izila warriors guarding the area, and complete the rescue objectives. Once you've successfully freed the captive and finished The Taken Wenja, Liberator unlocks automatically. Completing this mission also makes Fire Screamer Fort available, allowing you to continue progressing through the Izila storyline.
Tip
Use your owl to scout enemy positions before approaching. Marking guards and eliminating isolated targets with your bow makes clearing hostile areas much safer.
Warning
Liberator is tied to mandatory story progression and cannot be missed during a normal playthrough. You don't need to rescue additional captives for this particular trophy.
Video Guide: https://www.youtube.com/watch?v=BfhAL5yexpE&list=PLWaGPOt6HfARpqwV4-ADXkTdMVc3n9C80&index=3&pp=iAQB

Trophy: Mister Fix-It
Wogah joins the Wenja village.
Type: Bronze
Category: Story
How to Unlock
Recruit Wogah and bring him to the Wenja village. Progress through the main story until Wogah's specialist missions become available. You'll first need to complete Trapped, followed by Blood of Oros. During these missions, Takkar must survive Wogah's challenges and gather the materials needed to earn his trust. Follow the objectives for both missions and complete Blood of Oros to recruit Wogah. Mister Fix-It unlocks once he joins the Wenja village. Wogah unlocks additional Crafting Skills, including access to throwing shards and other useful equipment upgrades.
Tip
Recruit Wogah as soon as his missions become available. His crafting abilities help with combat and are necessary for working toward Quickdraw, which requires 15 throwing shard kills.
Warning
Completing Trapped alone isn't enough. You must also finish Blood of Oros before Wogah officially joins the village and the trophy unlocks.
Video Guide: https://www.youtube.com/watch?v=y17eIru6QEw&list=PLWaGPOt6HfARpqwV4-ADXkTdMVc3n9C80&index=8&pp=iAQB

Trophy: Spearproof
Repel the Udam attack.
Type: Silver
Category: Story
How to Unlock
Repel the Udam attack on your Wenja village. Early in the main story, you'll receive the mission Attack of the Udam, which involves defending your growing settlement from an enemy raid. Follow the mission objectives and eliminate the Udam warriors attacking the village. Use your bow and spears to keep enemies at a distance, switching to your club when opponents get too close. Continue defending the settlement until the attack has been repelled and the mission is complete. Spearproof unlocks automatically after successfully defending the village.
Tip
Keep your weapons stocked with crafting materials before beginning the mission. Spears deal substantial damage when thrown, while the bow is useful for targeting enemies from a safer distance.
Warning
This is a mandatory story trophy and cannot be missed during a normal playthrough. You don't need to complete any additional objectives beyond finishing Attack of the Udam.
Video Guide: https://www.youtube.com/watch?v=HEKAsQINel8&list=PLWaGPOt6HfARpqwV4-ADXkTdMVc3n9C80&index=2&pp=iAQB

Trophy: Spiritual Advisor
Tensay joins the Wenja village.
Type: Bronze
Category: Story
How to Unlock
Recruit Tensay and bring him to the Wenja village. Early in the story, you'll receive the mission Vision of Beasts, which introduces Takkar to Tensay, the Wenja shaman. Travel to Tensay's location and complete the mission's objectives, including the spirit vision sequence that teaches you about the connection between humans and animals. After completing Vision of Beasts, Tensay joins your village and Spiritual Advisor unlocks automatically. Recruiting Tensay also introduces beast taming and unlocks the Beast Master skill tree, allowing you to tame wild predators and use them as companions.
Tip
Prioritize Tensay's recruitment early. Tamed beasts are extremely helpful during combat, hunting, and outpost captures. They also contribute toward several trophies, including Menagerie, Fancy Friend, Veterinarian, and Sic 'Em.
Video Guide: https://www.youtube.com/watch?v=UdC1pPfXLk0&list=PLWaGPOt6HfARpqwV4-ADXkTdMVc3n9C80&index=7&pp=iAQB

Trophy: Subdivisions
Your Wenja tribe reaches a population of 20.
Type: Bronze
Category: Story
How to Unlock
Grow your Wenja village to a population of 20. Your village population increases as you rescue Wenja, complete story missions, capture enemy outposts, and secure bonfires throughout Oros. Continue exploring and completing these activities until your settlement reaches 20 inhabitants. You can check your current population through the Village menu. Subdivisions unlocks automatically once your village reaches the required population.
Tip
Capture bonfires and outposts as you travel between story missions. These activities expand your tribe, provide useful fast travel locations, and earn XP toward Expert Wenja. This trophy will usually unlock naturally early in your playthrough.
Warning
You don't need to upgrade huts or recruit 20 individual specialists. The requirement is simply to reach a total village population of 20.
Video Guide: https://www.youtube.com/watch?v=BYvb2ZTLGdE&list=PLWaGPOt6HfARpqwV4-ADXkTdMVc3n9C80&index=18&pp=iAQB

Trophy: This Way To Oros
Survive the mammoth hunt.
Type: Silver
Category: Story
How to Unlock
Survive the mammoth hunt during the opening prologue. At the beginning of Far Cry Primal, Takkar joins his fellow Wenja hunters in pursuit of a woolly mammoth. Follow the tutorial instructions as you track the herd, approach the mammoths, and participate in the hunt. Continue through the scripted events until the prologue concludes and Takkar survives the encounter. This Way To Oros unlocks automatically after completing the mammoth hunt.
Tip
Use this opening sequence to familiarize yourself with movement, aiming, and throwing spears. These mechanics will become essential as you explore Oros. The mammoth hunt is mandatory story progression, so there's nothing special you need to do for the trophy.
Video Guide: https://www.youtube.com/watch?v=aMlK5MrqA68&list=PLWaGPOt6HfARpqwV4-ADXkTdMVc3n9C80&index=1&pp=iAQB

Trophy: To Ash
Complete the mission, The Fall of Batari.
Type: Bronze
Category: Story
How to Unlock
Complete the main story mission The Fall of Batari. The Fall of Batari is one of the final missions in the Izila storyline, where Takkar confronts Batari, the leader of the Izila tribe. First, progress through the Izila campaign and complete The Mask of Krati to unlock the mission. You'll also need the Mammoth Rider skill to access the fortress where Batari is located. Follow the mission objectives, fight through the Izila defenses, and confront Batari during the final encounter. Defeat her and complete The Fall of Batari to unlock To Ash.
Tip
Upgrade your weapons and stock up on healing supplies before starting the mission. Fire-resistant protection and powerful ranged attacks can be especially helpful against the Izila. Use cover whenever possible and eliminate nearby enemies before focusing on Batari.
Warning
The Mammoth Rider skill is required to access the fortress involved in this mission. If you cannot progress toward Batari, check that you've unlocked the necessary riding ability.
Video Guide: https://www.youtube.com/watch?v=ZKlMvnchIkg&list=PLWaGPOt6HfARpqwV4-ADXkTdMVc3n9C80&index=11&pp=iAQB

Trophy: Uncaged
Escape the Udam caverns.
Type: Silver
Category: Story
How to Unlock
Escape the Udam caverns during the main story mission Into Udam Land. As the conflict with the Udam tribe progresses, Takkar must venture into their territory and survive a dangerous journey through their underground caverns. Follow the mission objectives as you navigate the cave system, deal with hostile Udam warriors, and make your way toward the exit. Complete Into Udam Land and successfully escape the caverns to unlock Uncaged. Finishing this mission also advances the Udam storyline and makes The Hunt for Ull available.
Tip
Keep your healing supplies stocked before entering the caverns. Use Hunter Vision to locate enemies and navigate darker areas, and rely on stealth whenever possible to avoid fighting several Udam warriors at once.
Warning
Uncaged is a mandatory story trophy and cannot be missed during a normal playthrough. Simply complete Into Udam Land to earn it.
Video Guide: https://www.youtube.com/watch?v=DMhwjd-P4TQ&list=PLWaGPOt6HfARpqwV4-ADXkTdMVc3n9C80&index=4&pp=iAQB

Welcome to Oros, where Takkar must survive deadly predators, hostile tribes, and the occasional mammoth having a terrible day. Begin by following the main story, recruiting Wenja specialists, and establishing your village. Focus on bringing Tensay, Jayma, Karoosh, and Wogah into your tribe, as they unlock beast taming, hunting abilities, combat skills, and crafting upgrades. You can play on Easy difficulty without affecting any trophies. For the smoothest Platinum, avoid Survivor Mode, where permanent beast deaths can complicate certain requirements.
As you explore, collect hardwood, stone, plants, animal skins, and other crafting materials whenever possible. You'll need plenty of resources to upgrade every village hut for Real Estate Baron, so gathering early will reduce the cleanup grind. Capture bonfires to unlock fast travel locations and clear enemy outposts for experience and village population growth. Whenever possible, capture outposts without being detected to earn additional XP. Your owl is especially useful for marking enemies and identifying alarm horns before attacking.
Begin making progress on combat trophies naturally by alternating between clubs, spears, and bows, each of which requires 100 enemy kills. Use takedowns, hunting traps, and your tamed beasts whenever opportunities arise. Once you've unlocked beast taming, recruit different animals and regularly heal your companions to work toward Menagerie, Fancy Friend, Veterinarian, and Sic 'Em. Don't worry about completing everything immediately; several abilities and activities remain locked behind story progression.
Continue the main story while expanding the Wenja village and pushing into the northern and southern regions of Oros. Complete specialist missions as they become available, including the quests leading toward the Udam and Izila strongholds. You'll eventually confront Ull and Batari, earning Evolution in Action and To Ash. Capturing the major forts also advances Conquest. Upgrade your winter clothing before exploring the frozen north, and unlock the necessary survival abilities before entering dangerous areas. A well-prepared caveman is a considerably happier caveman.
After recruiting Jayma and progressing through her hunting missions, begin tackling the legendary beast hunts. These involve the Bloodfang Sabretooth, Great Scar Bear, Snowblood Wolf, and Bloodtusk Mammoth. Their encounters contribute toward Here Kitty, Big Teddy, Good Boy, and Endangered. Save your game and consider making a backup before starting each Master Beast Hunt, as older versions have documented rare trophy and quest bugs. Dismiss your current beast companion before fighting a legendary animal to reduce the risk of it interfering with the scripted encounter.
Keep completing side activities while traveling between story missions. Capture outposts for Skirmish and Expansion, discover hidden locations for Mapmaker, and collect Daysha Hands, Izila Masks, Wenja Bracelets, Cave Paintings, and Spirit Totems for Cave Hoarder. You only need 80 collectibles rather than every item in Oros. Finish specialist missions when convenient, but pay attention to orange sidequests that award skill points. The game's normal XP progression eventually reaches a limit, making these additional skill points especially important for Expert Wenja.
Finish the remaining main story missions and defeat the leaders of the Udam and Izila tribes. By this stage, you should have access to most of the skills, weapons, and regions needed for trophy cleanup. Complete any remaining Master Beast Hunts, recruit missing specialists, and capture all 15 enemy outposts for Expansion. Remember that bonfires and forts are separate activities and don't count toward the outpost total. If combat becomes troublesome, use stealth, disable alarm horns, and send a powerful tamed beast ahead to distract enemies.
Focus on upgrading every village hut for Real Estate Baron. Check the village menu to identify missing construction materials, then hunt rare animals and gather regional resources as needed. Complete the remaining specialist missions for Twelve Labors and work through the required Help Wenja, Tribal Clash, and Beast Kill quests. These activities are particularly useful because some award skill points directly, helping you finish the entire skill tree for Expert Wenja after ordinary XP gains have reached their limit.
Now clean up the combat trophies that haven't unlocked naturally. Use fire to defeat 50 enemies, poison 25 enemies, sting bombs for 10 kills, throwing shards for 15 kills, and hunting traps for another 10. You'll also need kills with a sling, while riding a beast, and through owl attacks. For Right On Target and Bullseye, mark an enemy at the required distance and use a thrown spear or long bow to land the killing blow. If you've already captured every outpost, you can reset them through the options menu to create additional combat opportunities.
Check your remaining collectibles, village upgrades, and sidequests before beginning any unnecessary grinding. Cave Hoarder requires only 80 collectibles, so prioritize easily accessible Daysha Hands and other items already marked on your map. Finish discovering 15 hidden locations for Mapmaker, complete 15 Help Wenja quests for Good Neighbor, 10 Tribal Clash quests for Crush Your Enemies, and five Beast Kill quests for Master Tracker. For Kanda Of Faith, climb Pardaku Lookout and leap into the water below, while Mark 4 Wenja requires discovering the hidden secret inside Hasar Likarta cave.
Expert Wenja will likely be one of your final trophies because it requires learning every available skill. Once normal XP progression stops awarding skill points, concentrate on the sidequests that provide them directly. These quests are essential to completing the skill tree, so don't assume you've encountered an impossible grind when your experience stops increasing. If you're missing weapon or beast kills, reset outposts and use the newly populated enemy camps to finish them. You can also craft arrows repeatedly for Armorer if you haven't reached 100 crafting actions naturally.
Before wrapping up, double-check that every Master Beast Hunt trophy has unlocked successfully and that all village huts are fully upgraded. Most trophies remain available after completing the story, allowing you to explore Oros freely without starting another playthrough. The safest Platinum route is to play on a standard difficulty, avoid Survivor Mode, collect resources consistently, and make backups before the legendary beast hunts. Once every other trophy is complete, Apex Predator will unlock. You've conquered two rival tribes, tamed prehistoric monsters, and survived Oros with nothing but Stone Age technology. Not bad for a man who started with a spear.
YouTube Playlist
Far Cry Primal — Platinum Walkthrough