


Trophy Guide Preview
Overall Trophy Progress
0 / 32 Completed
0%
Trophy Types
Platinum
0 / 1Gold
0 / 5Silver
0 / 13Bronze
0 / 13Categories
Missable
0 / 7Collectible
0 / 4Grind
0 / 9Combat
0 / 2Misc
0 / 5Story
0 / 4
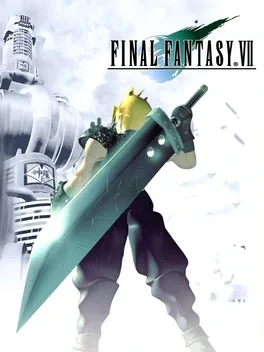
Join Cloud Strife and the rebel group AVALANCHE in a fight against the powerful Shinra corporation. Explore the vast world of Gaia, master the Materia battle system, summon legendary creatures, and confront the mysterious Sephiroth in one of gaming's most iconic RPG adventures.
Overall Trophy Progress
0 / 32 Completed
0%
Platinum Path
EARLY GAME Welcome to Midgar, where an enormous corporation is draining the planet, your sword is larger than most refrigerators, and Cloud has absolutely no interest in discussing his feelings. Begin by progressing through the story while learning the Active Time Battle system, equipping Materia, and experimenting with Limit Breaks. The PS4 version includes three optional boosters: L3 activates triple speed, R3 enab...
YouTube Playlist
FINAL FANTASY VII — Platinum Walkthrough
Trophy: Gaia's Guardian
Obtain all trophies
Type: Platinum
How to Unlock
Earn all 31 other trophies in Final Fantasy VII to unlock the Platinum. You'll need to complete the main story, recruit the optional party members, learn the required Limit Breaks, collect powerful Summon Materia, and conquer the optional Ruby and Emerald Weapon superbosses. Several trophies require careful planning, particularly Best Bromance, Consummate Cross-dresser, See the Light, and Waiting in the Wings. Missing these opportunities can force you to reload an earlier save or begin another playthrough. You'll also need to reach level 99 with one character and accumulate 99,999,999 gil. Thankfully, the PS4 version includes optional boosters that make the tougher battles and longer grinds considerably easier. Once every other trophy has been earned, Gaia's Guardian unlocks automatically.
Tip
Use multiple save slots and follow the roadmap's missable trophy precautions. One carefully planned playthrough is enough to earn the Platinum. The PS4 boosters don't disable trophies. Press L3 for triple speed, R3 for Battle Boost, or L3 + R3 to disable random encounters.
Warning
Battle Boost doesn't protect against every instant-death mechanic, so don't assume you're invincible against the game's superbosses. Protect your missable trophies first. Even a fully mastered Materia collection can't fix a forgotten conversation with Barret.

Trophy: Best Bromance
Go on a date with Barret in the Gold Saucer
Type: Bronze
Category: Missable
How to Unlock
Go on a date with Barret at the Gold Saucer. During your second visit to the Gold Saucer, Cloud goes on a date with whichever party member has the highest hidden affection score. Barret begins with zero points, so you must deliberately increase his affection while avoiding unnecessary increases for Aeris, Tifa, and Yuffie. Start working toward this trophy from the beginning of the game. Give the flower to Marlene, choose "Barret's snoring kept me up..." when Tifa asks about Cloud's sleep, and favor Barret whenever the story offers a relevant dialogue choice. In Kalm, support Barret's opinions. In Cosmo Canyon, speak with him about AVALANCHE and choose "Go on" followed by "And then" to gain additional affection points. Avoid actions that significantly raise affection with the other characters. When choosing party members for optional conversations or events, be mindful of how those decisions affect the hidden relationship system. If Barret visits Cloud's hotel room during the second Gold Saucer visit and invites him on the date, Best Bromance unlocks.
Tip
Follow a dedicated Barret affection walkthrough throughout the first part of the story. Because affection values are hidden, guessing your way through conversations is risky. Create separate saves before important dialogue sequences and before the Gold Saucer date.
Warning
This trophy is permanently missable once the date occurs. If someone other than Barret appears, you'll need to reload an earlier save or start another playthrough. Older game versions had reports of trophy registration issues. Keep your PS4 version updated and confirm the trophy unlocks. Even Sephiroth doesn't demand this much emotional preparation.
Video Guide: https://www.youtube.com/watch?v=aTWU0gABO8g

Trophy: Consummate Cross-dresser
Get Don Corneo to choose Cloud over the two females
Type: Bronze
Category: Missable
How to Unlock
Get Don Corneo to choose Cloud over Aeris and Tifa during the Wall Market storyline. This trophy is earned early in Midgar, when Cloud must disguise himself to enter Don Corneo's mansion. The better his disguise, the more likely Corneo is to choose him. Before entering the mansion, collect the following outfit items: Silk Dress: Visit the dress shop, find the owner's father at the bar, and request a dress that feels soft and shimmers. Blonde Wig: Visit the gym and win the squatting competition. Sexy Cologne: Eat at the restaurant and say the food was all right. Exchange the Pharmacy Coupon for Digestive medicine, then give it to the woman in the bar's bathroom. Diamond Tiara: Help the Materia shop owner by buying the 200-gil item from the inn's vending machine. Honey Bee Inn clothing: Obtain a membership card, enter the Honey Bee Inn, and complete one of the appropriate room events. Getting Cloud's makeup done provides an additional advantage. Once you've assembled your disguise, return to the dress shop to change clothes, then enter Don Corneo's mansion. If Corneo chooses Cloud, the trophy unlocks during the resulting scene. Turns out the enormous sword wasn't Cloud's most impressive accessory after all.
Tip
Make a separate save before entering Don Corneo's mansion. This gives you a convenient opportunity to retry if he chooses someone else or the trophy fails to appear. The Silk Dress, Blonde Wig, Sexy Cologne, and Diamond Tiara provide a strong foundation for the disguise.
Warning
This trophy is permanently missable once the Wall Market sequence ends. You cannot return later to repeat Don Corneo's selection. Older versions also had reports of trophy registration problems, so verify that the trophy unlocks before continuing.
Video Guide: https://www.youtube.com/watch?v=NyQAZq8S0Fk

Get Don Corneo to choose Cloud over Aeris and Tifa during the Wall Market storyline.
This trophy is earned early in Midgar, when Cloud must disguise himself to enter Don Corneo's mansion. The better his disguise, the more likely Corneo is to choose him.
Before entering the mansion, collect the following outfit items:
Silk Dress: Visit the dress shop, find the owner's father at the bar, and request a dress that feels soft and shimmers.
Blonde Wig: Visit the gym and win the squatting competition.
Sexy Cologne: Eat at the restaurant and say the food was all right. Exchange the Pharmacy Coupon for Digestive medicine, then give it to the woman in the bar's bathroom.
Diamond Tiara: Help the Materia shop owner by buying the 200-gil item from the inn's vending machine.
Honey Bee Inn clothing: Obtain a membership card, enter the Honey Bee Inn, and complete one of the appropriate room events. Getting Cloud's makeup done provides an additional advantage.
Once you've assembled your disguise, return to the dress shop to change clothes, then enter Don Corneo's mansion.
If Corneo chooses Cloud, the trophy unlocks during the resulting scene. Turns out the enormous sword wasn't Cloud's most impressive accessory after all.
Make a separate save before entering Don Corneo's mansion. This gives you a convenient opportunity to retry if he chooses someone else or the trophy fails to appear.
The Silk Dress, Blonde Wig, Sexy Cologne, and Diamond Tiara provide a strong foundation for the disguise.
This trophy is permanently missable once the Wall Market sequence ends. You cannot return later to repeat Don Corneo's selection.
Older versions also had reports of trophy registration problems, so verify that the trophy unlocks before continuing.
Trophy: Inner Demons
Learn Chaos—Vincent's last Limit Break
Type: Silver
Category: Missable
How to Unlock
Teach Vincent Valentine his final Limit Break, Chaos. First, recruit Vincent from the basement of Shinra Mansion in Nibelheim. You'll need him in your party to access the optional event that rewards his final Limit Break. After obtaining the submarine during the second part of the story, travel to the waterfall cave located between the Gold Saucer and Nibelheim regions. This hidden location is commonly known as Lucrecia's Cave. Enter the cave with Vincent and Cloud in your party to trigger a scene involving Lucrecia. After the scene, leave the cave and complete at least 10 random battles. Return to the cave to receive the Chaos Limit Break manual and Vincent's Death Penalty weapon. Vincent must also have learned his earlier Limit Breaks: Galian Beast, Death Gigas, and Hellmasker. Once these requirements are satisfied, use the Chaos manual on Vincent to unlock Inner Demons.
Tip
Visit Lucrecia's Cave during Part 2, as soon as you can reach it. You can then return for the rewards after completing the required battles. Equip Vincent in your active party during regular combat to accumulate the kills needed for his earlier Limit Breaks.
Warning
You must trigger Lucrecia's scene during Part 2. Waiting until Part 3 to visit the cave for the first time can permanently prevent you from obtaining the rewards. Failing to recruit Vincent also prevents you from completing this trophy. Make a separate save before visiting the cave and confirm that you've witnessed the scene before progressing. Vincent's idea of confronting his past involves a mysterious cave, ten random battles, and another nap. Therapy works differently in Gaia.

Trophy: Loose Cannon
Learn Catastrophe—Barret's last Limit Break
Type: Silver
Category: Missable
How to Unlock
Teach Barret his final Limit Break, Catastrophe. The Catastrophe manual is obtained in North Corel during the Huge Materia storyline. When Shinra attempts to transport the Huge Materia by train, you'll need to intercept the locomotive before it crashes into town. You have 10 minutes to catch the train, fight through its guards, and reach the engine. Rapidly alternate Up and Triangle to catch up with the runaway train, then defeat the enemies on each carriage. Once you reach the locomotive, follow the braking sequence to stop the train safely. After the resulting scenes, visit the house below the inn in North Corel and speak with the woman inside to receive the Catastrophe manual. Barret must also learn all six earlier Limit Breaks before he can use it: Big Shot, Mindblow, Grenade Bomb, Hammer Blow, Satellite Beam, and Angermax. Use the Catastrophe manual on Barret once these abilities are unlocked to earn Loose Cannon.
Tip
Save immediately before starting the train mission. Use Battle Boost and triple speed to clear the enemy encounters quickly without wasting your limited time. You don't need Barret in your active party to receive the manual.
Warning
Failing to stop the train can complicate the normal acquisition of Catastrophe and also costs you the North Corel Huge Materia. The safest approach is to save the town, collect the manual, and confirm that Barret learns Catastrophe before moving on. Shinra built a runaway train full of armed guards. Apparently ordinary public transportation wasn't dangerous enough.

Trophy: See the Light
Learn Great Gospel—Aeris's last Limit Break
Type: Silver
Category: Missable
How to Unlock
Teach Aeris her final Limit Break, Great Gospel, before completing the Temple of the Ancients. First, unlock all six of Aeris's earlier Limit Breaks: Healing Wind, Seal Evil, Breath of the Earth, Fury Brand, Planet Protector, and Pulse of Life. You unlock additional Limit Breaks by defeating enemies with Aeris and repeatedly using the abilities she has already learned. After obtaining the Tiny Bronco, travel to the cave containing the sleeping old man near Junon. You can reach the cave by transporting the buggy from Costa del Sol to Junon aboard the cargo ship. Speak with the old man until he tells you how many battles you've fought. He'll give you Mythril when the final two digits of your battle count match and are odd, such as 111, 133, or 155 battles. If your current count doesn't qualify, fight additional battles outside the cave and return when you reach the next matching odd pair. Take the Mythril to the weapon seller's house near Gongaga. Give it to the owner, then choose the small box upstairs to obtain the Great Gospel manual. Once Aeris has learned her previous Limit Breaks, use the manual on her to unlock See the Light.
Tip
Begin developing Aeris's Limit Breaks early. Equip offensive magic linked with All Materia so she can defeat several weak enemies in one action. Use Hyper to inflict Fury and increase how quickly her Limit gauge fills. Battle Boost also allows you to use Limit Breaks repeatedly without waiting for the gauge. Complete this trophy before entering the Temple of the Ancients to avoid unnecessary risk.
Warning
This is one of the game's most important permanently missable trophies. Story events eventually remove Aeris from your party, preventing you from teaching her Great Gospel afterward. Don't settle for simply obtaining the manual. Confirm that Aeris has actually learned Great Gospel and that See the Light has unlocked. There are many ways to save the planet, but apparently one involves visiting a sleeping man, counting battles, and trading a chunk of Mythril for a tiny box.

Trophy: Waiting in the Wings
Obtain the Bahamut Materia
Type: Bronze
Category: Missable
How to Unlock
Obtain the Bahamut Summon Materia inside the Temple of the Ancients. During the main story, you'll enter the Temple of the Ancients while pursuing Sephiroth. Progress through the dungeon until you reach the Mural Room and encounter the Red Dragon boss. Defeat the Red Dragon and look for the red Summon Materia orb that appears on the ground. Approach the orb and collect it before continuing through the temple. Once Bahamut is added to your Materia inventory, Waiting in the Wings unlocks. You'll also need this Materia later to obtain Bahamut ZERO for Bahamutype-0.
Tip
Make a separate save before progressing through the Temple of the Ancients. After defeating the Red Dragon, take a moment to inspect the room and confirm you've collected Bahamut before moving forward.
Warning
This trophy is permanently missable because you cannot return to the Temple of the Ancients after completing it. Defeating the Red Dragon isn't enough. You must physically pick up the Bahamut Materia. Leaving without it means reloading an earlier save or beginning another playthrough. Even Sephiroth probably wouldn't leave a free dragon lying on the floor.

Trophy: Won't You be My Valentine?
Have Vincent join your party
Type: Bronze
Category: Missable
How to Unlock
Recruit Vincent Valentine from Shinra Mansion in Nibelheim. During your first visit to Nibelheim, enter Shinra Mansion and locate the safe in the upstairs western room. You have 20 seconds to enter the combination, using the following directions: Right to 36. Left to 10. Right to 59. Right to 97. Do not overshoot any number. Opening the safe triggers a battle against the optional boss Lost Number. Defeat Lost Number, then collect the rewards, including the Basement Key. The boss also drops Cosmo Memory, Red XIII's final Limit Break manual. Head into the mansion's basement and unlock the previously inaccessible room. Examine the coffin to speak with Vincent. Choose "Talk about Sephiroth" during the first conversation. Examine the coffin again and select "Who are you?" After finishing both conversations, leave the room and continue toward the basement exit. Vincent will approach Cloud and join the party, unlocking Won't You be My Valentine?
Tip
Save before opening the safe. Lost Number has 7,000 HP and can be challenging during your first visit, so use strong magic, summons, and healing abilities. You can return later if the boss proves too difficult. Recruiting Vincent also allows you to pursue Inner Demons, which requires obtaining his final Limit Break, Chaos.
Warning
Vincent is optional, and missing his recruitment can also prevent you from earning Inner Demons. Follow both coffin conversations carefully and confirm that Vincent joins before leaving the mansion. Apparently, recruiting a mysterious gunman requires repeatedly interrupting his nap. Fair enough.

Trophy: Bahamutype-0
Obtain the Bahamut ZERO Materia
Type: Silver
Category: Collectible
How to Unlock
Obtain the Bahamut ZERO Summon Materia. The recommended method requires collecting the Bahamut and Neo Bahamut Materia, securing all four Huge Materia, and visiting Bugenhagen's observatory in Cosmo Canyon. First, collect Bahamut after defeating the Red Dragon inside the Temple of the Ancients. Later, pick up Neo Bahamut while exploring the Whirlwind Maze. Both locations become inaccessible after their respective story sections, so don't leave without the red Materia orbs. During the Huge Materia storyline, successfully complete all four operations: stop the runaway train at North Corel, defend Fort Condor, recover the Huge Materia from the sunken red submarine, and enter the correct security code aboard the rocket at Rocket Town. The rocket's security code is Circle, Square, Cross, Cross. Once you've collected everything, return to Cosmo Canyon and speak with Bugenhagen. Examine the blue Huge Materia in his observatory and choose to look closer. If you have the required Materia, you'll receive Bahamut ZERO and unlock Bahamutype-0.
Tip
Create separate saves before every Huge Materia mission. These events can be failed, and reloading is much easier than relying on a rare alternative method. Bahamut ZERO is also an excellent summon for challenging late-game encounters.
Warning
Missing Bahamut or Neo Bahamut can prevent the normal acquisition method. Bahamut ZERO can reportedly be excavated at Bone Village if missed, but the chance is very low. Don't assume completing a Huge Materia mission means you collected its reward. Verify that each Huge Materia is actually secured. Three different Bahamuts. Apparently one planet-threatening dragon simply wasn't enough.
Video Guide: https://www.youtube.com/watch?v=GyzwsOCxVVI

Trophy: Making Waves
Obtain the Leviathan Materia
Type: Bronze
Category: Collectible
How to Unlock
Obtain the Leviathan Summon Materia. Leviathan is awarded for completing Yuffie's optional Wutai Pagoda challenge. First, recruit Yuffie and travel to Wutai on the western continent. If you visit during the earlier portions of the game, you'll need to complete the sidequest where Yuffie steals your party's Materia before you can fully pursue the Pagoda challenge. Once your Materia has been recovered, travel to the Pagoda in Wutai and speak with the characters inside to begin Yuffie's trials. Yuffie must fight five opponents in consecutive individual challenges, culminating in a battle against her father, Godo. Defeat Godo to receive the Leviathan Materia and unlock Making Waves. You'll also obtain the All Creation manual, which is required for Yuffie's final Limit Break trophy, Meet Your Maker.
Tip
Attempt the Pagoda during the later stages of the game when Yuffie has stronger equipment, more HP, and better Materia. Equip healing Materia and useful defensive accessories. Battle Boost can also make the encounters considerably easier. Complete this challenge alongside Meet Your Maker to earn two trophies from the same sidequest.
Warning
Only Yuffie can participate in the Pagoda battles, so make sure she's properly equipped before entering. Obtaining Leviathan is enough for Making Waves. You don't need to use the summon in battle. Five challenging fights for a sea serpent and some family bonding. Just another perfectly normal day in Wutai.

Trophy: Roundtable Destruction
Obtain the Knights of the Round Materia
Type: Silver
Category: Collectible
How to Unlock
Obtain the Knights of the Round Summon Materia. Knights of the Round is hidden inside an isolated Materia Cave on an unmarked island in the northeastern part of the world map. The cave cannot be reached by ordinary transportation. You'll need a Gold Chocobo capable of crossing the terrain surrounding the island. There are two main ways to obtain one. The traditional method is Chocobo breeding. Capture suitable Good and Great Chocobos, breed them using Carob Nuts to obtain Blue and Green Chocobos, then breed those into a Black Chocobo. Finally, breed the Black Chocobo with a Wonderful Chocobo using a Zeio Nut to obtain a Gold Chocobo. Raising your chocobos' racing ranks and feeding them Sylkis Greens improves your breeding chances. Alternatively, defeat Ruby Weapon to obtain the Desert Rose. Exchange it with the Kalm Traveler to receive a Gold Chocobo without completing the full breeding process. Once you have a Gold Chocobo, ride it to the hidden northeastern island, enter the cave, and collect the Knights of the Round Materia to unlock Roundtable Destruction.
Tip
Save before breeding chocobos so you can reload if you receive the wrong color or gender. If you're using Battle Boost, defeating Ruby Weapon first may save considerable breeding time, although you'll need a strong strategy without Knights of the Round. Knights of the Round is one of the game's most powerful summons and is extremely useful against Emerald Weapon and other difficult bosses.
Warning
A Black Chocobo isn't enough to reach this particular cave. You need a Gold Chocobo. You must collect the actual Materia orb inside the cave. Simply reaching the island doesn't unlock the trophy. Thirteen knights, one summon animation, and enough damage to make Sephiroth reconsider his career choices.

Trophy: Transcendant Convoker
Obtain the Master Summon Materia
Type: Gold
Category: Collectible
How to Unlock
Obtain the Master Summon Materia. The easiest method is to defeat Emerald Weapon and exchange its reward with the Kalm Traveler. After obtaining the submarine, locate Emerald Weapon underwater near Junon. Prepare your party with powerful attacks, healing abilities, and defensive Materia before attempting the fight. Defeat Emerald Weapon to receive the Earth Harp. Travel to Kalm and enter the house where the traveling collector resides. Speak with him and exchange the Earth Harp for a set of Master Materia, including Master Summon. Once you receive Master Summon, Transcendant Convoker unlocks. There is also an alternative method involving mastering all 16 Summon Materia and interacting with the red Huge Materia in Bugenhagen's observatory. However, this requires significantly more grinding and depends on obtaining the necessary Summon Materia.
Tip
Save yourself the considerable Materia grind by defeating Emerald Weapon instead. Master Summon provides access to every summon without requiring you to equip each individual Summon Materia. It's especially useful against Ruby Weapon if you defeat Emerald first. Battle Boost can make the Emerald Weapon encounter easier, although you still need to prepare for its dangerous attacks.
Warning
You must actually exchange the Earth Harp with the Kalm Traveler. Defeating Emerald Weapon alone doesn't unlock this trophy. The alternative Huge Materia method requires mastering the complete Summon Materia collection, including summons that can be missed during the story. After defeating a million-HP sea monster, your reward is a little red orb. Final Fantasy has a fascinating sense of proportion.

Trophy: A Universe of Pain
Learn Cosmo Memory—Red XIII's last Limit Break
Type: Silver
Category: Grind
How to Unlock
Teach Red XIII his final Limit Break, Cosmo Memory. The Cosmo Memory manual is obtained by defeating Lost Number, an optional boss hidden inside the safe at Shinra Mansion in Nibelheim. Travel to the mansion and locate the safe in the upstairs western room. Enter the combination in this exact order: Right to 36. Left to 10. Right to 59. Right to 97. You have 20 seconds to enter the combination without overshooting any number. Opening the safe triggers a battle against Lost Number, which has 7,000 HP. Defeat the boss to receive the Cosmo Memory manual. Red XIII must also learn his six previous Limit Breaks: Sled Fang, Lunatic High, Blood Fang, Stardust Ray, Howling Moon, and Earth Rave. Once these abilities are unlocked, use the Cosmo Memory manual on Red XIII to earn A Universe of Pain.
Tip
Complete this objective alongside Won't You be My Valentine?, since opening the safe also provides the Basement Key required to recruit Vincent. Use strong magic and healing abilities against Lost Number, especially if you're attempting the fight during your first visit to Nibelheim. Battle Boost can make the encounter considerably easier.
Warning
Obtaining the Cosmo Memory manual isn't enough. Red XIII must learn all six earlier Limit Breaks before he can use it. Save before attempting the safe combination so you can retry if you run out of time or struggle with the boss. Apparently Shinra's preferred method of protecting valuables is locking a monster inside the safe. Surprisingly effective.

Trophy: Coming Up All Nines
Obtain 99,999,999 gil
Type: Silver
Category: Grind
How to Unlock
Accumulate 99,999,999 gil at one time. This is the maximum amount of gil you can carry in Final Fantasy VII, and reaching it through ordinary battles would take an enormous amount of time. The most efficient method is to master multiple copies of All Materia and sell them for 1,400,000 gil each. During the later stages of the story, purchase additional All Materia from Fort Condor and equip as many copies as possible across your party's weapons and armor. Use equipment with increased Materia growth, especially Cloud's Apocalypse sword or Cid's Scimitar, which provide triple AP growth. Travel to the Northern Cavern and locate the area containing Magic Pots and Movers. Magic Pots require an Elixir before they can be damaged, but reward substantial EXP and AP when defeated. Movers provide particularly high AP rewards. Continue mastering All Materia, replacing completed copies with fresh ones, and selling the mastered Materia until your gil total reaches 99,999,999. Coming Up All Nines unlocks once you've accumulated the full amount.
Tip
Obtain W-Item Materia during the return to Midgar. Its item duplication trick allows you to create large quantities of Elixirs, making Magic Pot farming considerably easier. Starting from zero gil, you'd need to sell approximately 72 mastered All Materia. Any existing savings reduce that number. Combine this grind with Liege of Leveling and Materia Mastermind to work toward three trophies simultaneously.
Warning
You must possess 99,999,999 gil at once. Earning that amount cumulatively and spending it along the way won't count. Don't accidentally sell valuable Materia you still need for superbosses or other trophies. Keep an eye on your Materia inventory capacity and replace mastered copies regularly so newly generated Materia aren't lost. Cloud may be saving the planet, but apparently he's also preparing to buy it.
Video Guide: https://www.youtube.com/watch?v=Z3kObepUuYk

Trophy: Gale Warning
Learn Highwind—Cid's last Limit Break
Type: Silver
Category: Grind
How to Unlock
Teach Cid Highwind his final Limit Break, Highwind. The Highwind manual is located inside the Sunken Gelnika, an optional underwater aircraft wreck accessible after obtaining the submarine. Travel beneath the ocean near Costa del Sol and locate the sunken aircraft. Enter the wreck and explore its rooms while collecting valuable equipment and Materia. Find the room containing the wrecked helicopter and open the treasure chest holding the Highwind manual. Before using the manual, Cid must learn his six earlier Limit Breaks: Boost Jump, Dynamite, Hyper Jump, Dragon, Dragon Dive, and Big Brawl. Once Cid has learned these abilities, use the Highwind manual on him to unlock Gale Warning.
Tip
The Sunken Gelnika contains several other valuable items, including Hades Materia, Double Cut Materia, and Yuffie's Conformer weapon. Bring strong equipment and healing supplies because the enemies inside are considerably more dangerous than ordinary encounters. Battle Boost can help you survive while collecting the required items.
Warning
The Sunken Gelnika is optional, so you won't necessarily discover it during the main story. Collecting the manual alone doesn't unlock Gale Warning. You must also teach Cid the Limit Break after learning his earlier abilities. Cid finally gets an attack named after his beloved airship. Naturally, the instructions were stored inside a completely different aircraft at the bottom of the ocean.

Trophy: Liege of Leveling
Reach Lv. 99 with one character
Type: Silver
Category: Grind
How to Unlock
Reach level 99 with any playable character. Throughout Final Fantasy VII, characters earn experience points by defeating enemies. As they accumulate EXP, their levels increase, improving their combat statistics. You only need one character to reach level 99, so focus on whichever party member is already closest to the maximum level. The most efficient grinding location is the Northern Cavern, particularly the area containing Magic Pots. Each defeated Magic Pot awards substantial experience, making them excellent targets for leveling. Remember to give each Magic Pot an Elixir before attempting to damage it. Continue defeating enemies until one character reaches level 99 to unlock Liege of Leveling.
Tip
Equip EXP Plus Materia, available from the Gold Saucer's Wonder Square for 2,000 GP, to accelerate the leveling process. Use triple speed with L3 and Battle Boost with R3 to make repeated encounters faster and easier. This is an excellent opportunity to work toward Coming Up All Nines by mastering All Materia during the same battles.
Warning
Movers provide excellent AP but no EXP, so prioritize Magic Pots when your main objective is reaching level 99. Reaching level 99 can strengthen the final boss under certain conditions. If you want an easier final encounter, create a separate save before reaching the maximum level and reload it after earning the trophy. Level 99 is impressive, but Sephiroth has apparently been studying your character sheet.
Video Guide: https://www.youtube.com/watch?v=moud59zKOnM

Trophy: Materia Mastermind
Raise a Materia to Lv. 5
Type: Bronze
Category: Grind
How to Unlock
Raise one Materia to level 5. Materia gains Ability Points, or AP, from battles while equipped in a character's weapon or armor. Accumulating enough AP increases its level and eventually allows certain Materia to reach level 5. Choose a Materia that supports five levels, such as All or many Summon Materia, and keep it equipped while progressing through the story. Continue winning battles to earn AP until your chosen Materia reaches its fifth level. The trophy unlocks when the Materia reaches level 5.
Tip
All Materia is an especially useful choice because a mastered copy can be sold for 1,400,000 gil, helping you work toward Coming Up All Nines. Later in the game, equip All Materia in weapons with double or triple Materia growth and fight Magic Pots or Movers in the Northern Cavern. These enemies provide excellent AP rewards. You can also use L3 to activate triple speed and make the grinding process less time-consuming.
Warning
Not every Materia has five levels. Check its growth potential before committing to the grind. Materia must remain equipped during battles to receive AP. Keeping it in your inventory won't increase its level.

Trophy: Meet Your Maker
Learn All Creation—Yuffie's last Limit Break
Type: Silver
Category: Grind
How to Unlock
Teach Yuffie her final Limit Break, All Creation. All Creation is obtained by completing the optional Wutai Pagoda challenge, where Yuffie must defeat five opponents in individual battles. First, recruit Yuffie and travel to Wutai. If you visit during the earlier parts of the game, complete the sidequest where she steals your party's Materia before attempting the Pagoda. Once your equipment has been recovered, enter the Pagoda and begin the series of battles. Yuffie must defeat each opponent alone, with the final battle taking place against her father, Godo. Defeating Godo rewards you with the All Creation manual and Leviathan Summon Materia. Before Yuffie can learn All Creation, she must unlock her six previous Limit Breaks: Greased Lightning, Clear Tranquil, Landscaper, Bloodfest, Gauntlet, and Doom of the Living. Use the All Creation manual on Yuffie once those abilities are learned to unlock Meet Your Maker.
Tip
Wait until the later stages of the game so Yuffie has access to stronger weapons, defensive accessories, and powerful Materia. Equip Restore Materia and a Ribbon if available. Battle Boost can also make the solo encounters much easier. Completing the Pagoda additionally earns Making Waves when you receive Leviathan.
Warning
Only Yuffie can participate in the Pagoda battles, so prepare her equipment before starting. Defeating Godo and collecting the manual won't unlock the trophy until Yuffie has learned her previous Limit Breaks and successfully uses the manual. Five floors of fighting, ending with your own father. Wutai apparently has very intense family traditions.

Trophy: Packing a Punch
Learn Final Heaven—Tifa's last Limit Break
Type: Silver
Category: Grind
How to Unlock
Teach Tifa her final Limit Break, Final Heaven. After rescuing Cloud from Mideel during the second part of the story, return to Nibelheim with Tifa in your active party. Enter Tifa's childhood home, head upstairs to her bedroom, and interact with the piano. Play the following melody using the PS4 controls: Cross, Square, Triangle, L2 + Triangle, L2 + Square, Cross, Square, Triangle, L2 + Cross, Circle, Cross, Square, Cross. Once you've performed the correct melody, finish the interaction to receive the Final Heaven manual. Before Tifa can learn Final Heaven, she must unlock her six previous Limit Breaks: Beat Rush, Somersault, Waterkick, Meteodrive, Dolphin Blow, and Meteor Strike. Use the manual on Tifa after learning these abilities to unlock Packing a Punch.
Tip
Make a separate save before attempting the piano sequence. Enter each button combination carefully rather than rushing through the melody. You can accelerate Tifa's Limit Break progression by letting her land the finishing blow on groups of weak enemies and repeatedly using her available Limit Breaks.
Warning
Tifa must be in your party, and Cloud must have returned after the Mideel storyline before the piano can reward you with Final Heaven. Obtaining the manual alone doesn't unlock the trophy. You must actually teach Tifa her final Limit Break. After everything that happens in Nibelheim, it's nice that the piano still works.

Trophy: The Slash to End All Slashes
Learn Omnislash—Cloud's last Limit Break
Type: Silver
Category: Grind
How to Unlock
Teach Cloud his final Limit Break, Omnislash. Omnislash is obtained by exchanging Battle Points at the Battle Square inside the Gold Saucer. Once the Battle Square becomes available, participate in its series of solo battles. Each challenge consists of up to eight consecutive encounters, with a randomized handicap applied between rounds. Winning battles awards Battle Points, or BP, which can be exchanged for prizes. Omnislash costs 51,200 BP earlier in the game, but the price drops to 32,000 BP after obtaining the Highwind. For an easier experience, wait until late in the story when Cloud has powerful weapons, armor, and Materia. Equip a Ribbon to protect against many status effects and use Battle Boost if desired. Continue winning Battle Square challenges until you've accumulated enough BP, then exchange your points for the Omnislash manual. Cloud must also have learned all six of his earlier Limit Breaks before he can use the manual: Braver, Cross-slash, Blade Beam, Climhazzard, Meteorain, and Finishing Touch. Use the Omnislash manual on Cloud once those requirements are satisfied to unlock The Slash to End All Slashes.
Tip
Wait until after obtaining the Highwind to benefit from the reduced 32,000 BP price. Keep Cloud well equipped, and choose manageable handicaps that still provide worthwhile BP rewards. Battle Boost can make the combat much easier, although equipment-breaking handicaps may still cause problems.
Warning
Battle Points are lost when you leave the Battle Square, so accumulate and spend the required amount before exiting. Simply purchasing the Omnislash manual isn't enough. You must teach Cloud the Limit Break after unlocking his previous techniques. Cloud's reward for surviving eight consecutive battles is another attack that involves hitting someone an unreasonable number of times. Very on-brand.

Trophy: Wheel of Fortune
Learn Slots—Cait Sith's last Limit Break
Type: Silver
Category: Grind
How to Unlock
Teach Cait Sith his final Limit Break, Slots. Unlike most party members, Cait Sith has only two Limit Breaks: Dice and Slots. You don't need to obtain a special manual or complete a hidden sidequest for this trophy. Simply recruit Cait Sith through normal story progression at the Gold Saucer, then use him in battle. Have Cait Sith defeat 40 enemies to unlock Slots, his second and final Limit Break. The trophy unlocks automatically when Cait Sith learns Slots.
Tip
Travel to an area containing groups of weak enemies and equip Cait Sith with offensive magic linked to All Materia. Allow Cait Sith to deliver the finishing blows while your other characters defend or provide healing. This makes it easier to accumulate the required 40 kills without relying on stronger party members.
Warning
Cait Sith must personally defeat the enemies. Simply having him in your active party while Cloud or another character gets the kills won't count. Slots unlocks through enemy kills, not repeated uses of Dice. Compared with everyone else's complicated Limit Break requirements, Cait Sith apparently decided that 40 defeated enemies were enough paperwork.

Trophy: Emerald Eviscerator
Defeat the Emerald Weapon
Type: Gold
Category: Combat
How to Unlock
Defeat Emerald Weapon, the optional underwater superboss. After obtaining the submarine during Part 2, explore the ocean floor near Junon to locate Emerald Weapon. Approach the enormous green creature to begin the encounter. Emerald Weapon has 1,000,000 HP, extremely powerful attacks, and a 20-minute battle timer. You can remove this time limit by equipping Underwater Materia. To obtain Underwater Materia, use Morph on a Ghost Ship enemy in the Junon Underwater Reactor to acquire the Guide Book. Take the Guide Book to the Kalm Traveler and exchange it for Underwater Materia. Prepare your party with powerful summons, healing abilities, and defensive Materia. Knights of the Round, W-Summon, Mime, and HP Absorb are especially useful. A reliable strategy is to link Knights of the Round with HP Absorb, use W-Summon to cast it twice, and have another character use Mime to repeat the attack without paying the original MP cost. Keep your party healed and continue attacking until Emerald Weapon is defeated. Emerald Eviscerator unlocks after winning the battle. You'll also receive the Earth Harp, which can be exchanged with the Kalm Traveler for Master Summon Materia.
Tip
Obtain Underwater Materia before attempting the fight if you're worried about the timer. This allows you to concentrate on surviving rather than racing against the clock. Emerald's Aire Tam attack deals 1,111 damage for each Materia equipped on the affected character. Consider limiting unnecessary Materia to reduce the damage. Battle Boost can make the encounter significantly easier, although it won't protect against every lethal attack.
Warning
Aire Tam can deal 9,999 damage to characters carrying nine or more Materia, potentially defeating them instantly. Emerald Weapon is optional and considerably stronger than most story bosses. Save before the encounter and bring your best equipment. Defeating Emerald only awards the Earth Harp. You must exchange it with the Kalm Traveler separately to obtain Transcendant Convoker. One million HP, a battle timer, and an attack that punishes you for equipping Materia. Apparently Emerald Weapon believes preparation should be illegal.

Trophy: Ruby Render
Defeat the Ruby Weapon
Type: Gold
Category: Combat
How to Unlock
Defeat Ruby Weapon, the optional superboss found in the desert surrounding the Gold Saucer. Ruby Weapon appears after Ultimate Weapon has been defeated. Once available, its red body can be seen emerging from the desert sand near the Gold Saucer. Approach it using the Highwind or a suitable Chocobo to begin the battle. Ruby Weapon has approximately 800,000 HP, extremely high defenses, devastating attacks, and the ability to permanently remove party members from the encounter. For a more reliable strategy, enter the fight with two party members already knocked out and only one character alive. This encourages Ruby to bury its claws in the sand and expose its tentacles, making its main body vulnerable. Once the tentacles appear, revive your teammates and begin attacking. Ruby Weapon is vulnerable to paralysis. Use Dazers or the Hades summon to temporarily stop it, then follow up with powerful attacks such as Knights of the Round, Omnislash, or repeated Mime combinations. Continue controlling Ruby's actions and dealing damage until it is defeated. Ruby Render unlocks after winning the battle. You'll also receive the Desert Rose, which can be traded with the Kalm Traveler for a Gold Chocobo.
Tip
Use W-Item to duplicate Dazers and Megalixirs before the battle. Keeping Ruby paralyzed while maintaining your party's health makes the encounter considerably more manageable. Knights of the Round, W-Summon, Mime, and strong defensive Materia are extremely helpful. If you haven't bred a Gold Chocobo, defeating Ruby and exchanging the Desert Rose offers an alternative route to obtaining one for Roundtable Destruction.
Warning
Ruby Weapon's Whirlsand attack can permanently eject characters from the battle. Entering with only one living character helps control its opening behavior. Battle Boost doesn't prevent every dangerous effect, including character removal and certain instant-death situations. Ruby's body is effectively protected until its tentacles emerge, so don't waste your strongest attacks before that phase. Sephiroth might be the villain, but Ruby Weapon is the one who really wants to ruin your weekend.

Trophy: Breaking New Ground
Use a Limit Break
Type: Bronze
Category: Misc
How to Unlock
Use a Limit Break for the first time. Every playable character has special attacks called Limit Breaks. Their Limit gauge fills as they take damage during combat. Once a character's Limit gauge is full, the standard Attack command is replaced by Limit. Select the command and choose the available technique to perform the special attack. Cloud begins with Braver, his first Limit Break, which deals powerful physical damage to a single enemy. You can earn Breaking New Ground during the opening Mako Reactor mission or in any later battle. The trophy unlocks after successfully using your first Limit Break.
Tip
The quickest method is to activate Battle Boost by pressing R3. This fills your party's Limit gauges, allowing you to use a Limit Break immediately. Limit Breaks are also important for several later trophies, so start experimenting with them early. Repeated use and enemy kills help unlock stronger techniques.
Warning
Simply filling the Limit gauge isn't enough. You must actually execute a Limit Break during battle. Battle Boost doesn't disable trophy progression, so there's no penalty for using it to unlock Breaking New Ground.

Trophy: Corel's Angel
Score 10,050 points or more in G-Bike at the Gold Saucer
Type: Bronze
Category: Misc
How to Unlock
Score at least 10,050 points in the G-Bike minigame at the Gold Saucer. Travel to the Gold Saucer and enter Wonder Square, where you'll find the G-Bike arcade machine. Each attempt costs 200 gil. The minigame recreates Cloud's motorcycle escape from Midgar. Your objective is to protect the truck from attacking motorcycles while eliminating as many enemy riders as possible. Each enemy motorcycle destroyed awards 500 points, while every successful enemy attack against the truck subtracts 50 points. Use the directional controls to position Cloud near approaching motorcycles, then attack with his sword to knock them down. Prioritize riders who are close to the truck and eliminate them quickly before they can land repeated attacks. Finish the minigame with at least 10,050 points to unlock Corel's Angel.
Tip
Focus on the orange motorcycles first because they tend to attack the truck directly. Red motorcycles may attempt to lure you away from the truck, so avoid chasing them too far. Stay close enough to protect the vehicle while striking enemies as they approach. Try positioning yourself slightly behind an enemy before moving forward and attacking. This can make it easier to land a successful hit before they dodge.
Warning
You must finish with 10,050 points or more. Reaching the score temporarily isn't enough if subsequent attacks lower your final total. The minigame is repeatable, so there's no permanent penalty for failing an attempt. Your reward for protecting a truck from motorcycles is more motorcycle gameplay. Cloud really should have negotiated better working conditions.
Video Guide: https://www.youtube.com/watch?v=dB2YeMJdy6A

Trophy: Failure IS an Option
Have your whole party fall in battle
Type: Bronze
Category: Misc
How to Unlock
Have your entire party fall in battle. To earn this trophy, every active party member must be defeated during the same encounter. The easiest method is to enter a battle against ordinary enemies and deliberately allow them to eliminate your party. Avoid healing, defending, or attacking the enemies. If necessary, you can also target your own characters with damaging abilities to speed up the process. Once every party member reaches zero HP and the Game Over screen appears, Failure IS an Option unlocks. You can earn this trophy at almost any point in the game, including during the opening battles.
Tip
Create a save before deliberately losing so you can immediately reload afterward without sacrificing progress. You can also earn this trophy by losing a challenge in the Gold Saucer's Battle Square. This is particularly convenient while working toward Omnislash, since losing there doesn't trigger a normal Game Over. If you've been using Battle Boost throughout your playthrough, temporarily disable it with R3 so your characters can actually be defeated.
Warning
A normal Game Over sends you back to your previous save, so any unsaved progress will be lost. Battle Boost continuously restores your party's HP, making it difficult to earn this trophy unless you disable it. You don't need to lose against a particular boss or enemy. Any qualifying full-party defeat is sufficient. Congratulations! You've unlocked a trophy for being terrible at your job. Somewhere, Sephiroth is applauding.

Trophy: Fledgling Summoner
Use a summon Materia in battle
Type: Bronze
Category: Misc
How to Unlock
Use Summon Materia in battle for the first time. Summon Materia is represented by red orbs that allow characters to call powerful creatures into battle. One of the earliest available summons is Choco/Mog, which you can obtain at the Chocobo Farm after leaving Midgar. Visit the farm and interact with the chocobos near the fence. Choose the dialogue option to imitate their call, and you'll receive the Choco/Mog Materia after the resulting scene. Equip the Materia to a character, enter a battle, and select the Summon command when that character's turn becomes available. Choose Choco/Mog and execute the summon to unlock Fledgling Summoner.
Tip
Choco/Mog is easy to obtain and useful during the early game, making it an excellent first summon. You can also activate Battle Boost with R3 to make the encounter safer while experimenting with your new Materia.
Warning
Simply collecting or equipping Summon Materia isn't enough. You must actually use a summon during combat. Any Summon Materia qualifies, so you don't need Choco/Mog specifically if you've already obtained another summon.

Trophy: Shuriken Join Us
Have Yuffie join your party
Type: Bronze
Category: Misc
How to Unlock
Recruit Yuffie Kisaragi into your party. After leaving Midgar and passing through the Mythril Mines, you can encounter Yuffie in forest areas around Junon. Walk through the forests until a random battle begins against an enemy called Mystery Ninja. Defeat her in battle to trigger a special conversation in a forest clearing. Do not use the nearby save point or open your menu. Instead, speak directly to Yuffie and select these dialogue responses in order: "Not interested." "Petrified..." "Wait a second!" "That's right." "Let's hurry." After the conversation, Yuffie joins your party and Shuriken Join Us unlocks.
Tip
Recruit Yuffie early so you can access her Wutai sidequests and eventually earn Making Waves and Meet Your Maker. If she runs away, you can find her again through another random forest encounter.
Warning
Choosing the wrong dialogue response causes Yuffie to leave, forcing you to repeat the encounter. If you're working toward Best Bromance, avoid repeatedly recruiting Yuffie after failed conversations. Certain dialogue choices can increase her hidden affection score and interfere with Barret's date.

Trophy: A Feat of Meteoric Proportions
Complete FINAL FANTASY VII
Type: Gold
Category: Story
How to Unlock
Complete the main story of Final Fantasy VII. Progress through the game's three story parts until you reach the Northern Cavern, the final dungeon. Before entering, make sure you've completed any outstanding missable objectives and collected the equipment or Materia you still need. Descend through the Northern Cavern, defeat the enemies and bosses along the way, and prepare your party for the final confrontation with Sephiroth. Equip powerful weapons, defensive accessories, and healing Materia. Strong summons such as Knights of the Round and Bahamut ZERO can also make the concluding battles easier. Continue through the final encounters and defeat Sephiroth to complete the story. A Feat of Meteoric Proportions unlocks after successfully finishing the game.
Tip
Create a separate save before entering the Northern Cavern so you can return to the world map and finish optional content if necessary. Battle Boost and triple speed remain available during the final dungeon and can make the concluding encounters considerably easier. If you've already defeated Ruby and Emerald Weapon, your party should be well prepared for the final battles.
Warning
Reaching level 99 can strengthen the final boss under certain conditions. If you want a less demanding ending, keep an earlier save from before reaching the maximum level. Be cautious when placing the portable Save Crystal inside the Northern Cavern, as older versions have reports of save-related problems. Defeating Sephiroth completes the story, but it won't automatically award the Platinum unless you've earned every other trophy. After saving the planet from a giant meteor, Cloud can finally take a break. Assuming nobody asks him to compete in another Chocobo Race.

Trophy: Chocochampion
Win the Chocobo Racing mini-game
Type: Bronze
Category: Story
How to Unlock
Win a Chocobo Race at the Gold Saucer. Your first opportunity comes during the story sequence in Corel Prison, where winning a Chocobo Race allows Cloud to leave the prison. During the race, switch to manual control using the touchpad. Press Square to increase your chocobo's running speed and use Circle for an additional burst of speed when necessary. Hold L2 and R2 together to help recover stamina, allowing you to maintain a stronger pace throughout the race. Reach the finish line in first place to unlock Chocochampion. If the trophy doesn't unlock during the story race, you can enter additional races later after gaining access to Chocobo Racing with your own chocobo.
Tip
Manage your stamina carefully. Holding L2 and R2 while racing helps you recover stamina, giving you more opportunities to accelerate. Don't waste your entire stamina bar at the beginning. A controlled race is usually easier to win than constantly sprinting.
Warning
Some older versions reportedly failed to award the trophy after the mandatory story race. If this happens, return to the Gold Saucer later and win another Chocobo Race using your own chocobo. You don't need to win every racing class or breed a Gold Chocobo specifically for this trophy.

Trophy: Diamond Disintegrator
Defeat the Diamond Weapon
Type: Gold
Category: Story
How to Unlock
Defeat Diamond Weapon during the main story. Diamond Weapon appears late in Part 2, after your second visit to the Forgotten City. The enormous Weapon emerges from the ocean and begins approaching Midgar. Travel toward the city using the Highwind and wait for Diamond Weapon to reach the coastline. Once the encounter becomes available, approach the Weapon to begin the battle. Diamond Weapon has strong defenses against physical attacks, so use powerful magic and summons to deal consistent damage. Lightning-based attacks are particularly effective. Watch for its countdown, which signals the upcoming Diamond Flash attack. This powerful ability can damage your entire party and inflict Silence. Keep your characters healed, remove harmful status effects when necessary, and continue attacking until Diamond Weapon falls. The trophy unlocks automatically after defeating it.
Tip
Equip Lightning Materia, Restore Materia, and your strongest available summons before starting the battle. Limit Breaks can also deal significant damage, even when Diamond Weapon is resisting ordinary physical attacks. Battle Boost provides a substantial advantage if you're primarily focused on trophy completion.
Warning
Diamond Flash can inflict Silence, preventing affected characters from casting spells. Bring items or abilities that remove the condition. Diamond Weapon is a mandatory story encounter and cannot be missed during a normal playthrough. Shinra has spent the entire game creating problems, and now a skyscraper-sized monster is marching toward its headquarters. Sometimes the universe handles customer complaints personally.

Trophy: First Blood
Emerge victorious from your first battle
Type: Bronze
Category: Story
How to Unlock
Win your first battle in Final Fantasy VII. The game begins with Cloud arriving at a Mako Reactor in Midgar alongside members of AVALANCHE. After stepping off the train, you'll encounter Shinra security guards and enter your first battle. Use Cloud's basic Attack command to defeat the enemies and finish the encounter. Once the battle ends in victory, First Blood unlocks automatically. This is a mandatory part of the opening sequence, so you don't need to perform any special actions or use particular equipment.
Tip
Use this first encounter to familiarize yourself with the game's Active Time Battle system, which determines when characters can perform actions. You can activate triple speed with L3 if you want to move through the opening battles more quickly.
Warning
First Blood requires winning the battle. Deliberately allowing Cloud to lose won't unlock it, although a full party defeat can contribute toward Failure IS an Option. Fortunately, your first opponents are considerably less threatening than the monsters waiting later in the game. Enjoy the confidence boost while it lasts.

Welcome to Midgar, where an enormous corporation is draining the planet, your sword is larger than most refrigerators, and Cloud has absolutely no interest in discussing his feelings. Begin by progressing through the story while learning the Active Time Battle system, equipping Materia, and experimenting with Limit Breaks. The PS4 version includes three optional boosters: L3 activates triple speed, R3 enables Battle Boost, and L3 + R3 disables random encounters. These do not disable trophies, so use them whenever you want to speed things up. Keep multiple save files throughout your journey, especially before major story events.
Your biggest concern from the beginning is Best Bromance, which requires Cloud to go on a date with Barret at the Gold Saucer. The game secretly tracks relationship points through dialogue choices, and Barret starts with the lowest affection score. Follow a dedicated Barret date walkthrough from the opening hours, favor his responses, and avoid unnecessarily increasing affection with Aeris, Tifa, or Yuffie. During the Wall Market sequence, obtain the best outfit items for Cloud so Don Corneo chooses him for Consummate Cross-dresser. You'll want the Silk Dress, Blonde Wig, Sexy Cologne, Diamond Tiara, and appropriate Honey Bee Inn clothing. Apparently saving the planet begins with winning a fashion competition.
After leaving Midgar, recruit Yuffie from the forests near Junon and Vincent from the basement of Shinra Mansion in Nibelheim. Both characters have trophies tied to their recruitment and additional abilities. When you reach the Gold Saucer, complete Barret's date before progressing further. Most importantly, prepare Aeris's final Limit Break, Great Gospel, before entering the Temple of the Ancients. You'll need to unlock her earlier Limit Breaks, obtain Mythril from the sleeping man near Junon, and exchange it for the manual at the weapon seller's house. During the Temple, pick up the Bahamut Materia after defeating the Red Dragon. These opportunities are easy to overlook and can force a restart if you don't have an earlier save.
Continue through the story while strengthening your party, upgrading equipment, and collecting useful Materia. Focus on learning Limit Breaks for the characters you use most often, as several trophies require unlocking their final techniques. Some Limit Break manuals come from optional bosses or sidequests, while others require minigames or hidden locations. Red XIII's Cosmo Memory comes from the Shinra Mansion safe boss, Yuffie's All Creation comes from completing the Wutai Pagoda, and Cloud's Omnislash is purchased with Battle Points at the Gold Saucer. Don't worry about finishing every Limit Break immediately; most can be completed during endgame cleanup.
As the story progresses into the Huge Materia missions, start making separate saves before each major objective. Secure the Huge Materia from North Corel, Fort Condor, the underwater reactor operation, and Rocket Town. Save the Corel train to preserve the straightforward route to Barret's Catastrophe manual, and don't forget to collect Neo Bahamut Materia in the Whirlwind Maze. Once you've secured the Huge Materia, visit Bugenhagen at Cosmo Canyon and interact with the blue Huge Materia to obtain Bahamut ZERO, provided you also collected Bahamut and Neo Bahamut. Missing these items can make the trophy considerably more troublesome. Shinra has enough questionable management decisions already; there's no need to contribute another one.
When the submarine becomes available, explore the underwater areas for valuable equipment and late-game Limit Break items. Visit Lucrecia's waterfall cave with Vincent in your party, then return after additional battles to obtain Chaos. Explore the Sunken Gelnika for Cid's Highwind manual and useful Materia, but be prepared for powerful enemies. During the return to Midgar, collect W-Item Materia from the Sector 8 Tunnel, as its duplication trick will make the upcoming gil and leveling grind much more manageable. Continue the story until the Northern Cavern becomes accessible, but keep a separate save before entering the final dungeon.
Now comes the part where Final Fantasy VII politely stops pretending its optional content is reasonable. Your biggest challenges are Ruby Weapon and Emerald Weapon, two superbosses designed to punish anyone who thought Sephiroth was intimidating enough. Before facing them, obtain powerful equipment, defensive accessories, and useful Materia such as Knights of the Round, Mime, W-Summon, and HP Plus. Knights of the Round is hidden in a cave accessible with a Gold Chocobo. You can breed one through the Chocobo Farm, or defeat Ruby Weapon and exchange its Desert Rose with the Kalm Traveler for a Gold Chocobo. The second route avoids the breeding grind, provided you're prepared to defeat Ruby without the summon.
Ruby Weapon appears in the desert around the Gold Saucer after Ultimate Weapon has been defeated. Its enormous defenses and ability to remove party members make preparation important. Entering with only one living character can help trigger its tentacle phase, after which you can revive your teammates. Dazers or Hades can temporarily paralyze Ruby, providing openings for powerful summons and Limit Breaks. Emerald Weapon lurks underwater and normally imposes a 20-minute battle timer unless you equip Underwater Materia. Be cautious with its Aire Tam attack, which deals damage based on how many Materia each character has equipped. Battle Boost helps enormously, but it doesn't prevent every form of instant defeat. These Weapons are still perfectly capable of reminding you who's boss.
Defeating Emerald Weapon rewards you with the Earth Harp, which can be exchanged with the Kalm Traveler for Master Summon Materia and Transcendant Convoker. Finish collecting remaining Limit Breaks, including Tifa's Final Heaven from her piano in Nibelheim and Cait Sith's Slots through enemy kills. Complete Yuffie's Wutai Pagoda challenge to obtain Leviathan, and revisit the Gold Saucer for Omnislash and the G-Bike minigame if necessary. Aim for at least 10,050 points in G-Bike by destroying enemy motorcycles quickly while protecting the truck. Once you're satisfied with your equipment, sidequests, and optional bosses, you're ready for the final cleanup before confronting Sephiroth.
Your largest remaining grinds will likely be Liege of Leveling, which requires one character to reach level 99, and Coming Up All Nines, which requires holding 99,999,999 gil simultaneously. Both can be tackled efficiently in the Northern Cavern, particularly in the swamp area containing Magic Pots and Movers. Magic Pots provide excellent experience and Ability Points once you feed them an Elixir, while Movers are especially valuable for Materia growth. Use equipment with double or triple Materia growth, and master as many All Materia as possible. Each mastered All Materia can be sold for 1,400,000 gil. W-Item duplication can provide the Elixirs needed for repeated Magic Pot encounters, while triple speed dramatically reduces the time spent grinding. Even an RPG hero has better things to do than spend an entire weekend feeding magical jars.
Check that you've earned the remaining miscellaneous trophies before committing to the final battle. Materia Mastermind requires raising a Materia to level 5, while Fledgling Summoner only requires using a summon in battle. Failure IS an Option requires your entire party to fall in battle, so deliberately earn it if you've somehow survived every encounter. Keep an earlier save before reaching level 99 if you'd prefer to avoid the final boss's stronger high-level variation. Also, be cautious when placing the Save Crystal inside the Northern Cavern, as older versions have reports of save-related problems. Save regularly and maintain a separate file outside the dungeon whenever possible.
There is no traditional Chapter Select, and a second playthrough should not be necessary if you've protected the missable trophies. Before finishing, confirm you've earned Best Bromance, Consummate Cross-dresser, See the Light, and Waiting in the Wings, along with the recruitment and important Materia trophies. If you missed a permanent opportunity, reload an earlier save rather than restarting the entire adventure whenever possible. After completing your remaining challenges, descend into the Northern Cavern and finish the story for A Feat of Meteoric Proportions. With all 31 other trophies earned, Gaia's Guardian will unlock. Congratulations: you've saved the planet, defeated its most terrifying monsters, and become wealthy enough to buy Shinra. Probably best not to.
YouTube Playlist
FINAL FANTASY VII — Platinum Walkthrough