


Trophy Guide Preview
Overall Trophy Progress
0 / 39 Completed
0%
Trophy Types
Platinum
0 / 1Gold
0 / 3Silver
0 / 11Bronze
0 / 24Categories
Collectible
0 / 4Grind
0 / 1Misc
0 / 24Story
0 / 9
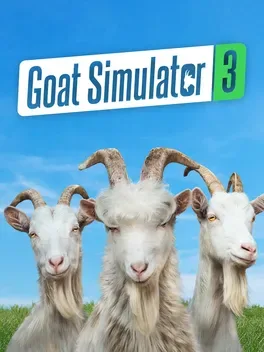
Pilgor returns for ridiculous open-world chaos on the island of San Angora. Headbutt unsuspecting locals, lick everything in sight, drive vehicles, dress up your goat, and uncover bizarre secrets as you complete absurd events alone or with friends in this physics-driven sandbox.
Overall Trophy Progress
0 / 39 Completed
0%
Platinum Path
EARLY GAME Welcome to San Angora, where you play as Pilgor, an extremely destructive goat with an impressive talent for causing trouble. Goat Simulator 3 is an open-world sandbox filled with bizarre events, hidden collectibles, ridiculous equipment, and plenty of opportunities to launch yourself across the map. When starting a new game, watch the entire opening sequence without skipping it to unlock I Watched the Int...
YouTube Playlist
Goat Simulator 3 — Platinum Walkthrough
Trophy: G.O.A.T
Unlock all the trophies
Type: Platinum
How to Unlock
**Unlock every other trophy in the Goat Simulator 3 base game to earn the Platinum.** Goat Simulator 3 features 39 base-game trophies, consisting of one Platinum, three Gold, 11 Silver, and 24 Bronze trophies. To earn the Platinum, you'll need to complete the main story, fully upgrade your Goat Castle, finish various miscellaneous challenges, and collect several types of items scattered throughout San Angora. The largest requirements involve collecting **200 golden Trinkets**, completing **99 Instincts**, and successfully jumping from **29 ramps**. You'll also need to locate hidden areas, complete unusual events, unlock specific cosmetics, and perform several activities that are exactly as ridiculous as you'd expect from a game starring an extremely destructive goat. The Platinum is estimated to take approximately **20–25 hours**, depending on your familiarity with the map and how efficiently you complete the collectible requirements. There are no difficulty-related trophies, no required online activities, and no permanently missable trophies.
Tip
**Activate all six Goat Towers as early as possible.** These reveal sections of San Angora, display nearby events, and unlock convenient fast-travel points. Complete events while exploring to earn Illuminati Points and progress toward fully upgrading your Goat Castle. Collect golden Trinkets, complete convenient Instincts, and jump from collectible ramps whenever you encounter them. However, don't spend unnecessary time searching for every collectible during your first visit to an area. The game's collectible tracker separates objectives by region, making it easier to identify missing items during post-game cleanup. Useful equipment such as the Paraglider, Jetpack, and Daredevil Helmet can significantly improve traversal. For the most efficient Platinum journey, finish the story and miscellaneous activities before using dedicated location videos to collect anything you've missed. No additional DLC trophies are required. Pilgor has returned to prove that greatness isn't measured by intelligence, dignity, or respect for public property. Apparently, it's measured by how much chaos one goat can cause before earning a Platinum trophy.

Trophy: Certified Fresh
Find all movie tapes
Type: Silver
Category: Collectible
How to Unlock
**Find all six movie tapes and deliver them to the movie theater in Goatenburg.** Scattered throughout San Angora are six collectible VHS tapes that can be played inside a movie theater. To earn this trophy, you'll need to locate each tape and transport it to the theater. First, travel to **Goatenburg** and locate the movie theater toward the eastern side of the region. Inside the building, find the projector room containing a large VHS player. This is where all six tapes must be delivered. When you discover a movie tape elsewhere on the map, approach it and press **Square** to grab it with Pilgor's tongue. Carry the tape back to the theater and place it into the VHS player. The tape will begin playing its associated movie. Repeat this process for each of the six tapes. **You must transport the tapes individually**, since Pilgor can only carry one object with her tongue at a time. Once all six tapes have been collected and delivered to the movie theater, the trophy unlocks automatically.
Tip
**Discover the movie theater before beginning the full tape collection**, so you know exactly where each item needs to be delivered. The six tapes are located in different parts of San Angora, so collecting them can involve considerable travel. A dedicated video walkthrough is the most efficient way to identify their locations and avoid unnecessary searching. Because Pilgor must transport each tape separately, prioritize convenient travel routes and use fast-travel points whenever possible. Be careful not to release a tape accidentally while transporting it. If you lose track of a tape, return to its original location or reload the area as appropriate. You don't need to sit through all six movies to earn the trophy. However, the short films contain additional humor and are worth watching if you're enjoying the game's bizarre presentation. Complete this trophy during collectible cleanup if you'd prefer to avoid interrupting your normal exploration. Pilgor has discovered that San Angora contains a fully functioning movie theater. Naturally, instead of buying a ticket, she spends her time stealing VHS tapes and carrying them across the island with her tongue. Somewhere, a cinema employee is reconsidering every decision that led to this job.
Video Guide: https://www.youtube.com/watch?v=UjV0khsphxI

Trophy: Daredevil
Jump off all Ramps
Type: Silver
Category: Collectible
How to Unlock
**Successfully jump from all 29 collectible ramps throughout San Angora.** Goat Simulator 3 allows Pilgor to drive various vehicles, including cars, trucks, and tractors. Some ramps scattered throughout the island are special collectible locations that register when you successfully drive a vehicle off them. There are **29 collectible ramps** required for this trophy. To use a vehicle, approach it and press **Triangle** to enter or take control of it. Use **R2** to accelerate, **L2** to reverse, and **Square** to activate the vehicle's boost. Drive toward a collectible ramp, build up enough speed, and launch your vehicle into the air. Successful collectible ramp jumps are accompanied by a distinctive slow-motion effect and fireworks, making them easy to recognize. Continue discovering and successfully jumping from all 29 required ramps. You can track your progress through the **Collectibles** section of the Touch Pad menu, which organizes completed and remaining ramps by region. The trophy unlocks automatically after your 29th successful ramp jump.
Tip
**Complete ramp jumps whenever you encounter them during normal exploration.** This reduces the amount of driving required during post-game cleanup. The game's collectible tracker is particularly useful because it separates ramps by area and identifies which ones you've already completed. Not every ramp-shaped structure counts toward the trophy. Look for larger ramps that trigger the special stunt animation when used correctly. If a jump doesn't register, return to the ramp and try again with more speed or a different vehicle. Vehicles with a reliable boost can make some jumps easier, particularly those requiring additional distance. A dedicated location video is recommended for finding the remaining ramps once you've completed most of them naturally. **Completing Daredevil also unlocks the Daredevil Helmet**, a useful traversal accessory that can greatly improve movement around San Angora. Consider prioritizing this trophy earlier than the other major collectibles if you want to use the helmet while searching for Trinkets and completing Instincts. Unlike conventional racing games, Goat Simulator 3 doesn't seem particularly concerned about whether Pilgor lands safely. As long as the vehicle flies spectacularly through the air, everyone apparently considers the stunt a success.
Video Guide: https://www.youtube.com/watch?v=IYUjQCclc2g&list=PLtA90_ts33NHzNroJoYdPydZHv9LBBMgE&index=2&pp=iAQB

Trophy: Try Hard 2
Find all Trinkets
Type: Gold
Category: Collectible
How to Unlock
**Collect all 200 golden Trinkets scattered throughout San Angora.** Try Hard 2 is one of the largest collectible challenges in Goat Simulator 3 and will likely account for a significant portion of your Platinum cleanup. Trinkets are small golden goat statues hidden throughout the open world. There are **200 Trinkets** to collect across San Angora's different regions. You'll find them in cities, residential neighborhoods, forests, industrial areas, rooftops, caves, and other unusual locations. Some are sitting in plain sight, while others require climbing, platforming, solving environmental puzzles, or using special equipment to reach them. To collect a Trinket, simply touch it with Pilgor. The statue disappears, and your collectible progress updates automatically. Continue collecting them until all 200 have been obtained. The trophy unlocks immediately after collecting the final Trinket.
Tip
**Use the in-game Collectibles menu to track your progress by region.** Open the Touch Pad menu and navigate to the Collectibles section. The game records how many Trinkets you've collected in each area and tracks individual collectible entries. This makes cleanup significantly easier because you can identify which statues you've already found instead of repeating the same locations. For maximum efficiency, collect visible Trinkets during normal exploration, but save the harder ones for after completing the story. Activate all six Goat Towers early to unlock fast travel and reveal more of the map. Useful traversal accessories can also make difficult locations easier to reach. The **Paraglider**, **Jetpack**, and **Daredevil Helmet** are especially valuable when navigating rooftops, steep terrain, and distant landmarks. The Daredevil Helmet is unlocked by completing all 29 collectible ramps for Daredevil. Once you've collected most of the Trinkets naturally, use a dedicated **200-Trinket location video** alongside the in-game tracker. Work through one region at a time, comparing your progress against the video and skipping statues you've already collected. There's no need to collect all 200 during a single session, and your progress is saved as you explore. If Try Hard 2 is your final remaining trophy, collecting the 200th Trinket will also unlock **G.O.A.T**, the Platinum trophy. You've defeated the farmer, upgraded a mysterious castle, uncovered alien conspiracies, and survived an unbelievable number of terrible decisions. Now only a mountain of tiny golden goat statues stands between Pilgor and immortality. One last collectible hunt. You've got this!
Video Guide: https://www.youtube.com/watch?v=1vBMgw6d3us

Trophy: You Trusted Your Instincts
Complete all Instincts
Type: Bronze
Category: Collectible
How to Unlock
**Complete all 99 Instinct challenges throughout San Angora.** Instincts are optional objectives that encourage you to experiment with Goat Simulator 3's unusual mechanics, equipment, and environmental interactions. There are **99 Instincts** to complete for this trophy. Some involve simple actions, such as performing tricks or interacting with objects, while others require specific accessories, unusual goat forms, or complicated combinations of abilities. New Instincts become available as you unlock equipment, discover additional goat types, and locate the **seven Instinct Shrines** scattered throughout San Angora. Instinct Shrines can be found on your map after synchronizing nearby Goat Towers. To monitor your progress, open the **Touch Pad menu** and navigate to the **Collectibles** section. Here, you can view available Instincts and track which challenges you've completed. You can also highlight an Instinct and press **Triangle** to pin it to your screen. Up to three Instincts can be pinned simultaneously. Continue completing the challenges until all 99 have been finished. The trophy unlocks automatically after your final Instinct.
Tip
**Unlock all six Goat Towers and seven Instinct Shrines early**, as this makes locating and tracking Instincts much easier. Don't attempt to complete all 99 immediately. Many challenges require equipment or goat forms you won't have access to during your initial exploration. Instead, complete the simple Instincts naturally while progressing through the story, then return for the more complicated ones during Platinum cleanup. Certain challenges require interacting with multiple NPCs simultaneously. The **Goat Queen accessory** is particularly useful for these because its special ability summons additional goats, which can count toward several NPC-related objectives. You'll unlock Goat Queen by interacting with the throne inside your Goat Castle after reaching C Tier. Many Instincts also require specific accessories. Purchase equipment with unique abilities whenever you have enough points, and investigate unusual gear discovered throughout the map. Use the in-game tracker to identify unfinished challenges rather than repeating objectives you've already completed. For particularly complicated Instincts, a dedicated video walkthrough can demonstrate the required positioning and equipment more clearly than written instructions. Completing all 99 Instincts is one of the longest tasks on the road to Platinum. Pilgor's instincts apparently involve everything from basic movement to increasingly elaborate acts of chaos. At this point, calling them instincts seems generous. Most goats don't need a 99-item checklist to figure out how to behave.

Trophy: Synchronization Complete
Synchronize with all the Goat Towers
Type: Bronze
Category: Grind
How to Unlock
**Synchronize with all six Goat Towers throughout San Angora.** Goat Towers are tall, distinctive structures scattered across the game's six main regions. Synchronizing with these towers reveals additional map information, highlights nearby activities, and unlocks convenient fast-travel locations. There are **six Goat Towers** to activate: - Fairmeadows Ranch - Suburbsville - Mornwood Falls - Goatenburg - Downtown - Libertarian Island When you discover a Goat Tower, approach the structure and find the entrance. Enter the tower and locate the synchronization point. Interact with the synchronization point to complete the activation sequence. The tower will become available as a fast-travel location, and additional information about the surrounding region will appear on your map. Repeat this process at all six towers. The trophy unlocks automatically after synchronizing with the sixth Goat Tower.
Tip
**Prioritize this trophy early in your Platinum journey**, ideally before attempting extensive collectible cleanup. Every synchronized Goat Tower makes exploration more convenient by revealing nearby points of interest and providing a reliable fast-travel destination. Fast travel is particularly valuable when you're collecting the 200 Trinkets, completing the 99 Instincts, and searching for hidden events. Goat Towers also provide access to the Goat Castle, allowing you to return whenever you've earned enough Illuminati Points for another upgrade. Use your map to identify which regions still contain an unsynchronized tower. The towers are generally prominent landmarks, making them easier to locate than smaller hidden collectibles. You don't need to complete every event in a region before synchronizing its tower. Simply travel to the structure and activate its synchronization point. You can collect Trinkets and complete nearby objectives while traveling between towers, but avoid spending too long searching for difficult collectibles until all six are activated. Completing Synchronization Complete early saves considerable travel time over the remainder of your adventure. Pilgor has now synchronized with every major tower across San Angora. She can travel rapidly between locations, discover hidden activities, and survey the island from impressive heights. Unfortunately for the local population, this means the goat is now more efficient at causing widespread chaos.

Trophy: [REDACTED]
Equip the [REDACTED] while playing as [REDACTED] with the [REDACTED] fur
Type: Silver
Category: Misc
How to Unlock
**Equip the Eggplant Head and Eggplant Fur while playing as an Abominana.** The trophy's description deliberately hides the required equipment and goat appearance, but the solution involves combining three specific customization options. First, unlock the **Abominana** form by completing the **How It's Made** event in **Suburbsville**. After finishing the event, enter one of the large testing tubes near the scientists to transform Pilgor into an Abominana. This unlocks the appearance for future use. Next, open the Wardrobe through the **Touch Pad menu**. Locate and purchase the following two cosmetic items: - **Eggplant Fur** - **Eggplant Head** Once you've purchased both items, equip them simultaneously while using the Abominana form. You must have the Abominana appearance, Eggplant Fur, and Eggplant Head active together. The trophy unlocks automatically once the correct combination is equipped.
Tip
**Complete Cannibanana first if you haven't already**, since both trophies require unlocking the Abominana transformation. You can earn Cannibanana by licking a regular banana while playing as an Abominana. Afterward, keep the Abominana form equipped and purchase the two Eggplant customization items. Make sure you equip both cosmetics rather than simply purchasing them. If the trophy doesn't unlock, check your Wardrobe and confirm that all three requirements are active simultaneously. You don't need to visit a special location or interact with an environmental object after equipping the items. The trophy is entirely based on the correct character customization combination. Both Eggplant items are purchased through the in-game Wardrobe using points earned during normal gameplay. If you don't have enough points, complete nearby events and activities before returning to the Wardrobe. There's no requirement to keep wearing this combination afterward, so you can switch back to your preferred appearance once the trophy unlocks. After everything Pilgor has experienced, including being swallowed by giant animals and transforming into an enormous banana, the game somehow decides that the next challenge should be dressing that banana as an eggplant. The developers clearly had a very productive meeting when designing this trophy.
Video Guide: https://www.youtube.com/watch?v=OJTp9xONWFU&list=PLtA90_ts33NHzNroJoYdPydZHv9LBBMgE&index=24&pp=iAQB

Trophy: 401(K.O.)
Use your Kärring to knock another Kärring down
Type: Bronze
Category: Misc
How to Unlock
**Use the Kärring accessory to knock down another Kärring.** This trophy requires obtaining a special accessory that allows Pilgor to carry and fire a hostile grandmother. First, travel to **Fairmeadows Ranch** and locate the **Trespassing!** event toward the eastern side of the region. At this location, you'll encounter an aggressive grandmother who attacks using a weapon that fires balls of yarn. Headbutt her to open the nearby storm shelter. Enter the shelter to discover a hidden area inspired by classic first-person shooters, filled with additional hostile grandmothers. Progress through the area and defeat the enemies blocking your path. Eventually, you'll reach a room containing several Kärrings. Defeat them to obtain the **Kärring accessory**, which allows Pilgor to carry one of these grandmothers on her back. Once you've unlocked the accessory, equip it through the Wardrobe. Next, locate another Kärring enemy and use your equipped accessory to attack her. When the accessory knocks down another Kärring, the trophy unlocks.
Tip
**The simplest approach is to complete Trespassing! first**, then use the Kärring accessory against another grandmother encountered elsewhere on the map. The accessory must be equipped and used against a qualifying Kärring enemy. Attacking an ordinary NPC won't satisfy the requirement. If you're having trouble finding another grandmother after completing the event, you can start a separate save and revisit the Trespassing! encounter with the accessory already unlocked. The original Kärring enemies can then provide convenient targets. You don't need to defeat a particular number of grandmothers after unlocking the accessory. One successful qualifying attack is sufficient. Completing Trespassing! also contributes toward your broader event progression and earns Illuminati Points for the Goat Castle. This trophy is an excellent example of Goat Simulator 3's commitment to making absolutely no sense. Pilgor can apparently defeat an angry grandmother, strap her to her back, and use her as a weapon against another grandmother. Retirement on San Angora is clearly a competitive sport.
Video Guide: https://www.youtube.com/watch?v=ODz0qOqqnDI&list=PLtA90_ts33NHzNroJoYdPydZHv9LBBMgE&index=5&pp=iAQB

Trophy: A Center for Ants?
Interact with the shrunken shrink house
Type: Silver
Category: Misc
How to Unlock
**Shrink a house in Suburbsville, then interact with the miniature building.** Travel to **Suburbsville** and locate the event called **Practicing Shrink**, found toward the northern-central portion of the region. This event involves a house and an unusual experiment that changes its size. Enter the event area and complete the objectives associated with Practicing Shrink. Once you've successfully finished the event, the house involved in the experiment will shrink into a miniature version of itself. Approach the now-tiny building and interact with it by using Pilgor's normal attacks. You can either **headbutt the house with R2** or **lick it with Square**. The trophy unlocks immediately after successfully interacting with the shrunken building. You don't need to destroy the house or transport it anywhere. Completing the event and touching the miniature structure is sufficient.
Tip
**Complete Practicing Shrink before attempting to interact with the house.** The trophy requires the building to be in its shrunken state. Simply visiting the location before completing the event won't satisfy the requirement. The house becomes very small afterward, so look carefully around the area where the original building stood. If the trophy doesn't unlock immediately, try headbutting the miniature structure instead of licking it. You can also reposition Pilgor and approach it from another angle. No specific outfit, accessory, or goat form is required. Completing Practicing Shrink also rewards progress toward the Illuminati Points needed to upgrade your Goat Castle. Consider earning this trophy while completing the other events throughout Suburbsville. Once the event is finished, the miniature house remains available for interaction during your current exploration. After causing destruction throughout San Angora, Pilgor finally discovers a house small enough to fit comfortably inside a shoebox. Naturally, her first instinct is to headbutt it. Architectural appreciation has never been her strongest quality.
Video Guide: https://www.youtube.com/watch?v=Y-CoP_HdANo&list=PLtA90_ts33NHzNroJoYdPydZHv9LBBMgE&index=6&pp=iAQB

Shrink a house in Suburbsville, then interact with the miniature building.
Travel to Suburbsville and locate the event called Practicing Shrink, found toward the northern-central portion of the region.
This event involves a house and an unusual experiment that changes its size.
Enter the event area and complete the objectives associated with Practicing Shrink.
Once you've successfully finished the event, the house involved in the experiment will shrink into a miniature version of itself.
Approach the now-tiny building and interact with it by using Pilgor's normal attacks.
You can either headbutt the house with R2 or lick it with Square.
The trophy unlocks immediately after successfully interacting with the shrunken building.
You don't need to destroy the house or transport it anywhere.
Completing the event and touching the miniature structure is sufficient.
Complete Practicing Shrink before attempting to interact with the house. The trophy requires the building to be in its shrunken state.
Simply visiting the location before completing the event won't satisfy the requirement.
The house becomes very small afterward, so look carefully around the area where the original building stood.
If the trophy doesn't unlock immediately, try headbutting the miniature structure instead of licking it.
You can also reposition Pilgor and approach it from another angle.
No specific outfit, accessory, or goat form is required.
Completing Practicing Shrink also rewards progress toward the Illuminati Points needed to upgrade your Goat Castle.
Consider earning this trophy while completing the other events throughout Suburbsville.
Once the event is finished, the miniature house remains available for interaction during your current exploration.
After causing destruction throughout San Angora, Pilgor finally discovers a house small enough to fit comfortably inside a shoebox.
Naturally, her first instinct is to headbutt it.
Architectural appreciation has never been her strongest quality.
Trophy: Beauty, Mindfulness and Meditation
Sit through the entire yoga session
Type: Silver
Category: Misc
How to Unlock
**Attend an entire five-minute yoga session without leaving your mat.** This trophy takes place at **Chatana Yoga**, located in the northeastern portion of **Fairmeadows Ranch**. Travel to the yoga center and look for an outdoor class where several people are practicing meditation. You'll notice a collection of yoga mats arranged on the ground. Find an empty mat and move Pilgor onto it. Once you're standing in the correct position, remain completely still while the yoga session continues. The session lasts approximately **five minutes**. You don't need to press any buttons, perform specific poses, or follow the instructor's movements. Simply remain on the mat without moving until the session finishes. The trophy unlocks automatically after you've completed the full yoga session. You'll also receive a special accessory associated with the activity.
Tip
**This is one of the easiest trophies in the game**, although it requires waiting for the entire session to finish. Make sure Pilgor is positioned on an empty yoga mat rather than standing beside the class. Once you're in place, avoid moving the left stick or performing any actions that might interrupt your participation. You can leave the controller untouched while the session runs. If the trophy doesn't unlock after approximately five minutes, remain still a little longer to ensure the activity has fully completed. There's no need to activate slow motion or equip special accessories. This trophy can be earned at any point during your exploration of Fairmeadows Ranch. Consider completing it while you're already nearby collecting Trinkets or finishing events. After spending countless hours headbutting civilians, destroying property, and causing widespread chaos, Pilgor has finally discovered the healing power of mindfulness. For five glorious minutes, the citizens of San Angora can enjoy some peace. Unfortunately, the session eventually ends.
Video Guide: https://www.youtube.com/watch?v=cDGvsZL8Oko&list=PLtA90_ts33NHzNroJoYdPydZHv9LBBMgE&index=7&pp=iAQB

Trophy: Black Market
Find the shady merchant
Type: Silver
Category: Misc
How to Unlock
**Discover the hidden Black Market merchant in Goatenburg.** The Black Market is a secret shop concealed behind an unmarked door near the waterfront in **Goatenburg**. Travel to the central-eastern portion of Goatenburg and explore the buildings along the water's edge. Look for a hidden entrance positioned near the lower level of the waterfront structures. Unlike ordinary shops, this entrance doesn't have an obvious sign advertising its location. Once you've found the door, stand directly in front of it. Press **Right on the D-Pad** to open the emote menu, then select the **Bow** emote. Performing the Bow emote in front of the correct entrance causes the hidden door to open. Enter the passage and proceed inside to discover the Black Market merchant. The trophy unlocks automatically after entering the secret shop. Inside, you'll find a merchant goat selling loot boxes containing random accessories for **500 points each**.
Tip
**The Bow emote is the key to opening the Black Market.** Headbutting the entrance or attempting to force your way inside won't trigger the intended interaction. Make sure you're standing directly in front of the correct door before opening the emote menu. If nothing happens, reposition Pilgor closer to the entrance and perform the Bow emote again. The hidden location can be difficult to recognize because it blends into the surrounding waterfront structures. A dedicated location video is useful if you're having trouble identifying the entrance. You don't need to purchase anything from the merchant to earn the trophy. Simply opening the door and entering the Black Market is sufficient. If you're working on equipment-related Instincts, the merchant's random accessory boxes may provide additional customization options, although buying them isn't necessary for this achievement. You can discover the Black Market at any point during free-roam exploration. Pilgor has finally found a secret underground shop where a mysterious goat sells questionable merchandise. Naturally, the password is to bow politely. Apparently, even San Angora's criminal underworld appreciates good manners.
Video Guide: https://www.youtube.com/watch?v=oLDHyhJkisU&list=PLtA90_ts33NHzNroJoYdPydZHv9LBBMgE&index=8&pp=iAQB

Trophy: Cannibanana
Lick a banana as an Abominana
Type: Bronze
Category: Misc
How to Unlock
**Lick a banana while playing as an Abominana.** Cannibanana requires transforming Pilgor into a giant banana creature and then performing a particularly questionable act of fruit consumption. First, travel to **Suburbsville** and locate the **How It's Made** event toward the eastern side of the region. Complete the event inside the factory to unlock access to the Abominana transformation. Once the event is finished, locate the large testing tubes positioned near the scientists. Step inside one of the tubes to transform Pilgor into an **Abominana**, unlocking the corresponding appearance for future use. Next, open the Wardrobe and make sure the Abominana appearance is equipped. Find a regular banana somewhere in San Angora. Approach the banana and press **Square** to lick it. The trophy unlocks immediately after an Abominana successfully licks a banana.
Tip
**The How It's Made event is the only significant prerequisite**, so complete it before searching for bananas. Once you've unlocked the Abominana appearance, you can use it through the Wardrobe without repeating the entire event. Bananas can be found throughout San Angora, particularly around buildings and areas containing food or other interactive objects. You don't need to eat the banana, carry it to a particular location, or perform any additional actions. Simply lick one while the Abominana appearance is active. Make sure you're actually using the Abominana form rather than a standard goat wearing unrelated banana-themed equipment. If the trophy doesn't unlock immediately, release the banana and try licking another one. The Abominana appearance is also required for **[REDACTED]**, so keep it unlocked for later trophy cleanup. Goat Simulator 3 has finally answered a question nobody was brave enough to ask. What happens when a banana licks another banana? Apparently, you earn a trophy.
Video Guide: https://www.youtube.com/watch?v=AcItBuxIV4E&list=PLtA90_ts33NHzNroJoYdPydZHv9LBBMgE&index=9&pp=iAQB

Trophy: Car Cave
Find the secret garage
Type: Silver
Category: Misc
How to Unlock
**Find the secret underground garage beneath the Fossil Fuel gas station.** Car Cave is a hidden location in **Fairmeadows Ranch**, connected to the Fossil Fuel gas station. This is the same gas station with the enormous dinosaur mascot required for the **Nasty!** trophy. Travel to the station and locate the small garage positioned beside the main building. The garage appears to be an ordinary vehicle storage area, but it conceals a hidden entrance. First, find a driveable vehicle somewhere nearby. Approach the vehicle and press **Triangle** to enter it. Drive toward the Fossil Fuel gas station and carefully position the vehicle inside the small garage. Once the vehicle is fully inside, press **L3** to honk the horn. Honk while positioned in the correct location to activate the secret mechanism. The garage floor will begin lowering, revealing a hidden underground area beneath the station. Remain in the vehicle as the platform descends. The trophy unlocks automatically after discovering the Car Cave.
Tip
**You must bring a vehicle into the garage and honk its horn** to activate the secret entrance. Simply walking into the garage as Pilgor won't reveal the underground area. Any ordinary driveable car should work, so there's no need to search for a particular model. If the platform doesn't move, reposition your vehicle farther inside the garage and press L3 again. Make sure you're using the small garage beside the dinosaur gas station rather than another building. Once you've entered the Car Cave, take a moment to explore the underground area. You'll find the **Furrari Fur** cosmetic here, which is a useful additional reward for discovering the location. The trophy can be earned during your first visit to Fairmeadows Ranch, provided you've obtained a vehicle. Consider completing **Nasty!** during the same visit to avoid returning to the gas station unnecessarily. Pilgor has discovered a secret underground facility hidden beneath an ordinary gas station. The entrance requires driving into a garage and honking the horn. Somewhere, a very wealthy superhero is wondering why nobody thought of that security system before.
Video Guide: https://www.youtube.com/watch?v=_s1CJf08jO0&list=PLtA90_ts33NHzNroJoYdPydZHv9LBBMgE&index=10&pp=iAQB

Trophy: Club Mohair
Enter the super secret container rave
Type: Silver
Category: Misc
How to Unlock
**Enter the secret rave hidden inside a shipping container.** Club Mohair is a hidden nightclub located inside a shipping container at the **Port of San Angora**. However, the entrance won't open unless Pilgor is wearing the correct outfit. First, travel to **Downtown** and locate the clothing store called **Lux**, positioned near the central portion of the region. Enter the store and find the changing rooms. Walk into one of the fitting rooms to obtain the **Suit Up!** accessory. Once unlocked, equip Suit Up! through the Wardrobe. Next, travel to the **Port of San Angora**, located along the waterfront. Explore the shipping container area until you find a distinctive **black container labeled Club Mohair**. Approach the container door while wearing the Suit Up! accessory. If the correct outfit is equipped, the entrance will open automatically. Enter the container and follow the passage inside. The interior contains a hidden maze, so continue navigating through the corridors until you reach the nightclub. You'll eventually discover a secret rave filled with dancing goats. The trophy unlocks automatically when you enter the rave.
Tip
**Suit Up! must be equipped before approaching the shipping container.** Simply owning the accessory won't open the entrance. The clothing store Lux is the easiest place to obtain the required outfit, and you don't need to purchase it from the regular Wardrobe shop. Once you've unlocked Suit Up!, equip it and travel directly to the port. Look carefully among the shipping containers for the black one marked Club Mohair. If the door doesn't open, double-check that the correct accessory is equipped and approach the entrance again. Inside the container, follow the available corridors until you reach the main rave area. You don't need to interact with the DJ, dance for a particular amount of time, or perform any special emotes. Discovering the nightclub is sufficient. This trophy can be completed at any point during free-roam exploration. After an adventure involving underground garages, suspicious merchants, and hidden scientific laboratories, Pilgor finally discovers the true purpose of San Angora's shipping containers. They're apparently being used to host exclusive goat raves. At least someone on this island knows how to have a good time.
Video Guide: https://www.youtube.com/watch?v=hax-mpRqGTs&list=PLtA90_ts33NHzNroJoYdPydZHv9LBBMgE&index=12&pp=iAQB0gcJCUoMAYcqIYzv

Trophy: Crocsquatch
Give Big Foot some shoes
Type: Bronze
Category: Misc
How to Unlock
**Give Bigfoot a pair of shoes using the Fashionista accessory.** This trophy requires completing an event, unlocking a special accessory, and using it on a specific character. First, travel to **Mornwood Falls** and locate the event called **Bigfoot Sighted!** near the center of the region. Complete the event by finding and capturing Bigfoot. This also unlocks the Birthday Suit fur needed for the separate **Streaking** trophy. Next, travel to **Libertarian Island** and locate the giant founder statue. Near the base of the statue, you'll find the **Fashionista accessory**, which allows Pilgor to give other characters fashionable items. Collect the accessory and equip it through the Wardrobe. Return to the location where you captured Bigfoot during the Bigfoot Sighted! event. Find the captured Bigfoot and use the Fashionista accessory's special ability to give her a pair of shoes. The trophy unlocks once the shoes have been successfully applied.
Tip
**Complete Bigfoot Sighted! before searching for the Fashionista accessory**, as you need access to the captured Bigfoot to finish this trophy. You can save time by earning **Streaking** after completing the Bigfoot event, then returning later with Fashionista for Crocsquatch. Make sure Fashionista is equipped before approaching Bigfoot. Merely collecting the accessory won't satisfy the requirement. If you're having trouble identifying where to use the accessory, aim directly at the captured character and activate its special ability. The location of the Fashionista accessory can be difficult to recognize among the landmarks surrounding the founder statue, so a short location video may be helpful. There's no requirement to purchase every shoe type or customize any other NPC. Once Bigfoot receives the footwear, the trophy is complete. Pilgor has finally discovered Bigfoot, one of the world's greatest mysteries. Naturally, her first priority isn't scientific research or documenting the discovery. It's making sure Bigfoot has appropriate footwear.
Video Guide: https://www.youtube.com/watch?v=HuvNoAIv-8o&list=PLtA90_ts33NHzNroJoYdPydZHv9LBBMgE&index=13&pp=iAQB

Trophy: Egg Simulator
Become an Egg
Type: Silver
Category: Misc
How to Unlock
**Allow a giant chicken to swallow Pilgor and transform her into an egg.** This trophy takes place at the **Chicken Eggs barn** in the northwestern portion of **Fairmeadows Ranch**. Travel to the farm area and locate the large building associated with chicken farming. Look for a red barn door with a **bell mounted beside it** and a food bowl positioned on the ground directly in front. The bell summons an enormous chicken that emerges from the barn and eats whatever is sitting inside the bowl. To unlock the trophy, Pilgor must become the chicken's next meal. Approach the bell and use your headbutt attack to ring it. Immediately move into the food bowl and remain inside as the giant chicken emerges. If you've positioned Pilgor correctly, the chicken will swallow her. A moment later, Pilgor will be released in the form of an egg. The trophy unlocks automatically after the transformation.
Tip
**Position Pilgor close to the food bowl before ringing the bell**, since you'll have only a short opportunity to get inside before the chicken appears. If you're too slow, the chicken may eat something else or return inside without swallowing Pilgor. In that case, simply repeat the attempt. You don't need to wear a particular outfit or equip any accessories. The challenge is entirely about timing and positioning. Look for the bell, food bowl, and red barn door as your key landmarks. Once the chicken begins emerging, make sure Pilgor is standing directly inside the bowl rather than beside it. If the transformation doesn't register, step out, ring the bell again, and reposition yourself. You can complete this trophy at any point during free-roam exploration. The resulting egg transformation is also one of the many bizarre appearances Pilgor can experience throughout the game. Pilgor has finally discovered an important scientific question. What happens when a giant chicken eats a goat? Apparently, the goat becomes an egg. Somewhere, a biologist has just decided to change careers.
Video Guide: https://www.youtube.com/watch?v=t0hf_Cmx8XU&list=PLtA90_ts33NHzNroJoYdPydZHv9LBBMgE&index=15&pp=iAQB

Trophy: French Fika
Lick the croissant
Type: Bronze
Category: Misc
How to Unlock
**Find and lick the large donut statue in Downtown.** Despite the trophy description mentioning a croissant, French Fika actually requires interacting with an oversized **donut statue**. Travel to **Downtown**, one of the main urban regions of San Angora. Head toward the western side of Downtown and search for a large donut-shaped sculpture mounted on a stand. The statue is easy to recognize because of its distinctive circular shape and oversized appearance. Approach the sculpture and use Pilgor's headbutt attack to knock the donut off its stand. Once the donut has fallen, move close enough to interact with it. Press **Square** to lick the donut. The trophy unlocks immediately after the successful interaction. You don't need to carry the donut anywhere, complete an event, or equip any special accessories.
Tip
**Make sure the donut has been knocked off its stand before trying to lick it.** The interaction may not register properly while the sculpture is still mounted. If you're having trouble locating the statue, search the western section of Downtown for a large circular decorative object. You don't need a croissant, despite the wording of the trophy description. Once the donut is on the ground, approach it closely and use the normal lick action. If the trophy doesn't unlock immediately, release the object and try licking it again from a different position. This trophy can be completed during your first visit to Downtown or saved for post-game cleanup. It's also convenient to combine with other Downtown objectives, such as **Raider of the Lost Parking Garage** and nearby collectible searches. Goat Simulator 3 has finally introduced a trophy involving sophisticated French cuisine. Naturally, the croissant is actually a giant donut. And the appropriate way to appreciate it is to knock it over and lick it. Bon appétit.
Video Guide: https://www.youtube.com/watch?v=kHA-J9BpBW0&list=PLtA90_ts33NHzNroJoYdPydZHv9LBBMgE&index=16&pp=iAQB

Trophy: Goat Queen
Become Queen of all the goats
Type: Gold
Category: Misc
How to Unlock
**Sit on the Goat Queen throne inside your Goat Castle.** To earn this trophy, you must first upgrade your Goat Castle to **C Tier**. Castle progression is tied to earning Illuminati Points by completing events throughout San Angora. You'll need to accumulate **55 Illuminati Points** to reach C Tier. Once you've earned enough points, return to the Goat Castle and interact with the main progression area to unlock the next rank. After reaching C Tier, the castle undergoes additional changes. A previously ordinary chair near the stairs leading toward the second floor is replaced by a large throne. This is the **Goat Queen throne**. Approach the throne and jump onto it. Once Pilgor sits on the throne, the trophy unlocks automatically. You'll also obtain the **Goat Queen accessory**, which grants a special ability that summons additional goats.
Tip
**Earn this trophy immediately after reaching C Tier**, since you'll already be visiting the Goat Castle to unlock the next progression milestone. The throne is positioned near the main staircase, making it relatively easy to locate. You don't need to complete a separate event or collect any special objects. Simply jump onto the throne after it becomes available. The Goat Queen accessory is particularly useful for **You Trusted Your Instincts**, which requires completing all 99 Instinct challenges. Some Instincts involve affecting several NPCs simultaneously, and the Goat Queen's special ability can summon additional goats to help satisfy those requirements. Once you've unlocked the accessory, equip it through the Wardrobe and experiment with its special ability. You don't need to remain seated on the throne or perform any additional actions afterward. The trophy is awarded for becoming Goat Queen, not for maintaining your royal position. Pilgor has finally achieved what every ambitious goat dreams of: sitting on a throne and ruling over an entire kingdom. Her first official act will presumably involve summoning goats from the sky. San Angora is in excellent hands.
Video Guide: https://www.youtube.com/watch?v=rAD5uIEPJQ0&list=PLtA90_ts33NHzNroJoYdPydZHv9LBBMgE&index=17&pp=iAQB

Trophy: Into the Matrix
Find the trainstation
Type: Bronze
Category: Misc
How to Unlock
**Find the hidden train station by entering the lava portal while wearing the Purity Ring.** This trophy involves discovering two secret locations inspired by popular movie franchises. First, travel to **Fairmeadows Ranch** and locate the small hobbit-style house near the **Dilbo's Journey** event. The house is positioned toward the eastern side of the region. Approach the building and headbutt its door to gain access. Inside, you'll find the **Purity Ring** accessory. Collect the ring and equip it through the Wardrobe. Next, travel to **Mornwood Falls** and locate the lava-filled area near the central portion of the region. Explore the lava pit until you discover a dark doorway surrounded by flowing lava. Enter this opening to reach a hidden location inspired by *The Lord of the Rings*. With the Purity Ring equipped, jump into the lava inside this secret area. Instead of simply returning to the normal map, Pilgor will be transported to a mysterious train station inspired by *The Matrix*. The trophy unlocks automatically after reaching the station.
Tip
**Make sure the Purity Ring is equipped before jumping into the lava.** Merely collecting the accessory isn't enough. The first step is finding the hobbit house in Fairmeadows Ranch, which is relatively easy to recognize because of its distinctive rounded architecture. The second step is locating the hidden opening within the lava pit at Mornwood Falls. If you're having trouble identifying the correct doorway, a short location video can make the route much easier to follow. You don't need to defeat enemies, complete a boss fight, or solve a complicated puzzle inside the train station. Simply reaching the location while wearing the correct accessory satisfies the trophy requirement. The entire challenge can be completed during free-roam exploration. You can also combine the trip to Fairmeadows Ranch with other nearby events and collectibles. After finding a suspicious ring, entering a hidden volcanic chamber, and jumping into molten lava, Pilgor somehow ends up in a train station. At this point, questioning the logic of Goat Simulator 3 seems like a complete waste of time. Maybe the real Matrix was the goats we met along the way.
Video Guide: https://www.youtube.com/watch?v=POSHC3_kVB0&list=PLtA90_ts33NHzNroJoYdPydZHv9LBBMgE&index=18&pp=iAQB

Trophy: Move! That! Bus!
Redecorate the entire Goat Castle
Type: Silver
Category: Misc
How to Unlock
**Customize all 25 available objects inside your Goat Castle.** The Goat Castle serves as your main progression hub in Goat Simulator 3. As you complete events throughout San Angora and earn Illuminati Points, you'll unlock additional castle tiers, rooms, and customization options. To earn this trophy, you must interact with **all 25 customizable objects** inside the castle. However, not every customization point is available immediately. You'll first gain access to castle customization after reaching **B Tier**, but you'll need to progress all the way to **S Tier** to unlock every option. Reaching S Tier requires accumulating **175 Illuminati Points** by completing events and hidden activities throughout San Angora. Once your castle is fully upgraded, explore its different rooms and look for objects that display a customization prompt when approached. Stand beside each customizable object and press **Triangle** to enter customization mode. Use the on-screen controls to cycle through the available appearances, then move on to the next object. Continue until you've interacted with all 25 customization points. The trophy unlocks after the final required object has been customized.
Tip
**Save this trophy for after earning New Goat Order**, which requires reaching S Tier. Trying to finish the customization requirement earlier won't work because several objects remain unavailable until the castle is fully upgraded. Explore every accessible floor and room rather than concentrating only on the main hall. Look carefully for customization prompts near furniture, decorations, and architectural features. You don't need to purchase every decorative option or create a particular appearance. Interacting with each customizable object is the important requirement. Some players have reported that customization progress doesn't always register consistently. If you've interacted with all 25 objects but the trophy hasn't unlocked, revisit every customization point and change each one again during the same play session. A dedicated video walkthrough is useful for identifying any object you've overlooked. Despite the trophy's name, **there is no actual bus involved** in the customization requirement. Pilgor has spent hours upgrading a mysterious castle, unlocking secret rooms, and establishing herself as the supreme ruler of goat society. Naturally, her next priority is redecorating. Every great empire needs an interior designer.
Video Guide: https://www.youtube.com/watch?v=EifIOKi50B8&list=PLtA90_ts33NHzNroJoYdPydZHv9LBBMgE&index=19&pp=iAQB

Trophy: Nasty!
Get squirted on by the Fossil Fuel mascot
Type: Bronze
Category: Misc
How to Unlock
**Get sprayed by the giant dinosaur mascot at the Fossil Fuel gas station.** This trophy is earned in **Fairmeadows Ranch**, one of the starting regions of San Angora. Travel toward the western side of Fairmeadows Ranch and locate the **Fossil Fuel gas station**. The station is recognizable by its enormous dinosaur mascot positioned above the building. Approach the dinosaur and look for the area directly underneath its rear end. Stand beneath the dinosaur's backside and remain there until it activates its unusual spraying animation. Once Pilgor is covered by the dinosaur's spray, the trophy unlocks automatically. You don't need to complete an event, purchase equipment, or unlock a special goat form. Simply locate the dinosaur and stand in the correct position.
Tip
**This trophy can be earned very early**, so consider completing it while exploring Fairmeadows Ranch during your first visit. The giant dinosaur makes the gas station easy to recognize from a distance. If the trophy doesn't unlock immediately, reposition Pilgor directly beneath the dinosaur's rear end and remain there until the animation activates. You don't need to headbutt the dinosaur or interact with the gas pumps. If you're unsure of the location, use the Fossil Fuel gas station landmark as your reference point. You can return at any time during free-roam exploration, so there's no reason to worry if you miss it initially. This trophy has no complicated prerequisites and should only take a few moments once you reach the correct location. Pilgor has traveled across San Angora causing destruction, disturbing innocent civilians, and generally behaving like an absolute menace. For this trophy, however, all she needs to do is stand underneath a giant dinosaur. What happens next is probably best left out of the official goat résumé.
Video Guide: https://www.youtube.com/watch?v=95kNS6QO5B0&list=PLtA90_ts33NHzNroJoYdPydZHv9LBBMgE&index=20&pp=iAQB

Trophy: Raider of the Lost Parking Garage
Find the perfectly round boulder
Type: Bronze
Category: Misc
How to Unlock
**Find and interact with the perfectly round boulder hidden inside a parking garage.** This trophy takes place in **Downtown**, one of the central regions of San Angora. Travel toward the southern portion of Downtown and locate the **police station**. Behind the police station, you'll find a parking garage with a partially closed entrance. The garage door doesn't provide enough space for Pilgor to walk through normally, so you'll need to find another way inside. One simple method involves using the game's ragdoll mechanic. Approach the garage door, build up some speed, and press **L1** just before reaching the opening. Pilgor will collapse into ragdoll mode, allowing her to slide underneath the narrow gap at the bottom of the door. Alternatively, you can use the **Angry Goat** ability to force the garage door open. Once inside the parking garage, search for a large, perfectly spherical boulder. Approach the boulder and either headbutt it or lick it. The trophy unlocks immediately after interacting with the boulder.
Tip
**Sliding beneath the garage door using ragdoll mode is the quickest method**, as it doesn't require unlocking or equipping any special abilities. If Pilgor gets stuck against the garage door, move farther away, gain additional speed, and activate ragdoll mode just before reaching the opening. Make sure you're approaching the garage behind the Downtown police station rather than another parking structure. The boulder is noticeably round and easy to recognize once you're inside. You don't need to move the boulder outside, carry it anywhere, or complete a puzzle involving it. A simple headbutt or lick is sufficient. This trophy can be earned at any point during free-roam exploration, making it convenient to complete while collecting nearby Downtown objectives. Hidden inside a parking garage, Pilgor discovers an unusually perfect boulder. After everything else that happens in Goat Simulator 3, finding an ordinary rock might seem disappointingly normal. But this one is *perfectly round*. Clearly, that changes everything.
Video Guide: https://www.youtube.com/watch?v=v16meFozC_w&list=PLtA90_ts33NHzNroJoYdPydZHv9LBBMgE&index=21&pp=iAQB

Trophy: Reach the Stratosphere
Get flung out of the map
Type: Bronze
Category: Misc
How to Unlock
**Launch Pilgor high enough to exceed the game's maximum altitude.** For this trophy, you must propel Pilgor so high into the air that the game automatically teleports her back toward the ground. The easiest method involves obtaining the **Jetpack** accessory. Travel to **Fairmeadows Ranch** and locate the **Pointy Foods Factory**, identifiable by its large industrial buildings and smokestacks. Climb to the top of the factory's smokestacks to find the Jetpack. Once you've collected it, open your Wardrobe and equip the accessory. The Jetpack allows Pilgor to propel herself through the air using its special ability. Find an open area with enough space above you and activate the Jetpack by pressing **R1**. Aim upward and continue using the Jetpack to gain altitude. If you're having difficulty controlling the direction, jump from an elevated surface before activating the Jetpack and adjust Pilgor's orientation so the thrust pushes her upward. Continue ascending until you reach the game's maximum altitude. Once Pilgor passes the upper boundary, the game automatically teleports her back down. The trophy unlocks when this occurs.
Tip
**The Jetpack is the most reliable method for reaching the required altitude**, but it can be surprisingly difficult to control. If Pilgor keeps flying sideways instead of upward, change her orientation before activating the accessory. Launching from an elevated area can provide additional room to adjust your trajectory. Try using an open space rather than a crowded area filled with buildings or objects that could interrupt your flight. You don't need to maintain control during the entire journey or land safely afterward. The trophy only requires exceeding the upper boundary of the map. Keep the Jetpack available after earning this trophy because it can also help with exploration, reaching rooftops, and accessing certain hidden locations. You can attempt this challenge at any time once you've obtained the accessory. Pilgor has spent most of the game proving that gravity is more of a suggestion than a rule. Now she's taking that philosophy to its logical conclusion. Apparently, the sky isn't the limit. The game's invisible ceiling is.
Video Guide: https://www.youtube.com/watch?v=lBaPeGFXbAQ&list=PLtA90_ts33NHzNroJoYdPydZHv9LBBMgE&index=22&pp=iAQB

Trophy: Real Buoy
Make like Pinocchio and get eaten!
Type: Bronze
Category: Misc
How to Unlock
**Stand on a specific buoy in the ocean and get swallowed by a whale.** Real Buoy requires discovering the hidden event called **Belly of the Beast**. The event takes place in the ocean off the **eastern side of San Angora**. Travel toward the coastline and look for a particular buoy floating offshore. You'll need to swim or otherwise travel across the water to reach it. Once you've located the correct buoy, climb onto it and remain standing on top. After a short moment, a massive whale will emerge from the water and swallow Pilgor. This triggers the secret event and transports you into a hidden area inside the whale. The trophy unlocks automatically after you're swallowed. You don't need to defeat the whale or activate an accessory beforehand.
Tip
**The most challenging part is locating the correct buoy**, as several objects can be found floating around San Angora's coastline. A dedicated location video is useful if you're having trouble identifying it among the surrounding ocean landmarks. Make sure Pilgor is standing directly on top of the buoy rather than swimming beside it. Remain on the buoy until the whale appears. You don't need to perform any additional action to trigger the encounter. After being swallowed, you'll find yourself inside the whale's stomach. To escape, repeatedly headbutt the **uvula hanging from the ceiling** until the game releases you. The encounter contributes toward discovering San Angora's hidden events, which can help with overall Goat Castle progression. You can complete this trophy at any point during free-roam exploration. No special goat form or equipment is required. Pilgor has survived explosions, impossible falls, dangerous experiments, and endless encounters with angry citizens. Getting swallowed by an enormous whale might seem like a particularly unfortunate development. Fortunately, the goat's solution is simple: headbutt the whale's internal anatomy until it regrets its dietary choices.
Video Guide: https://www.youtube.com/watch?v=9fi6jKvFG-o&list=PLtA90_ts33NHzNroJoYdPydZHv9LBBMgE&index=23&pp=iAQB

Trophy: San Angora: Become Human
Unlock the Capra Erectus
Type: Silver
Category: Misc
How to Unlock
**Discover the hidden cave on Libertarian Island and unlock the Capra Erectus goat form.** Capra Erectus is a special goat appearance that allows Pilgor to stand and move upright like a human. To unlock it, travel to **Libertarian Island**, located off the eastern side of San Angora. Explore the eastern portion of the island until you find a cave entrance concealed behind a large, suspicious-looking rock. The rock appears to block the entrance completely, but it can be moved using a specific interaction. Stand directly in front of the rock and press **Circle** to make Pilgor baa. The sound triggers the hidden mechanism, causing the rock to move aside and reveal the cave entrance. Enter the cave and explore the chamber inside. You'll discover a hidden character known as **Superstar**, accompanied by an unusual scene referencing religious imagery. Approach the character to unlock the **Capra Erectus** form. The trophy unlocks automatically after discovering the character and obtaining the new goat appearance.
Tip
**The key to this trophy is using Pilgor's baa ability rather than headbutting the rock.** If the entrance doesn't open, move closer to the large rock and press Circle again. The cave is located on Libertarian Island, so make sure you're searching the island itself rather than the nearby mainland. Look for a conspicuous boulder positioned against a rocky wall. Once the entrance opens, you don't need to complete a complicated puzzle or defeat any enemies. Simply enter the cave and approach the hidden character. Capra Erectus remains available through your goat customization options afterward. You can complete this trophy at any point during free-roam exploration. If you're having trouble locating the concealed cave, a short location video is the easiest way to identify the correct rock. After spending countless hours causing chaos as an ordinary four-legged goat, Pilgor finally discovers the ability to walk like a human. Considering how most humans behave on San Angora, whether this is actually an improvement remains highly questionable.
Video Guide: https://www.youtube.com/watch?v=poaeLaszOlc&list=PLtA90_ts33NHzNroJoYdPydZHv9LBBMgE&index=25&pp=iAQB

Trophy: Streaking
Run naked on the football field
Type: Bronze
Category: Misc
How to Unlock
**Run across the Hoofball field while wearing the Birthday Suit fur.** This trophy requires unlocking a specific cosmetic appearance before visiting a sporting location. First, travel to **Mornwood Falls** and complete the event called **Bigfoot Sighted!** The event involves tracking down Bigfoot and completing the associated objective. Successfully finishing this event unlocks the ability to purchase the **Birthday Suit** fur from the in-game Wardrobe. Open the menu using the Touch Pad, navigate to Wardrobe, and locate the Birthday Suit under the available Fur options. Purchase and equip it. Once Pilgor is wearing the Birthday Suit, travel to **Suburbsville**. Locate the **Hoofball field**, positioned toward the eastern side of the region. Enter the field while wearing the required fur and begin running across the playing area. The trophy unlocks automatically after Pilgor runs onto the field in the Birthday Suit.
Tip
**Complete Bigfoot Sighted! first**, as the Birthday Suit fur must be unlocked before you can attempt the trophy. Simply visiting the Hoofball field with Pilgor's default appearance won't satisfy the requirement. Make sure you've actually equipped the Birthday Suit rather than merely purchasing it. You don't need to participate in a Hoofball match, score a goal, or interact with any players. Running across the field while wearing the correct fur is sufficient. If the trophy doesn't unlock immediately, move farther into the playing area and continue running. The field remains accessible during free-roam exploration, so you can complete this trophy whenever you've obtained the required outfit. Finishing Bigfoot Sighted! also contributes toward your overall event progress and Goat Castle upgrades, making it worthwhile to complete during normal exploration. Pilgor has already demonstrated a complete disregard for public safety, private property, and the laws of physics. Now she's adding public decency to the list. Somewhere, a Hoofball referee is wondering whether the rulebook covers this situation.
Video Guide: https://www.youtube.com/watch?v=TD-zUAW7rVA&list=PLtA90_ts33NHzNroJoYdPydZHv9LBBMgE&index=26&pp=iAQB

Trophy: Welcome to Earth
Start the Alien invasion
Type: Bronze
Category: Misc
How to Unlock
**Trigger the alien invasion by completing the hidden 5G Upgrade event.** Welcome to Earth requires solving a secret environmental puzzle involving three electrical substations scattered throughout San Angora. The hidden event is called **5G Upgrade**. Each substation contains equipment that must be activated by transferring electricity between several power nodes. First, locate one of the electrical substations. Inside, you'll find a source of electricity and **three power nodes** that need to be activated. Use the environmental equipment to electrify Pilgor, then transfer the electrical charge to each node. Once all three nodes at that substation have been activated, the station will send a powerful electrical arc toward a large building in **Downtown**. Repeat this process at the other two substations. After you've successfully activated all three stations, their combined electrical energy triggers the hidden event. A group of UFOs will appear above San Angora, signaling the beginning of the alien invasion. The trophy unlocks automatically once the invasion begins.
Tip
**You must activate all three substations**, so completing only one or two won't unlock the trophy. Each substation follows the same general principle: electrify Pilgor and transfer the charge to the three required power nodes. Pay attention to the environmental layout and locate every node before beginning the puzzle. If you're struggling to identify the substations, a dedicated 5G Upgrade location video is the easiest way to find all three without searching the entire island. The electrical arcs traveling toward Downtown provide a useful visual confirmation that a station has been activated successfully. You don't need to defeat the UFOs or complete any additional alien-related activities after the invasion begins. This hidden event also contributes Illuminati Points toward upgrading your Goat Castle. Consider completing it while searching for the additional events required to reach S Tier. Pilgor has spent the entire game terrorizing the human population of San Angora. Apparently, that wasn't enough. Now she's helping summon an alien invasion. At this point, the local government should probably stop issuing parking tickets and start preparing an evacuation plan.
Video Guide: https://www.youtube.com/watch?v=jd7DEFoBu6Y&list=PLtA90_ts33NHzNroJoYdPydZHv9LBBMgE&index=27&pp=iAQB

Trophy: What a Waste of Money
Buy the Gators shoes
Type: Bronze
Category: Misc
How to Unlock
**Purchase the Gators shoes from the in-game Wardrobe.** Goat Simulator 3 allows you to customize Pilgor using a large selection of clothing, accessories, and other ridiculous cosmetic items. Many of these items can be purchased directly through the Wardrobe using points earned during normal gameplay. To unlock this trophy, open the in-game menu using the **Touch Pad** and navigate to the **Wardrobe** section. Use **R2** to move through the customization categories until you reach **Feet**. Look for the footwear named **Gators**. These are among the cheapest items available in the shop, costing just **one point**. Select the Gators and purchase them. The trophy unlocks immediately after completing the purchase. You don't need to complete any events or reach a particular stage of the story before buying them.
Tip
**This is one of the easiest trophies in Goat Simulator 3**, and you can earn it almost immediately after gaining control of Pilgor. The Gators cost only one point, so there's no reason to save the purchase for later. If you haven't earned any points yet, perform a few simple actions such as headbutting objects, knocking over NPCs, or completing basic activities. Return to the Wardrobe and purchase the shoes once you have enough. You don't need to buy every pair of shoes or unlock additional cosmetic categories. Simply purchasing the Gators is sufficient. If you're unfamiliar with the Wardrobe system, take a moment to explore the available equipment and customization options. Many items have special abilities that will become useful for other trophies. The Gators themselves aren't required for any additional Platinum objectives, so you can equip something else afterward. Pilgor may be an unstoppable force of destruction, but apparently even she understands the importance of proper footwear. Spending one point on a pair of shoes might not sound wasteful. Then again, she's a goat.
Video Guide: https://www.youtube.com/watch?v=c7hSoBlRHNQ&list=PLtA90_ts33NHzNroJoYdPydZHv9LBBMgE&index=28&pp=iAQB

Trophy: Where is It?
Find That clown
Type: Bronze
Category: Misc
How to Unlock
**Find the hidden clown inside the sewers of Suburbsville.** For this trophy, you'll need to locate a secret underground area containing a clown inspired by the horror character from *IT*. Travel to **Suburbsville**, a residential region of San Angora. Near the center of the area, look for a small isolated pond with a drainage pipe leading underground. Approach the pipe and enter the sewer system. Once inside, proceed forward through the tunnel until you reach the first intersection. Take the **first right turn** and continue along the passage. The tunnel eventually leads to a hidden area where you'll discover the clown. Simply enter the area and approach the clown to unlock the trophy. You don't need to defeat the clown, solve a puzzle, or interact with a particular object. Reaching the correct location is sufficient.
Tip
**The drainage pipe beside the small pond is the key landmark.** Once you've found the sewer entrance, the route is relatively short. If you're having trouble locating the pipe, search the central portion of Suburbsville for a pond separated from the larger bodies of water elsewhere on the map. Enter the pipe, travel forward, and take the first available right-hand passage. You don't need any special abilities, costumes, or equipment to reach the clown. This trophy can be earned at any point during free-roam exploration. Consider completing it while working on nearby Suburbsville events or searching for hidden collectibles. There's no need to interact with the clown after entering its hiding place, although you can certainly investigate the surroundings if you're curious. San Angora contains aliens, bizarre scientific experiments, secret underground facilities, and plenty of other unusual discoveries. Naturally, someone also decided to put a terrifying clown in the sewer. Pilgor, being a goat, probably just wants to lick it.
Video Guide: https://www.youtube.com/watch?v=UKIQ9ef27os&list=PLtA90_ts33NHzNroJoYdPydZHv9LBBMgE&index=29&pp=iAQB

Trophy: Who Baywatches the Baywatch?
Run on the beach in slow motion
Type: Bronze
Category: Misc
How to Unlock
**Run along the beach in slow motion.** Travel to **Goatenburg**, located on the western side of San Angora, and make your way toward **Capracabana Beach**. You'll recognize the area by its sandy shoreline, nearby water, and beach activities. Once you reach the beach, position Pilgor anywhere on the sand where you have enough room to run. Press **Left on the D-Pad** to activate the game's slow-motion mode. With slow motion active, begin running across the beach. You only need to run for a short distance while slow motion is enabled. The trophy unlocks automatically once the game registers the action. There's no need to wear a specific outfit, equip special gear, or complete any nearby events beforehand.
Tip
**Slow motion is a built-in gameplay feature**, so you don't need to purchase or unlock an accessory to use it. Make sure Pilgor is actually running on the beach rather than standing still or walking along the nearby road. If the trophy doesn't unlock immediately, move farther onto the sandy area and continue running with slow motion activated. You can perform this action during your first visit to Goatenburg or return later during free-roam cleanup. This is an easy trophy to combine with exploration of the surrounding coastline, where you'll find additional events and collectibles. Slow motion can also be helpful for certain movement challenges because it gives you more time to react and adjust Pilgor's position. After spending most of her adventure causing destruction at maximum speed, Pilgor finally discovers the dramatic appeal of running along a beach in slow motion. Somewhere, an imaginary lifeguard theme song is playing.
Video Guide: https://www.youtube.com/watch?v=C2m_JR_C3Mc&list=PLtA90_ts33NHzNroJoYdPydZHv9LBBMgE&index=30&pp=iAQB

Trophy: Covert Consortium
Goat Castle - Reach C Tier
Type: Bronze
Category: Story
How to Unlock
**Upgrade your Goat Castle to C Tier by earning 55 Illuminati Points.** To unlock Covert Consortium, continue completing events throughout San Angora until you've accumulated **55 Illuminati Points**. This is the total required across your adventure, not an additional 55 points after reaching D Tier. You can earn points by completing standard events and discovering hidden activities scattered across the island. Once you've reached the requirement, return to your Goat Castle. Approach the large locked door in the main hall and stand on the illuminated circle to activate the C Tier upgrade. The trophy unlocks automatically when the castle reaches C Tier. This upgrade also unlocks an important new feature: the **Goat Queen throne**. You'll find the throne near the staircase leading to the second floor. The ordinary chair previously occupying this area is replaced with a large royal throne.
Tip
**Immediately visit the Goat Queen throne after unlocking Covert Consortium.** Jump onto the throne to earn the separate **Goat Queen** trophy and unlock its special accessory. The Goat Queen accessory allows Pilgor to summon additional goats using its special ability. This can be particularly useful when completing Instinct challenges that require interacting with multiple characters. Unlocking the throne early gives you more opportunities to use this ability during normal exploration instead of saving every related Instinct for post-game cleanup. After reaching C Tier, continue completing events to work toward the next castle upgrade. Your next milestone is **B Tier at 90 Illuminati Points**, followed by A Tier at 130 and S Tier at 175. As with the earlier castle trophies, Covert Consortium is tied to normal story progression and cannot be missed. Pilgor has officially reached the upper ranks of a secret organization. Naturally, this promotion comes with access to a royal throne and the ability to summon more goats. San Angora's political system is becoming increasingly concerning.

Trophy: Don't touch the servers
You touched the servers
Type: Gold
Category: Story
How to Unlock
**Defeat the final boss, destroy the servers, and trigger the game's ending sequence.** After upgrading your Goat Castle to S Tier, the large locked door in the main hall opens, revealing the final area. Enter the newly accessible chamber to encounter the farmer from the game's opening sequence. He'll explain that he isn't ready for your confrontation and asks you to return later. Instead, approach him while he's standing near the edge and **headbutt him into the abyss** to begin the final boss encounter. The fight consists of three phases, each using different mechanics. #### Phase 1 — Dodge the Attacks The farmer attacks using large area-of-effect patterns. Watch the floor for indicators showing where his attacks will land, then move into safe areas before they activate. Focus on avoiding damage and following the encounter's prompts rather than attacking recklessly. #### Phase 2 — Find the Farmer The encounter changes into a timed hide-and-seek challenge. You'll need to locate the farmer before the timer expires over several rounds. Keep moving, search the available hiding areas, and pay attention to the environment to locate him quickly. #### Phase 3 — Retro Platforming The final phase transforms into a side-scrolling platforming sequence inspired by classic retro games. Move through the level, avoid hazards, and complete the platforming challenge to defeat the farmer. After all three phases are finished, the farmer gives another speech and asks Pilgor to leave. Most importantly, he specifically warns you **not to touch the servers**. Naturally, that's exactly what you should do. Move around the room and **headbutt every server until they're all destroyed**. Destroying the servers causes the game to simulate a crash and unlocks the trophy. Afterward, complete the vehicle escape sequence to finish the story and reach the credits.
Tip
**Don't leave the server room without destroying the servers.** The trophy's required interaction happens after defeating the final boss. During the first phase, prioritize recognizing the attack indicators instead of trying to rush the encounter. For the hide-and-seek phase, keep an eye on the timer and search methodically. During the platforming phase, focus on safely clearing each obstacle rather than rushing forward. If you're struggling, a video of the final boss encounter can help you recognize its different mechanics before attempting another run. The encounter is accessed through the S Tier Goat Castle door, so make sure you've earned New Goat Order first. The game's credits follow the final escape sequence, but the trophy unlocks when the servers are destroyed. After an entire adventure devoted to causing chaos, Pilgor is finally asked to do one simple thing. Don't touch the servers. For perhaps the first time in her life, she understands the assignment perfectly. And immediately does the opposite.
Video Guide: https://www.youtube.com/watch?v=JLOxDYh6kAk&list=PLtA90_ts33NHzNroJoYdPydZHv9LBBMgE&index=14&pp=iAQB

Trophy: Forgotten Sorority
Goat Castle - Reach F Tier
Type: Bronze
Category: Story
How to Unlock
**Upgrade your Goat Castle to F Tier.** Forgotten Sorority is one of the first progression trophies you'll earn in Goat Simulator 3. After completing the opening introduction, Pilgor gains access to the Goat Castle, which serves as the central hub for the game's story progression. The castle initially looks rather neglected, but you'll gradually transform it into a much more impressive headquarters by completing events throughout San Angora. When you first enter the Goat Castle, the game introduces the Illuminati ranking system. Your progression begins at **F Tier**, the castle's starting rank. Follow the introductory objectives and enter the castle to establish your position within the organization. The trophy unlocks automatically once you've reached F Tier. You'll also notice improvements to the castle as you progress, including additional decorations, rooms, and other changes.
Tip
**This trophy is story-related and cannot be missed during normal progression.** You don't need to collect any Trinkets, complete special challenges, or purchase equipment to reach F Tier. Simply follow the opening introduction and visit the Goat Castle. After earning Forgotten Sorority, your next objective is accumulating Illuminati Points by completing events around San Angora. These points allow you to increase your castle's rank and unlock the remaining progression trophies. You'll eventually need **175 Illuminati Points** to reach S Tier for **New Goat Order**. As you explore, prioritize activating the six Goat Towers to reveal nearby events and unlock fast-travel points. Completing events naturally advances your castle progression, so there's no reason to grind specifically for the early tiers. Pilgor has officially joined a mysterious organization dedicated to achieving greatness. Unfortunately, its newest recruit is a goat with absolutely no respect for furniture, architecture, or public safety. The organization may want to reconsider its admission standards.

Trophy: I Watched the Intro
Sit through the intro
Type: Bronze
Category: Story
How to Unlock
**Watch the entire opening sequence without skipping it.** When starting a new game in Goat Simulator 3, you'll experience an introductory sequence featuring Pilgor riding in the back of a cart. The opening is a parody of the famous introduction to The Elder Scrolls V: Skyrim, complete with a familiar journey toward an uncertain destination. To unlock this trophy, simply allow the introduction to play from beginning to end. The sequence lasts approximately **four to five minutes**. Although the game allows you to skip the opening by holding **Triangle**, doing so prevents you from earning the trophy during that particular introduction. Instead, leave your controller alone and watch the entire sequence until normal gameplay begins. The trophy unlocks automatically after the introduction finishes.
Tip
**Don't hold Triangle during the opening cutscene.** This is one of the easiest trophies in the game, but it's also easy to overlook if you normally skip introductions. You don't need to press any buttons, complete special interactions, or make particular choices. Simply watch the full sequence without skipping. If you accidentally skip the introduction, the trophy isn't permanently missable. Return to the main menu and begin a new game using a separate save slot. Goat Simulator 3 supports multiple save slots, allowing you to replay the opening without deleting your main progress. After the trophy unlocks, continue into San Angora and begin exploring. You only need to watch the full introduction once. Pilgor's grand adventure begins with a suspiciously familiar cart ride. Fortunately, this time nobody is asking whether you're finally awake. They're probably too busy wondering why there's a goat in the wagon.

Trophy: New Goat Order
Goat Castle - Reach S Tier
Type: Bronze
Category: Story
How to Unlock
**Upgrade your Goat Castle to S Tier by earning 175 Illuminati Points.** This trophy marks the final milestone in Goat Simulator 3's Goat Castle progression system. Throughout San Angora, you'll find events that reward Illuminati Points when completed. These events range from simple activities to elaborate environmental puzzles, secret locations, and increasingly ridiculous challenges. As you accumulate points, return to the Goat Castle and stand on the illuminated circle in front of the large locked door to activate each available upgrade. The castle progresses through seven ranks: - F Tier — Starting rank - E Tier — 15 Illuminati Points - D Tier — 30 Illuminati Points - C Tier — 55 Illuminati Points - B Tier — 90 Illuminati Points - A Tier — 130 Illuminati Points - S Tier — 175 Illuminati Points These requirements are cumulative, so you don't need to earn 175 additional points after reaching A Tier. Once you've accumulated 175 points, return to the castle and activate the final upgrade. This removes the last lock from the mysterious door and opens the final area of the Goat Castle. **New Goat Order unlocks shortly after opening the door.**
Tip
**Completing every standard event isn't enough to reach S Tier.** You'll also need to discover and finish several hidden events. If you've completed everything visible on your map but still need Illuminati Points, revisit the large map table inside your Goat Castle. This room unlocks at D Tier and contains clues pointing toward secret activities. One useful hidden event is **5G Upgrade**, which also awards Welcome to Earth when you activate three electrical substations and trigger an alien invasion. Activate all six Goat Towers to reveal regular events and make traveling between locations easier. You can complete events in any convenient order, so prioritize nearby activities rather than constantly crossing the island. Reaching S Tier also unlocks every Goat Castle customization point needed for Move! That! Bus! Once the final door opens, you're ready for the story's concluding boss encounter. Pilgor has finally reached the highest rank of a mysterious organization. Apparently, the secret to becoming an all-powerful leader is completing enough errands and destroying enough public property. An inspiring lesson for aspiring goats everywhere.

Trophy: Private Club
Goat Castle - Reach E Tier
Type: Bronze
Category: Story
How to Unlock
**Upgrade your Goat Castle to E Tier by earning 15 Illuminati Points.** After establishing your Goat Castle at F Tier, your next objective is to improve its ranking by completing events throughout San Angora. Events are marked on your map as you explore and activate Goat Towers. They involve everything from solving environmental puzzles to performing ridiculous tasks for the island's residents. Each completed event awards Illuminati Points, which contribute toward upgrading your castle. Once you've accumulated **15 Illuminati Points**, return to the Goat Castle. Approach the large locked door in the main hall and stand on the illuminated circle directly in front of it. This activates the next castle upgrade, raising your ranking from F Tier to E Tier. The trophy unlocks automatically after the upgrade. Reaching E Tier also expands your castle by introducing a second level and several additional locked rooms.
Tip
**Activate nearby Goat Towers before hunting for events.** Synchronizing these towers reveals activities on the map and unlocks convenient fast-travel points. You don't need to complete any particular combination of events to reach E Tier. Simply earn enough Illuminati Points through available activities. If you've accumulated the required points but the trophy hasn't unlocked, return to the castle and activate the upgrade at the main door. Illuminati Points alone don't automatically complete the ranking process. This trophy is part of the game's normal story progression and cannot be missed. Keep completing events after reaching E Tier, since you'll need **175 Illuminati Points** to reach S Tier for New Goat Order. Pilgor has officially gained access to a private club. Unfortunately for its members, their newest recruit specializes in headbutting furniture and destroying expensive decorations. The membership committee clearly didn't perform a background check.

Trophy: Rogue Guild
Goat Castle - Reach D Tier
Type: Bronze
Category: Story
How to Unlock
**Upgrade your Goat Castle to D Tier by earning 30 Illuminati Points.** Rogue Guild is another automatic progression trophy tied to improving your Goat Castle. After reaching E Tier, continue exploring San Angora and completing events to increase your Illuminati Points total. You'll need **30 Illuminati Points in total** to qualify for D Tier. These points accumulate across your completed activities, so you don't need to earn 30 additional points after reaching E Tier. Once your total reaches 30, return to the Goat Castle. Approach the large locked door in the main hall and stand on the illuminated circle to activate the next upgrade. The castle advances to D Tier, and Rogue Guild unlocks automatically. Reaching this rank also opens a room containing a **large table with a map of San Angora**. This map provides hints about hidden events scattered throughout the island.
Tip
**Investigate the newly unlocked map room before continuing your adventure.** Its clues can help you discover secret events that aren't immediately obvious during ordinary exploration. Hidden events become increasingly important later because completing every standard event won't provide enough Illuminati Points to reach S Tier. Whenever you discover an unusual building, suspicious landmark, or strange environmental interaction, investigate it. These locations often conceal additional activities. For efficiency, complete events near your current location rather than repeatedly traveling across the island. You can also work on Trinkets, Instincts, and miscellaneous trophies while moving between objectives. If you've earned 30 points and Rogue Guild hasn't unlocked, make sure you've returned to the castle and activated the D Tier upgrade. The trophy cannot be missed during normal story progression. Pilgor has climbed from an ordinary member of a mysterious organization to a respected figure within the Rogue Guild. Her reward is access to a giant map filled with even more opportunities to cause trouble. Exactly what every responsible leader needs.

Trophy: Secret Society
Goat Castle - Reach B Tier
Type: Bronze
Category: Story
How to Unlock
**Upgrade your Goat Castle to B Tier by earning 90 Illuminati Points.** Secret Society is another story progression trophy tied to upgrading your Goat Castle through the Illuminati ranking system. After reaching C Tier, continue exploring San Angora and completing events to earn additional Illuminati Points. You'll need **90 Illuminati Points in total** to qualify for B Tier. This is your cumulative total, so you don't need to earn another 90 points after reaching C Tier. Events throughout the island provide most of your progression points. These range from straightforward activities to complicated environmental puzzles and bizarre hidden challenges. Once you've accumulated enough points, return to the Goat Castle using any activated Goat Tower. Inside the castle, approach the large mysterious door in the main hall and stand on the illuminated platform. Follow the interaction prompt to activate the next upgrade. The castle will advance to **B Tier**, unlocking the trophy automatically.
Tip
**B Tier is an important milestone because it unlocks Goat Castle customization.** After reaching this rank, you can begin interacting with various decorative objects throughout the castle and changing their appearances. These interactions contribute toward **Move! That! Bus!**, which requires customizing all 25 available objects. However, you won't have access to every customization point until reaching S Tier, so there's no need to finish that trophy immediately. Continue exploring the castle after each upgrade to discover newly available rooms and features. For efficient progression, prioritize completing nearby events as you explore new regions rather than traveling back and forth across San Angora. Activating Goat Towers provides additional map visibility and fast-travel locations, making it easier to find your next activity. If you've reached 90 Illuminati Points but the trophy hasn't unlocked, make sure you've returned to the castle and activated the upgrade manually. Pilgor has officially joined the Secret Society. Considering she regularly headbutts strangers, steals vehicles, and destroys expensive equipment, she's a surprisingly questionable choice for an organization that values secrecy. Fortunately, nobody seems particularly concerned.

Trophy: Shadow Syndicate
Goat Castle - Reach A Tier
Type: Bronze
Category: Story
How to Unlock
**Upgrade your Goat Castle to A Tier by earning 130 Illuminati Points.** Shadow Syndicate is the penultimate Goat Castle ranking trophy, requiring substantial progression through San Angora's events and hidden activities. After reaching B Tier, continue completing events throughout the island until you've accumulated **130 Illuminati Points in total**. These points are awarded through various activities, including standard events, hidden events, and other progression objectives. You'll need to investigate multiple regions and complete a broad selection of activities to accumulate enough points. Once your total reaches 130, return to the Goat Castle through any available Goat Tower. Approach the mysterious door in the main hall and stand on the glowing platform in front of it. Use the interaction prompt to upgrade your castle from B Tier to **A Tier**. The trophy unlocks automatically after completing the upgrade. You'll also gain access to additional portions of the castle as its interior continues to expand.
Tip
**After reaching A Tier, your final castle milestone is S Tier at 175 Illuminati Points.** You'll need another 45 points to reach that milestone, so don't stop completing events after unlocking this trophy. If you've finished most of the obvious activities on your map, begin investigating hidden events. The map room unlocked at D Tier contains clues that can help identify secret activities scattered throughout San Angora. Some hidden events require interacting with unusual landmarks, completing environmental puzzles, or discovering concealed locations. The **5G Upgrade** event associated with Welcome to Earth is one example of a hidden activity worth completing. You can also continue working toward your remaining miscellaneous trophies while searching for events. Remember that the trophy requires you to activate the castle upgrade. Accumulating 130 points alone isn't sufficient. Shadow Syndicate cannot be missed during normal progression. Pilgor has nearly reached the highest possible rank within the Illuminati. She's conquered the organization's hierarchy through determination, destruction, and an almost supernatural ability to solve problems by hitting them with her head. Corporate leadership could learn a thing or two. Probably not anything useful, but still.

Welcome to San Angora, where you play as Pilgor, an extremely destructive goat with an impressive talent for causing trouble. Goat Simulator 3 is an open-world sandbox filled with bizarre events, hidden collectibles, ridiculous equipment, and plenty of opportunities to launch yourself across the map. When starting a new game, watch the entire opening sequence without skipping it to unlock I Watched the Intro. If you accidentally skip it, you can replay the introduction using another save slot. Afterward, begin exploring the island and familiarize yourself with jumping, licking objects, headbutting, ragdolling, and using the special abilities provided by different equipment.
Your first major priority should be activating all six Goat Towers. These reveal sections of the map, display nearby events, and unlock convenient fast-travel locations. Completing them also earns Synchronization Complete. As you explore, start completing nearby events to earn Illuminati Points and improve your Goat Castle. Collect any golden Trinkets you discover, activate Instinct Shrines, and complete obvious ramp jumps along the way. There's no need to follow an exhaustive collectible walkthrough yet. Focus on opening the map, discovering useful equipment, and getting comfortable with the game's wonderfully questionable physics.
Continue completing events throughout San Angora to earn Illuminati Points and raise your Goat Castle through its different tiers. The castle acts as your main progression hub, gradually unlocking additional rooms, equipment, and activities as you advance. You'll need 175 Illuminati Points to reach S Tier and earn New Goat Order. Regular events provide most of the required points, but you'll also need to complete some hidden events to reach the final milestone. Keep exploring newly revealed areas and investigate unusual landmarks, suspicious buildings, and anything that looks like it probably shouldn't be touched. This is Goat Simulator, so those are usually the interesting things.
As you progress, prioritize unlocking useful traversal equipment to make the increasingly large collectible cleanup easier. The Paraglider, Jetpack, and Daredevil Helmet can help you reach rooftops, cross the map, and access difficult locations. The Daredevil Helmet is particularly valuable because it makes traveling between distant objectives much faster. Continue collecting Trinkets, completing Instincts, and using vehicles to discover ramps. Also work through miscellaneous trophies that require specific outfits or equipment. Several activities share prerequisites, so completing an event and unlocking its reward may allow you to earn multiple trophies in the same area.
Once you've accumulated enough Illuminati Points, return to the Goat Castle and continue upgrading it until you reach S Tier. This unlocks the final section of the castle and provides access to the concluding boss encounter. Completing the castle's progression also earns the trophies associated with its lower tiers. Before finishing the story, make sure you've explored most of San Angora and collected any convenient items along your route. You don't need every collectible to finish the main campaign, so avoid delaying the ending just because a few golden statues remain hidden in inconvenient places.
After reaching the castle's final area, confront the farmer and complete the three-part boss encounter. Each phase uses different mechanics, including avoiding attacks, locating the farmer, and navigating a retro-inspired platforming sequence. Once the encounter is finished, you'll reach a room containing servers that you're specifically instructed not to touch. Destroy the servers to progress toward Don't touch the servers, then complete the final escape sequence to finish the story. Afterward, you can continue exploring and working on the Platinum. The game isn't particularly interested in taking itself seriously, and its final confrontation certainly doesn't change that.
With the story completed, focus on the three largest collectible requirements: 200 Trinkets for Try Hard 2, 99 Instincts for You Trusted Your Instincts, and 29 ramps for Daredevil. The in-game collectibles menu tracks progress by area, making it much easier to identify what's missing. Use that information alongside dedicated location videos rather than searching the entire island again. Many Instincts require particular goat forms or equipment, so unlock the relevant accessories before attempting their challenges. The Goat Queen ability is especially useful for certain objectives involving groups of NPCs. Also collect any remaining movie tapes, complete hidden events, and finish miscellaneous trophies involving specific locations or costumes.
For Move! That! Bus!, you'll need to customize all 25 available Goat Castle objects, which requires reaching S Tier to access every option. Some players have reported inconsistent tracking, so if the trophy doesn't unlock, try interacting with all customization points again during one session. No second story playthrough is required, and no trophies require online multiplayer or co-op. There are also no difficulty-related trophy restrictions. The biggest challenge is the volume of collectibles rather than difficult gameplay, so work through the remaining areas methodically and use the game's tracking tools to avoid repeating completed tasks. If a hidden event, Instinct, or collectible is giving you trouble, Ask Gami can help narrow down the requirements. With enough persistence, a sufficiently destructive goat can apparently achieve anything.
YouTube Playlist
Goat Simulator 3 — Platinum Walkthrough