


Trophy Guide Preview
Overall Trophy Progress
0 / 36 Completed
0%
Trophy Types
Platinum
0 / 1Gold
0 / 5Silver
0 / 10Bronze
0 / 20Categories
Collectible
0 / 10Grind
0 / 1Combat
0 / 3Misc
0 / 9Story
0 / 12
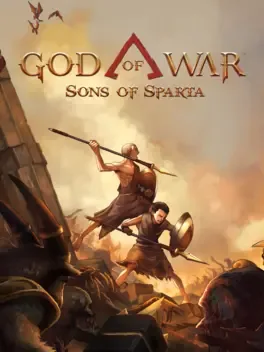
Before becoming the Ghost of Sparta, young Kratos trains alongside his brother Deimos in ancient Greece. Explore a richly detailed pixel-art world, master spear-and-shield combat, solve puzzles, and battle mythological enemies in this 2D action-adventure about duty, honor, and brotherhood.
Overall Trophy Progress
0 / 36 Completed
0%
Platinum Path
EARLY GAME Before Kratos became the Ghost of Sparta, he had to survive being a young Spartan with a spear, a shield, and a brother who probably wasn't making his life any easier. Start on whichever difficulty feels comfortable, since there are no difficulty-related trophies. Focus on learning your attack range, dodge timing, and parries. The opening hours can be surprisingly tough, especially against bosses like Ioke...
YouTube Playlist
God of War Sons of Sparta — Platinum Walkthrough
Trophy: Duty and Honor
Collect all Trophies
Type: Platinum
How to Unlock
Earn every other trophy in God of War: Sons of Sparta to unlock the Platinum.

Trophy: Bust Out
Obtain all Bust Powers
Type: Silver
Category: Collectible
How to Unlock
Obtain all eight Bust Powers for the Bust of Lycurgus. Bust Powers grant Kratos special abilities used to interact with objects, reveal hidden passages, explore inaccessible areas, and uncover collectibles throughout Laconia. Seven of these powers are acquired through normal story progression. However, the eighth, Helko, is hidden in an optional area and must be purchased separately. #### All Eight Bust Powers **1. Historeo — Sparta** Obtained at the Sculptor's Office during the story. Historeo records information about characters, locations, enemies, and gameplay tutorials. **2. Skopos — Eurotas River** Obtained from an altar to the left of Sparta. Skopos allows you to project an energy beam with R2 to activate eye-shaped mechanisms and examine historical murals. This ability is essential for collecting certain Lore entries for The Tourist. **3. Phona — The Gallery** Obtained from Konstantinos during the story. Phona allows Kratos and Deimos to communicate through their Busts. **4. Anemos — Port of Messenia** Obtained from an altar in the northeastern section of the region. Anemos lets you absorb and release magical substances such as Corrupted Fumes, Unsealing Mist, and Spectral Vapours using L2. It also allows you to interact with Hamadryads for The Tourist. **5. Eikon — The Gallery** Obtained from Konstantinos during the story. Eikon allows you to capture images of specific locations and save them to your world map. You'll need it to record Scenic Vistas for The Tourist. **6. Otos — Mount Taygetos** Obtained from an altar in the lower-middle shaft of the region. Otos reveals hidden passages and concealed environmental features using L2 and R2 together. It's especially important for finding hidden collectibles and the Ailouros Idols needed for Herding Cats. **7. Phos — The Sunken Agora** Obtained from an altar in the northeastern section of the region. Phos allows Kratos to illuminate translucent platforms using L3, temporarily making them solid enough to stand on. It's also required to reveal Forgotten Tomes for The Tourist. **8. Helko — Isle of Aeaea** Unlike the previous powers, Helko is optional and can easily be overlooked. Travel to the Isle of Aeaea and explore the western section of the region. You'll find a special Vermilion Globe near a barrier blocking access to a hidden chamber. Offer **2,000 red orbs** to the Globe to remove the barrier and enter the room containing Helko. This power increases the distance from which Kratos can absorb nearby orbs, making it easier to collect resources during combat and exploration. Once you've acquired Helko and the seven story-related powers, Bust Out will unlock.
Tip
Helko is worth collecting as soon as you can access its chamber and afford the required red orbs. Its increased pickup range makes gathering health, magic, spirit, and red orbs more convenient throughout the rest of the game. The remaining Bust Powers are valuable for exploration, so revisit suspicious walls, murals, and environmental puzzles whenever you obtain a new ability. Otos is particularly useful when searching for secret passages. If something looks suspicious, it's worth giving the Bust of Lycurgus a chance to prove its usefulness.
Warning
Helko is the only Bust Power that isn't awarded through normal story progression. You must visit the optional Isle of Aeaea and spend 2,000 red orbs at the special Globe to obtain it. Don't confuse this Globe with the region's standard Vermilion Globe required for Search High and Low. They serve different purposes, and activating the normal regional Globe won't automatically unlock Helko.

Trophy: Gift of the Gods
Obtain all Blessings of Olympus
Type: Gold
Category: Collectible
How to Unlock
Obtain all six Blessings of Olympus by completing the offerings at the six Olympian Temples throughout Laconia. Each Temple requires four Olives and three Sacred Monument plants associated with its deity. You'll need to complete all 24 Sacred Olive Tree battles for No Olive Branch and collect the 18 plants from Sacred Monuments scattered across the world. The six required Blessings are: Blessing of Apollo: 4 Olives of Apollo and 3 Undying Hyacinths. Blessing of Hestia: 4 Olives of Hestia and 3 Eternal Bales. Blessing of Nike: 4 Olives of Nike and 3 Gilded Wreaths. Blessing of Artemis: 4 Olives of Artemis and 3 Immortal Amaranths. Blessing of Demeter: 4 Olives of Demeter and 3 Radiant Cornucopias. Blessing of Dionysus: 4 Olives of Dionysus and 3 Sacred Pinecones. Activate Vermilion Globes as you explore to reveal Sacred Monuments and Olive Trees on your regional maps. Some locations require later traversal abilities, so revisit inaccessible areas as your equipment improves. Once you've completed all required offerings at every Temple and obtained the six Blessings, Gift of the Gods will unlock.
Tip
Collect Sacred Monument plants whenever you encounter them, since they're also useful for upgrading your magical abilities. The Blessing of Demeter increases red orb rewards from defeated enemies, making it particularly valuable for Deep Learning. All six Blessings also count as Gouri required for Like a Charm, so you'll be making progress toward multiple trophies at once.
Warning
Collecting the Olives and Sacred Monument plants isn't enough. You must return to each Temple and complete its offerings to receive the corresponding Blessing. Some Sacred Olive Trees and Monuments cannot be accessed until later in the game, so don't waste time trying to reach every location immediately.
Trophy: Herding Cats
Fulfill Circe's Request
Type: Silver
Category: Collectible
How to Unlock
Find all nine Ailouros Idols hidden throughout Laconia and return them to Circe on the Isle of Aeaea. During your exploration of the Isle of Aeaea, you'll meet Circe, who offers to craft special Gouri in exchange for rare materials. She also asks Kratos to recover nine mysterious cat-shaped idols scattered across the mainland, beginning the Forgotten Felines sidequest. Every idol is concealed behind an illusory wall, meaning you'll need the Otos Bust Power before you can collect them. Otos is obtained during the main story on Mount Taygetos and allows you to reveal hidden passages using L2 and R2 together. The idols can be collected in any order, although some locations require additional traversal abilities. #### All Nine Ailouros Idol Locations **1. The Barren Steppe** Travel approximately three map squares east of the Temple of Demeter. Find the pit containing a patrolling Cultist Thug and use Otos on the left wall to reveal the hidden passage containing the idol. **2. The Grand Cistern** From the Basement Campsite, travel approximately one map square south and five west. Look for a ledge containing a climbing wall and a nearby chest. Use Otos on the left wall beyond the chest to uncover the idol. **3. Stone Hollows** Return to the area containing the petrified Spartan battalion encountered during Stonewalled. Make your way over the cliff to the left of the soldiers. Use Otos on the right wall at the cliff's edge to reveal the hidden chamber. **4. The Sanctuary** Explore the southwestern portion of the region until you reach a field of reeds. Climb to the ledge above the reeds and use Otos on the right wall to uncover the secret passage containing the idol. **5. Eurotas River** From the Temple of Nike, head east until you reach a Spirit Monument guarded by a Hound. Use Otos on the wall beside the Monument to reveal the hidden idol. **6. Oenus Vineyard** Return to the central chamber and take the upper-right passage. Continue past the chest on the walkway above the patrolling Legionnaires, then use Otos on the left wall to uncover another secret chamber. **7. Sparta** Enter the barn in the lower-left section of the city. Use the Harvest Glaive to strike the cog hanging from the ceiling, then climb the vine that drops into place. Jump toward the upper-right ledge and use Otos on the right wall to reveal the idol. **8. Port of Messenia** Travel to the Harbor Campsite in the western section of the Port. Head left toward the walkway leading to a ladder. Use Otos on the right end of this walkway to reveal the concealed passage. **9. Mount Taygetos** Return to the area near Adrasteia's prison after the Kerkopes have lowered the rope that provides access. Enter the shaft to the left of the prison and climb the leftmost sliding wall. Jump into the alcove at the top, then use Otos on the left wall to reveal the final idol. #### Returning the Idols Once you've recovered the idols, return to Circe on the Isle of Aeaea and hand them over. Completing the collection rewards you with red orbs, crafting materials, and the **Talisman of Revival**, a special Gouri required for Like a Charm. After all nine idols have been returned and Circe's request is fulfilled, Herding Cats will unlock.
Tip
Collect the idols whenever you revisit earlier regions with Otos. Their concealed entrances are easy to overlook, so it's worth checking suspicious walls rather than relying entirely on the map. The Talisman of Revival is particularly valuable because it allows Kratos to survive a fatal blow once before needing to recharge it at a Campsite. If you're having trouble with a difficult boss, this little feline reward can be surprisingly useful. Turns out rescuing nine magical cats is excellent preparation for fighting monsters.
Warning
All nine idols require Otos, so you cannot begin collecting them until you've obtained that Bust Power. The Sparta idol also requires the Harvest Glaive, while the Mount Taygetos idol requires access to the section near Adrasteia's prison. Finding the idols alone isn't enough. You must return them to Circe to complete the request and earn the trophy.
Video Guide: https://www.youtube.com/watch?v=F6tWeQXffMo&list=PLicOuDSiPvy3JjwzmeeC1s8DLlHpvGmBV&index=11&pp=iAQB
Trophy: Like a Charm
Obtain all Gouri
Type: Silver
Category: Collectible
How to Unlock
Obtain every Gouri available in God of War: Sons of Sparta. Gouri are special accessories equipped through the Belt of Tyche, which you receive during the story in Stone Hollows. They provide passive bonuses such as increased damage, stronger defense, resource recovery, and unique combat effects. Unlike ordinary weapon upgrades, many Gouri are rewards for completing sidequests, returning collectibles, defeating optional bosses, or making offerings at Temples. This is one of the most involved collection trophies, so expect to work on it throughout the main story and finish the remaining requirements during post-game cleanup. #### Sparta and Exploration Gouri **The Ebony Ribbon — Sparta** Craft at the blacksmith for 2 Iron Bars. **The Brass Medallion — Sparta** Craft at the blacksmith for 2 Iron Bars. **Jewel of Ziteo — The Gallery** Activate the special Globe beside the scaffolding and pay 7,500 red orbs to access the hidden tomb containing its armory chest. This Gouri helps reveal nearby hidden collectibles, making it particularly useful for your final exploration sweep. **Hygeia's Ornament — Eurotas River** Near the Sacred Olive Tree of Apollo, northwest of the Hideout Campsite, push the nearby pillar into the cave. Use the pillar to reach the elevated armory chest. The Lunar Blade is required. **Ersa's Keepsake — Stone Hollows** Return with Level 3 Victory Sandals and perform Victory Ascent through the barrier above the passage to the left of the Catacomb Campsite. **Alke's Memento — Oenus Vineyard** After defeating the Fylaki during Evil Within, return to the chamber below the Cellar Campsite and collect the Gouri from the armory chest on the right. #### Gouri Crafted by Circe Visit Circe on the Isle of Aeaea to craft the following Gouri using special materials obtained from enemies and exploration. **The Sterling Brand** Requires a Wing of Wander, obtained from Butterflies. **Mark of the Slayer** Requires a Fang of Fear, obtained from Spiders. **Mark of the Redeemer** Requires a Shell of Sea, obtained from Crabs. **Emblem of Life** Requires a Feather of Fowl, obtained by hunting in reed fields. **Emblem of Mana** Requires a Tip of Tail, also obtained from hunting in reed fields. **Emblem of Vigor** Requires a Fluff of Fur, obtained through hunting. **Lucky Amber** Requires a Mane of Flaxen, dropped by the Sisters of Song encountered while rescuing the Keledones for Song of the Six. **The Arcane Seal** Requires a Tear of Stone, obtainable from Mavro Fidi or certain petrified bodies associated with the Gorgon Door in Stone Hollows. **The Noble Braid** Requires a Hair of Lion, found by examining traces of the Lion Coat scattered across Laconia. **Emblem of Fortune** Requires a Tusk of Gold, obtained by using Victory Charge against golden razorbacks. This is an especially useful Gouri because it increases red orb earnings. **The Scabrous Fleece** Requires a Scale of Serpent, obtained from the Serpent-Head Clusters encountered during Come to a Head. **The Oculus Armament** Requires an Eye of Cyclops. You'll receive the first one during the opening boss fight for Eye for an Eye. Additional Cyclops Eyes can be obtained by hunting the escaped Cyclopes during All Eyes on Thee. #### The Lexicon Rewards Return the Shards collected for The Historian to The Lexicon in Passage of Monuments. Completing each Shard collection rewards a different Gouri: **Primal Nectar** Return all 6 Primordial Shards. **Titanic Relic** Return all 12 Titan Shards. **Olympic Coin** Return all 12 Olympian Shards. These rewards require returning the Shards, not simply collecting them. #### Sidequest and Challenge Rewards **Shepherd's Wishbone — Sparta** Return the Lion Coat to Amara after completing the story for The Lionheart. **Token of Chilon — The Gallery** Complete all nine Ephor Trials for Battle Tested. The optional bonus objectives aren't required. **Token of Butades — The Gallery** Deliver all 92 Records of Danger to the altar near Konstantinos. You'll obtain these records by encountering the game's different enemy types. Some later enemies can also be encountered during the Ephor Trials. **Vigorous Honey — Laconian Woods** Recover the Map of Chrysus and return it to the Kerkopes for Rightful Owners. **Stymphalian Crest — The Drifting Spire** Defeat the Stymphalian Trio during The Summit. **Mystical Elixir — The Sunken Agora** Complete Cryptic, open the Mosaic Door, and enter the dimensional rift to obtain this Gouri. **Totem of Vengeance — The Barren Steppe** Complete False Prophet by defeating the cult leader during the post-game sidequest. **Stunning Screech — Kythira Island** Free all six Keledones for Song of the Six, then return to the Owl Door and collect the Gouri from the armory chest inside the final reward chamber. #### Blessings of Olympus You must also obtain all six Blessing Gouri awarded by the Temples. Each requires offering four Olives and three Sacred Monument plants associated with that deity. **Blessing of Nike** Offer 4 Olives of Nike and 3 Gilded Wreaths at the Temple of Nike. **Blessing of Hestia** Offer 4 Olives of Hestia and 3 Eternal Bales at the Temple of Hestia. **Blessing of Apollo** Offer 4 Olives of Apollo and 3 Undying Hyacinths at the Temple of Apollo. **Blessing of Artemis** Offer 4 Olives of Artemis and 3 Immortal Amaranths at the Temple of Artemis. **Blessing of Demeter** Offer 4 Olives of Demeter and 3 Radiant Cornucopias at the Temple of Demeter. **Blessing of Dionysus** Offer 4 Olives of Dionysus and 3 Sacred Pinecones at the Temple of Dionysus. These are also required for Gift of the Gods, so completing that trophy will take care of this entire group. #### Circe's Final Reward **Talisman of Revival — Isle of Aeaea** Collect all nine Ailouros Idols hidden throughout Laconia and return them to Circe for Herding Cats. Circe awards the Talisman of Revival during the process of returning the idols. Once you've obtained every Gouri, Like a Charm will unlock.
Tip
Don't leave every Gouri until the post-game. Many come naturally from trophy-related sidequests, so collecting them as those quests become available will significantly reduce your final cleanup. The Jewel of Ziteo is particularly useful for finding hidden collectibles, while the Emblem of Fortune and Blessing of Demeter help increase red orb earnings for Deep Learning. Prioritize the Talisman of Revival if you're struggling with difficult encounters. It provides a one-time revival when charged, giving you an extra chance to survive a dangerous boss fight. If you're missing a Gouri near the end, check your completed sidequests and reward locations before searching the open world again. Many of these accessories aren't lying in chests waiting to be discovered.
Warning
Several Gouri are locked behind post-game content, particularly The Lionheart, Cryptic, and False Prophet. The Ebony Ribbon and Brass Medallion require 4 Iron Bars combined, separate from the 20 needed for the forged weapon Parts. Reserve enough materials to craft both collections. Completing a sidequest doesn't always automatically place its associated Gouri in your collection. Remember to claim rewards from The Lexicon, Kerkopes, Owl Door, and other relevant locations. For the Blessings of Olympus, complete the required offerings at each Temple rather than assuming that collecting the Olives and plants is enough.
Video Guide: https://www.youtube.com/watch?v=EHI5zZ0_bDg&list=PLicOuDSiPvy3JjwzmeeC1s8DLlHpvGmBV&index=10&pp=iAQB

Trophy: Panoply Man
Obtain all Spear and Shield Parts
Type: Silver
Category: Collectible
How to Unlock
Obtain all 26 Spartan Dory spear and Spartan Aspis shield Parts scattered throughout Laconia. Parts modify Kratos' weapons by adding new attacks, elemental effects, defensive bonuses, and other combat enhancements. Some are hidden inside armory chests, others must be forged by the blacksmith in Sparta, and several are obtained by trading special boss materials to the Kerkopes. You only need to obtain each Part for this trophy. Enhancing every Part isn't required. The complete collection consists of 11 Dory Tips, 5 Dory Grips, 5 Dory Tails, and 5 Aspis Rims. #### Dory Tips — 11 Parts **1. Steel Edge — Eurotas River** From the Outskirts Campsite, drop through the ledge on the left to find an armory chest along the cliffside. **2. The Burnt Splinter — Laconian Woods** From the Ruins Campsite, travel approximately four map squares north and one west. Attack the left wall to reveal a hidden chamber containing a Minotaur, a Spirit Box, and the armory chest. **3. The Tainted Thorn — Stone Hollows** Find the chamber containing the petrified Spartan battalion encountered during the Stonewalled sidequest. Defeat or move past the Gorgon guarding the left side to reach the armory chest. **4. The Frigid Spiral — Port of Messenia** Locate the chamber containing the altar that grants Anemos. The armory chest is on a ledge against the rightmost wall of the passage above it. **5. The Thunder Barb — The Veiled Bog** Head into the lower-left passage opposite the Marsh Campsite. Knock down the vine-covered pillar and position it beneath the remaining vine patches. Use the Harvest Glaive to strike the patches and remove the magical obstruction on the right, revealing the chest. **6. The Wicked Needle — Isle of Aeaea** In the middle-right section of the larger western area, drop through the platforms beneath the ladder leading upward. Use the Evergreen Flame's upgraded Square attack to burn the door on the right and reach the chest. **7. The Petrified Spike — Stone Hollows** Explore the upper-left section of the western area. On the upper pathway, use the Harvest Glaive's upgraded Square attack to strike the hanging object overhead. Climb the vine that drops to reach the armory chest. **8. Crown of Agis — Sparta** Purchase from the blacksmith in Sparta's armory for 2 Iron Bars. **9. Soldier's Point — Sparta** Purchase from the blacksmith for 2 Iron Bars. **10. Iron Lance — Sparta** Purchase from the blacksmith for 2 Iron Bars. **11. Hunter's Blade — Laconian Woods** Defeat Alastor during the Bathed in Blood story encounter to obtain the Platinum Laurel. Bring the Laurel to the Kerkopes' Treehouse and exchange it for the Hunter's Blade. #### Dory Grips — 5 Parts **12. Hunter's Strap — Mount Taygetos** Find the large vent to the right of the Memorial Campsite and ride it upward. Use Celestial Leap to cross left toward a sliding wall, then climb to the armory chest. **13. Iron Handle — The Sunken Agora** Explore the multi-level northwestern section of the region. Transport the Spectral Vapours to the two chalices on the lower-right side of the chamber to remove the barriers blocking the chest. **14. Steel Brace — Sparta** Purchase from the blacksmith for 1 Iron Bar. **15. Hand of Agis — Sparta** Purchase from the blacksmith for 1 Iron Bar. **16. Soldier's Wrap — Laconian Woods** Defeat the Fylaki during Evil Within and obtain the Desecrated Slab. Trade the Slab to the Kerkopes at their Treehouse to receive the Soldier's Wrap. #### Dory Tails — 5 Parts **17. Soldier's Sauroter — Laconian Woods** In the large area northeast of the Grove Campsite, jump onto the block near the upper-right exit. Use it to reach the ledge beneath the exit, where you'll find the armory chest. **18. Heel of Agis — Passage of Monuments** Travel to the lower portion of the region and follow the path west toward the cliff overlooking The Lexicon. The armory chest is located near the far-left end of this route. **19. Steel Hind — Sparta** Purchase from the blacksmith for 2 Iron Bars. **20. Hunter's Base — Sparta** Purchase from the blacksmith for 2 Iron Bars. **21. Iron Anchor — Laconian Woods** Defeat the Skolopendra during Sea Sickness and collect the Gory Dregs from its remains. Bring the material to the Kerkopes' Treehouse and exchange it for the Iron Anchor. #### Aspis Rims — 5 Parts **22. Rim of Restoration — Eurotas River** Near the entrance to Sparta, climb the platforms to the left of the nearby landmass. The armory chest is positioned on the upper ledge. **23. Rim of Protection — The Barren Steppe** Explore the lower-left portion of the region and roll through the crawlspace leading into a room filled with laser hazards. Deactivate the lasers and make your way toward the upper-left corner to reach the chest. **24. Opportunistic Guard — Sparta** Purchase from the blacksmith for 2 Iron Bars. **25. Rim of Elusion — Sparta** Purchase from the blacksmith for 2 Iron Bars. **26. Rim of Fortification — Laconian Woods** Defeat the Ipotane during Horsing Around to obtain the Skull Fragment. Trade the Fragment to the Kerkopes at their Treehouse to receive the Rim of Fortification. Once all 26 Parts have been obtained, Panoply Man will unlock.
Tip
Prioritize the **Crown of Agis** when you can afford it. Its increased melee attack range makes ordinary encounters and boss fights more forgiving. Keep track of your Iron Bars. You'll need 20 in total for the Parts sold by Sparta's blacksmith, so avoid overlooking the materials needed to complete the collection. Three Iron Bars are rewarded through **The Rotten Nests**, an optional sidequest in The Grand Cistern. You'll need to destroy three Gadfly hives: - One is left of the room containing moving columns in the northwestern section. - One is southwest of the central elevator intersection, near the passage connecting to the Temple of Hestia. - One is through an upper-left exit near the top of the eastern shaft, accessible after using a pillar to lower a gate. These three Iron Bars are essential for obtaining every required forged Part.
Warning
The Rotten Nests sidequest isn't marked on the map, making its Iron Bar rewards particularly easy to overlook. Some Parts require upgraded magic or traversal abilities, so you won't be able to complete the collection during your initial visits to every region. Remember to trade the Platinum Laurel, Desecrated Slab, Gory Dregs, and Skull Fragment to the Kerkopes. Defeating the associated bosses doesn't automatically award their corresponding Parts.

Trophy: Search High and Low
Activate all Globes
Type: Bronze
Category: Collectible
How to Unlock
Activate all 21 Vermilion Globes found throughout Laconia. Vermilion Globes are glowing red spheres that reveal important exploration information for their respective regions. Activating one updates the regional checklist and marks Sacred Olive Trees and Sacred Monuments on the map. Most Globes require a payment of red orbs, typically between 250 and 1,000 depending on the region. It's worth activating them as soon as you can afford to, since their checklists make it considerably easier to track your progress toward the Platinum. There is one required Globe in each of these 21 regions: #### Early and Central Regions - Sparta — Upper city, near the barracks. - The Gallery — Near the top of the scaffolding. - Laconian Woods — Near the shaft leading toward the Kerkopes' Treehouse. - The Grand Cistern — Along the passage reached when entering from Sparta. - Stone Hollows — Below the Catacomb Campsite. - Isle of Aeaea — Along the path to the right of Circe. - The Sanctuary — At the far end of the Muse Chambers hallway. - Eurotas River — Near the pulley-block shortcut leading toward the Temple of Dionysus. - Oenus Vineyard — Near the Balcony Campsite. - Passage of Monuments — On a ledge near the gondola route. - The Veiled Bog — In the shaft leading toward the Sacred Olive Tree of Demeter. #### Later Regions - The Sunken Agora — East of the Crypt Campsite. - Kythira Island — Upper-left section of the main area. - Shores of Elafonisos — Northeastern section, near the route toward Demeter's Monument. - Port of Messenia — Eastern section, accessed from the upper part of a shaft. - Mount Taygetos — Upper-left area reached after the Kerkopes lower a rope. - The Splintered Peak — Near the bottom of the uppermost shaft. - Foundry of Invention — Above the passage used during the Metallon Bull chase. - The Drifting Spire — At the beginning of the lower-right passage. - Vyros Gorge — Below the Meadow Campsite. - The Barren Steppe — Above the main building's entrance, accessible in the post-game. Some locations require story progression or newly acquired traversal abilities before you can reach their Globe. Continue upgrading your equipment and revisiting previously inaccessible passages as the adventure progresses. The final Globe in The Barren Steppe requires post-game access. Once all 21 have been activated, Search High and Low will unlock.
Tip
Make activating each region's Globe an early priority whenever possible. The resulting checklist is one of your best tools for tracking collectibles and remaining activities. Don't confuse the standard regional Globes with the special ones that unlock additional rewards or abilities. For this trophy, you only need the 21 regional Globes, although the optional purchases can still be valuable for other trophies.
Warning
The Barren Steppe Globe cannot be reached until the post-game. Some versions have also exhibited unusual behavior where the Isle of Aeaea Globe becomes available for activation again, potentially affecting trophy progress. Don't rely on this behavior as a shortcut; activate every unique regional Globe normally and verify your progress.
Video Guide: https://www.youtube.com/watch?v=x1Mg4CQuctw&list=PLicOuDSiPvy3JjwzmeeC1s8DLlHpvGmBV&index=7&pp=iAQB
Trophy: Song of the Six
Free the Final Owl
Type: Bronze
Category: Collectible
How to Unlock
Rescue all six Keledones, magical owls imprisoned by the Sisters of Song throughout Laconia. You'll begin encountering these caged owls after obtaining the Phos Bust Power during the story. Each Keledone is guarded by a Sister of Song, a special Siren enemy that must be defeated to release the owl. The six owls are spread across Kythira Island, Shores of Elafonisos, and Isle of Aeaea. #### Keledone Locations **1. Kythira Island — Bluff Crossing** Travel approximately two map squares west of the Bluff Crossing of Olympus. Climb the ladder leading to an intersection near the upper section of the region, where you'll find the first Sister of Song guarding a cage. Defeat her to free the owl. **2. Kythira Island — Coast Campsite** From the Coast Campsite, head approximately six map squares east. Continue past the Sacred Olive Tree of Artemis to locate another Sister of Song and her captive owl. Defeat the Siren to complete the rescue. **3. Shores of Elafonisos — Strand Campsite** Head one map square south of the Strand Campsite. Use the Otos Bust Power to reveal an illusory wall on the left side of the passage. Enter the hidden area and defeat the Sister of Song to free the third owl. **4. Shores of Elafonisos — Basin Crossing** Travel approximately two map squares north and one east of the Basin Crossing of Olympus. Use Otos to reveal the hidden passage behind an illusory wall on the right. Defeat the Siren inside to rescue the fourth Keledone. **5. Isle of Aeaea — Peninsula Crossing** From the Peninsula Crossing of Olympus, travel approximately three map squares south. Look for a passage blocked by magical vines. Use the Harvest Glaive to strike the vine patches and clear the obstruction, then defeat the Sister of Song guarding the fifth owl. **6. Isle of Aeaea — Beach Campsite** Head approximately one map square north and two east of the Beach Campsite. Look for an upper-right exit that requires a double jump to reach. Continue into the adjoining area and defeat the final Sister of Song to free the last Keledone. Song of the Six unlocks after rescuing all six owls. #### Claiming the Owl Door Rewards After rescuing the Keledones, return to Kythira Island and visit the Owl Door in the uppermost section of the region. Each rescued owl opens an additional archway containing treasure chests with red orbs and upgrade materials. Once all six owls are free, the final archway becomes accessible. Inside, you'll find an armory chest containing **Stunning Screech**, a Gouri required for Like a Charm.
Tip
Visit the Owl Door periodically as you rescue the Keledones. The reward rooms contain plenty of red orbs and useful materials, which can help strengthen Kratos for the remaining story encounters. The Bluff Crossing of Olympus provides a convenient way to reach the Owl Door without retracing the entire region. The Sisters of Song also drop materials used for crafting the Lucky Amber Gouri with Circe, so these encounters contribute toward another collectible trophy.
Warning
Two Keledones are hidden behind illusory walls that require Otos, while another requires the Harvest Glaive to clear obstructing vines. Freeing the owls earns Song of the Six, but you must separately collect Stunning Screech from the final Owl Door reward chamber for Like a Charm.
Video Guide: https://www.youtube.com/watch?v=DxdZlG58ojI&list=PLicOuDSiPvy3JjwzmeeC1s8DLlHpvGmBV&index=2&pp=iAQB
Trophy: The Historian
Collect all Shards
Type: Bronze
Category: Collectible
How to Unlock
How to Unlock: Collect all 30 Shards hidden inside glowing red Monoliths throughout Laconia. These Monoliths contain fragments of The Lexicon, an ancient record of the gods and primordial beings. Strike each Monolith with your Spartan Dory to break it apart and collect the Shard inside. The 30 Shards are divided into three groups: 12 Olympian Shards 12 Titan Shards 6 Primordial Shards You'll encounter Monoliths throughout the adventure in regions such as Eurotas River, Mount Taygetos, The Sanctuary, Stone Hollows, Passage of Monuments, Vyros Gorge, and The Barren Steppe. Some can be destroyed immediately, while others require additional traversal abilities or magical upgrades. For example, several are hidden behind barriers requiring upgraded Victory Sandals, the Harvest Glaive, or the Solar Sling. A few particularly important locations to revisit include: Stone Hollows: Contains Monoliths locked behind environmental puzzles and later traversal abilities. Passage of Monuments: Look for hidden walls and passages requiring Otos or upgraded Victory Sandals. Eurotas River: Several Monoliths require returning with abilities such as Xyele or the Harvest Glaive. The Drifting Spire: Three Olympian Shards become accessible after completing all nine Muse Chambers and reaching this optional region. As you gather Shards, return them to The Lexicon, located in Passage of Monuments, west of Sparta. The Historian requires collecting all 30 Shards, while returning the completed groups rewards you with three additional Gouri needed for Like a Charm. The Historian will unlock once you've collected the final Shard.
Tip
Break every glowing red Monolith you encounter, even if you're not actively working on this trophy. Besides collecting Shards, destroying them awards red orbs that contribute toward purchasing every skill. You can gather all 30 Shards before finishing the story, although you won't be able to return every last one to The Lexicon until the post-game. Keep track of both collecting and returning them so you don't overlook the Gouri rewards.
Warning
Several Monoliths require abilities or upgrades obtained later in the story. If you cannot reach one, mark its location and return when you have the necessary equipment. There's no need to force your way into areas Kratos isn't ready to explore yet.
Video Guide: https://www.youtube.com/watch?v=RvOgQIsoDLU&list=PLicOuDSiPvy3JjwzmeeC1s8DLlHpvGmBV&index=14&pp=iAQB
Trophy: The Opportunist
Collect and return all Artifacts
Type: Bronze
Category: Collectible
How to Unlock
Collect all 30 Artifacts scattered across Laconia and return them to the Kerkopes at their Treehouse in the Laconian Woods. Artifacts are divided into six collections, each containing items hidden throughout the world. Unlike some collectibles, these objects can blend into their surroundings or be concealed behind breakable walls, environmental puzzles, and passages requiring later abilities. You'll need to complete the following collections: #### Statues (4) - Sparta — Sparta - Port of Messenia — Eurydice - Oenus Vineyard — Amyclas - Laconian Woods — Lacadaemon #### Jewelry (6) - The Gallery — Onyx Bracelet - Port of Messenia — Moonstone Ring - Stone Hollows — Peridot Earrings - Mount Taygetos — Garnet Anklet - Kythira Island — Amethyst Pendant - Shores of Elafonisos — Citrine Necklace #### Plans (4) - Passage of Monuments — Wing Sketches - Foundry of Invention — Guardian Plans - The Barren Steppe — Armature Diagrams - Vyros Gorge — Labyrinth Blueprints #### Pottery (6) - The Gallery — Lekythos - The Grand Cistern — Askos - The Sanctuary — Kernos - Oenus Vineyard — Kylix - Vyros Gorge — Krater - The Barren Steppe — Skyphos #### Scrolls (4) - The Sanctuary — Philosophy of Soul - The Barren Steppe — Philosophy of Heart - Eurotas River — Philosophy of Mind - Sparta — Philosophy of Body #### Banners (6) - The Barren Steppe — Banner of Argolis - Kythira Island — Banner of Crete - Oenus Vineyard — Banner of Elis - Port of Messenia — Banner of Messenia - Mount Taygetos — Banner of Achaea - Laconian Woods — Banner of Arcadia Once you've collected an Artifact, visit the Kerkopes' Treehouse and turn it in. Each returned Artifact awards 100 red orbs, while completing a full collection provides a rare upgrade material. Some Artifacts require additional equipment. For example, the Kylix in Oenus Vineyard requires an upgraded Evergreen Flame, while the Banner of Elis requires the Harvest Glaive's upgraded ranged attack. The final collection cannot be completed until the post-game. The Skyphos in The Barren Steppe is located inside a restricted building that becomes accessible through the False Prophet sidequest. Return all 30 Artifacts to the Kerkopes to unlock The Opportunist.
Tip
Check suspicious walls, alcoves, and environmental objects as you explore. Several Artifacts are concealed in places that look like ordinary scenery, so a little curiosity goes a long way. The Jewel of Ziteo Gouri can help reveal hidden items nearby, making it especially useful for cleanup. Returning Artifacts also earns a total of 3,000 red orbs, which contributes toward Deep Learning.
Warning
The Skyphos cannot be obtained until you acquire the Ritual Tablet during the post-game False Prophet sidequest. Remember that collecting Artifacts isn't enough for this trophy; all 30 must also be returned to the Kerkopes.
Video Guide: https://www.youtube.com/watch?v=kHKi4vctmS4&list=PLicOuDSiPvy3JjwzmeeC1s8DLlHpvGmBV&index=13&pp=iAQB
Trophy: The Tourist
Find all Lore
Type: Bronze
Category: Collectible
How to Unlock
Find all 30 pieces of Lore scattered throughout Laconia. These collectibles reveal stories about the region's history, mythology, and landmarks, and are divided into five categories with six entries each. Each category requires a different Bust Power to interact with: Murals — Skopos: Examine historical murals using the viewing ability. Cairns — Otos: Reveal the stories hidden within stone formations. Hamadryads — Anemos: Interact with the magical trees to collect their fruit and discover their lore. Forgotten Tomes — Phos: Illuminate and reveal hidden writings. Scenic Vistas — Eikon: Capture designated viewpoints to record their history. Most of these abilities become available naturally through story progression, but you'll need Phos, obtained during the events surrounding Evil Within, before you can complete every category. Lore is scattered across numerous regions, including Sparta, Eurotas River, Mount Taygetos, Oenus Vineyard, The Sanctuary, The Veiled Bog, and The Barren Steppe. Pay attention to unusual environmental details, especially murals, stone formations, distinctive trees, and scenic overlooks. You cannot finish this trophy until the post-game because one Mural, The First Sacred War, is located in a restricted section of The Barren Steppe. You'll need to progress through the post-game False Prophet sidequest and obtain the Ritual Tablet to reach it. Once you've discovered all 30 Lore entries, The Tourist will unlock.
Tip
Don't worry about collecting everything during your first visit to an area. Several Lore locations require abilities you won't have until much later, and you can return to previous regions after finishing the story. Each Lore discovery also awards 250 red orbs, making exploration useful for purchasing the skills required for Deep Learning. Apparently, learning history really does pay off.
Warning
The First Sacred War Mural cannot be collected until the False Prophet sidequest opens the relevant area of The Barren Steppe in the post-game. Don't waste time searching for an earlier route into that section.
Video Guide: https://www.youtube.com/watch?v=KrRoNJBKdHs&list=PLicOuDSiPvy3JjwzmeeC1s8DLlHpvGmBV&index=9&pp=iAQB
Trophy: Deep Learning
Obtain all Skills
Type: Gold
Category: Grind
How to Unlock
Purchase every Skill available to Kratos, including all upgrades in the final Spartan Unity tree. Skills are purchased with red orbs at Campsites and are divided into four main groups: Offensive Aggression: Improves spear attacks, charged strikes, and offensive techniques. Defensive Instincts: Enhances dodging, blocking, parrying, and counterattacks. Victory Sandals: Improves aerial and downward attacks. Spartan Unity: Provides permanent increases to health, magic, spirit, and red orb earnings. Purchase every Skill in the first three groups to unlock Spartan Unity. This final tree contains five upgrades each for Spartan Heart, Body, Mind, and Soul. Once those upgrades are purchased, buy the final Spartan Unity Skill for 50,000 red orbs to complete the collection and unlock Deep Learning. This is one of the game's biggest resource requirements, so expect to finish it toward the end of your Platinum journey.
Tip
Once Spartan Unity becomes available, prioritize all five Spartan Heart upgrades. These increase your red orb earnings and help pay for the remaining Skills. Equip the Emblem of Fortune Gouri and Blessing of Demeter to further increase your earnings. Completing sidequests and collecting treasures before intentionally grinding will also save time.
Warning
The final Spartan Unity Skill only becomes available after purchasing every other Skill. Don't overlook upgrades in categories you rarely use, as all of them count toward this trophy.
Trophy: All Eyes on Thee
Battle the Escaped
Type: Gold
Category: Combat
How to Unlock
Defeat all five escaped Cyclopes scattered throughout Laconia. During the Sea Sickness story encounter, the Mirror of Archimedes destroys the Cyclopes' prison in Passage of Monuments, allowing five powerful Cyclopes to escape. Return to Passage of Monuments afterward and encounter the Kerkopes to begin the hunt. The escaped Cyclopes will appear on your world map, and each can be challenged by entering its designated cavern. All Five Cyclops Locations 1. Cyclops Brute — The Veiled Bog Travel approximately two map squares south and one east of the Temple of Demeter. Access the cavern through the middle section of The Veiled Bog by climbing a vine created with the Harvest Glaive. 2. Cyclops Destroyer — Port of Messenia From the Lagoon Campsite, travel approximately one map square north and six east. This is one of the toughest Cyclopes, featuring a large health pool and an unblockable double-spin attack. 3. Cyclops Tyrant — Mount Taygetos From the Pasture Campsite, travel approximately two map squares north and four west. This Cyclops relies primarily on powerful punches and kicks. 4. Cyclops Executioner — Laconian Woods From the Ruins Campsite, travel approximately one map square south and one west. This Cyclops deals less damage than the other escaped prisoners, making it a good starting target. 5. Cyclops Tormentor — The Barren Steppe Travel approximately two map squares north and ten east of the Temple of Demeter. The cavern is beneath the granary building. Watch for the Cyclops' shockwave-producing stomps and powerful club attacks. Defeat all five escaped Cyclopes to unlock All Eyes on Thee.
Tip
Consider saving these encounters until late in the story or post-game, when Kratos has stronger equipment, improved health, and more combat Skills. Start with the Cyclops Executioner to get comfortable with the encounters before tackling the more dangerous Destroyer. The Cyclopes also provide additional Eyes of Cyclops, which are useful for enhancing the Oculus Armament Gouri.
Warning
These are five separate optional encounters. The opening Cyclops battle from Eye for an Eye does not count toward this trophy. The Cyclops Destroyer is particularly dangerous due to its unblockable spinning attack. Avoid attempting to block it and focus on dodging before counterattacking.
Trophy: Come to a Head
Battle the Dragon Heads
Type: Silver
Category: Combat
How to Unlock
Find and defeat all six Serpent-Head Clusters hidden inside dimensional rifts throughout Laconia. These encounters become accessible after obtaining the Level 3 Victory Sandals during the main story in Passage of Monuments. This upgrade allows Kratos to smash through special barriers using Victory Charge, Victory Ascent, and Victory Descent. Each rift contains a group of floating serpent heads that attack from different positions around the arena. Defeat every head in the encounter to clear the rift and receive a Scale of Serpent. You'll need to clear all six locations to unlock Come to a Head. #### Serpent-Head Cluster Locations **1. Passage of Monuments** From the Plateau Campsite, travel approximately two map squares south to the upper-right portion of the area near the altar where you obtained the upgraded Victory Sandals. Climb onto the upper ledge and use Phos to illuminate the translucent platform crossing the gap. Perform Celestial Rush across the platform, then use Victory Charge to smash through the barrier at the bottom of the slope. Enter the dimensional rift and defeat the serpent heads inside. **2. Mount Taygetos** Travel to the Pasture Campsite and descend the central shaft beside it. At the bottom, jump above the breakable floor and use Victory Descent to smash through the barrier. Enter the hidden chamber below to find the second rift. **3. The Grand Cistern** Head toward the passage to the left of the Temple of Hestia. Find the central moving column and pull the lever on the upper-right ledge above the braziers to activate it. Ride the column upward, then use Victory Ascent to smash through the barrier in the ceiling. The dimensional rift is inside the chamber on the left. **4. Stone Hollows** From the Catacomb Campsite, enter the passage directly below and continue all the way right. Use Victory Charge to break through the barrier against the right wall. Enter the newly accessible chamber to reach the fourth rift. **5. Eurotas River** Travel to the Cave Campsite and follow the passage west into a cavern guarded by a Minotaur Butcher. Defeat the enemy, then use Victory Charge to smash through the barrier blocking the route ahead. The rift is located beyond the barrier. You can also collect a Monolith Shard in this area for The Historian. **6. The Veiled Bog** From the Marsh Campsite, travel west into the long passage containing a movable pillar and several vine-covered obstacles. Locate the breakable floor in this section and use Victory Descent to smash through it. Drop into the hidden chamber below to reach the final dimensional rift. #### Defeating the Serpent Heads The serpent heads move around their arenas and attack from varying heights, making them difficult to hit consistently with ordinary spear attacks. Use your Spartan Dory when they're within melee range, and switch to ranged magic when they float beyond your reach. The Solar Sling is particularly useful because it lets you attack moving targets without constantly chasing them across the arena. Continue eliminating the heads until each encounter is complete. Once all six Serpent-Head Clusters have been defeated, Come to a Head will unlock.
Tip
The six encounters reward you with Scales of Serpent, which are used by Circe to craft The Scabrous Fleece Gouri for Like a Charm. You can begin clearing these rifts as soon as you obtain Level 3 Victory Sandals, making them a convenient objective during your next exploration sweep. Most of the encounters are relatively manageable with upgraded equipment. The real challenge is finding the entrances rather than defeating the creatures inside.
Warning
All six encounters require access to the relevant dimensional rifts, most of which are hidden behind barriers requiring Level 3 Victory Sandals. Defeating only the serpent heads encountered during normal story progression won't complete this trophy. You must clear all six dedicated rift encounters.
Video Guide: https://www.youtube.com/watch?v=Y5IEB7vj4FQ&list=PLicOuDSiPvy3JjwzmeeC1s8DLlHpvGmBV&index=6&pp=iAQB

Trophy: The Summit
Battle the Trio
Type: Gold
Category: Combat
How to Unlock
Defeat the Stymphalian Trio of Ioke, Ponea, and Apate in The Drifting Spire. First, complete all nine Muse Chambers in The Sanctuary for Amusing. Return to the Oracle's platform to activate the wind current leading to The Drifting Spire. Explore the region until you reach the Pinnacle Campsite, then take the left exit in the shaft below it to begin the fight. You'll face Apate first while Ponea occasionally attacks with falling ice. Dodge Apate's poisonous ground slams and counterattack during her recovery. Ponea fights next while Ioke occasionally dive-bombs the arena. Roll behind Ponea during her spinning attacks and punish her with powerful spear techniques. Ioke fights last without assistance. Avoid her spinning charges and ground slams, then attack during the openings between her attacks. Each bird has reduced health compared with its original encounter, and defeating the first two provides restorative orbs. Defeat all three to unlock The Summit and obtain the Stymphalian Crest, a Gouri required for Like a Charm.
Tip
Save your strongest attacks for openings after ground slams and spinning attacks. The restorative orbs between opponents make the encounter more manageable than fighting all three simultaneously.
Warning
You must complete all nine Muse Chambers to access The Drifting Spire. Defeating these bosses individually during the story doesn't count toward this trophy.
Trophy: Amusing
Complete all Muse Chambers
Type: Silver
Category: Misc
How to Unlock
Complete all nine Muse Chambers in The Sanctuary. The Muse Chambers are optional challenges that test Kratos' combat abilities, platforming skills, and puzzle-solving. You'll find three sealed archways inside The Sanctuary, each containing three separate challenges. To unlock the archways, you must collect the three Stymphalian Plumes obtained from the story bosses: - **Razor Plume:** Defeat Ioke during Flying Solo. - **Frost Plume:** Defeat Ponea during Pecking Order. - **Deadly Plume:** Defeat Apate during Wing and a Prayer. Each archway contains one timed platforming challenge, one timed puzzle, and one combat challenge. You must complete all nine chambers to unlock Amusing. #### First Archway — Razor Plume The first archway becomes accessible after defeating Ioke. **1. Melete's Race — Platforming Challenge** Reach the exit within 22 seconds. Move through the corridor while avoiding the miasma covering sections of the floor. Use the upper route after the opening platforms, then cross the pulley platforms and roll through the crawlspace beneath the sliding wall. Climb toward the ladder and jump into the alcove on the left to activate the lever. Once the gate opens, quickly return across the platforms and reach the exit before the timer expires. **2. Mneme's Reflection — Puzzle Challenge** Reach the upper-right exit within 44 seconds. Use Skopos to deactivate the energy beam near the beginning of the room. Continue toward the movable platform and strike the nearby mechanism with the Solar Sling to raise it. Climb upward, pass through the crawlspace, and activate the lever. Use Skopos on the second eye mechanism to disable the next energy barrier. Proceed across the platforms, burn the bramble concealing another mechanism, and activate the remaining lever. Finally, strike the exposed mechanism to raise the platform leading toward the open exit. **3. Aoede's Battle — Combat Challenge** Defeat all enemies within 72 seconds. You'll face a collection of smaller enemies followed by more dangerous creatures, including a Siren and Minotaur Calf. Clear the weaker enemies quickly with spear combos, then prioritize the Siren before dealing with the Calf. Use ranged magic when necessary to finish difficult enemies without wasting time chasing them around the arena. #### Second Archway — Frost Plume The second archway becomes accessible after defeating Ponea. **4. Melete's Course — Platforming Challenge** Reach the exit within 33 seconds. Jump across the opening platforms and use the moving blocks to reach the upper-left ledge. Pull the lever to open the gate on the right, then quickly cross the gap and climb the sliding wall. Use the connected pulley platforms to reach the final sliding wall, climb upward, and jump toward the exit. **5. Mneme's Meditation — Puzzle Challenge** Reach the exit within 66 seconds. Begin by descending through the opening platforms and climbing the sliding walls on the right. Burn the bramble blocking the upper wall, climb through the crawlspace, and activate the lever. Use the Evergreen Flame to clear the bramble covering the next mechanism, then strike it to open the lower gate. Collect the Unsealing Mist with Anemos and carry it through the newly opened passage. Deactivate the energy beam using Skopos and deposit the mist into the waiting pedestal to open the final route. Continue through the left passage and use Celestial Leap to reach the elevated exit platform. **6. Aoede's Clash — Combat Challenge** Defeat all enemies within 120 seconds. This encounter includes Remains, Legionnaires, Minotaurs, and several other enemy types spread across a multi-level arena. Keep moving between the platforms to reach newly spawned enemies quickly. Use powerful spear techniques against tougher enemies while clearing weaker targets with ordinary combos. If you need to recover, the separated platforms can provide brief opportunities to reposition and heal. #### Third Archway — Deadly Plume The final archway becomes accessible after defeating Apate. These are the most demanding Muse Chambers, so consider returning with upgraded equipment if you're struggling. **7. Melete's Competition — Platforming Challenge** Reach the exit within 38 seconds. Unlike the previous races, this course sends you toward the left. Jump across the opening platforms above the miasma, then use Victory Descent to break through the first floor barrier. Roll through the crawlspace and use Victory Ascent to smash through the ceiling barrier on the opposite side. Continue left and use Victory Charge to break through the vertical obstruction. Climb the sliding walls, cross the final gap with Celestial Leap, and reach the exit before the timer runs out. **8. Mneme's Enlightenment — Puzzle Challenge** Reach the exit within 90 seconds. This is the most complicated puzzle in the Muse Chambers and requires several different abilities. Start by climbing the platforms on the right and entering the upper crawlspace. Strike the mechanism inside to lower a vine-covered platform, then move the pillar below into position. Burn the bramble covering the platform and use the Harvest Glaive to strike the exposed vine patches, removing the magical obstruction on the left. Move the pillar again, collect the Unsealing Mist with Anemos, and carry it into the newly accessible passage. Deposit the mist into the first pedestal, then use the nearby mechanism to raise the platform. Retrieve the mist while using Phos to illuminate the translucent platforms leading upward. Carry it to the next pedestal near the top of the shaft to open the remaining route. Use Skopos to deactivate the energy barrier, then climb through the newly accessible passage. Finish by breaking through the final barrier above and jumping toward the upper-right exit. **9. Aoede's Onslaught — Combat Challenge** Defeat all enemies within 150 seconds. You'll face increasingly dangerous enemies, including Satyrs, Legionnaires, Hoplites, and other armored opponents. Clear each level of the arena before moving upward so enemies don't accumulate behind you. Save your strongest Spartan Dory techniques for the final armored enemies near the top. Once every enemy has been defeated, return to the entrance and claim the chamber's reward. #### Completing the Muse Chambers After finishing all nine challenges, return to the Oracle's platform in the upper-left section of The Sanctuary. The nine Muse statues will activate, creating a powerful wind current. Use the wind current to reach **The Drifting Spire**, a previously inaccessible region containing additional collectibles and an optional boss encounter. Amusing will unlock when the final reward sequence is triggered.
Tip
You can return to incomplete Muse Chambers later, so there's no need to finish every challenge as soon as you unlock its archway. For timed platforming and puzzle challenges, learn the route before worrying about speed. Once you understand the sequence, the time limits become much easier to manage. Upgraded Victory Sandals, the Solar Sling, and the Harvest Glaive are particularly valuable for the later challenges. Completing all nine chambers also provides access to The Drifting Spire, where you'll find the Stymphalian Trio boss fight required for The Summit. After surviving three separate bird encounters, getting the opportunity to settle the score with all three at once feels almost generous. Almost.
Warning
The third group of Muse Chambers requires late-game traversal abilities, including upgraded Victory Sandals and the Harvest Glaive. The timed puzzles can fail if you take too long to position objects or activate mechanisms. Practice each sequence before attempting a clean run. Don't leave The Sanctuary immediately after completing the ninth chamber. Return to the Oracle's platform to activate the reward sequence and unlock access to The Drifting Spire.

Trophy: Battle Tested
Complete all Ephor Trials
Type: Silver
Category: Misc
How to Unlock
Complete all nine Ephor Trials in The Gallery. Interact with the tome beside the monument on the left side of the area to select a challenge. Each Trial has a primary objective and optional bonus conditions. Only the primary objectives are required for the trophy. The nine Trials are: Security: Earn 50 points by standing inside a moving zone within 90 seconds. Overthrow: Remain on the central platform for 60 seconds without being knocked off. Levitation: Stay off the ground for more than 50 seconds by jumping between disappearing platforms. Marksman: Defeat six Archers within 30 seconds. Onslaught: Defeat all enemies within three minutes. Roundup: Defeat 20 enemies while they're inside the moving ring within three minutes. Convalescence: Defeat 20 regenerating enemies within four minutes. Catastrophe: Defeat 20 enemies within two minutes while avoiding explosions. Ruination: Destroy all four stone altars within three minutes. Complete every Trial's primary objective to unlock Battle Tested and receive the Token of Chilon, a Gouri required for Like a Charm.
Tip
Save the Trials until late in the game when you've upgraded your equipment and Skills. Stronger attacks make the timed challenges considerably easier, especially Catastrophe. Don't worry about achieving every bonus condition. Those rewards are optional, and Kratos has enough challenges without inventing more.
Warning
The Catastrophe description may mention 30 enemies, but the documented completion requirement is 20. Make sure you select the correct Trial before starting, as you cannot simply cancel an active attempt through the normal menu.

Trophy: Cryptic
Open the Mosaic Door
Type: Bronze
Category: Misc
How to Unlock
Clear the four haunted graveyards scattered across Laconia, then return to The Sunken Agora after completing the main story to open the Mosaic Door. After defeating the Fylaki during the Evil Within story encounter, rest at a Campsite to trigger a conversation with the Kerkopes. They'll explain that the released energy has awakened the dead throughout Laconia, beginning the associated graveyard sidequest. Your objective is to visit four graveyards and defeat every enemy that appears. These locations are marked on the world map with blue sword icons. #### Graveyard Locations **1. The Veiled Bog** Travel to the Marsh Campsite and head approximately three map squares north and four west. Look for a long passage near the middle of the region, close to the Delphic Oracle and Lycurgus Mural. Defeat the enemies that appear to clear the graveyard. **2. Eurotas River** This graveyard is approximately one map square north and six east of the Temple of Nike. You'll need to approach it through the eastern section of the Port of Messenia, following the connecting passage beneath the graveyard's location. Eliminate all the awakened enemies to complete this encounter. **3. Oenus Vineyard** Head directly below the Cellar Campsite to find the third graveyard. This location also contains Alke's Memento, a Gouri required for Like a Charm. Clear the enemies and collect the Gouri while you're there. **4. Vyros Gorge** From the Trail Campsite, travel approximately four map squares south and one west to reach the final graveyard. Defeat the enemies here to finish clearing the haunted locations. #### Opening the Mosaic Door Even after clearing all four graveyards, you cannot finish this trophy until the post-game. Once you've completed the story, fast-travel back to The Sunken Agora and return to the central elevator shaft where you previously encountered the Fylaki. Operate the elevator lever three times to move the platform up, back down, and then farther down to the mosaic chamber. The Mosaic Door will open when you reach the chamber, unlocking Cryptic. You can then enter the dimensional rift on the right to discover the **Mystical Elixir**, a Gouri required for Like a Charm.
Tip
Clear the graveyards as they become accessible rather than leaving every encounter until after the credits. Their blue sword markers make them relatively easy to track, and doing them along the way reduces your final cleanup. Remember to enter the dimensional rift after opening the Mosaic Door. The Mystical Elixir is another important step toward finishing your Gouri collection.
Warning
Cryptic cannot be completed before finishing the main story, even if you've already cleared all four graveyards. The last step requires returning to The Sunken Agora and reaching the Mosaic Door using the central elevator. Clearing the graveyards alone will not unlock the trophy.
Video Guide: https://www.youtube.com/watch?v=AXdS4GHq43M&list=PLicOuDSiPvy3JjwzmeeC1s8DLlHpvGmBV&index=4&pp=iAQB
Trophy: False Prophet
Stop the Cult Revival
Type: Silver
Category: Misc
How to Unlock
Stop the cult revival by clearing three cultist camps across Laconia, assembling the Ritual Tablet, and defeating the Cult Leader in The Barren Steppe. This sidequest becomes available after completing the main story and defeating the Ipotane during Horsing Around. When you return to certain previously explored regions, you'll discover that surviving members of the cult are attempting to reestablish their influence. Unlike many other sidequests, the cultist camps won't immediately appear on your map. You'll need to discover one of their locations first to begin tracking the activity. #### Step 1 — Clear the Three Cultist Camps **Camp 1 — Laconian Woods** Travel to the Ruins Campsite and head approximately one map square north and three east. Look for a barrier on the ceiling of a shaft. Break through it using the required traversal ability and continue past the area containing one of the Banners needed for The Opportunist. Defeat the cultists occupying the camp to obtain the first Shattered Tablet. **Camp 2 — Oenus Vineyard** From the Balcony Campsite, travel approximately three map squares north and two west. You can reach this location more conveniently from the upper passage connecting to Mount Taygetos, particularly if you've already opened the rope shortcut. Find the cultist camp and defeat its occupants to recover the second Shattered Tablet. **Camp 3 — Passage of Monuments** From the Plateau Campsite, travel approximately one map square south and five east. Continue past the Talos guarding the route to discover the final cultist camp. Eliminate the enemies and collect the third Shattered Tablet. #### Step 2 — Assemble the Ritual Tablet Once all three Shattered Tablets have been collected, they'll combine into the **Ritual Tablet**. This item allows you to remove the magical mist sealing several archways in The Barren Steppe. These previously inaccessible areas contain additional collectibles, making this sidequest essential for completing other trophies such as The Tourist and The Opportunist. #### Step 3 — Defeat the Cult Leader Return to The Barren Steppe and travel toward the rightmost sealed archway, east of the Passage Campsite. Use the Ritual Tablet to remove the mist and enter the building beyond. Climb through the structure until you encounter the Cult Leader. The Cult Leader uses a combination of fire and curse attacks, similar to the cultist enemies you've already encountered during the story. Watch for incoming projectiles, avoid the affected areas, and use your upgraded spear techniques to punish openings between attacks. By this point, Kratos should have access to enough powerful equipment and abilities to make the encounter relatively manageable. Defeat the Cult Leader to complete The Cost of Devotion sidequest and unlock False Prophet. You'll also receive the **Totem of Vengeance**, a Gouri required for Like a Charm.
Tip
Complete False Prophet early during your post-game cleanup. The Ritual Tablet opens restricted areas of The Barren Steppe containing collectibles needed for several other trophies. After defeating the Cult Leader, thoroughly explore the newly accessible buildings before leaving the region. The Cult Leader might believe the cult deserves another chance, but Kratos has a fairly convincing counterargument. It usually involves the sharp end of his spear.
Warning
False Prophet is a post-game sidequest and cannot be completed during the main story. The three cultist camps must be cleared before you can assemble the Ritual Tablet and access the sealed buildings in The Barren Steppe. Don't forget to collect the Totem of Vengeance after defeating the Cult Leader, as it's needed for Like a Charm.
Video Guide: https://www.youtube.com/watch?v=FGj7Mexqe1k&list=PLicOuDSiPvy3JjwzmeeC1s8DLlHpvGmBV&index=3&pp=iAQB

Stop the cult revival by clearing three cultist camps across Laconia, assembling the Ritual Tablet, and defeating the Cult Leader in The Barren Steppe.
This sidequest becomes available after completing the main story and defeating the Ipotane during Horsing Around.
When you return to certain previously explored regions, you'll discover that surviving members of the cult are attempting to reestablish their influence.
Unlike many other sidequests, the cultist camps won't immediately appear on your map. You'll need to discover one of their locations first to begin tracking the activity.
Camp 1 — Laconian Woods
Travel to the Ruins Campsite and head approximately one map square north and three east.
Look for a barrier on the ceiling of a shaft. Break through it using the required traversal ability and continue past the area containing one of the Banners needed for The Opportunist.
Defeat the cultists occupying the camp to obtain the first Shattered Tablet.
Camp 2 — Oenus Vineyard
From the Balcony Campsite, travel approximately three map squares north and two west.
You can reach this location more conveniently from the upper passage connecting to Mount Taygetos, particularly if you've already opened the rope shortcut.
Find the cultist camp and defeat its occupants to recover the second Shattered Tablet.
Camp 3 — Passage of Monuments
From the Plateau Campsite, travel approximately one map square south and five east.
Continue past the Talos guarding the route to discover the final cultist camp.
Eliminate the enemies and collect the third Shattered Tablet.
Once all three Shattered Tablets have been collected, they'll combine into the Ritual Tablet.
This item allows you to remove the magical mist sealing several archways in The Barren Steppe.
These previously inaccessible areas contain additional collectibles, making this sidequest essential for completing other trophies such as The Tourist and The Opportunist.
Return to The Barren Steppe and travel toward the rightmost sealed archway, east of the Passage Campsite.
Use the Ritual Tablet to remove the mist and enter the building beyond.
Climb through the structure until you encounter the Cult Leader.
The Cult Leader uses a combination of fire and curse attacks, similar to the cultist enemies you've already encountered during the story.
Watch for incoming projectiles, avoid the affected areas, and use your upgraded spear techniques to punish openings between attacks.
By this point, Kratos should have access to enough powerful equipment and abilities to make the encounter relatively manageable.
Defeat the Cult Leader to complete The Cost of Devotion sidequest and unlock False Prophet.
You'll also receive the Totem of Vengeance, a Gouri required for Like a Charm.
Complete False Prophet early during your post-game cleanup. The Ritual Tablet opens restricted areas of The Barren Steppe containing collectibles needed for several other trophies.
After defeating the Cult Leader, thoroughly explore the newly accessible buildings before leaving the region.
The Cult Leader might believe the cult deserves another chance, but Kratos has a fairly convincing counterargument. It usually involves the sharp end of his spear.
False Prophet is a post-game sidequest and cannot be completed during the main story.
The three cultist camps must be cleared before you can assemble the Ritual Tablet and access the sealed buildings in The Barren Steppe.
Don't forget to collect the Totem of Vengeance after defeating the Cult Leader, as it's needed for Like a Charm.
Trophy: No Olive Branch
Complete all Olive Tree Battles
Type: Silver
Category: Misc
How to Unlock
Complete all 24 Sacred Olive Tree battles scattered throughout Laconia. Sacred Olive Trees are special locations dedicated to six Olympian deities. Each tree presents Kratos with a combat challenge that must be completed to earn its reward. There are four Sacred Olive Trees associated with each deity, giving you 24 battles in total. Once you've activated a region's Vermilion Globe, its Sacred Olive Trees become marked on the map, making them easier to locate. Approach a tree and hold Triangle to begin its battle. Defeat every enemy summoned during the encounter to complete the challenge and receive an Olive associated with that deity. #### Apollo — 4 Sacred Olive Trees Apollo's offerings increase the strength of the Spartan Dory. **1. Laconian Woods** From the Canopy Crossing of Olympus, travel approximately two map squares south and four east. Strike the mechanism controlling the hanging block to reveal the path leading to the tree. The battle includes Boars, Nosoi, and a Minotaur. **2. Eurotas River** From the Hideout Campsite, travel one map square north and continue east along the passage. Defeat the Hound, Satyr Rangers, and Harpy Empress summoned during the encounter. **3. The Sunken Agora** Travel approximately four map squares north and two west of the Ossuary Campsite. Use Phos to illuminate the platforms leading up toward the tree. The battle includes Silver Strix enemies, Lampades Shadows, and Skorpiuses. **4. The Drifting Spire** From the Pinnacle Campsite, travel two rooms upward. Ride the large vent to the upper walkway, light the three braziers, and take the left exit. Defeat the Automaton Warden and Harplings to complete the final Apollo battle. #### Hestia — 4 Sacred Olive Trees Hestia's offerings increase Kratos' magic meter. **1. The Grand Cistern** From the Keep Campsite, travel approximately four map squares north and follow the upper path east. The tree is located before the bramble-filled crawlspace connecting to the beginning of the region. **2. Shores of Elafonisos** Travel approximately one map square north and four east of the Basin Crossing of Olympus. Continue through the main area and take two exits to the right to reach the tree. **3. Port of Messenia** From the Cove Campsite, travel approximately one map square south and three east. Use Phos to illuminate the translucent platforms and climb over the column on the right. The tree is positioned beyond the platforming section. **4. Vyros Gorge** From the Meadow Campsite, travel approximately four map squares south and two west. Locate the Unsealing Mist pedestal in the upper-left section of the large chamber. Use Anemos to transfer the mist to the pedestal at the bottom of the ladder on the right, opening the gate leading to the tree. #### Nike — 4 Sacred Olive Trees Nike's offerings increase Kratos' spirit meter. **1. Passage of Monuments** Approach from The Veiled Bog using the Glade Campsite. Follow the passage west, defeating the enemies along the route until you reach the tree at the far end. **2. Port of Messenia** From the Lagoon Campsite, travel approximately three map squares north and six east. Climb the sliding walls in the right-hand shaft, then take the exit leading to the tree. This location requires Xyele. **3. Mount Taygetos** From the Memorial Campsite, travel approximately two map squares south and two east. Push the nearby pillar into the pit and cross over it to reach the adjoining room containing the tree. The Lunar Blade is required. **4. Stone Hollows** From the Catacomb Campsite, travel approximately two map squares south and three west. Use Victory Charge to break through the horizontal barrier, then climb the ladder beyond it to reach the tree. Level 3 Victory Sandals are required. #### Dionysus — 4 Sacred Olive Trees Dionysus' offerings increase Kratos' health meter. **1. The Sanctuary** Travel to the upper-left section of The Sanctuary, where the Oracle normally stands on a platform shaped like hands. Drop from the platform's left edge to land near the Sacred Olive Tree below. **2. Isle of Aeaea** Travel to the bottom of the eastern shaft connecting the entrance and Beach Campsite. Push the nearby pillar through the passage on the right to reach the tree. The Lunar Blade is required. **3. Laconian Woods** From the Canopy Crossing of Olympus, travel approximately two map squares south and one east. Use the upgraded Solar Sling to strike the concealed mechanism controlling the hanging blocks. Once the path opens, climb toward the upper-left exit leading to the tree. **4. Mount Taygetos** Explore the upper-left section containing two large vents. Push the movable pillar onto the left vent and ride it upward to the exit on the right. Descend the ladder in the next room, pass through the crawlspace, and continue toward the tree. #### Artemis — 4 Sacred Olive Trees Artemis' offerings improve the defense of the Spartan Aspis. **1. Oenus Vineyard** After destroying the corrupted wine fountains, enter the upper-right hallway. Descend the ladder midway through the passage and take the exit to the right. **2. The Barren Steppe** From the Temple of Demeter, travel approximately one map square north and three east. Attack the wall on the left side of the passage to reveal the hidden route leading to the tree. **3. Kythira Island** From the Coast Campsite, travel approximately three map squares east. Strike the nearby cog to lower a vine, then climb it and double-jump toward the platform containing the tree. **4. The Sacred Foundry** After gaining access to Daedalus' workshop, open the door on the right and continue into the adjoining area. The Sacred Olive Tree is located along this route. #### Demeter — 4 Sacred Olive Trees Demeter's offerings increase the number of Gouri slots available through the Belt of Tyche. **1. Eurotas River** From the Valley Campsite, head right toward the tree. Use Phos to illuminate the translucent platforms surrounding the landmass, then climb up to reach it. **2. The Veiled Bog** From the Marsh Campsite, travel approximately three map squares north and three east. Use the Harvest Glaive's upgraded Square attack to strike the hanging object above the local Vermilion Globe. Climb the vine that appears and jump toward the exit on the right to reach the tree. **3. Passage of Monuments** Travel to the area beside the statue of Queen Sparta. From the statue's base, head right and use Victory Descent to break through the floor barrier at the far end of the adjoining area. Continue through the newly opened passage to the tree. **4. The Splintered Peak** Find the cave far to the left of the Shelter Campsite. Use the upgraded Solar Sling to strike the covered grate on the right side of the ceiling. Move the nearby pillar toward the opened gate on the left, then climb the sliding wall behind it to reach the tree. #### Completing the Trophy Once you've finished all 24 battles and collected their Olives, No Olive Branch will unlock. You can offer the Olives at their corresponding Temples to receive permanent upgrades and work toward Gift of the Gods.
Tip
Activate Vermilion Globes whenever you enter a new region so the Sacred Olive Tree locations appear on your map. Completing these encounters as you progress is worthwhile because the Olives provide permanent improvements to Kratos' combat abilities. The Demeter offerings are particularly valuable for unlocking additional Gouri slots, while Dionysus and Artemis can improve survivability during tougher encounters. If a Sacred Olive Tree battle is giving you trouble, leave it for later and return with stronger equipment. There's no difficulty restriction or permanently missable requirement forcing you to finish every challenge immediately.
Warning
Some Sacred Olive Trees require abilities or upgrades obtained much later in the story, including Level 3 Victory Sandals, Phos, the Lunar Blade, and upgraded magic attacks. Not every tree can be reached during your first visit to its region. Remember that the trophy requires completing the battles, not merely discovering the trees or marking them on your map.
Video Guide: https://www.youtube.com/watch?v=xG1WC65Himc&list=PLicOuDSiPvy3JjwzmeeC1s8DLlHpvGmBV&index=8&pp=iAQB

Trophy: Quick Study
Purchase a Skill
Type: Bronze
Category: Misc
How to Unlock
Purchase any Skill for Kratos at a Campsite. Skills unlock new combat techniques and improve existing abilities, making them an important part of surviving Laconia's increasingly dangerous enemies. Each Skill costs red orbs, which you'll earn by defeating enemies, opening chests, discovering collectibles, and completing activities. Visit any Campsite, open the Skills menu, and purchase an available upgrade. Many early Skills cost just 500 red orbs, so you should have enough to buy your first one during your initial exploration of the Laconian Woods. The trophy unlocks immediately after purchasing your first Skill.
Tip
**Vanguard II** is an excellent first purchase because it strengthens your basic spear combo, which you'll use constantly throughout the adventure. Afterward, consider defensive upgrades such as Frontal Assault and Laconian Revenge. Being able to counterattack after dodging or parrying makes early encounters much more manageable. You'll eventually need every Skill for Deep Learning, so your first purchase is just the beginning of Kratos' very expensive education.
Trophy: Rightful Owners
Return the Treasure Map
Type: Bronze
Category: Misc
How to Unlock
Recover the Map of Chrysus from the Katergaris in The Splintered Peak and return it to the Kerkopes at their Treehouse in the Laconian Woods. During the main story, the Kerkopes will help Kratos and Deimos gain access to the upper section of Mount Taygetos. They'll also mention a treasure map stolen by the Katergaris, a pair of powerful Faun Hunters found farther ahead in The Splintered Peak. To recover the map, travel through The Splintered Peak and make your way toward the **rightmost section of the region**. Look for a ladder near an armored Remains and a red orb chest. Climb the ladder to reach the area where the two Katergaris are waiting. Defeat both enemies to recover their stolen treasure. They can be dangerous if you're underprepared, so use your strongest upgraded spear attacks and magic abilities. Lighting the braziers around the arena will also make movement easier during the encounter. The Solar Sling's Solar Storm attack is particularly useful for dealing damage while keeping some distance. Try to avoid getting surrounded, and focus on bringing down one enemy before committing to the other. After defeating the Katergaris, collect the **Map of Chrysus** from their treasure chest during the following scene. Return to the Kerkopes' Treehouse in the Laconian Woods and hand over the map using the same interaction used to return Artifacts. Completing the exchange finishes the associated sidequest and unlocks Rightful Owners.
Tip
Returning the map rewards you with **2,500 red orbs** and **Vigorous Honey**, a Gouri required for Like a Charm. If you're already exploring The Splintered Peak for collectibles and upgrades, take care of the Katergaris while you're there. It's a convenient way to earn another trophy and pick up a useful reward without making a separate trip later.
Warning
Defeating the Katergaris and collecting the Map of Chrysus isn't enough to unlock the trophy. You must return the map to the Kerkopes at their Treehouse to complete the sidequest.
Trophy: Self Sufficient
Enhance a Spear or Shield Part
Type: Bronze
Category: Misc
How to Unlock
Enhance any Spartan Dory spear Part or Spartan Aspis shield Part for the first time. You can enhance Parts at Campsites or by visiting suitable merchants, including the blacksmith in Sparta's armory and Circe. To perform an enhancement, you'll need an equipment Part, the required upgrade materials, and enough red orbs to cover the cost. One of your earliest opportunities involves the **Steel Edge**, a spear Part found inside an armory chest in Eurotas River, along the route toward Sparta. Once you've collected it and obtained three Rusty Scraps, you can enhance it at an available upgrade location. Open the equipment enhancement menu, select the Part, and confirm the upgrade. Self Sufficient will unlock immediately after your first successful enhancement.
Tip
The Steel Edge is a convenient early choice because it improves critical hits and can be obtained relatively early in the adventure. You'll eventually need to collect every spear and shield Part for Panoply Man, so getting comfortable with enhancements now will make the rest of your journey easier. Even young Kratos knows that a sharper spear beats stubborn determination alone.
Video Guide: https://www.youtube.com/watch?v=ixbOtoMcbQk&list=PLicOuDSiPvy3JjwzmeeC1s8DLlHpvGmBV&index=12&pp=iAQB
Trophy: Stonewalled
Open the Gorgon Door
Type: Bronze
Category: Misc
How to Unlock
Find and activate all four Hatchery Locks in Stone Hollows to open the Gorgon Door. During your first visit to Stone Hollows, you'll encounter a group of petrified Spartan soldiers in the background, beginning the Unseen Horrors sidequest. However, you won't be able to explore the area containing the Gorgon Door until you acquire the Harvest Glaive later in the story. Once you have the Harvest Glaive, return to the petrified soldiers and strike the cog hanging from the ceiling above them. This lowers a vine that you can climb to reach the upper-left platform and enter the western section of Stone Hollows. You'll need to locate four Hatchery Locks hidden throughout this area. Each one can be activated with a regular attack. #### Hatchery Lock Locations **Lock 1 — First Intersection** From the first intersection, drop through the platform and head right into a cavern filled with harmful miasma. Light the torches to clear the fumes and continue toward the right side of the room. The lock is positioned high on the left wall, opposite a ledge with a gated vine. **Lock 2 — Upper Passage** Return to the first intersection and take the lower-left passage. Follow the route around a Monolith and climb toward the upper walkway, where you'll encounter a Gorgon near a barrier. The second lock is high on the right wall at the end of this passage. **Lock 3 — Second Intersection** From the upper section of the first intersection, travel left until you reach another intersection. Drop into the lower cavern and clear the miasma by lighting the torches. Push the nearby pillar into the pit on the right, then look along the pit's left wall to find the third lock. **Lock 4 — Gorgon Chamber** From the second intersection, follow the upper walkway around toward the lower-left section. Drop into the chamber guarded by a Gorgon and clear the surrounding miasma. The final lock is hidden along the left wall inside the previously contaminated area. Once you've activated all four locks, Stonewalled will unlock and the Gorgon Door will open.
Tip
You can find several useful resources and collectibles while exploring this section of Stone Hollows, so it's worth checking the surrounding passages before leaving. Beyond the Gorgon Door is an optional boss, **Mavro Fidi**. Defeating her rewards you with a Tear of Stone and completes the Unseen Horrors sidequest, but the boss fight itself isn't required for Stonewalled or the Platinum. You can also obtain a Tear of Stone from certain petrified bodies near the Gorgon Door, which is useful for crafting The Arcane Seal Gouri needed for Like a Charm.
Warning
You must acquire the Harvest Glaive before you can access the western section containing the Hatchery Locks. The trophy unlocks upon activating the fourth lock, not after defeating Mavro Fidi. If the optional boss proves troublesome, there's no need to fight her just to earn this trophy.
Video Guide: https://www.youtube.com/watch?v=yIfTeua0xpA&list=PLicOuDSiPvy3JjwzmeeC1s8DLlHpvGmBV&index=5&pp=iAQB
Trophy: Bathed in Blood
Battle the Blood
Type: Bronze
Category: Story
How to Unlock
Defeat Alastor during the main story in Oenus Vineyard. As you explore Oenus Vineyard, you'll eventually reach a large central chamber containing a strange statue and four branching paths. Each path leads toward a fountain filled with corrupted wine. Destroy all four fountains and defeat the Bloody Remains they release to remove the barriers throughout the region. Once all four fountains have been destroyed, return to the central chamber. Replenish your resources using the Monuments along the upper walkway, then drop to the ground floor and approach the center with Deimos to begin the battle against Alastor. This is one of the toughest encounters in the early game, largely because Alastor fills the arena with projectiles while constantly changing position. #### Phase 1 — Control the Projectiles Alastor attacks with a long-reaching blood whip, sweeping volleys of projectiles, and floating orbs that generate additional homing attacks. Prioritize survival while learning how each attack moves across the arena. Keep rolling through incoming projectiles and avoid standing still for long periods. Whenever Alastor summons floating orbs, destroy them as quickly as possible to reduce the number of projectiles you need to dodge. One of your best opportunities to attack comes when Alastor moves near the lower-left corner. Use Sky Impaler attacks to deal damage while he's within reach, then retreat before the next barrage begins. If you need to restore health using the Olpe of Wellness, wait until Alastor is directing his projectile attacks away from your position. #### Phase 2 — The Arena Gets Dangerous At approximately 55% health, Alastor moves toward the top of the arena and begins firing symmetrical waves of projectiles. Watch the gaps between these volleys and position yourself inside the safe areas rather than trying to outrun every attack. After this sequence, Alastor introduces large masses of corrupted wine that emerge from the walls and ceiling. These attacks deal substantial damage, making them the biggest threat during the second half of the fight. Watch the arena boundaries carefully. When Alastor pauses near either corner, you can move in for a few spear combos, but be ready to roll away immediately if a large projectile begins forming nearby. At approximately 10% health, Alastor starts teleporting rapidly, making sustained attacks difficult. Don't chase him recklessly. Wait for a safe opening, land a few hits, and repeat until his health is depleted. Defeating Alastor unlocks Bathed in Blood and rewards you with the **Platinum Laurel**, which can later be traded to the Kerkopes for a unique spear Part needed for Panoply Man.
Tip
Destroying Alastor's floating projectiles whenever possible makes the arena much easier to manage. Reducing the number of simultaneous threats gives you more opportunities to focus on the boss. If you're struggling, prioritize defensive upgrades, practice rolling through his attacks, and avoid committing to long combos unless you're confident the arena is safe. After completing this encounter, consider returning to earlier regions to collect upgrades and finish available side activities. This is an excellent point to strengthen Kratos before the next major stretch of the adventure.
Warning
Alastor's large projectiles during the second phase can inflict heavy damage, even if you've handled the earlier attacks comfortably. Do not attempt to heal while projectiles are traveling toward you. Wait for a safe opening, and remember that surviving the attack sequence matters more than squeezing in one additional combo.
Trophy: Evil Within
Battle the Ancient
Type: Bronze
Category: Story
How to Unlock
Defeat the Fylaki during the main story in The Sunken Agora. While exploring The Sunken Agora, you'll need to restore power to a central elevator by transporting Spectral Vapours to two energy pillars positioned on opposite sides of the region. Once both pillars have been activated, return to the central elevator area. Save at a nearby Campsite before approaching the lift to trigger a cutscene and begin the battle against the Fylaki. Despite its intimidating appearance, this encounter is more about avoiding environmental attacks than dealing with complicated melee patterns. #### Phase 1 — Avoid the Falling Tiles The Fylaki moves horizontally across the arena while summoning streams of tiles that slam into the elevator platform. Watch the ground for glowing green indicators showing where the tiles will land. Move into the gaps between these marked areas or roll through the incoming attacks to avoid damage. Whenever the Fylaki finishes an attack, move toward it and use Sky Impaler or your strongest available spear techniques to deal damage. Its large hitbox makes it relatively easy to land repeated attacks, so you can make substantial progress whenever the arena is clear. Periodically, the boss becomes enraged and fires an energy beam toward the ground while moving rapidly across the screen. Roll through the beam and wait for the brief aggressive sequence to finish before resuming your attacks. #### Phase 2 — Deal With the Reinforcements At approximately 75% health, the Fylaki begins summoning Ghastly Remains, skeletal enemies that can interfere with your movement. You don't need to eliminate every skeleton immediately. Focus on the boss whenever it's within reach, and clear nearby enemies when the Fylaki moves toward the opposite end of the arena. At approximately 75% and 50% health, the elevator rises through the shaft for a short sequence. Use these moments to recover health with the Olpe of Wellness if needed. Continue avoiding the falling tiles, rolling through the energy beam, and attacking the Fylaki during its recovery windows. Once its health is depleted, Evil Within unlocks automatically. After the battle, you'll receive the **Desecrated Slab**, which can be traded to the Kerkopes for a spear Part required for Panoply Man. Completing the associated story quest also awards a substantial amount of red orbs.
Tip
Don't let the number of projectiles distract you. Most of the Fylaki's attacks are clearly telegraphed, and its large size makes it an easy target whenever you have room to attack. The boss's elevator transitions are useful opportunities to heal, so there's no need to rush through the encounter with low health. After defeating the Fylaki, you'll also unlock the events needed for the Cryptic sidequest. Rest at a Campsite to hear about the haunted graveyards appearing across Laconia.
Warning
The green markings on the elevator platform indicate where the falling tiles will strike. Avoid standing inside these areas when the attack lands. The Fylaki's enraged energy beam can also catch you while attacking, so stop your combo and dodge whenever it begins sweeping across the arena.
Trophy: Eye for an Eye
Battle the Cyclops
Type: Bronze
Category: Story
How to Unlock
Defeat the Cyclops during the opening battle of God of War: Sons of Sparta. The game begins with young Kratos facing a Cyclops before he has access to most of his combat abilities. This encounter serves as your introduction to spear attacks, blocking, parrying, and dodging. The Cyclops relies on straightforward punches and kicks, but its attacks can still punish you if you get too aggressive. Your safest approach is to watch its movements, avoid an incoming strike, and counterattack with your basic Vanguard combo (Square, Square, Square). You have three reliable defensive options. Hold L1 to block, press L1 just before an attack connects to parry, or use Circle with a directional input to roll away from danger. Parrying is particularly helpful because it briefly stuns the Cyclops and gives you an opening to attack. Once the Cyclops reaches approximately half health, Deimos joins the battle and restores Kratos' health. With both brothers fighting together, the remaining portion becomes considerably easier. Continue attacking until the Cyclops is defeated. Eye for an Eye unlocks automatically as the story progresses.
Tip
Use this encounter to practice parry timing and positioning rather than rushing to finish the fight. These fundamentals will become increasingly important against the more dangerous enemies waiting across Laconia. The Cyclops is your first real test, but don't worry. Kratos has a long history of making monsters regret getting in his way.
Video Guide: https://www.youtube.com/watch?v=R8MdbW_c9KI&list=PLicOuDSiPvy3JjwzmeeC1s8DLlHpvGmBV&index=1&pp=iAQB
Trophy: Flying Solo
Battle the Bird
Type: Bronze
Category: Story
How to Unlock
Defeat Ioke, the giant Stymphalian bird encountered during the main story in the Laconian Woods. While searching for Konstantinos' stolen chiseling tools, you'll eventually reach the Ruins Campsite beneath a Magic Monument. Save your progress here before heading through the left exit. Continue outside until you approach the partially ruined statue head. This triggers your encounter with Ioke, one of the first challenging bosses in the game. #### Phase 1 — Learn the Attack Pattern Ioke initially relies on three main attacks: - **Razor Spin:** The bird spins horizontally across the arena. Roll through the attack to avoid damage. - **Wind Screech:** Ioke fires a diagonal blast from an upper corner. Standing directly underneath the boss keeps you outside the attack's path. - **Ground Slam:** The bird glows purple before crashing into the ground. Move away from the impact, then jump over or roll through the resulting shockwaves. The ground slam is especially dangerous because the impact itself cannot be blocked, parried, or rolled through safely. Avoid the landing zone completely. Your best opportunity to deal damage comes immediately after a ground slam, when Ioke remains stationary for a short time. Move in, land your attacks, and retreat before the next sequence begins. #### Phase 2 — Dive Bombs At approximately 75% health, Ioke releases restorative orbs and introduces a diagonal dive bomb. Watch for the highlighted attack path that appears shortly before the bird dives, then roll away from it. Ioke also begins performing additional spins and ground slams, so wait until the entire sequence finishes before committing to another combo. #### Final Phase — Survive the Rush When Ioke reaches approximately 10% health, it begins chaining rapid dive bombs together, leaving very few opportunities to attack. Focus on staying alive rather than chasing the boss around the arena. Wait for its occasional ground slam, avoid the impact and shockwaves, then use the brief opening to finish the fight. Once Ioke is defeated, Flying Solo unlocks automatically.
Tip
Patience is more valuable than aggression in this encounter. Learn the attack pattern, dodge consistently, and save your strongest attacks for the openings following ground slams. After the battle, you'll receive the **Razor Plume**, which is needed to access the first set of Muse Chambers in The Sanctuary for Amusing. If this boss takes a few attempts, don't get discouraged. The first major bird fight is a noticeable difficulty spike, and mastering it will make later encounters much easier.
Warning
Ioke's purple-glowing ground slam is unblockable. You must avoid the actual impact area rather than attempting to parry or roll through the landing itself.
Trophy: Heavy Metal
Battle the Bulls
Type: Bronze
Category: Story
How to Unlock
Defeat the Metallon Calf and Metallon Bull during the main story in the Foundry of Invention. While searching for Daedalus, Kratos and Deimos must navigate the machinery, hazards, and enemies inside the Foundry of Invention. Eventually, you'll reach a passage near Daedalus' workshop, with a ladder leading toward a Spirit Monument. Descend the ladder to trigger a cutscene and begin a dangerous chase involving the enormous Metallon Bull. This encounter has two distinct parts: escaping the Bull and defeating both mechanical creatures. Part 1 — Escape the Metallon Bull The Bull charges after Kratos through a passage filled with lava and moving obstacles. Run left immediately, jumping between the platforms ahead while maintaining your momentum. Don't stop to fight or explore; touching the Bull or falling into the lava will kill you. Continue across the platforms until you reach a chain that allows you to jump toward the next walkway. Watch for the horizontal lava hazard, then continue left and climb the sliding walls to reach a zipline. Ride the zipline and roll through the door at the bottom to escape the chase and enter the next encounter. Part 2 — Defeat the Metallon Calf The smaller Metallon Calf begins the fight by repeatedly charging across the arena. Roll through its charge and attack from behind, but watch for a backward kick when you approach. At approximately 80% health, the Calf becomes temporarily dazed. Use this opportunity to unleash your strongest Spartan Dory techniques and deal as much damage as possible. As the fight continues, the Calf gains additional attacks, including volleys of projectiles and jumping slams that scatter debris across the arena. Its jumping attacks can also leave burning oil on the ground, so keep moving and try to position yourself behind the creature whenever it leaps toward a wall. Part 3 — Finish Both Bulls At approximately 50% health, the original Metallon Bull breaks through the arena wall and joins the battle. The larger Bull attacks from the background with fireballs while the Calf continues fighting directly in front of you. Focus on finishing the Calf first. Continue dodging its charges and attacking from behind until it falls. Defeating the Calf releases restorative orbs, giving you a chance to recover before dealing with the larger Bull. Move close to the Metallon Bull and attack it with your spear. Staying near its body can help you avoid the arc of many of its fireball attacks. Keep attacking and repositioning as necessary until the larger Bull is defeated. Heavy Metal unlocks once the encounter is complete. After the battle, collect the Bronze Cog from the Metallon Calf. The Bull's Cog can be collected later when you circle back through the Foundry and revisit the chase passage.
Tip
During the chase, speed matters more than precision. Focus on your next platform and keep moving rather than trying to examine every obstacle. During the boss encounter, finishing the Calf first makes the fight much easier because you'll remove the enemy attacking you directly while also receiving restorative orbs. When you return through the Foundry later, remember to collect the second Bronze Cog from the Bull's remains. The surrounding area also contains a Vermilion Globe needed for Search High and Low
Warning
The opening chase contains instant-death hazards. Don't stop moving while the Metallon Bull is pursuing you. During the boss encounter, the Calf's jumping attacks can leave burning oil behind. Avoid standing in these areas while preparing your next attack.
Trophy: Horsing Around
Battle the Tyrant
Type: Bronze
Category: Story
How to Unlock
Defeat the Ipotane during the main story in The Barren Steppe. During your second required visit to The Barren Steppe, Kratos and Deimos will eventually reach a cult ritual near the highest section of the main building. After a story sequence in which Kratos is imprisoned, you'll regain control and receive the **Lion Coat**, an important item needed later for The Lionheart. Once you've escaped, prepare your equipment and restore your resources before returning to the ritual area to face the Ipotane. This enormous creature attacks from behind the arena, so you'll need to target its hands and head rather than its body. #### Phase 1 — Attack the Hands The Ipotane begins with several dangerous attacks: - **Claw Swipes:** The creature sweeps its claws across the arena, leaving cursed flames along the ground. - **Curse Projectiles:** It fires a spread of projectiles from its eye. - **Hand Slams:** The Ipotane smashes its hands into the arena with unblockable attacks. Focus on attacking whichever hand is currently closest to the ground. Roll away from claw swipes and hand slams, and use well-timed parries to defend against the incoming projectile streams. Be careful when standing on the raised platforms. The cursed flames left by the claw swipes can still reach you there. #### Phase 2 — Avoid the Flames and Lasers At approximately 75% health, the Ipotane collapses temporarily. Use this opening to restore health with the Olpe of Wellness if needed. You can also attack its head, although damaging the hands is generally more effective. When the creature recovers, it covers the ground in cursed flames. Move onto a raised platform to avoid the burning floor. The Ipotane also begins firing three consecutive laser beams across different sections of the arena. Watch the targeting pattern and stand between the affected areas. Don't attempt to block these attacks when you can avoid them entirely. #### Phase 3 — Survive the Curse Barrage At approximately 50% health, the Ipotane collapses again before introducing a more dangerous attack. It generates energy spheres in its hands that release ricocheting curse projectiles throughout the arena. These projectiles make movement increasingly difficult, so rely on your shield and parrying abilities to defend yourself while looking for opportunities to damage the hands. Keep attacking whenever an opening appears, but don't attempt to heal while you're surrounded by projectiles. Use your strongest available spear techniques to bring down the remaining health, and continue dodging or parrying until the Ipotane is defeated. Horsing Around unlocks automatically after the battle. You'll also receive the **Skull Fragment**, which can be traded to the Kerkopes for a shield Part required for Panoply Man.
Tip
The Ipotane's hands are your primary targets throughout the fight. Don't waste time trying to strike its body in the background. Use the brief collapse animations to recover health and prepare for the next phase. Defensive skills that improve parrying are particularly useful once the ricocheting projectiles begin filling the arena. After the battle, collect the Skull Fragment before continuing. You'll also be able to progress toward Vyros Gorge, bringing Kratos and Deimos closer to the end of their journey.
Warning
The Ipotane's hand slams are unblockable, and its claw swipes leave dangerous cursed flames across the arena. During the later phases, avoid drinking from the Olpe of Wellness while projectiles are bouncing around the battlefield. Wait until the boss collapses or another safe opening appears before healing.
Trophy: Pecking Order
Battle the Twin
Type: Bronze
Category: Story
How to Unlock
Defeat Ponea, the second Stymphalian bird boss, during the main story on Mount Taygetos. As Kratos and Deimos travel through Mount Taygetos, you'll encounter the griffin Adrasteia and continue across the region's cliffs and plateaus. Eventually, you'll climb a sliding wall on the right side of an outdoor canyon and reunite with Deimos. After the following cutscene, head right into the Stymphalian nest to begin your battle against Ponea. This encounter builds upon the earlier fight against Ioke, but Ponea introduces ice attacks that make positioning and timing considerably more important. #### Phase 1 — Watch the Ice Ponea uses several familiar attacks with dangerous new variations: - **Razor Spin:** Ponea pulls Kratos toward her before spinning across the arena. Move toward her and roll through the attack to finish behind her, where you can safely counterattack. - **Ice Beams:** From an upper corner, Ponea fires three icy beams in different directions. Stand directly underneath her to avoid them. - **Ground Slam:** Ponea crashes into the arena and releases an icy explosion. Avoid the initial impact, land one or two attacks if there's an opening, and retreat before the explosion catches you. The ground slam is one of your better opportunities to deal damage, but don't overstay your welcome. Getting caught in the icy explosion can leave Kratos slowed and vulnerable. #### Phase 2 — Survive the Ice Storms At approximately 75% and 25% health, Ponea flies offscreen and begins raining icy projectiles diagonally across the arena. These projectiles deal significant damage and can be difficult to dodge consistently. Instead of attempting to roll through every impact, use your shield to parry incoming attacks whenever possible. Once the storm finishes, return to the usual pattern of avoiding Ponea's attacks and counterattacking during safe openings. #### Final Phase — Keep Moving At approximately 10% health, Ponea begins chaining rapid dive bombs together, attacking vertically and horizontally before finishing with a ground slam. The icy mist makes movement more difficult, so focus on avoiding the dive bombs rather than forcing an attack. Wait until Ponea finishes her sequence, then use the opening after the ground slam to deliver your final blows. Defeating Ponea unlocks Pecking Order. After the battle, collect the **Frost Plume**, which is needed to access the second group of Muse Chambers in The Sanctuary for Amusing.
Tip
Ponea's ice storms are often more dangerous than her direct attacks. Practice parrying the falling projectiles rather than relying entirely on dodging, especially when their patterns become difficult to predict. If you haven't upgraded your defensive skills or equipment recently, consider doing so before this encounter. Extra survivability can make a noticeable difference. You've already survived one angry mythological bird. Unfortunately, this one apparently brought the weather.
Warning
Ponea's ground slam produces an icy explosion after the initial impact. Don't remain beside her for too long after attacking, or you risk taking damage and being slowed. The final dive-bomb sequence leaves very little room for aggressive play. Prioritize surviving until the next clear attack opening.
Trophy: Sea Sickness
Battle the Serpent
Type: Bronze
Category: Story
How to Unlock
Defeat the Skolopendra during the main story in the Port of Messenia. During your second visit to the Passage of Monuments, Kratos and Deimos learn that a griffin has appeared in the Port of Messenia. Return to the Port and use your upgraded Victory Sandals to break through the previously inaccessible barrier in the central section. Continue toward the tower at the far-left end of the region, where you'll find Adrasteia. After the following cutscene, return to the base of the tower and speak with Deimos to begin the battle against the enormous Skolopendra. This unusual encounter takes place across several connected arenas as the fight progresses upward through the tower. #### Phase 1 — Fight at the Tower's Base The Skolopendra initially attacks by slamming into the arena, spitting debris, and performing a powerful rushing attack from the right side. Stay mobile and avoid its slams while looking for opportunities to attack its body. One of your safest damage windows occurs when the Skolopendra raises itself and begins spitting debris. Move close enough to strike it with your spear while staying beneath the path of most of the falling projectiles. When it prepares its unblockable rushing attack, be ready to time a double jump to avoid the impact. Continue attacking until the fight transitions to the next platform. #### Phase 2 — Climb the Tower After losing approximately 10% health, the Skolopendra forces the battle into a higher arena containing a Spirit Monument. Here, it begins striking the arena to create traveling shockwaves while debris falls from above. Roll through the shockwaves and watch for falling objects before moving in to attack. As more health is depleted, the battle shifts upward again into another arena containing a Magic Monument. Take advantage of this resource by using ranged magic attacks such as Solar Storm or Hearth Rain to damage the Skolopendra while keeping some distance. Continue attacking and surviving the environmental hazards until its health reaches approximately 50%. #### Final Phase — Use the Mirror of Archimedes At half health, the fight moves to the top of the tower, where you'll discover the Mirror of Archimedes. The Skolopendra continues attacking while Kratos and Deimos work to activate the mechanism. Follow Deimos toward the support structure beneath the mirror. Double-jump onto the base and repeatedly strike the support until the mirror lowers into position. Once the mechanism is ready, move to the lever at its base and activate it. The Mirror of Archimedes fires a concentrated beam that destroys the Skolopendra, completing the encounter and unlocking Sea Sickness. Afterward, collect the **Gory Dregs** from the middle section of the creature's remains. This item can be traded to the Kerkopes for another Part required for Panoply Man.
Tip
The Skolopendra remains vulnerable to damage throughout the encounter, even when dialogue suggests otherwise. Keep attacking whenever a safe opportunity presents itself rather than waiting for a special vulnerability phase. During the upper portions of the fight, use the available Magic Monument to replenish your resources and speed things up with ranged attacks. After the battle, remember to collect the Gory Dregs before leaving. The Kerkopes will gladly turn another monster's unfortunate remains into something useful.
Warning
The Skolopendra's rushing attack cannot be blocked normally and requires careful timing to avoid. During the final phase, your priority is activating the Mirror of Archimedes. Don't waste time trying to finish the creature with ordinary attacks once the mirror mechanism becomes available. Although the Gory Dregs are needed for Panoply Man, they are not required to unlock Sea Sickness itself.
Trophy: The Lionheart
Return the Lion Coat
Type: Bronze
Category: Story
How to Unlock
Return the Lion Coat to Amara in Sparta after completing the main story. You'll automatically receive the Lion Coat during the story when Kratos and Deimos are captured by the cult in The Barren Steppe. This happens during the events leading toward the Horsing Around trophy, so there's no need to search for the coat separately. However, you cannot return it immediately. Continue through the main campaign, defeat the final boss, and complete the concluding story sequence. Once the credits have finished, return to **Sparta** and find **Amara near the bottom of the slope leading into the upper section of the city**, on the left side. Approach her to trigger a cutscene in which Kratos and Deimos return the Lion Coat. The Lionheart will unlock once the scene concludes.
Tip
This is one of the easiest trophies to finish during post-game cleanup. You already receive the required item through the story, and returning it only involves a short visit to Sparta. Completing this also awards the **Shepherd's Wishbone**, a Gouri required for Like a Charm.
Warning
The Lion Coat cannot be returned until after the main story concludes. This trophy is not awarded automatically through story progression, so remember to visit Amara once post-game exploration becomes available.
Trophy: Thunderstruck
Battle the Beast
Type: Gold
Category: Story
How to Unlock
Defeat Koteros, the final story boss, in Vyros Gorge. Near the end of the region, reach the Trail Campsite and save your progress before continuing left toward the bridge where the encounter begins. Koteros uses powerful charges, jumping slams, electric projectiles, and attacks that leave dangerous electrified areas across the arena. Most of these attacks are best avoided by rolling rather than blocking. Your safest strategy is to dodge through Koteros' attacks and strike from behind while the creature finishes its animations. Use your strongest Spartan Dory techniques whenever you have a clear opening. At approximately 50% health, Koteros becomes stunned and releases restorative orbs. After recovering, it gains an additional electric projectile attack. Stay relatively close to the boss to avoid the projectile's arc while continuing to attack. At approximately 10% health, Koteros retreats into the background and begins charging the arena with lightning. Keep moving to avoid the strikes and homing projectiles, then finish its remaining health with melee attacks or ranged magic. Defeating Koteros unlocks Thunderstruck and begins the final story sequence.
Tip
Save at the Trail Campsite and enhance your equipment before entering the battle. Rolling behind Koteros is particularly effective because the creature doesn't immediately turn around during many attacks. Don't panic during the final lightning phase. The boss has very little health remaining, so a few well-timed attacks can finish the fight.
Warning
Koteros' charges are unblockable, and the electrified areas remain dangerous after they're created. Keep track of your positioning rather than focusing entirely on attacking.
Trophy: Wing and a Prayer
Battle the Triplet
Type: Bronze
Category: Story
How to Unlock
Defeat Apate, the third Stymphalian bird boss, during the main story in Passage of Monuments. After Adrasteia carries Kratos and Deimos into the upper Passage of Monuments, you'll need to investigate evidence connected to Vasilis. Follow the story objectives until you reach an archer's perch in the lower-left portion of the area, near the path above the statue of Queen Sparta. Once you've examined the evidence and spoken with Deimos, take the right exit along the same route to encounter Apate. Like Ioke and Ponea before her, Apate relies on aerial attacks and ground slams, but this time you'll also have to contend with poison. #### Phase 1 — Watch for Poison Apate begins with several familiar Stymphalian attacks, including a spinning charge, an aerial projectile attack, and a ground slam. Her spinning charge sends her bouncing across the arena, making it difficult to punish safely. Focus on avoiding the attack instead of chasing her. The ground slam is your most reliable opportunity to deal damage, but Apate leaves a poisonous cloud behind when she lands. Move in for a brief spear combo, then retreat before the poison becomes a problem. She can also summon a Hemlock during this attack. Eliminate it quickly so you don't have another source of poison interfering with the fight. #### Phase 2 — Survive the Projectile Barrage At approximately 25% health, Apate flies above the arena and begins dropping poisonous projectiles in a sweeping pattern. Keep moving and roll through the attacks as they travel across the screen. Their movement follows a more predictable direction than Ponea's ice storm, so maintaining a consistent rhythm will help you avoid unnecessary damage. Afterward, Apate adds faster projectile attacks from the upper corners of the arena. Don't force your attacks while she's airborne. Wait for another ground slam, avoid the poisonous impact area, and use the brief opening to continue reducing her health. Repeat this pattern until Apate is defeated and Wing and a Prayer unlocks. After the battle, collect the **Deadly Plume**, which is needed to open the final set of Muse Chambers in The Sanctuary for Amusing.
Tip
The safest strategy is to let Apate come to you. Dodge her aerial attacks, wait for a ground slam, and punish the recovery animation before backing away. If you've already upgraded your spear and defensive abilities, this encounter should feel more manageable than the earlier Stymphalian fights. Three giant birds, three increasingly questionable attitudes toward personal space. At least Kratos is getting plenty of practice.
Warning
Apate's ground slam leaves poisonous clouds that can damage you if you remain nearby. Don't commit to lengthy combos after she lands. The Hemlock summoned during the fight can create additional problems if ignored, so eliminate it whenever you have a safe opportunity.
Trophy: With It or On It
Carry the Boy Home
Type: Silver
Category: Story
How to Unlock
Complete the final story sequence after defeating Koteros in Vyros Gorge. This trophy is earned automatically during the conclusion of God of War: Sons of Sparta and cannot be missed through normal story progression. After defeating Koteros during Thunderstruck, the story continues into a final sequence involving Kratos, Deimos, and their missing fellow Spartan, Vasilis. #### Final Story Sequence Following the battle, Kratos and Deimos approach Vasilis and prepare to carry him home. When you regain control, hold the left analog stick to the left to begin the journey back toward Sparta. Continue holding the direction as the brothers travel through Laconia. Along the way, several characters encountered during the adventure join the procession. This sequence takes roughly a minute and requires no additional combat or special actions. When the brothers finally reach Sparta, a concluding cutscene plays as they return Vasilis to his parents. With It or On It unlocks once the final scene concludes.
Tip
There's nothing difficult to complete here. Simply follow the final movement prompt and allow the story to reach its conclusion. After the credits, you'll be able to continue exploring Laconia and finish any remaining trophies. You can also return to Sparta to complete The Lionheart by speaking with Amara and returning the Lion Coat.
Warning
This sequence contains major story spoilers, so players wishing to experience the ending naturally should avoid reading the detailed story events beforehand. You don't need to complete all collectibles or sidequests before finishing the story. Post-game exploration remains available, allowing you to continue working toward the Platinum.

Before Kratos became the Ghost of Sparta, he had to survive being a young Spartan with a spear, a shield, and a brother who probably wasn't making his life any easier. Start on whichever difficulty feels comfortable, since there are no difficulty-related trophies. Focus on learning your attack range, dodge timing, and parries. The opening hours can be surprisingly tough, especially against bosses like Ioke and Alastor, but things become much more manageable once your equipment and abilities improve.
Take time to explore each region, activate Vermilion Globes, and collect whatever you can reach naturally. These Globes reveal useful regional completion information, making them particularly valuable for the Platinum. Upgrade your Spartan Dory and Aspis when materials become available, and invest in useful early skills such as Vanguard II, Frontal Assault, and Laconian Revenge. Stronger attacks and reliable counters will make a bigger difference than trying to brute-force every encounter.
Nothing is permanently missable, and you can revisit the world after completing the story. That means you don't need to obsess over every inaccessible passage or collectible during your first visit. Still, tackling available side activities as you progress will earn valuable resources and upgrades. A little exploration now can save you from a rather unpleasant reunion with the same enemies later.
As the journey opens up, Kratos gains new Bust Powers, magical abilities, and traversal upgrades that let him reach previously inaccessible areas. Pay particular attention to Anemos, Otos, Phos, and upgrades to the Victory Sandals, as these are important for exploration and numerous trophy requirements. After defeating Alastor in Oenus Vineyard, consider revisiting earlier regions to collect newly accessible rewards, complete Sacred Olive Tree battles, and strengthen your equipment before pushing forward.
Keep working toward the major collection trophies as you explore. Gather Artifacts for the Kerkopes, break Monoliths for Shards, discover Lore, and collect spear and shield Parts whenever possible. Visit Sacred Monuments to obtain offerings for your magical upgrades, and complete available sidequests for useful Gouri. The optional Isle of Aeaea is particularly important because Circe provides access to additional Gouri, while its hidden Helko Bust Power is required for Bust Out.
After defeating the Fylaki in The Sunken Agora and obtaining Phos, another substantial round of exploration becomes worthwhile. You'll have more tools for reaching hidden areas, completing collections, and finishing challenges that were previously inaccessible. Don't worry about finishing everything immediately, though. Some requirements deliberately extend into the post-game, and Kratos has enough on his plate without turning every trip across Laconia into a full-time housekeeping job.
During the later stages, focus on improving your combat setup while working through the remaining story regions. Complete Sacred Olive Tree battles and visit the corresponding Temples to improve your stats and unlock additional Belt of Tyche slots. Continue gathering Sacred Monument offerings for the Blessings of Olympus, and keep purchasing skills whenever your red orb supply allows. The stronger your build becomes, the easier the remaining optional encounters will be.
Several larger challenges are also worth tackling around this point. Complete all nine Muse Chambers in The Sanctuary to unlock The Drifting Spire and its Stymphalian Trio encounter for The Summit. The nine Ephor Trials in The Gallery are another major objective, although you only need to complete each trial's primary requirement rather than every optional bonus condition. You can also hunt the escaped Cyclopes for All Eyes on Thee, but saving particularly difficult encounters until you're well upgraded is perfectly reasonable.
Before heading into the final battle in Vyros Gorge, visit a Campsite to save and improve your equipment. The final boss, Koteros, rewards careful dodging and attacking during openings rather than reckless aggression. Complete the concluding story sequence afterward to unlock With It or On It and reach the credits. Don't worry about unfinished collectibles or sidequests before this point: the post-game allows you to continue exploring Laconia.
With the story finished, you can freely revisit regions and complete anything left behind. Activate the remaining Vermilion Globes, collect all Lore, Shards, Artifacts, spear and shield Parts, and Gouri, and finish any outstanding sidequests. Use the regional checklists to identify missing objectives, but remember that not every collectible appears directly on the map. The Jewel of Ziteo Gouri is especially helpful for locating hidden items, so consider obtaining it before tackling your final collection sweep.
Two important sidequests require post-game attention. For Cryptic, clear the graveyard encounters that become available after defeating the Fylaki, then return to The Sunken Agora to open the Mosaic Door. For False Prophet, defeat the cultists occupying three locations around Laconia, assemble the Ritual Tablet, and return to The Barren Steppe to confront their leader. This also opens previously inaccessible areas containing collectibles needed for other trophies. Don't forget to return the Lion Coat to Amara in Sparta for The Lionheart.
Finally, finish purchasing every skill for Deep Learning, including the expensive Spartan Unity upgrades. The Blessing of Demeter, Emblem of Fortune, and Spartan Heart skills can help increase your red orb earnings and reduce the remaining grind. There are no online trophies, no difficulty restrictions, and no second playthrough required, so the Platinum comes down to completing your collections, sidequests, and remaining challenges. Once every other trophy is earned, Duty and Honor will unlock. Young Kratos might not be a god yet, but that Platinum is certainly worthy of one.
YouTube Playlist
God of War Sons of Sparta — Platinum Walkthrough