


Trophy Guide Preview
Overall Trophy Progress
0 / 32 Completed
0%
Trophy Types
Platinum
0 / 1Gold
0 / 5Silver
0 / 9Bronze
0 / 17Categories
Missable
0 / 14Collectible
0 / 6Misc
0 / 2Story
0 / 9
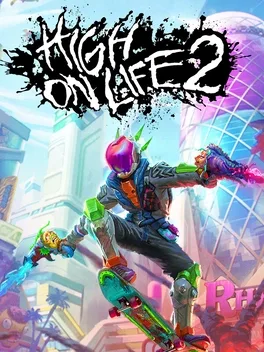
Bounty hunting made you a celebrity, but a threat to your sister pulls you back into a galactic mess. Battle a ruthless pharmaceutical empire with loudmouthed talking guns, grind through bizarre alien cities on your skateboard, and uncover another outrageous sci-fi conspiracy.
Overall Trophy Progress
0 / 32 Completed
0%
Platinum Path
EARLY GAME High On Life 2 throws you straight back into a galaxy full of talking guns, terrible decisions, and an unexpectedly useful skateboard. Your goal is to finish the story while collecting every missable trophy during its associated mission. There is no Chapter Select, and several story locations become inaccessible afterward. During the opening, visit all three exhibits at the Bounty Hunter Museum for Bountil...
Completion Video Playlist
1 video
High on Life 2 - 100% Platinum Guide - All Trophies & Collectibles - Full Walkthrough
Trophy: A Life Well Lived
You're done. You've lived a fulfilling life. Go ahead, close your eyes. It's time to pass on now.
Type: Platinum
How to Unlock
Earn all **31 other trophies in High On Life 2** to unlock A Life Well Lived and add another Platinum to your collection. You'll need to complete the main story, finish several optional activities, collect specific items, and complete challenges involving your weapons and skateboard. The Platinum can be earned in **one playthrough**, but careful planning is essential. Several trophies involve choices or interactions during story missions that cannot be replayed. Missing one of these opportunities can mean starting another playthrough. Fortunately, there are no online or difficulty-related trophies, so you can play on whichever difficulty suits you. Once you've earned all 31 other trophies, A Life Well Lived unlocks automatically. You've saved humanity again, survived another galactic conspiracy, and somehow kept your sanity while surrounded by talking weapons. That's a pretty respectable career.
Trophy: #1 Scientist
You made the ultimate sacrifice for science. Good work.
Type: Gold
Category: Missable
How to Unlock
Drink **all four experimental potions** offered by a scientist during the Professor Berkel bounty to unlock this trophy. The final potion kills your character, but this is intentional and immediately awards the trophy. You'll encounter this opportunity while exploring the research facility on the beach in **Pinkline Harbor**, before entering Gessie. #### Find the Scientist During the Professor Berkel bounty, you'll infiltrate the scientific research operation while disguised as **Branson Cooper**. Follow the story objectives until you meet the lead scientist, who explains the experiments taking place around Gessie. You'll need to assist several researchers to restore enough power to continue the mission. After speaking with the lead scientist, head into the **building on the right**. Continue downstairs and enter the room on your right. Inside, you'll find a scientist standing beside a table covered with experimental vials. Speak with the scientist to begin his experiment. He'll ask you to test one of the liquids. #### Drink All Four Potions The story only requires you to drink the first potion, but stopping there won't unlock the trophy. Follow these steps: 1. Speak with the scientist and agree to drink the first experimental potion. 2. After the effects wear off, **speak with him again** instead of leaving. 3. Agree to drink the second potion. 4. Continue the conversation and drink the third potion. 5. Speak with him once more and consume the fourth and final potion. Each potion produces a different strange effect. The final drink is fatal, causing your character to collapse. Don't worry about dying. This is a scripted consequence of the experiment, and **#1 Scientist** unlocks when you've consumed all four potions. You'll respawn afterward and can continue the Professor Berkel bounty normally. #### Continue the Bounty Once the trophy unlocks, return to the research objectives and finish assisting the other scientists. Before entering Gessie, remember to collect the **Dr. Gurgula transmission** hidden in the research area. That recording is another missable requirement during this bounty.
Tip
Complete the potion experiment as soon as you reach the scientist. Once you finish the research objectives and expose your disguise, you may lose access to his dialogue. Drinking all four potions immediately ensures you won't accidentally advance the story before earning the trophy.
Warning
**This trophy is missable.** You must consume all four experimental potions while working undercover during the Professor Berkel bounty. Drinking only the first potion satisfies the story objective but doesn't earn the trophy. Finish the entire experiment before leaving the research facility.
Video Guide: https://www.youtube.com/watch?v=ZovtqXi9RAw&t=2696s&utm_source=chatgpt.com
Trophy: All Your Vase Are Belong to Us
Break all of Apples' vases. He just can't have nice things, court order.
Type: Bronze
Category: Missable
How to Unlock
Destroy **all of Apples' red vases** during the Finance Wiz James Stevenson bounty to unlock this trophy. You'll find them in the fantasy world of Prismeria, particularly inside the Misty Woods maze. You must finish destroying the vases before leaving the forest, because you cannot return to this area later. During the Finance Wiz bounty, you'll enter a strange retro-style fantasy world. Follow the story path until you encounter **Apples**, a small floating character who needs help escaping the woods. #### Break the Vases Before Meeting Apples As you enter Prismeria, look for a wooden bridge near the beginning of the forest. There's a red vase sitting on the bridge and three more just beyond it. Destroy all four before continuing. Some players report that these introductory vases aren't required, but breaking them is the safest approach and takes only a few seconds. Continue through the forest, defeat the enemies blocking your path, and rescue Apples. He'll agree to guide you through Misty Woods. #### Follow Apples Through the Maze Misty Woods contains several interconnected rooms with dark passages and unusual exits. Taking an incorrect route can return you to an earlier room, while progressing too far toward the river can prevent you from collecting any missed vases. **Search each room completely before following Apples to the next area.** Use this route to locate the remaining vases: 1. **First room:** After meeting Apples, search the left side of the area for several red vases. Check behind the large rock near Apples for another. Destroy everything before taking the passage straight ahead. 2. **Second room:** Look for more vases near the left wall and behind the rock formation. Break them all, then follow the passage leading left. 3. **Third room:** You'll reach an area containing a much larger collection of vases. Search both sides carefully, including the vases grouped around a large rock. One can be positioned slightly above the others, so look upward before leaving. 4. **Final room:** After clearing the large collection, continue toward the next forest chamber rather than advancing to the river. Look along the right side of this room for the final two red vases. Destroy the remaining vases, and **All Your Vase Are Belong to Us** should unlock before you leave Misty Woods. Apples may complain about your enthusiasm for smashing his belongings, but that doesn't affect the trophy. #### Before Leaving the Forest Make sure the trophy has unlocked before following the story path toward the river and the next settlement. If you've reached the river without earning the trophy, **pause immediately and try loading the last checkpoint before moving farther forward**. If the game saves after you've left the maze, you may be unable to return.
Tip
The red vases can blend into the environment, especially when they're clustered around rocks. Move around each room's edges and look behind large objects before using an exit. The room containing the biggest collection is particularly easy to rush through, so double-check it before continuing.
Warning
**This trophy is missable.** Once you leave Misty Woods and progress into the next area, you cannot return for missed vases. Confirm the trophy unlocks before reaching the river or triggering another story checkpoint.
Video Guide: https://www.youtube.com/watch?v=ZovtqXi9RAw&t=2300s&utm_source=chatgpt.com
Trophy: Ankhs For The Memories
Was any of this even real?
Type: Gold
Category: Missable
How to Unlock
Unlock the secret ending by completing all three escape rooms at **Twilly's No Escape** in southwestern Pinkline Harbor. You must finish the rooms and sign up for Twilly's newsletter before going to bed ahead of the final court mission. Missing either requirement can prevent you from earning the trophy. Enter the attraction, speak with Twilly, and agree to participate. In the first room, activate the alarm clock to wake the mummy, then collect its Ankh. In the second room, take the meat from the dumpster, cook it on the barbecue, and give it to the mummy inside the doghouse to receive another Ankh. For the final room, collect the chainsaw and red gas canister, use the chainsaw on the mummy, and place its body on the bed to obtain the third Ankh. After completing all three rooms, you'll return to Twilly for a final conversation. **Before leaving, interact with the tablet on the reception desk and sign up for the newsletter.** This is essential for unlocking the secret ending. Now finish the main story normally. After defeating Super Nipulon, you'll attend a celebration. When you're ready to leave, look for an Ankh on the floor near the exit and interact with it. This triggers the secret ending and unlocks **Ankhs For The Memories**.
Warning
**This trophy is missable.** Complete all three escape rooms and register for the newsletter before the final mission's point of no return. You cannot unlock the secret ending retroactively after finishing the story.
Video Guide: https://www.youtube.com/watch?v=ZovtqXi9RAw&t=1994s&utm_source=chatgpt.com
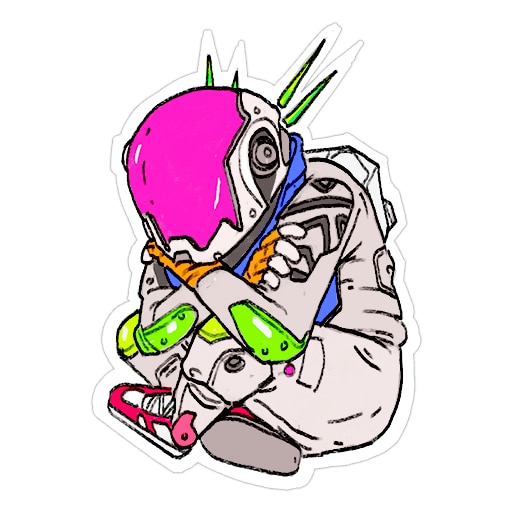
Trophy: Bountilogical Studies PhD
Visit every exhibit at the Bounty Hunter Museum.
Type: Bronze
Category: Missable
How to Unlock
Visit all **three main exhibits at the Bounty Hunter Museum** to unlock this trophy. You can earn it near the beginning of the game, immediately after the introductory sequence, when you're instructed to retrieve your talking weapons. The museum is located just outside your home during the opening story section. Although you'll pass through parts of it while collecting your equipment, one exhibit is optional and can easily be overlooked. #### Visit All Three Exhibits After leaving your house, enter the Bounty Hunter Museum and explore the three themed sections: 1. **Journey of a Hero:** This exhibit celebrates your rise from an inexperienced bounty hunter to the hero who defeated the G3 cartel. Enter the exhibit and walk far enough inside to trigger its narration. 2. **G3 Killer:** This exhibit focuses on your accomplishments against the G3. It's the easiest section to overlook because you don't need to enter it to recover your weapons. Make sure you visit it before continuing. 3. **Earth Welcomes Gatlians:** This section celebrates the relationship between humanity and the Gatlians following the events of the first game. Walk into the exhibit to register your visit. You don't need to press every red information button or listen to every recording. **Entering each themed section and triggering its introductory narration is enough** to register the visit. Once you've entered all three exhibits, **Bountilogical Studies PhD** unlocks. If it doesn't appear, return to each section and walk farther inside until the narration begins. Double-check G3 Killer in particular, since the story doesn't require you to explore it. The museum can also be revisited later through the **Zoo parking lot**, but completing the trophy during the opening is the safest approach.
Tip
Before leaving the museum with your recovered Gatlians, make one final circuit of all three exhibits. This takes very little time and removes an unnecessary Platinum risk before your bounty-hunting career has even properly started.
Warning
**Treat this trophy as missable.** Although the museum can be revisited later, some walkthroughs report inconsistent registration during return visits. Earn the trophy during your initial museum visit rather than relying on post-game cleanup.
Video Guide: https://www.youtube.com/watch?v=ZovtqXi9RAw&t=7s&utm_source=chatgpt.com
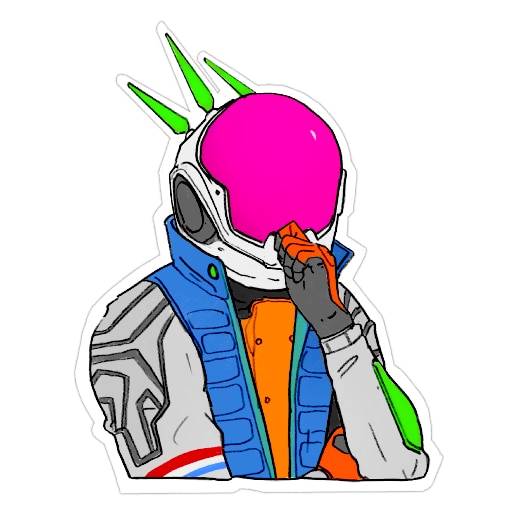
Trophy: Columbo in Space
You perfectly solved the murder mystery. You got every detail just right. You didn't cheat, right?
Type: Bronze
Category: Missable
How to Unlock
**Perfectly solve Larry Pinkstock's murder mystery** during his bounty mission to unlock this trophy. You must collect all 13 pieces of evidence, question the four suspects, correctly identify the murderer, and provide the right explanation for the crime. The investigation takes place aboard **Larry Pinkstock's luxury spaceship**, after you reach the VIP party and discover what appears to be Pinkstock's body. The game allows you to skip the investigation and continue the story, but doing so prevents you from earning this trophy. #### Step 1 — Find All 13 Pieces of Evidence Before accusing anyone, thoroughly search the party room. Several clues are hidden behind furniture or inside objects rather than sitting openly on display. Collect the following evidence: 1. **Music Class Photo:** On a small table beside the large cake, near the stage where Pinkstock's body was discovered. 2. **Inhaler:** Hidden inside the giant cake. Interact with the cake's openings until you find the inhaler near the side facing the windows. 3. **Pinkstock's Body:** Return to the body on the stage and inspect it to discover suspicious stains. 4. **Detention Slip:** Behind the central evidence table, near the area where you'll eventually present your accusation. 5. **Medical ID Card:** Hidden inside a red chair near O.B. Oberon. Walk into the chair to knock it over, then collect the card. 6. **Accident Photo:** Beneath another red chair near Richard Twelfth the Eighth. Knock the chair over to reveal the photograph. 7. **Military Order:** On a surface beside the bookcase and wardrobe near the middle of the room. 8. **Cheque:** On the bar counter behind O.B. Oberon. 9. **Military Service Record:** Behind the same bar, near the area where you found the cheque. 10. **Milk Carton:** On the floor near the exit door at the back of the party room. 11. **Newspaper Clipping:** On a nearby table close to the room's exit. 12. **Divorce Papers:** On a display shelf near Admiral Sessions. 13. **Shooting Competition Trophy:** On another display shelf behind Admiral Sessions, close to the divorce papers. Make sure you've investigated all 13 clues before continuing. The evidence helps unlock important questions during the suspect interviews, so collecting everything first makes the interrogation much easier. #### Step 2 — Question All Four Suspects Once you've collected the evidence, speak with every suspect and exhaust their available dialogue. Some questions only become available after discussing related evidence with another character. If new dialogue options appear, return to the relevant suspect and ask those questions too. **Admiral Sessions** Ask about his opinion of the prince, experience with firearms, military service record, Pinkstock's treatment of orphans, and the military order. Also use the option to smell his hand. **O.B. Oberon** Ask about Admiral Sessions, her perfume, firearms experience, music school, and the cheque you discovered. Question whether she was an orphan involved in Pinkstock's experiments and whether O.B. Oberon is her real name. Remember to smell her hand. **Richard Twelfth the Eighth** Ask about his firearms experience, inhaler, detention slip, and whether he previously killed someone with a car. Question why Oberon and the Admiral smell alike, and use the option to smell his hand. **Edeline Moss** Ask about her firearms experience, marriage to Pinkstock, and the matching perfume worn by Oberon and the Admiral. Continue questioning the suspects until you've exhausted every relevant dialogue option. #### Step 3 — Solve the Murder Mystery After collecting all the evidence and questioning the suspects, return to the **central evidence table**. Interact with the investigation controls to begin your accusation. Select the following answers in this exact order: 1. **Who killed Larry Pinkstock?** — O.B. Oberon 2. **Why would she want Larry dead?** — Because Pinkstock is responsible for her brother's death 3. **What evidence connects her to the crime?** — She's wearing a rosy perfume 4. **What other evidence supports the accusation?** — She won a shooting competition trophy 5. **What proves she fired the shot?** — Nobody else could have fired the shot Once you've presented the complete explanation, the game reveals the truth behind Pinkstock's apparent murder. If you've gathered all the necessary evidence, asked the relevant questions, and selected every answer correctly, **Columbo in Space** unlocks. You can then continue the Larry Pinkstock bounty normally.
Tip
Collect all the physical evidence before speaking with the suspects, then revisit anyone whose dialogue expands after another interview. This reduces unnecessary backtracking and makes it easier to identify which questions you've missed. Leave the central evidence table alone until you're ready to present the complete solution.
Warning
**Columbo in Space is missable.** Don't select the option to skip the investigation or submit an incomplete accusation. The game can save your progress when you advance the investigation, so complete the evidence collection and interviews before committing to the final solution.
Video Guide: https://www.youtube.com/watch?v=ZovtqXi9RAw&t=1222s&utm_source=chatgpt.com
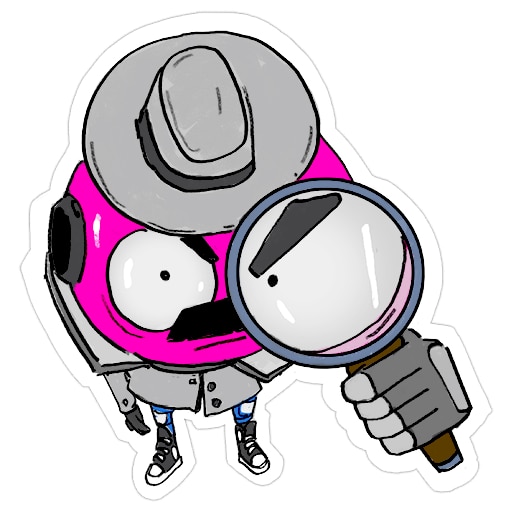
Trophy: Dr. Gurgula Will Return...
Found all of Dr. Gurgula's hidden transmissions... maybe he'll finally be important in the 3rd game?
Type: Gold
Category: Missable
How to Unlock
Find **all three hidden Dr. Gurgula transmissions** scattered throughout High On Life 2 to unlock this trophy. These secret recordings provide additional information about the mysterious scientist and his involvement in the game's events. Two recordings are located inside **story missions that cannot be replayed**, making this one of the most important collectible trophies to plan ahead for. The third recording is hidden in Circuit Arcadia and can be obtained during regular exploration. You can collect the transmissions in any order, but the safest route is to obtain the two story-specific recordings as soon as you reach their locations. #### Transmission 1 — Wyoming (Missable) **Mission: Rescue Your Dad From the Cult** During the Wyoming storyline, you'll travel to Birch Springs Ranch to rescue your father from a cult. Continue following the mission until you've saved him and returned to the main ranch building. After the encounter with the large mutant and the attacking cultists, you'll reach a room containing **Ted's clothes and several large windows**. Look toward the corner near the damaged window. You'll notice a small ventilation opening positioned high above the floor. To reach it, climb onto the **bookshelf beside the large windows**, then jump toward the elevated structure. Use your skateboard's wall-riding ability to cross the remaining gap and enter the ventilation shaft. Follow the narrow passage to discover the first **Dr. Gurgula transmission**. Collect the recording before returning to the main mission route. **Do not leave the ranch without this transmission.** Once the Wyoming story section ends, you cannot return to collect it. #### Transmission 2 — Professor Berkel Bounty (Missable) **Mission: Professor Berkel** The second recording is hidden in the **beach research facility in Pinkline Harbor**, before you enter Gessie. During the bounty, you'll investigate the scientific experiments taking place around the enormous creature. After dealing with the facility's security, explore the research tents near Gessie's head. Enter the **tent on the right side of the research area** and follow it toward the back. Look for a **red button** connected to an electrical cable. Press the button, then follow the cable toward the nearby research building. Enter the connected building and search inside to find the second **Dr. Gurgula transmission**. Make sure the recording has been collected before continuing the main objective and entering Gessie's mouth. Once you advance beyond the beach research facility, you cannot return to this section of the bounty. #### Transmission 3 — Circuit Arcadia (Not Missable) **Location: Northern Circuit Arcadia, near the Infestation Site** The final recording is hidden inside a building in northern Circuit Arcadia, near the comedy club. This transmission is available during open-world exploration once you've obtained the Gatlians required to solve its environmental puzzles. Approach the building and look for a **truck blocking the entrance**. Use **Travis and Jan** to lift the truck, then enter the building. Inside, you'll encounter several puzzles involving **Lugblobs**, movable machinery, and electrical connections. **First Room** Drop to the lower floor and locate the Lugblob inside a recessed area. Use Travis to move the Lugblob onto the pressure panel, opening the first gate. Proceed into the next room. **Second Room** Use the truck and Travis's abilities to move the next Lugblob onto the upper platform. Position it near the right edge of the platform so it can connect with the surrounding electrical nodes. Use **Gus** to open the panel near the bottom of the room, then use **Sheath** to connect the electrical circuit. Connect the panel to the Lugblob, then continue the connection through the upper corner node and toward the locked door. Once the circuit is complete, the door opens. **Final Room** Take the Lugblob into the final puzzle area. Use Travis and Jan to launch the Lugblob onto the truck in the middle of the room, then lower the truck slightly to position it correctly. Use Sheath to connect the electrical nodes in this order: 1. The panel on the right side of the room. 2. The lower node behind the truck. 3. The Lugblob positioned on the truck. 4. The node above the first gate. 5. The upper node behind the truck. 6. The locked door. Once all the connections are established, the final door opens. Enter the newly accessible room and collect the third **Dr. Gurgula transmission**. If you've already collected the recordings from Wyoming and Professor Berkel's research facility, **Dr. Gurgula Will Return...** unlocks immediately.
Tip
Prioritize the Wyoming and Professor Berkel transmissions during the story, then leave Circuit Arcadia for cleanup if necessary. The third recording is safely accessible later, but missing either story-specific recording will require another playthrough. There's no reason to make your Platinum run longer than it needs to be.
Warning
**Two of the three transmissions are permanently missable.** Collect the Wyoming recording before leaving Birch Springs Ranch and the Professor Berkel recording before entering Gessie. High On Life 2 has no Chapter Select, so completing either mission without its recording can prevent you from earning this trophy in your current playthrough.
Video Guide: https://www.youtube.com/watch?v=ZovtqXi9RAw&t=1222s&utm_source=chatgpt.com
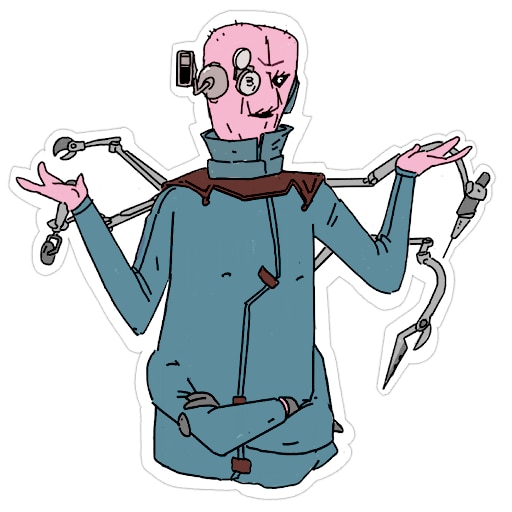
Trophy: Dunston Has Checked In
Navigate the laser maze with perfect precision to help a new friend.
Type: Bronze
Category: Missable
How to Unlock
Navigate the **laser maze aboard Larry Pinkstock's spaceship without hitting any of the framed banknotes** to unlock this trophy. The puzzle appears during the Larry Pinkstock bounty while you're searching the ship's museum for a fedora that Travis wants. You'll need to use a laser to open the display case containing the hat. However, firing directly through the maze can damage the framed money displays and prevent you from earning the trophy. The key is to guide the laser through the available gaps without triggering a mistake. #### Find the Laser Maze During the Larry Pinkstock bounty, follow your objectives until you reach the museum aboard his luxury spaceship. Explore the museum until Travis draws your attention to a **fedora displayed inside a glass case**. Nearby, you'll find a large laser device associated with one of the museum's more questionable exhibits. Between the laser and the fedora is a wall covered with framed banknotes. These frames form a maze that the laser must pass through. Approach the laser controls and interact with them to begin the puzzle. #### Navigate the Maze Without Hitting the Frames Your objective is to move the laser from its starting position to the fedora display on the opposite side. Carefully guide the beam through the open spaces between the framed banknotes. Use the following approach: 1. **Start slowly.** Move the laser through the first clear opening rather than trying to sweep directly across the wall. 2. **Follow the gaps between frames.** Adjust the beam vertically whenever necessary to avoid the banknotes blocking your path. 3. **Watch for moving frames.** As the laser approaches the right side of the maze, some picture frames begin shifting or falling. Stop moving when this happens and wait for a safe opening. 4. **Avoid the alien walking near the bottom.** The laser can behave unpredictably when it encounters him. Wait until he's out of your intended path before continuing. 5. **Reach the fedora display.** Once you've guided the laser through the maze, direct it toward the glass case containing Travis's hat. The laser will break the display case, allowing you to recover the fedora. If you've avoided damaging the framed banknotes, **Dunston Has Checked In** unlocks when you successfully complete the puzzle. #### What to Do if You Make a Mistake The game gives you a clear indication when you've hit something you shouldn't. If the laser strikes a framed banknote and the nearby alien reacts angrily, assume the attempt has failed. **Pause immediately and select Load Last Checkpoint.** This should return you to the museum entrance, allowing you to attempt the laser maze again. Don't continue through the mission hoping the trophy will unlock later. The laser-maze challenge is tied to this specific story sequence, and you won't be able to replay the bounty through Chapter Select. Repeat the puzzle slowly until you've completed it without triggering the failure reaction.
Tip
Pay particular attention to the right side of the maze, where the falling picture frames can catch you off guard. There's no time limit, so wait for the movement to stop before advancing the beam. Controlled movements are much safer than trying to finish quickly.
Warning
**Dunston Has Checked In is missable.** If you complete the laser puzzle after damaging the framed banknotes, you can lose the opportunity to earn this trophy during the current playthrough. Reload the last checkpoint immediately after a failed attempt, before progressing farther into the Larry Pinkstock bounty.
Video Guide: https://www.youtube.com/watch?v=ZovtqXi9RAw&t=157s&utm_source=chatgpt.com

Trophy: Fare Thee Well
You took those passengers to where they were ultimately heading, anyway.
Type: Bronze
Category: Missable
How to Unlock
Allow a passenger to die during the optional taxi side quest in **Circuit Arcadia**, then dispose of their remains in a portable toilet. You must complete this before finishing the taxi driver's entire delivery questline. Once the taxi activity becomes available, speak with the driver in Circuit Arcadia and agree to help transport passengers. He'll give you a **Taxiball**, which allows you to pick up aliens requesting rides around the city. Look for passengers waving their arms with flag icons above their heads. Pick up any passenger using the Taxiball. Normally, you'd take them to their destination before the countdown expires, but this time **let the timer reach zero**. The passenger will die inside the device, leaving you with their remains. Return toward the taxi driver's location and find a nearby **portable toilet**. Interact with it while carrying the deceased passenger to flush the remains and unlock **Fare Thee Well**. After earning the trophy, continue making successful deliveries to complete the taxi side quest. You'll need its reward for **B.A.L.L. In The Family** later.
Tip
The portable toilet near the original taxi driver is particularly convenient. Pick up a passenger, return to the plaza, and let the timer expire nearby. You'll be able to dispose of the remains without searching the city.
Warning
**This trophy is missable.** Complete the failed delivery and disposal before finishing all five successful deliveries and reporting back to the taxi driver, which can end the questline.
Video Guide: https://www.youtube.com/watch?v=ZovtqXi9RAw&t=1529s&utm_source=chatgpt.com
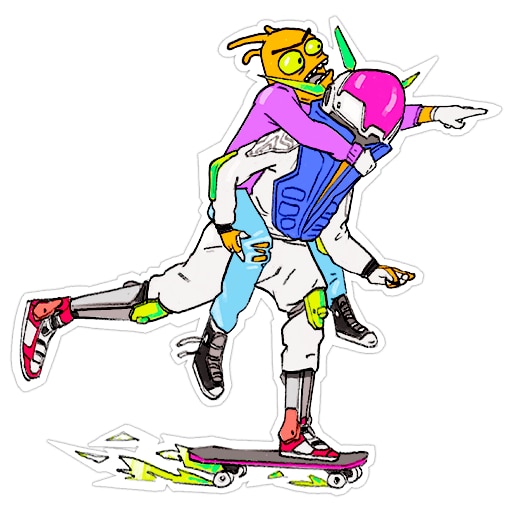
Trophy: Kobe!
You've joined the grand tradition of winning a court case due to basketball skills!
Type: Bronze
Category: Missable
How to Unlock
**Score three baskets using paper balls during the final courtroom sequence** to unlock this trophy. You'll have this opportunity during the **Legalization of Humans** story mission, when humanity's fate is being decided in the Intergalactic Supreme Court. The challenge is completely optional, and the game doesn't require you to play basketball to advance the story. However, the courtroom is a one-time story location, so make sure you've earned the trophy before the trial ends. #### Find the Basketball Hoop During the final mission, follow the story objectives until you reach the Supreme Court and take your place at the courtroom desk. You'll notice a large judge seated at the front of the courtroom, with basketball hoops positioned nearby. There will also be a stack of **yellow papers on the desk directly in front of you**. Approach the papers and interact with them to crumple a sheet into a ball. You'll now be able to aim and throw the paper toward the basketball hoop. #### Score Three Baskets The easiest method is to use the **blue flag hanging beneath the hoop** as an aiming reference. Follow these steps: 1. Interact with the papers on your desk to make a paper ball. 2. Face one of the basketball hoops near the judge. 3. Aim toward the **centre of the blue flag beneath the basket**. 4. Hold the throw button until the power meter is fully charged. 5. Release the button to throw the paper. 6. Repeat until you've scored three successful baskets. You can collect additional paper from the desk whenever you need another attempt. Missing a shot doesn't automatically fail the trophy, so keep adjusting your aim until you find a reliable angle. Once you've scored the required baskets, **Kobe!** should unlock. You don't need to complete a separate basketball game or achieve a particular score during the rest of the campaign. #### Before Advancing the Trial Keep an eye on the courtroom dialogue while you're throwing paper balls. The hearing progresses through several witnesses, and you don't want to accidentally reach its conclusion before earning the trophy. If your baskets aren't registering, adjust your aim slightly above the middle of the blue flag and continue using maximum throwing power. Make sure you've received the trophy notification before allowing the courtroom sequence to finish.
Tip
Use the blue flag as your reference rather than aiming directly at the hoop. A fully powered throw toward the flag's centre is the most consistently reported method. If you miss several times, make small adjustments to your aim instead of changing the throwing power.
Warning
**Kobe! is missable.** The courtroom sequence cannot be replayed after finishing the mission. Some players report inconsistent basket tracking, so continue shooting until the trophy actually unlocks rather than relying exclusively on the scoreboard.
Video Guide: https://www.youtube.com/watch?v=ZovtqXi9RAw&t=2896s&utm_source=chatgpt.com

Trophy: Nice Day With Jeppy
You're a good sibling. If Jeppy grows up to be a bad person, it's not on you.
Type: Bronze
Category: Missable
How to Unlock
Take Jeppy on a successful outing at the **Circuit Arcadia Zoo**. This side quest becomes available after progressing through the Wyoming storyline and the family events involving your mother. You must stay close to Jeppy and complete his activities without abandoning him. Fast travel to **Zoo → Gift Shop** and interact with the prompt outside to summon Jeppy. Follow him as he explores the area. His first stop is a vending machine, where you must dispense some food. Continue following him uphill until he wanders into an animal enclosure. **Use Gus's vacuum ability to pull Jeppy out safely**, then use it again whenever he becomes distracted and refuses to move. Eventually, Jeppy wants to play hide-and-seek. You'll need to find him in three locations: inside the small pond outside the Gift Shop, behind the shelves inside the Gift Shop, and on the roof of **Spaceforest Cafe**. Use Gus to pull him down from the roof once you've located him. After hide-and-seek, follow Jeppy to the photographer near the photo cutout board. Complete the photo interaction, speak with the photographer to collect your picture, and follow Jeppy through the final conversation. **Nice Day With Jeppy** unlocks when the outing is successfully completed.
Tip
Keep Gus equipped throughout the quest. His vacuum ability is needed several times, and switching weapons constantly only slows things down. Save unrelated exploration and collectibles until after Jeppy's outing is finished.
Warning
**This trophy is missable.** Straying too far from Jeppy or allowing the outing to fail can end the side quest permanently. If something goes wrong, immediately reload the last checkpoint before the failure is saved.
Video Guide: https://www.youtube.com/watch?v=naSLhcjdXG0&utm_source=chatgpt.com
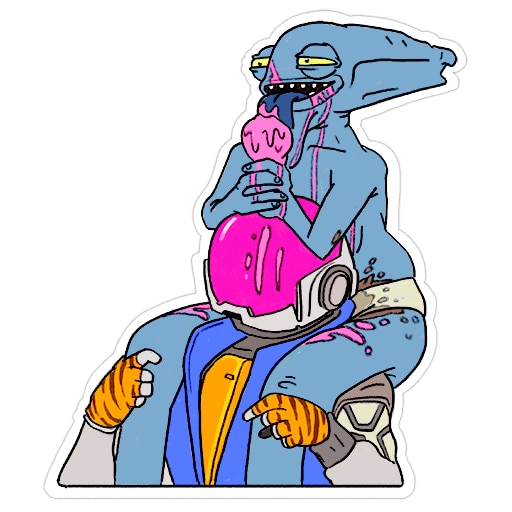
Trophy: Starstruck
You spared a movie star's life. He better thank you in his acceptance speech.
Type: Bronze
Category: Missable
How to Unlock
**Spare Bronkin Bucko and convince him to help you fight Rhea Pharma** instead of killing him during his bounty mission. This encounter takes place in Circuit Arcadia, where you'll be sent to assassinate the famous alien movie star. Although your objective tells you to eliminate Bronkin Bucko, killing him immediately will prevent you from earning this trophy. Instead, you'll need to speak with him, wait through his dialogue, and persuade him to join your cause. #### Find Bronkin Bucko Accept the Bronkin Bucko bounty and travel to Circuit Arcadia. Follow your objective marker through the city until you locate Bucko standing near a group of guards. When you approach, he'll begin talking and asking for directions. Your Gatlians will encourage you to shoot him, but **do not attack Bucko or the nearby guards**. Instead, allow him to continue speaking and move toward a nearby alley or quieter area away from the guards. Bucko will follow you as the conversation continues. #### Convince Him to Join You Stay near Bucko and listen to his dialogue. This interaction can take approximately **five minutes**, so don't assume the conversation is broken if the next option doesn't appear immediately. Eventually, you'll receive an opportunity to talk about your fight against Rhea Pharma. Choose these dialogue options: 1. **"We're trying to take down Rhea Pharma."** 2. **"Would you be willing to help us?"** These are the friendly dialogue choices associated with **Gus**. Follow his suggestions rather than Sweezy's more aggressive responses. Continue speaking with Bucko until he agrees to help your cause instead of fighting you. He'll eventually leave the area, and **Starstruck** unlocks once the encounter concludes. You don't need to defeat any enemies or complete an additional objective to earn the trophy. Successfully recruiting Bronkin Bucko is enough.
Tip
Don't rush this encounter just because your objective marker still tells you to kill Bucko. The conversation takes longer than most bounty interactions, and the other Gatlians repeatedly encourage violence. Stick with Gus's peaceful approach until Bucko agrees to help. Apparently, talking things through occasionally works in this universe.
Warning
**Starstruck is missable.** Killing Bronkin Bucko or selecting the aggressive dialogue options can permanently prevent you from earning the trophy during that playthrough. The encounter cannot be replayed through Chapter Select, so confirm the trophy unlocks before continuing.
Video Guide: https://www.youtube.com/watch?v=ZovtqXi9RAw&t=2538s&utm_source=chatgpt.com
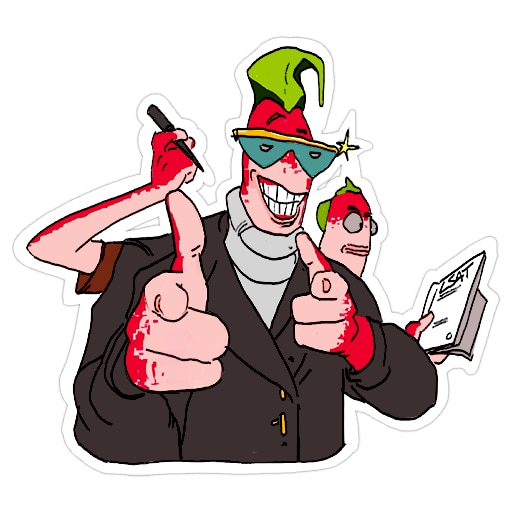
Trophy: The Good Ending
Wow, that was easy!
Type: Silver
Category: Missable
How to Unlock
**Shoot Lizzie instead of rescuing her** during the opening story mission, Find and Rescue Lizzie, to unlock this trophy. Doing so triggers a secret joke ending, complete with its own credits, before returning you to the same encounter so you can continue the adventure normally. This is one of the earliest missable trophies in High On Life 2, and you can earn it within the opening portion of the game. #### Reach Lizzie in the Aviary After the introduction, you'll discover that your sister Lizzie has a bounty on her head. Follow the story objectives through the **Circuit Arcadia Zoo** until you reach the Aviary, where Lizzie is hiding. Use Knifey's grappling ability and your Gatlians to navigate the surrounding paths and reach the central area containing Lizzie. When you approach her, several bounty hunters arrive and surround her. They recognize you as a famous bounty hunter and encourage you to kill Lizzie yourself. Normally, you'd attack the bounty hunters to protect your sister and continue the main story. **Don't attack them yet.** #### Trigger the Secret Ending Wait until the bounty hunters have finished surrounding Lizzie and she raises her hands. Equip your Gatlian and aim directly at **Lizzie**, then shoot her. Instead of continuing the story, the screen fades to black and a short secret-ending sequence begins. You'll see a humorous conclusion to your adventure, followed by a brief credits sequence. **The Good Ending** unlocks after shooting Lizzie and triggering this alternate ending. Once the sequence finishes, the game returns you to the checkpoint immediately before the decision. This time, attack the **bounty hunters instead of Lizzie** to rescue your sister and continue the campaign. Doing so also progresses the story toward the automatic trophy Broke the Code. You won't lose your story progress or permanently lock yourself into the joke ending.
Tip
Earn this trophy during your first encounter with Lizzie rather than planning to return later. The game automatically restores the encounter after the joke ending, so there's no downside to completing it immediately. You'll get the trophy and can continue the adventure without starting a new save.
Warning
**The Good Ending is missable.** You must shoot Lizzie before attacking any of the bounty hunters surrounding her. Once you've started fighting the hunters, the secret-ending opportunity is lost for that playthrough.
Video Guide: https://www.youtube.com/watch?v=ZovtqXi9RAw&t=71s&utm_source=chatgpt.com
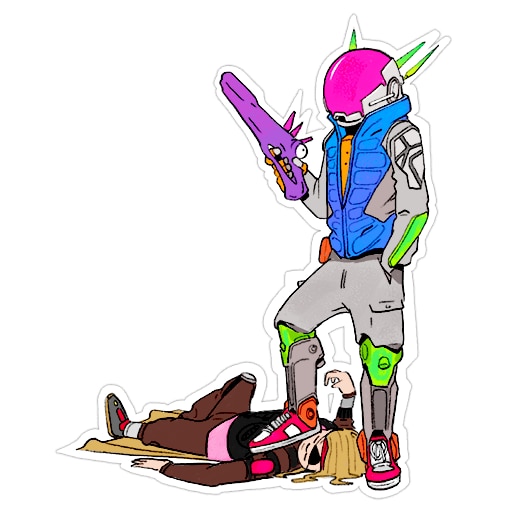
Trophy: Why do you know all that stuff?
Prove your Galactic Tax Code prowess.
Type: Bronze
Category: Missable
How to Unlock
Answer **all six Galactic Tax Code questions correctly** during the Finance Wiz James Stevenson bounty to unlock this trophy. The quiz takes place outside the Blue Wizard's castle, near the end of your journey through Prismeria. After escaping Misty Woods and progressing through the fantasy world, you'll approach the Blue Wizard's castle. A giant holographic version of the wizard appears above the entrance and challenges you to prove your knowledge of galactic taxation. You'll see a screen displaying questions with three possible answers. Each answer appears in a different position: top, middle, or bottom. **Shoot the correct answer for each question** using your equipped weapon. #### All Six Correct Answers The questions always appear in the same order. Select the following positions: 1. **Question 1 — Top** 2. **Question 2 — Bottom** 3. **Question 3 — Bottom** 4. **Question 4 — Middle** 5. **Question 5 — Top** 6. **Question 6 — Middle** Take your time aiming at the correct option. There's no need to rush, and the questions are deliberately ridiculous enough that guessing isn't worth the risk. Once you've answered the sixth question correctly, the Blue Wizard acknowledges your impressive knowledge of galactic tax law and **Why do you know all that stuff?** unlocks. #### Avoid Skipping the Quiz You can bypass the quiz by using Bowie's abilities on the mechanisms surrounding the castle entrance. However, **opening the gate without completing the quiz does not earn the trophy**. Ignore those mechanisms until you've answered all six questions and confirmed the trophy unlocks. If you accidentally shoot an incorrect answer, the game may allow you to repeat the question sequence. For the safest result, reload the last checkpoint before entering the castle and attempt the six answers again. After earning the trophy, continue inside and complete the Finance Wiz bounty normally.
Tip
Keep the six-answer sequence handy before approaching the castle: **Top, Bottom, Bottom, Middle, Top, Middle**. It takes less than a minute to complete the quiz when you already know the answers. There's no reason to gamble your Platinum progress on an alien accounting exam.
Warning
**This trophy is missable.** Don't bypass the Blue Wizard's questions or enter the castle before completing the quiz. Make sure the trophy unlocks before continuing toward the James Stevenson boss fight.
Video Guide: https://www.youtube.com/watch?v=ZovtqXi9RAw&t=2420s&utm_source=chatgpt.com
Trophy: Witness the Burning Bush
This must be what Moses saw when he, too, burned off Kreg Button's pants.
Type: Silver
Category: Missable
How to Unlock
**Set Kreg Button's pants on fire using a Flint Turtle** during the Larry Pinkstock bounty to unlock this trophy. You must perform this action during the boss fight aboard Pinkstock's luxury spaceship, before defeating Kreg. Near the end of the bounty, you'll fight Kreg on the ship's upper deck. He initially rides a large creature called PeePee Boy, using harpoons, gunfire, and other attacks to keep you moving around the arena. During the first phase, concentrate on damaging Kreg and his mount. Use your skateboard to avoid incoming attacks, and take advantage of openings when Kreg is knocked off PeePee Boy. #### Burn Kreg During the Second Phase After you've dealt enough damage, Kreg permanently dismounts and begins fighting you on foot. This happens during the final portion of his health bar. **Stop concentrating on damage once Kreg is on the ground.** You don't want to accidentally kill him before completing the trophy requirement. Look around the arena for a **Flint Turtle**, a small creature with flames coming from its shell. These creatures move around the deck during the encounter. Approach a Flint Turtle and pick it up using the interaction prompt. You can then use it as a makeshift flamethrower. Aim the turtle directly at Kreg and **spray him with flames until his pants catch fire**. Keep the flames on him until the trophy unlocks. You don't need to defeat Kreg with the Flint Turtle. The trophy only requires setting his pants on fire. Once Witness the Burning Bush unlocks, switch back to your regular weapons and finish the boss fight to earn **Smash That Kreg Button**.
Tip
Save your strongest attacks for after the trophy unlocks. During Kreg's ground phase, concentrate on avoiding his charges while locating a Flint Turtle. The turtle's flames are more important than dealing damage, so don't rush the final portion of the fight.
Warning
**This trophy is missable.** If you defeat Kreg before burning his pants, you cannot repeat the encounter through Chapter Select. Make sure Witness the Burning Bush unlocks before delivering the finishing blow.
Video Guide: https://www.youtube.com/watch?v=ZovtqXi9RAw&t=967s&utm_source=chatgpt.com

Trophy: B.A.L.L. In The Family
You brought those little freaks together again!
Type: Silver
Category: Collectible
How to Unlock
Find all **three B.A.L.L. GUYS** scattered across the game's open-world areas, then reunite them at your Quarters to unlock the B.A.L.L. Gun. None of these collectibles are missable, and you can obtain all three after completing the main story. **B.A.L.L. GUY #1 — Circuit Arcadia:** Find the taxi driver in Circuit Arcadia and agree to help with passenger deliveries. He'll give you the Taxiball, which lets you collect passengers marked with flag icons. Successfully deliver five passengers before their timers expire, then return to the driver. He'll ask you to take him to Rhea Plaza. Complete this final ride to receive the first B.A.L.L. GUY. **B.A.L.L. GUY #2 — Pinkline Harbor:** Travel to the southern part of Pinkline Harbor and locate the Liquid Nights nightclub. You'll need **Bowie** to shoot the sigil above the entrance and unlock the building. Defeat the enemies inside, speak with the bouncer, and enter the main club. Find DJ Globo and examine the small cage containing a B.A.L.L. GUY. Complete the rhythm minigame to win him. **B.A.L.L. GUY #3 — Circuit Arcadia Zoo:** First, obtain the Fishing Rod by speaking with the fisherman on the docks in Pinkline Harbor. Use Travis's ability to lift his sunken boat, and he'll reward you with the rod. Travel to the southern fishing spot at the Zoo and continue fishing until you catch the **small golden fish**, which is actually the final B.A.L.L. GUY. Once you've collected all three, return to your **Quarters** and locate their display tank. Interact with it to reunite the B.A.L.L. GUYS, then pick up the newly unlocked **B.A.L.L. Gun** to earn the trophy.
Tip
Complete **Fare Thee Well** before finishing the taxi driver's deliveries. That trophy requires deliberately failing a passenger delivery, while this one rewards you for completing the taxi quest. Handling both together prevents unnecessary backtracking.
Video Guide: https://www.youtube.com/watch?v=F-p3VzJFtGc&utm_source=chatgpt.com
Trophy: Pro Skater
Complete all teen skatepark activities.
Type: Gold
Category: Collectible
How to Unlock
Complete all **nine teen skatepark challenges** across Circuit Arcadia, Pinkline Harbor, and the Zoo. Each region contains one skatepark with three challenges, and every challenge requires collecting **10 floating Skate Letters before the timer expires**. You'll need to collect 90 letters in total, but you don't need an S rank or a high score. **Circuit Arcadia:** Fast travel to River Walk and look for a large spinning fan built into the wall. Climb the nearby stairs and use your skateboard to wall-ride onto the narrow structure beside the fan. Equip Sweezy and fire her Time Bubble to slow the blades, then pass through the opening to reach the hidden skatepark. **Pinkline Harbor:** Find Reptical's Skate Shop and enter the alley to its left. Follow the passage straight ahead until you reach the skatepark, where three teenage aliens are waiting beside the ramps. **Zoo:** Head to the parking lot near the Bounty Hunter Museum. The skatepark is visible in the open area, making it the easiest of the three locations to find. At each skatepark, speak with the teenagers and complete their three challenges. Follow the floating letters around the course, using your skateboard's jumps, wall-rides, and grinds to reach elevated or awkwardly positioned letters. **Every challenge must be completed within its time limit**, but your final rank doesn't matter. Once you've completed all three challenges at all three skateparks, **Pro Skater** unlocks.
Tip
Finish one skatepark completely before moving to the next. Each park contributes 30 letters, making it easy to track your progress. If you miss a difficult letter, restart the challenge rather than wasting time trying to recover from a bad route. None of these activities is missable.
Video Guide: https://www.youtube.com/watch?v=45kRlTzWgME&utm_source=chatgpt.com
Trophy: Tanks for the Memories
Fill up the aquarium in Quarters.
Type: Silver
Category: Collectible
How to Unlock
Fill the aquarium in your **Quarters** by catching all **37 unique fish and fishing collectibles** found throughout High On Life 2. There are eight fishing spots across Pinkline Harbor, Circuit Arcadia, and the Zoo. You can complete the entire collection after finishing the main story. First, obtain **Rod the Fishing Rod** from a fisherman on the docks in Pinkline Harbor. You'll need Travis, who becomes available through story progression. Speak with the fisherman and use Travis's ability to lift his sunken boat out of the water. He'll give you Rod as a reward, allowing you to fish throughout the galaxy. The eight fishing spots are divided between the three exploration hubs: - **Pinkline Harbor — 3 spots:** The docks beside the fisherman, a secluded shoreline reached along a wooden fence, and a pier beneath the large cruise ship. - **Circuit Arcadia — 2 spots:** The riverside fishing area and another location near Rhea Pharmaceuticals. - **Circuit Arcadia Zoo — 3 spots:** The central Zoo fishing area, the water near the Skate Bowl, and the large Zoo Aquarium. At each location, equip Rod and cast your line into the water. When a fish bites, follow the on-screen instructions to reel it in. **Prioritize fish with a golden sparkle**, as these indicate special catches you haven't collected yet. The game displays your collection progress while fishing. Continue casting at each spot until you've obtained its remaining unique catches, then move to another location. Some ordinary fish appear in multiple areas, so you don't need to collect every duplicate. Once you've obtained all the required unique catches across the eight spots, your aquarium collection will be complete and **Tanks for the Memories** unlocks automatically.
Tip
Start with the fishing spot beside the fisherman immediately after obtaining Rod. While exploring the Zoo, remember to catch the small golden fish at the southern fishing spot for **B.A.L.L. In The Family**. This lets you work toward both trophies during the same collectible sweep.
Video Guide: https://www.youtube.com/watch?v=9vPF1TSCsJo&utm_source=chatgpt.com
Trophy: Throne of Games
Find the games in the game.
Type: Silver
Category: Collectible
How to Unlock
Find all **six arcade game cartridges** hidden throughout High On Life 2. They can be collected in any order, and none are missable. Most are found in the three open-world hubs, although one is available inside your Quarters. You don't need to play the games to earn the trophy, only collect their cartridges. **Gourmet Warriors** is the easiest to obtain. Return to your Quarters and visit the arcade on the middle floor. Look for the Gourmet Warriors arcade cabinet and collect the cartridge sitting on it. Three cartridges are located in **Circuit Arcadia**. For **B.O.B.**, enter the movie theater and search the arcade cabinets along the left side of the main room. **Bonkey Trek** is sold at Spencer's in the shopping mall for **5,000 pesos**. Take the escalator upstairs, enter Spencer's beside Party City, and purchase the cartridge from the back of the store. The third Circuit Arcadia cartridge, **Super 3D Noah's Ark**, is inside the Chuck L. Nuts Comedy Club. You'll need Creature to access the building. Use his offspring to navigate the connected tubes, with Sweezy helping remove obstacles when necessary. Once inside, complete the stand-up comedy performance onstage. A backstage door will open afterward, revealing the cartridge. For **Bible Adventures**, visit the Liquid Nights nightclub in **Pinkline Harbor**. Use Bowie to open the entrance, defeat the enemies outside, and speak with the bouncer to enter. Head to the restrooms and investigate the strange hole inside the last stall on the right. Complete its conversation to open the adjoining stall, where you'll find the cartridge. The final game, **Radical Rex**, is hidden inside the **Human Exhibit at the Zoo**. Use a Lugblob and Sweezy's Time Bubble to open the partially blocked entrance. Inside, position the available Lugblobs near the electrical equipment and use Sheath to complete the circuit. This opens a container holding Radical Rex. Once you've collected all six cartridges, **Throne of Games** unlocks automatically.
Tip
Save at least **5,000 pesos** for Bonkey Trek before spending heavily on optional upgrades. It's the only cartridge you must purchase, and leaving it until the end can mean extra money farming. Collect the others during your normal exploration, then finish the collection after unlocking all your Gatlians.
Video Guide: https://www.youtube.com/watch?v=te_xN1gvoxE&utm_source=chatgpt.com
Find all six arcade game cartridges hidden throughout High On Life 2. They can be collected in any order, and none are missable. Most are found in the three open-world hubs, although one is available inside your Quarters. You don't need to play the games to earn the trophy, only collect their cartridges.
Gourmet Warriors is the easiest to obtain. Return to your Quarters and visit the arcade on the middle floor. Look for the Gourmet Warriors arcade cabinet and collect the cartridge sitting on it.
Three cartridges are located in Circuit Arcadia. For B.O.B., enter the movie theater and search the arcade cabinets along the left side of the main room. Bonkey Trek is sold at Spencer's in the shopping mall for 5,000 pesos. Take the escalator upstairs, enter Spencer's beside Party City, and purchase the cartridge from the back of the store.
The third Circuit Arcadia cartridge, Super 3D Noah's Ark, is inside the Chuck L. Nuts Comedy Club. You'll need Creature to access the building. Use his offspring to navigate the connected tubes, with Sweezy helping remove obstacles when necessary. Once inside, complete the stand-up comedy performance onstage. A backstage door will open afterward, revealing the cartridge.
For Bible Adventures, visit the Liquid Nights nightclub in Pinkline Harbor. Use Bowie to open the entrance, defeat the enemies outside, and speak with the bouncer to enter. Head to the restrooms and investigate the strange hole inside the last stall on the right. Complete its conversation to open the adjoining stall, where you'll find the cartridge.
The final game, Radical Rex, is hidden inside the Human Exhibit at the Zoo. Use a Lugblob and Sweezy's Time Bubble to open the partially blocked entrance. Inside, position the available Lugblobs near the electrical equipment and use Sheath to complete the circuit. This opens a container holding Radical Rex.
Once you've collected all six cartridges, Throne of Games unlocks automatically.
Save at least 5,000 pesos for Bonkey Trek before spending heavily on optional upgrades. It's the only cartridge you must purchase, and leaving it until the end can mean extra money farming. Collect the others during your normal exploration, then finish the collection after unlocking all your Gatlians.
Trophy: Unwanted
Slash all of your Wanted Posters.
Type: Silver
Category: Collectible
How to Unlock
Find and destroy all **21 Wanted Posters** scattered across Circuit Arcadia, Pinkline Harbor, and the Zoo. These posters display your character's bounty information and are usually guarded by hostile bounty hunters. None are missable, and you can collect them all after finishing the main story. When you discover a poster, **defeat the nearby enemies before approaching it**. Once the area is clear, use Knifey to slash the poster and claim the reward. Some posters become available only after progressing through the story, so post-game cleanup is the easiest approach. #### Wanted Poster Locations **Circuit Arcadia — 8 Posters:** Search the eastern streets, the area above the subway entrance, and the elevated walkways around the shopping district. Several posters require climbing stairs or using your skateboard to wall-ride between rooftops. Important locations include a rooftop beside two palm trees, an elevated platform near a Luglox, the alley near the movie theater, and the entrance to the Rhea Pharma building. **Pinkline Harbor — 5 Posters:** One poster is on a small island near the shoreline. Another requires climbing the stairs beside Twilly's escape rooms and crossing the rooftops to a circular platform. The remaining posters are on the eastern side of the Harbor, near the cruise-ticket checkpoint, and along the route leading toward the cruise ship. **Zoo — 8 Posters:** Check the northwestern corner, the bamboo-covered area near the parking lot, and the stairs below the Gift Shop. Additional posters are on the eastern path from the Aviary, inside the Aviary itself, and along the path south of it. Another is behind the Human Exhibit; use a Lugblob and Sweezy's Time Bubble to open the blocked entrance. The final poster is near the eastern fast-travel point. Use your map to check for remaining Wanted Poster markers as you explore. Some are hidden on elevated platforms, so look above street level when a marker appears nearby but you can't see its poster. After destroying your **21st Wanted Poster**, Unwanted unlocks.
Tip
Leave this trophy until after the story so every poster is available and you have all the movement abilities needed to reach them. If you've searched an entire region but still have one missing, revisit the Aviary and the areas around the Zoo parking lot. Those locations are particularly easy to overlook.
Warning
Occasionally, a poster may remain unavailable even after you've defeated its guards. If Knifey won't destroy it, try reloading the last checkpoint and clearing the enemies again. Don't assume the poster has registered unless you've actually slashed it.
Video Guide: https://www.youtube.com/watch?v=8G8vs39dVC0&utm_source=chatgpt.com
Trophy: Where's Maris?
Niles!!! Our dinner guests will arrive any minute now and I've just been turned into a crane game!!!
Type: Silver
Category: Collectible
How to Unlock
Collect all **seven unique decorative pillows** from the crane machine inside your Quarters. This trophy is available early in the game and can be completed whenever you have enough pesos. Return to your Quarters and head downstairs to the **arcade area**. Locate the crane machine and interact with it to begin playing. Each attempt costs **20 pesos**, and you'll need to maneuver the crane to grab one of the capsules inside. Successfully collecting a capsule gives you a random decorative pillow. There are seven different pillows available, but the rewards aren't guaranteed to be unique. You can receive duplicates, meaning you may need considerably more than seven attempts to finish the collection. Keep playing until you've obtained all seven different pillows. You can check your progress by visiting your **upstairs bedroom**, where the collected pillows appear on your bed. Once you've collected the seventh unique pillow, **Where's Maris?** unlocks. There are no story choices, special prerequisites, or missable conditions associated with this trophy.
Tip
Save this trophy for later if you're running low on money. Each attempt costs only 20 pesos, but duplicate pillows can make the total unpredictable. Once you've finished the story and gathered enough pesos from exploration, you can complete the entire collection without worrying about your remaining budget.
Video Guide: https://www.youtube.com/watch?v=rAeuPA4PqSY&utm_source=chatgpt.com
Trophy: 8-Bit Warrior
One by one, you have taken out each of Nipulon's 8-Bits (and 8 nips).
Type: Gold
Category: Misc
How to Unlock
Discover and play the hidden **Bounty Quest** arcade game after completing the main story. This trophy becomes available once you've defeated Super Nipulon and finished the campaign. You don't need to collect the six regular arcade cartridges for Throne of Games first. After the credits, return to your **Quarters** and head upstairs to your bedroom. Look at the television beside your bed. You'll find a small, damaged game cartridge sitting on top of it. Pick up the **Damaged Game** cartridge, then head downstairs to the arcade area. Locate the **Bounty Quest arcade cabinet**, positioned among the other playable machines. Interact with the cabinet and insert the damaged cartridge. Start the game to trigger **8-Bit Warrior**. You don't need to complete a lengthy arcade campaign or defeat any additional bosses. Despite the trophy description mentioning Nipulon's 8-Bits, this is simply a hidden post-game activity rather than another major combat challenge.
Tip
You can earn this immediately after completing the story. Before leaving your Quarters for collectible cleanup, check the television in your bedroom and bring the cartridge downstairs. It's a quick trophy to finish before tackling the longer skating challenges.
Video Guide: https://www.youtube.com/watch?v=5qrmP98bTiQ&utm_source=chatgpt.com
Trophy: Phony Hawk
Complete three races in each of the three hubs.
Type: Silver
Category: Misc
How to Unlock
Complete **three skateboard races in each of the three open-world hubs** to unlock this trophy. You need nine successful races in total, and every race must be finished before its timer expires. You don't need an S rank, and collecting the optional Skate Letters along each route isn't required. The races are organized by **Slugstar Jr.**, a racing enthusiast who offers timed courses in each region. Speak with him at the local racing hub to select a race. **Circuit Arcadia:** Find Slugstar Jr. near the Downtown fast-travel location, close to the main plaza. This region offers five races, but you only need to complete **any three** of them. **Pinkline Harbor:** Head toward the Pinkline Ticket Booth, near the entrance leading to the cruise ship docks. Speak with Slugstar Jr. and complete all three available races. **Zoo:** Travel to the Gift Shop fast-travel point and look for Slugstar Jr. nearby. Complete his three races to finish the final region. During each race, follow the marked route and pass through the checkpoints before time runs out. Use your skateboard's boost, jumps, and wall-rides to maintain speed, particularly when the route includes elevated platforms or sharp turns. Missing a checkpoint can cost valuable time, so prioritize staying on the course rather than collecting optional letters. After completing three races in Circuit Arcadia, three in Pinkline Harbor, and three at the Zoo, **Phony Hawk** unlocks automatically.
Tip
Start with the shortest or easiest races in Circuit Arcadia, since you can skip two of its five courses. In Pinkline Harbor and the Zoo, all three races are required. Focus on clean checkpoint navigation rather than collecting Skate Letters or earning high ranks. You can complete everything during post-game cleanup.
Video Guide: https://www.youtube.com/watch?v=9BlTyy8ysF4
Trophy: Broke the Code
You broke the Bounty Hunter code, and now you're a wanted outlaw. Good luck!
Type: Bronze
Category: Story
How to Unlock
Break the Bounty Hunter Code by **protecting Lizzie from the bounty hunters pursuing her** during the opening story mission, Find and Rescue Lizzie. This trophy is earned automatically through normal story progression. After the opening sequence, you'll leave your home and begin searching for your sister, who has become the target of a bounty. Follow the mission objectives through the **Circuit Arcadia Zoo** until you reach the Aviary. Inside, you'll find Lizzie surrounded by other bounty hunters. They demand that you kill her to complete the bounty, putting you in a rather uncomfortable position. **Important: Before attacking the bounty hunters, you have an opportunity to earn The Good Ending.** Shoot Lizzie instead to trigger a secret joke ending and unlock that missable trophy. The game returns you to the encounter afterward, allowing you to continue the story normally. When you're ready to proceed, **attack the bounty hunters instead of Lizzie**. This violates the Bounty Hunter Code, since you're turning against other hunters to protect your target. Fight through the resulting encounter and continue following the escape objectives. You'll eventually be confronted about breaking the code, setting up the events of the main story. Broke the Code unlocks automatically during this opening mission. You cannot miss it through normal story progression.
Tip
Make sure you earn **The Good Ending** before shooting the bounty hunters. Although that trophy appears much later in the official trophy list, this is your only opportunity to trigger it. Completing both during the same encounter saves you from an unnecessary second playthrough.
Trophy: Dad's All, Folks
You saved your dad but left a raging monster loose in Wyoming. Let's just call it a win!
Type: Bronze
Category: Story
How to Unlock
Complete the **Rescue Your Dad From the Cult** story mission in Wyoming to unlock this trophy. The mission begins after a family dinner at the Spaceforest Cafe is interrupted by hostile aliens, leading you to **Birch Springs Ranch**, where a cult is holding your father captive. After reaching the ranch, enter the main lodge and investigate your father's disappearance. You'll eventually learn that he's being held inside an Ego Chamber deeper in the surrounding area. Follow the objective markers through the forest. During this mission, you'll also obtain **Jan**, who works alongside Travis as a dual-wielded Gatlian. Use their combined abilities to overcome obstacles and reach the Ego Chamber. After finding your father, return toward the lodge and continue following the rescue objectives. You'll face additional enemies, a powerful mutant, and eventually the cult's leader, **Gwendolyn Birch**. #### Important: Collect the Hidden Transmission Before finishing the mission, collect the first hidden transmission required for **Dr. Gurgula Will Return...**. After defeating the large mutant and returning to the room containing **Ted's clothes**, look for the large windows and the damaged opening leading outside. **Do not leave through the broken window yet.** Instead, turn back into the room and locate the bookshelf near the window. Climb onto it, then use your movement abilities to reach the small ventilation opening high in the corner. Travel through the vent to find **Dr. Gurgula's hidden transmission**. Collect it before returning to the main story route. This recording is missable because you cannot revisit this part of the Wyoming mission afterward. #### Finish the Rescue Continue through the ranch until you confront Gwendolyn Birch. The final battle includes several phases, so keep moving, avoid her larger attacks, and use your Gatlians' abilities to damage her whenever she's vulnerable. Once the encounter ends, follow the remaining objectives and escape Wyoming with your family in the RV. **Dad's All, Folks** unlocks automatically after completing the mission.
Tip
After returning from Wyoming, the **Nice Day With Jeppy** side quest becomes available at the Zoo Gift Shop. It's another potentially missable trophy, so consider completing it before moving too far ahead with the story.
Warning
**The Wyoming transmission is missable, even though Dad's All, Folks is story-related.** Collect the recording from the hidden vent before leaving the ranch. Missing it will prevent you from earning Dr. Gurgula Will Return... during the same playthrough.
Trophy: Invasive Procedure
You assassinated a Senator and almost killed yourself in the process.
Type: Bronze
Category: Story
How to Unlock
Defeat **Senator Muppy Doo** during his bounty mission to unlock this trophy. You'll pursue him through several convention-themed locations, including ParkingCon, PoliCon, MurderCon, and HumanCon, before confronting him in one of the game's strangest boss fights. Follow the main objectives until you reach HumanCon. During the opening phase, Muppy Doo summons guards and repeatedly shrinks himself to escape your attacks. Eliminate the weaker enemies first, then watch for his tiny footsteps moving across the floor. Attack whenever he reveals himself, using Sweezy's Time Bubble to make him easier to hit. After taking enough damage, Muppy Doo drops his **Fanny Pack**. Pick it up to begin the next phase, where he shrinks down and invades your suit's operating system. Open the pause menu when prompted and look for **shaking menu options**. Select the affected entries to locate Muppy Doo and attack him as he moves between different menus. You'll eventually encounter a settings-slider puzzle followed by a factory reset sequence. Follow the prompts to continue; this is part of the boss fight, not an actual deletion of your save. The final encounter takes place inside a retro arcade-style game. Use **Knifey** to repeatedly strike Muppy Doo when he's within reach until his health is depleted. Once the Senator is defeated and the mission concludes, **Invasive Procedure** unlocks automatically.
Tip
Don't panic when Muppy Doo takes over your menu and threatens to reset everything. It's a scripted sequence. Pay attention to the moving text and follow Suit-O's instructions rather than trying to fight him using normal weapons.
Trophy: Romanced All 34 Erotic Worm Monsters
This one takes over 100 hours. Only the most dedicated worm romancers get this one. Great job!
Type: Bronze
Category: Story
How to Unlock
Progress through the **final boss fight against Super Nipulon** to unlock this trophy automatically. Despite the description claiming that you must romance 34 alien worm monsters over more than 100 hours, there are no romance challenges or collectible creatures associated with this trophy. It's another of High On Life 2's joke achievements, designed to make your PlayStation trophy history look considerably stranger than it needs to. During the final mission, you'll confront Nipulon at the Intergalactic Supreme Court. Once the courtroom sequence ends, the boss battle begins. Attack Nipulon until he forces you into a hallucination using Humanzapro. You'll then progress through a series of psychedelic skateboarding and platforming sections while continuing to fight him. **The trophy unlocks automatically during this final battle**, as Nipulon awards it through the scripted story sequence. You don't need to interact with any worms, visit a special location, or perform additional actions. Simply continue following the mission objectives and fighting Nipulon. The trophy cannot be missed through normal story progression.
Tip
Don't waste time searching for 34 hidden creatures or a romance-related side quest. There isn't one. This trophy is intentionally misleading, and you'll earn it while completing Trial of the Century. Save your collectible-hunting energy for the activities that actually count toward Platinum.
Trophy: Smash That Kreg Button
Congratulations, you have murdered an animal rights activist.
Type: Bronze
Category: Story
How to Unlock
Defeat **Kreg Button**, the leader of the Button's Gluttons, during the **Larry Pinkstock bounty** to unlock this trophy. You'll fight Kreg near the end of the mission, after uncovering the mystery aboard Larry Pinkstock's luxury spaceship. The encounter takes place on the ship's upper deck and consists of two phases. Kreg initially fights while riding a large creature called **PeePee Boy**, then continues attacking on foot once his mount is defeated. #### Phase 1 — Kreg and PeePee Boy During the opening phase, Kreg rides above the deck while launching several different attacks. Keep moving around the arena, using your skateboard to maintain distance and avoid getting trapped against the edges. Watch for the following attacks: - **Falling anchors:** Kreg drops anchors across the deck. Move into the gaps between them or jump clear of their impact areas. - **Harpoon attacks:** Kreg fires a harpoon attached to a chain. You can deflect the harpoon using Knifey, then travel along the chain to reach Kreg and attack him. - **Spinning chain:** Kreg anchors his chain to the deck and swings it around the arena. Jump over the chain as it approaches. - **Gatling gunfire:** Keep moving sideways or skate around the arena to avoid his sustained gunfire. When PeePee Boy opens its mouth to attack or pull you toward it, **fire a Glob Shot into its mouth**. This interrupts the attack and can knock Kreg from his mount, creating an opportunity to deal additional damage. Continue attacking until PeePee Boy is defeated and Kreg is forced to fight you on foot. #### Phase 2 — Kreg on the Deck Without his mount, Kreg becomes more aggressive. He uses a Gatling gun, shotgun attacks, and charges to pressure you at close range. **Keep moving and dodge sideways when Kreg charges.** Use your skateboard to circle the arena while shooting him between attacks. Avoid standing directly in front of his firearms, particularly when he begins firing continuously. You can also use the **Flint Turtles** found around the deck to attack him with fire. These creatures are especially useful during this phase because their flames deal damage while allowing you to stay mobile. #### Earn Witness the Burning Bush Before Finishing **Before killing Kreg, use a Flint Turtle to burn off his pants.** This earns the missable trophy **Witness the Burning Bush**, which cannot be obtained after the encounter. Once Kreg is fighting on foot, locate a Flint Turtle around the deck and pick it up. Aim its flames at Kreg, focusing on his lower body, until his pants catch fire and the trophy unlocks. After confirming you've earned Witness the Burning Bush, continue attacking Kreg normally. When his remaining health is depleted, he'll collapse, bringing the fight to an end. The story continues with you falling into the water and eventually awakening back at your Quarters. **Smash That Kreg Button** unlocks automatically for defeating him and completing this encounter.
Tip
Before reaching Kreg, make sure you've already earned **Dunston Has Checked In** and **Columbo in Space** during the Larry Pinkstock bounty. Both are missable, and you cannot return to their story sections afterward. Securing those trophies first lets you concentrate on the boss fight without worrying about unfinished objectives.
Warning
**Witness the Burning Bush is missable.** Do not kill Kreg during his second phase until you've burned off his pants with a Flint Turtle and confirmed that the trophy unlocked. Defeating him first will prevent you from repeating that challenge during the same playthrough.
Trophy: So Long, and Thanks For All The Ghosts
Don't feel bad for killing a dolphin. They've done some horrible things. For real. Look it up.
Type: Bronze
Category: Story
How to Unlock
Complete the **Professor Berkel bounty** by defeating the scientist responsible for Rhea Pharma's disturbing experiments. This story mission takes you to **Pinkline Harbor**, where you'll investigate a research facility before traveling through the remains of a gigantic creature named Gessie. Start the bounty and follow your objective marker to the research facility on the eastern side of Pinkline Harbor. You'll need to disguise yourself as a scientist, help the researchers with their experiments, and restore enough power to open Gessie's mouth. #### Complete Two Missable Objectives First Before entering Gessie, make sure you've taken care of two important trophy requirements. **#1 Scientist:** While disguised as a researcher, find the scientist offering experimental drinks inside the research facility. The story only requires you to drink one, but you must keep speaking with him and drink **all four experimental liquids** to unlock the trophy. The final drink kills you, but this is intentional. **Dr. Gurgula Will Return...:** While exploring the beach research area, find the tent near Gessie's head containing a red button. Press the button and follow the connected power cable to another building. Inside, you'll find one of Dr. Gurgula's hidden transmissions. Collect it before entering Gessie, as this location cannot be revisited after the bounty. #### Reach Professor Berkel Once you've completed the research objectives, enter Gessie's mouth and follow the story route through the creature's interior. You'll encounter ghostly enemies, environmental puzzles, and a large pirate ship before eventually reaching Berkel's chamber. Use your Gatlians' abilities to navigate the obstacles and defeat the enemies blocking your path. You'll also encounter Tiffany during the mission, but she retreats after taking enough damage. Continue until you reach the chamber containing **Baby Gessie**, where Professor Berkel reveals more information about the experiments performed on Creature. #### Defeat Professor Berkel The fight begins with Berkel wearing a large mechanical exosuit. She uses ranged projectiles, sweeping energy blades, and powerful close-range attacks. Keep moving around the arena while firing at her. **Travis and Jan** are effective for sustained damage, while Bowie's charged attacks can deal heavy damage when Berkel pauses between attacks. Watch for electrical effects around Berkel's hands, which signal an incoming grab. Dodge away immediately to avoid being thrown across the arena. When purple energy blades sweep through the room, move between the openings rather than trying to outrun them. After destroying her exosuit, you'll discover that Berkel is actually a dolphin. Tiffany arrives and joins the fight, forcing you to deal with both enemies. Focus your attacks on Berkel while avoiding Tiffany's charges and the additional projectiles. As the battle progresses, Baby Gessie helps reveal Berkel's deception, but you'll still need to finish the fight. Keep moving, use Bowie's attacks whenever possible, and concentrate your damage on the main target until Berkel is defeated. The encounter ends when Tiffany breaks free of Berkel's influence and throws her into the mouth of her living motorcycle. Complete the remaining story sequence to unlock **So Long, and Thanks For All The Ghosts**.
Tip
The Berkel bounty has two missable collectibles or interactions before the boss fight. Secure #1 Scientist and the hidden Dr. Gurgula transmission while you're still at the beach research facility. Once you've entered Gessie and progressed beyond the research area, you won't be able to return for them.
Trophy: Thats A Wrap on Character Actor Fred Melamed
Great job voicing the Blue Wizard, Fred! We loved you in "A Serious Man"!
Type: Bronze
Category: Story
How to Unlock
Defeat **Finance Wiz James Stevenson**, also known as the Blue Wizard, to unlock this trophy. You'll encounter him during the Finance Wiz bounty, which takes you from his penthouse in Circuit Arcadia into the unusual fantasy world of Prismeria. Follow the bounty objectives through the penthouse investigation and into Prismeria. Along the way, you'll meet Apples, navigate a forest, and rescue **Bowie**, a Gatlian whose Soul Hole ability is essential for the upcoming boss fight. Before reaching the Blue Wizard's castle, make sure you've completed two missable trophies: - **All Your Vase Are Belong to Us:** Destroy every red vase in Apples' fantasy world, including those along the forest route. - **Why do you know all that stuff?:** Answer the Blue Wizard's six tax questions instead of bypassing the quiz. The correct answer positions are **Top, Bottom, Bottom, Middle, Top, Middle**. Once you've completed both objectives, enter the castle and confront James Stevenson. #### Defeat the Blue Wizard Stevenson protects himself with a magical barrier, making ordinary gunfire ineffective. **Use Bowie's Soul Hole ability to reveal his hidden weak points**, then shoot through the opening to damage them. When the barrier drops, attack the exposed target with your other Gatlians. Gus is particularly effective for dealing heavy damage during these openings. Watch for incoming projectiles, ground-level shockwaves, and summoned enemies. Use the pillars around the arena for cover and eliminate weaker enemies when you need shield pickups. Continue exposing Stevenson's weak points with Bowie and attacking whenever his protection disappears. Once you've defeated him, **Thats A Wrap on Character Actor Fred Melamed** unlocks automatically.
Tip
Bowie's Soul Hole is the key to this fight. If your shots aren't damaging Stevenson, stop firing at his shield and look for a new angle through the Soul Hole. It's much more effective than trying to brute-force your way through his defenses.

Trophy: Trial of the Century
Nice, you saved humanity again! Thankfully there are no evil pharmaceutical companies in real life.
Type: Silver
Category: Story
How to Unlock
Complete the main story by defeating **Super Nipulon**, the leader of Rhea Pharma, following the final courtroom confrontation. This trophy is awarded automatically for finishing the campaign and cannot be missed through normal story progression. After completing the remaining bounties, follow the story objectives until you're ready to confront Rhea Pharma. Your investigation eventually leads to the **Intergalactic Supreme Court**, where Nipulon is attempting to legally classify humans as livestock so the company can continue producing Humanzapro. #### Before Starting the Final Mission Make sure you've prepared the missable **Ankhs For The Memories** trophy. Travel to **Twilly's escape rooms in southwestern Pinkline Harbor** and complete all three rooms. After finishing them, **sign up for the newsletter at the reception desk** before leaving. Both steps are required to access the secret ending after completing the game. You must finish them before the final mission's point of no return. #### Complete the Courtroom Sequence Once you reach the Supreme Court, you'll participate in a hearing to determine humanity's fate. During the hearing, you'll have an opportunity to earn the missable **Kobe!** trophy. While seated, interact with the papers on the desk in front of you and throw the resulting paper balls into the basketball hoop. Keep scoring until Kobe! unlocks, then continue the proceedings. Your dialogue choices can influence how the hearing unfolds, but the story ultimately leads to a confrontation with Nipulon regardless of the court's decision. #### Defeat Super Nipulon After the courtroom sequence, Nipulon attacks and begins the final boss encounter. The fight starts with conventional gunfire and close-range attacks. Keep moving, dodge his charges, and use your strongest Gatlians to reduce his health. As the battle progresses, Nipulon forces you to consume Humanzapro, transporting you into a psychedelic sequence involving **skateboarding, platforming, and combat**. Follow the shifting pathways while using your Gatlians' abilities to cross obstacles. You'll frequently need to skate between platforms while attacking Nipulon from a distance. Stay focused on the route ahead rather than trying to deal damage continuously. Falling from the platforms can interrupt your progress, so prioritize reaching stable ground before attacking. Continue through the hallucination sequences and defeat Nipulon to complete the final battle. After the ending sequence and the game's conclusion, **Trial of the Century** unlocks automatically. You can continue exploring the three main hubs afterward to finish remaining collectibles, side activities, and miscellaneous trophies.
Tip
Don't rush into the final mission just because the story tells you humanity is in danger. Complete the escape rooms, register for Twilly's newsletter, and handle any unfinished story-specific objectives first. Most open-world collectibles can wait until after the credits, but the secret-ending preparation cannot.
Trophy: Was That A Wiener?
We can't actually tell if you drew a wiener. But if you did, this was probably a little funny.
Type: Bronze
Category: Story
How to Unlock
Register for **MurderCon** during the Senator Muppy Doo bounty to unlock this trophy. Despite the suggestive trophy name, you don't need to draw anything specific. Simply completing the registration process is enough. During the bounty, follow Senator Muppy Doo's trail through the convention facilities. After progressing through the security encounters and learning how to create ziplines, you'll eventually reach the entrance to MurderCon. Approach the registration booth and speak with the attendant. You'll be asked to sign your name using a drawing interface. Draw anything you like and confirm your signature to complete the registration. Once you've signed up and gained access to MurderCon, **Was That A Wiener?** unlocks automatically. The trophy cannot be missed through normal story progression, so there's no need to restart the mission or worry about the quality of your artwork.
High On Life 2 throws you straight back into a galaxy full of talking guns, terrible decisions, and an unexpectedly useful skateboard. Your goal is to finish the story while collecting every missable trophy during its associated mission. There is no Chapter Select, and several story locations become inaccessible afterward. During the opening, visit all three exhibits at the Bounty Hunter Museum for Bountilogical Studies PhD. Later, when rescuing Lizzie in the Aviary, shoot her before attacking the bounty hunters to trigger the joke ending for The Good Ending. The game returns you to the encounter afterward so you can continue normally.
The Larry Pinkstock bounty contains three important missables. Complete the laser maze without hitting the money-filled picture frames for Dunston Has Checked In, investigate all 13 clues and correctly solve the murder mystery for Columbo in Space, and use the flame turtle against Kreg during his boss fight for Witness the Burning Bush. During the later Finance Wiz bounty, destroy every red vase while exploring Apples' fantasy world for All Your Vase Are Belong to Us. Before entering the Blue Wizard's castle, answer his tax-code questions correctly for Why do you know all that stuff?. Don't skip these optional interactions just to move the story along.
As the story opens up, you'll gain access to three large exploration hubs: Circuit Arcadia, Pinkline Harbor, and the Zoo. Take time to investigate side activities while traveling between bounties. Following the Wyoming rescue mission, visit the Zoo Gift Shop and complete Nice Day With Jeppy. Stay close to Jeppy throughout his outing and use Gus to pull him away from danger. This event can fail permanently, so reload the last checkpoint immediately if something goes wrong. You'll also want to start gathering the three B.A.L.L. GUYS, discovering arcade games, and completing any convenient skateboard challenges.
Watch for Dr. Gurgula's hidden transmissions, because two of the three are found in story missions you cannot revisit. Collect the first during the Wyoming storyline and the second during the Professor Berkel bounty. The remaining transmission can be obtained in Circuit Arcadia. During the Bronkin Bucko bounty, avoid killing your target immediately. Speak with him, follow the encounter through its dialogue, and convince him to help you for Starstruck. During Professor Berkel's research sequence, drink every experimental potion rather than stopping after the first one to unlock #1 Scientist.
There's also an important opportunity in Circuit Arcadia involving the taxi side quest. For Fare Thee Well, accept a passenger, allow their delivery timer to expire, and dispose of the resulting remains using a portable toilet. Complete this before finishing the taxi driver's full series of successful deliveries. You'll eventually need that quest for a B.A.L.L. GUY, so handling the unusual trophy requirement first prevents you from locking yourself out. Apparently, being a responsible taxi driver isn't especially important in this galaxy.
Before starting the final mission, visit Twilly's No Escape in the southwestern part of Pinkline Harbor. Complete all three escape rooms and sign up for the newsletter at the reception desk before leaving. Both steps are essential for Ankhs For The Memories, which unlocks through the secret ending after completing the story. Finish this preparation before the final point of no return. Forgetting the newsletter can cost an entire playthrough, making it considerably more dangerous than most of the game's enemies.
During the final court sequence, look for the paper on the desk and throw it into the basketball hoop until Kobe! unlocks. This opportunity is limited to the story encounter, so don't advance without earning it. Continue through the ending and watch for the secret-ending sequence enabled by the escape rooms. If you've completed all your chapter-specific trophies, you'll be in excellent shape for Platinum cleanup once free exploration becomes available again.
After finishing the story, return to the three exploration hubs to complete the remaining collectible trophies. Recover all three B.A.L.L. GUYS, collect every unique fish needed to fill the aquarium in your Quarters, find all six arcade games, and slash all 21 Wanted Posters. You'll also need to complete the nine teen skatepark activities and finish three races in each hub for a total of nine qualifying races. These activities can be completed after the story, so there's no need to interrupt important bounty missions to finish them early. Unlike the first High On Life, collecting every Luglox and trading card isn't required for the Platinum.
Finish the remaining miscellaneous trophies, including Where's Maris?, which involves winning the seven special pillows from the crane machine, and 8-Bit Warrior, which becomes available after completing the story. There are no online or difficulty-related trophies, so you can play on whichever difficulty you find comfortable. The main danger is missing an opportunity in a one-time story mission or permanently failing a side quest. There is no Chapter Select to repair those mistakes, and another playthrough may be necessary if a required trophy was missed. Once everything is complete, A Life Well Lived will be yours. At least your talking weapons can finally stop questioning your career choices.
Completion Video Playlist
1 video
High on Life 2 - 100% Platinum Guide - All Trophies & Collectibles - Full Walkthrough