


Trophy Guide Preview
Overall Trophy Progress
0 / 28 Completed
0%
Trophy Types
Platinum
0 / 1Gold
0 / 5Silver
0 / 15Bronze
0 / 7Categories
Missable
0 / 19Collectible
0 / 1Misc
0 / 3Story
0 / 4
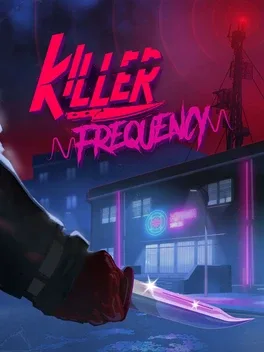
Step behind the mic as late-night radio host Forrest Nash in 1987 Gallows Creek. Take emergency calls, search the station for clues, solve puzzles, and make life-or-death decisions to save townsfolk from a masked killer in this darkly funny ’80s horror mystery.
Overall Trophy Progress
0 / 28 Completed
0%
Platinum Path
EARLY GAME Welcome to Killer Frequency. You’re Forrest Nash, late-night radio host for 189.16 – The Scream, working the midnight shift on September 3rd, 1987. Unfortunately, a killer is roaming the streets of Gallows Creek, and your quiet night behind the microphone is about to turn into the worst call-in show imaginable. For the best experience, consider playing blind at first. A huge part of the fun comes from list...
Completion Video Playlist
1 video
Killer Frequency Part 1 – Easy to Follow 100% Platinum Walkthrough and Trophy Guide
Trophy: Certified Platinum
Obtain all Trophies
Type: Platinum
Unlock Details
Obtain all Trophies

Trophy: A Shocking Turn of Events
Deputy Martinez survived The Whistling Man
Type: Silver
Category: Missable
Unlock Details
Save Deputy Martinez during the opening section of the game. After Forrest settles into what was supposed to be a normal night hosting his radio show, Leslie Harper—the Gallows Creek 911 operator and police dispatcher—calls the station. It quickly becomes clear that this isn't a prank, and you'll need to guide Leslie and Deputy Martinez to safety. During Leslie's first phone call, choose: "Find another set of keys?" "Check Sheriff Matthews?" "Lock the doors!" "Take a police cruiser!" "Take Sheriff Matthew's gun?" "Can you see any other weapons?" "Take the Taser" Leslie will eventually hang up before calling the station again. During the second phone call, choose: "Leslie! What's happening?" "Drive!" Make those choices and Deputy Martinez will survive his encounter with the Whistling Man, unlocking A Shocking Turn of Events. Congratulations, Forrest. You've been on the job for about five minutes and you're already doing emergency dispatcher's work from a radio booth. This shift is going wonderfully.
Tip
This trophy is missable. Choosing the wrong weapon or giving Leslie the wrong advice can result in Deputy Martinez dying. If that happens, reload an earlier save and replay the call.

Trophy: A Tale of Two Sisters
Peggy Weaver survived The Whistling Man
Type: Gold
Category: Missable
Unlock Details
Keep Peggy Weaver alive during the final confrontation with the Whistling Man. Peggy's survival depends on how you handle the interview with Teddy Gallows Jr. and the Whistling Man near the end of the game. Follow the dialogue choices and actions detailed in Took a Swing for Teddy Gallows. Successfully completing that sequence will keep Peggy alive and unlock A Tale of Two Sisters.
Warning
This trophy is missable and tied directly to the final interview. Make sure you follow the correct dialogue sequence and examine the inside of Peggy's birthday card when required.

Trophy: A Word from our Sponsors
Play all radio ads during the course of the night
Type: Bronze
Category: Missable
Unlock Details
Play all four radio advertisements from beginning to end during the night. Throughout the game, Peggy will occasionally tell you it's time for an advertisement. The ad cassettes are played using the cassette player beside the records. To play one, pick up the cassette, press the right-most button on the cassette player to eject the tray, insert the tape, and press play. There are four advertisements: MASTER ROBBIE - DEADILY MASTER OF MATRIAL ARTS !EXCLUSIVE! PROMO TAPE HARVEST FESIVAL TEDDY GALLOWS JR - 'TEDDY FOR MAYOR PROMO' GRILLING SPREE AD! Unlike the records required for Disc Jockey, these advertisements need to be played from start to finish. Peggy will only ask you to play three ad segments throughout the night, meaning you'll need to play the fourth advertisement yourself. A break is a good opportunity to do this without interfering with phone calls or music. The first three tapes are already available in the cassette storage. GRILLING SPREE AD! must be found separately. It's located on food critic Bradley's desk and can be collected from the first time you're allowed to freely explore the office. Unlike the hidden records, you'll need to physically carry this cassette back to the radio booth and insert it into the player. Play all four advertisements completely to unlock A Word from our Sponsors. Apparently saving Gallows Creek doesn't excuse KFAM from fulfilling its advertising contracts. The serial killer can wait; we've got sponsors to satisfy.
Tip
Grab GRILLING SPREE AD! from Bradley's desk as soon as you're able to explore, then play it during a break so you don't forget about it.
Warning
This trophy is missable. All four advertisements must be played from start to finish before the final break, when Peggy says, "This might be your final break for the night so try to enjoy it."

Trophy: An Alarming Development
Roller Ricky survived The Whistling Man
Type: Silver
Category: Missable
Unlock Details
Save Roller Ricky from the Whistling Man by realizing that Dawn isn't telling you the truth and giving her the alarm test activation code instead of the real entry code. Roller Ricky first calls earlier in the night and casually gives you several details that become very important later: he owns a roller rink, loves roller disco, has a roller-skating dog named Max who howls whenever trains pass, and recently had a Starling 4000 security system installed. After From Beyond The Grave, Dawn calls claiming she's in danger and has been locked out of her apartment by its security system. She says she needs an access code to get inside. Forrest and Peggy immediately sense that something isn't quite right. Your job is to figure out exactly what she's really trying to get into. You'll need the Starling 4000 access-code booklet from basement storage. If you already grabbed it while completing From Beyond The Grave, you can skip the trip downstairs. If not, return to basement storage and enter the area where you previously found Clive's tape recorders. Head toward the location of the first recorder, but turn left and go around the shelves. Continue through the archway into the small room. You'll find two useful documents here: a delivery note on the right and the access-code booklet on the left. Pick up the delivery note so the game registers that you've found it, then take the access-code booklet back to the radio booth. If you already have the booklet but the game isn't recognizing it, put it down and pick it back up. Forrest should comment on it, allowing you to continue. Back at the booth, Peggy will suggest trying to contact Ricky. You can attempt it, but he won't answer, so choose: "No need." Now it's time to expose Dawn's story. She claims she's at the new Wood Side Apartment building, but several clues say otherwise. A train can be heard during her call, despite Wood Side Apartments being nowhere near the train line. Immediately afterward, you hear a dog barking and howling. Ricky specifically told you that Max loves howling at passing trains. There's disco music playing in the background. Ricky owns a roller rink and loves roller disco. You also don't hear the Whistling Man's usual whistling during Dawn's supposedly desperate escape from him. Finally, the delivery note reveals that the Starling 4000 system hasn't even been installed at Wood Side Apartments yet. Installation isn't scheduled until September 17th, while the game takes place on September 3rd. Roller Ricky's Roller Rink, however, already has one. Dawn isn't trying to enter her apartment. She's trying to get inside Ricky's roller rink. When you're given the choice, select: "Give alarm test activation code" This prevents Dawn from gaining access to Ricky and allows him to survive, unlocking An Alarming Development. Nice try, Dawn. Unfortunately for you, Forrest Nash has spent the evening evolving from radio DJ into detective, emergency dispatcher, relationship counselor, and apparently certified Starling 4000 security technician.
Tip
Grab the access-code booklet while completing From Beyond The Grave to save yourself another trip through basement storage. If the game doesn't recognize that you already collected it, put it down and pick it back up.
Warning
Do NOT give Dawn the entry code. Choose "Give alarm test activation code." Giving her the real entry code allows her inside and gets Roller Ricky killed.

Trophy: An Explosive Escape
Chuck Brody survived The Whistling Man
Type: Silver
Category: Missable
Unlock Details
Save Chuck Brody from the Whistling Man by correctly identifying him as the killer's next target and figuring out where he can be found. After the events of Let Me In, you'll have information on four possible victims: Chuck Brody, Kim Walker, Rebecca Allen, and Ant Williams. The board from Clive's secret room will be moved upstairs, where you can investigate the clues and determine who is actually in danger. Here's how everything connects: Kim Walker can be ruled out. A marriage announcement reveals that she married Peter Stine, while another article confirms that Mr. P. Stine and Mrs. K. Stine were later killed in a bus accident. Rebecca Allen can also be eliminated. The articles connect her to a car-theft crime syndicate and reveal that she eventually left town because of the publicity surrounding it. Ant Williams isn't around either. He was the lead engineer connected to the festival disaster, but another article places him at the Quiet Ridge Health and Safety Convention from September 1st through September 6th. Since tonight is September 3rd, Ant is conveniently somewhere far away from Gallows Creek and its current serial-killer problem. That leaves Chuck Brody. The clues reveal that Chuck won the lottery and used his winnings to buy the Gas Station, giving you both the identity of the next victim and his likely location. Once you've solved the mystery, return to the radio booth and press the "Press 4 Peggy" button. Choose: "I'm ready" "Let's do this!" "Chuck Brody" "The Gas Station." With the correct victim and location identified, you'll be able to intervene in time and Chuck Brody will survive, unlocking An Explosive Escape. Turns out winning the lottery really can change your life. Usually the prize doesn't include becoming the target of a serial killer at your own gas station, but Gallows Creek likes to add a little excitement.
Tip
If you don't want to work through all the newspaper clues, the answers you need are Chuck Brody and the Gas Station.
Warning
This trophy is missable. You must correctly identify both Chuck Brody and the Gas Station. Choosing the wrong victim or location prevents you from saving him.

Trophy: Child of the Corn Maze
Eugene Stine survived The Whistling Man
Type: Silver
Category: Missable
Unlock Details
Save Eugene Stine from the Whistling Man by successfully guiding him out of the Maize Maze. Eugene calls the station while waiting in the middle of the maze for a girl named Molly. Unfortunately, Molly doesn't show. The Whistling Man does. Before you can guide Eugene out, you'll need a map. After his first call ends, head downstairs to the reception desk. You'll find a note explaining that Brad and Barbara should "see other people." Bad news for Barbara. Fantastic news for Eugene, because Barbara had planned to visit the Maize Maze but threw away her ticket and map after her plans changed. Check the bin beside the reception desk and grab the Maize Maze map. While you're here, look underneath the desk for the Final Breath record needed for Complete Discography. Nothing like doing a little collectible hunting while Eugene is being chased through a corn maze by a murderer. Take the map upstairs and let Peggy know you're ready. Eugene will call again from inside the maze and describe what he can see at each intersection. Give him these directions: Tractor statue ahead with gold hay bales to his right: "Go left!" Pig statue ahead with a rocking horse to his left: "Go backwards!" Crossroads with a pitchfork statue ahead: "Go left!" Tiny barn ahead, scarecrow behind him, and nothing on either side: "Go right!" He has just passed a Corn Silo and didn't see anything else along the way: "Go right!" Give Eugene all five correct directions and he'll escape the Maize Maze alive, unlocking Child of the Corn Maze. Eugene entered the maze hoping to meet Molly and left having survived a serial killer. There are easier ways to discover you've been stood up.
Tip
Grab the Final Breath record from underneath the reception desk while collecting the maze map. You'll need it for Complete Discography later.
Warning
This trophy is missable. Giving Eugene the wrong directions can lead him straight into the Whistling Man, so keep a manual save before navigating the maze.

Trophy: Complete Discography
Collect all hidden records around the station
Type: Bronze
Category: Missable
Unlock Details
Find all four hidden records located around the radio station. You begin Killer Frequency with eight records already available in the radio booth, but another four are hidden throughout the station. You only need to pick each hidden record up once. After collecting one, it will automatically become available in the radio booth, so there's no need to carry it all the way back. The four hidden records are: Final Breath by Roddy Snatcher This record is required for story progression, so you can't miss it. Head downstairs to the reception area and go behind the front desk. Continue toward the wall and check the bottom shelf of the storage unit underneath the desk. The record is near the blue trash can where you find the map used for Child of the Corn Maze. I'm Coming to Getcha by Vice Head into the staff room past the kitchen and continue to the lounge area containing the arcade machine and television. Look at the shelving to the left of the television. The record is slotted in next to several binders. Long Ride Home by The Barn Finds This record is also required for story progression and can't be missed. When the story sends Forrest outside, head left and then turn left again into the alleyway. You'll find the record sitting on top of a rather disgusting mattress. Try not to think too hard about where your new addition to the station's music library has been. One Last Goodbye by Caged Tiger This is found while exploring the basement maze during From Beyond The Grave. Navigate all the way to the desk at the end of the maze, where you'll find the final tape recorder containing Clive's research. Open the second drawer of this desk to find the record inside. Once you've picked up all four hidden records, Complete Discography will unlock.
Tip
Final Breath and Long Ride Home are collected as part of story progression. Pay particular attention to I'm Coming to Getcha in the staff-room lounge and One Last Goodbye in the second drawer of the desk at the end of the basement maze.
Warning
This trophy is missable. Make sure you've collected all four hidden records before progressing beyond the point of no return.

Trophy: Disc Jockey
Play all records during the course of the night
Type: Bronze
Category: Missable
Unlock Details
Play all 12 records over the course of the night. You begin the game with eight records already available at the station, while the remaining four are hidden and must be found as you explore. See Complete Discography for the locations of the four missing records. You only need to put each record on the turntable and play it. You don't need to let the entire song finish, and you don't need to announce the record on air when prompted. The 12 records you need to play are: 198X by the Blast Processors Moonlight by David Scopo The Flow by Crying for Help If You Dare by the Late Night Lurkers Stab in the Twilight by Knife and Ez The Glam Jam by Stormriders The Word by Smooth Final Breath by Roddy Snatcher I'm Coming to Getcha by Vice Long Ride Home by The Barn Finds One Last Goodbye by Caged Tiger Let Me Go by The Hang-Ups Play all 12 at least once during the night and Disc Jockey will unlock. Between preventing murders, solving puzzles, and becoming Gallows Creek's unofficial emergency dispatcher, don't forget Forrest technically still has a radio show to run.
Tip
You only need to briefly play each record for it to count. There's no need to listen to the entire song or announce it on air.
Warning
This trophy is missable because four of the required records must be found while exploring the station. Make sure you've collected and played all 12 before reaching the point of no return.

Trophy: For Fernando!
Murphy survived The Whistling Man
Type: Silver
Category: Missable
Unlock Details
Save Murphy from the Whistling Man by sending the correct person to the Gallows Waste Disposal Plant and guiding them to his location. Murphy previously called the station intending to lure the Whistling Man to the Waste Disposal Plant. When he calls back, things have gone slightly off-script. There's smoke, the town's only fire engine has had its tires slashed, and Murphy needs somebody to rescue him. Peggy has three possible people who can help: Alex, Jericho, and Katherine. The map on the wall gives you the clues needed to choose. Romero Road is closed between Haddonfield Road and Rogers Avenue, blocking Alex's direct route. Jericho is closer, but he's old and unlikely to reach Murphy quickly enough. That leaves: Katherine Return to the desk, press the "Press 4 Peggy" button, and tell Peggy to call Katherine. Once Katherine reaches the plant, you'll need to figure out exactly where Murphy is trapped. Choose: "See anything Murphy?" Murphy will describe old cans, bottles, and newspapers, including newspapers called the Henderson Headline. Choose: "Katherine - Recycling!" When Katherine reaches the next split, choose: "Hear anything, Murphy?" Murphy will hold the receiver up so you can hear what's happening around him. The banging indicates he's near the crusher. Choose: "Katherine, go to the crusher!" Katherine will then ask which dumpster she should check. Remember the newspaper Murphy mentioned earlier and choose: "Henderson!" Katherine will find Murphy and get him to safety, unlocking For Fernando! Apparently Forrest has now added "remote waste disposal plant rescue coordinator" to his résumé. At this point, just give the man a badge.
Tip
The two big clues are the Henderson Headline newspapers and the banging Murphy hears. They point Katherine toward the Recycling area, the crusher, and finally the Henderson dumpster.
Warning
This trophy is missable. Send Katherine to rescue Murphy. Alex is blocked by the road closure, while Jericho won't reach him in time.

Trophy: Fridge Horror
Place the mannequin head into the fridge
Type: Bronze
Category: Missable
Unlock Details
Place the mannequin head inside the fridge in the staff recreation area. After regaining access to the station during Let Me In, enter the first door on your right. This is the janitor's closet. Inside the closet, you'll discover a secret room hidden behind the cabinet. Enter the secret room and look on the desk. Alongside a key needed to regain access upstairs, you'll find a mannequin head that you can pick up. Take the mannequin head with you and return upstairs. Head into the staff recreation area through the door marked with the coffee cup sign and find the fridge. Open the fridge and use L2 to position the mannequin head inside. Once you've successfully placed the head in the fridge, Fridge Horror will unlock. Why? Because after several hours of preventing murders, Forrest deserves to unwind by putting a mannequin head in the staff fridge and making it somebody else's problem.
Tip
You don't have to do this immediately after finding the mannequin head. You can return to the secret room and complete it later whenever you're free to explore the station.
Warning
This trophy is missable. Place the mannequin head in the fridge before reaching the final break and point of no return.

Trophy: Game Over
Maurice Russell survived The Whistling Man
Type: Silver
Category: Missable
Unlock Details
Save Maurice Russell from the Whistling Man by helping him navigate his office and successfully execute Peggy's escape plan. After a little shameless advertising from Ponty's Pizza, Maurice calls the station and initially doesn't believe the Whistling Man is real. That confidence doesn't last particularly long. Once Maurice realizes he's actually in danger, Peggy comes up with a plan to lure the killer around the building using phone calls while Maurice escapes. Maurice will fax you a floorplan of his office. Leave the radio booth and head down the hall into the room filled with desks. The fax machine is immediately on your right as you enter. Grab the floorplan and return to the booth. When you're ready to execute the plan, choose: "Call the kitchen." "Go to the archives." "I'm sure." Once Maurice reaches the kitchen, choose: "Can you lock him in a room?" "Use a radio?" "Maurice, turn the volume down!" "Call the boardroom." "I'm sure. Make the call." Maurice will then start heading toward his office. You'll need to create another distraction and tell him where to hide. Choose: "I'll impersonate Mr. Russell." "Hide in your cabinet." The next dialogue choices are timed, but here's the important part: DO NOT SELECT ANYTHING. Let the entire timer expire. This gives Maurice enough time to hide, after which Forrest will automatically taunt the Whistling Man. Follow the sequence correctly and Maurice will survive, unlocking Game Over. Who knew surviving a serial killer would require a fax machine, office navigation, prank calls, and a radio DJ doing an impression? The '80s really did have everything.
Tip
Make sure you collect Maurice's faxed floorplan before continuing. You'll find the fax machine immediately to the right when entering the office area with all the desks.
Warning
When the final timed dialogue choices appear, don't press anything. Let the timer completely run out so Maurice has enough time to hide.

Trophy: Jason Lives
Jason Parker survived The Whistling Man
Type: Silver
Category: Missable
Unlock Details
Save Jason Parker after he's stabbed by giving Casey the correct medical instructions and finding someone nearby with the experience needed to help him. Casey Moore calls the station with her friend Jason in serious condition after being stabbed. Forrest and Peggy contact the hospital, but Gallows Creek's only ambulance was destroyed along with the gas station. At this point, this town may want to consider investing in a second emergency vehicle. The nurse explains how Casey should treat Jason's wound. When you get back on the phone with her, choose: "Don't touch the knife." "We need to secure the knife." "Use the cleaning rags" When Peggy points out that you can't stay on the phone indefinitely, choose: "Could somebody nearby help?" You'll learn that the station previously held mandatory first-aid training. Peggy missed it, but Reggie's personnel records might reveal another employee who can help. Grab the key to Reggie's office, head downstairs to reception, go through the staff door at the back, and turn right. Reggie's office is the first door on the right near the green neon clock. Inside, you'll need to open the safe on the right wall. Check the top-right desk drawer for a floppy disk. Insert it into the computer and read through its contents to discover the date 11/07, described as a "very important date for the town." Use this as the safe combination: 1107 Inside the safe are several employee floppy disks. The person you're looking for is John Hedges. Peggy and Karen didn't attend the first-aid course, while Brad and Barbara missed most of it. John may not have cooperated with the trainer either, but he was previously a war medic and lives on Nancy Drive, which is also where Jason currently is. John's floppy disk is located at the back-left of the safe. Once you've found the information you need, use the intercom to speak with Peggy and choose: "I think I know who to call." "He's going into shock." "Elevate Jason's legs." "Apply an additional bandage." "Be strong for Jason." "Call John Hedges" "This is a medical emergency!" Follow the sequence correctly and John will be sent to help Jason, allowing Jason Parker to survive and unlocking Jason Lives. Forrest started this shift expecting to play records. He's now giving emergency first-aid instructions while digging through his boss's confidential floppy disks. Whatever they're paying him, it isn't enough.
Tip
The safe combination in Reggie's office is 1107, and John Hedges is the person you need to identify. His personnel floppy disk is at the back-left of the safe.
Warning
This trophy is missable. Do not remove the knife from Jason's wound, and make sure you ultimately choose John Hedges as the person to help him.

Trophy: Keep Talking and Nobody Dies
Sandra Sharpe survived The Whistling Man
Type: Silver
Category: Missable
Unlock Details
Save Sandra Sharpe from the Whistling Man by helping her successfully hotwire her car. Sandra is the third real caller of the night, following a prank call. During her first call, none of your dialogue choices affect whether she survives, so enjoy the conversation while you still have the luxury of saying whatever you want. Sandra eventually needs help starting her car without the keys. Leave the radio studio, head straight across, go down the hallway on the right, and enter the door at the end. At the back of this room is a desk with a red toolbox. Check the note on the desk to learn that the car theft magazine you need has been borrowed and, thanks to some apparently weaponized huevos rancheros, you'll find it in the bathroom. Head to the men's bathroom and check the left-most cubicle. The magazine is on the floor to the left of the toilet. Pick it up and examine both sides to get the information needed to help Sandra. Return to the radio booth and press the "Press 4 Peggy" button when you're ready. When Sandra calls back, choose: "Put the screwdriver in the ignition and twist clockwise." "Unscrew the steering column." "Tell me exactly what you see." "What's the serial number on the steering column?" Sandra will give you the serial number: 576-895-320 Now choose: "Strip and twist together the Red and Yellow wires." Finally, choose: "Strip the purple wire and brush against the twisted wires." Follow those instructions correctly and Sandra will get her car started and survive, unlocking Keep Talking and Nobody Dies. Nothing says "local radio personality" quite like teaching a terrified caller how to hotwire a car using instructions you found next to a toilet.
Tip
You only need the car theft magazine for the solution. It's in the men's bathroom, inside the left-most cubicle on the floor beside the toilet.
Warning
This trophy is missable. Giving Sandra the wrong hotwiring instructions can get her killed, so keep a manual save before completing her call.

Trophy: Killer Frequently
Nobody survives The Whistling Man
Type: Silver
Category: Missable
Unlock Details
Make sure none of the required Whistling Man targets survive the night. This trophy unlocks at the conclusion of the game alongside The End?. This is best saved for a second playthrough after you've already completed the game and saved everyone. You'll know how each encounter works, and many sections become considerably shorter when your advice is... less helpful. Here are quick ways to eliminate each required character: Deputy Martinez: When Leslie needs to choose a weapon, tell her: "Take the Baton" Sandra Sharpe: Give Sandra the wrong instructions while she's trying to hotwire her car: "Unscrew the steering column." "Strip the Blue and Red wires and twist them together." Maurice Russell: When Maurice insists that you collect the faxed map, go and grab it. You can drop it along the way or simply return with it, then choose: "I lost it..." "Can you send it again?" Maurice will send another copy. Don't collect this one. Press the left-most call button again and choose: "Can you send it again?" At this point, Maurice may begin questioning why he called a radio DJ during a serial killer emergency. Virginia Sullivan: When arranging the food delivery, call either Grilling Spree or Chalupacabra. This sends the food to the wrong frat house and prevents Virginia from surviving her encounter. Eugene Stine: When Eugene needs directions, deliberately send him the wrong way by choosing: "Go forwards!" "Go backwards!" Murphy: When choosing someone to rescue Murphy, call either Alex or Jericho. Neither will reach him in time. The Teens: You need Jennifer, Scott, Cynthia, Tammy, Hot Dave, Chad, Kyle, Heather, Lisa, and Seth to die. Choose the worst possible person for each job: Who should climb onto the roof? Kyle Who should pick the lock? Scott Who should lure the killer by running away? Seth Who should use acting to lure the killer in? Cynthia Who should be the getaway driver? Tammy Carrie will always survive this encounter, but don't panic. She is not one of the characters required to die for the trophy. Chuck Brody: When determining the Whistling Man's next victim, deliberately choose the wrong person AND wrong location. Do NOT select Chuck Brody or the Gas Station. Roller Ricky: Choose: "Give entry code" This allows Dawn inside and seals Ricky's fate. And yes, this one hurts. Nobody said being the worst radio host in Gallows Creek was going to feel good. Jason Parker: Ignore basically everything the nurse told you about keeping Jason alive. First choose: "Take the knife out." After heading downstairs to Reggie's office, use the intercom again and choose: "Elevate Jason's wounds." "Replace the bandage." When you're given the opportunity to call someone, choose Brad, Barbara, or another available option, but DO NOT call John Hedges. You may need to remove the appropriate floppy disk from the safe and insert it into the computer before certain contacts appear as options. Teddy Gallows Jr: If you've successfully killed everyone required up to this point, Dawn won't give Forrest the opportunity to interview Teddy. Without the interview, Forrest cannot broadcast information that would help the police determine where Teddy is being held, resulting in Teddy's death. Peggy Weaver: Again, if everyone else has died up to this point, Forrest won't get the Teddy interview. Without that interview, Forrest also loses the opportunity to save Peggy when she arrives later, resulting in her death. Forrest Nash: If everyone else has died, Dawn will eventually reveal her true name and decide that Forrest hasn't exactly made a convincing case for keeping himself alive. Forrest won't be allowed to continue the interview, resulting in his death and completing your impressively disastrous night. Once all required Whistling Man targets are dead, finish the game and Killer Frequently will unlock alongside The End?. Congratulations. In your first playthrough, you were Gallows Creek's greatest hero. This time, answering Forrest's radio show was basically a death sentence.
Tip
Do this on a separate playthrough after earning Not All Talk. Several encounters end sooner when characters die, and later calls can disappear entirely because the characters involved are no longer alive, making this run considerably faster.
Warning
There is no Chapter Select. Save regularly in case you accidentally save someone. Yes, for this trophy, accidentally being competent is the problem.

Trophy: Not All Talk
Save all Whistling Man Targets
Type: Gold
Category: Missable
Unlock Details
Save every Whistling Man target and make sure they are all still alive when you reach the end of the night. The trophy will unlock at the conclusion of the game alongside The End? if everyone survived. The characters you need to save are: Deputy Martinez Sandra Sharpe Maurice Russell Virginia Sullivan Eugene Stine Murphy Jennifer Scott Cynthia Tammy Hot Dave Chad Kyle Heather Lisa Seth Chuck Brody Roller Ricky Jason Parker Teddy Gallows Jr Peggy Weaver Forrest Nash Each major character or group has an individual survival trophy, so those trophies are a good way to confirm that you're successfully keeping Gallows Creek's population from rapidly declining. The individual survival trophies are: A Shocking Turn of Events — Deputy Martinez Keep Talking and Nobody Dies — Sandra Sharpe Game Over — Maurice Russell Somebody Order a Savior? — Virginia Sullivan Child of the Corn Maze — Eugene Stine For Fernando! — Murphy Not So Stupid Teens — Jennifer, Scott, Cynthia, Tammy, Hot Dave, Chad, Kyle, Heather, Lisa, and Seth An Explosive Escape — Chuck Brody An Alarming Development — Roller Ricky Jason Lives — Jason Parker Took a Swing for Teddy Gallows — Teddy Gallows Jr A Tale of Two Sisters — Peggy Weaver The Man, The Myth, The Scream — Forrest Nash Killer Frequency does not have Chapter Select, which makes your manual saves extremely important. Save frequently and, ideally, create a new save at the beginning of each important phone call. If somebody dies, reload and try the sequence again rather than continuing. The individual trophy entries below cover exactly how to save each caller, so you don't need to memorize the entire night before starting. Keep everyone breathing until morning and Not All Talk will unlock at the end of the game. Apparently Forrest Nash's job description includes DJ, therapist, emergency dispatcher, puzzle solver, and the only competent person awake in Gallows Creek.
Tip
Use your three manual save slots throughout the night and save before important phone calls. If you make a mistake that gets someone killed, reload immediately and choose a different solution.
Warning
There is no Chapter Select. If you allow a required character to die and continue beyond a usable save, you'll need another playthrough to save them and earn this trophy.

Trophy: Not So Stupid Teens
All Teens (except Jimmy) survived The Whistling Man
Type: Silver
Category: Missable
Unlock Details
Save all of the teens except Jimmy during their encounter with the Whistling Man. After Teddy Gallows Jr. drops by to promote his mayoral campaign, Carrie calls the station while hiding from the Whistling Man inside a murder house. During the first part of the call, it doesn't matter which room you tell her to hide in or whether you tell her to run or hide. Unfortunately, Jimmy can't be saved. Once he meets his fate, tell the others: "RUN!" Carrie and the remaining teens will come up with an escape plan, but there's one problem: they have absolutely no idea who should do what. Thankfully, their friend Jeanie is an intern at the station and has apparently documented everyone's strengths and weaknesses like she knew this exact situation was coming. Head downstairs to reception and follow the right-hand wall toward the front entrance. Jeanie's desk is tucked behind a dividing wall. Pick up the friendship quiz from her desk and make sure you examine both sides. It contains the clues needed to assign everyone to the correct role. Return to the radio booth and, when Carrie calls again, make these assignments: Who should climb onto the roof? Heather Heather was voted "most likely to peak Mt. Everest," making her the best climber. Who should pick the lock? Jennifer Jennifer was voted "most likely to escape prison." We're not asking questions. Who should lure the killer by running away? Hot David He's the best choice because he's "most likely to become an Olympic athlete." Who should use acting to lure the killer in? Lisa Lisa and Tammy both scored for being "most likely to win an Oscar," but Tammy also has the "worst poker face." Lisa gets the role. Who should be the getaway driver? Chad Of the remaining choices, Chad is the only one who didn't receive any points for being "most likely to end up in a car crash." Once everyone has their roles and the plan begins, tell Carrie: "Focus" Now all you can do is listen as the plan unfolds. If you assigned everyone correctly, Jennifer, Scott, Cynthia, Tammy, Hot David, Chad, Kyle, Heather, Lisa, and Seth will survive, unlocking Not So Stupid Teens. Turns out that dumb friendship quiz everyone fills out with their friends might actually save your life one day. Take that, standardized testing.
Tip
Pick up Jeanie's friendship quiz from her desk downstairs and examine both sides if you want to work out the assignments yourself.
Warning
Jimmy cannot be saved and does not count against this trophy. Everyone else in the group must survive, so make sure you assign all five roles correctly and tell Carrie to "Focus."

Trophy: Somebody Order a Savior?
Virginia Sullivan survived The Whistling Man
Type: Silver
Category: Missable
Unlock Details
Save Virginia Sullivan from the Whistling Man by figuring out which restaurant is delivering food to the nearby frat house and using that delivery to send Virginia some very unconventional backup. During Virginia's first call, you can choose any dialogue options you like. She eventually hangs up, but not before mentioning enough details for Peggy to come up with a plan: find out where the nearby frat house ordered takeout, contact the restaurant, and use the delivery to get someone over to Virginia. Peggy will give you the key to the downstairs kitchen. You can investigate the food critic's desk in the upstairs office and the staff kitchen downstairs to piece together the clues. The important answer is: Ponty's Pizza If you want to follow the clues yourself, the food critic's desk rules out Chalupacabra because it's expensive and doesn't offer deals. Information about Grilling Spree isn't particularly promising either. Downstairs, enter the reception area, go through the staff door behind the desk, then immediately turn left and enter the room marked with a coffee cup. Check the bin to the left to find a Ponty's Pizza box advertising a special deal: one free beer for every point Gallows High scored in the big game. For a frat house throwing a party, that's less of a promotion and more of a legally binding obligation to order pizza. Once you've gathered the information, return to the radio booth and press the "Press 4 Peggy" button. Choose: "Yes. I'm ready." "Yes." "Call Ponty's Pizza." "FRAT MAN CALLING." "Garlic bread!" After a short intermission, members of the frat will call the station. Unfortunately, they're convinced Forrest might be someone named Goose, because apparently saving Virginia wasn't complicated enough already. Choose: "This is an emergency." When you're asked to prove yourself by playing a record, play: The Flow Do everything correctly and the plan will work, allowing Virginia to survive her encounter with the Whistling Man and unlocking Somebody Order a Savior? Only in Gallows Creek could ordering pizza and requesting garlic bread become part of an emergency rescue operation.
Tip
You don't actually need to solve the restaurant mystery again if you already know the answer. The correct restaurant is Ponty's Pizza, and the record you'll eventually need to play for the frat is The Flow.
Warning
This trophy is missable. Calling Grilling Spree or Chalupacabra sends the delivery to the wrong frat house and prevents Virginia from being saved.

Unlock Details
Save Virginia Sullivan from the Whistling Man by figuring out which restaurant is delivering food to the nearby frat house and using that delivery to send Virginia some very unconventional backup.
During Virginia's first call, you can choose any dialogue options you like. She eventually hangs up, but not before mentioning enough details for Peggy to come up with a plan: find out where the nearby frat house ordered takeout, contact the restaurant, and use the delivery to get someone over to Virginia.
Peggy will give you the key to the downstairs kitchen. You can investigate the food critic's desk in the upstairs office and the staff kitchen downstairs to piece together the clues.
The important answer is:
Ponty's Pizza
If you want to follow the clues yourself, the food critic's desk rules out Chalupacabra because it's expensive and doesn't offer deals. Information about Grilling Spree isn't particularly promising either.
Downstairs, enter the reception area, go through the staff door behind the desk, then immediately turn left and enter the room marked with a coffee cup. Check the bin to the left to find a Ponty's Pizza box advertising a special deal: one free beer for every point Gallows High scored in the big game.
For a frat house throwing a party, that's less of a promotion and more of a legally binding obligation to order pizza.
Once you've gathered the information, return to the radio booth and press the "Press 4 Peggy" button.
Choose:
"Yes. I'm ready."
"Yes."
"Call Ponty's Pizza."
"FRAT MAN CALLING."
"Garlic bread!"
After a short intermission, members of the frat will call the station. Unfortunately, they're convinced Forrest might be someone named Goose, because apparently saving Virginia wasn't complicated enough already.
Choose:
"This is an emergency."
When you're asked to prove yourself by playing a record, play:
The Flow
Do everything correctly and the plan will work, allowing Virginia to survive her encounter with the Whistling Man and unlocking Somebody Order a Savior?
Only in Gallows Creek could ordering pizza and requesting garlic bread become part of an emergency rescue operation.
Tip
You don't actually need to solve the restaurant mystery again if you already know the answer. The correct restaurant is Ponty's Pizza, and the record you'll eventually need to play for the frat is The Flow.
Warning
This trophy is missable. Calling Grilling Spree or Chalupacabra sends the delivery to the wrong frat house and prevents Virginia from being saved.
Trophy: The Man, The Myth, The Scream
Forrest Nash survived The Whistling Man
Type: Gold
Category: Missable
Unlock Details
Keep Forrest Nash alive during the final confrontation with the Whistling Man. Like Peggy, Forrest's fate is determined by how you handle the interview with Teddy Gallows Jr. and the Whistling Man near the end of the game. Follow the full sequence detailed in Took a Swing for Teddy Gallows. If you successfully navigate the confrontation, Forrest will survive and The Man, The Myth, The Scream will unlock. After everything Forrest has been asked to do during this shift, surviving long enough to clock out feels like the least Gallows Creek owes him.
Warning
This trophy is missable. Forrest's survival depends on your actions during the final interview, so follow the choices in Took a Swing for Teddy Gallows carefully.

Trophy: Took a Swing for Teddy Gallows
Teddy Gallows Jr survived The Whistling Man
Type: Silver
Category: Missable
Unlock Details
Save Teddy Gallows Jr. during the final confrontation at the radio station by choosing the correct dialogue options and finding proof that Peggy hasn't forgotten her past. After restoring the power and returning upstairs, you'll discover that the Whistling Man has made his way inside the station. Doors begin locking behind you, the radio booth is inaccessible, and Peggy's room has been left wide open. Head inside. The door will slam shut behind Forrest, and the Whistling Man will tear through the radio booth before pointing toward the controls. Press the right-most square yellow button underneath the sliders to answer the call. Dawn is on the other end, and she has Teddy Gallows Jr. with her. You'll also discover that there has been more than one Whistling Man operating around Gallows Creek tonight. During the following interview, choose these dialogue options: "I'll do it." "I can do that." "Do you want to die?" "Whistling night, right?" "No. Ricky didn't know." "Just a prank?" "Who was it?" "How do you know?" "Then why the cover up?" "He wasn't a blip." "Answer the question." "You've been through hell." "The School Gym!" Peggy will eventually arrive and more of the truth will come out. For the next few dialogue choices, your selections don't matter. Eventually, Marie will accuse Peggy of forgetting her. Forrest needs to prove otherwise. Look to the left of the speaker on the left side of the desk and pick up the birthday card. Rotate the card and examine the inside. Doing this provides the proof needed to continue the confrontation successfully and ensures Teddy Gallows Jr. survives, unlocking Took a Swing for Teddy Gallows. You've spent the entire night saving Gallows Creek with phone calls, pizza orders, floppy disks, friendship quizzes, and questionable emergency services. Naturally, the grand finale now depends on remembering to read a birthday card.
Tip
When Marie accuses Peggy of forgetting her, immediately look for the birthday card to the left of the speaker on the left side of the desk. Pick it up and rotate it to read the inside.
Warning
This trophy is missable. Follow the listed dialogue sequence during Teddy's interview and make sure you examine the inside of Peggy's birthday card when prompted.

Trophy: Master of Unlocking
Unlock all doors in the station
Type: Bronze
Category: Collectible
Unlock Details
Collect all six keys found throughout the radio station. Despite the trophy description saying you need to "Unlock all doors in the station," you don't actually need to physically open every door. The trophy unlocks once you've collected all six keys. Four of the keys are delivered by Peggy and appear on the yellow doormat outside her room. The remaining two are found in the secret basement room. The six keys are: 2nd Floor Stairway Staff Area (Reception) Fire Door Basement Stairs Basement Storage Reggie's Office All six keys are required for story progression, so none of them can be permanently missed. You'll naturally collect them as Forrest gains access to more of the station. Once you've picked up the sixth and final key, Master of Unlocking will unlock. Apparently Peggy's preferred security system is just slowly sliding Forrest the entire station's key collection over the course of one increasingly terrible night.
Tip
You don't need to hunt down and physically open every possible door. Concentrate on collecting all six keys; four come from Peggy's yellow doormat, while the other two are found in the secret basement room.

Trophy: Dead Air
Don't respond when prompted for 30 seconds
Type: Bronze
Category: Misc
Unlock Details
Ignore a conversation prompt for 30 seconds without selecting a response. Throughout the game, conversations will regularly give you multiple dialogue options to choose from. When one of these normal, non-timed dialogue prompts appears, simply don't choose anything. Leave Forrest awkwardly standing there in complete silence for 30 seconds and Dead Air will unlock. Timed dialogue choices won't work because the conversation automatically continues when their timer expires. Sometimes the best thing a radio host can say is absolutely nothing. Apparently 30 seconds of uncomfortable silence is enough to earn a trophy for it.
Tip
Do this during any regular dialogue choice without a visible timer so you don't accidentally allow the conversation to continue before the 30 seconds are up.

Trophy: Forrest Dash
Finish the game in under 4 hours with all callers surviving
Type: Gold
Category: Misc
Unlock Details
Finish the game in under 4 hours while keeping every caller alive. Save this trophy for last. By this point, you should already know the solutions to the callers' problems and the station's major puzzles, making a sub-four-hour run much easier. The biggest time saver is simply knowing what to do. Skip unnecessary exploration, avoid optional collectibles, and move directly between objectives. You can also skip the checks near the beginning of the game. They're primarily tutorials for playing records and tapes and aren't necessary for this run. Many less-important dialogue choices eventually reach the same outcome, although some responses move conversations along faster. You can also collect several useful objects before the story specifically asks for them. For example: Pick up Final Breath the first time you visit reception. Grab Eugene's maze map early. When searching the basement for Clive's research, collect the alarm-code booklet before leaving. This section eventually teleports you back upstairs, and you'll keep the booklet, saving yourself another trip into the basement later. You also don't always need to physically find the guide, book, or map associated with a puzzle if you already know the correct answer. The major exception is Maurice. You MUST collect the office map Maurice sends through the fax machine. Even if you already know how to save him, don't skip collecting his map. Most importantly, this isn't just a speedrun. Every caller still needs to survive, so use the correct solutions from the individual survival trophies throughout the run. Finish the game with everyone alive and a completion time below four hours to unlock Forrest Dash. Four hours might sound intimidating at first, but once you know Gallows Creek better than its emergency services apparently do, there's plenty of time.
Tip
Prioritize efficiency rather than rushing blindly. Collect useful story items early, skip unnecessary exploration, and use the solutions you've already learned instead of repeatedly hunting down their clues.
Warning
All callers must survive. A fast run with even one dead victim will not satisfy the trophy requirements. Also remember that Maurice's faxed office map must still be physically collected.

Trophy: Sound Blaster Master
Play a sound on the soundboard during a call
Type: Bronze
Category: Misc
Unlock Details
Play any soundboard effect during a phone call. The soundboard is the right-most control panel on the desk when you're facing Peggy. Despite being introduced during the tutorial, the game doesn't really require you to use it afterward, and callers don't seem particularly impressed by Forrest's incredible collection of sound effects. During any phone call, simply press any button on the soundboard. The moment you play a sound effect during an active call, Sound Blaster Master will unlock. This may accomplish absolutely nothing for the person calling for help, but at least Forrest is finally getting some use out of the equipment.

Trophy: From Beyond The Grave
Uncovered Clive's Research
Type: Silver
Category: Story
Unlock Details
Uncover Clive's research hidden in the basement of the radio station. After An Explosive Escape, Forrest and Peggy realize there may be more information hiding downstairs. Head back to the creepy mannequin room in the basement. Where the investigation board used to be, you'll now find a hidden Basement Storage key. Take the key and unlock the basement storage door near the stairs. Inside, you'll need to navigate a small maze of shelves and boxes while following Clive's trail of Polaroid photos. Your goal is to find six tape recorders along with the documents he left behind. You don't need to listen to each recording from beginning to end. For documents, simply picking them up is enough for them to register, so you can put them straight back down. Tape 1: From the entrance, go through the door on the right. The first tape recorder is on your right. Grab the Polaroid clue from the shelf below and slightly to the right of the recorder. Tape 2: From Tape 1, turn right and hug the right side as you enter the next room. Continue toward the opposite wall, then go right around the stack of boxes to find the second recorder. Open the nearby drawer to find the next Polaroid and make sure you pick up the document underneath it. Tape 3: Turn around from Tape 2 and head back toward the wooden support beam you passed earlier. Turn right and continue down the passage until you reach shelving at the end with two boxes stacked on the right. Turn right, hug the shelving on your right, then turn around. It's extremely dark here, but look for the red glow from the third tape recorder. The next Polaroid is on the shelf underneath it. Tape 4: Turn around from Tape 3 and head out. Look for shelves illuminated from behind and move through them until you reach the wall. Continue forward past the large stack of boxes on your right. Immediately afterward, look right again for a cabinet with Tape 4 sitting on top. The next Polaroid is behind the fan. Tape 5: Continue along the mostly linear path until you reach a hole in the wall. Crouch through it. After emerging on the other side, turn left and go through the gap in the shelves. You'll also pass a generator with a large red button. Remember this location because the generator becomes important later. Look through the shelves to spot a cabinet containing Tape 5. Open the cabinet, collect the tape and Polaroid, and make sure you also pick up the document on the right. Tape 6: From Tape 5, turn left to face forward and look for a group of filing cabinets. Follow the only path through them until you reach a desk at the end of the basement maze. The sixth and final tape recorder is sitting on the desk. There's also an optional blue pamphlet behind it containing some interesting names if you're digging into the story. Before leaving, check the second drawer down at this desk for a hidden record needed for Complete Discography. Once you've found Clive's research, you're finished with the requirements for From Beyond The Grave. Before returning upstairs, you can save yourself some backtracking later. Return to the area where you found Tape 1, face the recorder, turn left, and head around the shelves into the room at the back. Pick up the booklet containing access codes. If you're holding the booklet when you use the intercom, you'll be transported back to the booth while still carrying it. You'll need those codes for An Alarming Development, so future Forrest will appreciate the favor. Congratulations—you've survived the station's creepy basement, followed six mysterious recordings through a storage maze, and discovered that perhaps the mannequins weren't actually the most concerning thing down there.
Tip
You don't need to listen to every tape completely. Start each recording and pick up every required document to register it. Also grab the hidden record from the second drawer at the final desk and the access-code booklet near the Tape 1 area before returning to the booth.

Trophy: Let Me In
Gain access to the station after being locked out
Type: Silver
Category: Story
Unlock Details
Regain access to the radio station after Dawn sends Forrest outside to retrieve her requested record. Dawn initially asks Forrest to play a song, but there's one small problem: Peggy threw the record out of a window. Later, Dawn calls again and makes Forrest an offer. Retrieve the record and play her song, and she'll share information about who the Whistling Man might target next. Peggy gives you the key to the exit door. Head downstairs, go through the staff door, and make your way outside. Once outside, go left down the stairs and continue forward. Turn left into the laneway and look for a mattress on the right. Dawn's requested record is sitting on top of it. Before heading back, take note of the fuse box at the far end of the area on the left. Return to the station entrance and you'll discover the door has locked behind you. The button underneath the red light for the service lift doesn't work either. Looks like Forrest's quick trip outside has turned into an impromptu electrical engineering exam. Inspect the fuse box and you'll discover that several fuses need replacing. Search the small outdoor area for replacement fuses. The yellow sticky note beside the fuse box tells you what matters: the values of the four installed fuses must add up to 70. There are multiple valid combinations. Two confirmed solutions are: A30 + A5 + A15 + A20 = 70 or A5 + A5 + A30 + A30 = 70 Once your four fuses total 70, restore the power. Return to the service elevator shaft to the left of the locked station door. With the power restored, you can now access it. Crouch using R3, drop down through the shaft, and make your way back inside the station to unlock Let Me In. Forrest went outside to pick up a record and came back as an electrician. Just another perfectly normal night shift at KFAM.
Tip
You don't need one specific set of fuses. Any combination of four replacement fuses that totals 70 will solve the fuse-box puzzle.

Trophy: Let There Be Light
Restore power to the station after the blackout
Type: Silver
Category: Story
Unlock Details
Restore power to the radio station after the blackout. After Jason Lives, you'll reach the game's point of no return. Peggy will warn you: "this might be your last break for the night, so-- try to enjoy it" Before continuing, finish any remaining collectible or situational trophies you still need. After a few more phone calls, Forrest will be on the verge of receiving important information about the Whistling Man when the station suddenly loses power. Peggy tells you about an emergency generator in the basement. You've already passed this generator while searching for Clive's research during From Beyond The Grave. Head downstairs and make your way back through basement storage to the generator. Once you find it, press the big red button. The station's power will return and Let There Be Light will unlock. For once, Forrest gets a problem that can actually be solved by pushing a giant red button. Enjoy the simplicity while it lasts.
Warning
This section begins the point of no return. Finish any remaining collectible or situational trophies before progressing past Peggy's warning.

Trophy: The End?
Reach the end of Whistling Night
Type: Gold
Category: Story
Unlock Details
Reach the end of Whistling Night. This is a story-related trophy and will unlock shortly after the events connected to Took a Swing for Teddy Gallows, when your very eventful night behind the microphone finally comes to an end. If you've met the requirements, The End? will also unlock alongside either Not All Talk for saving everyone or Killer Frequently for ensuring nobody survives. Afterward, the credits will roll and you'll get to see the results of your night displayed on a corkboard. Each character is shown along with their final fate, with a red X covering the photo of anyone who didn't survive. So sit back, admire the consequences of several hours of questionable late-night radio advice, and see exactly how Gallows Creek fared under Forrest Nash's watch.

Welcome to Killer Frequency. You’re Forrest Nash, late-night radio host for 189.16 – The Scream, working the midnight shift on September 3rd, 1987. Unfortunately, a killer is roaming the streets of Gallows Creek, and your quiet night behind the microphone is about to turn into the worst call-in show imaginable.
For the best experience, consider playing blind at first. A huge part of the fun comes from listening to callers, searching the station for clues, and figuring out how to keep everyone alive yourself. If you’re going straight for the Platinum, make saving everyone your goal for this first playthrough. You have three manual save slots plus an autosave, so save at the beginning of new calls and reload if one of your brilliant pieces of radio advice accidentally gets somebody murdered.
While exploring the station, work on the records, radio ads, doors, and miscellaneous trophies as you encounter them. Play every record and radio ad you find, collect the hidden records, and unlock every door. You can also knock out simple trophies such as Dead Air, Sound Blaster Master, and Fridge Horror during this run. Missing something isn't disastrous, though—you'll be coming back for another night.
As more callers find themselves in trouble, saving them becomes the main focus. Not every dialogue choice matters, so when a choice doesn't affect someone's survival, feel free to let Forrest be Forrest. When a decision does matter, listen carefully and use the clues you've discovered around the station to work out the safest answer.
There are timed dialogue choices, so don't sit staring at those forever. Otherwise, despite callers sounding like they're approximately three seconds away from disaster, you generally have time to think. If you're following the trophy guide, use the individual survivor trophies when you need a puzzle solution rather than spoiling the entire game ahead of time.
Keep saving regularly, especially before important calls. Your ultimate goal for this playthrough is Not All Talk, which requires every Whistling Man target to survive. If somebody dies, reload rather than continuing and discovering several hours later that Forrest Nash's career in emergency crisis management has taken a slight downturn.
Continue protecting every caller as you approach the end of Whistling Night. Several survivor trophies will unlock naturally along the way if you've made the correct decisions, while story progression will also take care of trophies such as Let There Be Light, Let Me In, and eventually The End?.
This is also a good time to check your collectible and miscellaneous progress. Ideally you'll finish the night having played every record and radio ad, collected every hidden record, unlocked every station door, and completed the smaller miscellaneous trophies. Don't sacrifice a survivor just because you forgot something, though—the next playthrough gives you another chance.
Most importantly, enjoy the story. Killer Frequency is much more fun when Gallows Creek still has some surprises left for you, and anything you miss can be cleaned up afterward. Once everyone has survived and Forrest has somehow made it through the world's most stressful radio shift, the hardest part of your Platinum run is behind you.
Your second playthrough flips the entire plan around: let everyone die. This is required for Killer Frequently, and it should be considerably quicker than your first run. Several situations end earlier when you make the wrong choices, and some later calls won't happen when the characters required for them are already dead. You've spent an entire playthrough becoming Gallows Creek's greatest radio hero. Now it's time to become catastrophically bad at your job.
Use this second run to grab any records, advertisements, doors, or miscellaneous trophies you missed the first time. Since you already know the puzzles and station layout, getting around should be much faster.
Finally, complete a speedrun playthrough if you haven't already earned its trophy. By now you know the answers to the callers' problems, and for many situations you don't even need to search for the related clues if you already know the correct solution. Move quickly, save everyone, and you should be able to finish your final trip through Gallows Creek much faster than your first. If a particular puzzle, collectible, or trophy is holding you up, Ask Gami and get back behind the microphone.
Completion Video Playlist
1 video
Killer Frequency Part 1 – Easy to Follow 100% Platinum Walkthrough and Trophy Guide