


Trophy Guide Preview
Overall Trophy Progress
0 / 61 Completed
0%
Trophy Types
Platinum
0 / 1Gold
0 / 1Silver
0 / 0Bronze
0 / 59Categories
Collectible
0 / 55Story
0 / 5
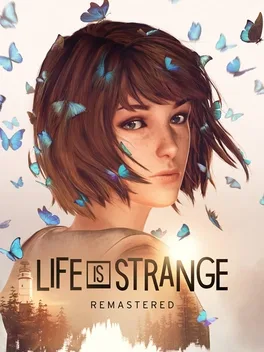
Return to Arcadia Bay as Max Caulfield, a photography student who discovers she can rewind time. Reconnect with an old friend, uncover the secrets of a quiet coastal town, and face choices with lasting consequences in this emotional, story-driven adventure with remastered visuals.
Overall Trophy Progress
0 / 61 Completed
0%
Platinum Path
EARLY GAME Welcome back to Arcadia Bay, where teenage drama is complicated enough before you discover you can rewind time. You'll play as Max Caulfield, a photography student whose unusual new ability lets her revisit conversations, change decisions, and explore different outcomes. Take your time, investigate your surroundings, and enjoy the story without worrying about making the perfect choices. Your main Platinum...
YouTube Playlist
Life is Strange Remastered — Platinum Walkthrough
Trophy: What if?
Unlock all other trophies from Life is Strange™ Remastered
Type: Platinum
Unlock Details
Unlock every other trophy in Life is Strange Remastered to earn the Platinum.

Trophy: Ambient
Take optional photo #1 in Episode 4: Dark Room
Type: Bronze
Category: Collectible
Unlock Details
Take optional photograph #1 in Episode 4: Dark Room. After returning to Chloe's bedroom, you'll find Chloe sitting at her computer. Move behind Chloe while she's working and position Max so that Chloe and the computer are visible. Wait for the photograph prompt to appear, then take the picture to unlock the trophy.
Tip
Capture this photograph before leaving Chloe's room. It's a straightforward opportunity, but easy to overlook if you're focused on continuing the investigation.

Trophy: Balance
Take optional photo #3 in Episode 4: Dark Room
Type: Bronze
Category: Collectible
Unlock Details
Take optional photograph #3 in Episode 4: Dark Room. After arriving at the Blackwell Academy dormitories, follow the main pathway past the students tossing a football. Look to the left side of the path for a small cairn, a stack of stones arranged on top of one another. Approach the stones and adjust Max's position until the photograph prompt appears. Take the picture to unlock the trophy.
Tip
The cairn is easy to overlook because it blends into the surrounding scenery. Check beside the pathway before continuing toward the dormitories.

Trophy: Blowup
Take optional photo #5 in Episode 5: Polarized
Type: Bronze
Category: Collectible
Unlock Details
Take optional photograph #5 in Episode 5: Polarized. After capturing the photograph of the whale outside the Two Whales Diner, turn around and locate the alley running along the right side of the building. Enter the alley and walk toward the far end, where the homeless woman could be found during earlier episodes. Once you reach that area, turn around and look upward toward the buildings on your left. You'll notice a car resting in an unusual position on top of a building. Adjust Max's viewing angle until the photograph prompt appears. Take the picture to unlock the trophy.
Tip
The car is above street level, so remember to look up. It's easy to miss if you're concentrating on the debris scattered throughout the alley.
Warning
Take this photograph before entering the diner. Both Blowup and Camera Obscura are available during the same outside exploration sequence, so collect them together before progressing.

Trophy: Bokeh
Take optional photo #5 in Episode 3: Chaos Theory
Type: Bronze
Category: Collectible
Unlock Details
Take optional photograph #5 in Episode 3: Chaos Theory. While exploring the Principal's office at Blackwell Academy, move around to the front of the desk. Look toward Chloe, who will be standing nearby as you investigate the room. Position Max so that Chloe is clearly visible and wait for the photograph prompt to appear. Take the picture to unlock the trophy.
Tip
Grab this photograph while investigating the office with Chloe. It's a quick opportunity that can easily slip past you if you're focused on searching for information.

Trophy: Camera Eye
Take all optional photos in Episode 3: Chaos Theory
Type: Bronze
Category: Collectible
Unlock Details
Take all 10 optional photographs in Episode 3: Chaos Theory. Each optional photograph has its own individual trophy. Once you've successfully captured all 10 photographs from Episode 3, Camera Eye will unlock automatically. If you missed any photographs during your playthrough, use Collectible Mode to revisit the appropriate scenes and capture the remaining images.
Tip
Check Max's journal to identify any missing photographs before replaying scenes. You only need to collect the photographs you missed, so there's no reason to replay the entire episode.
Video Guide: https://www.youtube.com/watch?v=_UjqtGcnxdY&list=PLBmi6vaTfD_fOMx5Y2gcIhkxpe96zbUMY&index=3&pp=iAQB

Trophy: Camera Obscura
Take optional photo #4 in Episode 5: Polarized
Type: Bronze
Category: Collectible
Unlock Details
Take optional photograph #4 in Episode 5: Polarized. During the storm sequence, Max will eventually reach the area surrounding the Two Whales Diner. Progress through the scene until you've stopped the nearby fire from spreading. Once the immediate danger has been dealt with, turn around and look toward the road. You'll see a whale lying in the street with flames burning in the background. Position Max so the whale and fire are visible, then wait for the photograph prompt to appear. Take the picture to unlock the trophy.
Tip
Deal with the fire first, then look back toward the road. The photograph becomes available once you've safely handled the situation.
Warning
Capture this photograph before entering the diner. Moving inside advances the sequence and ends the opportunity to take it during that visit.

Trophy: Close-Ups
Take optional photo #4 in Episode 1: Chrysalis
Type: Bronze
Category: Collectible
Unlock Details
Take optional photograph #4 in Episode 1: Chrysalis. After arriving at the dormitories, follow the main pathway past the two students playing football. Continue forward, then turn right toward the tree near the bench where Kate is sitting. Look around the right side of the tree to find a squirrel investigating a beer can. Approach carefully until the photograph prompt appears, then take the picture to unlock the trophy.
Tip
The squirrel is small and easy to overlook. Use Kate's bench as your landmark and check the base of the nearby tree before entering the dormitory.

Trophy: Colorized
Take optional photo #8 in Episode 2: Out of Time
Type: Bronze
Category: Collectible
Unlock Details
Take optional photograph #8 in Episode 2: Out of Time. Later during your time at the junkyard, Chloe will lie back on top of a car while pointing her gun toward the sky. Once Chloe is in position, move to the left side of the vehicle and face her. Adjust your position until the photograph prompt appears, then take a picture of Chloe to unlock the trophy.
Tip
This photograph becomes available during a specific moment in the junkyard sequence. Capture it while Chloe is lying on the car rather than continuing the scene immediately.

Trophy: Compressed
Take optional photo #5 in Episode 2: Out of Time
Type: Bronze
Category: Collectible
Unlock Details
Take optional photograph #5 in Episode 2: Out of Time. After entering the Two Whales Diner, turn left and head toward the back of the restaurant. Enter the restroom and look for the mirror mounted above the sink. You'll notice the words "Fire Walk With Me" written across the glass. Approach the mirror and examine the writing until the photograph prompt appears. Take the picture to unlock the trophy.
Tip
Don't leave the diner without checking the restroom. It's an easy location to overlook, especially when you're focused on meeting Chloe.

Trophy: Dioptric Power
Take optional photo #6 in Episode 4: Dark Room
Type: Bronze
Category: Collectible
Unlock Details
Take optional photograph #6 in Episode 4: Dark Room. When Max arrives at the beach, explore the area near Frank's RV. Look across from the RV to find a large beached whale lying on the sand. Walk toward the whale and position Max until the photograph prompt becomes available. Take the picture to unlock the trophy.
Tip
This is one of the easier photographs in Episode 4 thanks to its rather enormous subject. Capture it while exploring the beach before continuing the investigation.

Trophy: Dynamic Range
Take optional photo #7 in Episode 2: Out of Time
Type: Bronze
Category: Collectible
Unlock Details
Take optional photograph #7 in Episode 2: Out of Time. While exploring the junkyard, head toward the train tracks after photographing the yellow school bus. Continue along the path until you pass a washing machine, then turn left toward the nearby trees. Max will comment on a doe standing on a small hill. Look toward the wooded area to spot the animal. Approach the doe and position Max until the photograph prompt appears. Take the picture to unlock the trophy.
Tip
Listen for Max's comment about the doe. It's a useful clue that you're looking in the right area, especially since the animal can blend into the surrounding scenery.

Trophy: Field of View
Take optional photo #1 in Episode 2: Out of Time
Type: Bronze
Category: Collectible
Unlock Details
Take optional photograph #1 in Episode 2: Out of Time. During the episode, Max will visit Kate's dormitory room to return a borrowed book. While inside Kate's room, look around for the rabbit cage. Approach the cage and examine the rabbit until the photograph prompt appears. Take the picture to unlock the trophy.
Tip
Grab this photograph while returning Kate's book. It's an easy collectible to miss if you're focused entirely on the conversation and leave without exploring the room.

Unlock Details
Take optional photograph #1 in Episode 2: Out of Time.
During the episode, Max will visit Kate's dormitory room to return a borrowed book.
While inside Kate's room, look around for the rabbit cage. Approach the cage and examine the rabbit until the photograph prompt appears.
Take the picture to unlock the trophy.
Tip
Grab this photograph while returning Kate's book. It's an easy collectible to miss if you're focused entirely on the conversation and leave without exploring the room.
Trophy: Fisheye
Take optional photo #7 in Episode 4: Dark Room
Type: Bronze
Category: Collectible
Unlock Details
Take optional photograph #7 in Episode 4: Dark Room. After arriving at the barn, explore the outside area before entering the building. Walk toward the left side of the barn and look along the nearby fence. You'll spot a bird perched on the fence. Approach carefully until the photograph prompt appears. Take the picture to unlock the trophy.
Tip
The bird can fly away if you get too close. If this happens, rewind time to return it to the fence, then adjust Max's position and take the photograph.

Trophy: Flash!
Take optional photo #10 in Episode 3: Chaos Theory
Type: Bronze
Category: Collectible
Unlock Details
Take optional photograph #10 in Episode 3: Chaos Theory. Later in the episode, Max will return to Chloe's house and find herself in the kitchen. Look toward the kitchen counter near Chloe to find a camera resting on the surface. Approach the camera and examine it until the photograph prompt appears. Take the picture to unlock the trophy.
Tip
This is the final optional photograph in Episode 3. Make sure to capture it before continuing the story so you can complete the episode's photography collection.

Trophy: Focal Pointed
Take optional photo #8 in Episode 1: Chrysalis
Type: Bronze
Category: Collectible
Unlock Details
Take optional photograph #8 in Episode 1: Chrysalis. After entering the school parking lot, look toward the back-right corner of the area to find a large recreational vehicle (RV). Walk over to the RV and approach the side window nearest the rear of the vehicle. Examine the dirty glass until the "Draw" interaction becomes available. Select "Draw" to let Max leave a little artwork on the window. Once she's finished, examine the drawing again and select the photograph option. Capture the image to unlock the trophy.
Tip
Make sure you're interacting with the rear side window rather than the front windshield. The photo opportunity only becomes available after Max finishes drawing on the glass.

Trophy: Focused
Take optional photo #6 in Episode 1: Chrysalis
Type: Bronze
Category: Collectible
Unlock Details
Take optional photograph #6 in Episode 1: Chrysalis. When you gain access to Victoria's dormitory room, enter and turn around to face the doorway. Look at the collection of photographs displayed on the wall to the left of the door. Approach them and select the "Mess Up" interaction to rearrange Victoria's carefully organized display. Once the photographs have been disturbed, examine the arrangement again. The option to take a picture will appear, allowing you to capture Max's handiwork and unlock the trophy.
Tip
You must interact with the photographs before you can capture them. Apparently, Max's artistic vision involves a little unauthorized redecorating.

Trophy: Framed
Take optional photo #3 in Episode 5: Polarized
Type: Bronze
Category: Collectible
Unlock Details
Take optional photograph #3 in Episode 5: Polarized. Later in the episode, Max will return to the Dark Room and find herself in another conversation with Jefferson. Progress through the sequence until Max rewinds time and gets another opportunity to speak with him. During the repeated conversation, look for the dialogue option "One Last Picture." Select this option to ask Jefferson to take a final photograph of Max. He'll take the picture, unlocking the trophy.
Tip
This is a dialogue-based photograph rather than one taken using Max's camera. Watch for the specific conversation option after rewinding time.

Trophy: Full Exposure
Take optional photo #2 in Episode 2: Out of Time
Type: Bronze
Category: Collectible
Unlock Details
Take optional photograph #2 in Episode 2: Out of Time. After leaving the girls' dormitory, turn right and look for a trash can beside a nearby bench. Approach the trash can and examine its contents. You'll find a piece of bread that Max can use to attract a squirrel. Select the interaction to place the bread on the bench, then move away and give the squirrel time to approach. Once the squirrel jumps onto the bench to investigate the food, carefully return and take its photograph to unlock the trophy.
Tip
Give the squirrel some space after placing the bread. Standing too close can prevent it from approaching, and even the local wildlife apparently appreciates a little privacy.

Trophy: Gamma Value
Take optional photo #5 in Episode 4: Dark Room
Type: Bronze
Category: Collectible
Unlock Details
Take optional photograph #5 in Episode 4: Dark Room. After entering the men's dormitory at Blackwell Academy, turn right and look for a window overlooking the outside grounds. Approach the window and look toward the hillside in the distance. You'll notice a set of footprints visible on the hill. Position Max at the window until the photograph prompt appears, then take the picture to unlock the trophy.
Tip
There's no need to leave the building or find a way onto the hill. The photograph is taken from inside the dormitory through the window.

Trophy: Histogrammar
Take optional photo #4 in Episode 3: Chaos Theory
Type: Bronze
Category: Collectible
Unlock Details
Take optional photograph #4 in Episode 3: Chaos Theory. While exploring the Science classroom, head toward the exit at the back of the room. Look beside the doorway to find a classroom skeleton with a cigarette positioned in its mouth. Approach the skeleton and examine it until the photograph prompt appears. Take the picture to unlock the trophy.
Tip
This photograph is available in the same classroom as The Reflex. Collect both before leaving so you won't need to return later. Apparently, even the classroom skeleton has picked up some questionable habits.

Trophy: Image Stabilizer
Take optional photo #4 in Episode 2: Out of Time
Type: Bronze
Category: Collectible
Unlock Details
Take optional photograph #4 in Episode 2: Out of Time. While outside the Two Whales Diner, walk around the building toward the rear alley. Follow the alley until you reach the fence at the far end. Look for a man sitting near an RV with a dog resting beside him. Approach the fence and focus on the dog until the photograph prompt becomes available. Take the picture to unlock the trophy.
Tip
Collect this photograph immediately after photographing the diner's sign. Both opportunities are available during the same visit, so there's no reason to make another trip.

Trophy: Incandescent
Take optional photo #1 in Episode 5: Polarized
Type: Bronze
Category: Collectible
Unlock Details
Take optional photograph #1 in Episode 5: Polarized. After gaining control of Max in the classroom, look for Kate and approach her to start a conversation. During the conversation, select the "Comfort" dialogue option to reassure Kate. Once the conversation ends, approach Kate again and examine her until the photograph prompt appears. Take the picture to unlock the trophy.
Tip
Make sure to speak with Kate and comfort her before attempting the photograph. The photo opportunity becomes available after completing this interaction.

Trophy: Iris
Take optional photo #6 in Episode 5: Polarized
Type: Bronze
Category: Collectible
Unlock Details
Take optional photograph #6 in Episode 5: Polarized. During the later part of the episode, Max will find herself back in a familiar classroom, although things aren't quite as she remembers them. Walk toward the desk with "Rachel Amber ♥ 4 Ever" carved into its surface. Examine the writing twice. After the second interaction, the message will change to "Chloe Price ♥ 4 Ever." Once the writing has changed, the photograph prompt will appear. Take the picture to unlock the trophy.
Tip
Make sure to examine the desk twice. The photograph only becomes available after the writing changes, so don't move on after the first interaction.

Trophy: Lab Master
Take all optional photos in Episode 2: Out of Time
Type: Bronze
Category: Collectible
Unlock Details
Take all 10 optional photographs in Episode 2: Out of Time. Each photograph has its own individual trophy. Once you've captured all 10 photographs from Episode 2, Lab Master will unlock automatically. If you missed any photographs during your playthrough, use Collectible Mode to revisit the relevant scenes and capture the remaining images.
Tip
Check Max's journal to identify any missing photographs before replaying scenes. You only need to collect the ones you missed, so there's no reason to repeat the entire episode.
Video Guide: https://www.youtube.com/watch?v=XZUMCmd83k0&list=PLBmi6vaTfD_fOMx5Y2gcIhkxpe96zbUMY&index=2&pp=iAQB

Trophy: Lenscrafted
Take optional photo #2 in Episode 3: Chaos Theory
Type: Bronze
Category: Collectible
Unlock Details
Take optional photograph #2 in Episode 3: Chaos Theory. After leaving the dormitory building, turn right and look for a squirrel sitting on a nearby bench. You'll notice the squirrel moving around as it investigates a group of fireflies. Approach the bench. The squirrel will become startled and run away. Rewind time to bring the squirrel back to its original position, then take the photograph when the prompt appears.
Tip
Don't worry if the squirrel runs away when you approach. Rewinding is part of the solution, so use Max's ability to get another chance at the shot.

Trophy: Light Leak
Take optional photo #10 in Episode 1: Chrysalis
Type: Bronze
Category: Collectible
Unlock Details
Take optional photograph #10 in Episode 1: Chrysalis. After arriving at the lighthouse, follow the path uphill toward its base. You'll find Chloe sitting on a bench, looking out at the sunset. Walk behind her and position Max so that Chloe and the surrounding scenery are in view. When the photograph prompt appears, take the picture to unlock the trophy.
Tip
This is the final optional photograph in Episode 1. Capture it before continuing the story so you can finish the episode with all 10 photographs collected.

Trophy: Light Meter
Take optional photo #9 in Episode 5: Polarized
Type: Bronze
Category: Collectible
Unlock Details
Take optional photograph #9 in Episode 5: Polarized. During the nightmare sequence, Max will enter an area filled with lockers and patrolling figures carrying flashlights. Follow the initial path through the locker section until you reach a point where you can turn right. Turn right, then make two additional right turns to locate Warren's locker. Approach the locker and select the option to open it. After a short scene plays, the photograph prompt will become available. Take the picture to unlock the trophy.
Tip
Use the lockers as landmarks while navigating the area. Follow the path carefully and look for Warren's locker rather than rushing toward the exit.

Trophy: Macro Eyes
Take optional photo #1 in Episode 1: Chrysalis
Type: Bronze
Category: Collectible
Unlock Details
Take optional photograph #1 in Episode 1: Chrysalis. At the beginning of the episode, wait until the classroom bell rings and you're free to explore. Before leaving the room, look for a desk with "Rachel Amber 4 Ever" carved into its surface. Approach the desk, examine the writing, and select the option to photograph it. Capturing the image unlocks the trophy.
Tip
This is your introduction to optional photographs. Get into the habit of examining interesting objects before leaving an area, even when they don't immediately look like photo opportunities.

Trophy: Manually Exposed
Take optional photo #8 in Episode 4: Dark Room
Type: Bronze
Category: Collectible
Unlock Details
Take optional photograph #8 in Episode 4: Dark Room. While investigating the barn, progress through the area until Max reaches the upper rafters. Once you're on the upper level, carefully walk along the wooden walkway toward the far end of the rafters. Look for an owl resting on a bale of hay. Approach the owl and position Max until the photograph prompt appears. Take the picture to unlock the trophy.
Tip
Check the far end of the rafters before leaving the upper section of the barn. The owl can be easy to overlook if you're concentrating on the investigation.

Trophy: Maximum Aperture
Take optional photo #9 in Episode 1: Chrysalis
Type: Bronze
Category: Collectible
Unlock Details
Take optional photograph #9 in Episode 1: Chrysalis. Near the end of the episode, Max will return to the lighthouse area. From your starting position, head left toward the pathway with bushes and scattered rocks running through the middle. Look carefully at the rocks along the path to spot a small bird perched on top of one of them. Approach the bird until the photograph prompt appears, then take the picture to unlock the trophy.
Tip
The bird is easy to overlook against the surrounding rocks and vegetation. Check the pathway before heading up toward the lighthouse.

Trophy: Meter Made
Take optional photo #9 in Episode 2: Out of Time
Type: Bronze
Category: Collectible
Unlock Details
Take optional photograph #9 in Episode 2: Out of Time. After returning to Blackwell Academy and speaking with David, make your way to the Science Lab. Find Warren and start a conversation with him about his chemistry experiment. When he asks for help, initially select "Sodium." After hearing the result, rewind time and approach Ms. Grant at the front of the classroom. Ask her about the experiment to learn the correct approach. Return to Warren and help him successfully complete the experiment using the information you've learned. Once the experiment is finished, you'll have the opportunity to photograph Warren. Take the picture to unlock the trophy.
Tip
This is another opportunity to use Max's rewind ability to turn a failed interaction into a successful one. Make sure the experiment is completed correctly before trying to photograph Warren.

Trophy: Night Vision
Take optional photo #2 in Episode 5: Polarized
Type: Bronze
Category: Collectible
Unlock Details
Take optional photograph #2 in Episode 5: Polarized. After arriving at the art gallery, explore the building before continuing the main story. Head toward the right side of the gallery and walk downstairs. Look for a red-haired woman sitting on a bench in front of six photographs displayed on the wall. Approach the bench and examine the camera resting beside her. When the photograph prompt appears, take the picture to unlock the trophy.
Tip
The camera on the bench is your target, not the woman or the photographs hanging behind her.
Warning
Take this photograph before interacting with Max's picture on the upper level of the gallery. Doing so advances the story and ends your opportunity to collect it during that visit.

Trophy: On Display
Take optional photo #8 in Episode 5: Polarized
Type: Bronze
Category: Collectible
Unlock Details
Take optional photograph #8 in Episode 5: Polarized. During the school hallway sequence, walk forward until you reach the main foyer. Once you enter the foyer, turn right and look for a skeleton standing ahead of you. Approach the skeleton until Max receives a prompt to open her journal. Open the journal as instructed. This triggers the photograph automatically and unlocks the trophy.
Tip
This photograph works differently from most collectibles. You won't need to manually select a camera prompt. Simply interact with the skeleton and open Max's journal when prompted.

Trophy: Optican
Take optional photo #9 in Episode 3: Chaos Theory
Type: Bronze
Category: Collectible
Unlock Details
Take optional photograph #9 in Episode 3: Chaos Theory. While outside the Two Whales Diner, walk around to the right side of the building. Look carefully at the ground near the side of the diner to find a dead bird surrounded by ants. Approach the bird and examine it until the photograph prompt appears. Take the picture to unlock the trophy.
Tip
Collect this photograph immediately after Viewfinder while you're already exploring outside the diner. The bird is small and easy to overlook, so keep your eyes on the ground rather than searching the surrounding buildings.

Trophy: Parallax View
Take optional photo #1 in Episode 3: Chaos Theory
Type: Bronze
Category: Collectible
Unlock Details
Take optional photograph #1 in Episode 3: Chaos Theory. During your nighttime exploration of Blackwell Academy, enter Victoria's dormitory room. Find the action figure displayed on the shelf to the left of Victoria's computer. Point Max's flashlight directly at the figure and keep the light focused on it for a few seconds. Once the photograph prompt appears, take the picture to unlock the trophy.
Tip
Simply examining the figure isn't enough. Keep your flashlight trained on it until the photography opportunity becomes available.

Trophy: Pinholed
Take optional photo #6 in Episode 3: Chaos Theory
Type: Bronze
Category: Collectible
Unlock Details
Take optional photograph #6 in Episode 3: Chaos Theory. After spending the night at Chloe's house, Max will change into a different set of clothes. Once you're free to explore, leave Chloe's bedroom and head across the hallway into the bathroom. Approach the mirror and examine Max's reflection until the photograph prompt appears. Take the picture to unlock the trophy.
Tip
This is another easy mirror photograph. Make sure to collect it before heading downstairs to continue the story.

Trophy: Pixelated
Take optional photo #6 in Episode 2: Out of Time
Type: Bronze
Category: Collectible
Unlock Details
Take optional photograph #6 in Episode 2: Out of Time. After arriving at the junkyard, Chloe will ask Max to search for several bottles. Before getting too involved in the scavenger hunt, turn around and locate the large yellow school bus. Walk toward the bus and look for a pile of tires sitting nearby. Position Max beside the tires and adjust your angle until the photograph prompt appears. Take the picture to unlock the trophy.
Tip
The camera prompt can be a little particular about your position. Move around the tire pile until the correct angle appears rather than assuming you've found the wrong spot.

Trophy: Processor
Take optional photo #3 in Episode 2: Out of Time
Type: Bronze
Category: Collectible
Unlock Details
Take optional photograph #3 in Episode 2: Out of Time. After taking the bus to the Two Whales Diner, you'll arrive outside the restaurant. Before entering, walk toward the diner's main entrance and look up at the large sign mounted on the roof. Position Max so she's facing the sign and wait for the photograph prompt to appear. Take the picture to unlock the trophy.
Tip
If the photograph prompt doesn't appear immediately, move closer to the building and adjust your viewing angle. Make sure to capture the sign before heading inside.

Trophy: Rangefinder
Take optional photo #4 in Episode 4: Dark Room
Type: Bronze
Category: Collectible
Unlock Details
Take optional photograph #4 in Episode 4: Dark Room. While exploring the Blackwell Academy dormitory grounds, find Samuel and start a conversation with him. Ask Samuel about squirrels. During the conversation, he'll put out some food to attract one. Once the first squirrel approaches, look for the option to use the food on the nearby bench to attract a second squirrel. Wait until both squirrels are together, then position Max so they're visible. When the photograph prompt appears, take the picture to unlock the trophy.
Tip
You need both squirrels together for the photograph. If the prompt doesn't appear, make sure you've spoken to Samuel and used the food to attract the second squirrel.

Trophy: RAW Strength
Take optional photo #7 in Episode 3: Chaos Theory
Type: Bronze
Category: Collectible
Unlock Details
Take optional photograph #7 in Episode 3: Chaos Theory. While exploring Chloe's house, head downstairs into the kitchen. You'll notice a bird trapped inside the house. Before dealing with the bird, open the window beside the refrigerator to give it an escape route. Find the bird inside the room. It may be perched on top of the refrigerator or on the bookshelf near the garage door. Approach the bird repeatedly to encourage it to move. Continue guiding it around the room until it eventually flies through the open window. Once the bird has escaped, head outside into the backyard. Walk toward the fence and look for the bird resting nearby. Approach it until the photograph prompt appears, then take the picture to unlock the trophy.
Tip
Open the kitchen window first so the bird has somewhere to go. Once you've guided it outside, remember to follow it into the backyard rather than assuming the interaction is finished.
Warning
Complete this photograph opportunity before speaking to Joyce in the kitchen. Progressing the scene can prevent you from photographing the bird during that visit.

Trophy: Red Eye
Take optional photo #5 in Episode 1: Chrysalis
Type: Bronze
Category: Collectible
Unlock Details
Take optional photograph #5 in Episode 1: Chrysalis. Once you enter the girls' dormitory, head into Max's room. After stepping inside, turn around to face the door you just entered. Look to the left of the door, beside Max's bed, to find a mirror hanging on the wall. Approach the mirror and select the photograph option to capture Max's reflection and unlock the trophy.
Tip
This is one of the easiest photographs in the episode. Grab it while you're exploring Max's room so you don't have to return later just to admire yourself.

Trophy: Resolution Revolution
Take optional photo #10 in Episode 2: Out of Time
Type: Bronze
Category: Collectible
Unlock Details
Take optional photograph #10 in Episode 2: Out of Time. After entering the classroom near the end of the episode, look for Alyssa standing beside one of the windows. Approach Alyssa and position Max so that the photograph prompt appears. Take the picture to unlock the trophy.
Tip
This is the final optional photograph in Episode 2. Capture it before continuing the story so you can complete the episode's photography collection without needing to return later.

Trophy: Selfie Awareness
Take all optional photos in Episode 5: Polarized
Type: Bronze
Category: Collectible
Unlock Details
Take all 10 optional photographs in Episode 5: Polarized. Throughout the final episode, Max will encounter 10 photography opportunities spread across classrooms, the art gallery, the Dark Room, the area surrounding the Two Whales Diner, and the nightmare sequences. Each optional photograph has its own individual trophy. Once you've successfully captured all 10 photographs from Episode 5, Selfie Awareness will unlock automatically. If you missed any photographs during your playthrough, use Collectible Mode to revisit the appropriate scenes and capture the remaining images without changing your existing story decisions.
Tip
Check Max's journal to identify any missing photographs before replaying scenes. Once you've captured all 50 optional photographs across the five episodes and earned every story-related trophy, you'll also unlock the Platinum, What if?
Video Guide: https://www.youtube.com/watch?v=9HspOq1TkCY&list=PLBmi6vaTfD_fOMx5Y2gcIhkxpe96zbUMY&index=5&pp=iAQB

Trophy: Sensor
Take optional photo #7 in Episode 5: Polarized
Type: Bronze
Category: Collectible
Unlock Details
Take optional photograph #7 in Episode 5: Polarized. During the unusual dormitory hallway sequence, continue progressing through the area until you reach the section where the window near the girls' bathroom is open. Look toward the open window to spot a group of squirrels outside. Approach the window and position Max until the photograph prompt appears. Take the picture to unlock the trophy.
Tip
Pay attention to changes in the hallway as you progress through the sequence. The open window is your landmark, and the squirrels are easy to miss if you're concentrating entirely on finding your way forward.

Trophy: Shutterbug
Take all optional photos in Episode 4: Dark Room
Type: Bronze
Category: Collectible
Unlock Details
Take all 10 optional photographs in Episode 4: Dark Room. Each optional photograph has its own individual trophy. Once you've successfully captured all 10 photographs from Episode 4, Shutterbug will unlock automatically. If you missed any photographs during your playthrough, use Collectible Mode to revisit the appropriate scenes and capture the remaining images.
Tip
Check Max's journal to identify missing photographs before revisiting earlier scenes. You only need to collect the ones you missed, so there's no reason to repeat the entire episode.
Video Guide: https://www.youtube.com/watch?v=8zPllryLf-k&list=PLBmi6vaTfD_fOMx5Y2gcIhkxpe96zbUMY&index=4&pp=iAQB

Trophy: Silhouettes
Take optional photo #10 in Episode 5: Polarized
Type: Bronze
Category: Collectible
Unlock Details
Take optional photograph #10 in Episode 5: Polarized. During the nightmare sequence, Max will find herself in a strange version of the junkyard. To progress, you'll need to locate five bottles scattered throughout the area. Explore the junkyard and collect all five bottles before heading toward the exit. Once you've gathered the bottles, approach the exit and look to the right. You'll see a board displaying six bottles. Position Max in front of the display until the photograph prompt appears. Take the picture to unlock the trophy.
Tip
The photograph becomes available after collecting the five required bottles. Before leaving the junkyard, check the board beside the exit to capture the final optional photograph in the game.

Trophy: Slideshow
Take optional photo #9 in Episode 4: Dark Room
Type: Bronze
Category: Collectible
Unlock Details
Take optional photograph #9 in Episode 4: Dark Room. After entering the party at Blackwell Academy, make your way toward the VIP area. Look for a doorway to the left of the VIP entrance desk and head through it. Inside, you'll find skeleton graffiti on the wall. Look for Justin standing nearby and move Max into a position where the skeleton graffiti lines up with Justin's body. Adjust your viewing angle until the artwork and Justin create the intended composition. Once the photograph prompt appears, take the picture to unlock the trophy.
Tip
This photograph is all about perspective. If the prompt doesn't appear, move Max around until the skeleton artwork lines up properly with Justin.

Trophy: Telephotogenic
Take optional photo #3 in Episode 1: Chrysalis
Type: Bronze
Category: Collectible
Unlock Details
Take optional photograph #3 in Episode 1: Chrysalis. After photographing the campus fountain, turn around and find Justin sitting on a wall near the stairs leading toward the street. Speak with Justin and choose the "Thrash?" dialogue option. He'll dismiss Max for not knowing enough about skating. Rewind time and start the conversation again, this time selecting "I came to Noselide." When Justin asks which trick you'd like to see, choose "Tre Flip." Trevor will attempt the trick but fall during the landing. Approach Trevor while he's on the ground and take the photograph when the prompt appears. This unlocks the trophy.
Tip
This is one of the first photographs that demonstrates how useful Max's rewind ability can be. Learning something during a conversation and then rewinding allows you to approach the situation with information Max didn't originally have.

Trophy: The Reflex
Take optional photo #3 in Episode 3: Chaos Theory
Type: Bronze
Category: Collectible
Unlock Details
Take optional photograph #3 in Episode 3: Chaos Theory. After Max sends a text message to Warren, continue into the Science classroom. Look around the room until you find the fish tank. Approach the tank and select the "Look" interaction to examine it. Next, select "Turn On" to activate the aquarium light. With the tank illuminated, the photograph prompt will become available. Take the picture to unlock the trophy.
Tip
The aquarium must be illuminated before you can capture the photograph. If the prompt doesn't appear, make sure you've turned on the tank's light.

Trophy: Time-Lapsed
Take optional photo #2 in Episode 4: Dark Room
Type: Bronze
Category: Collectible
Unlock Details
Take optional photograph #2 in Episode 4: Dark Room. While exploring Chloe's house, head into the garage. Look for a bird's nest partially hidden behind a wooden plank. Approach the plank and select the "Look" interaction to examine the nest. Next, select "Move" to shift the plank out of the way and reveal the nest. Once the nest is visible, examine it again and take the photograph to unlock the trophy.
Tip
The photograph prompt won't appear until you've moved the plank. Make sure to interact with the wooden board rather than searching for a different camera angle.

Trophy: Tripod
Take optional photo #10 in Episode 4: Dark Room
Type: Bronze
Category: Collectible
Unlock Details
Take optional photograph #10 in Episode 4: Dark Room. While attending the party at Blackwell Academy, return to the area where Max originally entered the event. Look toward the windows and direct your view upward. You'll notice an unusual sight outside: two moons visible in the night sky. Position Max so that both moons are visible through the window. When the photograph prompt appears, take the picture to unlock the trophy.
Tip
Remember to look upward rather than searching around the party decorations. This is the final optional photograph in Episode 4, so capture it before continuing the story.

Trophy: Viewfinder
Take optional photo #8 in Episode 3: Chaos Theory
Type: Bronze
Category: Collectible
Unlock Details
Take optional photograph #8 in Episode 3: Chaos Theory. When you return to the Two Whales Diner, explore the area outside before entering. Look for a trucker standing near his vehicle and start a conversation with him. Continue speaking with the trucker until he gives Max permission to photograph his truck. Once you've received permission, turn toward the vehicle and examine it until the photograph prompt appears. Take the picture to unlock the trophy.
Tip
You need to speak with the trucker before the photograph becomes available. If you can't take the picture immediately, continue the conversation rather than repeatedly examining the vehicle.

Trophy: Visionary
Take all optional photos in Episode 1: Chrysalis
Type: Bronze
Category: Collectible
Unlock Details
Take all 10 optional photographs in Episode 1: Chrysalis. Each photograph has its own individual trophy, and Visionary unlocks once you've successfully captured the complete Episode 1 collection. If you missed any photographs during your first visit, return to the appropriate scenes using Collectible Mode and capture the missing images.
Tip
Check Max's journal to identify which photographs are missing. The image placeholders provide visual clues, making it easier to find the right locations without replaying the entire episode.
Video Guide: https://www.youtube.com/watch?v=6ryi_gVb6D8&list=PLBmi6vaTfD_fOMx5Y2gcIhkxpe96zbUMY&index=1&pp=iAQB

Trophy: Wide Angles
Take optional photo #2 in Episode 1: Chrysalis
Type: Bronze
Category: Collectible
Unlock Details
Take optional photograph #2 in Episode 1: Chrysalis. After leaving the school building and entering the main campus, walk toward the large fountain in the courtyard. Find the statue in the middle of the fountain and move around until you're facing its front. Adjust Max's position until the photograph prompt appears, then take the picture to unlock the trophy.
Tip
The photo prompt only appears from the correct angle. If nothing happens immediately, circle the fountain and reposition Max rather than moving on.

Trophy: Zoomed In
Take optional photo #7 in Episode 1: Chrysalis
Type: Bronze
Category: Collectible
Unlock Details
Take optional photograph #7 in Episode 1: Chrysalis. After leaving the dormitory building, you'll witness Alyssa getting hit in the head by a football. Immediately rewind time to before the accident. Approach Alyssa and warn her to move out of the ball's path. With Alyssa safely out of the way, the football will fly past her and smash a nearby window. Approach the broken window and wait for the photograph prompt to appear. Take the picture to unlock the trophy.
Tip
This photograph requires changing the outcome of an event with Max's rewind ability. If you haven't warned Alyssa yet, the broken-window photo opportunity won't appear.

Trophy: Chaos Theory
Finish Episode 3: Chaos Theory
Type: Bronze
Category: Story
Unlock Details
Complete Episode 3: Chaos Theory. This trophy unlocks automatically after finishing the episode. No special decisions, collectibles, or additional objectives are required.

Trophy: Chrysalis
Finish Episode 1: Chrysalis
Type: Bronze
Category: Story
Unlock Details
Complete Episode 1: Chrysalis. This trophy unlocks automatically after finishing the episode. No special choices or additional objectives are required.

Trophy: Dark Room
Finish Episode 4: Dark Room
Type: Bronze
Category: Story
Unlock Details
Complete Episode 4: Dark Room. This trophy unlocks automatically after finishing the episode. No special choices, collectibles, or additional objectives are required.

Trophy: Out of Time
Finish Episode 2: Out of Time
Type: Bronze
Category: Story
Unlock Details
Complete Episode 2: Out of Time. This trophy unlocks automatically after finishing the episode. No special decisions, collectibles, or additional objectives are required.

Trophy: Polarized
Finish Episode 5: Polarized
Type: Gold
Category: Story
Unlock Details
Complete Episode 5: Polarized. This trophy unlocks automatically after finishing the final episode of Life is Strange Remastered. No special choices, collectibles, or particular ending are required to earn this trophy.
Tip
Your final story decision doesn't affect Platinum eligibility. Choose the ending you prefer without worrying about missing a trophy.

EARLY GAME
Welcome back to Arcadia Bay, where teenage drama is complicated enough before you discover you can rewind time. You'll play as Max Caulfield, a photography student whose unusual new ability lets her revisit conversations, change decisions, and explore different outcomes. Take your time, investigate your surroundings, and enjoy the story without worrying about making the perfect choices.
Your main Platinum objective is to collect all 50 optional photographs, with 10 hidden throughout each of the five episodes. Episode 1 introduces several photo opportunities that require more than simply pointing a camera at something. Some involve interacting with objects, speaking to other characters, or using Max's rewind ability to create the right moment. Check your journal regularly for clues about photographs you haven't captured.
Nothing is permanently missable because Collectible Mode allows you to revisit earlier scenes. Still, grabbing photographs as you encounter them will make your Platinum journey much smoother. There's no need to turn every conversation into a tactical operation, though. Arcadia Bay has enough problems already.
MID GAME
As you progress through Episodes 2 and 3, the story becomes more complicated, and photography opportunities start requiring a little more creativity. Keep exploring each location before moving forward, especially the school, dormitories, diner, and junkyard. You'll encounter photographs involving animals, environmental details, and characters who need a little encouragement before they'll cooperate.
Some photographs require specific interactions. You might need to help Warren with a science experiment, convince someone to let you photograph their truck, or use rewind to recover an opportunity that disappeared. Pay attention to unusual objects and optional conversations, because they're often the key to getting the perfect shot.
Continue playing the story naturally while collecting photographs whenever possible. Your choices shape Max's journey, but you don't need to replay the story to explore different decisions for the Platinum. Focus on the photographs, let the narrative unfold, and resist the temptation to rewind every awkward conversation. Some things are better left embarrassing.
LATE GAME
Episodes 4 and 5 bring the story toward its conclusion, with increasingly unusual environments and some of the game's trickier photography opportunities. Continue checking your surroundings carefully, especially when entering new areas or returning to familiar locations. Several photographs involve animals, hidden environmental details, or carefully positioning Max to capture a particular scene.
Episode 5 deserves extra attention because certain photographs appear during sequences that don't behave like ordinary exploration. Some opportunities require specific dialogue choices, while others involve interacting with objects in unexpected ways. At the art gallery, make sure you capture the available photograph before interacting with Max's picture upstairs. Later, explore the area outside the diner before heading inside.
Complete the final episode and experience the ending that feels right for your version of Max's story. There are no trophies tied to selecting a particular ending, so you can make your final decision without worrying about your Platinum. For once, the consequences are entirely emotional.
TROPHY CLEANUP AND EXTRA TIPS
After finishing the story, check your journal and trophy list to identify any optional photographs you missed. Each episode contains 10 photographs, and completing an entire episode's collection awards an additional trophy. Collectible Mode allows you to revisit scenes, capture missing photographs, and return to the main game without changing your existing story decisions.
You only need one complete playthrough, and there are no online trophies, difficulty requirements, or additional challenge runs. Every story-related trophy unlocks through normal episode completion, leaving photography as your only real concern. With a little exploration and occasional cleanup, the Platinum should take approximately 10–20 hours.
Once you've completed all five episodes and captured every optional photograph, the Platinum will unlock. If you're missing something, use the individual trophy instructions to locate the remaining shots rather than replaying entire episodes unnecessarily. Max can rewind time, but thankfully, you don't have to rewind your entire weekend.
YouTube Playlist
Life is Strange Remastered — Platinum Walkthrough