


Trophy Guide Preview
Overall Trophy Progress
0 / 32 Completed
0%
Trophy Types
Platinum
0 / 1Gold
0 / 4Silver
0 / 16Bronze
0 / 11Categories
Online
0 / 1Collectible
0 / 9Combat
0 / 1Misc
0 / 12Story
0 / 8
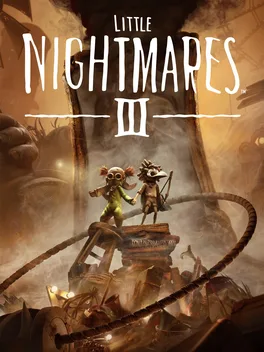
Enter the Nowhere alongside Low and Alone, two friends searching for a way to escape a twisted world. Solve eerie puzzles, outsmart terrifying creatures, and survive dangerous encounters across four haunting locations. Use their unique abilities to overcome obstacles and uncover the secrets of the Spiral.
Overall Trophy Progress
0 / 32 Completed
0%
Platinum Path
EARLY GAME Start your first playthrough as either Low, who uses a bow, or Alone, who carries a wrench. You'll eventually need to complete all four chapters with both characters, so choose whichever sounds more fun. Begin in Chapter 1 — Necropolis, where you can collect five dolls, earn The Windy City by opening your umbrella just before landing, and work toward Birdbrained by dealing with 11 crows. Also pay attention...
Completion Video Playlist
1 video
Little Nightmares 3 100% Walkthrough Guide | All Collectibles | Platinum Trophy
Trophy: Mastery of The Spiral
Keep on turning
Type: Platinum
Unlock Details
Earn all other 31 trophies in Little Nightmares III to unlock the Platinum.

Trophy: Special Connection
There is no bond as strong as this
Type: Gold
Category: Online
Unlock Details
Complete Chapter 4 — The Institute in online co-op with another player. From the main menu, select Multiplayer and invite another player to join your session. Once you've connected, select Chapter 4 and complete it together. You only need to finish The Institute in co-op. The first three chapters do not need to be completed online for this trophy. If your partner already has Chapter 4 unlocked, they can invite you directly into that chapter, even if you haven't reached it yourself.
Tip
Arrange a co-op partner before finishing your other trophies. You can combine this requirement with one of your character-specific chapter completions by playing as Low or Alone.
Warning
Online co-op requires two separate consoles and a PlayStation Plus subscription. Local split-screen co-op is not supported. If you're having connection problems, try switching which player hosts the session.
Trophy: Birdbrained
Always ruffling feathers
Type: Silver
Category: Collectible
Unlock Details
In Chapter 1 — Necropolis, shoot or scare away 11 crows. There are approximately 14 crows available throughout the chapter, so you don't need to get every one. The locations include: 1. First Doll Room: A crow is perched above the table in the same room as the first collectible doll. 2. Statue: Immediately after leaving the first doll room, look for a crow perched on a statue. 3. Key Puzzle: During the opening key puzzle, you'll reach an area containing a crow holding a key and two additional crows perched on the wall. All three count toward your total. 4. Umbrella Area: Shortly after obtaining the umbrella and encountering the giant baby, look for a crow perched on the wall before jumping down. 5. Crow Gathering: After another encounter with the baby, you'll move through a hallway containing statues and reach an area with several crows. Four are available here, although one may fly away as you enter. 6. Later Baby Encounter: Shortly after finding the fourth doll, you'll encounter more crows near the giant baby. Target the available birds before they fly away. Additional crows appear later in the chapter, giving you some room to miss a few.
Tip
Playing as Low is the most straightforward approach because you can personally aim and shoot the crows with his bow. His arrows are unlimited, so take your time lining up shots.
Warning
The most straightforward method is to play as Low and shoot 11 crows directly with his bow. Scaring crows away may also count, but shooting them is the safer approach.
Video Guide: https://www.youtube.com/watch?v=GPyq1E5lkcc&list=PLtA90_ts33NEh68Kqn9TvkdZMLYoYAQae&index=5&pp=iAQB

Trophy: Candy Shop
Sweets for my sweet
Type: Silver
Category: Collectible
Unlock Details
Find and collect all five dolls hidden throughout Chapter 2 — Candy Factory. Approach each doll and press R2 to collect it. Their locations are: 1. Overhead Beams: After your second encounter with the Supervisor, climb the ladder and cross the overhead beams. Continue forward, then turn left to find the first doll. 2. Kitchen Near the Elevator: When you reach the puzzle requiring two fuses to operate an elevator, head left into the kitchen. Look toward the right side of the kitchen for a partially hidden doll. 3. Metal Pipe Passage: After Low and Alone open a rolling door, follow the metal pipes to the left into the adjoining room. The doll is on the floor. 4. Supervisor's Power Outage: After the Supervisor becomes angry when the power goes out and leaves the area, enter the room on the left. The doll is on your right as you enter. 5. Partially Closed Door: Later in the chapter, you'll enter a hallway containing a partially closed door on the left. Crawl underneath it and look for the doll sitting on a table farther inside. Collect all five dolls to unlock Candy Shop.
Tip
These five dolls contribute toward Loose Threads, which requires all 25 dolls across the four chapters. If you're missing one, check Chapter Select to confirm your collection count before replaying Candy Factory.
Video Guide: https://www.youtube.com/watch?v=4RKRlGKSX_E

Trophy: Filed Away
Nothing left in the medicine cabinet
Type: Silver
Category: Collectible
Unlock Details
Find and collect all five dolls hidden throughout Chapter 4 — The Institute. Their locations are: 1. Opposite Room: Early in the chapter, you'll reach the end of a hallway where you must remove a wooden board to proceed. Before removing it, enter the room opposite you. Continue into its second section to find the doll on the floor. 2. Main Hallway: After finding the Alone doll during the story, carry it down the main hallway. Enter the first accessible room along the way to discover another collectible doll on the floor. 3. Vending Machine: After solving the elevator fuse puzzle and opening the gate, look on top of a vending machine for the third doll. 4. Jungle Lever: Following an encounter with the main enemy's hand in the jungle, complete the platforming sequence until you reach an area with a lever. Before pulling it, check the front corner for the doll. 5. Hidden Wall Passage: After stepping out of an elevator, head right until you reach an area with a wooden plank crossing a gap. Before crossing, enter the opening in the nearby wall. Follow the hidden passage to its end and find the final doll beside some boxes. Collect all five dolls to unlock Filed Away.
Tip
These are the final five dolls needed for Loose Threads, assuming you've collected all 20 from the previous chapters.
Video Guide: https://www.youtube.com/watch?v=GNG24OvbtTY

Trophy: Home Sweet Nome
Ready or not, here I come
Type: Silver
Category: Collectible
Unlock Details
Find and hug all six Nomes hidden in the first half of Chapter 3 — Carnevale. Approach each Nome and hold R2 to hug it. Their locations are: 1. Furnace Room: After helping a Nome by activating the furnace, it will give you the fuse needed for the elevator. Once it sits down in front of the furnace, approach and hug it. 2. Elevator Room: After exiting the elevator, enter the room directly to your right before climbing the stairs. Look behind a box in the corner to find the Nome. Your flashlight can help reveal it. 3. Power Puzzle: After completing the electrical puzzle with Low's bow and opening the gate, approach the lever used to progress. The Nome is hiding beside a pole to the left of the lever. 4. Hidden Drawer: After the area containing the third collectible doll, find a drawer on the right and pull it open. A Nome will run away. Follow it into the next area and look immediately to your right to find it. 5. Dark Staircase: After the section containing the fourth collectible doll, activate the light by shooting the nearby button. A Nome will run away. Follow it upstairs into the first room on the left, where it's hiding in the corner. 6. Piano Room: Find the piano used for Stay Tuned and move back and forth across its keys. A Nome will appear and sit beside the piano. Approach and hug it. The trophy unlocks once you've hugged all six Nomes.
Tip
The piano room lets you work toward two trophies at once. Play the keys to unlock Stay Tuned, then hug the Nome that appears for your final collectible.
Video Guide: https://www.youtube.com/watch?v=y45eOS17Gr8&list=PLmP58gVa8uZqq6XNa38h--UkmJRVIffTY&index=15&pp=iAQB
Unlock Details
Find and hug all six Nomes hidden in the first half of Chapter 3 — Carnevale.
Approach each Nome and hold R2 to hug it.
Their locations are:
The trophy unlocks once you've hugged all six Nomes.
Tip
The piano room lets you work toward two trophies at once. Play the keys to unlock Stay Tuned, then hug the Nome that appears for your final collectible.
Trophy: Institutionalized
The Kids Aren't Alright
Type: Silver
Category: Collectible
Unlock Details
Find all six Ghosts hidden throughout Chapter 4 — The Institute. Ghosts appear as shadowy figures of children. Approach each one until it disappears to collect it. Their locations are: 1. Outside the Institute: At the beginning of the chapter, before entering the building, head toward the far-right side of the opening in the wall. Find the nearby stairs and look to their right for a Ghost kneeling in the sand. 2. Overgrown Statue: After your second encounter with the dangerous plant, cross the wall and continue past the statue covered in mushrooms. The Ghost is standing in the corner beside a garbage bin. 3. First Boss Encounter: After your first encounter with the chapter's main enemy, wait until its foot leaves the area. Enter the room it came from to find a Ghost sitting on a table. 4. Staircase Window: After climbing a cabinet and passing through a window, you'll reach an area containing a staircase. Before heading upstairs, move left to find a Ghost in the corner. 5. Breakable Wall: Later in the chapter, Alone must use her wrench to break through a wall so Low can enter the room. Once the wall is destroyed, look for a Ghost sitting on a chair at the far end of the room. 6. Locked Room: After collecting the fifth doll, find the key sitting on a suitcase before leaving the area. Carry it across the wooden plank and head left to a locked door. Unlock the door and enter to find the final Ghost kneeling on the floor. The trophy unlocks once all six Ghosts have been collected.
Tip
Collect the Ghosts as you progress through The Institute rather than leaving them for cleanup. Several are tucked away from the main route, especially the final Ghost behind the locked door.
Warning
There are six Ghosts required for this trophy. Make sure you've found all six before considering the collection complete.
Video Guide: https://www.youtube.com/watch?v=JKCQgq0bty0&list=PLmP58gVa8uZqq6XNa38h--UkmJRVIffTY&index=3&pp=iAQB

Trophy: Loose Threads
Little shapes of big things to come
Type: Gold
Category: Collectible
Unlock Details
Find and collect all 25 dolls hidden throughout the four chapters of Little Nightmares III. The dolls are distributed as follows: Chapter 1 — Necropolis: 5 dolls Chapter 2 — Candy Factory: 5 dolls Chapter 3 — Carnevale: 10 dolls Chapter 4 — The Institute: 5 dolls To collect a doll, approach it and press R2. A sound will play to confirm you've picked it up. Once you've collected all 25 dolls, the trophy unlocks automatically.
Tip
You can track your doll collection progress through Chapter Select, which shows how many dolls you've found in each chapter. For exact locations, refer to the Gami trophy guides for Toybox, Candy Shop, Token Gestures, and Filed Away. Together, these cover all 25 collectible dolls.
Warning
If you miss a doll during your first playthrough, you can return to its chapter using Chapter Select. You don't need to start a new game to complete the collection.
Video Guide: https://www.youtube.com/watch?v=FuSVI5zmoU8&list=PLmP58gVa8uZqq6XNa38h--UkmJRVIffTY&index=16&pp=iAQB

Trophy: Omnipresence
Far or near, she can make us fear
Type: Silver
Category: Collectible
Unlock Details
Find and destroy all 10 statues of the Lady hidden in the second half of Chapter 3 — Carnevale. You can destroy the statues by shooting them with Low's bow, striking them with Alone's wrench, or picking them up and throwing them. Their locations are: 1. Under the Stairs: When you reach an area with several carnival visitors standing around, you'll need to climb a net to continue. Before climbing, head beneath the staircase behind you and follow the passage to find the statue. 2. Piñata Room: You'll reach an area where two visitors are hitting another person suspended like a piñata, with two dangerous puppets nearby. Deal with the puppets, then move toward the right side of the room. Look farther toward the back to spot the statue on the floor. 3. Magic Trick Room: In the room containing a failed sawing-in-half magic trick, look for an opening on the left leading outside. Step through it to find the statue on the ground. 4. Fortune-Teller Machine: Outside, you'll encounter a fortune-teller-style machine near a fence. The statue is sitting on the machine. Destroy it from a safe distance with Low's bow if possible. 5. Visitor Queue: After climbing a wooden ladder, you'll reach a long line of carnival visitors. Before progressing, check the corner on your left for the statue. 6. Staircase After the Mirror: After escaping the area with the broken mirror, descend the first flight of stairs. Continue to the second staircase and check the corner at its base for the statue. 7. Garbage Pile: After leaving an elevator alongside a restrained visitor, continue forward until you see an open room. Enter and look on top of the garbage for the statue. 8. Denture Pit: After falling into a pit filled with dentures, escape and climb the stairs on the left. Follow the walkway around until you reach the statue on the far side. 9. Sleeping Visitor: After raising your companion using a chandelier, push open the next door and enter a room with a sleeping visitor. The statue is on a table. Use the nearby chair to climb onto it and destroy the statue. 10. Final Elevator Area: After exiting an elevator, look to your right before climbing the nearby boxes. The final statue is on the ground. The trophy unlocks once all ten statues have been destroyed.
Tip
Keep track of each statue as you move through Carnevale. Several are located just off the main route, so check nearby side passages before progressing.
Warning
Be careful around the fortune-teller machine. Moving too close to the statue can put you in danger, so destroying it from a distance is the safer option.
Video Guide: https://www.youtube.com/watch?v=YyFHxPdIaz0&list=PLmP58gVa8uZqq6XNa38h--UkmJRVIffTY&index=2&pp=iAQB

Trophy: Token Gestures
You hit the jackpot
Type: Silver
Category: Collectible
Unlock Details
Find and collect all 10 dolls hidden throughout Chapter 3 — Carnevale. Approach each doll and press R2 to collect it. You'll hear a sound confirming the pickup. The 10 doll locations are: 1. Breakable Door: Early in Carnevale, drop into a hallway and find a door on the right. Break it open using Low's bow or Alone's wrench, then enter and collect the doll from the floor. 2. Sculpture Puzzle: After activating the sculpture to reach the second floor, climb the nearby boxes and crawl through the small opening into a hidden room containing the doll. 3. Wine Rack: After climbing the wine rack, you'll approach a bathtub and a chain used to reach the next floor. Before continuing, circle around the wooden platform and look for a hidden opening on the opposite side. The doll is inside. 4. Dark Hallway: Shortly after the previous doll, you'll enter a dark hallway. Take the stairs on the left and enter the adjoining room. Navigate around the obstacles to find the doll on the far side. 5. Piano Room: Enter the room with a piano and head upstairs. Move back and forth across the piano keys to shift a cupboard and reveal a hidden room containing the doll. This also helps unlock Stay Tuned. 6. Furnace Area: After activating the furnace by throwing three pieces of coal inside, climb out and head right. Look for a hole in the wall connected to a wooden beam. Follow it into a secret room containing the doll. 7. Red Tent: Once you reach the main carnival area, look for a red tent near the stairs. Turn around, climb the nearby ramp, and use the ladder on the right to reach a platform with the doll. 8. Well: Find the well in the carnival area and jump onto its handle to descend into a pit filled with dentures. After escaping the pit, collect the doll from the corner. 9. Trapdoor: In an area containing a pipe and a ladder, head left instead of climbing the ladder. Open the trapdoor and follow the passage into another room containing the doll. 10. Orange-Lit Room: When you reach an area with several boxes to climb, look toward the bottom-right corner before ascending. Follow the orange light into a partially hidden room to find the final doll beside some candles. Collecting all 10 unlocks Token Gestures.
Tip
Chapter 3 contains more dolls than any other chapter. Use Chapter Select to check your progress if the trophy doesn't unlock.
Video Guide: https://www.youtube.com/watch?v=9yWJ6_AbDZI
Trophy: Toybox
Playtime's over now
Type: Silver
Category: Collectible
Unlock Details
How to Unlock: Find and collect all five dolls hidden throughout Chapter 1 — Necropolis. Approach each doll and press R2 to collect it. You'll hear a sound confirming that it has been picked up. The five doll locations are: 1. Crow Room: After Alone breaks through a wall with her wrench, enter the next room containing a crow perched above a table. The doll is on the floor just before the table. 2. Hidden Room After the Baby Encounter: Following the second encounter with the giant baby, you'll descend on a platform. When the platform stops, head left instead of right. Have Alone break the wall to reveal a hidden room containing the doll. 3. Spiral Staircase: You'll reach an area with a spiral staircase and an upward air current used with your umbrella. Before using the air current, climb the stairs to find the doll at the top. 4. Nightmare Sequence: After the character's nightmare sequence ends and you regain control, head left rather than following the normal route to the right. The doll is in the adjoining room. 5. Upper Platform: Near the end of the chapter, Low and Alone remove a wooden board blocking the way forward. Before continuing, climb to the upper section of the area to find the final doll. Collecting all five unlocks Toybox.
Tip
Chapter Select displays your doll collection progress. All five dolls also count toward Loose Threads, which requires collecting every doll in the game.
Video Guide: https://www.youtube.com/watch?v=rXp2rhi77RQ
Trophy: Hand-Eye Coordination
You've stayed at arm's length
Type: Silver
Category: Combat
Unlock Details
In Chapter 4 — The Institute, survive every encounter with the Hypnotist, the chapter's main enemy, without dying. You'll encounter the Hypnotist several times throughout the chapter, including chase sequences and the final boss fight. You must survive all five major encounters without being killed. Encounter 1 — Awakening the Hypnotist After passing the blind nurse, you'll enter a room containing a gong. Use Alone's wrench to strike the gong, awakening the Hypnotist. Keep your distance as its enormous foot moves out of the room. Avoid getting caught or crushed during this sequence. Encounter 2 — Escaping the Hands After collecting the Alone doll and activating a lever, you'll squeeze through an opening in a gate. As you remove a wooden board blocking the path, the Hypnotist's hands will begin pursuing you. Enter the next room and immediately hide beneath the table. Remain crouched until the hand stops moving. Continue crouching toward the lever and have your companion boost you up to reach it. Pull the lever and prepare to run. Continue escaping through the following rooms until Alone breaks the glass, allowing both characters to fall into the garbage below. Encounter 3 — Jungle Chase During the jungle section, the Hypnotist's hand will appear again. Wait for the moving platform to rise, cross the river, and jump through the window on the opposite side. The hand will pursue you through a short chase sequence. Run around the corner and make the jump into the next room. Low will need to shoot the eye with his bow to stop the attack. Encounter 4 — Final Escape Sequence Later in The Institute, Low and Alone will inspect a bed before being interrupted by the Hypnotist. Be ready to move as soon as you regain control. Run through the platforming section, carefully timing your jumps to avoid falling. After reaching the next room, use Alone's wrench to strike the gong and temporarily stun the Hypnotist. Continue escaping until you reach the area containing the final mirror. Encounter 5 — Final Boss Fight During the final confrontation, you'll need to dodge falling debris while using both characters' abilities to damage the Hypnotist. The fight takes place in several stages: 1. Avoid the falling debris until a gong drops into the arena. 2. Free and strike the gong using Alone's wrench to stun the Hypnotist. 3. Shoot the exposed eye with Low's bow while the enemy is vulnerable. 4. Survive another round of falling debris until a second gong appears alongside a suspended box. 5. Shoot the rope holding the box with Low's bow, allowing Alone to climb up and reach the gong. 6. Strike the gong again, then shoot the Hypnotist's exposed eye. 7. Deliver the final attacks once the enemy collapses. Use Alone's wrench to strike the exposed weak point near its glasses, then finish the encounter with Low's bow. After defeating the Hypnotist and completing the following sequence, the trophy unlocks if you survived every required encounter without dying.
Tip
Learn the timing of each chase and boss attack before attempting a clean run. Focus on positioning during the falling-debris sections, and use the character abilities in the correct order during the final confrontation.
Warning
Dying during any required Hypnotist encounter invalidates the attempt. Restarting from a normal checkpoint after a registered death may not restore your eligibility. For the safest approach, restart Chapter 4 and complete all encounters without dying. On PS5, a cloud-save backup made before an encounter can provide an additional recovery option.
Video Guide: https://www.youtube.com/watch?v=TDU_5Nppyfk&list=PLmP58gVa8uZqq6XNa38h--UkmJRVIffTY&index=4&pp=iAQB
Trophy: Aim Low (and Alone)
Win a prize every time
Type: Bronze
Category: Misc
Unlock Details
In Chapter 3 — Carnevale, complete the carnival shooting gallery by hitting the correct targets. Around the middle of the chapter, you'll reach a shooting gallery featuring targets with different characters on them. Your goal is to hit the targets showing Nomes, the small creatures wearing triangular hats. Avoid hitting targets featuring the sinister-looking character without a triangular hat, as hitting one resets your progress. Watch the lights above the shooting gallery. Each successful target advances your progress toward the required total. Once you've lit all nine lights, the trophy unlocks.
Tip
Focus on identifying each target before shooting rather than firing as quickly as possible. If you're playing as Alone in solo mode, use Triangle to direct Low to shoot the correct targets.
Warning
Hitting an incorrect target resets the shooting-gallery challenge, so prioritize accuracy over speed.
Video Guide: https://www.youtube.com/watch?v=2iTca7zZysU&list=PLtA90_ts33NEh68Kqn9TvkdZMLYoYAQae&index=14&pp=iAQB
Trophy: Another One in the Bag
Nothing but net (profits)
Type: Bronze
Category: Misc
Unlock Details
In Chapter 2 — Candy Factory, throw a ball through a basketball hoop. During the chapter, you'll reach an elevator that requires two fuses to operate. From the elevator area, take the path to the right and enter the first room. Find the ball inside and pick it up. Carry the ball back to the elevator while collecting the necessary fuses. Once both fuses are installed, activate the elevator and take the ball with you to the next floor. After exiting the elevator, head left to find a basketball hoop. Aim carefully and throw the ball through the hoop to unlock the trophy.
Tip
Make sure to bring the ball with you when using the elevator. Carrying it to the next floor during your first visit saves you from having to replay this section.
Video Guide: https://www.youtube.com/watch?v=ZEGsnlo_eGk&list=PLtA90_ts33NEh68Kqn9TvkdZMLYoYAQae&index=9&pp=iAQB
Trophy: Bullseye
You gotta aim high
Type: Silver
Category: Misc
Unlock Details
Use Low's bow 50 times throughout the game. While controlling Low, shoot objects and targets using his bow. Destroying vases, shooting crows, and activating mechanisms with arrows can all help you progress toward the required total. There are plenty of opportunities to use the bow in Chapter 1 — Necropolis, so you can unlock this trophy relatively early. Continue using Low's bow until you've reached 50 uses and the trophy unlocks.
Tip
Work toward Bullseye while collecting the crows for Birdbrained. This lets you make progress on both trophies during the same chapter.
Trophy: Capital Punishment
You're heading for a shock
Type: Bronze
Category: Misc
Unlock Details
In Chapter 3 — Carnevale, activate two electrical buttons during the early elevator and sculpture puzzles. After finding the fuse needed to power the elevator, enter it and travel to the next floor. Once you exit, head left and use Low's bow to shoot the electrical button. Continue into the next area, where you'll encounter a large sculpture that must be moved to reach the upper level. Climb the ladder on the left side of the room. From the top, activate the second electrical button by shooting it with Low's bow or throwing a nearby ball at it. The trophy unlocks after you've activated both buttons.
Tip
Complete both interactions while progressing through this section of Carnevale. If you're playing as Alone, you can use the available objects or call Low to help activate buttons that require his bow.
Video Guide: https://www.youtube.com/watch?v=MmNdMpHtgcc&list=PLtA90_ts33NEh68Kqn9TvkdZMLYoYAQae&index=12&pp=iAQB
Trophy: Delivery Feed
From store to (cage) door
Type: Bronze
Category: Misc
Unlock Details
In Chapter 3 — Carnevale, deliver a sausage to the child trapped inside a cage. During the second half of the chapter, you'll encounter the Puppeteer and his puppet. After being captured, you'll eventually escape and enter a kitchen. Look on the floor for a sausage and pick it up. Carry the sausage into the next room, where you'll find a child locked inside a cage. Bring the sausage to the cage and give it to the child to unlock the trophy.
Tip
Pick up the sausage before leaving the kitchen. The child is in the following room, so you can complete this trophy while progressing naturally through the chapter.
Video Guide: https://www.youtube.com/watch?v=uyuWtVdDZhE&list=PLtA90_ts33NEh68Kqn9TvkdZMLYoYAQae&index=15&pp=iAQB
Trophy: Guiding Hands
We're connected, you and I
Type: Bronze
Category: Misc
Unlock Details
Hold your companion's hand for a total of five minutes. Stand near Low or Alone and press and hold R2 to take their hand. You can continue walking together while holding hands, so there's no need to stand still for the entire duration. Keep holding hands until you've accumulated five minutes and the trophy unlocks. This can be earned while playing solo with the AI companion or during online co-op.
Tip
Hold hands while traveling through safe areas. It's an easy trophy to finish naturally as you progress through the story.
Warning
You cannot jump while holding hands, so release your companion when you need to navigate platforming sections.
Video Guide: https://www.youtube.com/watch?v=cZTag_TatBU&list=PLmP58gVa8uZqq6XNa38h--UkmJRVIffTY&index=7&pp=iAQB
Trophy: Hello?
You can always call on me
Type: Bronze
Category: Misc
Unlock Details
Call your companion 50 times. While exploring, press Triangle to call Low or Alone, depending on which character you're controlling. Repeat the call until you've done it 50 times. The trophy unlocks automatically once you've reached the requirement. This can be completed during normal gameplay and doesn't require you to reach a particular chapter.
Tip
You can earn this early by repeatedly pressing Triangle in a safe area. Otherwise, use the call command regularly while exploring and solving puzzles.
Warning
The call command isn't available after the final boss encounter, so complete this before finishing the story or return through Chapter Select.
Trophy: Peekaboo
There's a twinkle in that eye
Type: Silver
Category: Misc
Unlock Details
Complete Chapter 1 — Necropolis without dying during any of the giant baby's encounters. These encounters involve avoiding the baby's gaze, hiding behind cover, escaping falling debris, and completing dangerous chase sequences. To earn the trophy, you must survive every encounter with the baby without being killed. Deaths outside these encounters do not invalidate the requirement. The encounters include: 1. First Appearance: After dropping through a trapdoor, the baby's hand reaches into the area. Move quickly to avoid the falling debris. 2. Eye Search: After descending with the umbrella, you'll encounter the baby's searching eye. Watch its movements and move between safe positions until you reach the pressure plate. 3. Broken Walkway: After pushing a wooden board to cross a gap, hide behind cover when the baby returns. Wait until it's safe to continue. 4. Crow Area: During another eye-search sequence, use cover and move only when the baby's gaze is facing away. 5. Bell Puzzle: After activating the bell using Alone's wrench and Low's bow, immediately hide inside the box with your companion to avoid falling debris. 6. Hanging Box: While moving a box across a broken pathway, the baby searches the area again. Use the available cover and wait for safe moments to move. Low must also shoot down a hanging box to progress. 7. Final Escape: Later, you'll escape through a window while the baby smashes the surrounding structure. Outrun the falling debris, then use the available objects and cover to survive its final search. Once you've survived the complete sequence and moved beyond the baby's final encounter, the trophy unlocks.
Tip
Learn the baby's search patterns before attempting a clean run. If you fail, restarting Chapter 1 is the safest way to reset your attempt.
Warning
Dying during any giant baby encounter invalidates the attempt. Focus on surviving every encounter rather than tracking a specific number of interactions. If you fail, restart the chapter for a fresh attempt.
Video Guide: https://www.youtube.com/watch?v=skQHSNxHjjA&list=PLtA90_ts33NEh68Kqn9TvkdZMLYoYAQae&index=3&pp=iAQB

Trophy: Spanner in the Works
I can be quite handy when I want to be
Type: Silver
Category: Misc
Unlock Details
Use Alone's wrench 50 times throughout the game. While playing as Alone, use her wrench to smash breakable objects, particularly the vases scattered throughout the chapters. Continue using the wrench until the trophy unlocks. Chapter 1 — Necropolis and Chapter 3 — Carnevale are especially good places to make progress because they contain plenty of objects you can destroy.
Tip
Start working toward this trophy during your Alone playthrough. Focus on smashing breakable objects in Necropolis and Carnevale. If you still need more wrench uses, you can reload checkpoints and repeat these actions.
Warning
To ensure your progress counts, focus on destroying breakable objects rather than relying entirely on wrench interactions required for story puzzles.
Trophy: Stay Tuned
Are you taking notes?
Type: Bronze
Category: Misc
Unlock Details
In Chapter 3 — Carnevale, play the piano hidden in a side room. During the first half of the chapter, you'll climb a large shelf containing bottles and jump onto a bathtub to reach the next section. Continue into a dark corridor. The main path leads through a door toward the back-left side, but don't enter it yet. Instead, continue along the corridor and enter the last doorway on the right. Inside, you'll find a piano. Jump onto the piano keys and move back and forth across them several times until the trophy unlocks.
Tip
Playing the piano also causes a Nome to appear nearby. Hug it to make progress toward Home Sweet Nome. This section also contains a collectible doll needed for Token Gestures.
Video Guide: https://www.youtube.com/watch?v=b9anBLWJWXQ&list=PLtA90_ts33NEh68Kqn9TvkdZMLYoYAQae&index=13&pp=iAQB
Trophy: The Windy City
Just don't open it indoors
Type: Bronze
Category: Misc
Unlock Details
In Chapter 1 — Necropolis, open your umbrella at the last possible moment before landing. Once you've obtained the umbrella, find a location where Mono's successors, Low or Alone, must jump down from a significant height. Jump off the ledge and allow your character to fall toward the ground. Just before landing, open the umbrella to slow your descent. If your timing is correct, the trophy unlocks. There are several opportunities throughout Necropolis, including a drop shortly after receiving the umbrella and another near the end of the chapter.
Tip
Try this during the first suitable drop after obtaining the umbrella. If you open it too early, use another opportunity later in the chapter.
Warning
Opening the umbrella too late can result in death. Aim to deploy it just above the ground rather than waiting until your character has practically landed.
Video Guide: https://www.youtube.com/watch?v=mmUZGgHpIN4&list=PLtA90_ts33NEh68Kqn9TvkdZMLYoYAQae&index=4&pp=iAQB

Trophy: Unsavory Delicacies
Rotting from the inside, delicious on the outside
Type: Bronze
Category: Misc
Unlock Details
In Chapter 2 — Candy Factory, feed three pieces of candy to the insects. After escaping from the Supervisor, you'll drop into a hallway filled with candy. Pick up three pieces of candy and throw them through the ventilation opening on the right side of the room. Once all three pieces are through the opening, crawl through the vent yourself. On the other side, retrieve the candy and throw each piece toward the insects to feed them. The trophy unlocks after you've fed all three pieces of candy to the insects.
Tip
Throw all three pieces through the vent before crawling through. This keeps everything together and saves you from having to move back and forth between the rooms.
Video Guide: https://www.youtube.com/watch?v=pitjJ71DYQc&list=PLtA90_ts33NEh68Kqn9TvkdZMLYoYAQae&index=8&pp=iAQB

Trophy: Child's Play
You're not rattled that easily
Type: Silver
Category: Story
Unlock Details
Complete Chapter 1 — Necropolis. Guide Low and Alone through the opening chapter, solving environmental puzzles and surviving encounters with the giant baby. You'll need to avoid its gaze, hide behind cover, and navigate the dangerous platforming sections to reach the end of the chapter. The trophy unlocks automatically after completing Necropolis.
Tip
While exploring, look for the five dolls needed for Toybox. Chapter 1 is also where you can work toward Birdbrained, The Windy City, and Peekaboo.
Warning
For Peekaboo, you must avoid dying during the giant baby's encounters. If you're attempting both trophies in the same run, approach those sections carefully.
Trophy: From Nowhere, With Love
...But to be is to have been
Type: Gold
Category: Story
Unlock Details
Complete all four story chapters while playing as Alone, the character with orange hair who carries a wrench. You must finish the following chapters as Alone: Chapter 1 — Necropolis Chapter 2 — Candy Factory Chapter 3 — Carnevale Chapter 4 — The Institute Alone uses her wrench to break certain obstacles, operate machinery, and help Low progress through the environment. The trophy unlocks once you've completed every chapter while controlling Alone.
Tip
If your first playthrough was as Low, select Alone for your second run. You can also complete the chapters through Chapter Select rather than starting another uninterrupted campaign.
Warning
Both character-completion trophies are required for the Platinum. Completing the story once with an AI-controlled companion doesn't automatically count as completing it with both characters.
Trophy: Illuminating Experiences
The gift of second sight
Type: Bronze
Category: Story
Unlock Details
Progress through Chapter 4 — The Institute until you obtain the special doll that changes how the surrounding environment appears. Around the middle of the chapter, you'll encounter this doll as part of the main story. Pick it up to trigger its effect on the environment and unlock the trophy automatically.
Tip
No additional collectibles or special actions are required. Continue through The Institute's story until you reach the doll.
Trophy: Light or Flight
Look on the bright side
Type: Bronze
Category: Story
Unlock Details
In Chapter 3 — Carnevale, collect a flashlight as part of the story. Early in the chapter, you'll use an elevator to reach a new area. Shortly after exiting the elevator, you'll find a flashlight lying on the ground. Pick it up to unlock the trophy automatically.
Tip
During online co-op, the player who collects the first flashlight receives the trophy. A second flashlight is available shortly afterward, near the boxes in a room containing a power puzzle, allowing the other player to earn it as well.
Trophy: Low-Spirited
The real memories are the friend you made along the way
Type: Gold
Category: Story
Unlock Details
How to Unlock: Complete all four story chapters while playing as Low, the character with black hair, a mask, and a bow. You must finish the following chapters as Low: Chapter 1 — Necropolis Chapter 2 — Candy Factory Chapter 3 — Carnevale Chapter 4 — The Institute Low uses his bow to shoot distant objects, activate mechanisms, and assist Alone with environmental puzzles. Once you've completed all four chapters as Low, the trophy unlocks.
Tip
You don't need to complete the chapters in chronological order. Use Chapter Select to finish any chapters you haven't completed as Low. Solo and online co-op chapter completions both count toward this trophy.
Warning
Playing alongside Low as Alone does not satisfy this requirement. You must personally control Low for the relevant chapter completions.

Trophy: Showstoppers
The show cannot go on
Type: Silver
Category: Story
Unlock Details
Complete Chapter 3 — Carnevale. Make your way through the unsettling carnival, navigate its puzzles and hazards, and survive the encounters involving the Puppeteer and his puppet. The trophy unlocks automatically upon completing Carnevale.
Tip
This chapter contains a large number of collectibles. Look for all ten dolls, hug six Nomes, and destroy ten Lady statues to work toward Token Gestures, Home Sweet Nome, and Omnipresence. You can also complete several miscellaneous trophies here, including Stay Tuned, Capital Punishment, Delivery Feed, and Aim Low (and Alone).
Trophy: Spiral Out
A twisted mind unraveled
Type: Silver
Category: Story
Unlock Details
Complete Chapter 4 — The Institute, the final chapter of Little Nightmares III. Navigate the Institute with Low and Alone, solve its environmental puzzles, and survive the encounters with the chapter's main enemy. Progress through the final confrontation and reach the ending to unlock the trophy automatically.
Tip
Chapter 4 contains five dolls and six Ghosts. Collecting them contributes toward Filed Away, Loose Threads, and Institutionalized. This chapter is also important for two other trophies: Hand-Eye Coordination, which requires surviving the main enemy's encounters without dying, and Special Connection, which requires completing the chapter in online co-op.
Warning
Completing Chapter 4 solo does not unlock Special Connection. You must complete it with another player in an online co-op session.

Trophy: Unsupervised
Survived the most pressing of situations
Type: Silver
Category: Story
Unlock Details
Complete Chapter 2 — Candy Factory. Progress through the factory with Low and Alone, solve its machinery-based puzzles, and escape the dangerous Supervisor. Use the characters' abilities to navigate the environment and survive the chapter's chase sequences. The trophy unlocks automatically once you've completed Candy Factory.
Tip
Collect the five dolls hidden throughout the chapter for Candy Shop. You can also earn Unsavory Delicacies by feeding candy to insects and Another One in the Bag by throwing a ball through a basketball hoop.
Start your first playthrough as either Low, who uses a bow, or Alone, who carries a wrench. You'll eventually need to complete all four chapters with both characters, so choose whichever sounds more fun. Begin in Chapter 1 — Necropolis, where you can collect five dolls, earn The Windy City by opening your umbrella just before landing, and work toward Birdbrained by dealing with 11 crows. Also pay attention to Peekaboo, which requires surviving every encounter with the giant baby without dying during those encounters. It's one of the trickier trophies, so tackling it while the chapter is fresh can save you a return visit.
Continue into Chapter 2 — Candy Factory, collecting another five dolls and completing the miscellaneous challenges Unsavory Delicacies and Another One in the Bag. Throughout your first run, regularly call your companion to work toward Hello? and hold their hand for five minutes total to earn Guiding Hands. The game gives you plenty of opportunities for both, so there's no reason to leave these for cleanup. You may be trapped in a nightmare, but at least you've got company.
Chapter 3 — Carnevale contains the largest concentration of collectibles and optional trophies. There are ten dolls, six Nomes to hug for Home Sweet Nome, and ten statues of the Lady to destroy for Omnipresence. Keep an eye out for Stay Tuned, which involves playing a piano, Capital Punishment, which involves activating electrical buttons, and Delivery Feed, which requires delivering food to a child in a cage. You'll also want to complete the shooting-gallery challenge for Aim Low (and Alone). Taking care of these during your first visit will make the second playthrough much smoother.
Move into Chapter 4 — The Institute, where you'll find the final five dolls and six Ghosts. Collecting all 25 dolls unlocks Loose Threads, while gathering every Ghost earns Institutionalized. This chapter also contains Hand-Eye Coordination, which requires surviving the encounters with the chapter's main boss without dying. Learn the chase sequences and boss mechanics carefully, since restarting after a failed attempt can be frustrating. Complete the story to earn either Low-Spirited or From Nowhere, With Love, depending on which character you chose.
Begin your second playthrough with the character you didn't use the first time. If you originally played as Low, switch to Alone; if you started with Alone, switch to Low. Finish all four chapters with your second character to unlock the remaining character-specific completion trophy. You can use this run to grab any collectibles or miscellaneous trophies you missed, although there's no need to repeat everything you've already finished. Knowing the puzzles and enemy patterns should make this playthrough noticeably faster.
Pay special attention to the weapon-use trophies during this run. Bullseye requires 50 uses of Low's bow, while Spanner in the Works requires 50 uses of Alone's wrench. Use each character's tool regularly throughout the adventure rather than leaving all the work until the end. Both guides recommend taking advantage of opportunities to shoot or smash objects, particularly in Necropolis and Carnevale. By the time you've completed both character playthroughs, most of your trophy list should already be finished.
The final major requirement is Special Connection, which involves completing Chapter 4 — The Institute in online co-op with another player. You don't need to finish the entire story together, only this chapter. Make sure you have access to PlayStation Plus and a co-op partner, since the game does not support local split-screen multiplayer. If you haven't arranged a partner yet, it's worth doing so before you've finished everything else. Chapter Select also lets you revisit any chapters where you're missing collectibles or miscellaneous trophies.
For cleanup, prioritize Peekaboo and Hand-Eye Coordination if either remains unfinished, since both require successful enemy encounters without dying. The guides also recommend using Chapter Select for anything you've missed rather than replaying the entire story unnecessarily. Check your collectible progress, revisit specific challenges, and use Ask Gami whenever you need help locating a doll, statue, Nome, or Ghost. Once you've completed both characters' stories, finished the co-op requirement, and earned the remaining trophies, Mastery of the Spiral will unlock as your Platinum.
Completion Video Playlist
1 video
Little Nightmares 3 100% Walkthrough Guide | All Collectibles | Platinum Trophy