


Trophy Guide Preview
Overall Trophy Progress
0 / 34 Completed
0%
Trophy Types
Platinum
0 / 1Gold
0 / 4Silver
0 / 11Bronze
0 / 18Categories
Missable
0 / 3Collectible
0 / 4Grind
0 / 4Misc
0 / 8Story
0 / 14
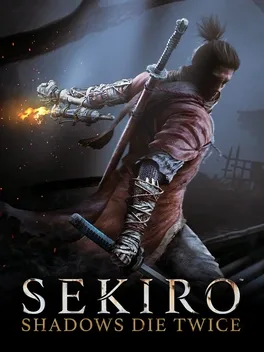
Enter a dark reimagining of Sengoku-era Japan as Wolf, a one-armed shinobi sworn to protect his young master. Master precise sword combat, devastating Deathblows, stealth, and powerful Shinobi Prosthetic tools while battling fearsome warriors and supernatural enemies. Explore the dangerous lands of Ashina, uncover ancient secrets, and fight to reclaim your honor in this challenging action-adventure from FromSoftware.
Overall Trophy Progress
0 / 34 Completed
0%
Platinum Path
EARLY GAME Welcome to Sekiro: Shadows Die Twice, where hesitation is defeat, your sword is your closest companion, and even ordinary enemies seem personally offended by your existence. This challenging action-adventure from FromSoftware follows Wolf, a shinobi sworn to protect his young master, Kuro, through the war-torn lands of Ashina. Unlike traditional Souls games, Sekiro places a heavy emphasis on aggressive swo...
YouTube Playlist
Sekiro Shadows Die Twice — Platinum Walkthrough
Trophy: Sekiro
All trophies have been unlocked.
Type: Platinum
How to Unlock
Earn all 33 other trophies in Sekiro: Shadows Die Twice to unlock the Platinum. This is a challenging completion that requires much more than simply finishing the main story. You'll need to defeat all major bosses, unlock all four endings, collect every Prosthetic Tool, fully upgrade those tools, master every required skill tree, and maximize Wolf's Vitality, Posture, and Healing Gourd. The four required endings are Immortal Severance, Purification, Dragon's Homecoming, and Shura. The first three share the same main story route, while Shura branches off at a critical decision involving Owl on the rooftop of Ashina Castle. You'll also need to defeat bosses exclusive to both routes for Man Without Equal, making New Game+ necessary even if you use save backups to unlock multiple ending trophies. The Platinum can be earned in two playthroughs with carefully managed save backups, or through four conventional playthroughs if you prefer to avoid manipulating saves. During your first playthrough, remain loyal to Kuro, complete the Purification and Dragon's Homecoming questlines, and explore all the late-game areas. Collect all 40 Prayer Beads, nine Gourd Seeds, and six available Lapis Lazuli whenever possible. In New Game+, obtain the Shura ending and its exclusive boss trophies, then use a backup to return to the non-Shura route and collect the remaining Lapis Lazuli needed for your final Prosthetic upgrades. Finally, purchase every required skill in the Shinobi, Prosthetic, Ashina, Temple, and Mushin Arts trees. Once the final outstanding trophy unlocks, Sekiro will be awarded automatically. Wolf has survived deadly samurai, supernatural monsters, and more boss encounters than any reasonable employment contract should permit. Unfortunately, the Platinum also expects him to become a master craftsman, complete four different endings, and memorize several hundred sword attacks. Apparently, simply saving his young master doesn't qualify as a complete performance review.
Tip
Follow the Platinum Roadmap carefully, particularly around Owl's decision on the Ashina Castle rooftop. For your first playthrough, choose Break the Iron Code, Stay Loyal to Kuro. This preserves access to Fountainhead Palace, Owl (Father), Demon of Hatred, and the three non-Shura endings. Before defeating the Divine Dragon, obtain Father's Bell Charm and complete the requirements for the Frozen Tears. Collect six Lapis Lazuli before starting New Game+, since you need 10 overall for Master of the Prosthetic. Prioritize Mikiri Counter, healing upgrades, and Posture-related skills early. Save your remaining experience points for Height of Technique rather than spending them through the Dancing Dragon Mask.
Warning
Sekiro contains numerous missable trophies and several points where bosses, minibosses, and collectibles become unavailable. Choosing the Shura route during your first playthrough locks you out of substantial late-game content. Missing Father's Bell Charm before defeating the Divine Dragon can prevent you from accessing the second Hirata Estate memory and obtaining the Prayer Beads required for Peak Physical Strength. You must defeat the bosses from both ending branches on the same continuing save file to satisfy Man Without Equal. Restoring an earlier backup removes in-game progress made after that backup, even though earned PlayStation trophies remain unlocked. Do not overwrite your only safe backup or begin New Game+ before completing your first-playthrough cleanup. There are no difficulty settings, and the base-game Platinum doesn't require completing the optional Gauntlets of Strength.

Trophy: Dragon's Homecoming
Attained the "Return" ending
Type: Silver
Category: Missable
How to Unlock
Obtain the Dragon's Homecoming ending, also known as the Return ending, by completing the Divine Child's questline and giving Kuro the Divine Dragon's Tears together with the Frozen Tears. Dragon's Homecoming is Sekiro's most elaborate ending because it involves multiple NPC conversations, special books, Rice deliveries, and two items obtained through encounters with the Great Serpent. Most of the quest can be completed while following the non-Shura story route, but several steps must be finished before defeating the Divine Dragon. First, remain loyal to Kuro during Owl's confrontation on the rooftop of Ashina Castle. Choosing the Shura route prevents you from reaching the necessary late-game areas and completing this ending. To begin the Divine Child's questline, travel to Senpou Temple, Mt. Kongo, and defeat the Folding Screen Monkeys. This grants access to the Inner Sanctum, where you'll meet the Divine Child of Rejuvenation. Speak with the Divine Child and request Rice. Consume the Rice, give it to one of the elderly women who discuss the serpent fruits, or otherwise remove it from your inventory so you can request another serving. Travel away or rest when necessary, then return and request more Rice. Repeat this process until the Divine Child becomes ill and asks for a Persimmon. Persimmons can be purchased from the Shugendo Memorial Mob in Senpou Temple or obtained from certain enemies and item locations in the region. Give the Divine Child a Persimmon to help her recover. Afterward, she'll provide **Rice for Kuro**. Return to Kuro's room in Ashina Castle and give him the Rice. Kuro will prepare a Sweet Rice Ball, which you'll need to consume to continue the quest. Eat the Sweet Rice Ball, then speak with Kuro again if additional dialogue becomes available. Return to the Divine Child and tell her about Kuro's gift. Continue her dialogue until she begins discussing the teachings contained in the Holy Chapter texts. You'll need to obtain **Holy Chapter: Infested** and deliver it to the Divine Child. This book has two possible acquisition methods. Early in the game, it can be received from the monk near the Senpou Temple Main Hall under the appropriate circumstances. If that opportunity has passed, the book can be found at the bottom of the pond near the Temple Grounds Sculptor's Idol after obtaining the Mibu Breathing Technique. Once you've delivered Holy Chapter: Infested, rest or reload the area. The Divine Child will eventually move to the Illusory Hall, accessible through the blue beam in the Inner Sanctum. Find her near the central tree and speak with her. She'll ask you to locate another text, **Holy Chapter: Dragon's Return**. Travel to the Main Hall Sculptor's Idol in Senpou Temple and enter the nearby cave system. Follow the tunnels through the narrow passages until you reach the remains of an old priest holding the book. Collect Holy Chapter Dragon's Return and bring it back to the Divine Child. She'll explain that two special serpent items are required: the Fresh Serpent Viscera and Dried Serpent Viscera. For the **Dried Serpent Viscera**, travel to the Bodhisattva Valley area in Sunken Valley, near the location of the original Guardian Ape encounter. Descend toward the poisonous river and follow the route leading to the Toxic Memorial Mob. Enter the nearby cave and continue until you encounter the Great Serpent blocking the passage. Look for a monkey near the serpent. Perform a Backstab Deathblow on the monkey and activate Puppeteer Ninjutsu. The controlled monkey will distract the serpent, allowing Wolf to grapple past its position and reach a small shrine containing the Dried Serpent Viscera. For the **Fresh Serpent Viscera**, return to Senpou Temple and locate the enemy operating a kite mechanism near the early temple paths. Approach the enemy from behind, perform a Backstab Deathblow, and use Puppeteer Ninjutsu. The controlled enemy will operate the kite, holding it in position so you can use it to cross a large gap. Continue through Senpou Temple until you reach the large tree overlooking the valley. Grapple onto the kite and travel across the gap to access the Sunken Valley Cavern area. Follow the path toward a high wooden platform overlooking the Great Serpent. Jump from the platform and perform the aerial Deathblow on the serpent. You'll obtain the Fresh Serpent Viscera and unlock the Great Serpent trophy. With both serpent items collected, return to the Divine Child in the Inner Sanctum and give her the Fresh and Dried Serpent Viscera. Leave the area and rest to advance her dialogue. When you return, the doors may be closed. Eavesdrop from outside to hear the Divine Child struggling with the ritual. Rest or reload the area again, then speak with her once the doors reopen. She'll eventually give you the **Frozen Tears**, the essential item for Dragon's Homecoming. After obtaining the Frozen Tears, continue through Fountainhead Palace and defeat the Divine Dragon to receive the Divine Dragon's Tears. Complete the story by defeating Sword Saint Isshin at the Secret Passage. Approach Kuro and select the ending option that gives him **Divine Dragon's Tears and Frozen Tears**. Dragon's Homecoming unlocks after the Return ending cinematic plays. If you're following the optimized Platinum route, the Divine Child's questline can be completed alongside Emma's Purification questline. Once you've obtained both the Aromatic Flower and Frozen Tears, all three non-Shura ending options can be made available during the same playthrough. The Divine Child's questline reveals that Wolf's responsibilities extend well beyond sword fighting and stealth. He must deliver Rice, find ancient religious texts, operate a giant kite, and collect supernatural serpent organs. At this point, protecting Kuro has somehow turned into the world's most dangerous grocery delivery service.
Tip
Begin requesting Rice from the Divine Child as soon as you've defeated the Folding Screen Monkeys and gained access to the Inner Sanctum. The Rice-related steps involve resting and revisiting the Divine Child, so completing them gradually while progressing through the story can reduce unnecessary backtracking. Obtain Puppeteer Ninjutsu before attempting the serpent-related objectives. You'll receive this technique automatically after defeating the Folding Screen Monkeys. The Fresh Serpent Viscera sequence also rewards the Great Serpent trophy, making it an efficient part of your Platinum route. If Holy Chapter Infested isn't available from the monk at Senpou Temple, check the underwater pond near Temple Grounds after obtaining Mibu Breathing Technique. Finish the entire Divine Child questline and obtain Frozen Tears before defeating the Divine Dragon.
Warning
Dragon's Homecoming is missable within a playthrough. The safest approach is to obtain the Frozen Tears before defeating the Divine Dragon. Several Divine Child dialogue steps require resting, traveling between Sculptor's Idols, or consuming previously obtained Rice before the next interaction becomes available. Make sure you actually consume the Sweet Rice Ball given by Kuro, since this is part of advancing the questline. Don't confuse the Fresh Serpent Viscera with the Dried Serpent Viscera. Both are required, and each comes from a different Great Serpent-related location. You must obtain Holy Chapter Infested and Holy Chapter: Dragon's Return to advance the Divine Child's storyline. At the final interaction with Kuro, select Divine Dragon's Tears and Frozen Tears. Giving him only the Divine Dragon's Tears triggers Immortal Severance, while giving him the Aromatic Flower instead triggers Purification. If you don't create a save backup before the final ending choice, obtaining the remaining endings requires additional playthroughs.

Trophy: Father Surpassed
Defeated "Great Shinobi - Owl" at the Hirata Estate
Type: Bronze
Category: Missable
How to Unlock
Defeat Owl (Father) in the second Hirata Estate memory, which is unlocked through Emma's optional Purification questline. Father Surpassed is one of Sekiro's most important missable trophies because the second Hirata Estate memory contains not only this difficult boss encounter but also two Prayer Beads required for Peak Physical Strength. Owl (Father) is a separate encounter from Great Shinobi Owl on the rooftop of Ashina Castle, and both versions must be defeated for Man Without Equal. To access the second memory, progress through the main story until Owl confronts you at Ashina Castle. Choose **Break the Iron Code, stay loyal to Kuro**, then defeat Great Shinobi Owl. Return to Kuro's room and exhaust the available conversations with Kuro and Emma. Rest as necessary to advance their dialogue. Next, move behind the wall near the incense burner in Kuro's room and eavesdrop on Kuro. After hearing him express his determination to do what must be done, rest at the nearby Sculptor's Idol. Emma should relocate upstairs, where you can speak with her and agree that Kuro must be kept alive. Rest again and continue speaking with Emma until she mentions visiting a grave. Travel to the Old Grave Sculptor's Idol and find Emma near the cemetery. Speak with her, then return to the Dilapidated Temple. At the temple, move behind the building and eavesdrop through the opening in the rear wall to overhear Emma speaking with the Sculptor. Afterward, confront Emma about their conversation and ask what she's hiding. She'll eventually give you **Father's Bell Charm**. Offer Father's Bell Charm at the Buddha statue inside the Dilapidated Temple to enter the second Hirata Estate memory. This version of the estate contains different enemies and encounters from the original memory accessed through the Young Lord's Bell Charm. Progress through the area and defeat Lone Shadow Masanaga the Spear-Bearer, then continue toward Juzou the Drunkard. Both minibosses award Prayer Beads, so don't skip them if you're working toward Peak Physical Strength. After defeating Juzou, continue through the estate toward the Hidden Temple where you previously fought Lady Butterfly. Owl (Father) will be waiting inside. This encounter contains two phases, each requiring a Deathblow. Owl is substantially more aggressive than his Ashina Castle counterpart, using sword combinations, shurikens, firecrackers, perilous attacks, and techniques designed to punish careless movement. During the first phase, remain close enough to pressure Owl but avoid attacking repeatedly without watching his response. Deflect his sword combinations and punish the openings after his larger attacks. One of his most dangerous combinations involves several sword strikes followed by firecrackers. When you recognize the explosive attack, dodge toward his side or behind him if you're positioned close enough. This can avoid the blast while placing you in an excellent position to counterattack. If you're farther away, retreat beyond the explosion's range and prepare for his next movement. Owl also performs a powerful overhead sword strike with a lengthy windup. This creates an opportunity to land one or two attacks before dodging to his side. However, don't dodge too early, because Owl can change his attack if you move away before he commits to the overhead strike. Watch carefully for perilous attacks. His thrust can be punished with Mikiri Counter, while his sweeping attacks should be avoided by jumping. Owl frequently retreats after attacking, but chasing him recklessly can leave you vulnerable to shurikens or sudden counterattacks. Maintain controlled pressure and take advantage of openings rather than attempting to overwhelm him through continuous attacks. After breaking his first Posture bar, perform a Deathblow to begin the second phase. During this stage, Owl summons a spectral owl that moves around the arena. He can disappear into the spirit and reappear with a sudden attack, so remain mobile when he vanishes and watch for his return. Another important attack involves Owl sending the spectral bird toward you while it burns with red flames. This is a sweeping attack that you can avoid by jumping. Owl often follows the flaming owl with a perilous thrust, providing an opportunity for Mikiri Counter immediately afterward. Continue deflecting his ordinary sword combinations, punishing his thrusts, and avoiding his firecracker attacks. Once you've broken his second Posture bar, perform the final Deathblow to defeat him. Father Surpassed unlocks automatically after the encounter. You'll also receive the Aromatic Flower, which is required for the Purification ending, along with a boss Memory that can increase Wolf's Attack Power. Wolf has already defeated his adoptive father once, but apparently that wasn't enough to settle their disagreement. The second confrontation takes place in a burning estate, features an assortment of explosives, and eventually includes a supernatural owl. Family relationships in Ashina are certainly complicated, but this one has become unusually expensive in Spirit Emblems.
Tip
Obtain Father's Bell Charm as soon as possible after defeating Great Shinobi Owl. The dialogue sequence required to receive it becomes unavailable after defeating the Divine Dragon. Once you've obtained and used the charm, you can return to the second Hirata Estate memory later if Owl (Father) proves too difficult immediately. Collect both Prayer Beads from the altered memory before moving on. They contribute toward the 40 required for Peak Physical Strength. Mikiri Counter is particularly useful because Owl frequently follows certain attacks with thrusts. During the second phase, jumping over the flaming owl and immediately countering the follow-up thrust can create a reliable opportunity to damage his Posture. If you're struggling, consider collecting additional Prayer Necklaces, Gourd Seeds, and boss Memories before returning to the encounter.
Warning
Father Surpassed is missable within a playthrough. You must obtain Father's Bell Charm through Emma's optional questline before defeating the Divine Dragon. If you progress beyond that point without obtaining the charm, the required conversations may no longer be available. Don't confuse Great Shinobi Owl at Ashina Castle with Owl (Father) in the second Hirata Estate memory. They are separate bosses, and both are required for Man Without Equal. The second memory also contains two Prayer Beads necessary for Peak Physical Strength, making this questline especially important for the Platinum. Owl (Father) can counter reckless thrust attacks, so avoid using charged thrusts against him. His firecrackers can inflict substantial damage if you remain directly in front of him, and the spectral owl introduces additional threats during the second phase. Defeating Owl (Father) rewards the Aromatic Flower, but you must still select the appropriate final ending choice to obtain Purification.

Trophy: Purification
Attained the "Purification" ending
Type: Silver
Category: Missable
How to Unlock
Obtain the Purification ending by completing Emma's optional questline, defeating Owl (Father), and giving Kuro the Divine Dragon's Tears together with the Aromatic Flower. Purification is one of Sekiro's most important missable endings because its questline provides access to the second Hirata Estate memory. This area contains the Owl (Father) boss encounter and two Prayer Beads required for Peak Physical Strength. Missing the questline can therefore affect several trophies simultaneously. Begin by progressing through the main story until Owl confronts you on the rooftop of Ashina Castle. Choose **Break the Iron Code, stay loyal to Kuro**, then defeat Great Shinobi Owl. Return to Kuro's room and exhaust the available dialogue with Kuro and Emma. Rest at the nearby Sculptor's Idol as necessary to advance their conversations. Next, move behind the wall near the incense burner in Kuro's room. The wall contains openings that allow Wolf to eavesdrop on Kuro without being seen. Listen until you hear Kuro expressing his determination to do what must be done. Rest at the Sculptor's Idol again. Emma should move upstairs, near the top of the staircase leading toward Isshin's room. Speak with her and agree that Kuro must be kept alive. Rest again, then speak with Emma once more. She'll explain that she intends to visit an important grave. Travel to the Old Grave Sculptor's Idol in Ashina Castle. From the Idol, move toward the nearby cemetery and locate Emma standing beside a grave. Speak with her until she explains that she intends to consult the Sculptor at the Dilapidated Temple. Return to the Dilapidated Temple and approach the building from behind. Locate the opening in the rear wall and use it to eavesdrop on the conversation between Emma and the Sculptor. Once you've heard their discussion, enter the temple and speak with Emma. Choose the dialogue options concerning what you overheard and press her for the information she's concealing. Emma will eventually give you **Father's Bell Charm**. Approach the Buddha statue inside the Dilapidated Temple and offer Father's Bell Charm to enter a second version of Hirata Estate. This memory differs from the original Hirata Estate visited through the Young Lord's Bell Charm. Progress through the altered estate and defeat the new minibosses along the way, including Lone Shadow Masanaga the Spear-Bearer and Juzou the Drunkard. Both reward Prayer Beads needed for Peak Physical Strength. Continue toward the Hidden Temple where Lady Butterfly was originally encountered. Instead of Lady Butterfly, you'll face Owl (Father), one of the game's most demanding optional bosses. Owl (Father) has two Deathblow markers and uses aggressive sword combinations, fireworks, sweeping attacks, and dangerous thrusts. During the second phase, he also summons a spectral owl and uses it to perform additional attacks. Focus on learning his attack patterns, deflecting his sword combinations, jumping over sweeps, and punishing thrust attacks with Mikiri Counter. Avoid reckless thrust attacks of your own, since Owl can counter them. Defeat Owl (Father) to obtain the **Aromatic Flower** and unlock Father Surpassed. Once you've acquired the Aromatic Flower, continue through the non-Shura story route until you've defeated the Divine Dragon and obtained the Divine Dragon's Tears. Proceed to the final confrontation against Sword Saint Isshin. After defeating him, approach Kuro. Select the ending option that gives him **Divine Dragon's Tears and Aromatic Flower**. The Purification ending will play, and the trophy unlocks automatically. If you're using save backups, create your backup after Sword Saint Isshin but before interacting with Kuro. This allows you to obtain Purification alongside Immortal Severance and Dragon's Homecoming without repeating the entire story. Wolf's journey through Hirata Estate becomes considerably more complicated when he discovers that one visit to the past apparently wasn't enough. The second memory introduces stronger enemies, hidden family secrets, and another confrontation with Owl. Family reunions in Ashina are rarely pleasant, but this one is especially committed to making everyone bring a sword.
Tip
Begin Emma's Purification questline immediately after defeating Great Shinobi Owl. Complete the dialogue and eavesdropping sequence before traveling too far into Fountainhead Palace. The safest approach is to obtain Father's Bell Charm before defeating the Divine Dragon. Once you've obtained and used Father's Bell Charm, the second Hirata Estate memory remains accessible, allowing you to return and fight Owl (Father) later if necessary. Collect both Prayer Beads during this memory. The minibosses are required for the complete set of 40 Prayer Beads, so defeating them now prevents unnecessary cleanup in New Game+. Owl (Father) is also required for Man Without Equal, making this questline essential even if you intend to obtain Purification through a later ending selection.
Warning
Purification is missable within a playthrough. You must obtain Father's Bell Charm before defeating the Divine Dragon. If you progress beyond that point without completing Emma's questline, the necessary dialogue opportunities can become unavailable. Defeating Great Shinobi Owl on the Ashina Castle rooftop isn't the same as defeating Owl (Father) in the second Hirata Estate memory. They are separate boss encounters. The Aromatic Flower is obtained specifically by defeating Owl (Father). Don't confuse Father's Bell Charm with the Young Lord's Bell Charm. The first opens the altered Hirata Estate memory, while the second opens the original version. To earn Purification, you must give Kuro both the Divine Dragon's Tears and Aromatic Flower at the final interaction. Choosing only the Divine Dragon's Tears instead triggers Immortal Severance. If you don't use a save backup, selecting a different ending means you'll need another playthrough to obtain Purification.
Video Guide: https://www.youtube.com/watch?v=X4w-UtofqBk&list=PLRr5L69yg_kEJkMWG-EroGgsRs6Xtt5kM&index=5&pp=iAQB

Obtain the Purification ending by completing Emma's optional questline, defeating Owl (Father), and giving Kuro the Divine Dragon's Tears together with the Aromatic Flower.
Purification is one of Sekiro's most important missable endings because its questline provides access to the second Hirata Estate memory. This area contains the Owl (Father) boss encounter and two Prayer Beads required for Peak Physical Strength. Missing the questline can therefore affect several trophies simultaneously.
Begin by progressing through the main story until Owl confronts you on the rooftop of Ashina Castle. Choose Break the Iron Code, stay loyal to Kuro, then defeat Great Shinobi Owl.
Return to Kuro's room and exhaust the available dialogue with Kuro and Emma. Rest at the nearby Sculptor's Idol as necessary to advance their conversations.
Next, move behind the wall near the incense burner in Kuro's room. The wall contains openings that allow Wolf to eavesdrop on Kuro without being seen. Listen until you hear Kuro expressing his determination to do what must be done.
Rest at the Sculptor's Idol again. Emma should move upstairs, near the top of the staircase leading toward Isshin's room. Speak with her and agree that Kuro must be kept alive.
Rest again, then speak with Emma once more. She'll explain that she intends to visit an important grave.
Travel to the Old Grave Sculptor's Idol in Ashina Castle. From the Idol, move toward the nearby cemetery and locate Emma standing beside a grave. Speak with her until she explains that she intends to consult the Sculptor at the Dilapidated Temple.
Return to the Dilapidated Temple and approach the building from behind. Locate the opening in the rear wall and use it to eavesdrop on the conversation between Emma and the Sculptor.
Once you've heard their discussion, enter the temple and speak with Emma. Choose the dialogue options concerning what you overheard and press her for the information she's concealing.
Emma will eventually give you Father's Bell Charm.
Approach the Buddha statue inside the Dilapidated Temple and offer Father's Bell Charm to enter a second version of Hirata Estate. This memory differs from the original Hirata Estate visited through the Young Lord's Bell Charm.
Progress through the altered estate and defeat the new minibosses along the way, including Lone Shadow Masanaga the Spear-Bearer and Juzou the Drunkard. Both reward Prayer Beads needed for Peak Physical Strength.
Continue toward the Hidden Temple where Lady Butterfly was originally encountered. Instead of Lady Butterfly, you'll face Owl (Father), one of the game's most demanding optional bosses.
Owl (Father) has two Deathblow markers and uses aggressive sword combinations, fireworks, sweeping attacks, and dangerous thrusts. During the second phase, he also summons a spectral owl and uses it to perform additional attacks.
Focus on learning his attack patterns, deflecting his sword combinations, jumping over sweeps, and punishing thrust attacks with Mikiri Counter. Avoid reckless thrust attacks of your own, since Owl can counter them.
Defeat Owl (Father) to obtain the Aromatic Flower and unlock Father Surpassed.
Once you've acquired the Aromatic Flower, continue through the non-Shura story route until you've defeated the Divine Dragon and obtained the Divine Dragon's Tears.
Proceed to the final confrontation against Sword Saint Isshin. After defeating him, approach Kuro.
Select the ending option that gives him Divine Dragon's Tears and Aromatic Flower.
The Purification ending will play, and the trophy unlocks automatically.
If you're using save backups, create your backup after Sword Saint Isshin but before interacting with Kuro. This allows you to obtain Purification alongside Immortal Severance and Dragon's Homecoming without repeating the entire story.
Wolf's journey through Hirata Estate becomes considerably more complicated when he discovers that one visit to the past apparently wasn't enough. The second memory introduces stronger enemies, hidden family secrets, and another confrontation with Owl. Family reunions in Ashina are rarely pleasant, but this one is especially committed to making everyone bring a sword.
Begin Emma's Purification questline immediately after defeating Great Shinobi Owl.
Complete the dialogue and eavesdropping sequence before traveling too far into Fountainhead Palace. The safest approach is to obtain Father's Bell Charm before defeating the Divine Dragon.
Once you've obtained and used Father's Bell Charm, the second Hirata Estate memory remains accessible, allowing you to return and fight Owl (Father) later if necessary.
Collect both Prayer Beads during this memory. The minibosses are required for the complete set of 40 Prayer Beads, so defeating them now prevents unnecessary cleanup in New Game+.
Owl (Father) is also required for Man Without Equal, making this questline essential even if you intend to obtain Purification through a later ending selection.
Purification is missable within a playthrough.
You must obtain Father's Bell Charm before defeating the Divine Dragon. If you progress beyond that point without completing Emma's questline, the necessary dialogue opportunities can become unavailable.
Defeating Great Shinobi Owl on the Ashina Castle rooftop isn't the same as defeating Owl (Father) in the second Hirata Estate memory. They are separate boss encounters.
The Aromatic Flower is obtained specifically by defeating Owl (Father).
Don't confuse Father's Bell Charm with the Young Lord's Bell Charm. The first opens the altered Hirata Estate memory, while the second opens the original version.
To earn Purification, you must give Kuro both the Divine Dragon's Tears and Aromatic Flower at the final interaction.
Choosing only the Divine Dragon's Tears instead triggers Immortal Severance.
If you don't use a save backup, selecting a different ending means you'll need another playthrough to obtain Purification.
Trophy: All Ninjutsu Techniques
Acquired all Ninjutsu Techniques
Type: Silver
Category: Collectible
How to Unlock
Acquire all three Ninjutsu Techniques: Bloodsmoke Ninjutsu, Puppeteer Ninjutsu, and Bestowal Ninjutsu. Ninjutsu Techniques are specialized shinobi abilities that allow Wolf to perform powerful follow-up actions after a Backstab Deathblow. Unlike regular Combat Arts, these techniques occupy their own equipment slot and generally consume Spirit Emblems when activated. You'll obtain two through mandatory story encounters, while the third requires completing an optional boss encounter in Ashina Depths. The first technique, Bloodsmoke Ninjutsu, is awarded automatically after defeating Genichiro Ashina on the rooftop of Ashina Castle. This ability creates a cloud of blood after a Backstab Deathblow, obscuring nearby enemies' vision and allowing you to reposition or perform additional stealth attacks. Since Genichiro is a mandatory boss, you'll obtain Bloodsmoke naturally while progressing through the story. The second technique, Puppeteer Ninjutsu, is obtained after defeating the Folding Screen Monkeys at Senpou Temple, Mt. Kongo. You'll access this unusual boss encounter through the Main Hall after progressing far enough through the main story. Once all four monkeys have been defeated, you'll receive Puppeteer Ninjutsu, which temporarily turns an enemy into an ally after a Backstab Deathblow. Puppeteer is particularly important because it's also required for the Dragon's Homecoming ending. You'll use it to manipulate an enemy operating a kite in Senpou Temple and distract the Great Serpent using a monkey in Sunken Valley. Because this ending is required for the Platinum, obtaining Puppeteer serves multiple purposes. The final technique, Bestowal Ninjutsu, requires defeating the Headless Ape during its second encounter in Ashina Depths. After defeating the Guardian Ape in Sunken Valley, the creature can reappear in Guardian Ape's Burrow, located along the route between Poison Pool and Hidden Forest. During this encounter, you'll fight the Headless Ape again, and a second ape will join during the later portion of the battle. Use Shinobi Firecracker to help control the companion while focusing on surviving the Headless Ape's dangerous sword attacks and Terror-inducing scream. Once both apes have been defeated, the Headless Ape will collapse. Approach its body and perform the additional Deathblow using the Mortal Blade to sever its immortality permanently. This final execution awards Bestowal Ninjutsu, provided you've already obtained the Mortal Blade from Senpou Temple. When all three techniques have been acquired, All Ninjutsu Techniques unlocks automatically. Wolf's journey begins with a straightforward mission to protect his master, but eventually his ninja training includes creating clouds of blood, mind-controlling enemies, and empowering his sword through supernatural executions. Apparently, being extremely good at stabbing people wasn't considered a complete qualification.
Tip
Complete the Headless Ape encounter during your first playthrough rather than postponing it until New Game+. Not only does it award Bestowal Ninjutsu, but severing the ape's immortality also contributes to Guardian Ape Immortality Severed and prepares the area for a later Shichimen Warrior encounter. That Shichimen Warrior drops Malcontent's Ring, which is required for one of the final Prosthetic upgrades. If the Headless Ape isn't appearing, check whether you've defeated the original Guardian Ape in Sunken Valley and whether you've already progressed through Guardian Ape's Burrow. Remember that Ninjutsu Techniques activate after a Backstab Deathblow, not through the ordinary Combat Arts controls.
Warning
You must acquire all three techniques. Obtaining Bloodsmoke and Puppeteer through the story isn't enough. Bestowal Ninjutsu requires the second Headless Ape encounter in Ashina Depths and the additional Mortal Blade execution. Simply defeating the original Guardian Ape in Sunken Valley doesn't unlock Bestowal. If you reach the Headless Ape's body without having the Mortal Blade, you'll need to return after acquiring it from Senpou Temple. You don't need to activate each Ninjutsu Technique for this trophy. Acquiring them is sufficient. Don't confuse Ninjutsu Techniques with skills purchased from the Shinobi Arts or Mushin Arts trees. Those belong to the separate Height of Technique trophy.

Trophy: All Prosthetic Tools
Acquired all Prosthetic Tools
Type: Silver
Category: Collectible
How to Unlock
Acquire and install all 10 base Shinobi Prosthetic Tools. Sekiro's Prosthetic Tools provide Wolf with a versatile selection of equipment designed to exploit enemy weaknesses, interrupt dangerous attacks, and expand his combat options. Each tool begins as a special material or component found somewhere in Ashina. After obtaining one, return to the Sculptor at the Dilapidated Temple and ask him to fit the component into your Shinobi Prosthetic. You must acquire and install all 10 tools to unlock this trophy. Purchasing their upgrades isn't necessary here, although every modification will eventually be required for Master of the Prosthetic. The 10 required tools and their locations are: 1. Loaded Shuriken — Ashina Outskirts. From the Outskirts Wall – Gate Path Idol, look for a damaged gatehouse with an opening above the entrance. Grapple into the building and collect the Shuriken Wheel from the corpse inside. Bring it to the Sculptor to create the Loaded Shuriken. 2. Flame Vent — Hirata Estate. From the Estate Path Idol, progress through the village until you reach a group of bandits gathered around a large bonfire. The Flame Barrel is hidden inside the flames. Collect it and bring it to the Sculptor to unlock the Flame Vent. 3. Loaded Axe — Hirata Estate. Continue through the Estate Path area and locate a courtyard containing a small shrine guarded by bandits. Open the shrine to obtain the Shinobi Axe of the Monkey. The Sculptor can convert this into the Loaded Axe, which is particularly effective against shield-bearing enemies. 4. Shinobi Firecracker — Ashina Outskirts. Purchase Robert's Firecrackers from the Crow's Memorial Mob near the Outskirts Wall – Gate Path for 500 Sen. The merchant is positioned on a high cliff reached through grappling points near the early destroyed buildings. You can also purchase the item from the Battlefield Memorial Mob after defeating Gyoubu Masataka Oniwa. 5. Loaded Spear — Ashina Reservoir. Obtain the Gatehouse Key from the guards near the bridge connected to Ashina Castle. Travel to Ashina Reservoir and locate the locked building near the area where Wolf began the game. Use the key to enter and collect Gyoubu's Broken Horn, which becomes the Loaded Spear. 6. Mist Raven — Hirata Estate. From the Bamboo Thicket Slope area, reach the bridge leading toward the burning estate. Drop beneath the bridge and follow the river toward a hidden passage. Climb the wall and continue to a secluded building guarded by a purple shinobi. Inside, you'll find Mist Raven's Feathers. 7. Loaded Umbrella — Ashina Castle. Travel to the Old Grave Idol and locate the nearby building with a hole in its roof. Inside is Blackhat Badger, who sells the Iron Fortress for 1,600 Sen. Purchase it and bring the material to the Sculptor to unlock the Loaded Umbrella. 8. Sabimaru — Ashina Castle. From the Upper Tower – Antechamber Idol, progress through the interior of the castle and drop through the opening in the central floor to reach the lower level. Find the chest in the nearby room to obtain Sabimaru. The Sculptor will install it as a poisonous secondary weapon. 9. Divine Abduction — Sunken Valley. Progress through the Gun Fort until you defeat Long-arm Centipede Giraffe. After the encounter, collect the Large Fan from the Buddha statue inside the same chamber. Bring it to the Sculptor to unlock Divine Abduction. 10. Finger Whistle — Sunken Valley. Defeat the Guardian Ape at the Guardian Ape's Watering Hole to obtain the Slender Finger. Return to the Dilapidated Temple and have the Sculptor convert it into the Finger Whistle. Once you've collected the final material, return to the Sculptor and install any tools you haven't yet fitted. All Prosthetic Tools unlocks when all 10 base tools have been acquired and fitted into Wolf's prosthetic arm. These tools provide an enormous range of tactical options. Firecrackers can frighten animals and interrupt many enemy attacks, the Loaded Axe can break shields, Sabimaru applies poison, and the Loaded Umbrella offers powerful defensive possibilities. By the time you've collected everything, Wolf's mechanical arm will contain more specialized equipment than most of Ashina's military units. The Sculptor deserves considerable credit for fitting all of it into something approximately the size of an ordinary forearm.
Tip
Collect the Loaded Shuriken and Shinobi Firecracker early, as both provide immediate benefits against several opening bosses. Visit Hirata Estate soon after obtaining the Young Lord's Bell Charm because it contains three Prosthetic Tools: Flame Vent, Loaded Axe, and Mist Raven. Regularly return to the Sculptor whenever you discover a new component. Installing tools immediately makes them available for combat and allows you to begin purchasing upgrades. Some tools are especially useful against particular enemies. Loaded Axe excels against shields, Shinobi Firecracker helps against Gyoubu and several beast-type opponents, and Loaded Spear becomes valuable during the Guardian Ape encounter. Prosthetic Tools carry over into New Game+, so you won't need to collect or install them again once they're permanently unlocked.
Warning
Finding a Prosthetic Tool component doesn't automatically install the corresponding weapon. You must bring the material to the Sculptor and have it fitted into your Shinobi Prosthetic. Some components become difficult or impossible to obtain through their original locations after major story events, particularly those found in Ashina Castle. Prioritize obtaining Gyoubu's Broken Horn from Ashina Reservoir and Iron Fortress from Blackhat Badger before progressing too far into the story. Certain missed materials may later appear in the Offering Box at the Dilapidated Temple, but it's safer to collect everything during normal exploration. Don't confuse the 10 base tools with their numerous upgrades. All Prosthetic Tools only requires the initial equipment, while Master of the Prosthetic requires purchasing every modification in the entire upgrade tree. The trophy can be completed during the first playthrough, and collecting everything early makes the remainder of the Platinum considerably easier.

Trophy: Peak Physical Strength
Upgraded Vitality and Posture to their limit
Type: Silver
Category: Collectible
How to Unlock
Collect all 40 Prayer Beads and use them to create 10 Prayer Necklaces, permanently maximizing Wolf's Vitality and Posture. Prayer Beads are among Sekiro's most valuable collectibles because every four beads can be offered at a Sculptor's Idol to increase your maximum health and Posture capacity. Most are dropped by minibosses, although several are hidden in chests, underwater locations, and secret rooms. The full set contains exactly 40 Prayer Beads, and you'll need to obtain all of them to unlock Peak Physical Strength. You can begin collecting Prayer Beads almost immediately. General Naomori Kawarada, Chained Ogre, and General Tenzen Yamauchi in Ashina Outskirts provide several early beads. Other important encounters include Shinobi Hunter Enshin of Misen and Juzou the Drunkard in Hirata Estate, as well as the generals and elite warriors guarding Ashina Castle. As you progress, thoroughly explore Senpou Temple, Ashina Depths, and Sunken Valley. Several Prayer Beads are hidden in less obvious locations, including the concealed room behind a wall scroll in Ashina Castle's Upper Tower – Antechamber and a similar hidden room near the Hirata Audience Chamber. You'll also find Prayer Beads underwater after obtaining the Mibu Breathing Technique from the illusion of Corrupted Monk in Ashina Depths. Important underwater locations include the pond near Senpou Temple's Temple Grounds, the lake in Mibu Village, and the large lake at Fountainhead Palace. The most important requirement involves the second Hirata Estate memory, accessed through the Purification ending questline. After defeating Great Shinobi Owl on the rooftop of Ashina Castle, follow Emma's conversations and eavesdropping sequence until she gives you Father's Bell Charm. Offer this charm at the Buddha statue in the Dilapidated Temple to enter the altered Hirata Estate memory. This version contains two additional Prayer Beads, awarded by Lone Shadow Masanaga the Spear-Bearer and Juzou the Drunkard. Both are required to reach the full set of 40. You must obtain Father's Bell Charm before defeating the Divine Dragon, because progressing past that story event can prevent you from completing the dialogue sequence that unlocks the second memory. Several additional minibosses appear as Ashina Castle and Ashina Outskirts change during the story. During the second Ashina Castle phase, defeat Lone Shadow Masanaga near Great Serpent Shrine, Lone Shadow Vilehand in Ashina Dojo, and the Chained Ogre in the lower castle interior. After defeating the Divine Dragon, revisit Ashina Castle and Ashina Outskirts again. New encounters include Ashina Elite Ujinari Mizou, Seven Ashina Spears Shume Masaji Oniwa, and Shigekichi of the Red Guard. In Fountainhead Palace, defeat the Sakura Bull of the Palace and Okami Leader Shizu, then explore the underwater area for another Prayer Bead. As soon as you've collected four Prayer Beads, rest at any Sculptor's Idol and select Enhance Physical Attributes to create a Prayer Necklace. Repeat this process until you've created all 10 necklaces. Peak Physical Strength unlocks when Wolf's Vitality and Posture reach their maximum values. By the end of this trophy, Wolf will have defeated dozens of heavily armed warriors, explored hidden rooms, and searched the bottoms of several lakes for mysterious beads. Apparently, Ashina's preferred fitness program involves collecting jewelry from people who were trying to kill you.
Tip
Defeat minibosses as you encounter them rather than leaving everything for the end of the story. Ashina Castle changes twice during the main campaign, and several minibosses disappear or are replaced after important events. Collecting their Prayer Beads before advancing reduces the risk of needing another playthrough. Keep track of your total by counting completed Prayer Necklaces. Ten necklaces represent all 40 Prayer Beads. Prioritize the Purification questline during your first playthrough because the second Hirata Estate memory contains two exclusive beads. After learning Mibu Breathing Technique, revisit previously explored lakes and ponds to collect underwater treasures. The Offering Box at the Dilapidated Temple may provide access to certain missed Prayer Beads, but it isn't a guaranteed replacement for thoroughly exploring each area.
Warning
Peak Physical Strength is missable within a single playthrough if you fail to unlock the second Hirata Estate memory. The two Prayer Beads found there require Father's Bell Charm, which must be obtained through Emma's Purification questline before defeating the Divine Dragon. If you advance too far without obtaining the charm, you'll need another eligible playthrough to collect those beads. Several Ashina Castle minibosses disappear when the castle changes, so defeat them before major story transitions whenever possible. Don't confuse Prayer Beads with Gourd Seeds. Prayer Beads increase maximum Vitality and Posture, while Gourd Seeds increase the number of Healing Gourd uses. You must create all 10 Prayer Necklaces at Sculptor's Idols. Merely collecting 40 beads without converting the final set won't complete the requirement. Prayer Necklaces and permanent stat improvements carry forward into New Game+, but previously collected Prayer Beads cannot be obtained again from the same sources for additional upgrades.

Trophy: Ultimate Healing Gourd
Fully upgraded the "Healing Gourd"
Type: Silver
Category: Collectible
How to Unlock
Collect all nine Gourd Seeds and give them to Emma to fully upgrade the Healing Gourd to 10 uses. The Healing Gourd is Wolf's primary method of restoring health during combat. You receive it from Kuro during the prologue, initially containing a single healing charge. Every Gourd Seed you give to Emma increases its maximum capacity by one, eventually providing 10 uses between rests at Sculptor's Idols. You need nine Gourd Seeds in total. Unlike Prayer Beads, these upgrades don't require combining several collectibles. Each individual seed increases the Gourd's capacity once Emma has received it. The first seed is obtained by defeating General Naomori Kawarada in Ashina Outskirts, near the Outskirts Wall – Gate Path Sculptor's Idol. This is one of the earliest minibosses you encounter after leaving the Dilapidated Temple. The second seed is found shortly after defeating the Chained Ogre in Ashina Outskirts. Grapple into the building above the battlefield and search the nearby room to collect it. The third seed is purchased from the Battlefield Memorial Mob for 1,000 Sen. This merchant is located near the Ashina Castle Gate area after defeating Gyoubu Masataka Oniwa. The fourth seed is found inside Ashina Castle, near the Upper Tower – Antechamber Sculptor's Idol. Check the chest in the nearby interior room. The fifth seed can be purchased from Fujioka the Info Broker for 2,000 Sen after he relocates to the Dilapidated Temple. You'll initially encounter Fujioka near Ashina Castle, where he asks you to clear nearby enemies before relocating. The sixth seed is found in Senpou Temple, Mt. Kongo. Progress through the main temple buildings until you reach the room containing monks gathered around an infested priest. The Gourd Seed is located near the priest. The seventh seed is found in Sunken Valley, near the Under-Shrine Valley Sculptor's Idol. Explore the cliffs and grappling routes above the valley until you reach a small shelter containing the seed. The eighth seed is located in Mibu Village within Ashina Depths. Progress through the village and look for a large orange tree surrounded by enemies. The Gourd Seed can be collected beside the tree. The ninth and final seed is found in Fountainhead Palace, near the Palace Grounds Sculptor's Idol. Search the chest inside the nearby building containing palace nobles. After collecting the seeds, return to Emma and give her any remaining Gourd Seeds you haven't already exchanged for upgrades. You can find Emma at different locations as the story progresses, so check her current position if she isn't at the Dilapidated Temple. Once you've delivered all nine seeds, the Healing Gourd will have its maximum capacity of 10 uses. Ultimate Healing Gourd unlocks automatically after Emma completes the final upgrade. Wolf's Healing Gourd begins with barely enough medicine to survive an embarrassing encounter with a single samurai. By the time you've collected every seed, it becomes a remarkably dependable medical supply system. Emma deserves considerable recognition for repeatedly improving the same drinking container while Wolf continues returning with increasingly serious injuries.
Tip
Collect Gourd Seeds as early as possible, since additional healing charges make difficult boss encounters considerably more manageable. Many seeds are located close to mandatory story routes, so thorough exploration often allows you to obtain them without much additional effort. Purchase the seeds sold by the Battlefield Memorial Mob and Fujioka as soon as you can afford them. Spend excess Sen on useful items before difficult encounters, since dying can result in losing half of your unprotected currency. Remember to return to Emma regularly. Holding several Gourd Seeds in your inventory doesn't increase the Healing Gourd's capacity until she upgrades it. The final seed in Fountainhead Palace is available only on the non-Shura story route, so remaining loyal to Kuro during your first playthrough is important.
Warning
Ultimate Healing Gourd requires all nine Gourd Seeds and the final upgrade from Emma. Simply collecting the seeds isn't sufficient. Fountainhead Palace cannot be accessed if you choose the Shura ending, so that route prevents you from obtaining the final seed during the same playthrough. Some earlier locations change as the story progresses, potentially making their original collectibles harder to reach. Collect each seed when you first encounter its area whenever practical. Fujioka's seed requires purchasing it for 2,000 Sen after he becomes available as a merchant at the Dilapidated Temple. The Battlefield Memorial Mob also sells a seed for 1,000 Sen, so make sure you don't overlook the merchant purchases while concentrating on exploration. Gourd Seeds and Healing Gourd upgrades carry forward into New Game+, and previously collected seeds cannot be used again to increase capacity beyond the maximum. Once your Healing Gourd reaches 10 uses, no additional upgrades are necessary for the Platinum.
Video Guide: https://www.youtube.com/watch?v=BvBTYJi4cgE&list=PLRr5L69yg_kEJkMWG-EroGgsRs6Xtt5kM&index=3&pp=iAQB

Trophy: Height of Technique
Acquired all skills
Type: Gold
Category: Grind
How to Unlock
Purchase every skill in the five required combat skill trees: Shinobi Arts, Prosthetic Arts, Ashina Arts, Temple Arts, and Mushin Arts. Height of Technique is commonly one of the final trophies earned before the Platinum. Although many skills unlock naturally as you progress, purchasing the complete set requires a substantial amount of experience, especially because the experience needed to earn each additional skill point increases as your character develops. Skills are purchased at Sculptor's Idols through the Acquire Skills menu. Each tree contains a combination of Combat Arts, Martial Arts, and Latent Skills. Combat Arts provide special attacks that must be equipped individually, Martial Arts unlock additional combat techniques or counters, and Latent Skills grant passive bonuses such as increased Posture damage or better resource efficiency. Before you can purchase every skill, you'll need to unlock the five corresponding trees. Shinobi Arts is obtained from the Sculptor at the Dilapidated Temple after earning your first skill point. This tree contains several essential abilities, including Mikiri Counter, which should be one of your earliest purchases. Prosthetic Arts is also obtained from the Sculptor after installing at least three different Prosthetic Tools. Its abilities improve the way you integrate prosthetic equipment into combat. Ashina Arts comes from the Tengu of Ashina, encountered near the Ashina Castle Gate after defeating Gyoubu Masataka Oniwa. Complete his request to eliminate the nearby enemies he calls rats, then speak with him again to receive the Ashina Esoteric Text. Temple Arts is found in Senpou Temple, Mt. Kongo. From the Main Hall area, explore the nearby cave system and follow the passages toward a small shrine containing the Senpou Esoteric Text. Mushin Arts becomes available after mastering the final skill of another combat tree. Speak with the Tengu of Ashina or the appropriate story-related character to receive the Mushin Esoteric Text. Depending on your story progress, Isshin or Emma can provide the text if the original opportunity is no longer available. You'll also need to acquire Floating Passage from a Noble Pot merchant using Treasure Carp Scales. This technique is a prerequisite for one of the Mushin Arts skills, so obtain it before attempting to finish that tree. Once you've unlocked all five skill trees, begin purchasing the remaining abilities. The game requires all skills obtained through the ordinary Acquire Skills menu, including the expensive abilities at the ends of the branches. Boss-reward Combat Arts such as One Mind and Dragon Flash aren't required for Height of Technique, although their associated bosses must still be defeated for other trophies. Most players won't accumulate enough experience through ordinary story progression to purchase everything. Expect to perform dedicated experience farming, preferably during New Game+ or a later cycle when enemies award significantly more experience. An effective late-game farming location is Ashina Outskirts, near the Outskirts Wall – Stairway Sculptor's Idol after the Interior Ministry invasion. Starting at the Idol, eliminate the nearby red-armored soldiers using stealth Deathblows, collect their experience, return to the Idol, and rest to respawn them. Another excellent location is Ashina Castle's Upper Tower – Antechamber after the Divine Dragon. A purple Interior Ministry shinobi patrols near the Idol and can be defeated repeatedly through stealth. You can also farm Fountainhead Palace near the Flower Viewing Stage, targeting the nobles in the surrounding buildings before returning to the Sculptor's Idol. Continue accumulating experience and purchasing skills until every required node in all five trees has been acquired. Height of Technique unlocks automatically after purchasing the final required skill. Wolf's journey begins with mastering a simple sword, but the Platinum eventually demands that he become proficient in practically every fighting technique ever developed in Ashina. Apparently, defeating legendary warriors isn't proof of expertise until you've also completed the entire professional development curriculum.
Tip
Unlock Mikiri Counter early, followed by useful Posture-related improvements such as Ascending Carp and Descending Carp from Ashina Arts. These abilities make many boss encounters significantly more manageable. Avoid wasting experience before you've earned complete skill points. When you die, you can lose half of your progress toward the next skill point, although already-earned skill points remain safe. If you're approaching a new point, consider farming nearby enemies until the experience bar fills before attempting a difficult boss. New Game+ provides increased experience rewards, making it a better place to complete the larger portion of the grind. If you're comfortable progressing into NG++ or beyond, the additional experience can further reduce repetitive farming, although you'll need to complete more story encounters to reach the best farming locations. The Outskirts Wall – Stairway route is especially useful when you also need Fulminated Mercury for Master of the Prosthetic.
Warning
Do not spend skill points through the Dancing Dragon Mask if you're pursuing the Platinum efficiently. The mask allows you to exchange five skill points for one additional Attack Power, but every point spent this way increases the amount of experience you'll need to earn before completing Height of Technique. The cost of future skill points continues increasing, so repeated Attack Power purchases can add substantial time to the final grind. You must unlock all five Esoteric Texts and purchase every required skill in their associated trees. If a Mushin Arts ability appears unavailable, confirm you've purchased its prerequisites, including Floating Passage where applicable. Skills acquired exclusively through boss rewards, such as One Mind, aren't part of the ordinary skill-tree purchase requirement. If you're using save backups for the different endings, avoid grinding expensive skills on a temporary branch you intend to overwrite. Restoring a save removes all experience points and purchased skills earned after that backup. For the most efficient cleanup, complete your major ending and upgrade requirements first, then concentrate on Height of Technique using the save file you intend to keep.

Trophy: Lazuline Upgrade
Used Lapis Lazuli to upgrade any tool to its limit
Type: Silver
Category: Grind
How to Unlock
Use Lapis Lazuli to purchase one of the four ultimate Lazulite Prosthetic Tool upgrades. Lapis Lazuli is one of the rarest crafting materials in Sekiro: Shadows Die Twice. Unlike ordinary materials such as Scrap Iron or Black Gunpowder, it cannot be farmed from regular enemies and is available only from a limited number of sources during each playthrough. Fortunately, Lazuline Upgrade requires you to purchase just one fully upgraded Lazulite modification rather than complete the entire Prosthetic upgrade tree. First, progress through the story until you've defeated Gyoubu Masataka Oniwa at the Ashina Castle Gate. This boss drops the Mechanical Barrel, which unlocks Prosthetic Tool upgrades through the Sculptor at the Dilapidated Temple. As you continue exploring Ashina, collect the necessary crafting materials and purchase earlier modifications to open additional branches of the upgrade tree. The final Lazulite upgrades become available toward the end of the non-Shura story route. You'll need to remain loyal to Kuro during Owl's confrontation on the Ashina Castle rooftop, allowing you to continue toward Fountainhead Palace and the late-game areas containing Lapis Lazuli. There are four Lazulite modifications associated with Master of the Prosthetic: Lazulite Shuriken, Lazulite Sabimaru, Lazulite Axe, and Lazulite Sacred Flame. Lazulite Shuriken and Lazulite Sabimaru each require two Lapis Lazuli, while Lazulite Axe and Lazulite Sacred Flame each require three. Any one of these upgrades can satisfy Lazuline Upgrade. The easiest approach is usually to purchase the materials required for Lazulite Shuriken. This upgrade needs two Lapis Lazuli, along with the other materials and prerequisite modifications shown in the Prosthetic upgrade tree. One convenient source of Lapis Lazuli is the Noble Pot merchant located in Fountainhead Palace. The merchant sells two pieces for six Treasure Carp Scales each, allowing you to obtain enough for Lazulite Shuriken without needing to defeat Demon of Hatred. To find additional Treasure Carp Scales, explore rivers, ponds, and underwater areas throughout Ashina. Treasure Carp can be identified by their distinctive appearance, and defeating them rewards scales that can be exchanged with Noble Pot merchants. Once you've obtained two Lapis Lazuli and the materials needed for your chosen upgrade, return to the Sculptor's Prosthetic upgrade interface. Purchase the required earlier modifications, then unlock the Lazulite upgrade. Lazuline Upgrade unlocks immediately after the modification is purchased. You don't need to equip the upgraded tool or use it against an enemy. Completing the purchase is sufficient. For the Platinum, you'll eventually need all four Lazulite upgrades, requiring 10 Lapis Lazuli across at least two non-Shura-accessible playthroughs. Therefore, purchasing one now also contributes directly toward Master of the Prosthetic. Wolf's mechanical arm begins with a handful of practical weapons, but apparently ordinary explosives and razor-sharp projectiles aren't enough. Eventually, the Sculptor discovers how to incorporate a rare supernatural mineral into the equipment. At this point, Wolf's prosthetic is probably worth more than most of Ashina Castle.
Tip
Save your first two Lapis Lazuli for Lazulite Shuriken or Lazulite Sabimaru, whichever has the most accessible prerequisite upgrades and materials in your current save. Purchasing the two Lapis Lazuli from the Fountainhead Noble Pot merchant is a relatively straightforward option if you've collected enough Treasure Carp Scales during exploration. You can also obtain Lapis Lazuli from the Great Colored Carp questline, the Shichimen Warrior near the Fountainhead Palace waterfall, and Demon of Hatred. Collect all six available pieces during your first non-Shura playthrough, even if you've already unlocked Lazuline Upgrade. You'll need the remaining materials for Master of the Prosthetic, and collecting them now reduces the amount of work required during New Game+.
Warning
Lapis Lazuli cannot be farmed indefinitely from ordinary enemies. Only six pieces are available during each non-Shura playthrough, while completing every Lazulite upgrade requires 10. Choosing the Shura route prevents you from reaching Fountainhead Palace and the other late-game Lapis Lazuli sources during that playthrough. Make sure you've unlocked the necessary prerequisite modifications before attempting to purchase a Lazulite upgrade. Owning two or three Lapis Lazuli doesn't automatically unlock the trophy. You must spend the required materials to purchase a qualifying ultimate modification. Don't confuse Lazuline Upgrade with Master of the Prosthetic. The former requires one Lazulite modification, while the latter requires completing the entire upgrade tree. If you're using save backups, remember that restoring an earlier save removes upgrades and materials obtained after the backup was created, even though an already-earned PlayStation trophy remains unlocked.

Trophy: Man Without Equal
Defeated all bosses
Type: Gold
Category: Grind
How to Unlock
Defeat every major boss required by the base-game trophy list. Man Without Equal is one of Sekiro's most important completion trophies because several bosses are exclusive to different ending routes. You cannot defeat all required bosses during a single uninterrupted playthrough. The most efficient approach is to complete the non-Shura route first, then defeat the Shura-exclusive bosses during New Game+. The required major bosses are: Gyoubu Masataka Oniwa — Ashina Castle Gate. Lady Butterfly — Hirata Estate. Genichiro Ashina — Ashina Castle rooftop. Folding Screen Monkeys — Senpou Temple. Corrupted Monk (Illusion) — Ashina Depths. True Corrupted Monk — Fountainhead Palace. Guardian Ape — Sunken Valley. Headless Ape — Ashina Depths. Great Shinobi Owl — Ashina Castle rooftop. Owl (Father) — Second Hirata Estate memory. Divine Dragon — Fountainhead Palace. Demon of Hatred — Late-game Ashina Outskirts. Sword Saint Isshin Ashina — Final boss of the non-Shura route. Emma, the Gentle Blade — Shura route. Isshin Ashina — Shura route. During your first playthrough, choose to remain loyal to Kuro when confronted by Owl. This allows you to defeat Great Shinobi Owl and continue through the main story toward Fountainhead Palace. Complete the Purification questline to obtain Father's Bell Charm, then use it at the Dilapidated Temple to enter the second Hirata Estate memory. Defeat Owl (Father) there before leaving the first playthrough. You'll also need to defeat Demon of Hatred, an optional late-game boss found in Ashina Outskirts after the Divine Dragon. Make sure you've defeated Headless Ape in Ashina Depths and performed the additional Mortal Blade Deathblow needed to sever its immortality. Continue through the non-Shura story until you've defeated Sword Saint Isshin. After finishing this route, start New Game+. When you reach Owl on the Ashina Castle rooftop, choose Obey the Iron Code, Forsake Kuro. This triggers the Shura ending route and its two exclusive bosses: Emma, the Gentle Blade, and Isshin Ashina. Defeat both bosses. If you've already defeated every other required major boss on your continuing save, Man Without Equal unlocks after the final qualifying boss is defeated. Wolf has apparently been assigned the impossible task of defeating every legendary warrior and supernatural threat in Ashina. Unfortunately, several of these opponents exist on mutually exclusive story paths. Even the game's trophy system refuses to believe one lifetime of dangerous sword fighting is sufficient.
Tip
Track major bosses as you defeat them instead of relying on memory during New Game+. Owl (Father), Demon of Hatred, and Headless Ape are especially important because they're easier to overlook than mandatory story bosses. The second Hirata Estate memory requires Father's Bell Charm, obtained through Emma's Purification questline before defeating the Divine Dragon. Demon of Hatred becomes accessible during the final Ashina Outskirts invasion. The Headless Ape encounter also rewards Bestowal Ninjutsu when you sever its immortality with the Mortal Blade. Defeating the Shura-exclusive bosses during New Game+ completes the remaining route requirements while also earning Shura and Isshin Ashina.
Warning
Boss kills must be registered on the same continuing save file. Simply unlocking boss-specific PlayStation trophies on separate restored saves doesn't guarantee Man Without Equal. If you defeat Emma and Isshin Ashina, then restore a backup from before Owl's decision, that restored save no longer contains those boss kills. Therefore, make sure Man Without Equal unlocks before restoring your New Game+ backup. You must defeat both Great Shinobi Owl and Owl (Father), as they're separate encounters. Likewise, the illusion of Corrupted Monk in Ashina Depths and the True Corrupted Monk in Fountainhead Palace are different bosses. Ordinary minibosses such as Headless and most Shichimen Warriors aren't required for Man Without Equal, although particular Shichimen encounters provide materials needed for other trophies. Inner bosses from the optional Gauntlets of Strength aren't required.

Trophy: Master of the Prosthetic
Upgraded all Prosthetic Tools to their limit
Type: Gold
Category: Grind
How to Unlock
Purchase every upgrade in the Shinobi Prosthetic upgrade tree, including all four Lazulite upgrades. This is one of Sekiro's most time-consuming trophies because it requires collecting numerous crafting materials, spending a considerable amount of Sen, and obtaining a limited resource called Lapis Lazuli. You'll also need to discover all 10 base Prosthetic Tools before you can complete the upgrade tree. Prosthetic upgrades become available after defeating Gyoubu Masataka Oniwa at the Ashina Castle Gate. The boss drops the Mechanical Barrel, which allows the Sculptor at the Dilapidated Temple to begin upgrading your equipment. Return to the Sculptor, select the Prosthetic upgrade option, and examine the interconnected upgrade tree. Each upgrade requires specific materials and Sen, while certain advanced modifications also depend on earlier upgrades being purchased. Most materials can be collected naturally through exploration, enemy drops, and merchants. Scrap Iron, Scrap Magnetite, and Black Gunpowder are relatively common, while Adamantite Scrap, Fulminated Mercury, and Lump of Grave Wax become more accessible later in the game. Don't worry about upgrading everything immediately. Focus on useful combat tools during your first playthrough, then purchase the remaining modifications once you've reached areas with better material drops. Several upgrades also require unique components. Phantom Kunai can be purchased from Anayama the Peddler near the Outskirts Wall – Stairway for 3,000 Sen. Pine Resin Ember is found in Mibu Village, on the rooftops of a small settlement reached by crossing the lake. Malcontent's Ring is dropped by the Shichimen Warrior that appears in Guardian Ape's Burrow after you've permanently defeated the Headless Ape using the Mortal Blade. These items are necessary for their associated upgrades, so collect them before concentrating on your final upgrade cleanup. The largest obstacle is **Lapis Lazuli**. You need 10 pieces to purchase the four Lazulite upgrades: Lazulite Shuriken, Lazulite Sabimaru, Lazulite Axe, and Lazulite Sacred Flame. Their individual costs are two, two, three, and three Lapis Lazuli respectively. Only six pieces can be obtained during a single non-Shura playthrough, meaning you'll need to visit Fountainhead Palace across at least two playthroughs. During your first playthrough, collect all six available pieces. Two are purchased from the Noble Pot merchant in Fountainhead Palace for six Treasure Carp Scales each. One is obtained by completing the Great Colored Carp questline using Truly Precious Bait. Another drops from the Shichimen Warrior near the Fountainhead Palace waterfall, while the final two come from defeating Demon of Hatred during the last Ashina Outskirts invasion. Once you've collected these six pieces, finish the main story and begin New Game+. For the optimized Platinum route, create a backup before Owl's rooftop decision, complete Shura to defeat its exclusive bosses, then restore your backup and remain loyal to Kuro. Continue to Fountainhead Palace and collect four additional Lapis Lazuli. The easiest four are the two merchant purchases, the Great Colored Carp reward, and the waterfall Shichimen Warrior drop. This avoids needing to fight Demon of Hatred a second time. With 10 Lapis Lazuli collected across both playthroughs, return to the Sculptor's upgrade interface and purchase every remaining modification. You may need to farm additional materials or Sen for intermediate upgrades before the final nodes become available. Master of the Prosthetic unlocks when you've purchased the entire Prosthetic upgrade tree. Wolf begins his journey with a missing arm and a mysterious mechanical replacement. By the end of this trophy, that replacement will contain enough weapons, gadgets, explosives, and supernatural modifications to make an entire blacksmithing guild question its career choices.
Tip
Follow a material checklist while upgrading rather than purchasing modifications randomly. The interconnected upgrade tree requires certain earlier nodes to be unlocked, so working systematically helps prevent confusion. For Fulminated Mercury and other late-game materials, a particularly effective farming location is the Outskirts Wall – Stairway Sculptor's Idol after the Interior Ministry invasion. Several red-armored enemies patrol nearby and can be eliminated quickly with stealth Deathblows. This route also provides useful experience toward Height of Technique, allowing you to progress two demanding trophies simultaneously. Use Mibu Possession Balloons to increase item drops. The Bell Demon can also improve drop quality, although it makes enemies more dangerous while active. Once you've finished farming, remove its effect through the Bell Demon item in your inventory. Remember that Prosthetic Tools and their upgrades carry forward into New Game+. You don't need to repurchase modifications you've already unlocked.
Warning
Master of the Prosthetic requires every upgrade, not simply obtaining all 10 base Prosthetic Tools. Those have a separate trophy. There are only six Lapis Lazuli available per non-Shura playthrough, and you need 10 in total. It's impossible to complete all Lazulite modifications during one ordinary playthrough without carrying resources forward. The Shura ending prevents access to Fountainhead Palace and the late-game sources of Lapis Lazuli. Don't commit permanently to Shura before you've obtained the materials needed for the Platinum. Make sure you defeat Demon of Hatred during your first non-Shura playthrough to obtain two Lapis Lazuli and contribute toward Man Without Equal. Phantom Kunai, Pine Resin Ember, and Malcontent's Ring are unique upgrade components. If a material becomes unavailable through normal progression, check the Offering Box at the Dilapidated Temple, but don't assume every missed item will appear there. If you're using save backups, remember that restoring an older save also restores your previous inventory and upgrade progress. Trophies remain unlocked, but materials and purchased modifications obtained after that backup will no longer exist on the restored save.

Trophy: Demon of Hatred
Defeated the "Demon of Hatred"
Type: Bronze
Category: Misc
How to Unlock
Defeat the Demon of Hatred, an optional major boss encountered in Ashina Outskirts during the final Interior Ministry invasion. The Demon of Hatred is one of Sekiro's most difficult optional bosses and a significant departure from the game's ordinary sword duels. Instead of fighting a human opponent whose attacks can be punished through continuous deflections, you'll face an enormous, fire-covered creature capable of dealing devastating damage across a wide area. Defeating the Demon of Hatred is required for its individual trophy and Man Without Equal. The boss also drops two Lapis Lazuli, making it an important part of Master of the Prosthetic. To unlock the encounter, follow the non-Shura story route by remaining loyal to Kuro during Owl's confrontation at Ashina Castle. Continue through Fountainhead Palace and defeat the Divine Dragon. This triggers the final Interior Ministry invasion and changes several areas around Ashina Castle and Ashina Outskirts. Return to Ashina Castle and make your way toward the Old Grave area. From there, follow the available route toward the Outskirts, which will now be occupied by Interior Ministry forces. Continue through the burning outskirts, using the Sculptor's Idols and grappling points to navigate the changed environment. Eventually, you'll reach the Flames of Hatred Sculptor's Idol near the large battlefield where you previously fought Gyoubu Masataka Oniwa. Enter the battlefield to begin the Demon of Hatred encounter. The boss has three phases, each requiring a Deathblow. Its enormous size and fire-based attacks make positioning especially important, and you'll need to manage both physical damage and Burn buildup. Before entering the fight, consider equipping Suzaku's Lotus Umbrella, which provides protection against many fire-based attacks, and Malcontent, an upgraded version of the Finger Whistle that can briefly stun the Demon of Hatred. The Malcontent upgrade is obtained using Malcontent's Ring, dropped by the Shichimen Warrior that appears in Guardian Ape's Burrow after permanently defeating the Headless Ape. During the first phase, try to remain close to the Demon's legs whenever possible. Although the boss can still attack at close range, many of its large fire projectiles and sweeping arm attacks are more dangerous when you're standing at medium distance. Watch for stomping attacks and heavy arm swings. Physical attacks can often be deflected, but the creature's flaming attacks may inflict chip damage or Burn buildup unless you're using appropriate protection. When the Demon leaps high into the air, immediately create distance. This attack ends with a powerful explosion when it lands, followed by a shockwave. After the explosion, watch for the grappling indicator that appears near the boss. Use your grappling hook to return quickly and punish its recovery. Another dangerous attack involves the Demon charging across the battlefield. The red perilous warning signals an incoming sweep-like rush, which can be avoided by jumping as the charge begins. Once the Demon reaches the opposite side of the arena, approach carefully rather than running directly into its next attack. Continue attacking its legs during openings, watching its movements closely and preserving your healing resources. After the first Deathblow, the Demon enters its second phase. The boss retains many of its previous attacks but introduces additional fire-based techniques, including a long-reaching eruption that travels across the ground. When the Demon creates distance and begins preparing a powerful downward attack, sprint sideways and jump to avoid the advancing flames. If a grappling opportunity appears afterward, use it to close the distance and resume attacking. The Demon may also summon a barrage of flaming projectiles that track Wolf as he moves. Running sideways at a consistent pace is an effective way to avoid these projectiles until the sequence ends. Continue using careful positioning and controlled attacks until you break the second health bar. During the third phase, the Demon introduces a dangerous flaming sweep that can create a ring of fire around the battlefield. When the red perilous warning appears, prepare to jump over the sweep. Additional sweeps may follow, so don't immediately rush forward after avoiding the first attack. The resulting fire ring can restrict your movement, making it important to stay aware of the arena's boundaries and avoid getting trapped against the flames. This final phase is an excellent opportunity to use Malcontent if you've unlocked it. The upgraded whistle can stun the Demon of Hatred up to three times during the encounter, giving you valuable openings to deal considerable damage. Save these stuns for the final phase if possible, since they can significantly shorten the most dangerous portion of the battle. Continue attacking during safe recovery windows, avoid its fire-based combinations, and use the grappling hook whenever the boss creates an opportunity to close the distance. Once you've depleted the third health bar, perform the final Deathblow to defeat the Demon of Hatred. Demon of Hatred unlocks automatically following the encounter. You'll receive a boss Memory that can increase Wolf's Attack Power, along with two Lapis Lazuli required for the final Prosthetic upgrades. The Demon of Hatred is a particularly cruel test because it asks players to abandon some of the habits they've developed throughout Sekiro. After spending dozens of hours learning to fight disciplined swordsmen, Wolf suddenly has to survive an enormous flaming creature with three health bars. Apparently, Ashina's final examination includes a practical course in fire safety.
Tip
Defeat Demon of Hatred during your first non-Shura playthrough. The two Lapis Lazuli it drops are extremely valuable because only six can be obtained during each non-Shura playthrough, and you need 10 for Master of the Prosthetic. Suzaku's Lotus Umbrella is one of the most useful defensive tools for this encounter, especially against attacks involving fire. Malcontent can stun the Demon up to three times. Saving these uses for the third phase can make the final portion of the fight considerably easier. Remain relatively close to the boss's legs when attacking, but watch carefully for stomps and charged movements. When the Demon jumps into the air, retreat from the explosion and use the grappling hook to return afterward. If you're struggling, complete additional Prayer Necklaces, Healing Gourd upgrades, and boss Memory upgrades before attempting the encounter.
Warning
Demon of Hatred is an optional boss and can be missed if you finish the playthrough without defeating it. The encounter is only available during the late-game non-Shura route after defeating the Divine Dragon. Choosing the Shura ending prevents access to this version of Ashina Outskirts and the Demon of Hatred during that playthrough. The boss has three phases, so preserve your healing items and Spirit Emblems for the later stages. Many of its fire attacks can inflict Burn buildup or deal damage through ordinary blocking. Suzaku's Lotus Umbrella is highly recommended if you have access to it. Malcontent has a limited number of effective stuns during the encounter, so avoid wasting them during moments when you cannot capitalize on the opening. The Demon drops two Lapis Lazuli, making it especially important for players following the optimized two-playthrough Platinum route. Don't begin New Game+ until you've defeated Demon of Hatred and collected the available upgrade materials from your first non-Shura playthrough.

Trophy: Great Colored Carp
Defeated the "Great Colored Carp".
Type: Bronze
Category: Misc
How to Unlock
Defeat the Great Colored Carp in Fountainhead Palace by feeding it Truly Precious Bait, then travel to the Guardian Ape's Watering Hole to discover its remains. The Great Colored Carp is a massive, supernatural fish encountered in Fountainhead Palace. Unlike most bosses in Sekiro: Shadows Die Twice, it cannot be defeated through ordinary sword combat. Instead, you'll need to complete a special quest involving the Noble Pot merchants, obtain Truly Precious Bait, and use it to poison the carp. This quest is particularly valuable for Platinum hunters because it also rewards one Lapis Lazuli, a rare upgrade material required for Master of the Prosthetic. Completing it during your first non-Shura playthrough helps ensure you collect all six available pieces before entering New Game+. To begin, progress through the main story until Owl confronts you on the rooftop of Ashina Castle. Choose **Break the Iron Code, stay loyal to Kuro**, then defeat Great Shinobi Owl and continue toward Fountainhead Palace. After defeating the True Corrupted Monk and entering Fountainhead Palace, explore the region until you reach the large lake. You'll need to obtain the Mibu Breathing Technique from the illusion of Corrupted Monk in Ashina Depths to swim underwater, which is necessary for progressing through certain sections of the palace. As you explore Fountainhead Palace, you'll eventually reach the Feeding Grounds, an area where the Great Colored Carp can be summoned and fed. Before attempting to poison the carp, you'll need to obtain Truly Precious Bait from one of the Noble Pot merchants. There are two Noble Pot merchants involved in this quest: Pot Noble Harunaga in Hirata Estate and Pot Noble Koremori in Fountainhead Palace. Pot Noble Harunaga is encountered in the original Hirata Estate memory, near the Dragonspring area. You'll find him sitting inside a large ceramic pot in the water, offering unusual items in exchange for Treasure Carp Scales. Pot Noble Koremori is located in Fountainhead Palace, near the Near Pot Noble Sculptor's Idol. He also trades items for Treasure Carp Scales, including Lapis Lazuli. Both merchants are connected to the Great Colored Carp questline, and either can provide the Truly Precious Bait needed to defeat the creature. The most convenient approach for the Platinum is to work with Pot Noble Koremori in Fountainhead Palace because he sells two Lapis Lazuli for six Treasure Carp Scales each. Collect Treasure Carp Scales by defeating Treasure Carp found in rivers, ponds, and lakes throughout Ashina. These fish are recognizable by their distinctive appearance and can usually be approached through careful swimming or diving. Once you've collected enough scales, purchase items from Pot Noble Koremori until you've spent the amount required to advance his dialogue. After qualifying purchases, speak with him again and continue through his conversation options until he gives you **Truly Precious Bait**. With the bait obtained, travel to the Feeding Grounds Sculptor's Idol in Fountainhead Palace. You'll find a large platform overlooking the water, where an elderly attendant is responsible for feeding the Great Colored Carp. Approach the large bell on the platform and ring it to summon the carp. The Great Colored Carp will rise from the water and approach the feeding platform. When the interaction becomes available, choose to feed the carp the Truly Precious Bait received from your selected Noble Pot merchant. The carp will consume the bait and swim away. At this point, the creature has been poisoned, but **the trophy doesn't unlock immediately**. You'll need to confirm what happened to the Great Colored Carp by traveling to another location. Use a Sculptor's Idol to fast travel to the Guardian Ape's Watering Hole in Sunken Valley, where you originally fought the Guardian Ape. Upon arriving, look around the large pool of water near the boss arena. You'll discover the enormous body of the Great Colored Carp lying in the water. Approach its remains and collect the item called **Great White Whisker**. This confirms the carp's death and completes the required trophy interaction. Great Colored Carp unlocks after you've discovered the carp's remains and collected the Great White Whisker. After earning the trophy, return to the Noble Pot merchant whose Truly Precious Bait you used. The surviving or transformed merchant's quest state will have changed, and you'll be able to collect an additional Lapis Lazuli associated with the completed questline. This Lapis Lazuli contributes toward Master of the Prosthetic, so make sure you collect it before leaving the playthrough. You can also return the Great White Whisker to the attendant at the Feeding Grounds to resolve the remaining portion of his storyline, although this isn't necessary to unlock Great Colored Carp. The Great Colored Carp is an enormous, ancient creature that has apparently survived for countless years beneath the waters of Fountainhead Palace. Naturally, Wolf's solution is to participate in a suspicious fish-feeding program organized by two merchants living inside ceramic pots. After defeating samurai, immortal monsters, and supernatural dragons, the final trophy involves confirming that a giant fish has eaten something it shouldn't have.
Tip
Complete the Great Colored Carp questline during your first non-Shura playthrough. The quest rewards one Lapis Lazuli, while Pot Noble Koremori also sells two additional pieces for six Treasure Carp Scales each. Combining these with the Lapis Lazuli from the Fountainhead Palace Shichimen Warrior and Demon of Hatred allows you to obtain all six pieces available during the playthrough. You can collect Treasure Carp Scales throughout the game, so consider gathering them whenever you encounter Treasure Carp rather than leaving all the farming until Fountainhead Palace. The Mibu Breathing Technique makes collecting underwater scales much easier, especially in the large palace lake. If you're struggling to locate Pot Noble Koremori, explore the area around the Near Pot Noble Sculptor's Idol. The merchant is situated on a small elevated section overlooking the surrounding water. After feeding the Truly Precious Bait, remember to travel to Guardian Ape's Watering Hole rather than continuing to search Fountainhead Palace for the carp's body. Collect the Great White Whisker and return to the Noble Pot questline for the additional Lapis Lazuli.
Warning
You must feed the Great Colored Carp **Truly Precious Bait**, not ordinary Precious Bait. The Feeding Grounds allows you to give the creature different types of bait, but ordinary Precious Bait doesn't poison the carp or complete this trophy. Truly Precious Bait is obtained through the Noble Pot merchant questline after making the required purchases with Treasure Carp Scales. You can obtain the necessary bait through either Pot Noble Harunaga or Pot Noble Koremori, but only one merchant's quest outcome can be selected during a playthrough. After feeding the Truly Precious Bait, the trophy won't necessarily unlock at the Feeding Grounds. You must travel to Guardian Ape's Watering Hole and discover the dead carp, then collect the Great White Whisker. Don't forget to return to the Noble Pot merchant afterward to collect the associated Lapis Lazuli. Fountainhead Palace is inaccessible if you choose the Shura route, so you must remain loyal to Kuro to complete the quest during that playthrough. The Great Colored Carp doesn't require a conventional boss fight, and attacking the creature with ordinary weapons isn't how this trophy is earned. Finally, don't begin New Game+ until you've collected the quest-related Lapis Lazuli and any remaining materials needed for Master of the Prosthetic.

Trophy: Great Serpent
Defeated the "Great Serpent".
Type: Bronze
Category: Misc
How to Unlock
Defeat the Great Serpent by performing an aerial Deathblow from the Sunken Valley Cavern area. The Great Serpent is a massive creature that appears several times throughout Sekiro's story. Although you'll encounter it during ordinary exploration, the trophy requires locating a specific opportunity to attack the serpent from above and perform a finishing Deathblow. This encounter is closely connected to Dragon's Homecoming because defeating the Great Serpent rewards the Fresh Serpent Viscera, one of the two special items required for the Divine Child's ending questline. To begin, progress through the story until you've defeated the Folding Screen Monkeys in Senpou Temple and obtained Puppeteer Ninjutsu. You'll need this technique to manipulate an enemy operating a kite mechanism. Travel to Senpou Temple, Mt. Kongo, and locate the area near the early temple paths where a small enemy stands beside a kite control mechanism. Approach the enemy from behind and perform a Backstab Deathblow. Immediately activate Puppeteer Ninjutsu to take control of the enemy. The controlled enemy will begin operating the kite mechanism, raising the kite into position and keeping it extended across the nearby valley. With the kite prepared, continue progressing through Senpou Temple toward the building containing the monks gathered around an infested priest. Exit through the appropriate opening and locate the large tree overlooking the surrounding valley. Climb the tree and look toward the kite suspended across the gap. When the grappling indicator appears, use your grappling hook to launch Wolf toward the kite and cross the valley. Continue following the path until you reach the Sunken Valley Cavern Sculptor's Idol. From the Idol, proceed toward the nearby wooden platform extending over a deep ravine. Look down from the edge and locate the Great Serpent wrapped around the rock formation far below. Position Wolf carefully and jump from the platform toward the serpent. As you fall, watch for the red Deathblow indicator to appear over the creature. Press the attack button when prompted to perform the aerial Deathblow. Wolf will land on the serpent and execute a special finishing attack, permanently defeating it. Great Serpent unlocks automatically following the successful execution. You'll also obtain the Fresh Serpent Viscera, which is required for Dragon's Homecoming. Afterward, return to the Divine Child's questline and continue gathering the remaining items needed for the Return ending. The Great Serpent spends much of the adventure terrorizing Wolf from cliffs, caves, and narrow passages. Eventually, Wolf discovers that the simplest solution involves using a giant kite as transportation and jumping directly onto the creature's head. It's an incredibly dangerous plan, but one that demonstrates a remarkable commitment to solving problems vertically.
Tip
Complete Great Serpent while working through Dragon's Homecoming. The Fresh Serpent Viscera is required for that ending, so obtaining the trophy also advances one of the most complicated questlines in the Platinum. Puppeteer Ninjutsu is awarded after defeating the Folding Screen Monkeys, making Senpou Temple the natural place to begin this objective. Make sure the enemy operating the kite mechanism remains under your control long enough for the kite to be extended. Once the kite has been positioned, use the large tree to grapple across the valley and reach Sunken Valley Cavern. Take your time positioning the aerial Deathblow. The correct attack prompt appears while Wolf is falling toward the serpent.
Warning
Simply encountering the Great Serpent during the main story doesn't unlock this trophy. You must perform the specific aerial Deathblow from the elevated platform in Sunken Valley Cavern. Puppeteer Ninjutsu is required to operate the kite mechanism needed to access the route. Without the technique, you cannot use the enemy to extend the kite across the valley. Don't confuse the Fresh Serpent Viscera with the Dried Serpent Viscera, which is found through a different Great Serpent-related encounter inside a cave. Both items are required for Dragon's Homecoming. If you jump from the platform without performing the Deathblow correctly, you'll need to return and attempt the sequence again. The Great Serpent trophy doesn't require defeating the creature during its earlier appearances. Only the successful aerial execution counts.

Trophy: Guardian Ape Immortality Severed
Used the Mortal Blade to sever the Guardian Ape's undying
Type: Bronze
Category: Misc
How to Unlock
Defeat the Headless Ape during its second encounter in Ashina Depths and use the Mortal Blade to permanently sever its immortality. Although you'll first encounter the Guardian Ape at the Guardian Ape's Watering Hole in Sunken Valley, defeating it there doesn't permanently end its existence. The creature reappears in Ashina Depths, where you'll need to confront it again to complete this trophy and obtain the final Ninjutsu Technique. Before attempting the encounter, make sure you've acquired the Mortal Blade from Senpou Temple, Mt. Kongo. You'll receive this weapon after defeating the Folding Screen Monkeys and speaking with the Divine Child in the Inner Sanctum. The Mortal Blade is essential because ordinary weapons cannot permanently destroy the immortal centipede responsible for keeping the ape alive. Next, defeat the original Guardian Ape in Sunken Valley and collect the Lotus of the Palace. The Headless Ape can subsequently appear in Guardian Ape's Burrow, a large cavern connecting the Poison Pool and Hidden Forest areas of Ashina Depths. To reach the cavern, travel to the Poison Pool Sculptor's Idol and follow the path that leads deeper into Ashina Depths. If the Headless Ape has appeared, entering the arena will begin the encounter. It's worth noting that if you explore and pass through this cavern before defeating the original Guardian Ape, you may avoid the encounter temporarily. Return after progressing through Sunken Valley to fight the Headless Ape when it becomes available. The encounter consists of two stages. During the first, you'll fight the Headless Ape alone. Its moveset resembles the second phase of the original Guardian Ape battle, including large sword swings, perilous sweeps, and a dangerous scream that rapidly builds Terror. The most reliable strategy is to focus on deflecting the ape's sword attacks. When you successfully deflect its heavy overhead slam, the creature collapses forward and becomes vulnerable. Use the Loaded Spear's thrust-and-pull function during this opening to drag the centipede from its neck, dealing considerable Vitality and Posture damage. Repeat this strategy while retreating whenever the ape raises its severed head to prepare its Terror-inducing scream. After removing the first Deathblow marker, the Headless Ape summons a second, brown-furred ape to assist it. This companion creates the encounter's greatest difficulty because the two enemies can attack from different directions and interrupt your attempts to punish the Headless Ape. The Shinobi Firecracker is particularly effective against the brown ape. When the companion approaches, use Firecrackers to stun it, then attack aggressively to damage its Posture. Defeating the brown ape makes the rest of the encounter considerably easier, although eliminating it isn't strictly necessary to defeat the main boss. Once the companion is defeated or safely separated, return your attention to the Headless Ape. Continue deflecting its sword combinations, punishing overhead slams with the Loaded Spear, and retreating from its scream. After breaking the Headless Ape's second Posture bar, perform the Deathblow to defeat it. However, **don't leave the arena immediately**. The creature's body will remain on the ground, and an additional Deathblow opportunity will become available. Approach the body and perform the special execution using the Mortal Blade. This permanently severs the centipede's immortality and unlocks Guardian Ape Immortality Severed. You'll also receive Bestowal Ninjutsu, the final technique required for All Ninjutsu Techniques. The Guardian Ape has already survived losing its head, being defeated in battle, and apparently ignoring the entire concept of death. Wolf's solution is to track it down, fight it again, and introduce it to a sword specifically designed to end immortality. Sometimes persistence works both ways.
Tip
Acquire the Mortal Blade before attempting this encounter so you can complete the additional execution immediately after defeating the Headless Ape. Bring the Loaded Spear and Shinobi Firecracker. The spear is highly effective against the Headless Ape's staggered state, while Firecrackers can quickly overwhelm the brown ape during the second stage. Consider equipping the Phoenix's Lilac Umbrella if you've unlocked it, since it can protect against the Headless Ape's Terror scream. Pacifying Agents are also useful for managing Terror buildup. After completing the encounter, revisit Guardian Ape's Burrow later to find a Shichimen Warrior. Defeating this enemy rewards Malcontent's Ring, which is required for Master of the Prosthetic.
Warning
Defeating the original Guardian Ape in Sunken Valley doesn't unlock Guardian Ape Immortality Severed. You must defeat the Headless Ape during its separate Ashina Depths encounter and perform the additional Mortal Blade Deathblow. Simply reducing the Headless Ape's health to zero isn't sufficient if you leave without severing its immortality. The Mortal Blade is required for the final execution. If you haven't acquired it yet, return after obtaining it from Senpou Temple. The brown ape's presence makes the second stage significantly more dangerous, so avoid standing between both enemies. The Headless Ape's scream can inflict Terror, which kills Wolf instantly if the status gauge fills. Completing this encounter also contributes toward Man Without Equal, so don't overlook it during your Platinum preparations.

Trophy: Master of the Arts
Grasped the inner mysteries of any combat style
Type: Silver
Category: Misc
How to Unlock
Acquire the ultimate skill at the end of any one of the main combat skill trees. Master of the Arts is a relatively straightforward trophy compared with Height of Technique, which requires purchasing every skill across all five trees. For this trophy, you only need to complete one path leading to a skill tree's ultimate technique. Skills are unlocked using experience points earned by defeating enemies. As you accumulate experience, the blue experience bar fills and awards Skill Points. These points can then be spent through the Acquire Skills menu at any Sculptor's Idol. Before purchasing advanced abilities, you'll need to obtain the appropriate Esoteric Text to unlock its skill tree. There are four main combat styles with ultimate techniques that can satisfy the trophy: Shinobi Arts, Prosthetic Arts, Ashina Arts, and Temple Arts. Each tree contains several prerequisite skills that must be purchased before its final technique becomes available. The recommended approach is to complete the Ashina Arts tree because its ultimate technique, Ashina Cross, can be unlocked through a relatively manageable set of prerequisite abilities. To obtain Ashina Arts, defeat Gyoubu Masataka Oniwa at the Ashina Castle Gate. After the boss fight, explore the nearby building where you'll encounter the Tengu of Ashina. Speak with him and accept his request to eliminate the nearby enemies he refers to as rats. Travel toward the Ashina Castle Gate area and locate the small enemies wearing distinctive hats. These enemies can be found on the rooftops and near the surrounding paths. Defeat the required enemies, then return to the Tengu. He'll reward you with the Ashina Esoteric Text, unlocking the Ashina Arts skill tree. Once you've obtained the text, visit a Sculptor's Idol and open the Acquire Skills menu. Begin purchasing abilities that lead toward Ashina Cross. Useful prerequisites include Ascending Carp and Descending Carp, which increase the Posture damage dealt through successful deflections and make many boss encounters easier. Continue acquiring the necessary abilities until Ashina Cross becomes available. Purchase Ashina Cross to complete the tree's ultimate technique requirement. Master of the Arts unlocks automatically after acquiring the qualifying final skill. You don't need to equip or use Ashina Cross during combat to earn the trophy. Purchasing the ability is sufficient. Alternatively, you can complete the ultimate skill path in Shinobi Arts, Prosthetic Arts, or Temple Arts if you've already invested heavily in another tree. Because Height of Technique requires all purchasable abilities eventually, Master of the Arts will unlock naturally during your Platinum journey even if you don't specifically prioritize it. Wolf begins his adventure with a single sword and a collection of dangerous opponents. Eventually, he earns the ability to perform highly specialized sword techniques that would take ordinary warriors a lifetime to master. The trophy system considers this an impressive achievement, although it will immediately demand that he learn every other technique as well.
Tip
Ashina Arts is an excellent first skill tree to complete because its passive abilities provide benefits beyond the trophy itself. Ascending Carp and Descending Carp improve Posture damage during combat, which is valuable against enemies who rely heavily on sword attacks. Obtaining Ashina Cross also provides a useful Combat Art for certain encounters, although you'll need to consider its Spirit Emblem cost when using it. If you've already invested heavily in another skill tree, check its ultimate technique before spending additional points. You may be closer to completing a different path. Don't worry about farming every skill immediately. You'll need substantial experience for Height of Technique anyway, and completing Master of the Arts naturally contributes toward that larger requirement.
Warning
Master of the Arts requires purchasing an ultimate skill from one of the eligible combat skill trees. Simply unlocking an Esoteric Text doesn't satisfy the requirement. Likewise, purchasing several ordinary abilities without reaching the ultimate technique won't unlock the trophy. You don't need to acquire the Mushin Esoteric Text specifically for Master of the Arts. Mushin Arts is a separate advanced skill tree required for Height of Technique. Remember that some skills require multiple prerequisites before their purchase becomes available. Follow the connected branches in the Acquire Skills menu and make sure you've unlocked everything leading to your chosen ultimate skill. Avoid spending Skill Points on Attack Power through the Dancing Dragon Mask while working toward the Platinum. The mask consumes five Skill Points per upgrade, which increases the experience farming required for Height of Technique. If you're using save backups, purchase the ultimate skill on the save file you intend to keep whenever possible, so the progress continues contributing toward your remaining trophies.

Trophy: Memorial Mob
Encountered the Memorial Mob
Type: Bronze
Category: Misc
How to Unlock
Encounter a Memorial Mob merchant for the first time. Memorial Mob merchants are mysterious vendors scattered throughout Ashina who sell consumables, equipment components, and valuable items in exchange for Sen. Although they look similar, individual merchants offer different inventories, making them worth visiting throughout your Platinum journey. This trophy is one of the easiest miscellaneous objectives in Sekiro because you only need to find and interact with a single Memorial Mob merchant. You don't need to purchase anything or complete a merchant questline. One of the earliest opportunities is in Ashina Outskirts, near the Outskirts Wall – Gate Path Sculptor's Idol. After progressing past General Naomori Kawarada, continue toward the ruined buildings and look for a path leading up the mountainside to your left. Use the grappling hook to reach the elevated branches and platforms. Near the top, you'll discover a small tent occupied by the Crow's Bed Memorial Mob. Speak with the merchant to open their shop inventory. Memorial Mob unlocks when you've successfully encountered and interacted with the merchant. If you miss this early vendor, another convenient opportunity appears after defeating Gyoubu Masataka Oniwa at the Ashina Castle Gate. From the battlefield where you defeated Gyoubu, head toward the nearby staircase leading to the building where the Tengu of Ashina can be found. Instead of entering the building immediately, follow the outer walls and continue along the elevated route until you reach the Battlefield Memorial Mob. Interact with the merchant to unlock the trophy. Memorial Mob merchants sell different items depending on their location. Some provide Prosthetic Tool components, while others offer Gourd Seeds, Prayer Beads, and useful consumables. For example, the Crow's Bed Memorial Mob sells Robert's Firecrackers, an essential component for the Shinobi Firecracker Prosthetic Tool. The Battlefield Memorial Mob sells a Gourd Seed, which you'll eventually need for Ultimate Healing Gourd. It's worth checking each merchant's inventory whenever you discover a new region, particularly if you're working toward All Prosthetic Tools or Peak Physical Strength. Wolf's travels through Ashina involve constant danger, supernatural enemies, and heavily armed warriors determined to stop him. Fortunately, there are also merchants willing to conduct business in some of the least commercially viable locations imaginable. Nothing says successful retail planning quite like opening a shop on a cliff overlooking a battlefield.
Tip
Visit the Crow's Bed Memorial Mob early and purchase Robert's Firecrackers for 500 Sen if you can afford them. The Shinobi Firecracker is extremely useful against several early bosses, especially Gyoubu Masataka Oniwa and certain beast-type enemies. After defeating Gyoubu, check the Battlefield Memorial Mob for the Gourd Seed sold for 1,000 Sen. The additional Healing Gourd use can make a noticeable difference during difficult encounters. Other Memorial Mob merchants sell Prayer Beads and crafting materials needed for various trophies, so consider exploring their inventories before spending Sen elsewhere.
Warning
Memorial Mob only requires encountering and interacting with a Memorial Mob merchant. You don't need to purchase an item, exhaust a merchant's inventory, or locate every vendor in Ashina. Make sure you're interacting with an actual Memorial Mob rather than an unrelated merchant such as Anayama the Peddler or Fujioka the Info Broker. Although these characters also sell useful items, the trophy specifically concerns Memorial Mob merchants. Some vendors are positioned along optional paths and can be overlooked if you rush through the main story. However, multiple Memorial Mob merchants are available throughout the game, so missing the first opportunity doesn't make the trophy permanently unobtainable. You can complete Memorial Mob during your first playthrough or any subsequent New Game+ cycle.
Video Guide: https://www.youtube.com/watch?v=5OaXKLG11KQ&list=PLRr5L69yg_kEJkMWG-EroGgsRs6Xtt5kM&index=1&pp=iAQB

Trophy: Resurrection
Returned from the dead using "Resurrection" for the first time
Type: Bronze
Category: Misc
How to Unlock
Use the Resurrection ability to return from death for the first time. Resurrection is one of Sekiro's defining gameplay mechanics, allowing Wolf to revive himself during combat rather than immediately returning to the last Sculptor's Idol after taking fatal damage. You'll gain access to this ability during the opening story sequence, making Resurrection one of the earliest trophies available. After receiving the Shinobi Prosthetic at the Dilapidated Temple, begin exploring Ashina Outskirts and engage the enemies along the main path. When Wolf's Vitality reaches zero, the game will display the death screen and provide the option to resurrect, assuming you have an available resurrection charge. Instead of accepting permanent death, press the indicated button to activate Resurrection. Wolf will return to life at the location where he fell, allowing you to continue fighting or retreat to safety. Resurrection unlocks immediately after you successfully revive yourself for the first time. You don't need to defeat the enemy responsible for killing you, complete a boss encounter, or resurrect multiple times. The mechanic can be used against ordinary enemies, minibosses, and major bosses, provided the necessary resurrection conditions are satisfied. Resurrection charges are represented by circular icons near Wolf's Vitality bar. These charges are replenished through resting and certain combat actions or items, although the game restricts how frequently they can be used. After resurrecting, additional revivals are temporarily restricted until the appropriate conditions are met, such as performing a Deathblow. Learning when to use Resurrection is an important part of Sekiro's combat system. Reviving during a difficult boss fight can provide a second opportunity to finish the encounter, while resurrecting in a dangerous position may simply result in another immediate death. You can also use the mechanic tactically. Some ordinary enemies may turn away after defeating Wolf, potentially allowing you to recover and reposition before continuing the fight. Wolf has been given the extraordinary ability to return from death, which sounds like a tremendous advantage until you realize how enthusiastically Ashina's enemies intend to test it. Fortunately, the trophy only requires one successful resurrection rather than keeping track of every time someone has introduced your sword to the ground.
Tip
You'll almost certainly unlock Resurrection naturally during the opening hours, so there's no reason to deliberately seek out a dangerous encounter. When Wolf falls, examine the surrounding enemies before choosing to revive. If your position is unsafe, consider whether resurrecting will give you a reasonable opportunity to escape or counterattack. Against bosses, Resurrection can be particularly valuable after you've already removed one Deathblow marker and are close to finishing the fight. You can practice the mechanic without worrying about permanently missing the trophy. The early sections of Ashina Outskirts provide plenty of opportunities to learn how resurrection charges and combat recovery work.
Warning
You must actually activate Resurrection after Wolf has been defeated. Simply dying and returning to a Sculptor's Idol doesn't count. You need an available resurrection charge, and the option must not be temporarily restricted. Resurrection isn't unlimited during a single encounter. After using it, the game may prevent another revival until you've fulfilled the necessary conditions. Dragonrot can spread after repeated true deaths, reducing the chance of receiving Unseen Aid and temporarily interfering with certain NPC questlines. However, Dragonrot doesn't permanently block the Platinum or prevent you from using the Resurrection mechanic. You don't need to defeat a boss or use Resurrection against a specific enemy. Any qualifying first resurrection unlocks the trophy.

Trophy: The Phantom Lady Butterfly
Defeated "Lady Butterfly"
Type: Bronze
Category: Misc
How to Unlock
Defeat Lady Butterfly in the original Hirata Estate memory. Lady Butterfly is an optional major boss encountered toward the end of Hirata Estate, one of Sekiro's earliest side areas. Although you can access this memory relatively early, she's a demanding opponent who tests your ability to balance aggression, deflections, and evasive movement. Defeating her is required for The Phantom Lady Butterfly and contributes toward Man Without Equal, so you'll need to defeat her eventually even if you decide to return later with more upgrades. To access Hirata Estate, travel to Ashina Outskirts and locate the ruined house near the Outskirts Wall – Gate Path Sculptor's Idol. Speak with the elderly woman inside to obtain the Young Lord's Bell Charm, then return to the Dilapidated Temple. Offer the charm at the Buddha statue beside the Sculptor to enter the memory. Progress through Hirata Estate until you reach the burning estate grounds. Along the way, defeat Shinobi Hunter Enshin of Misen and continue toward Juzou the Drunkard, who guards the approach to the main building. After defeating Juzou, enter the estate and activate the Hirata Audience Chamber Sculptor's Idol. From there, proceed toward the hidden temple entrance. You'll need the Hidden Temple Key obtained from Owl earlier in the memory to open the passage. Lady Butterfly waits inside the underground temple. She has two phases, each requiring a Deathblow. During the first phase, she'll attack with rapid dagger combinations, throwing knives, aerial movements, and perilous sweeps. Her speed can be intimidating, but most of her ordinary attacks can be deflected, allowing you to build her Posture while maintaining pressure. Stay close enough to prevent her Posture from recovering freely, but avoid attacking continuously without watching her response. Strike once or twice, react to her counterattacks, and resume your offense after successfully deflecting. When she performs a sweeping perilous attack, jump over it and press jump again while above her to deal additional Posture damage. Lady Butterfly frequently leaps onto nearly invisible threads suspended above the arena. The Loaded Shuriken is especially useful here because throwing a shuriken while she's airborne can interrupt her movement and knock her down. Follow up with sword attacks if you're close enough to capitalize on the opening. Once you've removed her first Deathblow marker, the second phase begins. Lady Butterfly will now summon illusionary enemies and release dangerous magical projectiles. Snap Seeds can dispel nearby illusions, although you may have only a limited supply during your first encounter. Don't waste all your Snap Seeds immediately if you aren't comfortable with the fight yet. If you don't have Snap Seeds, you can still complete the encounter. When Lady Butterfly summons her illusions, run around the outer edge of the arena to avoid being surrounded. Eventually, she'll dismiss the remaining illusions and convert them into glowing projectiles. Continue moving or use the pillars for cover until the projectiles have passed. Once the arena clears, resume the same aggressive deflection-based strategy used during the first phase. Continue pressuring Lady Butterfly, punish her aerial movements with shurikens, and avoid standing directly in front of her when she begins a dangerous combination. After breaking her second Posture bar, perform the finishing Deathblow to defeat her. The Phantom Lady Butterfly unlocks automatically following the encounter. Lady Butterfly's boss fight is an early reminder that Sekiro's elderly characters should never be underestimated. Despite her age, she's capable of moving through the air, summoning an entire audience of imaginary assassins, and throwing enough knives to supply a small weapons shop. Retirement apparently works differently in Ashina.
Tip
If Lady Butterfly feels overwhelming when you first reach Hirata Estate, leave and return after progressing further through Ashina Castle. Additional Prayer Necklaces, Healing Gourd charges, and Attack Power will make the fight more forgiving. The Loaded Shuriken is particularly helpful for interrupting her aerial movements. Wait until she's airborne rather than wasting Spirit Emblems while she's safely standing on the ground. During the second phase, save Snap Seeds for moments when several illusions are close together. You don't need them to win, and running around the arena is a reliable alternative when your supply runs out. Use the pillars to block incoming magical projectiles while repositioning. Defeating Lady Butterfly also awards a Memory that can increase Wolf's Attack Power, making the victory valuable beyond the trophy itself.
Warning
Lady Butterfly is an optional boss and can be overlooked if you never explore Hirata Estate. However, she's required for Man Without Equal, so don't finish your Platinum journey without defeating her. The original Hirata Estate memory is accessed using the Young Lord's Bell Charm. Don't confuse this with Father's Bell Charm, which opens a second version of Hirata Estate later in the Purification questline. Lady Butterfly has two phases. Removing her first Deathblow marker doesn't end the encounter. During the second phase, the illusionary enemies can overwhelm you if you remain stationary. The glowing projectiles created when the illusions disappear can also inflict significant damage, so continue moving or use cover until they've passed. Snap Seeds are helpful but aren't required to defeat her. If you die during the fight, you'll need to restart the encounter from the first phase.

Trophy: Ashina Traveler
Traveled to all areas of the game
Type: Gold
Category: Story
How to Unlock
Visit every major region in Sekiro: Shadows Die Twice. Ashina Traveler requires you to explore the game's main geographical areas, rather than discover every individual Sculptor's Idol or uncover every hidden passage. There are nine regions to visit: Ashina Reservoir. Ashina Outskirts. Hirata Estate. Ashina Castle. Abandoned Dungeon. Senpou Temple, Mt. Kongo. Ashina Depths. Sunken Valley. Fountainhead Palace. You'll visit most of these regions naturally while progressing through the main story. Ashina Outskirts and Ashina Castle are encountered during the opening chapters, while the Abandoned Dungeon provides access to additional routes. Senpou Temple contains the Folding Screen Monkeys and the Mortal Blade. Ashina Depths leads toward Mibu Village and the illusion of Corrupted Monk. Sunken Valley contains the Guardian Ape and the Lotus of the Palace. Hirata Estate is an optional memory area accessed through the Young Lord's Bell Charm. To unlock it, find the elderly woman in the ruined house near the Outskirts Wall – Gate Path Sculptor's Idol in Ashina Outskirts. Speak with her to receive the Young Lord's Bell Charm. Return to the Dilapidated Temple and offer the charm at the Buddha statue to travel into the Hirata Estate memory. The final major region, Fountainhead Palace, is accessible only if you remain loyal to Kuro during Owl's confrontation on the Ashina Castle rooftop. Choose Break the Iron Code, Stay Loyal to Kuro, then continue progressing through the main story. After defeating the True Corrupted Monk, you'll enter Fountainhead Palace and register the final region. If you've already visited all the other required areas, Ashina Traveler unlocks automatically upon entering Fountainhead Palace. You don't need to explore every corner of the palace or activate every Sculptor's Idol. Wolf has traveled through castles, forests, valleys, abandoned dungeons, and ancient temples. Apparently, his Shinobi Prosthetic doesn't include a pedometer, so the trophy system has taken responsibility for confirming that he's officially seen enough of Ashina.
Tip
Visit Hirata Estate early because it contains valuable Prosthetic Tools, upgrade materials, and the optional Lady Butterfly boss. The Flame Vent and Loaded Axe are especially useful during the opening hours. You can access most other regions through normal story progression, so there's no need to explore every route immediately. If you're missing Ashina Traveler after reaching Fountainhead Palace, confirm that you've entered Hirata Estate using the Young Lord's Bell Charm. Remember that discovering a region only requires visiting its main area, not activating every checkpoint. The trophy can be earned during your first non-Shura playthrough.
Warning
Fountainhead Palace cannot be accessed if you choose the Shura route. When Owl asks you to decide between the Iron Code and Kuro, you must choose to remain loyal to Kuro to continue toward this final region. Hirata Estate is also easy to overlook because it's accessed through a special memory rather than an ordinary world-map connection. Make sure you collect the Young Lord's Bell Charm and use it at the Dilapidated Temple. You don't need to unlock every Sculptor's Idol for Ashina Traveler. However, visiting every region is separate from collecting all Prayer Beads, Gourd Seeds, and Prosthetic Tools. Those requirements have their own trophies and may require considerably more exploration. If you miss a region during your first playthrough, you can visit it during a later non-Shura run.

Trophy: Corrupted Monk
Defeated the "Corrupted Monk"
Type: Bronze
Category: Story
How to Unlock
Defeat the True Corrupted Monk at the entrance to Fountainhead Palace. Although Sekiro features two encounters involving the Corrupted Monk, this trophy is awarded specifically for defeating the True Corrupted Monk in Fountainhead Palace. The earlier illusion encountered in Ashina Depths is a mandatory story boss, but defeating that version doesn't unlock Corrupted Monk. To reach Fountainhead Palace, progress through the story until you've defeated Guardian Ape in Sunken Valley and the illusion of Corrupted Monk in Ashina Depths. Collect the Lotus of the Palace and Shelter Stone, then return to Ashina Castle. At the top of the castle, Owl will ask you to choose between obeying the Iron Code and remaining loyal to Kuro. Select **Break the Iron Code, stay loyal to Kuro**, then defeat Great Shinobi Owl. Continue following Kuro's instructions until you've completed the preparations required to reach Fountainhead Palace. Travel to the Wedding Cave Door in Ashina Depths and interact with the palanquin after the appropriate story requirements have been fulfilled. You'll be transported to Fountainhead Palace, where the True Corrupted Monk guards the entrance. This encounter consists of three phases, each requiring a Deathblow. The monk uses a long naginata with tremendous reach, combining sweeping attacks, delayed strikes, perilous thrusts, and supernatural techniques. During the first phase, concentrate on learning the rhythm of the monk's weapon combinations. Many attacks have unusually long windups, so reacting too early can cause Wolf to miss the deflection timing. Stay within a manageable distance and deflect the ordinary strikes while watching for perilous warnings. Use Mikiri Counter against thrust attacks and jump over sweeps. One of the monk's most recognizable combinations involves several consecutive spinning attacks. You can deflect the sequence if you're comfortable with the timing or create distance until the final swing finishes, then approach during the recovery. The monk's Posture regenerates quickly while its Vitality remains high, so landing several clean attacks before attempting to overwhelm the Posture bar can make the phase easier. After removing the first Deathblow marker, the second phase begins. The monk will now summon shadowy duplicates that attack across the bridge. These apparitions can be difficult to track, especially if you're standing in the middle of the arena. A useful strategy is to grapple onto the tree branches surrounding the bridge when the second phase begins. From an elevated position, you can avoid many of the shadow attacks while watching for the monk's movements. It's also possible to perform an aerial Deathblow against the True Corrupted Monk during this phase if you position yourself correctly on the branches and catch the boss at the appropriate moment. This can eliminate the second phase quickly, although it requires precise positioning and timing. If you're unable to perform the aerial Deathblow, simply avoid the shadow attacks and continue fighting normally once the monk resumes its ordinary attacks. During the third phase, the monk reveals its true supernatural nature as a centipede emerges from its body. The boss becomes more aggressive and gains a dangerous Terror-inducing attack. When the monk prepares to release the centipede's poisonous-looking breath, move away or dodge to the side to avoid accumulating Terror. The monk also continues using sweeping weapon combinations and perilous attacks, so maintain the deflection techniques you've practiced throughout the encounter. Shinobi Firecracker can interrupt the monk and provide openings for attacks. The Purple Fume Spark upgrade is particularly effective if you've already unlocked it, although ordinary Firecrackers can also help. Use the stun opportunities to deal Vitality damage and maintain pressure, but don't waste all your Spirit Emblems when the monk is out of range. After breaking the final Posture bar, perform the finishing Deathblow to defeat the True Corrupted Monk. Corrupted Monk unlocks automatically following the encounter. You'll also receive the Dragon's Tally Board, which expands the inventories of merchants throughout Ashina and makes several valuable supplies easier to purchase. Defeating the monk opens the route deeper into Fountainhead Palace, where you'll continue toward the Divine Dragon. Wolf's first encounter with the Corrupted Monk involves fighting an illusion that refuses to explain why it's guarding a cave. The second encounter reveals that the real monk has three separate phases, summons shadow duplicates, and contains an alarming centipede. Apparently, the first fight was simply the introductory demonstration.
Tip
Use the bridge's surrounding branches during the second phase to avoid the shadow duplicates and look for an aerial Deathblow opportunity. The True Corrupted Monk's attacks have deliberate timing, so focus on recognizing each swing instead of deflecting too early. Mikiri Counter is especially useful against thrust attacks, while jumping over sweeps provides additional Posture damage opportunities. Firecrackers can create valuable openings during the final phase. After defeating the monk, the Dragon's Tally Board allows merchants to sell additional supplies, including Divine Confetti. This makes it easier to prepare for apparition enemies such as Shichimen Warriors and Headless.
Warning
The Corrupted Monk trophy unlocks from the True Corrupted Monk in Fountainhead Palace, not the illusion in Ashina Depths. The earlier illusion must still be defeated for story progression, but it doesn't award this trophy. Fountainhead Palace is inaccessible during the Shura route. You must remain loyal to Kuro during Owl's decision to reach this boss. The True Corrupted Monk has three phases, so don't assume the encounter is complete after the first or second Deathblow. The shadow duplicates during the second phase can overwhelm Wolf if you remain stationary. During the third phase, the centipede attack builds Terror, which can kill Wolf immediately if the status gauge fills. You don't need to use the aerial Deathblow strategy or Firecrackers to unlock the trophy. Defeating the boss through ordinary combat is sufficient. The monk's defeat contributes toward Man Without Equal and grants access to the remaining Fountainhead Palace content.

Trophy: Folding Screen Monkeys
Caught the Folding Screen Monkeys
Type: Bronze
Category: Story
How to Unlock
Capture and defeat all four Folding Screen Monkeys inside the Illusory Hall at Senpou Temple, Mt. Kongo. The Folding Screen Monkeys encounter is unlike most boss fights in Sekiro. Rather than battling a powerful swordsman, you'll need to locate four elusive monkeys hiding throughout a strange temple environment. Each monkey behaves differently, and understanding their individual weaknesses is the key to completing the encounter efficiently. To access this boss, progress through the main story until you've defeated Genichiro Ashina on the rooftop of Ashina Castle and learned about the Mortal Blade. Travel to Senpou Temple, Mt. Kongo, and make your way to the Main Hall. After the relevant story progression, interact with the bell on the altar near the large Buddha statue. You'll be transported to the Illusory Hall, a separate area containing the four monkeys. The monkeys are represented by the Folding Screen artwork visible near the beginning of the encounter. Every monkey you defeat removes one portion of the boss's overall health. The four targets are the Seeing Monkey, Hearing Monkey, Speaking Monkey, and an invisible monkey that follows Wolf. The **Seeing Monkey**, represented by the purple screen, has excellent vision but poor hearing. It can spot Wolf from a considerable distance, making direct approaches difficult. Use stealth and the environment to approach from an unexpected direction. One particularly useful area contains a darkened room that limits the monkey's visibility, allowing you to close the distance before it escapes. The **Hearing Monkey**, represented by the green screen, has excellent hearing but limited vision. It reacts quickly to footsteps and other sounds, so ordinary approaches can cause it to flee. Look for the area containing a waterfall, where the loud rushing water can conceal your movement. Lure or approach the monkey near this location, then close the distance and eliminate it before it escapes. The **Speaking Monkey**, represented by the orange screen, alerts the other monkeys when it notices Wolf. This makes the encounter more difficult because the remaining targets may change position after being warned. Prioritize eliminating the orange monkey early to reduce interruptions while pursuing the others. The fourth monkey is invisible and leaves glowing footprints behind as it moves. This monkey follows Wolf from the beginning of the encounter, making it surprisingly easy to defeat once you understand its behavior. One effective method is to turn around immediately after entering the Illusory Hall and attack the space directly behind you. If the invisible monkey is positioned there, the sword strike will reveal and defeat it. If you've already moved away from the starting point, watch for the glowing footprints and listen for the monkey's movements while attempting to locate it. Throughout the encounter, smaller illusionary monkeys may appear and attack Wolf. These enemies can inflict Terror, so don't ignore them when they begin surrounding you. You can defeat these smaller enemies with ordinary sword attacks or use the Loaded Shuriken to eliminate them from a distance. The Illusory Hall Bell, provided when you enter the encounter, allows you to reset the monkeys' positions and return to the starting location. This is useful if the remaining monkeys have scattered into difficult areas or you're struggling to track them. Gachiin's Sugar can also help by reducing Wolf's visibility and making stealth approaches easier. Once all four Folding Screen Monkeys have been defeated, the encounter ends automatically. Folding Screen Monkeys unlocks following the successful completion of the encounter. You'll then gain access to the Inner Sanctum, where you'll meet the Divine Child of Rejuvenation and obtain the Mortal Blade. The encounter also rewards Puppeteer Ninjutsu, which is essential for All Ninjutsu Techniques and the Dragon's Homecoming ending. After fighting heavily armed warriors, enormous monsters, and supernatural enemies, Wolf's next assignment is to chase four monkeys around a temple. Somehow, this turns into a surprisingly complicated exercise in stealth, environmental awareness, and accepting that the most dangerous opponent may be the one leaving footprints directly behind you.
Tip
Defeat the invisible monkey immediately by turning around and attacking behind your starting position. Prioritize the orange monkey next to prevent it from alerting the remaining targets. Use Gachiin's Sugar if you're struggling to approach the monkeys without being detected. Pay attention to the environment. Dark rooms, waterfalls, and other obstacles are deliberately designed to interfere with the monkeys' senses. The Illusory Hall Bell can reset the encounter's positions without requiring you to restart the entire story sequence. After defeating the monkeys, speak with the Divine Child and obtain the Mortal Blade before leaving Senpou Temple.
Warning
All four Folding Screen Monkeys must be defeated to complete the encounter. The invisible monkey counts as one of the four targets, even though it isn't immediately visible in the environment. Don't confuse the smaller illusionary monkeys with the four primary targets. Defeating ordinary illusions doesn't contribute toward the boss's required health segments. The smaller enemies can inflict Terror, making them dangerous if they surround you. The Folding Screen Monkeys encounter is mandatory for obtaining the Mortal Blade and progressing through the non-Shura story route. Puppeteer Ninjutsu is also awarded through this encounter, so make sure you understand how to use it before attempting the Great Serpent-related objectives for Dragon's Homecoming. You don't need to defeat the monkeys in a specific order. Any sequence that eliminates all four will satisfy the trophy.

Trophy: Genichiro Ashina
Defeated "Genichiro Ashina"
Type: Bronze
Category: Story
How to Unlock
Defeat Genichiro Ashina during the main story encounter on the rooftop of Ashina Castle. Genichiro Ashina is one of Sekiro's most important bosses because he represents a major turning point in both the story and the combat system. By the time you reach him, the game expects you to understand that maintaining pressure and deflecting correctly are often more effective than constantly retreating or attempting to dodge every attack. You'll encounter Genichiro briefly during the opening prologue, but that confrontation doesn't award this trophy. The qualifying battle occurs later on the rooftop of Ashina Castle. Progress through Ashina Outskirts, defeat Gyoubu Masataka Oniwa, and enter Ashina Castle. Explore the castle interior and follow the rooftop route marked by the purple smoke signals until you reach the Upper Tower – Ashina Dojo and the nearby Tower Lookout. Before confronting Genichiro, consider defeating available minibosses and collecting additional Prayer Beads and Gourd Seeds. Unlocking Mikiri Counter is strongly recommended, since several of his attacks create valuable opportunities to use it. The encounter consists of two primary stages. During the first, Genichiro has two Deathblow markers and fights using his sword, bow, and a variety of perilous attacks. Once both markers are removed, he'll enter the Way of Tomoe stage, which introduces lightning attacks. During the opening stage, stay close and apply consistent sword pressure. Genichiro frequently responds to your attacks with his own sword combinations, creating opportunities to build Posture through well-timed deflections. Rather than attacking repeatedly without watching him, establish a rhythm of controlled strikes followed by defensive responses. One of Genichiro's most recognizable moves is a jumping downward strike. Deflect or avoid the impact, then prepare for a possible perilous follow-up. During the earlier portion of the encounter, he frequently uses a thrust that can be punished with Mikiri Counter. Later, he may vary the response with a sweep, requiring you to read his movement rather than react to every warning symbol in the same way. When Genichiro performs a thrust, dodge forward using Mikiri Counter to step onto his weapon and inflict substantial Posture damage. When he uses a sweep, jump over the attack and perform a second jump while above him to punish his recovery. His bow attacks are another important threat. Genichiro may jump backward and fire several arrows in rapid succession, particularly when you create distance. Be prepared to deflect the arrows rather than assuming you're safe simply because you've moved away. After removing both Deathblow markers, Genichiro enters the Way of Tomoe phase. His sword attacks remain familiar, but he becomes more aggressive and introduces lightning-based techniques. At the beginning of this stage, he often opens with a jumping thrust, creating an immediate opportunity for Mikiri Counter. The defining mechanic of the final stage is lightning reversal. When Genichiro leaps into the air and charges his weapon with electricity, wait until the attack is about to connect, then jump so Wolf receives the lightning while airborne. Press the attack button before landing to send the electricity back toward Genichiro. A successful lightning reversal deals considerable Vitality and Posture damage while briefly stunning him, creating an opportunity for additional attacks. Continue using deflections, Mikiri Counter, and lightning reversal until you've broken his final Posture bar. Perform the finishing Deathblow to defeat Genichiro and complete the encounter. Genichiro Ashina unlocks automatically after the battle. You'll also receive a Memory that can increase Attack Power and Bloodsmoke Ninjutsu, the first of the three techniques required for All Ninjutsu Techniques. Genichiro is the kind of opponent who makes an excellent first impression by cutting off Wolf's arm during the prologue. Unfortunately for him, Wolf returns with a replacement arm full of weapons and a much stronger understanding of sword combat. It's an unusually thorough response to a previous disagreement.
Tip
Treat Genichiro as an opportunity to master Sekiro's core combat mechanics rather than searching for a strategy that avoids direct engagement. Staying close, attacking with control, and deflecting his combinations will usually produce better results than constantly retreating. Mikiri Counter is essential for punishing his thrust attacks and remains valuable against numerous later bosses, including Sword Saint Isshin. Practice identifying the difference between thrusts and sweeps. Both display the red perilous warning, but they require different responses. During the Way of Tomoe phase, learning lightning reversal can dramatically shorten the fight. Before entering the rooftop encounter, consider upgrading your Healing Gourd and collecting available Prayer Beads to increase your survivability.
Warning
The Genichiro encounter during the prologue doesn't count toward this trophy, even if you manage to defeat him. You must defeat the version encountered later on the rooftop of Ashina Castle. The battle contains two Deathblow markers in its opening stage and an additional marker during the Way of Tomoe stage. Don't assume the fight is finished after breaking his second Posture bar. Mikiri Counter works against thrust attacks, not sweeping attacks. Attempting the wrong response to a perilous attack can result in significant damage. Lightning reversal requires Wolf to be airborne when receiving the electrical attack and to send it back before landing. If you land while still carrying the lightning, you'll suffer damage instead of successfully reversing it. Defeating Genichiro is mandatory for normal story progression and contributes toward Man Without Equal.

Trophy: Gracious Gift of Tears
Defeated the "Divine Dragon" and obtained the "Divine Dragon's Tears"
Type: Bronze
Category: Story
How to Unlock
Defeat the Divine Dragon in Fountainhead Palace and obtain the Divine Dragon's Tears. Gracious Gift of Tears is awarded during the final portion of Sekiro's non-Shura story route. Unlike many major bosses, the Divine Dragon encounter is primarily a mechanical battle that tests movement, grappling, and lightning reversal rather than ordinary sword combat. To reach the Divine Dragon, you must remain loyal to Kuro during Owl's confrontation on the rooftop of Ashina Castle. Choose Break the Iron Code, stay loyal to Kuro, defeat Great Shinobi Owl, and continue through Fountainhead Palace. Progress through the area until you reach the Sanctuary Sculptor's Idol near the end of the region. Before beginning the Divine Dragon encounter, make sure you've completed the important optional quest requirements for Purification and Dragon's Homecoming. For Purification, obtain Father's Bell Charm from Emma to preserve access to the second Hirata Estate memory. For Dragon's Homecoming, finish the Divine Child's questline and obtain the Frozen Tears. These preparations are important because defeating the Divine Dragon advances the world into its final story state and can permanently close the dialogue opportunities needed for the alternative endings. When you're ready, proceed into the Sanctuary and interact with the praying figure to begin the encounter. The battle consists of two stages: the Old Dragons of the Tree, followed by the Divine Dragon itself. During the first stage, you'll face numerous pale, tree-like enemies known as the Old Dragons of the Tree. These creatures emerge from the ground and attack using relatively simple movements, including poisonous breath. Your objective is to defeat enough of them to deplete the shared boss health bar. Move through the arena and attack the dragons while avoiding their poisonous attacks. As the encounter progresses, large tree roots will emerge from the ground, creating opportunities to grapple into the air. When a suitable grappling point appears, use it to launch Wolf above the enemies and perform an aerial Deathblow. This triggers a special attack that damages multiple nearby dragons simultaneously, allowing you to complete the first stage quickly. Once the Old Dragons of the Tree have been defeated, the Divine Dragon appears. The second stage takes place in a large open arena where the Divine Dragon attacks using enormous sweeping sword strikes and powerful wind attacks. Ordinary sword attacks aren't your primary method of dealing damage during this phase. Instead, you'll need to use the lightning-charged trees appearing throughout the arena. Watch the trees in front of the Divine Dragon. One will periodically become charged with electricity, making it glow and crackle with lightning. Run toward the charged tree while avoiding the Dragon's sword attacks. When the grappling indicator appears, grapple onto the electrified branch. Wolf will be launched into the air and struck by lightning. While airborne, press the attack button to redirect the lightning toward the Divine Dragon. A successful lightning reversal deals substantial damage to the boss. Repeat this process while watching for the Dragon's sweeping attacks. The horizontal wind attacks can be avoided by jumping, while vertical strikes require moving out of their direct path. As the encounter progresses, the Dragon's attacks become more aggressive, and the timing between lightning opportunities may change. Continue using the charged trees to perform lightning reversals until the Dragon's health is nearly depleted. During the final sequence, the lightning trees temporarily disappear while the Dragon unleashes a prolonged series of attacks. Survive this barrage by moving carefully and avoiding the incoming strikes. Once the charged trees return, grapple onto one and perform another lightning reversal. This final successful attack will stagger the Divine Dragon and bring its head within reach. Approach the Dragon and perform the finishing Deathblow using the Mortal Blade. Wolf will obtain the Divine Dragon's Tears, completing the encounter. Gracious Gift of Tears unlocks automatically after obtaining the Tears. The Divine Dragon's Tears are essential for Immortal Severance, Purification, and Dragon's Homecoming, so completing this battle brings you close to the final ending decision. After confronting dozens of warriors who insist on attacking Wolf with increasingly elaborate sword techniques, the Divine Dragon introduces a refreshing change of pace. Rather than engaging in an ordinary duel, Wolf must repeatedly climb electrified trees and throw lightning at an ancient supernatural being. Ashina's combat instructors probably didn't cover this particular scenario.
Tip
Complete the Purification and Dragon's Homecoming quest requirements before fighting the Divine Dragon. Obtain Father's Bell Charm and Frozen Tears to preserve access to the alternative endings. The Divine Dragon encounter relies heavily on lightning reversal, so remember to attack while airborne after grappling onto a charged tree. Watch for the horizontal wind attacks and jump over them. Move sideways to avoid the Dragon's vertical strikes. During the Old Dragons of the Tree stage, use the emerging roots to perform aerial Deathblows and clear groups of enemies efficiently. You don't need to purchase additional Prosthetic Tools or Combat Arts specifically for this encounter.
Warning
Defeating the Divine Dragon triggers a major story transition. After this event, Ashina Castle and Ashina Outskirts change again, and several earlier enemies and minibosses become unavailable. More importantly, failing to obtain Father's Bell Charm before defeating the Divine Dragon can prevent access to the second Hirata Estate memory, affecting Purification, Father Surpassed, and Peak Physical Strength. The Dragon's Homecoming questline should also be completed before this encounter, with the Frozen Tears already in your inventory. The Divine Dragon is exclusive to the non-Shura route. Choosing to obey Owl prevents you from reaching Fountainhead Palace during that playthrough. During the boss battle, ordinary sword attacks won't effectively replace the required lightning reversal mechanic. Make sure you grapple onto charged trees and redirect the lightning toward the Dragon. The trophy unlocks after obtaining the Divine Dragon's Tears, not simply upon entering the Sanctuary or beginning the encounter.

Trophy: Great Shinobi - Owl
Defeated "Great Shinobi - Owl"
Type: Bronze
Category: Story
How to Unlock
Defeat Great Shinobi Owl on the rooftop of Ashina Castle after choosing to remain loyal to Kuro. Great Shinobi Owl is a major story boss encountered during the second Ashina Castle invasion. The confrontation represents one of Sekiro's most important decisions because your response determines whether the game continues toward Fountainhead Palace or ends early through the Shura route. To reach this encounter, progress through the story until you've defeated Guardian Ape in Sunken Valley and the illusion of Corrupted Monk in Ashina Depths. Collect the Lotus of the Palace and Shelter Stone, then return to Ashina Castle. You'll discover that the castle has been invaded, with new enemies occupying several familiar locations. Some Sculptor's Idols will temporarily become unavailable, requiring you to approach the upper castle through an accessible route. Fight your way through the castle interior and return to the Tower Lookout rooftop where you previously defeated Genichiro Ashina. Owl will be waiting and will demand that Wolf obey the Iron Code by abandoning Kuro. Choose **Break the Iron Code, stay loyal to Kuro**. This initiates the Great Shinobi Owl boss fight and preserves access to the longer non-Shura story route. The encounter consists of two phases, each requiring a Deathblow. Owl uses a large sword, shurikens, explosives, and unusual shinobi techniques that can punish reckless aggression. Unlike many earlier bosses, he also has excellent Posture recovery, making it important to deal some Vitality damage before attempting to overwhelm him through deflections. During the first phase, stay close enough to pressure Owl but avoid attacking continuously. His sword combinations can be deflected, although he frequently follows them with movements intended to create distance or catch Wolf recovering from an attack. One of Owl's most recognizable combinations involves throwing two shurikens before performing a powerful jumping overhead strike. Deflect the shurikens, then dodge to the side as he descends. This creates a reliable opportunity to strike him from behind while he recovers. Another important attack involves Owl throwing a small device that releases green smoke. This substance temporarily prevents Wolf from using healing items if it connects. Avoid the smoke by moving to the side rather than standing directly in front of Owl. You can sometimes punish the recovery after he throws the device, but don't become so aggressive that you walk directly into its effect. Owl also uses firecrackers during certain combinations. When you recognize the animation, move away from the explosive area or reposition behind him to avoid the blast. Continue dealing Vitality damage and maintaining steady Posture pressure until you remove his first Deathblow marker. During the second phase, Owl becomes more dangerous by adding poison attacks and smoke-based distractions. He may jump backward and scatter poison across the arena, limiting the safe spaces available for movement. Avoid standing in the affected areas and be careful when approaching him after these attacks. Owl can also release a smoke bomb that temporarily obscures your vision. When this happens, reposition quickly and be prepared to defend against his next attack. Another important mechanic appears when Owl attempts to recover his Posture. Watch for a blue glow surrounding him, which indicates that he's preparing to reduce the damage you've built up. Throw a Loaded Shuriken to interrupt this recovery whenever possible. Throughout both phases, avoid using thrust attacks directly against Owl. As an experienced shinobi, he can perform Mikiri Counter against Wolf's thrusts, often resulting in devastating damage. Instead, rely on ordinary sword attacks, deflections, and carefully chosen punishes after his larger movements. Once you've broken Owl's second Posture bar, perform the final Deathblow to defeat him. Great Shinobi – Owl unlocks automatically following the encounter. You'll also receive a Memory that can increase Wolf's Attack Power, and the story will continue toward the preparations required to reach Fountainhead Palace. Defeating Owl is essential for Immortal Severance, Purification, and Dragon's Homecoming, along with several other trophies tied to the non-Shura route. Owl is Wolf's adoptive father, which makes this confrontation a particularly unpleasant family disagreement. Most parents settle arguments through stern conversations, but Owl prefers poisoned blades, explosives, and the occasional attempt to prevent his son from using medicine. Ashina's approach to family counseling is clearly in need of reform.
Tip
Focus on reducing Owl's Vitality during the early portions of each phase. His Posture recovers quickly when his health is high, making pure deflection pressure less effective until you've landed several successful attacks. The two-shuriken jumping attack is one of your safest opportunities to deal damage. Deflect the projectiles, dodge the overhead strike, and punish his recovery. Keep the Loaded Shuriken equipped to interrupt Owl when he attempts to recover Posture during the second phase. Avoid relying on thrust attacks because Owl can counter them. After defeating him, begin the Purification questline immediately. Eavesdrop on Kuro, follow Emma's conversations, and obtain Father's Bell Charm before defeating the Divine Dragon. This unlocks the second Hirata Estate memory containing Owl (Father), a separate boss required for Father Surpassed and Man Without Equal.
Warning
Great Shinobi – Owl is missable within a playthrough if you choose the Shura route. Selecting Obey the Iron Code, forsake Kuro prevents this boss fight and instead leads toward Emma and Isshin Ashina. To unlock Great Shinobi – Owl, you must choose to break the Iron Code and remain loyal to Kuro. Don't confuse Great Shinobi Owl with Owl (Father). They are two separate encounters, and both must be defeated for Man Without Equal. Owl's green smoke temporarily blocks healing, so avoid standing inside it when you need to restore Vitality. His poison attacks during the second phase can restrict your movement, and his smoke bomb can make it difficult to track his next attack. Most importantly, don't use charged thrust attacks recklessly. Owl can counter them with Mikiri Counter. After defeating Great Shinobi Owl, remember that the Purification and Dragon's Homecoming questlines have important requirements that should be completed before the Divine Dragon encounter.

Trophy: Guardian Ape
Defeated the "Guardian Ape"
Type: Bronze
Category: Story
How to Unlock
Defeat the Guardian Ape in Sunken Valley and obtain the Lotus of the Palace. The Guardian Ape is one of Sekiro's most memorable major bosses, combining unpredictable beast attacks with a dramatic second phase that requires a different combat strategy. The encounter takes place at the Guardian Ape's Watering Hole in Sunken Valley, where the creature guards the Lotus of the Palace, an important item needed to advance the main story. To reach the boss, progress through Sunken Valley and the Gun Fort, eventually arriving at the Bodhisattva Valley Sculptor's Idol. Continue toward the large watering hole below to begin the encounter. Before attempting the fight, upgrade your Healing Gourd, collect available Prayer Beads, and equip the Shinobi Firecracker and Loaded Spear if you've obtained them. Firecrackers are particularly effective during the first phase, while the Loaded Spear becomes extremely valuable during the second. The Guardian Ape has two distinct phases, each requiring a Deathblow. During the first phase, the ape fights primarily through physical attacks, including wild arm swings, body slams, dangerous grabs, and unpredictable movements across the arena. Unlike humanoid sword-wielding enemies, its animations can be difficult to read because its attacks don't follow the familiar rhythm of a conventional duel. Stay relatively close when possible, but avoid attacking continuously. Watch for the end of its combinations and punish the recovery windows with several sword strikes. The Shinobi Firecracker can briefly frighten the ape, creating an opportunity to deal damage. Use it when you're close enough for the effect to connect, then be prepared to dodge if the ape responds with a falling body slam. The ape also performs a series of attacks while lying on its back, flailing its arms in a wide area. You can deflect these attacks or move away until the animation ends, then approach to punish its recovery. Its perilous grabs are among the most dangerous attacks in the first phase. When the red warning appears, watch the ape's movement carefully. Jump or create distance to avoid the grabbing animation, particularly when it begins a large leaping approach. The creature also uses poisonous attacks, including throwing excrement and releasing toxic gas. Although these moves are unpleasant, they create opportunities to reposition while the ape completes its animation. Continue dealing Vitality and Posture damage until you can perform the first Deathblow. After the execution, the Guardian Ape appears defeated, but the encounter isn't over. The creature rises again without its head, now carrying a large sword. This begins the second phase, which dramatically changes the fight. The Headless Ape's attacks become more deliberate, with wide sword swings, longer combinations, perilous sweeps, and a dangerous scream that rapidly builds Terror. Unlike the first phase, the second is particularly well suited to precise deflections. Watch for the Headless Ape's sword combinations and attempt to deflect each strike. After certain successful deflections, the ape performs a powerful overhead sword slam. Deflecting this heavy attack causes the creature to collapse forward, creating a large opening. If you have the Loaded Spear equipped, use its thrust-and-pull function while the ape is staggered. This allows Wolf to pull the centipede from its neck, dealing substantial Vitality and Posture damage. The timing can take practice, but this technique can shorten the second phase considerably. The most dangerous move is the Headless Ape's Terror-inducing scream. Before performing it, the creature raises its severed head toward its neck. When you recognize this animation, immediately run away to avoid the expanding area of effect. If you've acquired the Phoenix's Lilac Umbrella upgrade, it can also provide protection against the scream, although retreating is a perfectly reliable option. For perilous sweeps, jump over the sword rather than attempting an ordinary block. Maintain pressure after successfully deflecting the ape's combinations, but avoid staying close when it begins preparing its scream. Once the second Posture bar is broken, perform the final Deathblow to defeat the Guardian Ape and end the encounter. Guardian Ape unlocks automatically after the boss is defeated. You'll receive the Guardian Ape Memory, which can increase Wolf's Attack Power, and the Slender Finger, which the Sculptor can convert into the Finger Whistle Prosthetic Tool. After the battle, collect the Lotus of the Palace from the area behind the boss to continue the main story. The Guardian Ape initially appears to be an unusually angry animal guarding an important flower. By the middle of the fight, it becomes clear that ordinary biological rules have stopped applying. Wolf's decision to continue fighting after the creature gets back up without its head demonstrates either exceptional courage or a complete unwillingness to accept that the boss battle has changed phases.
Tip
Use Shinobi Firecracker during the first phase to interrupt the ape and create safe opportunities for damage. During the second phase, prioritize deflecting the large sword combinations rather than constantly dodging away. The Loaded Spear's pull function is extremely effective after the Headless Ape collapses from a successfully deflected overhead attack. When the creature raises its head toward its neck, retreat immediately to avoid the Terror scream. Consider bringing Pacifying Agents to manage Terror buildup if you're having trouble avoiding the attack. Defeating the Guardian Ape provides the Slender Finger needed for the Finger Whistle, one of the 10 tools required for All Prosthetic Tools.
Warning
The Guardian Ape has two phases. The first Deathblow doesn't complete the encounter. Don't relax when the creature appears defeated, because the second phase begins shortly afterward. The Headless Ape's scream can fill your Terror gauge very quickly. If the gauge fills completely, Wolf dies regardless of his remaining Vitality. The Shinobi Firecracker is most useful during the first phase. During the second, concentrate on sword deflections and the Loaded Spear. Defeating Guardian Ape in Sunken Valley isn't the same as completing the separate Headless Ape encounter in Ashina Depths. You'll need to defeat that later encounter and use the Mortal Blade to sever the ape's immortality for Guardian Ape Immortality Severed and Bestowal Ninjutsu. After defeating the Guardian Ape, collect the Lotus of the Palace when you're ready to advance the story. Obtaining it alongside the Shelter Stone leads toward the next major Ashina Castle transition, so finish collecting available miniboss rewards and equipment before triggering that change.

Trophy: Gyoubu Masataka Oniwa
Defeated "Gyoubu Masataka Oniwa"
Type: Bronze
Category: Story
How to Unlock
Defeat Gyoubu Masataka Oniwa, the mounted general guarding the entrance to Ashina Castle. Gyoubu Masataka Oniwa is one of the first major bosses you'll encounter in Sekiro: Shadows Die Twice. He serves as an early test of your understanding of deflections, grappling, and aggressive combat, although his large arena provides more room to maneuver than many later encounters. You'll find him at the Ashina Castle Gate, after progressing through Ashina Outskirts and overcoming several minibosses along the way. Continue through the outskirts until you've defeated the Chained Ogre and passed through the guarded areas leading toward the castle. Eventually, you'll reach a large battlefield filled with the remains of soldiers and broken fortifications. As you enter the arena, Gyoubu will charge toward you on horseback, loudly announcing his arrival. The boss has two Deathblow markers, meaning you'll need to break his Posture or deplete his Vitality twice to defeat him. Gyoubu fights using a long spear while riding his horse, giving him considerable reach and mobility. His attacks include wide sweeping combinations, charging strikes, and powerful spear swings capable of catching players who remain too far away or attempt to dodge without watching his weapon. Despite his intimidating appearance, Gyoubu is vulnerable to several straightforward tactics. The most important is staying relatively close to his horse and deflecting his spear attacks. When Gyoubu begins a combination, hold your position and time your deflections to match the rhythm of his swings. Successful deflections increase his Posture and often create opportunities for one or two retaliatory attacks. Avoid repeatedly attacking while he's in the middle of an active spear combination. Instead, wait until his sequence finishes, then punish the recovery window. Gyoubu frequently rides away to reposition before charging back into combat. When he creates distance, watch for the green grappling indicator that occasionally appears above him. Press the grappling hook button when the indicator becomes available to pull Wolf toward the mounted general. This maneuver helps close the distance quickly and can create an opportunity to land additional sword strikes before Gyoubu resumes attacking. The Shinobi Firecracker is particularly effective during this encounter because its explosions can frighten Gyoubu's horse and temporarily interrupt his movements. You can acquire Robert's Firecrackers from the Crow's Bed Memorial Mob in Ashina Outskirts for 500 Sen. Bring the component to the Sculptor at the Dilapidated Temple to have it installed as the Shinobi Firecracker. During the boss fight, use the Firecracker when Gyoubu and his horse are close enough to be affected. The horse may rear up, briefly stunning Gyoubu and allowing you to attack safely. Don't use Firecrackers repeatedly without paying attention to your Spirit Emblem supply or the boss's recovery animation. Space out their use and return to ordinary sword combat between openings. After removing Gyoubu's first Deathblow marker, the encounter continues with his second phase. His overall fighting style remains similar, although his attacks may become more aggressive and he may use additional charging or sweeping maneuvers. Maintain the same strategy: deflect his spear combinations, grapple toward him when the indicator appears, and use Firecrackers to create controlled openings. When his second Posture bar is broken, perform the final Deathblow to defeat him. Gyoubu Masataka Oniwa unlocks automatically after the boss is defeated. You'll also receive his Memory, which can be used at a Sculptor's Idol to increase Wolf's Attack Power, and the Mechanical Barrel, which unlocks Prosthetic Tool upgrades through the Sculptor. Gyoubu is famous for announcing his identity at a volume that can probably be heard across the entire province. Fortunately, his dramatic entrance is considerably more intimidating than his actual tactical options. Once you've mastered deflecting his spear and frightening his horse with Firecrackers, the most difficult part of the encounter may be resisting the urge to imitate his introduction every time you enter a room.
Tip
Purchase and install the Shinobi Firecracker before fighting Gyoubu if you're struggling with the encounter. The Firecracker is especially effective against his horse and provides valuable opportunities to deal Vitality and Posture damage. You can also unlock the Grappling Hook Attack skill from the Prosthetic Arts tree after obtaining the corresponding Esoteric Text, allowing you to perform follow-up attacks when grappling toward enemies. However, this skill isn't required to defeat Gyoubu. Stay relatively close to the boss instead of constantly retreating across the arena. His large spear makes fighting at medium range more dangerous than it initially appears. After defeating Gyoubu, use his Memory at a Sculptor's Idol to increase your Attack Power. Visit the nearby Battlefield Memorial Mob for a Gourd Seed, then explore the building where the Tengu of Ashina offers the rat-hunting quest needed to unlock Ashina Arts.
Warning
Gyoubu Masataka Oniwa is a mandatory story boss and cannot be missed on a normal story playthrough. You must remove both Deathblow markers and perform the final Deathblow to complete the encounter. Simply breaking his first Posture bar isn't enough. Firecrackers consume Spirit Emblems, so avoid using them unnecessarily when Gyoubu is too far away to be affected. Watch for his long-range spear attacks when attempting to heal. Creating distance doesn't always guarantee safety because he can quickly close the gap with his horse. Defeating Gyoubu also unlocks the Mechanical Barrel upgrade system, which is essential for Master of the Prosthetic. Make sure you return to the Sculptor with the Mechanical Barrel so you can begin upgrading your tools. Gyoubu's defeat contributes toward Man Without Equal, which requires every major boss across the different ending routes.

Trophy: Immortal Severance
Attained the "Immortal Severance" ending
Type: Silver
Category: Story
How to Unlock
Obtain the Immortal Severance ending by remaining loyal to Kuro and giving him only the Divine Dragon's Tears at the conclusion of the story. Immortal Severance is the standard ending on Sekiro's non-Shura story route. Unlike Purification and Dragon's Homecoming, it doesn't require completing an extensive optional questline. However, you'll need to make the correct decision during the confrontation with Owl at Ashina Castle to preserve access to the ending. Progress through the main story until you've defeated the Guardian Ape in Sunken Valley and the illusion of Corrupted Monk in Ashina Depths. Collect the Lotus of the Palace and Shelter Stone, then return to Ashina Castle. The castle will have changed, and several Sculptor's Idols will temporarily become unavailable as new enemies occupy the area. Fight your way back to the rooftop where you previously defeated Genichiro Ashina. Here, Owl will confront you and demand that you obey the Iron Code by abandoning Kuro. Choose **Break the Iron Code, stay loyal to Kuro**. This decision initiates the boss encounter against Great Shinobi Owl and allows you to continue the main story toward Fountainhead Palace. After defeating Owl, follow Kuro's instructions to complete the preparations required to reach Fountainhead Palace. Continue through the region, defeat the True Corrupted Monk, and eventually confront the Divine Dragon. Defeating the Divine Dragon rewards you with the Divine Dragon's Tears, the essential item for Immortal Severance. Return to Ashina Castle, which will now be experiencing its final invasion, and continue toward the Secret Passage where Wolf and Kuro originally attempted to escape during the prologue. Defeat Genichiro, Way of Tomoe, followed by Sword Saint Isshin Ashina. After the final boss, approach Kuro, who will be waiting nearby. You'll be presented with different ending choices depending on the optional items you've obtained. For Immortal Severance, select the option to give Kuro **only the Divine Dragon's Tears**. Allow the ending cinematic to finish. Immortal Severance unlocks automatically. If you're following the optimized Platinum Roadmap, prepare the Purification and Dragon's Homecoming endings before defeating the Divine Dragon. After defeating Sword Saint Isshin, create a verified save backup before interacting with Kuro. You can then obtain all three non-Shura ending trophies by choosing one ending, restoring your backup, and selecting the next. Wolf has endured countless battles to fulfill his duty as Kuro's protector, only to discover that the final decision involves choosing which supernatural ingredients to hand over. Apparently, even the fate of immortality eventually comes down to carefully checking the contents of your inventory.
Tip
Use Immortal Severance as one of the three endings obtained through your first non-Shura playthrough. Complete the optional requirements for Purification and Dragon's Homecoming before defeating the Divine Dragon. This ensures all three ending choices can be available after Sword Saint Isshin. If you're using save backups, the safest point is after defeating the final boss but before interacting with Kuro. At that point, your ending items should already be collected, and you won't need to fight Sword Saint Isshin repeatedly to obtain the other two trophies. After restoring your backup, verify that you're back at the point immediately before the final interaction.
Warning
Choosing Obey the Iron Code, forsake Kuro during Owl's confrontation leads to the Shura ending and prevents Immortal Severance during that playthrough. You must remain loyal to Kuro to reach Fountainhead Palace, obtain the Divine Dragon's Tears, and fight Sword Saint Isshin. At the final interaction, select the option using only the Divine Dragon's Tears. Giving Kuro the Aromatic Flower or Frozen Tears alongside them triggers different endings. Without a backup, you'll need another playthrough to obtain a different ending after making your final choice. Save restoration also reverses any inventory, upgrade, and boss progress made after the backup was created. Make sure you're restoring the correct file. Immortal Severance doesn't require defeating Owl (Father) or completing the Divine Child's optional questline, but both are recommended during the Platinum route.

Trophy: Isshin Ashina
Defeated "Isshin Ashina"
Type: Bronze
Category: Story
How to Unlock
Defeat Isshin Ashina during the Shura ending route. Isshin Ashina is one of the two bosses exclusive to the Shura ending, making this encounter essential for both the Isshin Ashina trophy and Man Without Equal. This is a completely different fight from Sword Saint Isshin, who appears at the conclusion of the longer non-Shura story route. For the most efficient Platinum, complete the Shura ending during New Game+ after finishing the three non-Shura endings and collecting the important late-game materials during your first playthrough. This ensures you've already experienced most of the game before committing to the shorter ending route. To reach Isshin Ashina, progress through the story until you've defeated the illusion of Corrupted Monk in Ashina Depths and Guardian Ape in Sunken Valley. Collect the Shelter Stone and Lotus of the Palace, then return to Ashina Castle. The castle will have changed following the invasion. Fight your way through its occupied interior and return to the rooftop where you previously defeated Genichiro Ashina. Owl will be waiting and will demand that Wolf honor the Iron Code by abandoning Kuro. Choose **Obey the Iron Code, forsake Kuro**. This decision commits you to the Shura route and immediately leads into a sequence of two boss encounters: Emma, the Gentle Blade, followed by Isshin Ashina. You must defeat Emma before confronting Isshin. Emma has one Deathblow marker and relies on fast sword combinations, dangerous grabs, and precise counterattacks. Focus on deflecting her ordinary strikes, countering thrusts with Mikiri Counter, and creating distance when she prepares her grab. After defeating Emma, you'll face Isshin Ashina. Isshin has two phases, each requiring a Deathblow. His first phase is a disciplined sword duel that rewards careful timing and punishes reckless aggression. During this phase, stay within a manageable distance and watch Isshin's movements closely. He frequently deflects or evades ordinary attacks before responding with fast sword combinations. Attempting to attack continuously can leave Wolf vulnerable to devastating counters. Instead, strike once or twice, observe his reaction, and prepare to deflect his response. Isshin can perform Ashina Cross, a powerful two-hit sword technique signaled by a brief glint near his sheathed weapon. When you see him preparing this attack, create distance or time your deflections carefully. He also uses perilous attacks that require different responses. Punish thrusts with Mikiri Counter and avoid sweeps by jumping. Learning to recognize the difference between these attacks will make the first phase considerably easier. Once you've broken Isshin's first Posture bar, perform a Deathblow to begin the second phase. During this stage, Isshin introduces devastating fire-based attacks that dramatically change the encounter. He can ignite sections of the arena, send flames forward across the floor, and combine his fire techniques with powerful sword attacks. One dangerous move involves Isshin preparing a large area attack that causes flames to erupt from sections of the floor. Watch the ground carefully and move toward an area that isn't glowing with fire. After the eruption, Isshin may unleash a rapid sequence of sword strikes known as One Mind. These attacks can overwhelm ordinary blocking if your timing or positioning is poor. A reliable approach is to create distance before the attack begins or use a defensive Prosthetic Tool such as the Loaded Umbrella to help survive the sequence. Isshin also performs a powerful forward-moving fire attack that can catch Wolf if he remains directly in front of the boss. Move sideways to avoid the flames and punish the recovery if you're safely positioned. The Shinobi Firecracker can interrupt certain preparations when used early enough, although you shouldn't depend on it to cancel every attack. Continue dealing controlled Vitality damage while using deflections to build Isshin's Posture. Avoid standing inside burning areas and don't attempt to trade hits with his fire techniques. Once you've broken his second Posture bar, perform the finishing Deathblow. Isshin Ashina unlocks automatically after the boss is defeated. Completing the encounter also leads directly into the Shura ending. If you've already defeated every other required major boss on the same continuing save file, Man Without Equal should unlock as well. Isshin has spent his life becoming one of the greatest swordsmen in Ashina. Unfortunately for Wolf, retirement hasn't reduced his ability to deliver extremely painful sword lessons. During the second phase, Isshin also introduces fire into the curriculum, apparently deciding that ordinary sword wounds weren't educational enough.
Tip
Complete Isshin Ashina during New Game+ after finishing the longer non-Shura route. Before speaking with Owl on the rooftop, create a verified save backup. This allows you to obtain the Shura ending and its exclusive boss trophies, then restore your previous save and continue toward Fountainhead Palace for the remaining Lapis Lazuli. During the first phase, focus on recognizing Isshin's attack patterns rather than attacking continuously. The second phase is considerably easier when you learn to identify his fire attack preparations. Watch the floor for safe spaces and create distance before his most dangerous combinations. The Loaded Umbrella can help defend against certain sword attacks, while Firecrackers may interrupt some of his longer preparations. Keep your Healing Gourd upgraded and enter the fight with a full supply of Spirit Emblems.
Warning
Isshin Ashina is exclusive to the Shura ending route. Choosing Break the Iron Code, stay loyal to Kuro leads toward the longer story route and Sword Saint Isshin instead. You must select Obey the Iron Code, forsake Kuro during Owl's confrontation to reach this boss. Isshin Ashina and Sword Saint Isshin are different encounters, and defeating one doesn't satisfy the trophy requirement for the other. You must defeat Emma before fighting Isshin, and dying during the sequence means repeating the encounter from Emma. Isshin has two phases, with the second introducing dangerous fire attacks and One Mind. Avoid remaining in glowing floor areas when he's preparing his large fire technique. If you're using a save backup for the optimized Platinum, confirm that Isshin Ashina, Shura, and Man Without Equal have unlocked before restoring your earlier save. Restoring the backup removes the Shura boss victories from the restored game state, even though the PlayStation trophies remain earned.

Trophy: Revered Blade
Received the "Kusabimaru" from Kuro
Type: Bronze
Category: Story
How to Unlock
Receive the Kusabimaru from Kuro during the opening prologue. Revered Blade is a mandatory story trophy and should be the first trophy you unlock in Sekiro: Shadows Die Twice. It requires no optional exploration, collectibles, or special combat techniques. At the beginning of the game, Wolf awakens in a dark well beneath Ashina Reservoir. After regaining control, follow the tutorial instructions to learn the basics of movement, crouching, and stealth. Your initial objective is to reach the Moon-view Tower, where Kuro is being held. Because Wolf doesn't yet have his sword, you'll need to avoid enemies rather than engage them directly. Follow the grassy areas and narrow passages while remaining crouched to stay out of sight. Use the ledges and wall-hugging mechanics introduced during the tutorial to navigate past the guards stationed around the reservoir. Watch their patrol routes and wait until they're facing away before advancing. Eventually, you'll reach the Moon-view Tower. Enter the building and approach Kuro to begin the story conversation. During this interaction, Kuro returns the Kusabimaru to Wolf. The Kusabimaru is Wolf's primary sword and remains his main weapon throughout the adventure. Unlike the Prosthetic Tools, it doesn't need to be replaced or upgraded through a separate crafting system. Once Kuro gives you the sword, Revered Blade unlocks automatically. You'll then proceed through the remainder of the prologue, learning the fundamentals of sword combat before attempting to escape with Kuro. The trophy requires no additional action after receiving the weapon. Wolf spends the opening moments of his adventure sneaking through hostile territory without a sword. Fortunately, his young master has been keeping it safe for him. It's an unusually generous gesture considering the next several dozen hours will involve testing exactly how much punishment one blade can endure.
Tip
Use the opening section to become comfortable with stealth, crouching, ledge movement, and enemy awareness. You'll need these abilities throughout the game, particularly when approaching dangerous minibosses guarded by multiple ordinary enemies. Once you've received the Kusabimaru, practice basic attacks and deflections against the tutorial enemies before progressing. Sekiro's combat rewards precise timing and controlled aggression, so learning the fundamentals early will make later encounters considerably easier. There are no optional items or hidden requirements associated with Revered Blade.
Warning
Revered Blade is story-related and cannot be missed. You don't need to defeat a particular enemy, upgrade your sword, or complete any optional objectives. The Kusabimaru is obtained automatically when you reach Kuro during the prologue. Don't confuse this trophy with Shinobi Prosthetic, which unlocks shortly afterward through a separate mandatory story event. The prologue includes an encounter against Genichiro Ashina, but defeating him during this early battle isn't required. Regardless of the encounter's outcome, the story continues toward the events that provide Wolf with his Shinobi Prosthetic.

Trophy: Shinobi Prosthetic
Acquired the Shinobi Prosthetic
Type: Bronze
Category: Story
How to Unlock
Acquire the Shinobi Prosthetic after completing the opening prologue. The Shinobi Prosthetic is one of Sekiro's defining gameplay mechanics, transforming Wolf's missing arm into a versatile mechanical weapon system capable of supporting numerous specialized tools. You'll receive it automatically during the opening events, shortly after obtaining the Kusabimaru from Kuro. After reaching the Moon-view Tower and receiving your sword, follow Kuro's instructions and proceed through Ashina Reservoir toward the Secret Passage. The prologue introduces several essential combat mechanics along the way, including ordinary attacks, deflections, Posture damage, and Deathblows. Use the early enemies to practice your timing before continuing. Once you've reached the Secret Passage, Wolf and Kuro will attempt to escape Ashina together. However, Genichiro Ashina intercepts them, initiating a scripted story encounter. Genichiro is considerably more dangerous than the enemies you've encountered up to this point. Although it's possible to defeat him during the prologue, winning doesn't change the overall outcome of the story. Following the confrontation, Wolf loses his left arm and becomes separated from Kuro. He later awakens at the Dilapidated Temple, where the Sculptor has rescued him and fitted him with a mechanical replacement. This device is known as the Shinobi Prosthetic. Shinobi Prosthetic unlocks automatically once Wolf receives the arm and the story resumes at the Dilapidated Temple. You can now begin exploring Ashina Outskirts and discovering components that allow the Sculptor to install different tools into the prosthetic. Early examples include the Loaded Shuriken, Shinobi Firecracker, Flame Vent, and Loaded Axe. The Shinobi Prosthetic also incorporates Wolf's grappling hook, allowing him to travel across rooftops, reach elevated platforms, and access otherwise unreachable areas. As you progress through the game, you'll eventually unlock 10 base Prosthetic Tools and numerous modifications, all of which contribute toward separate trophies. For now, simply continue through the mandatory story events to receive the equipment. Wolf begins his adventure as a capable shinobi, but the story quickly decides that an ordinary human arm isn't sufficiently impressive. Fortunately, the Sculptor has an extremely sophisticated mechanical replacement lying around. It's convenient, although Wolf probably would have preferred a less traumatic introduction to advanced engineering.
Tip
After receiving the Shinobi Prosthetic, spend some time exploring the Dilapidated Temple. Speak with the Sculptor to learn more about the mechanical arm and its potential upgrades. You'll also meet Emma, who can improve your Healing Gourd when you bring her Gourd Seeds. Hanbei the Undying, located outside the temple, provides a convenient opportunity to practice combat mechanics without risking experience or Sen. As you progress into Ashina Outskirts, look for grappling points marked by the on-screen indicator. The grappling hook is essential for exploration, stealth approaches, and several boss encounters.
Warning
Shinobi Prosthetic is mandatory and cannot be missed. You don't need to acquire any optional Prosthetic Tools or purchase upgrades to unlock it. The trophy is awarded during the opening story sequence after Wolf receives his mechanical arm. Defeating Genichiro during the prologue isn't required and doesn't alter the acquisition of the prosthetic. Don't confuse this trophy with All Prosthetic Tools, which requires finding and installing all 10 base tools. Likewise, Master of the Prosthetic requires purchasing every upgrade in the Prosthetic modification tree. Those objectives are considerably more involved, but receiving the Shinobi Prosthetic is the starting point for both.

Trophy: Shura
Attained the "Shura" ending
Type: Silver
Category: Story
How to Unlock
Obtain the Shura ending by choosing to obey the Iron Code, betraying Kuro, and defeating Emma and Isshin Ashina during the confrontation at Ashina Castle. Shura is one of the four endings required for the Platinum and is substantially different from Immortal Severance, Purification, and Dragon's Homecoming. Unlike the other three endings, which share the longer story route through Fountainhead Palace, Shura concludes the game early and introduces two exclusive boss encounters. Because these bosses are also required for Man Without Equal, you'll need to experience the Shura route even if you've already completed the other endings. For the most efficient Platinum route, complete Shura during New Game+ rather than your first playthrough. This allows you to finish the longer non-Shura story first, collect important upgrade materials, defeat the optional bosses, and prepare all three other endings before committing to the shorter Shura path. To reach the required decision, progress through the story until you've defeated the illusion of Corrupted Monk in Ashina Depths and Guardian Ape in Sunken Valley. Collect the Shelter Stone and Lotus of the Palace, then return to Ashina Castle. The castle will have changed, with new enemies occupying its interior and several Sculptor's Idols temporarily unavailable. Fight your way back to the rooftop where you originally confronted Genichiro Ashina. Owl will be waiting and will demand that you honor the Iron Code by abandoning Kuro. For the Shura ending, select **Obey the Iron Code, forsake Kuro**. This decision immediately commits you to the Shura route and prevents you from continuing toward Fountainhead Palace during that playthrough. After making your choice, you'll face Emma, the Gentle Blade. Emma is an exceptionally skilled swordswoman who relies on precise attacks, quick counters, and dangerous grabs. Although she has only one Deathblow marker, her movements are fast enough to punish careless aggression. Focus on deflecting her ordinary sword combinations while watching for perilous attacks. Her thrust can be punished using Mikiri Counter, while sweeping attacks should be avoided by jumping. When she prepares her dangerous grab, create distance rather than attempting to interrupt it through ordinary attacks. Defeat Emma to begin the encounter against Isshin Ashina. Unlike Sword Saint Isshin, this version of Isshin is an older swordsman who fights using a different set of techniques. He has two Deathblow markers and becomes particularly dangerous during his second phase, when he introduces fire-based attacks. During the first phase, concentrate on controlled aggression and precise deflections. Isshin can evade careless attacks and punish you with fast counterattacks, so avoid swinging repeatedly without watching his response. Use Mikiri Counter when he performs a thrust, and punish his slower attacks after successfully avoiding them. In the second phase, Isshin begins using powerful fire attacks that can cover significant portions of the arena. Watch for flames appearing beneath Wolf's feet and move toward areas that aren't burning. When Isshin prepares a large area attack followed by rapid sword strikes, create distance or use an appropriate defensive counter rather than attempting to trade blows. The Loaded Umbrella can help manage dangerous sword combinations, while Shinobi Firecracker may provide opportunities to interrupt certain attacks if used at the correct moment. After landing the final Deathblow on Isshin Ashina, the Shura ending cinematic will begin. Allow the ending to finish, and the Shura trophy unlocks automatically. If you've already defeated every other required major boss on the same continuing save file, Man Without Equal should also unlock after completing the Shura-exclusive encounters. For the optimized two-playthrough Platinum route, create a backup immediately before speaking with Owl during New Game+. Complete Shura, confirm that you've earned the required trophies, then restore your backup and choose to remain loyal to Kuro. This allows you to continue toward Fountainhead Palace and obtain the remaining Lapis Lazuli needed for Master of the Prosthetic. Wolf has spent most of the adventure protecting Kuro, confronting dangerous enemies, and resisting the influence of powerful forces. The Shura ending explores what happens when those loyalties collapse. It's a remarkably effective demonstration of why blindly following an old family code might not be the healthiest approach to conflict resolution.
Tip
Save Shura for New Game+ after completing the three non-Shura endings during your first playthrough. This approach allows you to collect the six available Lapis Lazuli, complete the second Hirata Estate memory, and defeat the late-game optional bosses before choosing the shorter story branch. Create a verified save backup before speaking with Owl during New Game+. This is one of the most important backup points in the entire Platinum route. For Emma and Isshin, prioritize learning their attack patterns rather than attempting to overwhelm them. Both are dangerous in close combat, and Isshin's second phase can punish players who rely exclusively on aggressive sword attacks. Keep Kuro's Charm during New Game+ unless you're comfortable with the additional difficulty of playing without it. Once Shura and Man Without Equal have unlocked, restore your backup and continue along the non-Shura route to finish your remaining upgrades.
Warning
The Shura ending is mutually exclusive with the other three endings during a single uninterrupted playthrough. Choosing Obey the Iron Code, forsake Kuro permanently commits that playthrough to Shura. You won't be able to access Fountainhead Palace, defeat the Divine Dragon, or obtain the late-game Lapis Lazuli available on the non-Shura route. For this reason, completing Shura during your first playthrough is not recommended for an efficient Platinum run. Man Without Equal requires the relevant boss victories to exist on the same continuing save file. If you defeat Emma and Isshin, then restore an earlier backup, those victories will no longer be registered in the restored save. Make sure Man Without Equal unlocks before restoring the backup. If it doesn't unlock, check whether you've missed a required major boss, especially Owl (Father), Demon of Hatred, or the Headless Ape. Don't confuse Isshin Ashina with Sword Saint Isshin Ashina. They are separate bosses associated with different ending routes, and both are required for the Platinum.

Trophy: Sword Saint, Isshin Ashina
Defeated "Sword Saint Isshin Ashina"
Type: Silver
Category: Story
How to Unlock
Defeat Sword Saint Isshin Ashina at the end of the non-Shura story route. Sword Saint Isshin is the final boss encountered when pursuing Immortal Severance, Purification, or Dragon's Homecoming. He is widely regarded as one of Sekiro's most demanding opponents because the encounter tests almost every major combat mechanic you've learned throughout the game, including deflection timing, Posture management, Mikiri Counter, sweeping attack responses, and lightning reversal. To reach this encounter, you must remain loyal to Kuro during Owl's confrontation on the rooftop of Ashina Castle. Select Break the Iron Code, stay loyal to Kuro, then continue through Fountainhead Palace and defeat the Divine Dragon. After obtaining the Divine Dragon's Tears, return to Ashina Castle. The region will now be experiencing its final invasion, and your route toward Kuro will lead back to the Secret Passage near Ashina Reservoir. Follow the path to the passage where Wolf and Kuro attempted to escape during the prologue. Here, you'll begin the final encounter, which contains four consecutive combat stages: one against Genichiro, Way of Tomoe, followed by three against Sword Saint Isshin. The battle begins with Genichiro, Way of Tomoe. Although he's stronger than the version you fought earlier in Ashina Castle, he should feel familiar by this stage. His attacks include sword combinations, perilous thrusts, and a powerful Mortal Blade technique that creates a dangerous sweeping attack in front of him. At the beginning of the encounter, Genichiro often prepares his Mortal Blade attack. Move around him to avoid the main strike and punish the lengthy animation with several sword attacks. Stay aggressive, deflect his ordinary combinations, and use Mikiri Counter against his thrusts. Once you've defeated Genichiro, the actual confrontation against Sword Saint Isshin begins. **Sword Saint Isshin — First Phase** Isshin initially fights using his sword, relying on precise combinations, sudden attacks, and techniques that punish hesitation. His movements are controlled but extremely dangerous, particularly when you're standing directly in front of him. Stay relatively close and maintain pressure without attacking recklessly. Deflect his sword combinations and respond with one or two attacks whenever he finishes a sequence. When Isshin performs a perilous thrust, use Mikiri Counter to inflict substantial Posture damage. Pay attention when he sheathes his sword and a brief glint appears near the weapon. This signals a powerful Ashina Cross-style attack. You can create distance to avoid the slashes or approach closely to provoke a different response, including a sweep that can be punished by jumping. His charged wind attacks can also be avoided by moving out of their path rather than attempting to absorb them. Your objective is to maintain enough pressure that Isshin's Posture cannot recover completely. His Posture regeneration slows as his Vitality decreases, so landing a few clean attacks before focusing on deflections can make the phase considerably easier. After filling his Posture gauge or reducing his health enough to land a Deathblow, Isshin moves into the next phase. **Sword Saint Isshin — Second Phase** During the second phase, Isshin introduces a long spear alongside his sword and firearm, significantly expanding his attack range and making his combinations harder to read. This is often the most difficult portion of the encounter because Isshin becomes more aggressive and uses sequences containing delayed spear swings, gunfire, and perilous thrusts. Avoid panicking when he begins a long combination. Focus on the rhythm of his spear strikes, even when the timing changes between attacks. Deflecting the entire sequence can quickly increase his Posture, especially when he finishes with a thrust that you can punish using Mikiri Counter. One particularly useful opportunity occurs when Isshin jumps backward while swinging his spear. Be ready to deflect the attack and watch for follow-up gunshots. After firing, he may transition into another dangerous spear attack, giving you an opportunity to respond with Mikiri Counter or a jump depending on the warning animation. Isshin also performs a large jumping spear slam. You can deflect the impact or dodge toward his side as he descends, then punish his recovery with a few strikes. Don't attempt to outrun every combination. Although creating distance is useful for healing, consistently retreating allows Isshin's Posture to recover and can make the fight much longer. Instead, stay close enough to pressure him, learn the attack sequences, and exploit the recovery windows after successfully countering his most dangerous moves. When his second Posture bar breaks, perform the next Deathblow to enter the final phase. **Sword Saint Isshin — Third Phase** Isshin retains his sword, spear, and firearm during the final phase, but now introduces powerful lightning attacks. These attacks initially look intimidating, but they're actually among your best opportunities to inflict significant damage. When Isshin jumps into the air and charges his spear with lightning, prepare to perform a lightning reversal. Jump so that Wolf is airborne when the lightning attack connects, then press the attack button before landing. If executed correctly, Wolf redirects the lightning back toward Isshin, dealing major Vitality and Posture damage while briefly stunning him. Use this opening to approach and land additional attacks. The timing is important. Jumping too early can cause Wolf to land before the reversal is completed, while jumping too late can result in taking the full lightning attack. Isshin also retains his dangerous spear combinations and may introduce additional wind-based attacks. Continue using Mikiri Counter against thrusts and avoid getting caught in his extended attack strings. A few successful lightning reversals can drastically shorten the final phase. Once Isshin's final Posture bar is broken, perform the required finishing Deathblow to defeat him permanently. Sword Saint, Isshin Ashina unlocks after completing the encounter. Defeating him also allows you to obtain Immortal Severance, Purification, and Dragon's Homecoming, depending on which ending items you've prepared. For the optimized Platinum route, don't interact with Kuro immediately after defeating Isshin. Instead, exit the game and create a verified backup so you can select each of the three available non-Shura endings without repeating the battle. Wolf's final examination involves surviving four consecutive combat stages against two of Ashina's most dangerous swordsmen. There's no written test, no partial credit, and absolutely no sympathy for poor deflection timing. Fortunately, by the time you've defeated Isshin, you'll have earned a combat qualification that practically no one else in Ashina could survive long enough to obtain.
Tip
Before attempting Sword Saint Isshin, maximize your available Healing Gourd charges and collect as many Prayer Necklaces as possible. Defeat optional minibosses and use any unused boss Memories to increase your Attack Power. Practice Mikiri Counter until responding to thrust attacks feels automatic. Isshin frequently creates opportunities to use it, particularly during his spear phases. The Shinobi Firecracker can interrupt certain attacks and create brief openings, although it shouldn't replace learning Isshin's actual combinations. During the final phase, prioritize lightning reversals. They provide substantial damage and often make the last stage easier than the preceding spear phase once you've mastered the timing. If you're repeatedly struggling, focus on consistently defeating Genichiro and Isshin's first phase while using as few Healing Gourd charges as possible. Preserving healing resources for the later stages improves your chances of success.
Warning
Sword Saint Isshin is exclusive to the non-Shura story route. Choosing to obey Owl and forsake Kuro prevents this encounter during that playthrough. You must defeat Genichiro, Way of Tomoe, followed by all three phases of Sword Saint Isshin in a single attempt. If you die and cannot resurrect, the encounter resets to Genichiro. Don't mistake Isshin's second phase for the final stage. The complete encounter includes Genichiro and three separate Sword Saint phases. Lightning reversal requires Wolf to be airborne when struck and to redirect the attack before landing. Poor timing can result in significant damage. After defeating Isshin, don't immediately select an ending if you're following the save-backup route. Create your backup before interacting with Kuro so you can obtain all three non-Shura ending trophies from the same completed boss encounter. Boss Memories, Prayer Necklaces, and Healing Gourd improvements are permanent upgrades, so use everything available before attempting this fight.

Welcome to Sekiro: Shadows Die Twice, where hesitation is defeat, your sword is your closest companion, and even ordinary enemies seem personally offended by your existence. This challenging action-adventure from FromSoftware follows Wolf, a shinobi sworn to protect his young master, Kuro, through the war-torn lands of Ashina. Unlike traditional Souls games, Sekiro places a heavy emphasis on aggressive swordplay, precise deflections, and breaking an enemy's Posture rather than simply reducing their health. Spend your opening hours learning how to deflect attacks, counter perilous moves, and recognize enemy patterns. Unlock Mikiri Counter as soon as possible, since it allows you to punish dangerous thrust attacks and remains invaluable throughout the adventure. You can also practice with Hanbei the Undying at the Dilapidated Temple. Don't worry if the opening bosses defeat you repeatedly; learning their attack rhythms is far more valuable than trying to overpower them. The Platinum requires all four endings, every major boss, all skills, and fully upgraded Prosthetic Tools. You can obtain everything in two playthroughs with carefully managed save backups, although completing four conventional playthroughs is a perfectly valid alternative.
Begin exploring Ashina Outskirts and collect the Young Lord's Bell Charm from the elderly woman in the ruined house near the Outskirts Wall – Gate Path. Bring it to the Dilapidated Temple to unlock Hirata Estate, where you'll find valuable Prosthetic Tools and the optional boss Lady Butterfly. As you progress through Ashina Castle, Senpou Temple, Ashina Depths, and Sunken Valley, collect Prayer Beads, Gourd Seeds, and Prosthetic Tool materials whenever possible. There are 40 Prayer Beads needed for 10 Prayer Necklaces, nine Gourd Seeds needed to reach 10 Healing Gourd uses, and 10 base Prosthetic Tools to discover. Regularly visit Emma to upgrade your Healing Gourd and the Sculptor to install and improve your tools. Defeat optional minibosses as you encounter them, particularly those around Ashina Castle, because story events eventually replace several enemies and make their Prayer Beads temporarily inaccessible. Some missing items may appear in the Offering Box, but don't rely on it as your primary collection strategy. Wolf may be an exceptionally skilled shinobi, but apparently his survival still depends on collecting enough beads to open a small jewelry store.
Continue progressing until you've defeated the illusion of the Corrupted Monk in Ashina Depths and the Guardian Ape in Sunken Valley. These encounters guard important story items, and collecting both the Shelter Stone and Lotus of the Palace advances the game toward its first major turning point. Before triggering the next Ashina Castle invasion, revisit the earlier areas and defeat any remaining available minibosses, collect accessible Prayer Beads and Gourd Seeds, and obtain the Loaded Spear material from the Ashina Reservoir gatehouse. Once the castle changes, some original encounters disappear and its Sculptor's Idols temporarily become unavailable. You'll eventually return to the top of Ashina Castle, where Owl presents a critical decision. For your first playthrough, choose Break the Iron Code, stay loyal to Kuro. This allows you to continue toward Fountainhead Palace and pursue Immortal Severance, Purification, and Dragon's Homecoming. Choosing to obey Owl instead triggers the shorter Shura route and locks you out of much of the late-game content. Save that decision for New Game+.
After defeating Great Shinobi Owl, prepare the two optional ending questlines before defeating the Divine Dragon. For Purification, eavesdrop on Kuro in his room, follow Emma's conversations through Ashina Castle and the Old Grave, then eavesdrop on Emma and the Sculptor from behind the Dilapidated Temple. Confront Emma about what you heard to obtain Father's Bell Charm, which unlocks a second version of Hirata Estate. Defeat Owl (Father) there to obtain the Aromatic Flower and secure access to the two Prayer Beads exclusive to this memory. For Dragon's Homecoming, work with the Divine Child at Senpou Temple by requesting Rice, giving her a Persimmon when she becomes ill, delivering Rice for Kuro, and obtaining the Holy Chapter texts. You'll also need the Fresh and Dried Serpent Viscera, which involve using Puppeteer Ninjutsu to manipulate enemies near the Great Serpent. Return both items to the Divine Child and complete her conversations to receive the Frozen Tears. Finish these preparations before defeating the Divine Dragon, since progressing past that encounter can permanently close the necessary dialogue opportunities. These questlines are easy to overlook, so treat them as essential Platinum objectives rather than optional distractions. Sekiro already expects you to memorize deadly sword combinations; naturally, it also expects you to become an expert at listening through walls.
With the Aromatic Flower and Frozen Tears secured, continue through Fountainhead Palace and defeat the True Corrupted Monk and Divine Dragon. Before and after the Divine Dragon encounter, carefully revisit areas affected by the changing story, particularly Ashina Castle and Ashina Outskirts, to defeat newly available minibosses and collect their Prayer Beads. Make sure you've visited every major region for Ashina Traveler, acquired all three Ninjutsu Techniques, and collected every Prosthetic Tool. Defeat the Headless Ape in Ashina Depths and use the Mortal Blade to sever its immortality, then return to the same location later to defeat the Shichimen Warrior and obtain Malcontent's Ring. You'll also need to defeat the optional Demon of Hatred in the late-game Ashina Outskirts and Owl (Father) in the second Hirata Estate memory for Man Without Equal. Both are formidable encounters, so bring upgraded tools, maximize your available healing, and approach each fight patiently. Demon of Hatred is particularly challenging because its large attacks encourage a different rhythm from the sword duels you've spent the game mastering. Apparently, learning to deflect perfectly wasn't enough; FromSoftware also wanted to see whether you could survive a giant flaming nightmare.
Before leaving your first playthrough, collect all six available Lapis Lazuli. Two can be purchased from the Fountainhead Noble Pot using Treasure Carp Scales, one comes from the Great Colored Carp questline, one is dropped by the Shichimen Warrior near the Fountainhead Palace waterfall, and two are rewarded for defeating Demon of Hatred. You'll need 10 Lapis Lazuli overall for Master of the Prosthetic, making a second non-Shura visit to Fountainhead Palace necessary. After defeating Sword Saint Isshin at the end of the story, do not interact with Kuro immediately. Exit the game and create a verified backup of your save. On PlayStation, Sekiro uses PS4 save data, which can be backed up using supported USB storage or PlayStation Plus cloud saves. Disable automatic cloud syncing where applicable and make certain you know which copy is your backup before restoring anything. Return to the game and select one ending using the appropriate item combination: Divine Dragon's Tears alone for Immortal Severance, Tears with the Aromatic Flower for Purification, or Tears with the Frozen Tears for Dragon's Homecoming. After each ending, restore your backup and choose the next option until you've earned all three trophies. Keep the final completed save, decline the immediate New Game+ prompt, and finish any accessible cleanup before starting your second journey. Restoring a backup restores the entire earlier game state, so be careful not to overwrite your main progress accidentally.
Start New Game+ from the Sculptor's Idol at the Dilapidated Temple once you've completed your first-playthrough preparations. Your acquired skills, Prosthetic Tools, materials, and permanent upgrades carry forward, allowing you to progress much more efficiently. Keep Kuro's Charm during the opening sequence unless you're deliberately seeking an additional challenge, since returning it makes combat substantially harder. Progress until you return to Owl on the Ashina Castle rooftop, then create another verified save backup before speaking with him. This time choose Obey the Iron Code, forsake Kuro, which leads to the exclusive encounters against Emma and Isshin Ashina and unlocks the Shura ending. Provided you've defeated all the required bosses on your continuing save, Man Without Equal should also unlock after completing these encounters. Once you've confirmed the trophies, restore the backup you created before Owl's decision and choose to remain loyal to Kuro instead. Continue into Fountainhead Palace to collect at least four additional Lapis Lazuli and finish upgrading every Prosthetic Tool. This second visit is essential because Shura prevents you from accessing the region and therefore cannot provide the materials needed for your final upgrades. Make sure your first playthrough included Owl (Father), Demon of Hatred, and the other major bosses so that the Shura-exclusive encounters complete your boss requirements.
Your final major obstacle will probably be Height of Technique, which requires purchasing all skills in the Shinobi, Prosthetic, Ashina, Temple, and Mushin Arts trees. You'll need to obtain the associated Esoteric Texts and acquire Floating Passage from a Noble Pot merchant to unlock one of the Mushin abilities. The experience required for each additional skill point increases substantially, making this the game's longest grind for many players. Avoid spending skill points through the Dancing Dragon Mask to increase Attack Power, since doing so unnecessarily extends the grind. Efficient farming locations include the Interior Ministry soldiers near the Outskirts Wall – Stairway Idol after the final invasion, the purple shinobi near Ashina Castle's Upper Tower – Antechamber, and the nobles around Fountainhead Palace's Flower Viewing Stage. Repeat short stealth-kill routes, rest at the nearby Sculptor's Idol, and spend your earned skill points as you finish each tree. Farming on New Game+ provides higher experience rewards, although advancing to additional playthroughs can make the process faster if you're comfortable fighting the bosses again. Remember that defeating Inner bosses in the added Gauntlets of Strength isn't required for the base-game Platinum. If you're struggling with a particular boss, missing an upgrade material, or unsure which ending step to complete next, Ask Gami can help with specific locations and combat strategies. Sekiro rewards persistence, preparation, and the ability to turn repeated failure into improvement. By the time the Platinum unlocks, you'll have mastered nearly every challenge Ashina can offer, and the phrase "Hesitation is defeat" will probably be permanently engraved into your memory.
YouTube Playlist
Sekiro Shadows Die Twice — Platinum Walkthrough