


Trophy Guide Preview
Overall Trophy Progress
0 / 44 Completed
0%
Trophy Types
Platinum
0 / 1Gold
0 / 3Silver
0 / 6Bronze
0 / 34Categories
Collectible
0 / 2Grind
0 / 5Misc
0 / 36
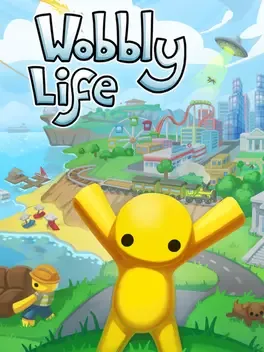
Explore a colorful open-world physics sandbox packed with ridiculous jobs, missions, vehicles, secrets, and plenty of wobbling. Earn cash, buy houses and clothes, uncover mysteries, head into space, or cause complete chaos with friends in local or online co-op.
Overall Trophy Progress
0 / 44 Completed
0%
Platinum Path
EARLY GAME Wobbly Life gives you the whole island from the start, so there’s no need to rush through a traditional story or worry about areas being locked behind progression. Before starting the big collectible hunt, knock out A Supernatural Delivery by delivering pizza to the UFO and complete at least one mining job for Mining The Glowy Green Ore. These two trophies give you some extremely useful rewards. The Alien...
Completion Video Playlist
1 video
Wobbly Life - Complete Guide 100% (All Secrets, All Presents(103), All Pets, All Artifacts)
Trophy: The Wobble Master
Complete All Trophies
Type: Platinum
Unlock Details
Complete All Trophies

Trophy: Marine Master
Collect every fish in Wobbly Island
Type: Gold
Category: Collectible
Unlock Details
Name: Marine Master Category: Collectible How to Unlock: Catch every fish in Wobbly Life. There are 56 fish spread across 7 different water types. There is no bait system, and none of the fish are restricted by weather or time of day, so every fish can be caught at any time as long as you are fishing in the correct type of water. Fish come in 3 rarities: Green – Common Blue – Rare Purple – Epic Common fish appear frequently and are usually very easy to reel in. Rare fish appear less often and fight a little harder, but they should not cause too much trouble once you are comfortable with the fishing controls. Epic fish are where this trophy can become a grind. They appear much less frequently and take considerably longer to reel in. Because the reeling bar moves so slowly with them, you can often tell when you have hooked something rare before you actually see it. You can check your collection at any Fish Log beside a pier. These are usually located near the Fishing Job Wobbly. Any entry still showing “???” is a fish you have not caught yet. You need to fish in all 7 water types: Shallow Sea This is the lighter water around the coastlines and between the islands. It is shallow enough that you can usually see the seabed below you. While fishing here, you can also collect 2 artifacts for the Ocean Collection. Pearl: Fish in the Shallow Sea between Village Island and Paradise Island near the small underwater shipwreck. Turtle Shell: Fish in the shallow water just off the beach on Paradise Island. Deep Sea Head farther away from the islands until you reach the darker water where you can no longer see the seabed. The Clam Shell artifact for the Ocean Collection can also be caught in any Deep Sea area. Tropical Sea This is the shallow tropical water surrounding Jungle Island. Be careful when navigating here because parts of the water become extremely shallow and it is easy to beach your fishing boat. Nothing says “master fisherman” quite like spending five minutes trying to get your boat off a sandbank. Coral Reef There are 2 Coral Reef fishing areas around Jungle Island. You’ll know you are in the right place when you can see the coral beneath the water. The surrounding water can be extremely shallow, so approach carefully with your fishing boat. You can also catch the Coral artifact here for the Ocean Collection. Docks Fish in the waters surrounding the port yard on southern City Island. Avoid the Overfished Areas. These spots mainly give you trash or common fish and are not useful when you are trying to finish the full collection. Fresh Water Fresh Water fishing can be done in the ponds and lakes found across the islands. A good location is the pond on Village Island near the start of the Ground Race. Fishing rods are already provided on the pier, so you do not even need to bring a boat. Ice Fishing There is only one Ice Fishing location. Head to Mountain Island and look for the 2 frozen lakes. The smaller lake has an opening in the ice with fishing rods positioned around it. Fish here until you have completed the Ice Fishing section of your collection. Keep rotating between these 7 water types and checking the Fish Log for any remaining “???” entries. Once you have caught every required fish, the trophy will unlock.
Tip
Tip: Work on the Ocean Collection for Recovering The Past at the same time. The Pearl, Turtle Shell, Clam Shell, and Coral are all obtained while fishing in areas you already need for this trophy, so there is no reason to make a separate trip later. Tip: Sell the fish you catch if you still need money for There’s A Big Spender In Wobbly Town. You will catch a lot of duplicates while hunting the rarer fish, and selling them can bring in a good amount of extra cash. Tip: Use the Fish Log regularly instead of relying on memory. Once the collection starts filling up, the “???” entries make it much easier to see which water type still needs attention.
Warning
The Epic fish are luck-based. There is no bait, weather trick, or time-of-day shortcut to force them to appear. If one refuses to show up, the answer is unfortunately to keep fishing. This will probably be one of the longest trophies in the game. Eventually you will stop celebrating the fish you catch and begin taking every duplicate personally.
Trophy: Recovering The Past
Complete your first Museum collection
Type: Bronze
Category: Collectible
Unlock Details
Complete any 1 Artifact Collection at the Museum on City Island. There are 10 Artifact Collections in total, but you only need to finish one of them for this trophy. The two best options are: Ocean Collection This is one of the easiest choices because you can work on it naturally while fishing for Marine Master. You need 4 artifacts: Coral Fish in Coral Reef waters. There are 2 reef locations. Clam Shell Fish in Deep Sea water, out past the shallow water surrounding the islands. Turtle Shell Fish from the beach shore of Paradise Island. Pearl Fish in the Shallow Sea near the small sunken ship between Village Island and Paradise Island. Return all 4 artifacts to the Museum to complete the Ocean Collection and unlock the trophy. You’ll also receive the Ocean Collection Outfit. Crystal Collection This is another strong option because several of its artifacts are found in areas you’ll already visit while collecting the scrolls for Trivializing The Trials. You need 4 artifacts: A Giant Jade Crystal Found in the hidden cave below the bridge connecting City Island and Mountain Island. The green crystal wall containing the artifact is beside the scroll chest found here. Cluster of Sapphire Crystals Head into the cave on the eastern edge of Paradise Island. Break through the large blue crystals to reach the rear of the cavern, then destroy the blue crystal wall to reveal the artifact. Cluster of Ruby Crystals Found inside the cave on the eastern side of Mountain Island. After breaking through the wall to reach the scroll for Trivializing The Trials, destroy the nearby red crystal wall with a pickaxe. Amethyst Crystal Geode Found in the cavern between Farm Island and Mountain Island. After completing the bridge needed to reach the scroll, break the large purple crystal wall blocking your path. Carry the artifact carefully in the boat while leaving the cavern. Take the waterfalls slowly and let the waves settle after each drop so your precious rock does not decide it would rather live at the bottom of the river. Completing the Crystal Collection also unlocks the Gemmy Pet. Once every artifact from your chosen collection has been returned to the Museum, the trophy will unlock.
Tip
The Ocean Collection is probably the cleanest choice for the Platinum because you already need to do plenty of fishing for Marine Master. You can work on both trophies at the same time instead of turning this into a separate artifact hunt. The Crystal Collection is also efficient if you are already working through the caves for Trivializing The Trials.
Warning
Some of the other Museum collections require artifacts obtained through Treasure Hunt Jobs. Their final dig locations are random, and even completing a Treasure Hunt does not guarantee an artifact. Hard Treasure Maps have a better chance of producing artifacts than Easy or Medium maps, but this route can become much more time-consuming.
Trophy: Feeding Frenzy
Feed the Monster 50 toxic barrels
Type: Silver
Category: Grind
Unlock Details
Feed Louie the Monster 50 toxic barrels. Louie is the large green monster used during the Power Plant Job. He only appears while that job is active, and each run lets you feed him 5 barrels. Because each job contributes 5 barrels, you’ll need to complete a minimum of 10 Power Plant Jobs to reach the full 50. Load the toxic barrels, drive them to the dump, and place them onto the conveyor belt so Louie can eat them. The game displays your running total when a barrel is fed to him, even though the count is not shown on the To-Do List. Once Louie has eaten 50 barrels, the trophy will unlock. You’ll also unlock the Monster Pet, which can then be purchased from the Pet Shop on Farm Island for $1,200.
Tip
This grind also earns you $500 total from the Power Plant Jobs, which helps toward There’s A Big Spender In Wobbly Town.
Warning
Only barrels required by the active Power Plant Job count, so you cannot just stockpile extras and feed Louie endlessly. He may look hungry, but apparently even giant toxic-waste monsters have portion control.
Trophy: High Roller
Have $5000 in the bank
Type: Silver
Category: Grind
Unlock Details
Have $5,000 in the bank at one time. You’ll earn a large chunk of this naturally while collecting presents, completing jobs, and working through the rest of the Platinum. If you are saving toward There’s A Big Spender In Wobbly Town, this trophy will unlock automatically halfway to the $10,000 requirement.
Tip
Hold off on houses, pets, and other unnecessary purchases until you reach $10,000. Your Wobbly can survive without becoming a property mogul for a little while longer.

Trophy: Look At Me Grandma!
Have $1000 in the bank
Type: Bronze
Category: Grind
Unlock Details
Have $1,000 in the bank at one time. You’ll earn money naturally from jobs, presents, races, and other activities, so there’s no need to specifically grind for this early. If you’re working toward There’s A Big Spender In Wobbly Town, just keep saving and this will unlock automatically along the way.
Tip
Avoid spending money until you have reached $10,000 for There’s A Big Spender In Wobbly Town. That way, this trophy and High Roller both take care of themselves.

Trophy: Powering The Whole Island
Feed the Monster 25 toxic barrels
Type: Bronze
Category: Grind
Unlock Details
Feed Louie the Monster 25 toxic barrels. Louie only appears while a Power Plant Job is active. Each job requires you to dispose of 5 toxic barrels, so you’ll need to complete at least 5 Power Plant Jobs to reach 25 barrels. Take each barrel to the dump and place it onto the conveyor belt leading to Louie. An in-game tracker appears when you feed him a barrel, although this progress does not show on the regular To-Do List. Feed Louie 25 barrels to unlock the trophy.
Tip
Keep going after this unlocks. You need 50 barrels total for Feeding Frenzy, so stopping at 25 just means you’ll be coming back later anyway.
Trophy: There's A Big Spender In Wobbly Town
Have $10000 in the bank
Type: Gold
Category: Grind
Unlock Details
Have $10,000 in the bank at one time. The important part is that you need the full $10,000 sitting in your bank at once. Money you spend does not count toward the total, so buying houses, pets, or other extras before earning this trophy will only increase how much you need to make later. A large portion of the money should come naturally while going for the Platinum. Collecting the presents for Explorer Extraordinaire can get you close to $5,000 depending on how much you spend, while completing the various jobs around Wobbly Island can add another $1,000–$2,000. Fishing is also a great source of money because you’ll already need to catch a large number of fish for Marine Master. Sell the fish you catch and you can easily add another couple thousand dollars to the bank. If you finish most of the other trophies and are still short, repeat jobs until you reach $10,000. The Mine Job is one of the better options because the payout varies depending on the ore you collect and can range from $5 up to $150 per run. The Village Island Newspaper Job is another quick option, paying $50 for a run that takes around 1 minute and 30 seconds. As soon as your bank balance reaches $10,000, the trophy will unlock.
Tip
The cleanest approach is to simply stop spending money until this trophy unlocks. Presents, required jobs, and selling fish should do most of the work for you. If you need to farm the last bit of cash, prioritize the Mine Job or the Village Island Newspaper Job rather than repeating slower activities.
Warning
Do not buy your first house for Making Grandma Proud until after earning this trophy. Every dollar spent before reaching $10,000 is another dollar you’ll have to earn again. This is less “Big Spender” and more “responsible Wobbly who refuses to buy anything until a trophy pops.”
Unlock Details
Have $10,000 in the bank at one time.
The important part is that you need the full $10,000 sitting in your bank at once. Money you spend does not count toward the total, so buying houses, pets, or other extras before earning this trophy will only increase how much you need to make later.
A large portion of the money should come naturally while going for the Platinum. Collecting the presents for Explorer Extraordinaire can get you close to $5,000 depending on how much you spend, while completing the various jobs around Wobbly Island can add another $1,000–$2,000.
Fishing is also a great source of money because you’ll already need to catch a large number of fish for Marine Master. Sell the fish you catch and you can easily add another couple thousand dollars to the bank.
If you finish most of the other trophies and are still short, repeat jobs until you reach $10,000. The Mine Job is one of the better options because the payout varies depending on the ore you collect and can range from $5 up to $150 per run. The Village Island Newspaper Job is another quick option, paying $50 for a run that takes around 1 minute and 30 seconds.
As soon as your bank balance reaches $10,000, the trophy will unlock.
Tip
The cleanest approach is to simply stop spending money until this trophy unlocks. Presents, required jobs, and selling fish should do most of the work for you.
If you need to farm the last bit of cash, prioritize the Mine Job or the Village Island Newspaper Job rather than repeating slower activities.
Warning
Do not buy your first house for Making Grandma Proud until after earning this trophy. Every dollar spent before reaching $10,000 is another dollar you’ll have to earn again.
This is less “Big Spender” and more “responsible Wobbly who refuses to buy anything until a trophy pops.”
Trophy: A Daring Demolition
Complete the Demolition Job
Type: Bronze
Category: Misc
Unlock Details
Complete the Demolition Job on Mountain Island, just after the bridge connecting Mountain Island to Farm Island. The Demolition, Construction, and Recycling jobs cycle into one another. If the Demolition Job is not currently available, complete the Construction Job first. Once the job begins, you have 5 minutes to completely destroy the house. You can use dynamite or the wrecking ball, but the wrecking ball is the easier option. Keep smashing the building until every required section has been destroyed. Destroy the entire house before the timer expires to complete the job and unlock the trophy along with the Construction Hat.
Tip
Use the wrecking ball instead of relying on dynamite. It is much easier to control and lets you keep smashing any stubborn pieces that refuse to disappear. There is something beautifully Wobbly about recycling a house, rebuilding the house, and then immediately getting paid to destroy the house again.

Trophy: A Deep Spooky Wobbly Secret
Unlock the Ghost Pet
Type: Silver
Category: Misc
Unlock Details
Unlock the Ghost Pet by bringing the blue and green glowing orbs to the hidden chamber inside the Mountain Island mine. First, get the glowing blue orb from the Ancient Temple. Progress through the Temple until you reach the rotating disc puzzle, complete it, then take the blue orb with you when you leave. Next, head to the cave behind the waterfall on Jungle Island. In the second puzzle room, use the tilt board to free the glowing green orb. Take both orbs out of the cave and transport them carefully to the Mining Job on Mountain Island. Before starting the Mining Job, leave the orbs safely outside the mine or in a vehicle near the entrance. Once the job starts, take a pickaxe or TNT and break the wooden wall just to the right of the mining machine room. Follow the hidden path. When the route splits, take the right path both times. At the end, break through the wall behind the rocks to reveal a hidden doorway with 2 pedestals. Go back for the orbs and place them as follows: Green orb on the left pedestal. Blue orb on the right pedestal. The door will open. Grab the tombstone inside, carry it back to the Mining Machine, and place it on the conveyor belt. When the tombstone reaches the grinder, the Ghost Pet will unlock along with the trophy. The Ghost Pet can then be purchased for $1,200.
Tip
Leave the orbs outside before starting the Mining Job. If the job ends while they are still inside the mine, they can disappear and force you to go all the way back for them again.
Warning
You need to physically carry both glowing orbs across multiple areas, so take your time during transport. Losing one is a much bigger problem than losing a random box during a delivery job. Apparently the secret to unlocking a ghost is equal parts ancient puzzles, mining equipment, and putting a tombstone through an industrial grinder. Wobbly Life remains committed to science.
Trophy: A Jelly Fueled Journey
Complete the Jelly Car
Type: Silver
Category: Misc
Unlock Details
Complete the Jelly Car objective in the Jelly Man’s basement. Before you can start, buy a Metal Detector for $5 from any Treasure Hunt Job location. The closest one is on City Island. Take the Metal Detector to the Jelly Man’s house and head into the backyard. Look for an X in the ground near one of the corners and use the Metal Detector to dig there. A chest will appear containing a basement key and some jelly. Take the key inside the house, unlock the basement door, and interact with it to enter. Speak with the Jelly Man downstairs and he’ll ask you to repair the Jelly Car. You need to collect and complete 4 things: Jelly Tires There are 4 tires hidden around the basement. Tire #1: From the entrance, check the back-left area behind the large jelly mounds. Tire #2: From the entrance, look on the right side of the room behind some jelly. Tire #3: Found on a table in the Workshop area in the back-right corner. Tire #4: Found behind the console where the Jelly Car is assembled. Jelly Engine Once all 4 tires are collected, the Lab door on the left side of the room will open. Inside is an Engine Test console with a red button and 2 floor buttons. The left floor button lowers the temperature. The right floor button raises the temperature. Press the red button to start the test, then watch the temperature gauge. If the engine gets too cold, step on the heat button. If it gets too hot, step on the cold button. Keep the temperature steady for about 1 minute to finish the test. When you leave the room, the completed engine will be just to the right below the blue conveyor belt. Jelly x5 You may still have the jelly from the chest containing the basement key. Any remaining jelly can be bought for $10 each from the grocery store in the mall on Village Island. Take all 5 jellies back to the Jelly Man’s house and place them into the chute next to the basement door. Go back downstairs and move the jelly from the chute onto the conveyor belt. Once all 5 have been turned in, press the red button on the console to fill the Jelly Car. Steering Wheel On the right side of the basement is a section of extremely bouncy green jelly. Use it to reach the conveyor belt above the central console. Cross the belt, follow the green jelly upward, and go through the hole in the wall above the door with the security cameras. On the other side, you’ll find a conveyor-belt obstacle course. The belts alternate between slow and very fast speeds. Only run across while they are moving slowly and use the side platforms when they speed up. The lights will flash red just before the belts accelerate. At the end, use the green jelly to bounce up to the high platform where the Steering Wheel is sitting. Grab it, use the zipline to get back down, return through the wall opening, and bring the Steering Wheel to the console. Once the tires, engine, jelly, and steering wheel are all finished, the Jelly Car will be completed and the trophy will unlock. The Jelly Car can then be spawned from any phone using the vehicle menu.
Tip
Tip: Buy the Metal Detector before heading to the Jelly Man’s house. Without it, you cannot dig up the basement key and actually start the objective. Tip: During the Engine Test, make small temperature corrections instead of holding one button too long. The goal is to keep the gauge steady, not recreate the surface of the sun.
Warning
The conveyor belts on the way to the Steering Wheel suddenly switch to high speed. Watch for the flashing red lights and wait on the side platforms until they slow down again.
Trophy: A Speedy Slice
Complete Pizza Job
Type: Bronze
Category: Misc
Unlock Details
Complete the Pizza Job located on the eastern side of City Island. Before starting the job, bring a vehicle that can safely carry the stack of pizza boxes. The Wobbly Delivery truck is a great choice because tossing unsecured pizza into the back of a random car and hoping Wobbly Life physics behaves is a dangerous game. Accept the job, grab the stack of pizza boxes from the counter, load them into your vehicle, and drive to the marked customer before the timer expires. You can place a marker on the map if you want a clearer route to the destination. Deliver the pizzas in time to unlock the trophy and the Pizza Outfit.
Tip
Use a vehicle with a trunk or a large, flat cargo area so the pizzas do not bounce out during the drive. The real challenge here is less “deliver pizza quickly” and more “convince the pizza to remain inside the vehicle.”

Trophy: A Supernatural Delivery
Deliver Pizza to the UFO
Type: Bronze
Category: Misc
Unlock Details
First, complete at least one normal Pizza Job. Next, return to the Pizza Job around midnight and start it between roughly 12:00 and 12:30. If you triggered the special version correctly, cosmic alien music will begin playing. Load the pizza into your delivery vehicle and look into the sky near the pizza shop. A UFO will appear with a green beam shining underneath it. Follow the UFO until it reaches the small frozen pond on the mountain. Take the pizza into the green beam and send it up to the UFO. If the pizza keeps slipping out of position, grab onto it and float upward with it so you can guide it more easily. Once the pizza reaches the UFO, the trophy will unlock and you will receive the Alien Outfit. The Alien Top includes a Jetpack, making this one of the most useful rewards you can earn early in the game.
Tip
Do this as early as possible. The Jetpack makes reaching high areas much easier and is especially helpful while collecting presents later.
Warning
You need to start the Pizza Job around midnight for the UFO event to trigger. If you do not hear the alien music, you probably missed the correct time window and will need to try again.
Video Guide: https://www.youtube.com/watch?v=Ttic5XkVtKI&list=PLW39xVUJ595I&index=12
Trophy: A Sweet Day At Work
Complete Ice Cream Job
Type: Bronze
Category: Misc
Unlock Details
Complete the Ice Cream Job on Paradise Island. The job works a lot like the Burger Job, except you’ll be building ice cream orders instead. Each order contains 3 scoops using chocolate, vanilla, and strawberry. The order may also include chocolate or strawberry syrup and either confetti or chocolate sprinkles. The current orders appear on the wall above the counter. You need to successfully complete 5 orders before the timer runs out. If you are struggling with the time limit, there is a useful trick you can use. The ice cream room does not reset between job attempts unless you leave the area or quit the game. That means baskets, scoops, and spills will stay exactly where you left them. Use one attempt to prepare several baskets with different combinations of 2 scoops, such as: 2 chocolate 1 chocolate and 1 vanilla 1 vanilla and 1 strawberry 2 vanilla 2 strawberry You can keep up to 5 prepared baskets before they start disappearing. When the job ends, stay inside the building and start it again. You can then use the prepared baskets and focus on adding the final scoop, syrup, and sprinkles needed for each order. Complete all 5 orders in time to unlock the trophy and the Ice Cream Tester Outfit.
Tip
Prepping baskets before a serious attempt can make this job much easier. It is not guaranteed to match every order, but it can save enough time to make the difference. At some point this stops being an ice cream job and becomes a highly organized frozen-dessert speedrun.
Video Guide: https://www.youtube.com/watch?v=HGRCDZ1CGZU&list=PLW39xVUJ595I&index=8

Trophy: A Tiny Adventure
Complete the UFO
Type: Bronze
Category: Misc
Unlock Details
Complete the Repair the UFO objective inside the Lab on Mountain Island. The scientist who starts the objective is at the bottom of the lift, just before the first security gate. You’ll know you’re in the right place because there is a massive UFO sitting behind him. Getting close will automatically begin the objective. You need to find 4 parts to repair the UFO: UFO Key Head to the corner office of the Lab and use the shrinking machine to become tiny. When you leave the machine, speak with the nearby Scientist to begin the Life Scientist objective. You need to find 4 missing Scientists around the miniature office area. Scientist #1: Press the red button on the table near the elevator. The Scientist beside it will lower his clipboard so you can jump on, then lift you up onto the table. Cross the sponges, burners, and rotating scales. Continue through the brown bottles and across the table scales to find the Scientist standing on a stack of books. Scientist #2: From the first Scientist, jump down onto the white hamster cage. Go through the hamster tunnel or jump off the left side. Follow the table to the end, use the zipline to reach the next table, then cross the sponges and make your way through the green and red lasers. Do not touch either color or you’ll be sent back to the start of the sponge section. The Scientist is just past the lasers behind the large fishbowl. Scientist #3: From Scientist #2, jump down and look for the cart with the clipboard ramp. Use the ramp and cart to enter the cabinet, then go through the wall. Follow the narrow passage upward and through the higher hole in the wall. The Scientist is waiting beside a computer. Scientist #4: Enter the computer password: 2 - 9 - 7 - 4 This activates a mechanical arm that carries you up to the final Scientist and the UFO Key. Pick up the key, return to the shrinking machine, and grow back to normal size while still holding it. Give the key to the scientist beside the UFO. UFO Fuse Finding all 4 missing Scientists also unlocks the Scientist Outfit. Equip the Scientist Jacket — the white jacket with pens in the pocket. If you need to change clothes, use the changing rooms near the ramp and stacks of boxes. With the Scientist Jacket equipped, go through the guarded door beside the dressing rooms and ATM. Follow the hallway to the elevator in the vending machine room. Go up one floor, follow the hallway, then enter the guarded door on the right. Head up the ramp and grab the Fuse in the next room. UFO Battery Go to the warehouse area on the opposite side of the Lab from the UFO. There are 5 colored boxes on the ground. Use the nearby forklift to find the pallets matching each color and move the correct pallets onto the colored boxes. Climb the ramp and continue past the Scientist connected to the Super Scientist objective. Use the stacks of boxes you moved to jump across to the next platform. The Battery is sitting just before the next doorway. UFO Fuel Head to the Science Job area up the ramp near the stacks of boxes and pallets. Set the Science Machine ingredients to match the required UFO Fuel formula, then press the red button. Wait for the container to travel through the machine and fill with the finished formula. Pick up the completed barrel and carry it back to the UFO. Once the Key, Fuse, Battery, and Fuel have all been delivered, the UFO will be repaired and the trophy will unlock. You’ll also gain access to the UFO Vehicle.
Warning
The laser section while searching for Scientist #2 sends you back to the beginning of that obstacle section if you touch either the red or green lasers. Take your time instead of trying to speed through it.
Trophy: A Wobbly Start
Complete Jelly Job
Type: Bronze
Category: Misc
Unlock Details
Complete the Jelly Job. You can do this during the Tutorial or pick up the job from the Jelly Man after starting the game normally. Head to the Mall on Village Island, grab the jelly, and bring it back to the Jelly Man. The Tutorial teaches you how to carry items and use vehicles along the way, but outside the Tutorial you can simply follow the job markers on your minimap. There is no time limit during the Tutorial. Outside the Tutorial, you have 6 minutes to finish the delivery. Complete the job to unlock the trophy and the Jelly Hat.
Tip
Doing this during the Tutorial is the easiest option since there is no timer. It is also a fitting introduction to Wobbly Life: go buy jelly, somehow earn a trophy. Perfectly normal.
Video Guide: https://www.youtube.com/watch?v=5Kd_RbJX63I&list=PLW39xVUJ595I&index=17
Trophy: Awesome Archaeologist
Complete the Temple
Type: Silver
Category: Misc
Unlock Details
Complete the Temple on the western side of Jungle Island. Look for the large pyramid with the hot air balloon parked in front of it. Use one of the bombs from the jeep at the bottom of the pyramid stairs to destroy the wall at the top, then take the lift down into the Temple. Run past the 3 swinging axes in the first corridor and you’ll reach the first puzzle room. The Temple has four main puzzle sections: Mirror Room Rotate the mirrors to redirect the beam of light into the different obelisks. The right door leads to a chest containing a present. The left door contains the solution for the upcoming Bridge Puzzle. The back door is the route you need to continue deeper into the Temple. Bridge Puzzle Use the pattern shown in the left treasure room from the Mirror Room and step across the bridge tiles in the correct order. Before continuing, check around the small corner on the left just before the next puzzle. There is a chest containing 3 presents here. Blue Orb Puzzle Use the wooden wheels to rotate the wall discs and guide the glowing blue orb from the upper-left side down to the lower-left exit. Take the orb and place it on the pedestal beside the corridor blocked by the large boulder. There is also a chest containing a present just to the right of the pedestal. Placing the orb activates the boulder. It will repeatedly roll down the corridor and respawn at the top, so use the small recesses in the walls to stay out of its way. At the next set of doorways: The right doorway contains the Bomb Artifact needed for the Ocean Collection and Recovering the Past. The middle doorway contains nothing required. The left doorway contains 2 chests with a total of 4 presents and also leads deeper into the Temple. Fountain Puzzle Room Stand on the platform with the 4 floor buttons and watch the symbols light up on the wall. Step on the matching floor symbols in the same order. The complete sequence is: Sun Eye Sun Sun Pizza Snake Pizza Each successful round adds another section to the bridge. Once the entire bridge appears and the walls light up, cross into the final treasure room. There are 2 chests containing a total of 6 presents inside. The trophy unlocks as soon as you enter the treasure room.
Tip
This Temple is packed with presents, so grab them while you are here if you are working toward Explorer Extraordinaire. You can also pick up the Bomb Artifact during the Blue Orb section, saving yourself a return trip later.
Warning
For the final Simon-style puzzle, the sequence never changes: Sun, Eye, Sun, Sun, Pizza, Snake, Pizza. Apparently thousands of years of ancient Wobbly civilization ultimately led to one sacred symbol above all others: pizza.
Trophy: Cleaning Up The Island
Complete Garbage Job
Type: Bronze
Category: Misc
Unlock Details
Complete the Garbage Job on Central City Island. Drive the Garbage Truck around the marked route and collect the trash bags shown on your minimap. Each bag needs to be manually placed onto the lift at the back of the truck, then you’ll need to press the button to raise it into the garbage compartment. Keep working through the marked bags until you collect the required amount and finish the job. Complete the Garbage Job to unlock the trophy and the Garbage Outfit.
Tip
You can mark bags on the map to help plan your route, but opening the map does not pause the timer. Try to keep stops short so you are not studying the map while your precious garbage-collecting seconds disappear.
Video Guide: https://www.youtube.com/watch?v=zd6P58hevJU&list=PLW39xVUJ595I&index=6

Trophy: Cream Of The Crop
Complete Harvest Farm Job
Type: Bronze
Category: Misc
Unlock Details
Complete a Harvest Farm Job on Farm Island. There are 2 locations where this job can appear. The Harvest, Seeding, and Plowing jobs rotate, so if Harvesting is not available, complete a Seeding Job first. If Seeding is unavailable, complete a Plowing Job. Start by getting into the large green harvester and drive to the field that needs to be harvested. Press Left on the D-pad to raise the arm, then press Down on the D-pad to turn the Harvester on. Drive over the crops to harvest them. After roughly every 4–5 crops, a crop bundle will appear on the field. Collect the bundles and load them into a truck or van. A Wobbly Delivery truck is recommended because the enclosed cargo area helps keep everything inside where it belongs. Take all of the bundles to the delivery location marked by the green flag on the map. Deliver the full harvest to unlock the trophy and the Farmer Bottoms.
Tip
Bring a Wobbly Delivery truck before starting the delivery portion. Harvesting is already more involved than the other farm jobs, so there is no need to add “chase escaped vegetables down the road” to the workload.

Trophy: Creative Courier
Complete Furniture Job
Type: Bronze
Category: Misc
Unlock Details
Complete the Furniture Job at the Furniture Shop on Mountain Island. When the job starts, the required piece of furniture should appear next to the checkout counter with an arrow above it. Load it into the Wobbly Delivery truck parked outside, drive to the recipient marked by the green arrow on your map, and place the furniture inside the glowing delivery circle. Complete the delivery to unlock the trophy and the Furniture Shop Outfit.
Tip
Use the delivery truck outside the shop. It is built for exactly this job and gives you plenty of room for awkward furniture that absolutely does not want to cooperate.
Warning
If the furniture does not spawn when the job starts, speak to the Wobbly to end the job, then start it again. It may take a few attempts before the job registers correctly.

Trophy: Dazzling On The Dance Floor
Complete Disco Job
Type: Bronze
Category: Misc
Unlock Details
Complete the Disco Job in the city. Look for the Disco Job icon, which is a disco ball with 2 musical notes. Head inside and speak with the DJ to start the job. You’ll be moved onto the dance floor, where tiles around you will begin lighting up one at a time. Wait until a tile is fully lit and its border turns green, then step on it. Each successful step helps keep the bar at the top of the screen green. Miss too many notes and the bar will move toward red. If it turns completely red, you’ll fail the job. The song lasts around 2 minutes. Stay in the green until the end to complete the job. Finish the Disco Job to unlock the trophy and the Disco Clothes.
Tip
Don’t step on the tiles too early. Wait for the border to turn green so the game actually counts it. The hardest part of this trophy is accepting that your Wobbly somehow has better rhythm than you do.
Video Guide: https://www.youtube.com/watch?v=YHegx_DIP_Q&list=PLW39xVUJ595I&index=1
Trophy: Explorer Extraordinaire
Collect all presents on Wobbly Island
Type: Gold
Category: Misc
Unlock Details
Collect all 102 presents scattered across Wobbly Island. Every present rewards you with either money or a cosmetic item, so this is worth tackling early rather than leaving it for the very end. You’ll probably find a good number just by exploring normally, but some are hidden well enough that you’ll eventually want to follow a complete collectible route. The money from these presents also makes a big dent in the $10,000 needed for There’s A Big Spender In Wobbly Town, which is another good reason to prioritize this trophy before spending much cash. A few presents are tied to larger puzzle areas rather than simple exploration. The Ancient Temple contains presents that you’ll collect while working on Awesome Archaeologist, and the Ancient Trials contain presents tied to Trivializing The Trials. Collect the full set of 102 presents to unlock the trophy.
Tip
Do this early in the Platinum journey. The rewards help with your money trophies, and your route will naturally take you past a huge number of jobs and activities you can knock out along the way.
Warning
The source confirms that presents are hidden inside both the Ancient Temple and the Ancient Trials. Those areas have their own puzzle-related trophies, so don’t assume every present is just sitting out in the open waiting for you. This is the part where “I’ll just grab the ones I see naturally” slowly turns into “okay, where is present number 87?”
Video Guide: https://www.youtube.com/watch?v=HXDk6xpzWhU

Trophy: Flipping The Perfect Burger
Complete Burger Job
Type: Bronze
Category: Misc
Unlock Details
Complete the Burger Job at Wobbly Burger on Main Street on City Island. Once the job starts, check the order tab to see which ingredients the customer wants. Grab the required ingredients and place them on the left side of the Burgermatic 2000. When everything is ready, press the red button and the machine will somehow transform your pile of ingredients into a respectable burger. Take the finished burger and place it on the glowing tray beside the order tabs. You need to complete all 5 orders without failing the job. Finish all 5 successfully to unlock the trophy and the Chef Outfit.
Tip
Focus on one order at a time and double-check the ingredients before hitting the red button. The Burgermatic 2000 may be advanced technology, but it still cannot save you from putting the wrong thing into it.
Video Guide: https://www.youtube.com/watch?v=PHl6yCbKI28&list=PLW39xVUJ595I&index=3
Trophy: Formula Frenzy
Complete Science Job
Type: Bronze
Category: Misc
Unlock Details
Complete the Science Job inside the Lab next to the airport on Mountain Island. Enter through the large Lab doors, head all the way left, go up the ramp, and speak with the Wobbly Scientist to start the job. Your goal is to create and turn in 5 correct formulas before time runs out. Each formula recipe appears on a whiteboard near the scientist. On the left side of the work area are 3 ingredient sources: Vegetable Mineral Liquid Change each ingredient source so it matches the recipe shown on the whiteboard, then press the red button on the Science Machine. A container will travel along the conveyor belt and collect the selected ingredients. Once it reaches the end, pick up the finished formula and carry it to the golden pipe to turn it in. The formula does not count until you physically place it into the golden pipe. Repeat this process until you successfully complete 5 formulas. Finish the job to unlock the trophy and the Mad Scientist Hat.
Tip
The timer is fairly tight, so start preparing the next formula while the current container is moving along the conveyor belt. As soon as a container passes an ingredient station, switch that station to what the next recipe needs. You can even press the red button early and quickly change the ingredients before the container reaches each chute. It sounds slightly reckless, which means you are officially doing science correctly.
Warning
Do not forget to carry each finished formula to the golden pipe. Creating it is not enough; the game only counts the formula once it has been turned in.
Trophy: Frantic Fares
Complete Taxi Job
Type: Bronze
Category: Misc
Unlock Details
Complete any Taxi Job. There are 3 Taxi Job locations around Wobbly Island. Speak with the attendant at any of them to start the job. Once the job begins, a timer and fare goal will appear. You need to pick up and drop off the required number of passengers before time runs out. The passengers and routes are different each time, so use the map markers to plan the quickest path between pickups and drop-offs. Complete one Taxi Job to unlock the trophy and the Taxi Driver Clothes.
Tip
The Paradise Island Taxi Job is the easiest option. The Village Island and City Island jobs can send you between islands, while the Paradise Island version keeps everything on the same island.
Warning
Opening the map does not pause the job timer, so check your route quickly and get moving.
Video Guide: https://www.youtube.com/watch?v=PbEvxP6LrJw&list=PLW39xVUJ595I&index=9

Trophy: Growing Your Own
Complete Seeding Farm Job
Type: Bronze
Category: Misc
Unlock Details
Complete a Seeding Farm Job on Farm Island. There are 2 locations where this job can appear. The Seeding, Plowing, and Harvesting jobs rotate into one another, so if Seeding is not available, complete a Plowing Job first. If Plowing is unavailable, complete a Harvesting Job. Once the Seeding Job is active, grab one of the nearby tractors and reverse into the seeder attachment. If you line it up correctly, it will attach automatically. Drive to the field, press Left on the D-pad to turn the Seeder on, then make passes across the field until the progress reaches 100%. Complete the job to unlock the trophy and the Farmer Top.
Tip
Use long, clean passes and try not to overlap too much. You are farming here, not drawing crop circles.
Video Guide: https://www.youtube.com/watch?v=zzLI8VFBGqU&list=PLW39xVUJ595I&index=2
Trophy: Helping The Wobbly That Time Forgot
Choosing Wisely
Type: Silver
Category: Misc
Unlock Details
Wait for a thunderstorm, then use the hidden sword from Jungle Island to open the vault in the cave on Mountain Island. The weather must be a proper thunderstorm with lightning, not just normal rain. When the thunderstorm begins, a small island will rise from the river mouth on Jungle Island. Go to the island and pick up the sword. Carry the sword to the cave on the northern wall of Mountain Island. Inside, you’ll find the Wobbly That Time Forgot and a sword-shaped outline on the floor. Place the sword into the outline to open the nearby vault. As soon as the vault door opens, the trophy will unlock.
Tip
Open the chest inside the vault while you are here. It contains presents needed for Explorer Extraordinaire, so grabbing them now saves a return trip later.
Warning
The hidden island only appears during a thunderstorm with lightning. Regular rain is not enough. Yes, this is absolutely an Indiana Jones-style Easter egg. All that is missing is your Wobbly dramatically swapping the sword for a bag of sand and immediately regretting it.
Trophy: Lumber Legend
Complete Woodcutter Job
Type: Bronze
Category: Misc
Unlock Details
Complete the Woodcutter Job on Mountain Island. Start the job, grab one of the yellow lumber trucks and an axe, then look for the dead trees marked with a red X. These trees are also marked on the map, so you should not have much trouble finding them. Chop down a marked tree, load it into the truck, and drive it back to the sawmill. Place the tree onto the conveyor belt to turn it into planks. On the opposite side of the sawmill is a glowing delivery area. Bring at least one plank into that zone to complete the requirement. Turn in a plank to unlock the trophy and the Lumberjack Outfit.
Tip
You only need to turn in at least one plank, so do not overcomplicate this one. One tree, one trip, one plank, done. Your brief career in the lumber industry can officially end there.

Trophy: Making Grandma Proud
Buy your first house
Type: Bronze
Category: Misc
Unlock Details
Buy your first house anywhere on Wobbly Island. Houses for sale are marked on the map with a house icon containing a money symbol. The cheapest option is a cabin on Mountain Island, while most other homes cost around $750–$1,000. The mansions on Paradise Island are much more expensive, ranging from roughly $9,500 to $11,000. Purchase any house for the first time to unlock the trophy.
Tip
Wait until after earning There’s A Big Spender in Wobbly Town before buying a house. That trophy requires you to have $10,000, so spending money early only makes the grind longer. Once the spending trophy is done, feel free to finally become a homeowner. Just maybe skip the $11,000 mansion unless your Wobbly has developed a sudden interest in bad financial decisions.

Trophy: Making Waves
Complete a Boat Race
Type: Bronze
Category: Misc
Unlock Details
Complete the Boat Race on the eastern coast of Village Island. Race through every checkpoint in order and reach the finish line before time runs out. Each checkpoint adds extra seconds to the clock, so as long as you stay on course, you should have plenty of time. Complete the race successfully to unlock the trophy.
Tip
Focus more on hitting every checkpoint cleanly than trying to take the fastest possible line. Missing one and having to turn around is much worse than losing a few seconds on a wide corner.
Video Guide: https://www.youtube.com/watch?v=o96AOgYh4lg&list=PLW39xVUJ595I&index=15
Trophy: Mining The Glowy Green Ore
Deposit Uranium into the Mining Machine
Type: Bronze
Category: Misc
Unlock Details
Start the Mining Job on Mountain Island and deposit a piece of Uranium into the Mining Machine. While working in the mine, different mineral nodes will appear that you can break for money. Keep an eye out for a glowing green node — that is Uranium. Use a pickaxe or TNT to break the wall around it, then carry the Uranium back to the Mining Machine. Place it onto the machine and let it travel up into the grinder. As soon as the Uranium reaches the grinder, the trophy will unlock.
Tip
Do this early. The Mining Job also gives you access to the Mining Hat, which has a built-in light and is extremely useful while hunting presents in darker areas.
Video Guide: https://www.youtube.com/watch?v=-MlRlRKAS40&list=PLW39xVUJ595I&index=5
Trophy: Monster Manager
Complete Power Plant Job
Type: Bronze
Category: Misc
Unlock Details
Complete the Power Plant Job on the western side of City Island. Start the job and collect the toxic barrels from the warehouse. Load them into a vehicle and drive them to the dump, where Louie the Monster is waiting. The trucks at the Power Plant will work, but a Wobbly Delivery truck is especially useful because its cargo area is enclosed and helps keep the barrels from escaping during the drive. Be careful when handling the barrels. They can hit the ground while you are carrying them, but if you drop one completely, it can explode. The explosion will not hurt you, but it can waste time during the job. At the dump, place the barrels onto the conveyor belt leading to Louie. Complete the required delivery to finish the Power Plant Job and unlock the trophy along with the Hazmat Suit.
Tip
Only 5 barrels can be turned in during each active Power Plant Job. These barrels also count toward Powering The Whole Island and Feeding Frenzy, so feeding Louie every time you do this job will save you extra trips later.
Warning
The job is timed, so using an enclosed vehicle is worth it. Few things are more Wobbly Life than watching your toxic barrels bounce out of the truck while the timer keeps ticking.
Trophy: One Happy Hammerer
Complete the Construction Job
Type: Bronze
Category: Misc
Unlock Details
Complete the Construction Job on Mountain Island, just after the bridge connecting Mountain Island to Farm Island. The Construction, Recycling, and Demolition jobs cycle into one another. If the Construction Job is not currently available, complete the Recycling Job first. Once the job begins, you’ll need to rebuild the house using the materials created during the Recycling Job. Look for the outlines showing where each wall needs to be built. Drag one of the material bags into a wall outline. Once it connects with the correct area, the wall will partially fill in. Grab a hammer and hit the unfinished wall 3 times to complete it. Repeat this process for every required wall. Once all the walls are finished, the other Wobblies will take care of the rest. Complete the job to unlock the trophy and the Construction Jacket.
Tip
Make sure the material bag properly connects with the wall outline before you start hammering. If the wall has not filled in, hitting it repeatedly just makes you a very determined Wobbly with a hammer.
Trophy: Plowing Ahead
Complete Plowing Farm Job
Type: Bronze
Category: Misc
Unlock Details
Complete a Plowing Farm Job on Farm Island. There are 2 locations where this job can appear. The Plowing, Seeding, and Harvesting jobs cycle into one another, so if Plowing is not currently available, you may need to complete a Harvesting Job first. If Harvesting is unavailable, complete a Seeding Job. Once the Plowing Job is active, grab one of the nearby tractors and reverse into the plow attachment. If lined up properly, it will connect automatically. Drive onto the field and begin plowing. The attachment works automatically, so keep moving back and forth across the plot until the progress reaches 100%. Finish the job to unlock the trophy and the Farmer Hat.
Tip
Use long, straight passes across the field instead of turning constantly. It keeps the coverage cleaner and saves you from repeatedly plowing the same sad patch of dirt.
Video Guide: https://www.youtube.com/watch?v=zzLI8VFBGqU&list=PLW39xVUJ595I&index=2
Trophy: Putting The Pedal To The Metal
Complete a Kart Race
Type: Bronze
Category: Misc
Unlock Details
Complete any Kart Race, also shown as a Ground Race around Wobbly Island. There are no opponents here. Your only enemy is the clock. Drive through each checkpoint in order to add more time to the timer, then reach the finish line before time runs out. If you miss a checkpoint, turn around and collect it before continuing because every checkpoint is required. The time limits are generous, so you do not need a perfect run or every booster to finish successfully. Complete your first Ground Race to unlock the trophy. If this is also your first race win overall, you will unlock the Race Outfit as well.
Tip
Do not panic if you miss a booster or take a bad corner. The timer gives you plenty of room, so focus on hitting every checkpoint in order instead of trying to drive like Wobbly Island suddenly became Formula 1.
Video Guide: https://www.youtube.com/watch?v=isUERe5G6Ow&list=PLW39xVUJ595I&index=13
Trophy: Rapid Delivery To Your Door
Complete Newspaper Job
Type: Bronze
Category: Misc
Unlock Details
Complete the Newspaper Job at either Newsstand on Village Island or Paradise Island. You’ll control a conveyor belt cannon and fire newspapers toward the mailboxes along the route. The Village Island version requires 25 deliveries, while Paradise Island requires 30. The route and mailbox locations stay the same each time, so once you learn the path, the job becomes much easier. Complete either version of the Newspaper Job for the first time to unlock the trophy and the News Clothes.
Tip
The Village Island job is the easier choice because it only requires 25 newspapers instead of 30. Since the route never changes, one or two attempts is usually enough to get comfortable with the mailbox order.
Video Guide: https://www.youtube.com/watch?v=CM0LDJkTFng&list=PLW39xVUJ595I&index=16

Trophy: Relentless Reeler
Complete Fishing Job
Type: Bronze
Category: Misc
Unlock Details
Complete any Fishing Job on Wobbly Island. There are 3 Fishing Job locations available. Before starting, make sure there is a fishing boat nearby. These are the boats with fishing rods attached to the back. Once the job begins, you’ll be given a required number of fish to catch, usually 5. Open the map and look for the white circle with a fish icon. This marks the area where you need to fish. Head into the marked zone and keep fishing until you catch the required number. Only fish that can be sold count toward the objective. Junk items such as seaweed, shopping carts, or boots do not count. Once you have enough fish, return to the dock where you started the job. You can turn the fish in either by placing them into the large fish tank or by giving them to the Wobbly standing beside it with the yellow circle. The Wobbly is the safer option since you’re less likely to accidentally drop yourself into the water while turning everything in. Complete any one Fishing Job to unlock the trophy and the Fishing Clothes. Tip: Use the Wobbly with the yellow circle instead of the tank when turning in fish. It’s easier and removes the risk of fumbling a fish straight into the water at the finish line. How to Fish: Interact with one of the fishing rods on the back of the boat. Hold R2 to extend the line, then press L2 while still holding R2 to cast. When a fish bites, press L2 when prompted. You can then release R2 and pull the Right Stick in the opposite direction the fish is moving. When the fish stops pulling, hold L2 to reel it in. If the fish starts fighting again, repeat the process by pulling the Right Stick against its movement, then reel when it settles. Keep alternating between fighting and reeling until you catch it.
Tip
The fishing controls feel awkward at first, but once you understand the rhythm, it gets much easier. Pull against the fish while it fights, reel when it stops. That’s the whole dance. Unfortunately, the shopping cart you just hauled out of the ocean does not count as dinner.
Video Guide: https://www.youtube.com/watch?v=6jvDNM-BTAE&list=PLW39xVUJ595I&index=14
Trophy: Speedy Nee-Naw
Complete Emergency Job
Type: Bronze
Category: Misc
Unlock Details
Complete an Emergency Job from either hospital on City Island or Paradise Island. On City Island, you’ll use an Ambulance. On Paradise Island, you’ll use an Emergency Helicopter. Head to the marked emergency location, load the patient onto the stretcher, and get them into your vehicle. Bring the patient back to the hospital, then wheel the stretcher to the Wobbly standing by the glowing circle to complete the job. Finish the Emergency Job for the first time to unlock the trophy and the Hospital Outfit.
Tip
City Island is the more straightforward option if you prefer driving over flying. Either version works, so pick whichever vehicle causes you less Wobbly-related chaos.
Video Guide: https://www.youtube.com/watch?v=Z6piXaiIvSs&list=PLW39xVUJ595I&index=10

Trophy: Taking To The Skies!
Complete a Plane Race
Type: Bronze
Category: Misc
Unlock Details
Complete any Plane Race on Wobbly Island. There are 3 Plane Races available. Like the other races, you need to fly through every checkpoint in order and cross the finish line before the timer runs out. Each checkpoint adds a little more time, and the overall time limit is fairly generous. The main challenge is getting comfortable with the controls. The Right Stick handles your flight direction while the Left Stick controls the camera, so sharp movements can get disorienting fast. Use small, steady adjustments instead of yanking the plane around. Win your first Plane Race to unlock the trophy.
Tip
The Plane Race on Paradise Island also rewards you with the Pilot Helmet. Small steering corrections make the race much easier and help keep your Wobbly pilot from discovering several new ways to point an airplane at the ground.
Video Guide: https://www.youtube.com/watch?v=5T248Wr5kzg&list=PLW39xVUJ595I&index=11
Trophy: The Rapid Recycler
Complete the Recycling Job
Type: Bronze
Category: Misc
Unlock Details
Complete the Recycling Job on Mountain Island, just after the bridge connecting Mountain Island to Farm Island. The Recycling, Construction, and Demolition jobs cycle into one another. If the Recycling Job is not currently available, complete the Demolition Job first. Once the job starts, head to the area where the house was demolished and look for 2 piles of debris. Carry the debris over to the conveyor belt next to the Wobbly who gave you the job. Sit in the chair in front of the recycling machine and follow the on-screen instructions to smash, stir, and cut the debris. Once the first pile is processed, 2 bags will drop from the left side of the machine. Carry both bags to the yellow delivery area to the right of the Wobbly. Repeat the process with the second pile of debris for a total of 4 bags. Deliver all 4 bags to complete the job and unlock the trophy along with the Construction Pants.
Tip
Finish one pile completely before moving on to the next. Process it, deliver both bags, then repeat. It keeps things simple and avoids turning the worksite into the usual Wobbly pile of chaos.
Trophy: Trivializing The Trials
Complete the Ancient Wobbly Trials
Type: Bronze
Category: Misc
Unlock Details
Name: Trivializing The Trials Category: Misc How to Unlock: Complete the Ancient Wobbly Trials. This is one of the longer questlines in the game, so expect a full Wobbly-sized detour before the trophy finally pops. Start by heading to the ruins near the Pyramid on Jungle Island. Inside, speak with the explorer Wobbly to begin the quest for 4 hidden scrolls. Scroll #1 Go to the cave on the eastern side of Mountain Island near the water. This one is a simple obstacle course. Go through the fountains on the left, then use the trampolines to reach the chest containing the scroll. To leave, cross the wooden scaffolding and use the zipline back down toward the entrance. Scroll #2 Go to the hidden cave below the bridge connecting City Island and Mountain Island. Inside the cave, the water path will be blocked. Head left into the small ruins area and solve the symbol puzzle. For the first door, find the disc showing one complete sun and place it into the hollow sun on the wall. The correct disc can be found inside one of the red pots near the entrance. In the next section, 3 symbols will light up on the wall. Find the 3 matching discs and place them into the wall in the same order. If you place the wrong disc or put one in the wrong position, the puzzle resets with a new combination. Once all 3 are correct, return to the water tunnel. Take either route when the path splits and you’ll reach the chest containing the scroll. Scroll #3 Between Farm Island and Mountain Island are 2 waterfalls with a hole between them. Drop into the hole and make your way into the cavern. You need to press 3 red buttons to raise a bridge. Since you cannot swim, use the flotation devices and rubber ducks to travel through the water tunnels. There is one button in each of the two water tunnels and one on the underside of the central island where you landed. Once all 3 buttons are pressed, cross the completed bridge and use the nearby pickaxes to break the purple crystal wall. This wall also drops the Amethyst Crystal Geode needed for the Crystal Collection. Continue into the boat and follow the tunnel. When the route splits, take the right path. The scroll chest will be on the right. Scroll #4 Go to the cave on the eastern side of Mountain Island, in the green grassy area shown on the map. Inside, head up the wooden ramp to the zipline and bombs. In the center of the cavern is a hole. You need to drop 3 bombs into it. Grab a bomb, use the zipline to swing across the room, and release the bomb over the hole. If aiming from the zipline is giving you trouble, you can simply drop down while holding the bomb and place it into the hole yourself. Jump into the water afterward to reset your position. After 3 successful bombs, the wall near the entrance will break and reveal the chest containing the final scroll. Once all 4 scrolls are collected, return to the explorer Wobbly at the ruins on Jungle Island. You’ll now be sent to find the Ancient Hat. Go to the secret cave on the northern side of Jungle Island. If the quest is active, it will be marked on your map. Drop into the cave and work through the rooms until you reach an area with 2 explorer Wobblies. The Ancient Hat is sitting on the tables between them. Pick up the hat, carry it out of the cave, and return it to the explorer at the ruins. The door to the Trials will now open. Before going inside, use the nearby wardrobe and equip the Ancient Hat. You are going to need it for every puzzle ahead. Room 1: Sun and Moon There are 4 obelisks around the room and a crystal in the center. Use the Ancient Hat to activate the obelisks in the correct order. With your back facing the entrance, activate them in this order: Sunrise – Front left Noon – Front right Sunset – Back left Midnight – Back right Use Left on the D-pad while facing each obelisk to activate the Ancient Hat. There is also a chest with a present behind the front-right obelisk. When the sequence is correct, beams of light will connect the crystal to the obelisks and the next door will open. Room 2: Light Bridge There is a chest with a present immediately to the left when you enter. You need to cross an invisible bridge. Activating the obelisks causes light to shine across sections of the path, briefly showing you where it is safe to walk. With your back facing the entrance, use the obelisks in this order: Front right Front left Back left Back right There is no timer here, so take it slowly. If you fall, you simply restart from the beginning of the bridge. Room 3: Lifts There is another chest with a present immediately to the right when you enter. Use the Ancient Hat to activate symbols on the walls, which raise a series of platforms. The platforms only stay raised for a few seconds, so you need to activate the next symbol and move quickly. The symbol locations are: Level 1: Eastern wall Level 2: Eastern wall Level 3: Northern wall Level 4: Western wall Level 5: Eastern wall Keep activating the next symbol and jumping from lift to lift until you reach the top. Final Room: Hoverboard Race The final challenge is a timed Hoverboard race. There are no checkpoints. You simply need to reach the end of the course within 2 minutes and 30 seconds. The time limit is fairly generous as long as you are not constantly crashing. If you fail, you restart from the beginning of the race. Once you finish the course, interact with the Hoverboard again to unlock it. The trophy will unlock at the same time.
Tip
Tip: Equip the Ancient Hat before entering the Trials. The puzzles depend on it, and forgetting it means an unnecessary trip back to the wardrobe. Tip: Grab the presents in each Trial room while you are here. They count toward Explorer Extraordinaire and are easy to miss if you rush through the puzzles. Tip: During Scroll #3, pick up the Amethyst Crystal Geode when you break the purple wall. It counts toward the Crystal Collection for Recovering The Past.
Warning
The lifts in Room 3 only stay active for a few seconds. Activate the next symbol as soon as you reach each platform instead of stopping to admire your excellent ancient Wobbly engineering. This quest starts with “find four scrolls” and somehow ends with invisible bridges, exploding caves, ancient magic, and a Hoverboard race. Completely reasonable progression.
Trophy: What A Clever Wobbly
Win the Wonderful Wobbly Quiz
Type: Bronze
Category: Misc
Unlock Details
Win the Wonderful Wobbly Quiz at the WTV building on City Island. Head to the top floor of the building by taking the 2 elevators, then follow the arrows to the stage. Speak with the announcer to start the quiz. You’ll be asked 5 random questions about Wobbly Island and have roughly 15 seconds to answer each one. You need to get all 5 correct. Miss even 1 question and the entire attempt fails. Known questions and answers include: In the Jungle, there is a large stone statue. What is it of? A Wobbly In the Wobbly Mall, what is the name of the clothes shop? Cosmic Clothing How many red barns are there on Farm Island? 2 How does Wobbly Island deal with its toxic waste? Feed it to a monster What colour is the Wobbly Island train? Green What material in the Mine is the most valuable? Uranium What’s the tallest ride in the Theme Park? The Rollercoaster What colour is your Granny’s dress? Purple What is the name of this TV Studio? Wobbly TV What’s the best Wobbly job? Pizza What is the pet snail’s favourite thing? Breakdancing What is the sewer monster’s name? Louie What colour is the spiral slide at the swimming pool? Green What food do Wobbly aliens enjoy most? Pizza What hat do you get for completing the Trash Collection Job? Hard hat What happens when you drive into a Wobbly cow? They fly into the air What side of the road do Wobblies drive on? Left What studio is across the road from Wobbly Burger? RubberBandGames What is the most wobbly? Jelly What street is this studio located on? Main Street Where can you find the Wobbly Fighter Jets? The Aircraft Carrier Where can you find the Wobbly Island airport? The Mountain Where does the pet ghost come from? The Mine Which of these foods are not grown at the Wobbly Farm? Strawberries Which of these ingredients isn’t available on a Wobbly burger? Onions Answer all 5 questions correctly to unlock the trophy.
Tip
If you fail, just try again. Since the questions are pulled from a known pool, a few attempts usually make the quiz much easier. This is basically Wobbly Island trivia night, except one wrong answer means the host immediately decides you are no longer clever.

Trophy: You're My Wobbly Hero
Complete Fire Fighter Job
Type: Bronze
Category: Misc
Unlock Details
Complete the Fire Fighter Job at the Fire Station on City Island. Start the job, grab one of the Firetrucks, and drive to the marked emergency area. You’ll need to extinguish around 8–10 fires before the timer runs out. Use the hose attached to the side of the Firetruck to put out each fire. The hose is easier to control with both hands, but its range is limited, so you may need to reposition the truck several times. The fire locations are random. Some layouts are much easier than others, with Farm Island generally being quicker while areas such as the Power Plant can take longer because the fires are more spread out. Put out every fire before the timer expires to complete the job and unlock the trophy along with the Fire Fighter Outfit.
Tip
If you get a bad fire layout, don’t be afraid to restart and try again. A compact group of fires is much easier than spending half the timer dragging a hose across the Power Plant. The real emergency here is realizing the hose is three feet too short for the last fire.
Video Guide: https://www.youtube.com/watch?v=zt4DBIetNIg&list=PLW39xVUJ595I&index=4
Trophy: Your New Best Friend
Purchasing First Pet
Type: Bronze
Category: Misc
Unlock Details
Purchase your first pet from either pet shop on Wobbly Island. There are 2 pet shops available: Farm Island Paradise Island Both sell several pets from the start, while others only become available after completing certain tasks or collections. If you just want the trophy as cheaply as possible, buy one of the $500 pets available from the start, such as a Cat, Rabbit, Chicken, Hedgehog, or Dog depending on the shop. As soon as you purchase your first pet, the trophy will unlock.
Tip
Wait until after earning There’s A Big Spender In Wobbly Town before buying a pet. That trophy requires $10,000 in the bank at one time, so buying a pet early only means earning that money again later.
Warning
Some pets need to be unlocked through quests, collections, or other trophies before you can buy them, but none of that is required here. You only need to purchase one pet. If your only goal is the trophy, save yourself the grand pet-collecting expedition and buy one of the cheap starter options. Your Wobbly does not need an exotic companion to prove they understand friendship.
Video Guide: https://www.youtube.com/watch?v=XmsOk3Cv7-g&list=PLW39xVUJ595I&index=7

Wobbly Life gives you the whole island from the start, so there’s no need to rush through a traditional story or worry about areas being locked behind progression. Before starting the big collectible hunt, knock out A Supernatural Delivery by delivering pizza to the UFO and complete at least one mining job for Mining The Glowy Green Ore.
These two trophies give you some extremely useful rewards. The Alien Top from A Supernatural Delivery includes a jetpack that lets you float around and reach higher places, while the Mining Hat gives you a light you can switch on whenever things get dark. Grab both early. Future you, dangling from the side of some ridiculous Wobbly Island structure looking for a present, will be thankful.
Once you have them, start working toward Explorer Extraordinaire by collecting all 102 presents. Try not to spend much money yet. You’ll naturally build up your bank balance while working through jobs and eventually want that cash for the $10,000 needed for There’s A Big Spender In Wobbly Town.
The present hunt is also the perfect excuse to start clearing jobs around Wobbly Island. You’ll pass near many trophy-related locations while searching for all 102 presents, so complete their jobs whenever you reach them instead of making a special trip later. The island is completely open, so none of these need to be done in a specific order.
This is where you can make a lot of natural progress on trophies such as A Wobbly Start, A Speedy Slice, Flipping The Perfect Burger, Monster Manager, Speedy Nee-Naw, Rapid Delivery To Your Door, Creative Courier, Cleaning Up The Island, Plowing Ahead, Growing Your Own, Cream Of The Crop, You’re My Wobbly Hero, Lumber Legend, Formula Frenzy, Frantic Fares, A Sweet Day At Work, The Rapid Recycler, One Happy Hammerer, and A Daring Demolition.
You can also tackle activities like the kart, plane, and boat races, the temple, Ancient Wobbly Trials, Wonderful Wobbly Quiz, UFO, Disco Job, Fishing Job, Jelly Car, and other activities you encounter along the way. Powering The Whole Island and Feeding Frenzy can also be worked on by feeding the Monster toxic barrels. Doing as much as possible naturally during your present route will save you from turning the end of the Platinum into one giant sightseeing tour.
Your main goal should still be finishing all 102 presents for Explorer Extraordinaire while continuing to complete nearby activities and build up money. If you’ve avoided unnecessary purchases, you should be around halfway toward the $10,000 needed for There’s A Big Spender In Wobbly Town by the time the present hunt is finished.
Don’t worry yet about buying houses or pets, completing the museum’s artifact collections, or catching every fish. Those fit much better into the cleanup portion of the Platinum and spending money too early only slows down the $10,000 trophy.
One thing worth leaving until near the end of this part of the journey is unlocking the Ghost Pet. Its requirements send you around several locations on Wobbly Island and can be a little tedious, so there’s not much benefit in interrupting your present route specifically for it.
Now it’s time to go fishing. There are 56 different fish spread across 7 water types, and unfortunately there’s no magic trick here. Fishing is luck-based, with no bait system and no fish locked behind weather or time of day. You might finish quickly, or the RNG gods might decide that today is the day you learn patience.
Sell the fish you catch instead of letting them pile up. The money earned from fishing should push you much closer to the $10,000 required for There’s A Big Spender In Wobbly Town, especially if you kept your spending under control earlier. Once that trophy unlocks, your Wobbly can finally stop pretending to understand financial responsibility. Go ahead and buy the house and pet you need.
While fishing, keep an eye out for the 4 Artifacts needed to complete the Ocean Collection at the museum. These artifacts are more common than some of the fish, so working on Recovering the Past at the same time as Marine Master is the cleanest approach and avoids doing two separate fishing grinds.
After the fish, artifacts, spending requirements, house, pet, and any remaining activities are finished, clean up whatever jobs or miscellaneous trophies you skipped during the present hunt. Because Wobbly Island is completely open, you can return to anything you missed without needing another playthrough. Most of the Platinum is simply about being efficient with your wandering — which is about as organized as life gets when your character walks like their knees have been replaced with jelly.
Completion Video Playlist
1 video
Wobbly Life - Complete Guide 100% (All Secrets, All Presents(103), All Pets, All Artifacts)