


Trophy Guide Preview
Overall Trophy Progress
0 / 35 Completed
0%
Trophy Types
Platinum
0 / 1Gold
0 / 3Silver
0 / 15Bronze
0 / 16Categories
Collectible
0 / 7Misc
0 / 21Story
0 / 6
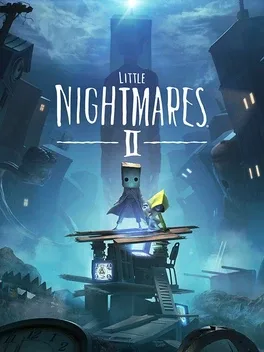
Step into a distorted world as Mono, a young boy searching for answers alongside Six. Escape terrifying enemies, solve unsettling puzzles, and uncover the secrets of the Signal Tower. Explore haunting environments where danger lurks around every corner and survival demands courage.
Overall Trophy Progress
0 / 35 Completed
0%
Platinum Path
EARLY GAME Begin Mono's journey through Chapter 1 — The Wilderness, where you'll learn the basics of stealth, puzzle-solving, and surviving enemies that are considerably larger than you. Start collecting Glitching Remains and hats immediately, since both are essential for the Platinum. The Wilderness contains four Glitching Remains and two collectible hats. Keep an eye out for What's in the Box?!, earned by opening t...
Completion Video Playlist
1 video
LITTLE NIGHTMARES 2 - 100% Platinum Walkthrough - Full Trophy & Achievement Guide
Trophy: Primetime Content Consumer
Your life is now free of challenges. Congratulations
Type: Platinum

Trophy: Far Ahead
Hats are very important to some people
Type: Gold
Category: Collectible
Unlock Details
Collect all eight hats hidden throughout the first four chapters. There are two collectible hats per chapter. Chapter 1 — The Wilderness Coonskin Cap: Inside the Hunter's house, after leaving the kitchen, head toward the screen in the hallway and enter the doorway on the left. Rain Hat: In the forest after leaving the house, find the hat hanging inside a cage. Climb the nearby cages and jump onto the suspended cage until it falls. Chapter 2 — The School Soccer Ball Hat: On a dumpster near the entrance to the school playground. Tin Can Hat: In the library, on a bookshelf slightly to the right of the movable ladder's starting position. Chapter 3 — The Hospital Stuffed Bear Head: In the toy room near the X-ray machine. Climb the bookshelf toward the back-right corner. Bandage Wraps: In the morgue section, after Six pushes you across in a crate, open the refrigerator on the floor near the left side of the counter. Chapter 4 — The Pale City Postman's Hat: In the post office section, after obtaining the TV remote. At the gap near the elevated television, drop down instead of jumping across. Find the opening to the left and follow it into the hidden room. Flat Cap: In the toy store with the movable shopping cart, climb the packages on the shelf in the back-left corner. Collect it before pushing the cart down the slope.
Tip
Several miscellaneous trophies require specific hats to be equipped, including Fair Prey, Referee!, Toys Are for Kids, and Post Industrial. Equip the relevant hat before completing those actions.

Trophy: Half hat
It would be cliché to collect them all
Type: Bronze
Category: Collectible
Unlock Details
Collect four of the eight hidden hats found throughout Little Nightmares II. You can earn this trophy as early as Chapter 2 — The School if you collect both hats in Chapter 1 and both hats in Chapter 2. The first four available collectible hats are: Coonskin Cap — Chapter 1 Rain Hat — Chapter 1 Soccer Ball Hat — Chapter 2 Tin Can Hat — Chapter 2 The trophy unlocks automatically after collecting your fourth hat.
Tip
Follow the locations listed under Far Ahead to collect all eight hats. That will earn you both Half Hat and Far Ahead.

Trophy: No More Remains
Nothing of us remains anywhere. Bravo!
Type: Gold
Category: Collectible
Unlock Details
Find all 18 Glitching Remains hidden throughout the first four chapters. Glitching Remains are shadowy figures resembling children. Approach and interact with each one to collect it. Their distribution is: Chapter 1 — The Wilderness: 4 Chapter 2 — The School: 6 Chapter 3 — The Hospital: 4 Chapter 4 — The Pale City: 4 Chapter 5 has no Glitching Remains.
Tip
Chapter Select displays how many Glitching Remains you've collected in each chapter, helping you identify where you're missing some.

Trophy: Pale Kids
Nothing of us remains in the pale city
Type: Silver
Category: Collectible
Unlock Details
Find all four Glitching Remains hidden throughout Chapter 4 — The Pale City. Their locations are: 1. City Streets: At the beginning of the chapter, after leaving the Hospital, move toward the back of the street to find an open sewer entrance. Climb down to discover a Glitching Remain near the bottom, appearing to fish. 2. Elevator Area: After completing the elevator puzzle with Six, you'll reach an area containing the elevator winch. Move left and find a movable box. Push it aside, crawl through the tunnel behind it, and enter the hidden room containing the Glitching Remain. 3. Signal Tower Viewpoint: After Mono and Six see the Signal Tower for the first time, continue right until you reach a building with wooden supports you can climb. Before climbing, enter the doorway underneath the supports to find another Glitching Remain. 4. Clothesline Window: After learning to use the televisions, ride the clothes hanger until you crash through a window. Go back outside, move toward the back, and enter the next window. You'll find the final Glitching Remain alongside the Lady statue required for Unladylike.
Tip
Chapter 4 contains the final four Glitching Remains in the game. If you've collected all 14 from the previous chapters, obtaining these four will also unlock No More Remains.

Trophy: School Kids
Nothing of us remains at the school
Type: Silver
Category: Collectible
Unlock Details
Find all six Glitching Remains hidden throughout Chapter 2 — The School. Their locations are: 1. TV Lift: Near the beginning of the chapter, you'll solve a puzzle involving televisions that Mono and Six use to lift each other between platforms. After pushing the television to raise Six, return to the broken staircase and jump across with Six's help. Head to the spot where Six stepped off the television lift to find the Glitching Remain. 2. School Playground: When you reach the playground outside the school, move toward the back-right corner. You'll find a Glitching Remain standing beside a tricycle. 3. Hidden Locker: After the Bullies capture Six, continue through the school until you pass the room containing a large pile of desks and a Bully. In the following hallway, find the lockers without latches. Open the third locker to reveal the Glitching Remain. If you've reached the Teacher's classroom, you've gone too far. 4. Upper Hallway: After leaving the library, you'll reach a hallway with stairs. Instead of heading right toward the chessboard puzzle, go up the left side of the hallway. The Glitching Remain is waiting near the broken railing. 5. Cafeteria Storage Room: After passing through the school's kitchen and cafeteria areas, you'll find a hallway containing a movable tray cart used to reach a ventilation opening. Move the cart, then return to the door it was blocking. Push the door open to find a room containing a dead chef and a Glitching Remain. 6. Paper Boat Alley: Near the end of Chapter 2, after escaping the school, you'll solve a puzzle involving a dumpster lid. Continue carefully until you reach an alleyway containing a paper boat. The final Glitching Remain is nearby.
Tip
Chapter Select displays your Glitching Remains count for each chapter. If you're missing one from The School, use the six locations above to narrow down your search.

Trophy: Sick Kids
Nothing of us remains in the hospital
Type: Silver
Category: Collectible
Unlock Details
Find all four Glitching Remains hidden throughout Chapter 3 — The Hospital. Their locations are: 1. Patient Ward: After obtaining the flashlight, enter the large patient ward. Move toward the back of the room to find a Glitching Remain near a door and a wagon. 2. Mannequin Hallway: After completing the stuffed animal and X-ray puzzle, unlock the upstairs-right section. Continue until you reach a hallway where you can travel toward or away from the screen. Instead of proceeding through the broken glass doorway, head toward the back past the shelves of mannequin parts to find the Glitching Remain. 3. Hidden Cell Room: After obtaining the first power node and accessing the upstairs-left section, continue until you drop through a vent into a cell containing a piece of cheese. Exit the cell and move toward the back instead of following the normal route. Pass through the gap in the bars and enter the room on the left to find the Glitching Remain beside a hole. 4. Shower Area: While searching for the second power node, you'll reach a shower room containing a box of soap bars. Move toward the back of the room and look for a movable box. Push it aside to reveal a hidden passage leading to the final Glitching Remain.
Tip
The third Glitching Remain shares its location with Objection. Bring the cheese from the nearby cell and throw it into the hole to earn that trophy while you're here.

Trophy: Wild Kids
Nothing of us remains in the wilderness
Type: Silver
Category: Collectible
Unlock Details
Find all four Glitching Remains hidden throughout Chapter 1 — The Wilderness. Their locations are: 1. Collapsed Bridge: Early in the chapter, you'll encounter a collapsed bridge. Before climbing it, move toward the screen and then to the right. Look for a tunnel you can enter. Follow it into a hidden area containing a shovel and the Glitching Remain. 2. Bear Trap Area: When you first encounter bear traps, activate the trap blocking the hollow log and crawl through. After dropping down on the other side, move backward and find a hidden passage beneath the log. Follow it to an area containing a dead animal and the Glitching Remain. 3. Hunter's Outhouse: After escaping the Hunter's house with Six, look for an outhouse near the exit. Have Six boost Mono up so he can reach the door handle. Open the outhouse to discover the Glitching Remain inside. 4. Beach Landing: Near the end of the chapter, Mono and Six travel toward the Pale City on a raft. After landing on the beach, move toward the back of the area. You'll find the final Glitching Remain standing beside a broken television.
Tip
The second Glitching Remain is located near the bear traps required for Evasive Prey. Take your time and avoid stepping into a trap while collecting it.

Trophy: ...And Stay Dead!
Better to be safe than sorry
Type: Bronze
Category: Misc
Unlock Details
In Chapter 3 — The Hospital, defeat a crawling hand enemy and then hit it three additional times to make sure it stays dead. After completing the stuffed animal puzzle and retrieving the key, you'll unlock a door in the upstairs-right section of the Hospital. As you progress, you'll encounter a detached hand that chases Mono. Eventually, you'll reach a dead end containing a metal pipe. Pick up the pipe and prepare to fight the hand. The hand signals an incoming attack by raising its middle and index fingers. Wait for it to leap toward you, dodge the attack, and strike it with the pipe while it's vulnerable. After three successful hits, the hand will be defeated. Don't leave yet. Strike the defeated hand three more times with the pipe to unlock the trophy.
Tip
Let the hand attack first, then punish its missed jump. Trying to swing too early can leave Mono vulnerable.
Warning
Make sure you deliver the three additional hits after defeating the hand. If you miss this opportunity, you'll encounter other hand enemies later in the chapter.
Video Guide: https://www.youtube.com/watch?v=rDGExrntLos&list=PLicOuDSiPvy2WEVilK9hcQMReCoWxUPpY&index=12&pp=iAQB

Trophy: Bully of Bullies
Creative, efficient, brutal. Top of the class!
Type: Silver
Category: Misc
Unlock Details
In Chapter 2 — The School, crush three Bullies at once using a falling bookshelf. When you first encounter the Teacher, you'll need to pass through a classroom and enter the adjoining room containing a key. The key is on a bookshelf that collapses when Mono attempts to climb it. Before climbing the bookshelf, alert the Teacher so that three Bullies begin chasing you. Run into the room with the bookshelf and allow all three Bullies to follow. Quickly start climbing the shelf to make it fall. If the collapsing bookshelf crushes all three Bullies, the trophy unlocks.
Tip
Try to keep the three Bullies close together as you approach the bookshelf. If one falls too far behind, the shelf might not hit all of them.
Warning
All three Bullies must be crushed by the falling bookshelf during the same attempt. If the trophy doesn't unlock, retry the encounter or return through Chapter Select.
Video Guide: https://www.youtube.com/watch?v=XXZRC4ebSdE&list=PLicOuDSiPvy2WEVilK9hcQMReCoWxUPpY&index=6&pp=iAQB

Trophy: Evasive prey
Not today!
Type: Silver
Category: Misc
Unlock Details
In Chapter 1 — The Wilderness, make it through the early bear-trap section without being killed by a trap. Some traps are hidden beneath piles of leaves, so don't rush blindly through the forest. Use the stick to strike suspicious patches of leaves and reveal nearby traps. You can also throw pinecones into leaf piles to safely trigger traps from a distance. Continue through the area without dying to a bear trap. The trophy should unlock when you reach the Hunter's house.
Tip
Move carefully and test suspicious ground before crossing it. There's no time limit, so taking the safer route is always better.
Warning
If a bear trap kills you before reaching the house, retry the section. You can also revisit Chapter 1 through Chapter Select.
Video Guide: https://www.youtube.com/watch?v=pg5qW9MWEKs&list=PLicOuDSiPvy2WEVilK9hcQMReCoWxUPpY&index=3&pp=iAQB

Trophy: Fair Prey
It's not murder if they're bad people... is it?
Type: Bronze
Category: Misc
Unlock Details
In Chapter 1 — The Wilderness, shoot the Hunter while wearing the Coonskin Cap. First, collect the Coonskin Cap from the Hunter's house. After leaving the kitchen, enter the hallway, move toward the screen, and go through the doorway on the left to find it. Equip the hat before reaching the chapter's final encounter. Near the end of The Wilderness, Mono and Six will escape from the Hunter and enter a small shack containing a shotgun mounted on a gun rack. Keep the Coonskin Cap equipped and use the shotgun during the encounter. The trophy unlocks when you shoot the Hunter while wearing the hat.
Tip
Equip the Coonskin Cap as soon as you collect it and leave it on for the rest of Chapter 1. That way, you won't accidentally reach the shotgun encounter wearing the wrong hat.
Warning
The Coonskin Cap must be equipped when you fire the shotgun. Simply having it in your collection isn't enough.
Video Guide: https://www.youtube.com/watch?v=G3OzgdWkVIs&list=PLicOuDSiPvy2WEVilK9hcQMReCoWxUPpY&index=2&pp=iAQB

Trophy: First do no harm
It's crueller to let him live
Type: Bronze
Category: Misc
Unlock Details
In Chapter 3 — The Hospital, escape from the Doctor without burning him in the incinerator. Near the end of the chapter, the Doctor will chase Mono and Six into an incinerator area. After escaping, you'll have the opportunity to trap the Doctor inside the furnace. Once he's trapped, you'll see a switch that can activate the incinerator. Do not pull the switch. Instead, leave the Doctor trapped and continue toward the elevator. The trophy unlocks when you leave the area without burning him.
Tip
As soon as the Doctor is trapped, head straight for the elevator. You don't need to interact with the incinerator again.
Warning
Activating the incinerator prevents the trophy from unlocking during that attempt. If you accidentally burn the Doctor, use Chapter Select to retry.
Video Guide: https://www.youtube.com/watch?v=GqOLxsIKnLA&list=PLicOuDSiPvy2WEVilK9hcQMReCoWxUPpY&index=16&pp=iAQB

Trophy: Fly Free
Rebellion at its finest!
Type: Bronze
Category: Misc
Unlock Details
In Chapter 2 — The School, throw a paper airplane out of the window you used to enter the school. After climbing the rope from the playground into the school, you'll need to find an object to throw at a painting to progress. Head along the hallway and enter the room on the left. Inside, you'll find several objects, including a paper airplane. Pick up the paper airplane and carry it back to the open window where Mono entered the building. Throw the airplane through the window and outside to unlock the trophy.
Tip
Complete this before progressing further into the school. The paper airplane is close to the entrance, making this an easy trophy to grab during your first visit.
Video Guide: https://www.youtube.com/watch?v=lIsPBbYdanI&list=PLicOuDSiPvy2WEVilK9hcQMReCoWxUPpY&index=5&pp=iAQB

Trophy: How Do I Look?
Perfect! It's so... you!
Type: Bronze
Category: Misc
Unlock Details
Equip the Fedora Hat, which becomes available after completing the main story. Once you've finished Chapter 5 and unlocked the Fedora, return to the main menu and select any chapter through Chapter Select. After loading into the chapter, open the hat selection menu and equip the Fedora. The trophy unlocks as soon as Mono wears it.
Tip
You don't need to collect the Fedora from a hidden location. It's automatically unlocked after beating the game.
Warning
This trophy cannot be earned before completing the story, because the Fedora isn't available until then.

Trophy: Hunger
Plenty of snacks for a growing boy
Type: Bronze
Category: Misc
Unlock Details
In Chapter 3 — The Hospital, repeatedly use the vending machine near the beginning of the chapter. After entering the Hospital, you'll encounter a vending machine with a lever. Normally, you only need to dispense one item to throw at a button and open the way forward. Instead, keep pulling the vending machine's lever to dispense more food. After approximately five or six uses, the trophy should unlock.
Tip
Earn this before leaving the vending machine area. It only takes a few extra seconds, and there's no special preparation required.
Video Guide: https://www.youtube.com/watch?v=MoEh0EEhTF8&list=PLicOuDSiPvy2WEVilK9hcQMReCoWxUPpY&index=9&pp=iAQB

Trophy: In The Palm Of My Hand
Hold tight and we'll be just fine
Type: Silver
Category: Misc
Unlock Details
Hold Six's hand for an extended period of time. Whenever Six is walking alongside Mono, approach her and hold R2 to take her hand. Continue exploring while holding her hand until the trophy unlocks. You don't need to do this in one uninterrupted stretch. Your progress carries over between chapters and when using Chapter Select.
Tip
Make a habit of holding Six's hand whenever you're traveling together. You'll likely earn this naturally without needing any additional cleanup.

Trophy: Medicine ball
Any other last requests?
Type: Bronze
Category: Misc
Unlock Details
In Chapter 3 — The Hospital, throw a ball to the Patients and have them throw it back. While searching for the second power node upstairs, you'll eventually reach a room containing an electric chair after escaping from several Patients. Look around the room for a ball lying on the floor. Pick up the ball and carry it toward the left, where the Patients' hands are reaching toward you. Throw the ball in their direction. When they catch it and throw it back, the trophy unlocks.
Tip
You don't need to complete a separate puzzle or wear a special hat. Just make sure you throw the ball close enough for the Patients to interact with it.
Video Guide: https://www.youtube.com/watch?v=n-19O1ZSbt0&list=PLicOuDSiPvy2WEVilK9hcQMReCoWxUPpY&index=15&pp=iAQB

Trophy: Merciful feat
Tempting, so tempting...
Type: Bronze
Category: Misc
Unlock Details
In Chapter 2 — The School, spare the Bully who's tied to the ground while still escaping the room. During your search for Six, you'll encounter a Bully sitting on the floor and drawing symbols. A metal pipe is lying nearby. Normally, you might use the pipe to defeat the Bully before breaking through the door to the right. For this trophy, you must leave the Bully alive. Approach the Bully to provoke an attack, then avoid it. While the Bully recovers, grab the pipe and run toward the door on the right. Move far enough away that the Bully can no longer reach you, then use the pipe to break down the door and continue. The trophy unlocks after you escape without killing the Bully.
Tip
Bait the Bully into attacking before grabbing the pipe. The short recovery window gives you enough time to escape safely.
Warning
Do not hit the Bully with the pipe. You must leave it alive to satisfy the trophy requirement.
Video Guide: https://www.youtube.com/watch?v=kJIBuvLxdxI&list=PLicOuDSiPvy2WEVilK9hcQMReCoWxUPpY&index=7&pp=iAQB

Trophy: Mono Tones
My, what a curious song you play!
Type: Bronze
Category: Misc
Unlock Details
In Chapter 2 — The School, play the piano several times. Near the end of the chapter, you'll enter a building containing a piano that you need to use to break through the floor. Before progressing, jump onto the piano and move back and forth across its keys several times. Keep stepping on the keys until the trophy unlocks.
Tip
There's no specific melody to play. Simply walk across the keyboard repeatedly before continuing through the floor.
Video Guide: https://www.youtube.com/watch?v=yWm3f0owmdw&list=PLicOuDSiPvy2WEVilK9hcQMReCoWxUPpY&index=8&pp=iAQB0gcJCTUMAYcqIYzv

Trophy: Objection
Some holes are more picky than others
Type: Silver
Category: Misc
Unlock Details
In Chapter 3 — The Hospital, throw a piece of cheese into a hidden hole. After obtaining the first power node and unlocking the Hospital's left section, continue until you crawl through a vent and drop onto a bed inside a cell. Look on the floor for a piece of cheese, near a wall marked with an eye. Pick it up and leave the cell. Instead of heading toward the normal route at the bottom of the screen, move toward the back of the area and pass through a gap in the bars. Enter the room on the left, where you'll find a hole in the floor and a Glitching Remain. Throw the cheese into the hole to unlock the trophy.
Tip
Collect the Glitching Remain in this room while you're here. It counts toward Sick Kids and No More Remains.
Video Guide: https://www.youtube.com/watch?v=hzpZy18i7II&list=PLicOuDSiPvy2WEVilK9hcQMReCoWxUPpY&index=14&pp=iAQB

Trophy: Popcorn
Movie night on the ward - all taken care of!
Type: Silver
Category: Misc
Unlock Details
In Chapter 3 — The Hospital, use the incinerator to turn a piece of corn into popcorn. After obtaining the first power node, use it to unlock the left section of the Hospital. Head up the hallway and enter the room on the left. You'll find a piece of corn in the back-left corner of this room. Pick it up and carry it back to the incinerator you previously used for the stuffed animal puzzle. Throw the corn into the incinerator and activate it. Once the burning process finishes, check inside to find the popcorn and unlock the trophy.
Tip
Complete this while you're working through the Hospital's power-node puzzles. Returning to the incinerator with the corn is easier than replaying the chapter later.
Video Guide: https://www.youtube.com/watch?v=ugOIO82o7EQ&list=PLicOuDSiPvy2WEVilK9hcQMReCoWxUPpY&index=13&pp=iAQB

Trophy: Post Industrial
You punctuated someone's day. Maybe they'll notice!
Type: Silver
Category: Misc
Unlock Details
In Chapter 4 — The Pale City, deliver an envelope while wearing the Postman's Hat. After learning to travel through televisions, you'll eventually drop down a garbage chute into an area containing an elevator puzzle. Before solving the puzzle, return to the pile of garbage where you landed. Look for a suitcase containing an envelope. Make sure you've collected and equipped the Postman's Hat, then pick up the envelope and carry it toward the left. Find the door marked with an eye and approach its mail slot. A hand will reach through and take the envelope, unlocking the trophy.
Tip
The Postman's Hat is found earlier in Chapter 4, in the post office area. Near the elevated television and a gap you're meant to jump across, drop down instead and follow the opening on the left to find the hat.
Warning
You must be wearing the Postman's Hat when delivering the envelope. Collecting the hat alone won't satisfy the requirement.
Video Guide: https://www.youtube.com/watch?v=G4GTkbHxFac&list=PLicOuDSiPvy2WEVilK9hcQMReCoWxUPpY&index=18&pp=iAQB

Trophy: Referee!
Unorthodox, but they all count!
Type: Bronze
Category: Misc
Unlock Details
In Chapter 2 — The School, run through a football goal while wearing the Soccer Ball Hat. When you reach the school playground, look for the Soccer Ball Hat sitting on a dumpster near the school entrance. Climb onto the dumpster and collect the hat, then equip it from the hat selection menu. Once you're wearing it, run through either of the playground's goalposts to unlock the trophy.
Tip
You can complete this as soon as you reach the playground. Grab the hat and earn the trophy before entering the school building.
Video Guide: https://www.youtube.com/watch?v=h_Zu-nSA9KE&list=PLicOuDSiPvy2WEVilK9hcQMReCoWxUPpY&index=4&pp=iAQB

Trophy: Toys Are For Kids
There, you'll be much warmer now
Type: Bronze
Category: Misc
Unlock Details
In Chapter 3 — The Hospital, burn the stuffed animal containing the key while wearing the Stuffed Bear Head hat. During the chapter, you'll reach an area with an X-ray machine and an adjoining playroom. The puzzle requires you to identify the stuffed animal containing a key and take it to the incinerator. Before burning the stuffed animal, collect the Stuffed Bear Head hat from the playroom. It's located on top of the bookshelf toward the back-right corner. Equip the hat, carry the correct stuffed animal to the incinerator, and burn it to unlock the trophy.
Tip
Equip the Stuffed Bear Head as soon as you collect it so you don't forget during the puzzle.
Warning
The hat must be equipped when you burn the stuffed animal. Simply collecting it isn't enough.
Video Guide: https://www.youtube.com/watch?v=Aot98KpTFzU&list=PLicOuDSiPvy2WEVilK9hcQMReCoWxUPpY&index=11&pp=iAQB

Trophy: Twenty-Six
Relax, she heard you!
Type: Bronze
Category: Misc
Unlock Details
Call out to Six repeatedly until the trophy unlocks. Once you've learned to call Six, press Triangle to shout for her attention. Keep pressing Triangle several times in succession until you earn the trophy. You don't need to be in a particular chapter or location, as long as Six is available to respond to Mono.
Tip
Earn this during a quiet moment when there are no enemies nearby. It's a quick trophy that requires no collectibles, puzzles, or special equipment.

Trophy: Unladylike
Hello, have we met?
Type: Silver
Category: Misc
Unlock Details
In Chapter 4 — The Pale City, find and destroy a hidden statue of the Lady from the first Little Nightmares game. After learning to travel through televisions, you'll eventually ride a clothes hanger along a line and crash through a window. Instead of continuing forward, return outside through the window you just entered. Move toward the back of the area and enter the next window on the right. Inside, you'll discover a hidden room containing a Glitching Remain and a small statue of the Lady. Pick up the statue and throw it against the ground to break it. The trophy unlocks once the statue is destroyed.
Tip
Collect the Glitching Remain in the same room. It's the fourth collectible needed for Pale Kids.
Video Guide: https://www.youtube.com/watch?v=kvCHJdMpuBM&list=PLicOuDSiPvy2WEVilK9hcQMReCoWxUPpY&index=17&pp=iAQB

Trophy: What's in the box?!
What did you expect to see in there?
Type: Bronze
Category: Misc
Unlock Details
In Chapter 1 — The Wilderness, open the refrigerator inside the Hunter's house. When Mono first enters the house, you'll arrive in a kitchen. Look toward the right side of the kitchen to find a refrigerator. Approach the refrigerator, grab its handle, and pull the door open. The trophy unlocks immediately after opening it.
Tip
This is one of the earliest miscellaneous trophies in the game. Open the refrigerator before leaving the kitchen so you won't have to revisit Chapter 1 later.
Video Guide: https://www.youtube.com/watch?v=uV4G_Ec0U6w&list=PLicOuDSiPvy2WEVilK9hcQMReCoWxUPpY

Trophy: X Best Friends
I see through you...
Type: Bronze
Category: Misc
Unlock Details
In Chapter 3 — The Hospital, hold Six's hand while standing behind the X-ray screen with the machine switched on. You'll encounter an X-ray room connected to the playroom containing the stuffed animals. Activate the X-ray machine using the nearby switch. Then quickly move Mono and Six behind the X-ray screen. While both characters are visible on the screen, press and hold R2 to take Six's hand. The trophy unlocks when you successfully hold hands together behind the active X-ray screen.
Tip
Position Six close to the X-ray machine before activating it. That way, you can move behind the screen and grab her hand without wasting time.
Video Guide: https://www.youtube.com/watch?v=92HIwDH1aPg&list=PLicOuDSiPvy2WEVilK9hcQMReCoWxUPpY&index=10&pp=iAQB

Trophy: Foraged
Nature is a terrifying thing
Type: Silver
Category: Story
Unlock Details
Complete Chapter 1 — The Wilderness. Guide Mono through the forest, navigate the hidden traps, explore the Hunter's house, and escape the dangers of the Wilderness. The trophy unlocks automatically once you complete the chapter.
Tip
Before finishing Chapter 1, try to collect its four Glitching Remains and two hats. You can also earn Evasive Prey, What's in the Box?!, and Fair Prey during this chapter.

Trophy: Hospitalised
Are you sure you don't need any further... treatments?
Type: Silver
Category: Story
Unlock Details
Complete Chapter 3 — The Hospital. Guide Mono and Six through the Hospital, solve the puzzles involving the X-ray machine and power nodes, survive encounters with the Patients, and escape the Doctor. The trophy unlocks automatically upon completing Chapter 3.
Tip
The Hospital contains four Glitching Remains and two collectible hats. It's also home to several miscellaneous trophies, including Hunger, Popcorn, Toys Are for Kids, and First Do No Harm.

Trophy: Paled
Life in the big city is all over
Type: Silver
Category: Story
Unlock Details
Complete Chapter 4 — The Pale City. Navigate the abandoned streets and buildings of the Pale City, solve the television-related puzzles, avoid the dangerous inhabitants, and progress through the chapter until its conclusion. The trophy unlocks automatically after completing Chapter 4.
Tip
This chapter contains the final four Glitching Remains and two collectible hats. You can also earn Post Industrial and Unladylike here.

Trophy: Schooled
Best days of our short, terrible life
Type: Silver
Category: Story
Unlock Details
Complete Chapter 2 — The School. Navigate the school, avoid the Teacher and Bullies, solve the environmental puzzles, and escape the building with Six. The trophy unlocks automatically after completing Chapter 2.
Tip
The School contains six Glitching Remains and two collectible hats. Several miscellaneous trophies are also available here, including Referee!, Mono Tones, Bully of Bullies, Fly Free, and Merciful Feat.

Trophy: Signal interruption
It's all over now
Type: Gold
Category: Story
Unlock Details
Complete Chapter 5 — The Tower and finish the main story of Little Nightmares II. Progress through the Signal Tower, solve its final puzzles, and reach the ending of Mono's journey. The trophy unlocks automatically after completing the game.
Tip
Chapter 5 contains no Glitching Remains or collectible hats, so you can focus entirely on completing the story. If you've collected all 18 Glitching Remains, replaying the final chapter also allows you to view the game's hidden ending.

Trophy: True Colours
You never know when you need protection from the elements
Type: Bronze
Category: Story
Unlock Details
Progress through Chapter 2 — The School until Six obtains her iconic yellow raincoat. This event occurs automatically near the end of the chapter as part of the main story. Once Six puts on her raincoat, the trophy unlocks.
Tip
No special actions or collectibles are required. Simply continue playing through Chapter 2, and you'll earn this trophy naturally.

Begin Mono's journey through Chapter 1 — The Wilderness, where you'll learn the basics of stealth, puzzle-solving, and surviving enemies that are considerably larger than you. Start collecting Glitching Remains and hats immediately, since both are essential for the Platinum. The Wilderness contains four Glitching Remains and two collectible hats. Keep an eye out for What's in the Box?!, earned by opening the refrigerator inside the Hunter's house, and Evasive Prey, which rewards you for getting through the early bear traps without being caught.
As you progress into Chapter 2 — The School, continue exploring every suspicious corner. This chapter contains six Glitching Remains and two hats, along with several easy-to-miss miscellaneous trophies. Use the Soccer Ball hat for Referee!, play around on the piano for Mono Tones, and watch for opportunities to earn Fly Free, Bully of Bullies, and Merciful Feat. Make a habit of holding Six's hand whenever possible to work toward In the Palm of My Hand. A little teamwork goes a long way when the entire world seems determined to eat you.
Chapter 3 — The Hospital introduces more dangerous encounters and several trophies tied to specific objects and puzzles. There are four Glitching Remains and two hats to collect here. Make sure to grab the Stuffed Bear Head hat before burning the stuffed animal containing the key, as wearing it during the incinerator sequence unlocks Toys Are for Kids. You'll also want to earn Hunger by repeatedly using the vending machine, X Best Friends by holding Six's hand behind the X-ray screen, and Popcorn by taking corn to the incinerator.
The Hospital also contains Objection, Medicine Ball, and ...And Stay Dead!, so pay attention to objects that can be carried or used during enemy encounters. Near the end, First Do No Harm requires you to leave the Doctor trapped without activating the incinerator. None of these trophies is permanently missable thanks to Chapter Select, but knocking them out now will save you another trip through a hospital that clearly has some staffing issues.
Continue into Chapter 4 — The Pale City, where you'll find the final four Glitching Remains and two collectible hats. Look out for Post Industrial, which requires wearing the Postman's Hat while delivering an envelope, and Unladylike, earned by smashing a hidden statue of the Lady. By the end of this chapter, you can have all 18 Glitching Remains and all eight collectible hats needed for No More Remains and Far Ahead.
Finish Chapter 5 — The Tower to complete the story and unlock Signal Interruption. This final chapter has no hats or Glitching Remains, so you can focus entirely on completing the adventure. After the credits, you'll unlock the Fedora hat. Equip it after loading a chapter to earn How Do I Look?. If you've also collected all 18 Glitching Remains, replaying the final chapter will let you see the additional ending.
Once the story is complete, use Chapter Select to clean up any missing trophies. The chapter menu tracks your collected hats and Glitching Remains, making it easier to identify where you still need to search. Just remember that replaying a chapter means starting it from the beginning, so plan your cleanup around the trophies you need. You can use Ask Gami whenever you need help finding a particular collectible or figuring out a hidden trophy requirement.
The good news is that Little Nightmares II has no difficulty-related trophies, no missable trophies, and no deathless speedrun requirement. You can earn the Platinum in a single playthrough with Chapter Select cleanup, so there's no need to rush through the environments. Take your time, collect everything you can, and enjoy the unsettling atmosphere. Once the remaining miscellaneous trophies and collectibles are finished, Primetime Content Consumer will unlock as your Platinum.
Completion Video Playlist
1 video
LITTLE NIGHTMARES 2 - 100% Platinum Walkthrough - Full Trophy & Achievement Guide