


Trophy Guide Preview
Overall Trophy Progress
0 / 50 Completed
0%
Trophy Types
Platinum
0 / 1Gold
0 / 3Silver
0 / 6Bronze
0 / 40Categories
Collectible
0 / 11Grind
0 / 5Combat
0 / 10Ending
0 / 4Misc
0 / 10Story
0 / 9
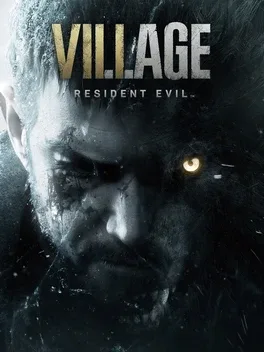
Survive a terrifying journey through a mysterious village as Ethan Winters in Resident Evil Village. Battle horrifying creatures, explore gothic castles and eerie landscapes, upgrade powerful weapons, and uncover dark secrets in this gripping survival horror adventure.
Overall Trophy Progress
0 / 50 Completed
0%
Platinum Path
Early Game The opening hours drop you into a snowy village and quickly teach you the basics of survival. Ammo is limited, enemies hit hard, and the game wastes no time throwing you into chaotic fights. Focus on learning how combat flows, when to block, and when to run instead of trying to fight everything. Surviving the early lycan attack is your first real test, so don’t panic if things feel overwhelming at first. T...
Completion Video Playlist
4 videos
Resident Evil Village Trailer | Resident Evil Showcase
Trophy: Ethan Winters
Obtain all trophies.
Type: Platinum
Tags: Misc
Unlock Details
Obtain all trophies.

Trophy: Art Collector
View all concept art.
Type: Silver
Category: Collectible
Unlock Details
Art Collector unlocks once you view every piece of concept art available in the Extras menu. To do this, you need to purchase all 120 concept art entries from the Extra Content Shop using Completion Points, for a total cost of 12,000 CP. After buying them, go to Bonuses, then Concept Art from the main menu, and scroll through every entry until the trophy pops. If you want to conserve CP, you can back up your save data to the cloud before making the purchases. Buy all the concept art, view everything in the menu to unlock the trophy, then restore your save afterward. This step is optional, but useful if you want to keep CP available for weapons or other unlocks. Once every piece has been viewed at least once, the trophy unlocks automatically.

Trophy: Artisan
Collect every crafting recipe.
Type: Bronze
Category: Collectible
Unlock Details
Artisan unlocks once you collect every crafting recipe available, for a total of eleven. Two of these are given automatically when you first reach the Village, First Aid Med and Handgun Ammo, and act as the introduction to crafting. Most of the remaining recipes are purchased from the Duke as you progress naturally through the story, so this trophy comes down to checking his shop regularly and not skipping upgrades just because you feel stocked. Six recipes become available through normal progression, including Shotgun Ammo, Sniper Rifle Ammo, Mines, Pipe Bombs, Explosive Rounds, and Flashbangs. The final three are tied to weapon ownership and only appear after you acquire the matching weapons, those being Magnum Ammo after getting the Wolfsbane, Rifle Ammo after obtaining the WCX, and Rocket Pistol Ammo later in the game. As long as you buy everything the Duke offers and pick up the required weapons, this will unlock without stress. Once all recipes are collected, crafting one of each will also complete Tinkerer, letting you knock out both trophies cleanly.
Trophy: Bookworm
Read every file in the story.
Type: Bronze
Category: Collectible
Unlock Details
Bookworm requires you to read every file in the story, for a total of 47. Files are notes, diaries, reports, signs, and computers, and they are counted the moment you open and read them. Nothing needs to be reread if you die or reload, but this trophy is missable if you rush areas and skip interiors. The safest mindset is simple: if it looks readable, read it. Slow play equals no cleanup.

Trophy: Cynic
Destroy a Goat of Warding.
Type: Bronze
Category: Collectible
Unlock Details
Cynic unlocks the moment you destroy your first Goat of Warding. These small wooden charms are hidden throughout the world and usually tucked just out of sight, often watching you from rooftops, trees, or awkward corners like they know what they’re doing. Shoot one, stab it, or otherwise ruin its day and the trophy pops immediately, no menu checks or follow-up required. You’ll almost certainly get this naturally while exploring, especially if you’re hunting collectibles, since the game makes a point of placing Goats along main paths and optional areas alike. There’s no penalty for breaking them early or late, and nothing fancy you need to do beyond spotting one and destroying it. If this doesn’t unlock naturally, it’s not because it’s hard, it’s because that Goat successfully judged you from afar a little longer than intended.

Trophy: Doll Collector
View all character and weapon models.
Type: Silver
Category: Collectible
Unlock Details
Doll Collector unlocks once you view every character and weapon model in the Figures menu. To do this, you need to purchase all 76 figures from the Extra Content Shop using Completion Points, which costs a total of 8,900 CP. After buying them, go to Bonuses, then Figures from the main menu, and scroll through every model until the trophy pops. If you want to save CP, there is a simple workaround. Back up your save data to the cloud, buy all the figures, view them in the Figures menu to unlock the trophy, then restore your save. This step is optional, but helpful if you want to keep CP for other unlocks. Either way, once every model has been viewed at least once, the trophy unlocks automatically.

Trophy: Heretic
Destroy all Goats of Warding.
Type: Bronze
Category: Collectible
Unlock Details
Heretic is the full commitment version of Cynic, and it’s all about total goat destruction. There are 20 Goats of Warding hidden across the world, and you need to destroy every single one to unlock this trophy. They’re small, wooden, and annoyingly well-hidden, often perched on rooftops, hanging from trees, or tucked into corners you’ll only notice if you slow down and actually look around. Any weapon works, and the moment one breaks, it’s permanently counted. The good news is progress is saved instantly to your Records, so if you die, reload, or leave an area, you never lose credit for goats you’ve already smashed. Nothing fancy is required beyond finding them all, but since some only appear later or during revisits, this trophy is missable if you rush the game and skip exploration. If you’re following a collectible-focused path, this will pop naturally near the end, right around the time you realize the goats were never protecting anything except their own smug existence.

Trophy: Mapmatician
Complete the village map.
Type: Bronze
Category: Collectible
Unlock Details
Mapmatician is all about being thorough. To unlock it, you need to fully clear the Village map by visiting every location and removing all the fogged-out sections. This doesn’t require anything fancy, just exploration. As long as you poke into every path, building, and side area that becomes available across the story, the map will eventually fill itself in. If you’ve been playing smart and grabbing collectibles as you go, this trophy will unlock automatically near the end of the game, shortly after you gain control of Chris. There’s no strict checklist or secret area that’s easy to miss, most players get this without trying as long as they don’t sprint past everything. Think of it as the game quietly rewarding you for being curious instead of bee-lining objectives like you’re late for dinner.

Trophy: Repairer
Combine a treasure into its complete form.
Type: Bronze
Category: Collectible
Unlock Details
Repairer unlocks when you fully assemble any combinable treasure, and the game makes Castle Dimitrescu the perfect place to do it. Your earliest and easiest option is the Azure Eye Ring. First, grab the Silver Ring from the Hall of Pleasure on the castle’s second floor—the same room where you pick up the Mask of Pleasure. Later, once you’ve got the Iron Insignia Key from the piano puzzle in the Opera Hall, head back down to the Dungeon (B1), unlock the sealed door, blow open the cracked wall with the conveniently placed pipe bomb, and solve the small puzzle inside to get the Azure Eye. Combine the two in your inventory and the trophy pops immediately. This trophy is technically missable since you don’t have to combine treasures before selling them, but honestly that would be a crime against your own wallet. Fully assembled treasures sell for way more Lei, and you’ll want that cash for Duke upgrades later on. During a normal playthrough of Resident Evil Village, this trophy comes naturally as long as you resist the urge to sell shiny things before checking if they snap together. If it fits, combine it, Ethan may suffer, but your bank account shouldn’t.
Video Guide: https://www.youtube.com/embed/2E6KpSxXe5k

Trophy: Tinkerer
Create every type of item in the Crafting menu.
Type: Bronze
Category: Collectible
Unlock Details
Tinkerer is the full crafting checklist trophy, and it unlocks once you’ve created every item that appears in the Crafting menu at least once. This includes all ammo types, healing items, explosives, and special craftables as they unlock through recipes found in the world or purchased from the Duke. You don’t need to hold everything at the same time, just successfully craft each item once and it’s permanently counted. This trophy is missable if you finish the game without crafting one of the late-game items, so don’t leave crafting until the very end and assume you’re covered. The safest approach is to occasionally scroll through the Crafting menu and make sure nothing is still greyed out or uncrafted, even if you don’t actually need the item. Think of this as “touch everything once” rather than resource management, craft it, move on, and let the trophy quietly take care of itself.
Trophy: Veteran Gunsmith
Equip every gun with their customizable parts.
Type: Bronze
Category: Collectible
Unlock Details
Veteran Gunsmith is the long game version of slapping parts on your toys. To unlock it, you need to equip every weapon in the game with all of its customizable parts, 22 attachments total. Some are found naturally while exploring, but most are sold by the Duke, with several only unlocking in New Game+. This is not something you do casually on a first run; it’s a cleanup trophy meant for later, once money stops being a problem and weapons start feeling like collectibles instead of lifelines. The good news is this trophy is way friendlier than it sounds. You don’t need to own every weapon fully kitted at the same time, once a part is equipped, it counts forever. You can attach parts, sell the weapon, buy it back later, and nothing is lost. If you followed a smart NG+ path and used the infinite-ammo S.T.A.K.E. trick, you’ll have more than enough Lei to fund this without grinding. Treat it like a checklist, take your time, and enjoy turning every gun into its final form. When the trophy pops, it’s basically the game nodding and saying, “Yeah… you’ve seen everything.”
Video Guide: https://www.youtube.com/embed/FtVeouZbJb8

Trophy: When You Gotta Go...
Open the door to every outhouse in the village in a single playthrough.
Type: Bronze
Category: Collectible
Unlock Details
When You Gotta Go… is exactly as dumb as it sounds and exactly the kind of trophy Resident Evil Village would hide in plain sight. You need to open all ten outhouses in a single playthrough, and yes, just opening the doors is enough, no loot, no enemies, just curiosity and questionable hygiene. Most of them are scattered naturally along your Village routes, starting right at the beginning behind the first house you explore, down the main road near the Iron Insignia Gate, and in the yard of Luiza’s House during the early chaos. If you’re exploring properly, you’ll accidentally open half of these without realizing you’re working toward a trophy. The rest come during revisits and light backtracking: one behind the Craftsman’s Hut after Castle Dimitrescu, a pair near the large house and livestock pen when the Village opens up again, one inside Luthier’s yard once you can break the lock, another behind the red chimney house near the ladder, one up by the Gardener’s Shack after House Beneviento, and the final one near the Reservoir Gatehouse close to the Duke. Nothing here is missable as long as you’re thorough, but the trophy is single-playthrough only, so don’t start a fresh run thinking progress carries over, it doesn’t. Open every door like a true Village inspector, and when the trophy pops, feel proud… and slightly concerned about Ethan’s priorities.

Trophy: Dashing Dad
Finish the story within three hours.
Type: Silver
Category: Grind
Unlock Details
Dashing Dad asks you to finish the story in under three hours, and it’s far more forgiving than it sounds. This can be done on New Game+ and is best treated as a clean, efficient run rather than a speedrun. Once you know where to go and what to ignore, finishing around two and a half hours is very realistic without rushing or stressing. Skip optional areas, avoid unnecessary fights, and move objective to objective with purpose. A couple of things make this much easier. The in-game timer completely stops when you pause with Options, so you can safely pause to check routes or plan ahead without losing time. Cutscenes can also be skipped, which saves a surprising amount of minutes over a full run. If you plan things right, this trophy pairs very well with other challenge runs, turning it into more of a disciplined walkthrough than a race.

Trophy: Don't Trust That Snake Oil
Finish the story using four or fewer recovery items.
Type: Gold
Category: Grind
Unlock Details
Don’t Trust That Snake Oil is a strict survival trophy that asks you to finish the entire story while using four or fewer recovery items. Any manual heal counts, so this is not something to attempt blind. The cleanest approach is doing it after at least one full completion so you already know enemy placements, ambush points, and when damage is unavoidable. Casual difficulty is strongly recommended, along with all of the Duke’s permanent stat upgrades, since higher max health and damage reduction give you far more breathing room without needing to heal. What makes this doable is that the game heals you automatically at several story moments, and those do not count against your limit. You get free heals after the first encounter with Bela, Daniela, and Cassandra in the castle, during the House Beneviento sequence, right before the Heisenberg fight in the Factory, and during the short playable section with Chris. Plan your run around those checkpoints, save your heals for true emergencies, and avoid chip damage whenever possible. If you stay disciplined and don’t panic-heal, this trophy is more about patience than skill.

Trophy: Frugal Father
Finish the story without spending more than 10,000 Lei.
Type: Silver
Category: Grind
Unlock Details
Frugal Father challenges you to finish the story while spending no more than 10,000 Lei total. This includes anything you buy from the Duke, so the safest strategy is treating the shop like it does not exist. Sell items if you want, since selling does not count against the limit, but avoid purchases unless you are absolutely sure you are still under budget. This is much easier once you already know enemy layouts and can rely on movement and positioning instead of upgrades. This trophy is best paired with other challenge runs like a fast completion or limited healing run, ideally on Casual difficulty. Planning is everything here, and restraint matters more than skill. If you go in with a clear route and resist the urge to buy comfort upgrades, this becomes a test of discipline rather than difficulty. When the credits roll and the trophy pops, it feels less like survival horror and more like beating the economy itself.

Trophy: Knives Out
Finish the story using only close combat weapons except for certain boss fights.
Type: Gold
Category: Grind
Unlock Details
Knives Out is the strictest challenge run in the game. You must finish the entire story using only close combat weapons, meaning knives only. Firearms, grenades, flashbangs, and explosives are not allowed, but the game does permit weapon use when it is absolutely required for story progression. This includes shooting the castle bells, powering generators in the Factory, destroying required objects, shooting down treasures, and specific boss mechanics where the game forces weapon use. These exceptions will not void the trophy as long as you return to the knife immediately afterward. There are a few moments to be extra careful. During the Heisenberg fight, the opening section that forces weapon use is allowed. During the final Miranda fight, you must shoot the glowing orb when prompted, then switch back to the knife to finish her. Some players have also safely used the handgun during her grab sequence without failing the challenge. You must not use the laser weapon during the Uriaș Străjer fight while playing as Chris. Casual difficulty is strongly recommended, along with the Karambit Knife from the Extra Content Shop. You can always confirm you are still clean by checking the challenge tracker in the menu, which should remain at zero for the entire run.

Trophy: Legendary Cowboy
Achieve an S Rank on all stages in The Mercenaries.
Type: Silver
Category: Grind
Unlock Details
Legendary Cowboy is earned by getting at least an S Rank on all eight base Mercenaries stages. That means clearing The Village, Castle, Factory, and Mad Village, plus their harder second versions, with strong scores across the board. This mode is all about maintaining long combo chains, moving efficiently between enemy spawns, and managing your money and ammo so you never break momentum. Combos matter more than kills, so learning enemy locations and planning your route through each area is far more important than raw aim. This is a grind trophy and one of the hardest in the game, but it is very doable with the right mindset. You do not need to finish a stage if you already have enough points for an S Rank, so you can let yourself die once the score is secured. On console, turning off adaptive triggers helps maintain fire rate and control. Whether you use a sniper-focused strategy early or adapt later stages with handgun, magnum, or knife builds, patience and repetition are key. Stick with it, learn each stage’s flow, and when the final S Rank locks in, the trophy pops as proof you truly mastered Mercenaries.

Trophy: Combo King
Get a combo of at least 30 during The Mercenaries.
Type: Bronze
Category: Combat
Unlock Details
After completing the story once you will unlock the Extra Content Shop where Challenge Points can be spent to unlock additional modes. One of the first items available is The Mercenaries mode, which only costs a small amount of CP to unlock. The Mercenaries challenges you to defeat enemies as quickly as possible while maintaining a combo streak. A combo continues as long as you keep eliminating enemies without letting the timer expire between kills. To earn this trophy you only need to reach a combo of 30 enemies. This can easily be done on the first Mercenaries stage by moving quickly through the map and chaining kills together. Keep the pressure on enemies and maintain the combo timer until you reach 30.

Trophy: Fast Reflexes
Knock a flaming arrow out of the sky with a close combat weapon.
Type: Bronze
Category: Combat
Unlock Details
Fast Reflexes is a flex trophy that proves you’ve got hands, not just ammo. After defeating Moreau and heading toward the Stronghold, you’ll start running into Lycans armed with crossbows. This is where the fun starts. Let one of them spot you from a short distance, far enough that they keep firing arrows instead of rushing, equip your knife, and swat a flaming arrow out of the air with a melee swing. The timing is forgiving if you mash R2 as the arrow comes in, and the trophy pops the moment you connect. This is much easier on Casual difficulty since flaming arrows hurt on higher settings and you don’t want to trade health for style points. Stand your ground, keep your spacing right, and don’t overthink it, this is less Jedi precision and more “panic swing at the fire.” Once it clicks, it’s over fast, and you can proudly say you parried a projectile like a horror-action legend in Resident Evil Village.

Trophy: Leader of the Pack
Take down the Vârcolac Alfa.
Type: Bronze
Category: Combat
Unlock Details
Leader of the Pack unlocks when you defeat the Vârcolac Alfa, a hidden mini-boss that appears in the Fallow Plot area of the Village. This is the scarecrow field you pass through after the church and before Luiza’s house, and the Alfa only spawns here after you return from the Reservoir. You will know you are in the right spot when the music shifts and something very large starts moving much faster than it should. This enemy hits hard and closes distance quickly, so do not feel pressured to fight it the moment it appears. If your gear feels weak on a first run, it is perfectly fine to leave it alone and come back later. The easiest and safest way is on a New Game+ run with infinite ammo, especially using a high-damage magnum, which turns this fight from a threat into a cleanup stop. Kill it once and the trophy pops immediately.
Video Guide: https://www.youtube.com/embed/hL99RUR-d7w

Trophy: Medium Rare
Set fire to a Moroaică.
Type: Bronze
Category: Combat
Unlock Details
Medium Rare is a classic environmental kill trophy, and it wants you to roast a Moroaică using fire rather than bullets. These hooded enemies show up in Castle Dimitrescu, and the trick is to knock a hanging brazier down onto one of them. Your earliest and cleanest opportunity is in the Castle Dungeon, specifically the room where you collect the Azure Eye treasure. Lure a Moroaică underneath one of the suspended braziers, shoot the chain, and if it drops onto her and sets her on fire, the trophy pops immediately. If you miss it there, don’t worry, the game gives you a guaranteed second chance at the Riverbank Treasure House, where burning a Moroaică is actually part of the puzzle to access the Golden Chest. Just be aware that there aren’t many braziers in the game, so don’t waste them by dropping fire with no enemy underneath. Done correctly, this trophy unlocks naturally during progression in and yes, the name is awful, in the best possible way.
Video Guide: https://www.youtube.com/embed/Eu_DYMfNBdQ

Trophy: Push Comes to Shove
Push away an enemy after guarding in the story.
Type: Bronze
Category: Combat
Unlock Details
Push Comes to Shove is one of those trophies you’ll probably unlock by accident while panicking in a fight. All you need to do is block an enemy attack by holding L1, then press L1 again right after the hit to shove them back with a counter. If it doesn’t pop naturally, the best place to force it is against the very first Lycan you encounter early in the game, block the swing, shove him away, and the trophy should unlock instantly. There’s no penalty for failing here either. If you mess up the timing or get taken out, just restart the checkpoint and try again until it clicks. Guarding is an important survival tool anyway, especially on higher difficulties, so this is really the game rewarding you for not face-tanking everything. In normal play, this one unlocks effortlessly, usually right before you realize blocking is way more useful than you thought.
Video Guide: https://www.youtube.com/embed/VlYPMdNyvxE

Trophy: Quit Hanging Around
Shoot down a Soldat hanging from the production line in the Factory.
Type: Bronze
Category: Combat
Unlock Details
Quit Hanging Around is a quick trophy you’ll earn in Heisenberg’s Factory, and it doesn’t even require a real fight. Soldats are the mechanical enemies built in this area, but for this one you specifically need to shoot a Soldat that’s still hanging from the production line, not one that’s active and charging you like a maniac. The easiest spot is near the main elevator where you repeatedly meet the Duke. Look through the open gap nearby and you’ll see the assembly line in the background with Soldats dangling in place, put a few shots into any one of them and the trophy pops instantly. If you miss that opportunity, there’s another chance later after meeting Chris, during the vehicle sequence against Heisenberg, where infinite ammo lets you freely take shots at a hanging Soldat during the elevator ride. Either way, this one is fast, simple, and hard to mess up.

Trophy: Squawk Shot
Shoot down five flying crows in the story.
Type: Bronze
Category: Combat
Unlock Details
Squawk Shot is all about timing and a little cruelty, as you need to shoot down five crows while they’re actually in the air. Grounded crows don’t count, so you want to spook them first, let them take off, and then blast them mid-flight. Your earliest chance comes right after placing the Maiden and Demon Crests on the Village gate while heading toward Castle Dimitrescu, but you’ll see more good spots later near the cemetery on your second Village visit, just before Garden Beneviento, and on the path to Otto’s mill. If you miss your shots (and you will), don’t sweat it. You can use Restart to retry the same crow since challenge progress is saved automatically in your Records. A shotgun makes this trophy way less annoying because crows bolt the instant you get close, and precision weapons can feel like overkill with none of the payoff. In normal play, this trophy unlocks naturally in Resident Evil Village as long as you remember one rule: wait for the flap, then fire. Feathers optional.
Video Guide: https://www.youtube.com/embed/eVvwwbcARkQ

Trophy: Strategist
Defeat at least three enemies with one attack.
Type: Bronze
Category: Combat
Unlock Details
Strategist is all about letting the game’s chaos work in your favor. You need to defeat at least three enemies with a single attack, and the game gives you plenty of tools to do it: pipe bombs, mines, explosive grenade rounds, or good old-fashioned explosive barrels. The trophy pops instantly as long as three enemies go down from the same blast, so positioning matters more than raw firepower. Your earliest and easiest chance comes during the Lycan ambush when you first reach the Village and are forced to survive until the Urias cutscene triggers. There’s a house near the red locked door with an explosive barrel inside, run in, barricade with furniture to slow the Lycans, wait for them to bunch up outside, then shoot the barrel and enjoy the fireworks. If you miss it there, the Stronghold later on is basically a buffet of tightly packed enemies begging for explosions. If three scream and fall at once, congrats, you just earned the trophy the smart way.

Trophy: Timber
Defeat Uriaș during the first lycan attack.
Type: Bronze
Category: Combat
Unlock Details
Timber is one of those “because you can” trophies that flips the script on the opening Village chaos. During your first Lycan ambush, the game expects you to survive until a cutscene triggers, right as Uriaș, the giant hammer-wielding nightmare, shows up to scare you into running. For this trophy, you do the opposite: you stand your ground and kill him right there, ending the party early instead of hiding like the game intends. Real talk, this is best done on New Game+ on Casual with infinite ammo, ideally using the S.T.A.K.E. Magnum so you’re not tickling him to death. You’ll reach this section within minutes of starting the run, unload everything you’ve got into Uriaș, and once he drops, the trophy pops immediately. Don’t try this on a fresh save unless you enjoy pain, this is a victory lap trophy, not a skill check. Take him down, enjoy the absurdity, and smile knowing you just bullied a boss before the game was ready.
Video Guide: https://www.youtube.com/embed/MSBONiIjz8g
Trophy: Trick Shot
Defeat an enemy from long range with the sniper rifle.
Type: Bronze
Category: Combat
Unlock Details
Trick Shot is a clean, satisfying trophy that rewards you for actually using the sniper rifle the way it was meant to be used. You’ll pick up the sniper rifle in the attic of Castle Dimitrescu, sitting in plain sight on a chair just before you head out onto the roof. Once you step outside, the game practically hands you the trophy by introducing Samca, flying enemies that love to hover at long range and beg to be shot out of the sky. Back up as far as you reasonably can, line up a shot, and take one down with the sniper; there’s no strict distance requirement, so common sense “this feels far” absolutely counts. If you somehow miss the opportunity here, don’t worry, the Stronghold later on gives you plenty of long-range enemies to work with. This trophy comes naturally during normal play and once it pops, you’ll probably start trusting the rifle a whole lot more. One good shot, one dead enemy, simple, clean, and very Ethan.
Video Guide: https://www.youtube.com/embed/aNtgi42nhbg

Trophy: Best Dad Ever
Finish the story on at least Standard difficulty.
Type: Bronze
Category: Ending
Unlock Details
Best Dad Ever unlocks for finishing the story on Standard difficulty or higher, and this is where the game starts to feel like classic survival horror. Enemy health and damage are set to normal, aggression is higher than Casual, and resources are no longer handed out generously. You will need to pay attention to positioning, blocking, and ammo management, but nothing here is unfair if you play smart and don’t rush rooms blindly. Once you defeat the final boss and watch the credits, the trophy unlocks automatically. Completing the story on Standard also rewards you with the Dragoon assault rifle, a fully automatic weapon with solid power and handling that carries over into future runs. There are no tricks or hidden requirements here. Finish the story on Standard, survive the pressure, and enjoy the upgrade.

Trophy: Great Dad
Finish the story on at least Casual difficulty.
Type: Bronze
Category: Ending
Unlock Details
Great Dad unlocks for finishing the story on Casual difficulty or higher, and it is meant to be approachable rather than challenging. Casual is designed for players who want to focus on exploration, puzzles, and story without constant pressure from enemies. Enemies have lower health, deal less damage, behave less aggressively, and resources drop more often, which makes this an ideal first playthrough or a relaxed cleanup run. Once you defeat the final boss and let the credits roll, the trophy unlocks automatically. Completing the story on this difficulty also rewards you with the USM-AI pistol, a solid semi-automatic weapon customized by Chris with balanced power, accuracy, and fire rate. There is nothing tricky here at all. Finish the story, enjoy the ride, and take the win.

Trophy: Universe's Best Dad
Finish the story on the Village of Shadows difficulty.
Type: Gold
Category: Ending
Unlock Details
Universe’s Best Dad is earned by finishing the story on Village of Shadows, the hardest difficulty available. This mode is unlocked after beating the game once, or immediately if you have the Trauma Pack. Enemies have massively increased health, take reduced damage, hit much harder, appear in different places, and resources are scarce. This is not meant to be a fair first run. It is a knowledge check that expects you to already understand enemy patterns, ambushes, and when to fight or move on. This run is strongly recommended on New Game+ with infinite ammo, ideally using the S.T.A.K.E. Magnum to keep fights manageable. Other options like the Wolfsbane or grenade launcher can work early on, but difficulty spikes hard in areas like the Stronghold if your damage output is not high enough. During the Chris section, infinite weapons from earlier do not carry over, so having the infinite Dragoon helps a lot, along with smart use of flash grenades and positioning. Even with infinite ammo, you still need to block, move carefully, and avoid getting surrounded. Beat the final boss, watch the credits, and the trophy unlocks automatically. This is the final test, and it earns its name.

Trophy: World's Best Dad
Finish the story on at least Hardcore difficulty.
Type: Silver
Category: Ending
Unlock Details
World’s Best Dad unlocks for finishing the story on Hardcore difficulty or higher, and this is where the game stops pulling punches. Enemies have more health, hit harder, and behave more aggressively, while resources are noticeably scarcer. Ammo management, blocking, and knowing when to run matter a lot more here, and mistakes are punished quickly. This difficulty is best tackled after you already know enemy placements and major encounters, not as a blind first run. Defeat the final boss on Hardcore and let the credits roll to unlock the trophy automatically. Completing the story on this difficulty also rewards you with the Handcannon PZ, an extremely powerful revolver that uses sniper ammo and can be upgraded for future runs. There are no hidden conditions or tricks involved. Survive Hardcore, finish the story, and the trophy is yours.

Trophy: Crafter
Craft an item in the Crafting menu.
Type: Bronze
Category: Misc
Unlock Details
Crafter is one of those trophies you’ll unlock without even trying—unless you’re doing some kind of unhinged no-crafting challenge on your first run. As soon as you reach the Village and gain access to crafting, open your inventory with Triangle, tap R1 to switch to the Crafting menu, and make literally anything. First Aid Med or Handgun Ammo both work, and the trophy pops the moment the item finishes crafting. Technically, this trophy is missable because the game doesn’t force you to craft anything, but in real-world gameplay that’s almost impossible. Between healing, ammo shortages, and later difficulty runs, crafting is basically survival 101 in Resident Evil Village. If you somehow miss this, it’s less “oops” and more “how are you still alive?” Craft once and move on—you’ve got bigger horrors to deal with.

Trophy: Get the Ball Rolling
Solve a Labyrinth.
Type: Bronze
Category: Misc
Unlock Details
Get the Ball Rolling unlocks the first time you complete one of the Labyrinth mini-games scattered around Resident Evil Village. These are small tilt-style puzzles where you drop a metal ball into a board and guide it to the goal, and there are four total across the main areas. You’ll need to find the matching metal ball nearby to activate each one, and finishing the puzzle rewards you with a valuable treasure you can sell to the Duke for a nice chunk of Lei. Your earliest chance is in Castle Dimitrescu. Grab the Flower Sword Ball from the second floor of the Opera Hall, then take it to the Duke’s room on the first floor, the door closest to where you place the castle masks. Insert the ball, complete the very simple labyrinth, and the trophy pops immediately. This one isn’t missable in any practical sense since the puzzles are easy, rewarding, and hard to ignore, but even if you somehow skipped them all, remember: free money plus an easy trophy is never the wrong move.
Video Guide: https://www.youtube.com/embed/Wu0RUm25Bn4

Trophy: Goooaaal!
Move the ball from the Winterses' bedroom into the study.
Type: Bronze
Category: Misc
Unlock Details
Goooaaal! is a quick and silly trophy you can knock out during the prologue, before things go completely off the rails. After carrying Rose upstairs and placing her in the crib, look around the bedroom for the small yellow ball on the floor. Your goal is to push that ball from the Winterses’ bedroom into the adjacent study—no menus, no prompts, just good old-fashioned soccer physics inside a horror game. Take it slow when nudging the ball, because sprinting can make it refuse to move, and watch out for the small table directly ahead since the ball loves to get stuck underneath it. If that happens, a quick Restart fixes it, but you’ll save time by lining it up carefully the first time. It’s an easy trophy, but also an easy one to forget since it’s locked to the prologue, so score that goal early and enjoy the calm before the chaos in the game.
Video Guide: https://www.youtube.com/embed/efLTA-HKShY

Trophy: Gunsmith
Equip a gun with a customizable part.
Type: Bronze
Category: Misc
Unlock Details
Gunsmith unlocks the first time you equip any weapon with a customizable part. Once you obtain a weapon attachment, such as a grip, stock, or scope, open your inventory, select the weapon, and attach the part. The trophy pops immediately as soon as the upgrade is equipped, no firing test required. You’ll almost always get this naturally since weapon parts are common rewards from exploration or purchases, but it’s technically missable if you somehow finish the game without equipping a single attachment. That’s extremely unlikely unless you’re intentionally avoiding upgrades, which is basically playing on hard mode for no reason. Equip one part, enjoy the instant trophy, and move on, this is one of the easiest unlocks in the entire run.

Trophy: Hooligan
Break every breakable window in Castle Dimitrescu in a single playthrough.
Type: Bronze
Category: Misc
Unlock Details
Hooligan is Castle Dimitrescu’s unofficial vandalism challenge, and it requires you to break every breakable window inside the castle in a single playthrough. Most of these will shatter naturally as you explore, but a few are easy to miss if you rush. You’ll find windows in the Kitchen backroom (one breaks automatically during the first Daughter fight), two in the Dining Room facing the courtyard, two above the main staircase leading to Dimitrescu’s Chambers, three along the second-floor hallway near the Hall of Ablution, and three inside Lady Dimitrescu’s Chambers, all of which must be shot from the balcony outside, including the one by her bathroom that cannot be hit from inside. The rest are spread out but still easy to clean up if you’re paying attention: three side-by-side windows on the Opera Hall stairwell near the Library, three more on the second floor of the Opera Hall (two in the lounge and one along the balcony path toward the Labyrinth Ball), a single small window tucked between the Library and the Hall of Joy statue, and the final one in the Atelier that’s required for the Five Bells puzzle. Nothing here is missable as long as you’re thorough before leaving the castle, but once you’re done with Dimitrescu’s section, that’s it, no going back. Take a moment to channel your inner menace, double-check each area, and enjoy turning Castle Dimitrescu into a drafty ruin.
Video Guide: https://www.youtube.com/embed/D_mwCyvUSLM

Trophy: Hunter
Hunt an animal during the story.
Type: Bronze
Category: Misc
Unlock Details
Hunter pops the moment you take down your first animal, and Resident Evil Village makes sure you don’t have to go out of your way to do it. As you explore the Village, you’ll run into fish, chickens, pigs, goats, and other unlucky wildlife just minding their business. Kill any one of them, knife or gun both work, and the trophy unlocks immediately. No menuing, no cooking required, just one successful hunt. This trophy is technically missable since you could finish the game without hunting, but that would mean skipping permanent stat boosts from the Duke’s Kitchen, which is borderline self-sabotage. You’ll naturally encounter animals while exploring or backtracking, and once you realize they turn into free upgrades, you’ll probably start eyeing them like bonus loot. If this trophy doesn’t unlock naturally, it’s not because the game hid it, it’s because you showed an unusual amount of mercy in a very unmerciful village.

Trophy: Lucky Number 7
Have 777, 7,777, or 77,777 Lei in your possession.
Type: Bronze
Category: Misc
Unlock Details
Lucky Number 7 is one of those trophies that turns the game into an accidental math exam. You need to have exactly 777, 7,777, or 77,777 Lei at a single moment—not cumulative, not close enough, and yes, the Duke will absolutely judge you silently while you do arithmetic. The cleanest way is to manipulate buying and selling until you land on one of those numbers, which almost never happens naturally unless the universe really likes you. The easiest method is unlocking the WCX Rifle in the Extra Content Shop so you get the recipe for Rifle Ammo, which conveniently sells for exactly 7 Lei per bullet. Burn your wallet down as close to zero as you can, then sell ammo in chunks until you hit one of the magic numbers (111 bullets for 777 Lei is the usual target). If you can’t get to perfect zero first—and you probably won’t—use handgun ammo buying and selling to fine-tune the total, then finish with rifle bullets for precision. It’s a little trial and error, a little calculator work, and a lot of “wait… one more.” When it finally hits, the trophy pops instantly and you can proudly say you beat the Duke at his own numbers game.

Trophy: Patron
Purchase something from the Duke in the story.
Type: Bronze
Category: Misc
Unlock Details
Patron pops the first time you hand over some Lei to the Duke, and you’ll meet him very early, right after escaping the mines, just before heading into Castle Dimitrescu. When you see his very welcoming shop, buy literally anything: ammo, a weapon part, a recipe, or even just sell an item back to him. The trophy unlocks the moment a transaction goes through, no haggling required (sadly). This one is technically missable because you can beat Resident Evil Village without ever buying anything, but doing that is about as practical as fighting a Lycans with harsh language. Between upgrades, inventory space, and infinite ammo setups for later runs, you’ll be living at the Duke’s shop on the road to Platinum. If you somehow miss this trophy, the real mystery isn’t the village, it’s how you survived at all.

Trophy: Petty Thief
Unlock a simple lock with a lockpick.
Type: Bronze
Category: Misc
Unlock Details
Petty Thief unlocks the first time you use a lockpick on a simple lock, and the game gives you an almost comically convenient opportunity to do it. Your earliest chance is inside Castle Dimitrescu, right after the fight with Bela. Grab the lockpick from the room next to the kitchen, then turn around and open the nearby locked cupboard, problem solved, trophy earned, crime career officially started. This one is technically missable since you could finish the game without ever touching a lockpick, but that would mean walking past free loot with full awareness, which is illegal in gamer law. Lockpicks are scattered generously and usually guard useful items, so this trophy almost unlocks itself during normal play. If you somehow miss it, don’t worry, Ethan’s already committed worse crimes against door hinges.

Trophy: Photographer
Use Photo Mode.
Type: Bronze
Category: Misc
Unlock Details
Photographer is as easy as it gets. Pause the game at any point, open Photo Mode from the Options menu, then exit back out by pressing Circle. You do not need to save a photo, frame a shot, or change any settings. The moment you leave Photo Mode, the trophy unlocks automatically. If you somehow miss this during normal play, just pause once, dip into Photo Mode, and back out. Trophy earned in seconds.

Trophy: Fish Out of Water
Defeat the mutated Moreau.
Type: Bronze
Category: Story
Unlock Details
This trophy unlocks after defeating Moreau in the reservoir area. During the fight he mutates into a massive creature but his real weak point is the human body visible inside his mouth. Focus your shots on the exposed human body whenever it appears. The sniper rifle works very well for hitting the weak point at range, while the shotgun is great when he gets close. If you deal enough damage he will stagger and fall over briefly, giving you a chance to unload more shots. Moreau will often spit acid from a distance or charge directly at you across the arena. When he climbs onto the raised platform he will launch acid into the sky that rains down across the area. Hide under the small covered sections until the attack finishes to avoid the damage. Explosive barrels scattered around the arena can deal heavy damage if you lure him near them before shooting. Mines are also very effective if you place them along the paths he charges through. Keep targeting the weak point whenever possible and the fight will end quickly.

Trophy: Four Lords
Escape the mine.
Type: Bronze
Category: Story
Unlock Details
This trophy unlocks after the opening sequence where Ethan is captured by Heisenberg and brought before the rulers of the village. Once the cutscene ends you must escape the underground mine. The path is mostly linear, but watch for wooden fences that can be broken to continue forward. Follow the tunnel until you reach a hallway where a massive spiked crusher rolls toward you. Immediately move to the far left corner of the room and crouch. Stay there while the machine passes over you. The spikes will break Ethan’s handcuffs and allow you to escape, ending the sequence and unlocking the trophy.

Trophy: Got No Strings
Defeat Donna and Angie.
Type: Bronze
Category: Story
Unlock Details
This trophy unlocks after defeating Donna Beneviento and Angie inside House Beneviento. The encounter is less of a traditional boss fight and more of a short hide and seek sequence. After escaping the giant baby in the basement you will enter a room filled with dolls where Angie begins hiding somewhere inside the house. Your goal is to find her and stab her before the surrounding dolls attack. Angie is the only bright white doll in the house so she stands out clearly. Each time you find her you must interact with her to stab her. After this she will move to a new location and the sequence repeats. You need to find and stab Angie three times to finish the fight. The house is small and her locations are predetermined, so simply search the nearby rooms and you will spot her quickly. Once the third stab happens the fight ends and the trophy unlocks.

Trophy: Iron Giant Down
Defeat the mutated Heisenberg.
Type: Bronze
Category: Story
Unlock Details
The battle with Heisenberg takes place at the end of the factory section. Ethan pilots a makeshift metal vehicle equipped with a machine gun and a cannon for the first phase of the fight. Focus your fire on the glowing red weak points on his body, starting with the arms near the elbows. Destroying these weak points briefly staggers him and exposes new ones on other parts of his body. If he gets too close, fire the cannon to push him back and create distance. At times he will surround himself with spinning metal plates. When this happens aim for his exposed head until the armor breaks and the weak points return. After dealing enough damage he will trigger a tornado attack that ends the vehicle phase. The fight then continues on foot. Keep your distance and land shots with powerful weapons such as the sniper rifle until the tornado attack triggers again, ending the battle.

Trophy: Not Lycan This…
Survive the lycan attack.
Type: Bronze
Category: Story
Unlock Details
During the first visit to the village you will trigger a large lycan attack shortly after picking up the M1897 shotgun. Your objective here is simply to survive long enough for the event to end. At first you will only deal with regular lycans, but after a short time a large hammer-wielding lycan named Uriaș will enter the area. The safest strategy is to keep moving rather than fighting. Run between the buildings, climb ladders, and use the houses to create distance. You can block doorways with shelves and use explosive barrels to slow enemies if you need space, but spending ammo is not required. The encounter ends automatically after enough time passes. Even if you take lethal damage right at the end the cutscene can still trigger and the story will continue.

Trophy: Temporary Measures
Place the Giant's Chalice in the ceremony site.
Type: Bronze
Category: Story
Unlock Details
After defeating Uriaș in the Stronghold you will obtain the final of Rose’s four flasks. With all of them collected, return to the Altar in the village. Place the four flasks into the altar to trigger a short sequence where the structure lowers and reveals the Giant’s Chalice. Pick it up and carry it to the nearby Ceremony Site. Set the chalice on the pedestal at the ceremony platform to continue the story and earn the trophy.

Trophy: That Sucked!
Defeat the mutated Dimitrescu.
Type: Bronze
Category: Story
Unlock Details
This trophy unlocks after defeating Lady Dimitrescu at the top of Castle Dimitrescu. During the fight she mutates into a large winged creature but her real weak point remains the human body attached to the monster. Focus your shots on the human torso whenever possible. The sniper rifle works very well here, especially when she flies away and circles the tower. If you land a shot on the weak point while she is flying she can stagger and crash back down, giving you an opening to deal more damage. She will occasionally send swarms of insects toward you. When this happens move inside the small covered tower area to avoid damage until she returns to the platform. In the second phase the fight moves to a smaller rooftop area where space is limited. Keep some distance and aim for the human body with your sniper rifle or shotgun to end the fight quickly. Once she goes down the trophy will unlock.

Trophy: The Root of the Matter
Find the Megamycete in the underground ruins.
Type: Bronze
Category: Story
Unlock Details
After defeating Heisenberg the story briefly shifts to Chris Redfield. During this section you must fight through large groups of lycans while pushing toward the underground ruins beneath the village. Continue advancing through the battlefield until you reach the area near the Maiden of War statue. Here Chris uses the targeting device to call in Lobo missiles that destroy the massive roots blocking the path forward. Once the route opens you will enter the underground ruins where a stronger version of Uriaș appears. Defeat him to proceed deeper into the cave system. Shortly after entering the cavern that contains the Megamycete the trophy will appear.

Trophy: Up Urs!
Defeat Uriaș in the stronghold.
Type: Bronze
Category: Story
Unlock Details
This trophy unlocks after defeating Uriaș in the Stronghold. He is a large hammer-wielding enemy with a lot of health, but his attacks are slow and easy to read if you keep your distance. At the start of the fight he will stand on the platform and roar before jumping down. Use this moment to land several free shots before the fight properly begins. Throughout the battle you should aim for his head, which takes much more damage than the rest of his body. The arena contains several stone pillars that can be used as cover. Move around these pillars to avoid his wide hammer swings and give yourself space to line up shots. Flashbangs can briefly stagger him, giving you a safe window to deal extra damage. During the fight he will sometimes summon regular lycans to attack alongside him. Clear these enemies quickly so they do not overwhelm you while you focus on the boss. Once Uriaș is defeated the trophy will unlock.

The opening hours drop you into a snowy village and quickly teach you the basics of survival. Ammo is limited, enemies hit hard, and the game wastes no time throwing you into chaotic fights. Focus on learning how combat flows, when to block, and when to run instead of trying to fight everything. Surviving the early lycan attack is your first real test, so don’t panic if things feel overwhelming at first.
Take some time to explore buildings and collect supplies whenever the game lets you breathe. The village acts as a central hub that slowly opens new paths as you progress. Pay attention to locked doors and strange items because many of them become accessible later. A good early tip is to conserve ammo whenever possible and rely on headshots to stagger enemies before finishing them.
As you begin entering the first major area, the game introduces puzzles and exploration alongside combat. Treat this section as your training ground. Learn how enemies behave and experiment with different weapons. If something feels confusing or you’re unsure where to go next, don’t stress. That’s exactly the kind of moment where asking Gami can point you in the right direction.
Once you complete the first major location, the village opens up and starts acting like a hub you’ll revisit several times. New keys unlock new areas, and you’ll slowly track down important story objectives across different regions. This is where the game really finds its rhythm as you bounce between exploration, puzzles, and boss encounters.
Make regular stops at the Duke’s shop whenever you return to the village. Selling treasures and upgrading your weapons makes a big difference later in the game. A great habit is to combine treasure items before selling them whenever possible since many valuables become much more profitable when completed.
Mid game is also a great time to keep an eye on collectibles and small challenge trophies. Things like destroying Goats of Warding, exploring every house, and interacting with odd objects around the village often lead to easy trophies. Just remember there’s no need to obsess over everything yet. Let the game guide you naturally and pick things up along the way.
The final stretch shifts toward heavier combat and larger enemy encounters. Enemies become more aggressive and the game expects you to make good use of upgraded weapons and resources you’ve collected earlier. If you’ve been saving ammo and upgrading your gear at the Duke, you’ll feel much more prepared here.
Before pushing into the last areas, it’s a good idea to spend some time selling treasures, upgrading weapons, and stocking up on healing items. Stronger weapons and sniper upgrades make late fights much easier. One helpful tip is to slow down during intense fights and focus on enemy weak points rather than spraying bullets everywhere.
As you approach the end of the story, try to finish any side exploration you still want to do in the village. Some doors and areas become inaccessible later, so it’s better to wrap things up before the final sequence begins. If you feel unsure about missing something important, asking Gami can quickly confirm whether you’re on the right track.
After finishing the story, the game opens up several additional challenges that are required for the platinum trophy. New Game Plus lets you replay the game with upgraded weapons, which makes many trophies significantly easier to complete. This is especially helpful for speedruns, difficulty trophies, and special challenge runs.
Some trophies require unusual playstyles such as finishing the game quickly, spending very little money, or using specific weapons. These sound intimidating at first, but they become much easier once you already know the game and have stronger gear from previous runs. Think of these runs as victory laps rather than stressful challenges.
Modes like The Mercenaries and collectible cleanup will likely make up the final steps toward the platinum trophy. Take your time and enjoy experimenting with different strategies. And if a trophy or challenge starts giving you trouble, don’t hesitate to Ask Gami for quick help so you can jump right back into the action.
Completion Video Playlist
4 videos
Resident Evil Village Trailer | Resident Evil Showcase