Walkthrough Preview
Walkthrough Completion
0 / 8 Completed
0%
Overall Walkthrough Progress0/8 • 0%
Parts
8
Main Story
8 Hrs

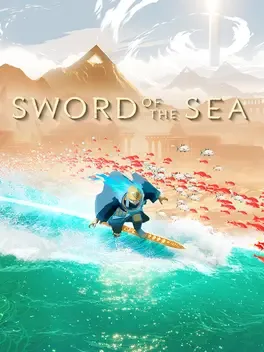
Surf across breathtaking landscapes on a mystical Hoversword in Sword of the Sea, an atmospheric adventure from the creators of Journey, ABZÛ, and The Pathless. Restore a forgotten ocean, explore ancient ruins, and uncover secrets hidden beneath a world buried in sand.
Walkthrough Completion
0 / 8 Completed
0%
Parts
8
Main Story
8 Hrs
Video Library
3 videos
Sword of the Sea | Launch Date Trailer | PS5 & PC
Tour Pages
Tour Pages Coming Soon
Article-style guides for puzzles, bosses, collectibles, systems, trophies, and side quests are still being built for this game.
8 Sections | Main Story 8 Hrs
48 Trophies | 1 Platinum
Trophy: Pro Surfer
Collect all trophies.
Type: Platinum
Tags: Misc
Unlock Details
Unlock every other trophy in the game to earn this automatically. Nothing tricky here, just clean up whatever you are missing and this will pop at the end, so use it as your final checkpoint to make sure nothing slipped through.
Trophy: Archelon Rider
Ride an archelon.
Type: Bronze
Category: Collectible
Unlock Details
In the Lost Grotto, activate the main water point on top of the central building that also opens the path forward. After this, turtle-like creatures begin swimming around the shark statue, and these are the ones that count. Do not confuse them with earlier ones in the level, just wait until this moment and hop onto one as it passes.
Trophy: Blue Whale Rider
Ride a blue whale.
Type: Bronze
Category: Collectible
Unlock Details
In the Sacred River, activate the water point on top of the floating island and blue whales will begin appearing in the area. If you are on the lower level, use the kelp around the buildings to get back up and position yourself above them, then drop onto one as it swims past.
Trophy: Boiling Cavern Shell Collector
Find all the secret shells in the Boiling Cavern.
Type: Bronze
Category: Collectible
Unlock Details
Shells in this area tend to be hidden around tight paths, corners, and near environmental hazards, so move carefully and scan each section before pushing forward. If something looks like a side route or a small detour, it usually leads to a collectible.
Trophy: Bullfrog
Find the bullfrog.
Type: Bronze
Category: Collectible
Unlock Details
The bullfrog is found in a hidden location that rewards exploration, so take your time checking side paths and areas that are easy to overlook. If you are thorough and do not rush through each chapter, you are likely to stumble across it naturally.
Trophy: Cleanse the Forbidden Valley
Return all water to the Forbidden Valley.
Type: Bronze
Category: Collectible
Unlock Details
You need to activate every water point in the Forbidden Valley chapter, and a few are easy to miss if you only follow the main path. Most of these are tied to lighting lantern clusters, so your goal is to explore slightly off-route and make sure every lantern group you see gets activated before moving on. 1. In the first area, light the lanterns around the main pillar to activate the initial water flow at its base. 2. As the water spreads, head left instead of jumping over the ledge to find another set of lanterns in the center of the raised area. 3. After using the jellyfish to get over the wall, go left and move up the sandfall to reach another lantern cluster. 4. Continue along the water’s edge until you reach a group of lanterns beside another sandfall and activate them. 5. Before progressing forward, check the immediate right above near the base of a pillar to find an easy-to-miss lantern group. 6. When you reach the second jellyfish section, do not go straight up, instead head left and jump across two pillars to reach a higher platform with a large cluster of lanterns for the final water point.
Video Guide: https://www.youtube.com/embed/TrJmoAr8gmU
Trophy: Cleanse the Frozen Drifts
Return all water to the Frozen Drifts.
Type: Bronze
Category: Collectible
Unlock Details
You need to activate every water point in the Frozen Drifts chapter, and most of them are tied to lighting lantern clusters that spawn Tetra. A lot of these are slightly off the main path, so the key here is to slow down and check both sides of each new area before moving forward, especially around arches, hills, and elevated paths. 1. In the first clearing, head left and light the lanterns to summon Tetra and activate the first water point. 2. Stay on the left side of the area and find another nearby cluster of lanterns that also summons Tetra. 3. After entering the next area, check the left side near the ice for another lantern group. 4. Just past the archway, look to the left again for another set of lanterns. 5. After passing the crystal, move left to find another lantern cluster tied to a water point. 6. In the next area on the first hill, activate the lanterns you find there before continuing. 7. Head to the right side of the elevated section and follow the snowy path to another group of lanterns. 8. Continue through the central area and watch for another snow path leading to more lanterns. 9. After breaking the ice crystal, check to the left of the archway for another hidden cluster. 10. Follow the snowy trail near the elevated area to find another set of lanterns. 11. Behind the hill with the pillar, you will find the final lantern cluster needed for completion.
Video Guide: https://www.youtube.com/embed/K7wGTiioClw
Trophy: Cleanse the Sacred River
Return all water to the Sacred River.
Type: Bronze
Category: Collectible
Unlock Details
You need to activate every water point in the Sacred River chapter, and several are easy to miss if you only follow the main route. Most of them are tied to lantern clusters placed slightly off the path, so make sure to check both sides of the river and any nearby structures before moving forward. 1. As you enter the large outdoor area, head down and immediately check to your left for a cluster of lanterns. 2. Follow the trail to the left of the ghostly arches to find another lantern group. 3. Then check the trail on the right side of the ghostly arches for another set. 4. After crossing the chain beneath the floating island, jump across the two jellyfish on your right to reach a smaller island with lanterns, activating them creates paper lanterns that let you water grind to the far wall and reach the water point. 5. Continue along the main path until you reach the large inverted tower, then use the bowl ramp at the base where lanterns are located. 6. At the top island building, head to the half pipe and drop down into the lower room to find a hidden water point. 7. Use the floating lanterns to cross over to the next building, where activating the lanterns on the floor will generate kelp and reveal the final water point.
Video Guide: https://www.youtube.com/embed/cfD2pQ8soO8
Trophy: Cleanse the Shadow Tundra
Return all water to the Shadow Tundra.
Type: Bronze
Category: Collectible
Unlock Details
You need to activate every water point in the Shadow Tundra chapter, and while most are tied to progression, there is at least one easy-to-miss location early on. When you first encounter the boost wisps, look to your left for a jellyfish jump that leads away from the main path toward a distant doorway. Head inside and follow the trail of bones to find a hidden water point, and make sure you grab this before moving on so you do not have to come back later.
Video Guide: https://www.youtube.com/embed/OD5LUjAObHU
Trophy: Cleanse the Veiled Sea
Return all water to the Veiled Sea.
Type: Bronze
Category: Collectible
Unlock Details
You need to activate every water point in the Veiled Sea chapter, including a few that are easy to miss if you stay on the main path. Some are tied to progression, but others are tucked away behind simple puzzles, so take your time exploring along the edges of the area instead of rushing forward. A reliable route is to stick to the left wall after your first encounter with the vendor and clear everything as you go. 1. In the large open area after the vendor, follow the left wall to a lantern pillar, activate all lanterns to spawn jellyfish, then ride them up to reach a water point on the upper level. 2. Continue along the left wall up the hill and look for a cave hidden behind a sand waterfall, jump onto the central platform inside to find the next water point. 3. Stay left and find a small hill with lanterns, light them to reveal an entrance, then activate another set inside to lower the sand and follow the left path to the water point. 4. After the large mural lights up, check to the right for a small cave, use the jellyfish inside and take the left path to reach another water point. 5. In the central area near the entrance where chains connect, light the lanterns around the middle rock spikes to reveal a water point. 6. Once you raise the structure from the sand, activate the two lanterns on top to open the building and access the final water point.
Video Guide: https://www.youtube.com/embed/BFRadHUFUzw
Trophy: Desert Rain Frog
Find the desert rain frog.
Type: Bronze
Category: Collectible
Unlock Details
This frog is hidden off the main path, so you will need to explore quieter side areas rather than following the obvious route. Listen for subtle environmental cues and check tucked-away spots or small hidden sections, and you should come across it without too much trouble if you stay observant.
Trophy: Elasmosaur Rider
Ride an elasmosaur.
Type: Bronze
Category: Collectible
Unlock Details
In the Shadow Tundra, head to the upper section where you use boost wisps, then take the path toward the doorway on the left as you descend the hill. Inside, activate the water point within the skull to restore the area, which causes elasmosaurs to appear. Use the kelp nearby to launch yourself and land on one, and if you miss, just reset and try again since they stay in the area.
Video Guide: https://www.youtube.com/embed/ujtbiL2pGPA
Trophy: Forbidden Valley Shell Collector
Find all the secret shells in the Forbidden Valley.
Type: Bronze
Category: Collectible
Unlock Details
Shells in this area are often hidden near lantern puzzles and along the edges of the map, so after activating water points, take a moment to check nearby cliffs, pillars, and raised platforms. If you stay thorough while progressing, you can grab most of them without needing to backtrack later.
Trophy: Frog Skeleton
Find the frog skeleton.
Type: Bronze
Category: Collectible
Unlock Details
You need to locate the frog skeleton, which is hidden in a hard to spot area similar to the other frog collectibles. When you reach the area with the water bubble near the large door, head to the right and cross over to the nearby boat. From there, make your way upward to the taller platform and look for a lantern at the top where the frog skeleton is resting. It is easy to overlook if you stay focused on the main objective, so take a moment to explore upward paths in this section. 1. Desert Rain Frog, after activating the sphere water point on the right chain, use the kelp behind the building to climb to the top of the waterfall, then follow the cliffs to the right and drop down the set of four stone platforms to find it at the lowest level. 2. Bullfrog, after activating the water point that triggers the exit chain, go to the top of the building behind the large shark statue, then carefully cross the narrow rooftop toward a pillar and climb it to reach the frog. 3. Horned Frog, after activating the first gold bell, head to the back of the large open area and use the ramp with a boost jump to reach the highest central platform where the frog is located. 4. Poison Dart Frog, after activating the water point on the boat, use kelp or the chain to reach the first pillar, then water grind toward the cliff near the boat to find the frog along that route. 5. Frog Skeleton, in the area with the water bubble near the large door, go right to the boat, then climb up to the higher platform and check the lantern at the top to find it.
Video Guide: https://www.youtube.com/embed/4YyUhELFhcc
Trophy: Frozen Drifts Shell Collector
Find all the secret shells in the Frozen Drifts.
Type: Bronze
Category: Collectible
Unlock Details
Most shells here are placed near lantern clusters, snowy paths, and around ice formations, so make sure to explore both sides of each new area before continuing forward. If you are lighting lanterns for water points, always check the nearby surroundings since shells are often placed close by.
Trophy: Horned Frog
Find the horned frog.
Type: Bronze
Category: Collectible
Unlock Details
This frog is tucked away in a less obvious part of the environment, so look for areas that feel slightly off the main route or require a small detour. Staying curious and checking unusual paths will lead you right to it.
Trophy: Humpback Rider
Ride a humpback whale.
Type: Bronze
Category: Collectible
Unlock Details
In the Shadow Tundra, restore the water around the large statue by activating the point on its hand and you will see humpback whales appear in the area. Use the kelp that spawns nearby to launch yourself upward and land on one of the whales. Take your time lining up the jump since they move slowly and are easy to catch.
Trophy: Lost Grotto Shell Collector
Find all the secret shells in the Lost Grotto.
Type: Bronze
Category: Collectible
Unlock Details
All shells in the Lost Grotto are tied to exploration around buildings, rooftops, and hidden corners, so make sure to fully clear each section before moving on. Pay extra attention to elevated paths and areas that require wall rides or bubble routes, as shells are often placed slightly off the main objective path.
Trophy: Orca Rider
Ride an orca.
Type: Bronze
Category: Collectible
Unlock Details
In the Veiled Sea, restore the water that activates the left chain in the main open area and you will start to see marine life appear, including orcas. Use nearby jellyfish to gain height and land on one as it swims past. If you miss your jump, just reposition and try again, they circle the area so you will get another chance quickly.
Trophy: Poison Dart Frog
Find the poison dart frog.
Type: Bronze
Category: Collectible
Unlock Details
Like the other frogs, this one is hidden in a side area that is easy to miss if you are rushing forward. Slow down, explore thoroughly, and check hidden corners or elevated spots, and you will find it without needing to backtrack later.
Trophy: Restore the Lost Grotto
Return all water to the Lost Grotto.
Type: Bronze
Category: Collectible
Unlock Details
You need to activate every water point in the Lost Grotto chapter, including a few that are slightly off the main path. Some will happen naturally, but others require you to carry water bubbles and solve simple traversal routes, so take your time and focus on completing each area fully before moving on. 1. Pick up the water bubble near the door and follow the ground path into the building to guide it into the turtle mouth for the first water point. 2. Grab the water bubble again, activate the lanterns near the first turtle head to unlock the wall ride, then follow the rooftop path until you reach the next turtle head on your right. 3. To open the large gold door, activate the four switches in the tall building area, then use the left wall ride to reach another water bubble. Carefully return by chaining wall rides and avoiding falling sand, then deliver the bubble safely to the turtle mouth. 4. After activating the previous point, head above the building and continue forward to find the final water point tied to that route.
Video Guide: https://www.youtube.com/embed/GYYZb0dpF80
Trophy: Sacred River Shell Collector
Find all the secret shells in the Sacred River.
Type: Bronze
Category: Collectible
Unlock Details
Shells in this chapter are spread across islands, rooftops, and paths connected by chains or jellyfish, so take your time exploring vertically as well as horizontally. If you see a structure or platform slightly off the main route, it is usually worth checking since shells are often placed there.
Trophy: Shadow Tundra Shell Collector
Find all the secret shells in the Shadow Tundra.
Type: Bronze
Category: Collectible
Unlock Details
In the Shadow Tundra, shells are commonly found near wisp routes, hidden side paths, and areas slightly off the main downhill flow. Use your speed boosts to explore alternate routes and check any side openings, especially near bones or structures, to avoid missing the harder ones.
Trophy: Sperm Whale Rider
Ride a sperm whale.
Type: Bronze
Category: Collectible
Unlock Details
In the Sacred River, activate the water point in the center of the large circular room to bring life back to the area. Sperm whales will begin swimming nearby, and you can use the kelp to boost yourself onto one. They move in clear paths, so just wait for a good angle and go for it.
Trophy: Tile Finder
Find 10 fish tiles.
Type: Bronze
Category: Collectible
Unlock Details
Fish tiles are scattered all over the game and you only need 10, so this is very manageable as long as you explore a bit. You do not need all of them, so do not stress about missing a few, just grab the ones along your path and you will get this naturally. If you want a quick route, here are 10 easy early locations you can follow to secure the trophy without backtracking too much. 1. Before the big circular tower window, go around the back by following the fish markings and grab the tile behind the tower. 2. Use the pothole shortcut after the first tile to reach the top of the tower, then check the right side for the next tile. 3. Jump through the dome of the tower and slowly drop onto the statue on the right side to collect it. 4. On the left side of the large temple, check the lower section of the roof for a tile. 5. From the previous spot, glide to the end of the roof and look down into an open archway marked with fish, then jump across to reach it. 6. Near the hidden chest inside a wall from the Treasure Tracker area, go around the interior corner of the building to find this tile. 7. Drop down from there, head right of the vendor, then look right again to spot a tile on a ledge. 8. After restoring water in the temple, go to the front of the roof and use the kelp to float up to the large statue where the tile is located. 9. Exit the temple and head to the right side where three small buildings are, use the jellyfish jump strips to reach the tile on the third roof. 10. From the top of the main temple, move along the right side and look toward a statue off the ledge where the final tile is waiting.
Trophy: Treasure Tracker
Open 10 treasure chests.
Type: Bronze
Category: Collectible
Unlock Details
Treasure chests are spread all across the world and you only need 10, so this will come naturally as long as you explore a bit instead of rushing forward. You do not need anywhere close to all of them, so do not stress about missing a few, just grab the easy ones you see along your path and you will hit this early. If you plan to go for extra currency later, opening more along the way will save you time.
Video Guide: https://www.youtube.com/embed/6kiJ8K-9b3w
Trophy: Trick Attack Seeker
Find all trick attack areas.
Type: Bronze
Category: Collectible
Unlock Details
You need to locate every Trick Attack area across the game, and while they are slightly hidden, they are not too difficult to find if you explore side paths in each chapter. These areas appear in Veiled Sea, Lost Grotto, Shadow Tundra, and Sacred River, so make sure you check for doors, alternate routes, and anything that looks slightly off the main path. 1. Veiled Sea, in the second major area with the two chains, activate the water point on top of the building that rises from the sand, then check the left side of the central building to find a door in the wall that leads to the trick attack area. 2. Lost Grotto, in the area with the tall buildings, head to the right side and follow the path toward the large open structure where the trick attack area is located. 3. Shadow Tundra, after activating the first golden bell, go to the far right side of the large area and continue past the right golden bell to find the hidden entrance. 4. Sacred River, after activating the water point on the large boat, ride the chain toward the floating island, then bounce across the two jellyfish and aim right to reach a smaller island with lanterns, activate them to spawn paper lanterns and use them to grind to the distant wall where the doorway to the trick attack area is located.
Video Guide: https://www.youtube.com/embed/fGdhTRRJS3I
Trophy: Veiled Sea Shell Collector
Find all the secret shells in the Veiled Sea.
Type: Bronze
Category: Collectible
Unlock Details
You need to collect every shell hidden throughout the Veiled Sea, and while many are along the main route, several are tucked away on side paths or higher ledges. Take your time exploring around structures, walls, and rooftops instead of rushing forward, and you will find most of them naturally without needing a full cleanup later.
Trophy: Water Whisperer
Find all secret shells.
Type: Gold
Category: Collectible
Unlock Details
You need to collect all 50 secret shells spread across every chapter, and many of them are hidden in hard to spot locations off the main path. Take your time exploring rooftops, side paths, and elevated areas in each level instead of rushing forward, since most shells are placed just slightly out of view. One shell is tied to purchasing the final reward from the mysterious vendor, so make sure you are also collecting enough currency along the way, and if you stay thorough during your playthrough, you can avoid a long cleanup at the end.
Video Guide: https://www.youtube.com/embed/rM8jFC1zDNs
Trophy: Whale Shark Rider
Ride a whale shark.
Type: Bronze
Category: Collectible
Unlock Details
In the Sacred River, restore the water by activating the mechanism on top of the large ship and you will see whale sharks swimming around the surface. Jump onto one as it passes by the ship, and do not overthink it, they are large targets and easy to land on if you stay patient.
Trophy: Wisdom of the Ancients
Read all the stele messages.
Type: Bronze
Category: Collectible
Unlock Details
You need to find and interact with all 23 stele messages scattered throughout the game, and while many are along the main path, several are tucked away in side areas or slightly off-route. Keep an eye out for glowing rune-like structures as you explore and make a habit of checking nearby ledges, corners, and hidden paths so you do not miss any. If you stay thorough as you progress instead of rushing forward, you can pick up most of them naturally and avoid a full cleanup later.
Video Guide: https://www.youtube.com/embed/GnR9mXITqjU
Trophy: Great Score
Earn a game-wide high score of 1,000,000 points or higher.
Type: Silver
Category: Grind
Unlock Details
The easiest way to reach one million points is by chaining tricks on jellyfish so you can stay airborne and build a massive combo without interruption. Bounce between two nearby jellyfish and keep performing tricks until your score is well over the requirement, then make sure to land safely to lock it in. After that, simply finish the game and let the credits play for the score to register, and the trophy will unlock.
Trophy: Loyal Customer
Earn the last reward from the mysterious vendor.
Type: Silver
Category: Grind
Unlock Details
You need to purchase all five rewards from the mysterious vendor using Tetra, which totals 8550, so this will likely carry into a second run or some light cleanup. The upgrades cost 50 for Tricks, 500 for Spin Tricks, 1000 for Drop, 2000 for Super Jump, and 5000 for the final reward, and the easiest way to finish this is by replaying a fast chapter like Frozen Drifts and collecting all available Tetra in a quick loop. Once you buy the final upgrade, the trophy will unlock immediately, so just stay consistent and it will come together faster than it looks.
Trophy: New High Score
Beat your own game-wide high score.
Type: Gold
Category: Grind
Unlock Details
The easiest way to do this is to treat your first playthrough as setup, then go for a massive score run afterward. Find an area with two jellyfish and bounce between them while chaining tricks to build a huge combo, then land safely to lock in a score that beats your previous total. If you combine this with a fast completion run, you can also benefit from the end-game score multiplier, so staying efficient while building your combo will make this much easier than it sounds.
Trophy: Untouchable
Defeat Tornamun without taking a single hit.
Type: Silver
Category: Combat
Unlock Details
You need to defeat the final boss without taking any damage, and this is easily the hardest trophy in the game, so expect a few practice runs before everything clicks. The fight is built around collecting fish balls and firing them at the boss to progress phases, so your main focus is survival first and damage second, and if you stay calm and keep moving, every attack is avoidable. 1. Phase One, falling rocks are the only threat and the terrain shifts between flat ground, broken sections, half pipes, and a straight run. Keep moving left or right at all times to avoid the rocks, do not panic when the ground breaks, and focus on staying on safe paths until you reach the section where you can collect fish balls and deal damage. 2. Phase Two, you fight in a large half pipe while dealing with a fire beam, fire wall, and falling meteors. Always keep moving side to side since the fire beam tracks where you were, not where you are, so constant movement keeps you safe. Jump over the fire wall by staying near one side and reacting late, and watch the ground for meteor indicators so you can shift position early instead of reacting last second. 3. Phase Three, the arena becomes a looping whirlpool and adds fire rings and deflected fireballs to the fire beam. Hold a steady direction to avoid the beam, ride along the curve of the whirlpool to slip through fire rings or jump them if needed, and when the boss deflects your attack, time your button press to send it back. When the dolphin and later the shark assist, use the same timing to reflect attacks and then move in to deal damage quickly before backing off again.
Trophy: Awesome Combo!
Land a 20x combo trick.
Type: Silver
Category: Misc
Unlock Details
The easiest way to reach a 20x combo is by using jellyfish to stay in the air for an extended period. Keep bouncing between them and perform tricks continuously, and if one jellyfish is not enough, move to another mid-combo to keep it going. Once you hit 20x, make sure you land safely to lock it in, and do not be surprised if it takes a couple tries until your timing feels right.
Trophy: Cool Combo!
Land a 10x combo trick.
Type: Bronze
Category: Misc
Unlock Details
For a 10x combo, you will need a bit more airtime, so using jellyfish or bounce spots is the easiest method. Chain your tricks while staying airborne and focus on a smooth landing at the end since the combo only counts once you touch the ground. If you drop early, just reset and try again, it comes together quickly once you get a rhythm.
Trophy: Drop
Earn the Drop ability.
Type: Bronze
Category: Misc
Unlock Details
The Drop ability is purchased from the mysterious vendor using Tetra, so just keep collecting currency as you play and spend it when you find the vendor. This comes fairly early compared to the later upgrades, so you should unlock it naturally as long as you are not skipping collectibles, and it is worth grabbing as soon as possible since it helps with traversal.
Trophy: Long Distance Jumper
Travel a huge distance without touching the ground.
Type: Bronze
Category: Misc
Unlock Details
The easiest way to get this is in the Shadow Tundra where you first encounter wisps, which give you a forward speed boost when activated. Head to the upper section of the area, turn back toward the entrance near the shark statue, and line yourself up with the jellyfish jump that leads to distant platforms. Instead of taking the normal route, aim slightly left of the platform, chain your wisps for speed, and use your extra jump to stay airborne as long as possible. If it does not pop right away, do not worry, just keep your momentum going and you will get it after a couple tries once you get the timing down.
Video Guide: https://www.youtube.com/embed/dy1vA3NXIQw
Trophy: New Game Plus Completed
Complete the adventure in New Game Plus mode and view the credits.
Type: Gold
Category: Misc
Unlock Details
Start a New Game Plus run and finish the game again while watching the credits to the end. This is much easier than your first playthrough since you will already have your upgrades and knowledge of the routes, so focus on moving quickly and skipping anything optional to reach the ending without slowing down.
Trophy: Nice Combo!
Land a 5x combo trick.
Type: Bronze
Category: Misc
Unlock Details
This is your first combo milestone and will likely come naturally once you unlock tricks. Find any area with good airtime like jellyfish or jump pads, perform a few tricks while in the air, and land cleanly to secure the combo. Do not rush your inputs, just keep it controlled and you will hit 5x without much effort.
Trophy: Speed Surfer
Complete the adventure in under 2 hours.
Type: Silver
Category: Misc
Unlock Details
You need to finish the game in under two hours, and this is much easier on a second run once you know the routes. Ignore optional water points and only activate the main ones needed to progress, and keep your movement smooth instead of stopping to explore. If you already have upgrades like faster traversal abilities, this becomes very manageable, so treat this as a clean, focused run where you just keep moving forward.
Trophy: Spin Tricks
Earn the Spin Tricks ability.
Type: Bronze
Category: Misc
Unlock Details
Spin Tricks are unlocked by purchasing them from the mysterious vendor with Tetra, and this is one of the earlier upgrades you can get. Focus on picking up easy Tetra from exploration and chests, and you should be able to afford this without going out of your way, making it a quick and natural unlock.
Trophy: Super Jump
Earn the Super Jump ability.
Type: Bronze
Category: Misc
Unlock Details
Super Jump is a later upgrade from the mysterious vendor and requires a larger amount of Tetra, so you will likely unlock it closer to the end of your playthrough or shortly after. Keep collecting Tetra consistently and you will reach it without too much grinding, and it is very useful once you have it.
Trophy: Trick Attack Expert
Beat the high score in all trick attack areas.
Type: Silver
Category: Misc
Unlock Details
You need to beat the high score in all four Trick Attack areas, and the easiest way to do this is by chaining tricks while staying airborne as long as possible. Most areas have jellyfish or bounce points, so use them to keep your combo going and build score quickly, then land safely once you are above the required score to lock it in. The target scores are 8000 in Veiled Sea and 10000 in Lost Grotto, Shadow Tundra, and Sacred River, and while Veiled Sea does not have jellyfish, you can still build enough score with clean trick chains and good timing. If you fall short, just reset and try again, it becomes much easier once you get into a rhythm.
Trophy: Tricky
Do all the aerial spin tricks.
Type: Silver
Category: Misc
Unlock Details
You need to perform all 20 aerial spin tricks at least once, and the easiest way to do this is by using jellyfish to stay airborne while cycling through each input. Make sure you have both the Tricks and Spin Tricks upgrades unlocked first, then take your time and go through each combination one by one so you do not miss any, since the game does not track them for you. 1. L1 + Cross = Pommel 2. L1 + Square = False Edge 3. L1 + Triangle = Stinger 4. L1 + Circle = True Edge 5. L1 + Cross, Cross = Pommel Backflip 6. L1 + Cross, Square = Pommel Left Spin 7. L1 + Cross, Triangle = Pommel Frontflip 8. L1 + Cross, Circle = Pommel Right Spin 9. L1 + Square, Cross = False Edge Backflip 10. L1 + Square, Square = False Edge Left Spin 11. L1 + Square, Triangle = False Edge Frontflip 12. L1 + Square, Circle = False Edge Right Spin 13. L1 + Triangle, Cross = Stinger Backflip 14. L1 + Triangle, Square = Stinger Left Spin 15. L1 + Triangle, Triangle = Stinger Frontflip 16. L1 + Triangle, Circle = Stinger Right Spin 17. L1 + Circle, Cross = True Edge Backflip 18. L1 + Circle, Square = True Edge Left Spin 19. L1 + Circle, Triangle = True Edge Frontflip 20. L1 + Circle, Circle = True Edge Right Spin
Trophy: Water Rider
Ride the water rail 4 times consecutively.
Type: Bronze
Category: Misc
Unlock Details
As soon as you unlock the water rail ability, head to an area with jellyfish since they make this much easier to control. Bounce on a jellyfish and press jump three times while airborne to activate the water rail, then aim to land back on the same jellyfish and repeat the process without touching the ground. Keep the rhythm steady rather than rushing, and once you chain four in a row cleanly, the trophy will pop.
Trophy: Sword of the Sea
Complete the adventure and view the credits.
Type: Silver
Category: Story
Unlock Details
Finish the game and watch the credits all the way through to unlock this. You do not need to 100 percent everything before finishing since chapter select lets you clean up anything later, so just focus on completing the story at your own pace and enjoy the ending, the trophy will pop once the credits finish.
The opening chapters are all about learning how the game flows, and it does a great job of easing you in. You will start getting used to movement, water restoration, and how exploration works, and this is the perfect time to slow down and actually look around. There are a lot of collectibles hidden just slightly off the main path, so if something looks climbable or reachable, it probably is.
This is also where you meet the mysterious vendor, and your main focus early on should be collecting as much Tetra as possible without going out of your way to grind. Just play naturally, grab chests and shells when you see them, and you will unlock your early abilities without stress. If you miss something, do not worry, nothing here will lock you out permanently.
Once the game opens up, you will notice levels becoming more vertical and more layered, with a lot more hidden routes and optional paths. This is where exploration really starts to matter, especially for shells, fish tiles, frogs, and other collectibles. The game rewards curiosity heavily, so take your time clearing each area before moving forward.
Your abilities also start to come together here, and movement becomes smoother and faster. Water Rail, Spin Tricks, and Super Jump all make traversal easier and help with trophies tied to combos and movement. If something feels difficult, it usually just means you have not fully used your abilities yet, and this is a great time to experiment and get comfortable with them.
As you move into the final chapters, the game becomes more about execution and less about discovery. You will still find collectibles, but most of your focus should shift toward finishing remaining upgrades and making sure you are not leaving anything behind before the final stretch. This is also a good time to double-check areas if you feel like you missed something earlier.
The final sequences test everything you have learned, especially movement control and reaction timing. Stay calm, keep moving, and remember that most challenges are more about rhythm than difficulty. If something feels overwhelming, you can always take a step back and retry, and if needed, Ask Gami for a quick assist.
After finishing the game, cleanup is very manageable thanks to chapter select, so you can go back and grab anything you missed without replaying everything. This is the time to finish collectibles like shells, steles, frogs, and any leftover trophies tied to exploration or abilities.
For score-based or speed-related trophies, it is best to handle them after you are comfortable with the game. A second run will feel much faster and smoother, especially with all upgrades unlocked. If anything feels confusing or tedious, just Ask Gami and save yourself the headache, that is literally what it is here for.
Video Library
3 videos
Sword of the Sea | Launch Date Trailer | PS5 & PC
Tour Pages
Tour Pages Coming Soon
Article-style guides for puzzles, bosses, collectibles, systems, trophies, and side quests are still being built for this game.