Walkthrough Preview
Walkthrough Completion
0 / 49 Completed
0%
Overall Walkthrough Progress0/49 • 0%
Parts
49
Main Story
40 Hrs
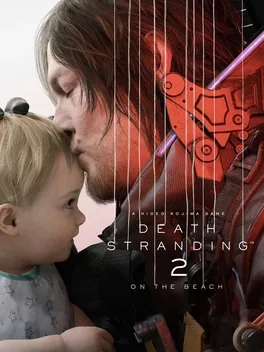
Reconnect a fractured world across Mexico and Australia in Death Stranding 2: On the Beach. Deliver vital cargo, build routes with other players, face new environmental threats, and uncover a mysterious story as Sam Porter Bridges embarks on another unforgettable journey.
Walkthrough Completion
0 / 49 Completed
0%
Parts
49
Main Story
40 Hrs
Video Library
5 videos
Death Stranding 2: On the Beach - Final Trailer | PS5 Games
Tour Pages
19 guides
The Motherhood door code in Death Stranding 2 is the birthday you entered when starting the game. During Order 26, open the Corpus, read the Motherhood facility entry, and you'll discover that the passcode is tied to Sam's date of birth.
If you've forgotten your birthday selection, the Motherhood Corpus entry can reveal the code directly.
The VR Training Room can be accessed from any location that contains a Private Room, including major facilities, player-built Safe Houses, and the DHV Magellan.
Inside the VR Training Room, players can replay tutorials, test weapons, complete score-based delivery challenges, and view enemy models through the Ghost Mech Archive.
To recover the Stolen Record Collection in Death Stranding 2, accept Sub Order 103 from the Musician during Episode 3. The cargo is located at the bottom of the cliff behind the Musician's shelter and can be reached using multiple Climbing Anchors.
Once you reach the search area, look toward the yellow cargo containers on the right side of the cliff. The record collection is located there. Be careful on the return trip, as the cargo is breakable.
There are 36 Prepper and Facility Locations spread across Australia in Death Stranding 2. Increasing your Connection Level with each facility unlocks weapons, skeleton upgrades, APAS Enhancements, vehicle upgrades, backpack customization options, music tracks, and cosmetic rewards.
Many facilities are required through the main story, while others are optional preppers that can only be unlocked through lost cargo, side orders, or exploration.
The Yotei Mask is a special Ghost of Yotei Easter egg that can be unlocked from The Adventurer in Death Stranding 2. After rescuing him during Order 37, you'll receive an SSS message asking you to deliver cargo to him.
Once the message appears, simply complete any delivery for the Adventurer and he will reward you with the Yotei Mask, which can be equipped as a face accessory.
There are currently 52 songs available in Death Stranding 2. Eighteen tracks unlock after connecting The Musician to the Chiral Network, while the remaining songs are earned through story progression, prepper connection levels, side orders, and completing the game's ending.
Most songs are automatically unlocked during Main Orders, but several require increasing your relationship with specific preppers such as the Musician, Data Scientist, and Ghost Hunter.
Players can find Usada Pekora in Death Stranding 2 as the prepper known as the Data Scientist. She is first encountered during Order 25, which requires Sam to deliver a pizza from the Pizza Chef to her facility within a time limit.
After unlocking the Data Scientist, reaching Connection Level 2 rewards players with the Nousagi Hat, a cosmetic item that also slows stamina depletion while traveling on foot.
Blade Ghost Mechs are heavily armored enemies first encountered during Order 22 in Death Stranding 2. To defeat them, focus on breaking their color-coded shields with sustained gunfire, dodge their melee attacks at the last second, and use weapons like the Machine Gun or Grenade Pistol to create openings.
The key to winning is staying mobile and avoiding their powerful spinning blade attacks while continuously wearing down their shields.
The Kraken Ghost Mech is a major boss encountered during Order 12 in Death Stranding 2. To defeat it, focus on its glowing orange weak points, especially the joints on its tentacles and the large orange nodes beneath its body.
A Shotgun is the most effective weapon for destroying these weak points quickly, while careful dodging is essential for surviving its powerful slam and tentacle attacks.
Porter Grade in Death Stranding 2 increases through deliveries, combat, stealth gameplay, online interactions, and cargo quality. Each Porter Grade category levels separately and contributes to unlocking powerful APAS Enhancements later in the story.
Improving your Porter Grade gives Sam access to new passive abilities and customization options, making it one of the most important progression systems in the game.
There are 48 APAS Enhancements available in Death Stranding 2. These upgrades act as passive skills that improve Sam's delivery efficiency, combat abilities, stealth tools, social features, and traversal capabilities.
New APAS Enhancements unlock by increasing Porter Grade categories and raising connection levels with facilities throughout Australia.
There are 21 Backpack Components and 8 Backpack Accessories in Death Stranding 2. Components provide major gameplay benefits such as increased battery life, additional ammunition storage, improved balance, and cargo protection, while accessories offer smaller passive bonuses that improve exploration, combat, and deliveries.
Most backpack upgrades are unlocked by increasing Connection Levels with facilities throughout Australia. :contentReference[oaicite:0]{index=0}
There are currently 3 Skeleton Types in Death Stranding 2: the Battle Skeleton, Boost Skeleton, and Bokka Skeleton. Each Skeleton has three upgrade levels that improve their effectiveness and unlock through facility connection levels.
The Battle Skeleton focuses on combat and defense, the Boost Skeleton increases movement speed, and the Bokka Skeleton is designed for traversing difficult mountain terrain.
To upgrade your backpack battery in Death Stranding 2, connect Heartman's Lab to the Chiral Network and increase your connection level with the facility. Extra Battery upgrades unlock at connection levels 2, 3, and 4, providing larger battery reserves for Skeletons, equipment, and other powered devices.
Once unlocked, Extra Batteries can be fabricated at facilities and attached directly to Sam's backpack.
Animals become available in Death Stranding 2 after completing Order 15: Deliver the Test Subject Kangaroo to the Animal Shelter. Once unlocked, wildlife can be found throughout Australia and captured by approaching them and pressing Square.
Captured animals are placed into an Animal Carrier and must be delivered to the Animal Shelter, where they can safely live on the reserve and reward Sam with Likes.
The fastest way to farm materials in Death Stranding 2 is by restoring and upgrading Mines across Australia. Mines generate large amounts of resources in exchange for Chiral Crystals and can be upgraded for even greater yields.
For early and mid-game farming, clearing Brigand Camps, claiming materials from facility terminals, and collecting abandoned resource containers from other players are the most reliable methods. Special Alloys are generally easiest to obtain through mines, while Metals and Ceramics are commonly found at enemy camps and distribution centers.
To unlock the Savior of Terminal Fort Knot trophy in Death Stranding 2, you must complete the Ghost Hunter questline, reach approximately 4.5 stars with him, accept Sub Order 114: Save F8 from a Voidout, and defeat the secret Giga BT boss near Terminal Fort Knot.
The trophy can only be earned after finishing the main story because Terminal Fort Knot must be connected to the Chiral Network first.
To earn the Showdown at Tar Lake trophy in Death Stranding 2, you must connect the Fisherman to the Chiral Network, raise him to 4 stars, complete Sub Order 117, capture a Delphis BT Catcher using an EX Capture Grenade, and use it as bait to summon the Lord of Tar Lake.
Defeating the Lord of Tar Lake unlocks the trophy and completes the Fisherman's unique questline.
To unlock the Conqueror of the Golden CC trophy in Death Stranding 2, simply find and destroy a Golden Chiral Creature. The easiest known location is near The Architect in northern Australia, where several Golden Chiral Creatures can spawn around small tar pools southeast of the shelter.
Destroying just one Golden Chiral Creature immediately unlocks the trophy.
49 Sections | Main Story 40 Hrs
55 Trophies | 1 Platinum
Trophy: Homo Liberans: The Savior of Humanity
Obtain all trophies.
Type: Platinum
Tags: Misc
Unlock Details
Obtain all trophies.
Trophy: Rare Specimen Rescuer
Deliver an albino animal.
Type: Bronze
Category: Collectible
Unlock Details
This requires you to find and deliver an albino animal, which is just a rarer version of the regular wildlife you see while exploring. The easiest way is to keep scanning open areas, especially desert regions, where albino animals stand out more clearly due to their bright white color. Once you spot one, take your time approaching so you do not accidentally run it over, then capture it and deliver it to the Animal Shelter. It might take a bit of luck to find one, but once you know what to look for, it becomes much easier and feels like a nice little bonus objective while exploring.
Video Guide: https://www.youtube.com/embed/NQnIdYVAwWY
Trophy: A Life Well Liked
Receive 2400 Likes from orders.
Type: Bronze
Category: Grind
Unlock Details
This unlocks once you earn 2400 total Likes from completing orders, which will happen very early without any effort as long as you are doing regular deliveries. Every successful delivery gives you Likes based on performance, and even a handful of standard runs will push you past this requirement quickly. If you are picking up extra cargo along the way and turning it in, this will pop almost immediately, so just play normally and enjoy the steady stream of Likes coming in.
Trophy: A Porter at Peak Popularity
Receive 50000 Likes from orders.
Type: Bronze
Category: Grind
Unlock Details
This requires 50000 total Likes from completed orders, but it sounds much worse than it actually is since you will naturally build toward this while progressing through the game. As you improve your delivery routes, carry more cargo, and complete higher-rated orders, the number of Likes you earn per run increases significantly, especially when turning in multiple items at once. If you are actively working toward maxing facility connections and completing Standard Orders, this will come without needing any dedicated grind, so just stay consistent and the trophy will eventually unlock on its own.
Trophy: A Premier Porter
Reach high porter grades in all categories.
Type: Silver
Category: Grind
Unlock Details
This requires you to reach level 40 in all porter categories, which sounds intimidating but happens naturally if you are working toward full completion. Each category levels up through different actions, so the key is to play in a balanced way by delivering cargo, fighting enemies, using stealth, completing aid requests, and building or upgrading structures. If one category is lagging behind, focus on activities tied to it, like clearing enemy camps for combat or completing aid requests for servicemanship. This is a long-term trophy, but if you are actively going for five stars with every facility and engaging with all systems, it will come without needing a dedicated grind.
Video Guide: https://www.youtube.com/embed/Rafe-HJ3oFs
Trophy: Compulsive Cargo Carrier
Deliver 500 pieces of cargo.
Type: Bronze
Category: Grind
Unlock Details
This unlocks after delivering 500 pieces of cargo, which sounds like a lot at first but happens naturally as you progress through the game. As you reach later areas, many orders include multiple cargo pieces, and combining deliveries with lost cargo quickly adds up without extra effort. If you are actively working toward maxing facility connections, you will hit this milestone much earlier than expected, so just keep stacking deliveries and it will pop on its own.
Trophy: Connecting Hearts and Minds
Maximize connection level with all facilities.
Type: Gold
Category: Grind
Unlock Details
This is one of the biggest grinds in the game and requires you to reach five stars with every facility, so expect to spend a good amount of time doing deliveries and helping out preppers. The most efficient way to approach this is to combine it with Standard Orders, constantly scan for lost cargo, and deliver everything you find while moving between locations. Some preppers require extra steps like Sub Orders or waiting for messages before they progress, so if one seems stuck, move on and come back later instead of forcing it. It also helps to build roads, ziplines, and other infrastructure early, since this will speed up deliveries significantly over time. If you stay consistent and chip away at it alongside other trophies, this becomes much more manageable and avoids a massive grind at the end.
Video Guide: https://www.youtube.com/embed/IlIC1NJ_AcY
Trophy: Heavy Lifter
Deliver cargo totaling two tons.
Type: Bronze
Category: Grind
Unlock Details
This requires delivering a total of 2000 kg of cargo, which is easier than it sounds once you start carrying larger loads and combining deliveries. A good approach is to stack multiple orders going to the same destination and pick up lost cargo along the way, since turning everything in at once increases your total quickly. Using vehicles or storing cargo at facilities to deliver in bulk also speeds things up, but even without going out of your way, this will come naturally as you progress through the game and handle bigger shipments.
Trophy: Keep on Connecting
Connect all facilities using your Q-pid.
Type: Silver
Category: Grind
Unlock Details
This requires you to connect every facility in the game to the Chiral Network, which will mostly happen naturally as you progress through the story, with only a handful of optional preppers needing extra effort. The main thing to watch for is scanning for lost cargo and accepting Sub Orders, since some characters will not appear or progress unless you interact with their items first. If a facility is not advancing, it usually just means you need to deliver more cargo or wait for a follow-up request to appear. By the time you are near the end of the game, you should have most of these connected already, making cleanup fairly straightforward.
Video Guide: https://www.youtube.com/embed/pIvO778BFFs
Trophy: Long-Distance Lugger
Travel 80km during deliveries.
Type: Bronze
Category: Grind
Unlock Details
This unlocks after traveling a total of 80 km during deliveries, and it is completely unavoidable as long as you are playing the game normally. Every delivery adds to your total distance, whether you are walking, driving, or using other traversal methods, and the game requires far more travel than this just to complete the story. You will likely earn this without noticing, so just keep moving and it will pop sooner than you expect.
Trophy: Master Builder
Build every structure type.
Type: Bronze
Category: Grind
Unlock Details
This requires you to build every structure type in the game, including PCC structures, tools, and certain unlockable items, so it is more of a long-term checklist than a difficult challenge. The key thing to remember is that you must place each structure yourself from scratch, since contributing to other players’ builds does not count. Many of these unlock naturally through story progression and increasing facility connection levels, so do not rush this early, just keep building new structures as they become available. A simple way to stay on track is to occasionally check your structure records and place anything you have not used yet, especially less obvious ones like the Cargo Catapult or Hot Spring Digger. If you make a habit of testing each new structure as you unlock it, this trophy becomes much easier and avoids a tedious cleanup at the end.
Video Guide: https://www.youtube.com/embed/kc_rOFgymmA
Trophy: Seasoned Porter
Complete multiple standard orders with S rank.
Type: Gold
Category: Grind
Unlock Details
This is one of the longer grinds in the game and requires you to earn S ranks in 10 delivery, 10 recovery, and 10 elimination or destruction Standard Orders, so you will naturally make progress as you work toward maxing connections and improving your porter grade. Make sure you are playing on at least Casual difficulty before starting any orders, otherwise your S ranks will not count, which is an easy mistake to make if you started on Story. Delivery orders are the simplest, just focus on keeping cargo damage low by driving carefully and avoiding unnecessary risks, while recovery orders usually require you to grab everything in the area, so take your time and scan thoroughly. The elimination and destruction category is the trickiest since there are fewer of them, so prioritize these whenever you see them and aim to take as little damage as possible during combat. A strong strategy for BT fights is to summon a captured BT to distract and deal damage, making these encounters much easier and faster. This will take time, but if you stay consistent and chip away at it alongside other trophies, it becomes much more manageable than it first looks.
Video Guide: https://www.youtube.com/embed/VRN2zyEsIQ4
Trophy: BT's Best Friend
Capture a large BT.
Type: Bronze
Category: Combat
Unlock Details
This unlocks after capturing a large BT using an EX Capture Grenade, which you gain access to later in the game. The key is to weaken a large BT until its health is low, then throw the grenade at it, ideally into its mouth, to successfully capture it instead of killing it. Once captured, you will receive a crystal that lets you summon that BT in future fights, which is both useful and honestly pretty cool. If you do not go out of your way for this, you will likely earn it naturally during later side quests or boss fights where capturing one is encouraged.
Video Guide: https://www.youtube.com/embed/5hn2mzqUUJI
Trophy: Conqueror of the Golden CC
Defeat the golden chiral creature.
Type: Bronze
Category: Combat
Unlock Details
This unlocks after defeating a golden chiral creature, which appears among groups of smaller chiral creatures usually found near tar pools or mines. The main challenge is not difficulty but spotting one before it burrows away, so slow down when approaching these areas and look carefully, especially at night when the golden glow is easier to see. Once you find one, take it out quickly from a distance with a weapon before it disappears. If it escapes, just move away and come back to reset the spawn, and you will eventually get another chance.
Video Guide: https://www.youtube.com/embed/vHJ4WtKQ-qw
Trophy: Savior of Terminal Fort Knot
Prevent a voidout at Terminal Fort Knot.
Type: Silver
Category: Combat
Unlock Details
This is the final step in the Ghost Hunter questline and becomes available late in the game after progressing his previous Sub Orders and reaching a point where his connection level temporarily stops. Once the final mission unlocks, you will be sent into a large-scale BT boss fight near Terminal Fort Knot, so come prepared with strong weapons like rocket launchers, machine guns, and plenty of Blood Bags. The boss is a massive BT with fairly readable attacks, so focus on keeping your distance, dodging its swings, and dealing steady damage rather than rushing in. If you have a captured BT available, using it during the fight makes things significantly easier by drawing attention away from you. Defeat the boss to prevent the voidout, and the trophy will unlock, finishing one of the more involved side quest chains in the game.
Video Guide: https://www.youtube.com/embed/fEPn_R3HFvs
Trophy: Showdown at the Tar Lake
Defeat the Lord of the Tar Lake.
Type: Silver
Category: Combat
Unlock Details
This is a multi-step side quest that ends with one of the tougher optional boss fights, so preparation makes a big difference. Progress the Fisherman to around four stars to unlock the final sub order. Head to the ghost mech factory and allow yourself to be dragged by BTs to trigger a fight with Delphis. Weaken Delphis and throw an EX Capture Grenade into its mouth when it is low to capture it. Return to the tar lake and summon Delphis using the BT crystal to start the main boss fight. The Lord of the Tar Lake is a large flying BT that dives in and out of the tar, so keep your distance, stay mobile, and focus your fire when it comes close. Using a summoned BT to distract it makes the fight much easier, giving you more time to deal damage safely. Once you bring it down, the trophy unlocks, and you will also finish off the Fisherman’s questline in the process.
Video Guide: https://www.youtube.com/embed/H3zjO_SLhgI
Trophy: A First Glimpse of the SSS
Read an SSS post.
Type: Bronze
Category: Misc
Unlock Details
This unlocks the first time you read a post on the Social Strand Service, which you will start receiving naturally after story events or resting in a private room. When a notification appears, you can open it immediately or access it later through the menu, and viewing any post will trigger the trophy. If it has not popped yet, just open the SSS tab from the menu and read the first available message, it takes a couple seconds and is basically unavoidable during normal play.
Trophy: A Private Show!
Watch a live performance.
Type: Bronze
Category: Misc
Unlock Details
This unlocks after watching a live performance in your private room, which becomes available once you gain access to the Music Player. Play the track “Horizon Dreamer” while in a private room, then talk to Dollman and choose to start the performance, which will trigger a full scene and unlock the trophy afterward. If it does not pop right away, try doing it again later in the story or specifically in the DHV Magellan’s private room, as it can be a bit inconsistent. Either way, it is a simple trophy and a nice moment worth watching at least once.
Trophy: Creature Comforter
Deliver a wild animal to the shelter.
Type: Bronze
Category: Misc
Unlock Details
You will unlock this by capturing and delivering any wild animal to the Animal Shelter, but it must be one you find yourself and not one tied to a story mission. Animals can be spotted by scanning the environment, and once you get close, you can capture them and carry them in a container. The easiest approach is to grab one you encounter naturally while exploring and either deliver it directly or entrust it to a nearby facility for later delivery. This is much simpler than it sounds and will likely happen without much effort once you start paying attention to wildlife.
Trophy: Dig, Dig, Dig!
Restore three mines.
Type: Bronze
Category: Misc
Unlock Details
This unlocks after restoring three mines, which you will naturally work toward while progressing other systems like monorails and facility connections. Mines require Resins and Special Alloys to restore, and once active, they let you exchange Chiral Crystals for useful materials, making them worth building beyond just the trophy. You only need three out of several available across the map, so just restore the ones you come across during normal play instead of going out of your way. If you are already working on monorail lines or nearby facilities, you will likely complete this without even noticing.
Trophy: Emergency Worker
Deliver emergency support.
Type: Bronze
Category: Misc
Unlock Details
You will unlock this by repairing a damaged structure, which can happen anywhere in the world after events like gate quakes. Look for the yellow hammer icon on the map or keep an eye out for worn-down structures while exploring, then interact with them and contribute materials, usually just Chiral Crystals, to repair them. The easiest way to trigger this is to check areas after a gate quake, since damaged structures are almost guaranteed to appear nearby. This is a quick and simple trophy if you make a habit of fixing things as you travel.
Trophy: Helping People to Connect
Complete an aid request for the first time.
Type: Bronze
Category: Misc
Unlock Details
You will unlock this the first time you complete any aid request, and this will happen naturally as you play since they are everywhere once the system is introduced. The easiest way is to look for the green circular markers on the ground near structures or facilities, step inside, and donate the requested item from your inventory, which only takes a few seconds. If you want a quick and reliable method, just keep a spare tool or material on you and fulfill the first request you see instead of overthinking it. NPC aid requests are also worth doing since they help increase connection levels, so this is one of those trophies that quietly contributes to your overall progress while barely requiring any effort.
Trophy: It's Like That
Send a Like for the first time.
Type: Bronze
Category: Misc
Unlock Details
This unlocks the first time you send a Like, which happens constantly throughout the game and is basically unavoidable. You can press the touchpad near structures, signs, or during certain interactions to send one, but you will likely trigger this without even trying since the game throws opportunities at you nonstop. If for some reason it has not popped yet, just walk up to any player structure and spam the Like button, and you will have it instantly.
Trophy: Making It Your Own
Decorate your private room with a photo.
Type: Bronze
Category: Misc
Unlock Details
This unlocks after you take a photo in Photo Mode and use it to decorate your private room, which is a quick and easy process once you know where to look. While out in the world, open Photo Mode and snap any picture, then head to a standard private room and interact with the screen opposite Sam to change the displayed image. Select your photo and the trophy will pop instantly, so feel free to take something cool or completely random, it does not matter as long as it is yours.
Trophy: My First Structure
Build your first structure.
Type: Bronze
Category: Misc
Unlock Details
You will unlock this the first time you place any structure, which will likely happen early without even trying since the game encourages using ladders and basic tools right away. The easiest way is to simply place a ladder, sign, or PCC structure during one of your early deliveries, and the trophy will pop instantly. If for some reason you have not triggered it yet, just open your inventory, select a ladder or PCC, place it anywhere valid, and you are done, this is basically a free introduction to the building system.
Trophy: My First Training Session
Complete a VR Training program.
Type: Bronze
Category: Misc
Unlock Details
This unlocks after completing any VR Training program, which you can access from the private room either through the VR option or the weapon testing area. You only need to finish one course with no score requirement, so pick something simple like the early stealth training and get it done quickly. These are short and straightforward, and honestly a nice break from deliveries, so do one as soon as it becomes available and grab this easy trophy without overthinking it.
Trophy: Porters Make the World Go Round
Barter with another porter.
Type: Bronze
Category: Misc
Unlock Details
You will unlock this by trading with an NPC porter, which you will start encountering after progressing the story a bit. When you see one, approach them and wait for them to offer you an item, accept it, then drop something from your inventory nearby for them to pick up in return. It does not need to be anything valuable, so just hand over a spare tool or item and the trophy will pop. These encounters happen naturally, but stopping for one quick trade is all it takes to get this done.
Trophy: Promising Signs
Construct an online aid request sign.
Type: Bronze
Category: Misc
Unlock Details
This unlocks as soon as you create your first aid request sign, which can be done manually through the signs menu or automatically if you unlock and activate the APAS enhancement that generates them for you. The fastest method is simply opening the signs menu and placing an online aid request anywhere, which takes only a few seconds and immediately pops the trophy. If you prefer a more passive approach, turning on the automatic aid request feature will trigger it shortly after without any input, though it can get a bit spammy. Either way, this is a quick free trophy and more of a system introduction than an actual challenge.
Trophy: Rail Restorer
Restore a monorail line.
Type: Bronze
Category: Misc
Unlock Details
This unlocks after fully restoring a monorail line, which means completing every Tracklayer section along that route and restoring any mines connected to it. The easiest approach is to focus on the line between West Fort Knot and the F2 South Distribution Center, since part of it is naturally progressed during the story, leaving less work for cleanup. Bring Resins, Special Alloys, and Chiral Crystals to each Tracklayer and mine, contribute the required materials, and continue until the entire route is complete. This can take some time, but it becomes much easier if other players have already contributed resources, so check progress before committing a full load yourself.
Trophy: Road Restorer
Restore a section of road.
Type: Bronze
Category: Misc
Unlock Details
You will unlock this the first time you fully restore a road segment using an Auto-Paver, which becomes available once you start expanding the network in Australia. Simply bring the required materials like Metals, Ceramics, and Chiral Crystals to any incomplete Auto-Paver and contribute enough to finish construction, and the trophy will pop as soon as the road is completed. This is something you should actively work on anyway since roads make travel much faster and safer, so consider building early sections when you can to save yourself a lot of time later.
Trophy: Self-Improvement
Activate an APAS enhancement.
Type: Bronze
Category: Misc
Unlock Details
You will unlock this as soon as you activate your first APAS enhancement, which becomes available early in Episode 3. Open the APAS menu either before an order or from the pause screen, select any upgrade you can afford, and activate it to immediately earn the trophy. There is no risk here, since you can freely turn enhancements on or off at any time, so feel free to experiment. A few early useful ones make traversal and combat smoother, but honestly just picking anything you can afford will get this done in seconds.
Trophy: So YOU'RE the Pizza Chef!
Discover the truth about the Pizza Chef.
Type: Bronze
Category: Misc
Unlock Details
This is a short side quest chain tied to the Pizza Chef that unlocks after progressing several related characters and story orders. First, connect the Pizza Chef, Data Scientist, and Architect to the network, then continue progressing the Pizza Chef’s orders until you are sent to retrieve his Misanga from a nearby bandit camp. Once you return it and gain access to his shelter, head inside and defeat the ghost mechs guarding the lower area to trigger a cutscene. The trophy unlocks after this reveal, and it is definitely one of the more memorable side moments in the game, so enjoy it.
Video Guide: https://www.youtube.com/embed/RbbTLqdHmE8
Trophy: Spring into Life
Dig a hot spring.
Type: Bronze
Category: Misc
Unlock Details
You will unlock this the first time you dig up a hot spring using the Hot Spring Digger, which becomes available later in the story once you reach the Motherhood area. After unlocking the tool, head to a marked spring location, equip the Hot Spring Digger from your PCC, and place it in the correct spot until the signal confirms you are in position. This is a quick and satisfying one, and you will likely get it naturally while going for the related star-gazing trophy, so think of it as a bonus for exploring a bit.
Trophy: Standard Porter
Complete a standard order for the first time.
Type: Bronze
Category: Misc
Unlock Details
You will unlock this naturally the first time you complete any Standard Order, which becomes available partway through Episode 3. These are optional deliveries that focus on things like speed, cargo condition, or quantity, and they are a core part of progressing your connection levels with facilities. Just pick one up from a terminal and deliver it to the destination, and the trophy will pop as soon as you complete it. You will be doing a lot of these throughout the game anyway, so there is no need to go out of your way here, this is basically the game introducing you to the grind in the nicest way possible.
Trophy: The Headless Riders Unmasked
Solve the headless riders mystery.
Type: Bronze
Category: Misc
Unlock Details
This side quest starts by progressing the Ghost Hunter’s connection level to around two stars, which requires completing a mix of Standard and Sub Orders after first meeting him near the Chronobiologist. Once unlocked, the mission takes place at night and requires you to use a Tri-Cruiser to trigger the event, so make sure you bring one or grab one nearby. You will be thrown into a chaotic fight against multiple ghost mech riders on a generated highway, but the key is to ignore the endless enemies and focus on the blue-glowing rider boss once Dollman points him out. Take him down as quickly as possible using weapons or even ramming with your vehicle, and the fight will end immediately. Once the boss is defeated, the trophy unlocks, wrapping up one of the more unique and unexpected encounters in the game.
Video Guide: https://www.youtube.com/embed/zTwexr8QYo0
Trophy: The Real Story of the Ghost Hunter
Reveal the truth about the Ghost Hunter.
Type: Bronze
Category: Misc
Unlock Details
This is a post-game trophy tied to the Ghost Hunter, and it becomes available after finishing the main story and returning to his shelter. If you chose to enable the Drawbridge Q-pid after the credits, his terminal will be inaccessible, but interacting with it will trigger a short scene and unlock the trophy. If you turned the system off instead, you can simply toggle it on in the settings to get the same result. This is a quick cleanup trophy and a final bit of closure for his storyline.
Video Guide: https://www.youtube.com/embed/GYUES3a6M8g
Trophy: Written in the Stars
Study the night sky.
Type: Bronze
Category: Misc
Unlock Details
This unlocks by relaxing in a hot spring at night and looking up at the sky to find a constellation, which is one of the more unique and chill moments in the game. Once you have access to a spring, rest until nighttime, get in, and follow the prompt to look at the stars, then scan around until you spot a bright constellation. It is a simple interaction, but a nice break from deliveries and combat, and honestly one of those moments where the game tells you to slow down and just enjoy the view for a second.
Trophy: Death Can't Tear Us Apart
Complete Episode 16: Tomorrow.
Type: Silver
Category: Story
Unlock Details
This trophy unlocks at the end of Episode 16 after the credits roll, marking the true completion of the main story, so all you need to do is finish the final sequence and let everything play out. There is a short playable section and a few final choices along the way, but nothing here will prevent the trophy, so feel free to sit back and take it in or skip through if you prefer. You will be given the option to turn the Drawbridge Q-pid on or off, which affects how dangerous the world feels in the post game, with one option making cleanup easier and the other keeping things more challenging. Do keep in mind that turning it on can temporarily block access to one specific side character, but this can be reversed later in the settings, so do not stress too much about the choice. Once the credits finish, the trophy will pop, and you are officially done with the story and ready to clean up everything else.
Trophy: Did He Say Nirvana?
Complete Episode 5: Conflagration.
Type: Bronze
Category: Story
Unlock Details
Episode 5 is a full combat-focused sequence where you are thrown into a strange realm and told to fight your way out, so this is less about deliveries and more about surviving the chaos. The first section is straightforward, just clear out enemies as you move forward, and do not worry too much about conserving ammo since the game gives you plenty of weapons to work with. The second area is more open, but honestly, going in aggressive is faster and more reliable than trying to play stealth, especially on lower difficulties where enemies are easier to handle. Your main target is the Mysterious Man, who will teleport around the area, so keep scanning or watch your Odradek to track his position and focus your fire on him whenever he appears. Once you deal enough damage and bring him down, the episode wraps up and the trophy unlocks, marking one of the more action-heavy moments in the game.
Trophy: Help us Bring Australia into the Network
Complete Episode 3: Drawbridge.
Type: Bronze
Category: Story
Unlock Details
Episode 3 is where the game really starts opening up, introducing more systems, tougher encounters, and longer deliveries, so this is your first real test as a porter. You will be completing orders up through Main Order 14, dealing with heavier cargo, BT zones, and your first proper combat-heavy missions against brigands and bosses. Vehicles become extremely important here, especially for hauling large deliveries, so do not hesitate to rely on the Tri-Cruiser or switch to the Off-Roader once unlocked for tougher terrain. When dealing with BT bosses or larger enemies, focus on hitting weak points and playing defensively rather than rushing in, since getting knocked down can spiral quickly. Restoring roads and the monorail during this episode is also a huge quality of life boost, making future deliveries much easier and saving you a lot of time later. Once you complete the final delivery to Rainbow Valley and meet up with your contact nearby, the trophy will pop, and by this point you should feel way more comfortable with the game’s core systems.
Trophy: His Name is Neil. Neil Vana
Complete Episode 8: Deluge.
Type: Bronze
Category: Story
Unlock Details
Episode 8 is a long and varied stretch that mixes combat encounters, fragile deliveries, and some of the first real challenges with harsh environments, so pacing yourself is key here. The opening sequence throws you back into combat against the Mysterious Man, where staying aggressive and using grenade-based weapons makes the fight much quicker, especially when dealing with the stamina-draining ice crystals. From there, you will juggle multiple delivery types, including cargo that cannot be submerged and heavier transport jobs that strongly favor using the Off-Roader and planning safer routes around hazards. The mountain section stands out as the toughest part, where snowstorms and steep terrain can slow you down significantly, so take safer angled routes instead of trying to brute force straight climbs. The final rescue mission is fairly straightforward if you travel light and focus on getting in and out cleanly. Once you return and enter the private room on the DHV Magellan, the trophy unlocks, marking one of the more demanding episodes so far.
Trophy: I Don't Break That Easily
Complete Episode 9: Puppets.
Type: Bronze
Category: Story
Unlock Details
Episode 9 leans heavily into mountain traversal and large-scale combat, so this is where preparation and smart routing really start to matter. The early deliveries across the mountain can be rough due to steep terrain, avalanches, and oxygen drain, so use the route planner carefully, avoid red zones, and equip the Oxygen Mask as soon as you get it to make life much easier. The giant mech fight is one of the bigger highlights here, and the safest approach is to keep your distance, aim for weak points, and let the DHV Magellan support you while you focus on dodging its heavier attacks. Later missions mix BT-heavy recovery zones and massive cargo deliveries, so knowing when to fight and when to just grab what you need and leave will save you a lot of frustration. The final order throws a large combat encounter at you, so bring plenty of weapons and Blood Bags, use cover effectively, and clear smaller enemies before dealing with the tougher threats. Finish the sequence and follow the prompts in the final scene, and the trophy will unlock after one of the more intense story segments in the game.
Trophy: I'll Always Be With You
Complete Episode 15: On the Beach.
Type: Bronze
Category: Story
Unlock Details
Episode 15 is the final major gameplay stretch and it leans fully into combat, so this is where everything you have learned comes together in a series of boss phases. The guitar becomes your main weapon here, and you can use it freely, so focus on quick shots to deal with incoming enemies efficiently rather than charging every attack. The first boss phase is all about reading attacks and reacting, so watch for swings and jumps, block when needed, and punish openings with a mix of charged and quick hits. The second phase gives you more space and cover, making it easier as long as you track the boss using sound and your scanner instead of chasing blindly. The final phase shifts into a more controlled melee fight, where patience matters more than aggression, so get a few hits in, block, then repeat instead of trying to rush it. There is even a moment where you can recover your health during a guitar sequence, which can save a run if things get messy. Finish the fight and follow the final prompt, and the trophy will unlock as you close out the last major challenge of the story.
Trophy: Keep Lou Safe...
Complete Episode 11: Quake.
Type: Bronze
Category: Story
Unlock Details
Episode 11 throws you straight into a long combat sequence, so this is all about preparation and staying alive under pressure. Before heading out, load up on weapons and Blood Bags and leave anything unnecessary behind, since you will not need delivery gear here. The fight against Neil Vana happens across multiple phases, starting with a more open battlefield where taking out his soldiers first can make things much easier before focusing on him. Pay attention to his voice lines, since they warn you when he is about to use explosive attacks, and use cover often to avoid getting overwhelmed. The train section is more about movement than combat, so take your time with jumps and avoid rushing, since falling means restarting. The final one-on-one fight is similar to earlier, just stay patient, keep your distance when needed, and chip away at his health until the cutscene triggers. Once he goes down for good, the trophy unlocks after one of the more intense combat-focused episodes in the game.
Trophy: Lou? Can you hear me? Can you see me?
Complete Episode 1: Sam.
Type: Bronze
Category: Story
Unlock Details
This unlocks after completing Episode 1, which walks you through the first seven main orders and basically teaches you how to survive the world without falling on your face every five seconds. Focus on taking safe routes downhill, using ladders when crossing rivers, and managing your balance during gate quakes by holding both triggers. The early bandit camps can be avoided if you stay to the sides, which is usually faster and way less stressful than fighting with starter gear. When dealing with BTs, stock up on Blood Grenades and follow your Odradek closely, waiting for targets to turn red before throwing. The giant BT boss might look intimidating, but just keep moving, aim for the mouth, and dodge sideways when it lunges. Once you finish the final delivery back to Sam’s shelter and follow the footprints outside, the trophy will pop and you’re officially past the tutorial, even if the game still has a lot more to throw at you.
Trophy: Sam the Man—In the Dark About Everything
Complete Episode 7: Pod.
Type: Bronze
Category: Story
Unlock Details
Episode 7 mixes in a bit of everything, from fragile deliveries to stealth infiltrations and long-distance hauling, so this is where efficiency and preparation really start to matter. The early pizza deliveries are easier than they sound as long as you use a vehicle and plan your route to avoid enemies, since trying to fight while carrying fragile or timed cargo usually ends badly. The weapons factory mission is the most notable part here, where a stealth approach is much safer due to the number of mechs, so take your time, stay out of their line of sight, and move carefully through the building rather than forcing a fight. You will also deal with heavier recovery missions that strongly favor using the Off-Roader, especially when transporting large cargo like the coffin. By the end of the episode, you will have unlocked several powerful traversal tools and upgrades, so take advantage of them to make future deliveries smoother. Finish the final delivery to East Fort Knot, and the trophy will pop as the game continues to scale up both in size and complexity.
Trophy: Starting Point
Connect your Q-pid for the first time.
Type: Bronze
Category: Story
Unlock Details
This unlocks the first time you connect a facility to the Chiral Network using your Q-pid, which happens early in the story and is completely unmissable. All you need to do is complete the objective tied to linking your first location, and the trophy will pop automatically. This is essentially the game introducing its core progression system, so just focus on the story and you will get this without thinking about it.
Trophy: The Scars Left by the Giants
Arrive at the BT nexus in the crater.
Type: Silver
Category: Story
Unlock Details
This unlocks the first time you reach the BT nexus in the F3 crater, which can be done in a few different ways depending on how far you are in the game. The easiest method is to use the giant jellyfish BT near the Adventurer’s area, which will teleport you directly to the crater when it grabs you, saving a lot of effort. You can also reach it manually using bridges or the Coffin Board, but those options take more setup and time. If you are not in a rush, you will naturally be sent here later while progressing the Adventurer’s questline, making this essentially a free trophy.
Trophy: Time to Start a New Journey
Complete Episode 2: Lou.
Type: Bronze
Category: Story
Unlock Details
Episode 2 is short and mostly serves as a transition, so you will not be doing any major deliveries here. Just follow the objective marker downhill through a BT-heavy area and stay alert, since this is more about movement and awareness than combat. Take your time, watch your footing, and rely on your Odradek to safely navigate through the BTs instead of rushing through and risking a messy encounter. The trophy unlocks once you reach and are introduced to the DHV Magellan, which becomes your mobile base going forward and a huge quality of life upgrade for fast travel, even if it comes with a tradeoff for delivery rankings. Think of this as the game opening up a bit more, so enjoy the breather before things ramp up again.
Trophy: To Forsake Our Flesh and Our Freedom
Complete Episode 13: Die Hard.
Type: Bronze
Category: Story
Unlock Details
Episode 13 is very linear and mostly focused on story, so there is not much in terms of gameplay challenges here. You will move through a short sequence where you are given a choice that affects how much of the story you experience, but it does not impact the trophy at all. If you are even slightly curious, it is worth choosing the option that gives more context, since it adds to the overall understanding of the world. Once the sequence finishes and the episode concludes, the trophy will unlock automatically, making this one more about experiencing the moment than overcoming any difficulty.
Trophy: To Help You Find the Strength to Carry On
Complete Episode 12: Fragile.
Type: Bronze
Category: Story
Unlock Details
Episode 12 is a long combat-heavy mission that feels like a full-on warzone, so preparation makes a huge difference before you even start. Bring strong weapons like Machine Guns and rocket launchers along with plenty of Blood Bags, since you will be dealing with waves of ghost mechs across multiple areas. The first sections are fairly manageable if you take your time and use cover or Electric Traps to control enemy movement, and calling in support from the DHV Magellan helps take pressure off you. The timed section is generous, so focus on safe driving rather than rushing and crashing into enemies. The bridge sequence is where things get intense, with multiple forced fights that can easily overwhelm you if you ignore the smaller enemies, so clear them out first before focusing on the bigger threats. The final encounter against the massive mech is straightforward if you keep your distance, aim for the glowing weak point, and stay mobile to avoid heavy attacks. Complete the delivery at Terminal Fort Knot and the trophy will unlock after one of the most action-packed episodes in the game.
Trophy: To Our Little Family
Complete Episode 6: Chrysalis.
Type: Bronze
Category: Story
Unlock Details
Episode 6 is where the game starts stacking multiple mechanics together, mixing stealth, heavy deliveries, rescue missions, and some light combat variety, so adaptability is key here. The early brigand camp can be handled stealthily from the cliff side, which is much safer, especially since the items you are recovering are hazardous and not something you want to grab mid-fight. The necrobiote delivery adds a twist by forcing you to avoid water completely, making vehicles and road building extremely useful, and honestly worth the effort if you want a smoother route. The rescue mission can get messy if you rush in, so take a second to scout with a Watchtower or Dollman and grab the target cleanly before things escalate. By this point you should also start taking advantage of tools like ziplines and upgraded PCC structures, since they make a huge difference for traversal going forward. Once you complete the final delivery to Heartman’s Lab, the trophy unlocks, and you will likely feel the game pushing you toward mastering efficiency rather than just surviving.
Trophy: We Have to Get Tomorrow Back
Complete Episode 14: Last Stranding.
Type: Bronze
Category: Story
Unlock Details
Episode 14 sends you all the way back to Mexico without access to fast travel, so this is more about smart routing than difficulty. The fastest way is to follow the beach along the left side of the map straight to the Plate Gate, which saves you from dealing with rough terrain and unnecessary detours. Once in Mexico, avoid spending time on deliveries since most facilities are inactive, and instead focus on preparing for the upcoming boss. The BT fight near Ciudad Nudo del Norte is the main challenge here, and the safest approach is to keep your distance, aim for the mouth, and stay mobile to avoid grabs and incoming projectiles. If you are feeling confident, you can capture it using an EX Capture Grenade near the end, but defeating it normally is perfectly fine. After that, head back to Sam’s Shelter, complete the short sequence there, and return to the DHV Magellan to trigger the trophy, closing out a long journey back across the map.
Trophy: We'll Show the World the Hope in Your Rain
Complete Episode 4: Raindrops.
Type: Bronze
Category: Story
Unlock Details
Episode 4 introduces your first timed delivery and starts pushing you to think more efficiently about routes and cargo management. The kangaroo rescue might sound stressful, but the 30 minute timer is very forgiving if you use a vehicle like the Off-Roader, which also helps you avoid accidentally submerging the animal in water. The real threat here is the spreading brushfire, so keep moving and scan often to stay on track. The second order is all about heavy hauling, with a massive delivery that practically begs you to use a vehicle, and this is where planning ahead really pays off if you bring extra materials for roads or monorail work. You will also start unlocking more useful tools and structures, making future runs smoother if you take advantage of them now. Finish the final objective and investigation sequence, and the trophy will pop as the game continues to ramp up both in scale and expectations.
Trophy: You Will Never, Ever Be Alone
Complete Episode 10: Isolation.
Type: Bronze
Category: Story
Unlock Details
Episode 10 is short but slightly annoying in how it sends you back and forth across the map, so planning your route properly will save you a lot of time. You will need to travel to Heartman’s Lab to pick up the Network Stabilizer, then deliver it all the way back toward F7 North Distribution Center, and while going straight over the mountains is the fastest option, it is also the riskiest due to rough terrain and weather. If you have roads or ziplines set up, this is where they really pay off, otherwise take your time and avoid unnecessary detours. Before finishing the delivery, make sure you are not carrying anything that replaces your backpack, since the game will immediately throw you into a combat scenario after leaving the facility, and you will want your weapons and healing items ready. Complete the delivery and prepare for the sudden shift into combat, and the trophy will unlock as the story pushes forward again.
The opening hours ease you into the core loop of delivering cargo, managing balance, and navigating rough terrain without faceplanting every five seconds. Focus on learning how movement works, especially using ladders, anchors, and scanning terrain before committing to a route. The game is more about smart decisions than speed early on, so take it slow and get comfortable with the systems.
You will start unlocking key features like Standard Orders and basic structures, which are essential for long-term progression. Do not worry about grinding anything yet, just complete story orders and experiment with tools as they unlock. If something feels confusing, this is a perfect time to Ask Gami and get a quick answer instead of guessing.
A good early tip is to always plan your path before moving, especially downhill or near rivers. A few seconds of planning can save you from losing cargo and having to redo a delivery, which is way more painful than it sounds.
This is where the game really opens up and starts throwing more systems at you, including vehicles, better structures, and larger deliveries. You should begin focusing on building infrastructure like roads, ziplines, and generators, since these will save you a massive amount of time later. Trust me, future you will be very grateful.
Standard Orders become more important here, especially for raising connection levels and progressing toward key trophies. You do not need to grind them heavily yet, but try to complete them alongside story objectives and always pick up extra cargo along your route. It all adds up faster than you think.
If things start to feel overwhelming, simplify your approach. Focus on one delivery route at a time and build it up with structures. Turning a difficult path into an easy one is one of the most satisfying parts of the game.
By this point, you should have a strong understanding of the game and a solid network of structures to support your deliveries. The focus now shifts toward finishing the story and preparing for the final stretch, which includes tougher encounters and longer missions. Make sure you are well stocked with equipment and not overloading yourself with unnecessary cargo.
You should also start thinking about any side content or facility connections you have ignored, since these will matter for the platinum. Some preppers require extra steps to unlock or progress, so if something seems stuck, move on and come back later instead of forcing it.
A helpful tip here is to prioritize efficiency over speed. Clean routes, reliable vehicles, and good preparation will carry you much further than rushing and making mistakes.
After finishing the story, you will be in a great position to clean up remaining trophies, including maxing out connections, finishing deliveries, and completing side content. This is where all the systems you built earlier really pay off, making cleanup much faster and less grindy.
Focus on combining objectives whenever possible, like delivering cargo while working on connection levels or completing Standard Orders for multiple trophies at once. If something feels like a grind, it usually means there is a more efficient way to approach it, so take a step back and rethink your route.
If you ever get stuck, whether it is a specific trophy, prepper, or system, just Ask Gami and get a quick answer instead of wasting time searching around. Stay consistent, keep optimizing your routes, and you will have the platinum before you know it.
Video Library
5 videos
Death Stranding 2: On the Beach - Final Trailer | PS5 Games
Tour Pages
19 guides
The Motherhood door code in Death Stranding 2 is the birthday you entered when starting the game. During Order 26, open the Corpus, read the Motherhood facility entry, and you'll discover that the passcode is tied to Sam's date of birth.
If you've forgotten your birthday selection, the Motherhood Corpus entry can reveal the code directly.
The VR Training Room can be accessed from any location that contains a Private Room, including major facilities, player-built Safe Houses, and the DHV Magellan.
Inside the VR Training Room, players can replay tutorials, test weapons, complete score-based delivery challenges, and view enemy models through the Ghost Mech Archive.
To recover the Stolen Record Collection in Death Stranding 2, accept Sub Order 103 from the Musician during Episode 3. The cargo is located at the bottom of the cliff behind the Musician's shelter and can be reached using multiple Climbing Anchors.
Once you reach the search area, look toward the yellow cargo containers on the right side of the cliff. The record collection is located there. Be careful on the return trip, as the cargo is breakable.
There are 36 Prepper and Facility Locations spread across Australia in Death Stranding 2. Increasing your Connection Level with each facility unlocks weapons, skeleton upgrades, APAS Enhancements, vehicle upgrades, backpack customization options, music tracks, and cosmetic rewards.
Many facilities are required through the main story, while others are optional preppers that can only be unlocked through lost cargo, side orders, or exploration.
The Yotei Mask is a special Ghost of Yotei Easter egg that can be unlocked from The Adventurer in Death Stranding 2. After rescuing him during Order 37, you'll receive an SSS message asking you to deliver cargo to him.
Once the message appears, simply complete any delivery for the Adventurer and he will reward you with the Yotei Mask, which can be equipped as a face accessory.
There are currently 52 songs available in Death Stranding 2. Eighteen tracks unlock after connecting The Musician to the Chiral Network, while the remaining songs are earned through story progression, prepper connection levels, side orders, and completing the game's ending.
Most songs are automatically unlocked during Main Orders, but several require increasing your relationship with specific preppers such as the Musician, Data Scientist, and Ghost Hunter.
Players can find Usada Pekora in Death Stranding 2 as the prepper known as the Data Scientist. She is first encountered during Order 25, which requires Sam to deliver a pizza from the Pizza Chef to her facility within a time limit.
After unlocking the Data Scientist, reaching Connection Level 2 rewards players with the Nousagi Hat, a cosmetic item that also slows stamina depletion while traveling on foot.
Blade Ghost Mechs are heavily armored enemies first encountered during Order 22 in Death Stranding 2. To defeat them, focus on breaking their color-coded shields with sustained gunfire, dodge their melee attacks at the last second, and use weapons like the Machine Gun or Grenade Pistol to create openings.
The key to winning is staying mobile and avoiding their powerful spinning blade attacks while continuously wearing down their shields.
The Kraken Ghost Mech is a major boss encountered during Order 12 in Death Stranding 2. To defeat it, focus on its glowing orange weak points, especially the joints on its tentacles and the large orange nodes beneath its body.
A Shotgun is the most effective weapon for destroying these weak points quickly, while careful dodging is essential for surviving its powerful slam and tentacle attacks.
Porter Grade in Death Stranding 2 increases through deliveries, combat, stealth gameplay, online interactions, and cargo quality. Each Porter Grade category levels separately and contributes to unlocking powerful APAS Enhancements later in the story.
Improving your Porter Grade gives Sam access to new passive abilities and customization options, making it one of the most important progression systems in the game.
There are 48 APAS Enhancements available in Death Stranding 2. These upgrades act as passive skills that improve Sam's delivery efficiency, combat abilities, stealth tools, social features, and traversal capabilities.
New APAS Enhancements unlock by increasing Porter Grade categories and raising connection levels with facilities throughout Australia.
There are 21 Backpack Components and 8 Backpack Accessories in Death Stranding 2. Components provide major gameplay benefits such as increased battery life, additional ammunition storage, improved balance, and cargo protection, while accessories offer smaller passive bonuses that improve exploration, combat, and deliveries.
Most backpack upgrades are unlocked by increasing Connection Levels with facilities throughout Australia. :contentReference[oaicite:0]{index=0}
There are currently 3 Skeleton Types in Death Stranding 2: the Battle Skeleton, Boost Skeleton, and Bokka Skeleton. Each Skeleton has three upgrade levels that improve their effectiveness and unlock through facility connection levels.
The Battle Skeleton focuses on combat and defense, the Boost Skeleton increases movement speed, and the Bokka Skeleton is designed for traversing difficult mountain terrain.
To upgrade your backpack battery in Death Stranding 2, connect Heartman's Lab to the Chiral Network and increase your connection level with the facility. Extra Battery upgrades unlock at connection levels 2, 3, and 4, providing larger battery reserves for Skeletons, equipment, and other powered devices.
Once unlocked, Extra Batteries can be fabricated at facilities and attached directly to Sam's backpack.
Animals become available in Death Stranding 2 after completing Order 15: Deliver the Test Subject Kangaroo to the Animal Shelter. Once unlocked, wildlife can be found throughout Australia and captured by approaching them and pressing Square.
Captured animals are placed into an Animal Carrier and must be delivered to the Animal Shelter, where they can safely live on the reserve and reward Sam with Likes.
The fastest way to farm materials in Death Stranding 2 is by restoring and upgrading Mines across Australia. Mines generate large amounts of resources in exchange for Chiral Crystals and can be upgraded for even greater yields.
For early and mid-game farming, clearing Brigand Camps, claiming materials from facility terminals, and collecting abandoned resource containers from other players are the most reliable methods. Special Alloys are generally easiest to obtain through mines, while Metals and Ceramics are commonly found at enemy camps and distribution centers.
To unlock the Savior of Terminal Fort Knot trophy in Death Stranding 2, you must complete the Ghost Hunter questline, reach approximately 4.5 stars with him, accept Sub Order 114: Save F8 from a Voidout, and defeat the secret Giga BT boss near Terminal Fort Knot.
The trophy can only be earned after finishing the main story because Terminal Fort Knot must be connected to the Chiral Network first.
To earn the Showdown at Tar Lake trophy in Death Stranding 2, you must connect the Fisherman to the Chiral Network, raise him to 4 stars, complete Sub Order 117, capture a Delphis BT Catcher using an EX Capture Grenade, and use it as bait to summon the Lord of Tar Lake.
Defeating the Lord of Tar Lake unlocks the trophy and completes the Fisherman's unique questline.
To unlock the Conqueror of the Golden CC trophy in Death Stranding 2, simply find and destroy a Golden Chiral Creature. The easiest known location is near The Architect in northern Australia, where several Golden Chiral Creatures can spawn around small tar pools southeast of the shelter.
Destroying just one Golden Chiral Creature immediately unlocks the trophy.